In this documentation, you will learn how to add custom fields to the thank you page.
To display a custom field on the thank-you page, you must first add the custom field to the checkout page. Once you collect the custom value during checkout, you can display it on the thank you page.
Here are the steps you need to follow:
Step 1: Add a custom field to the checkout page
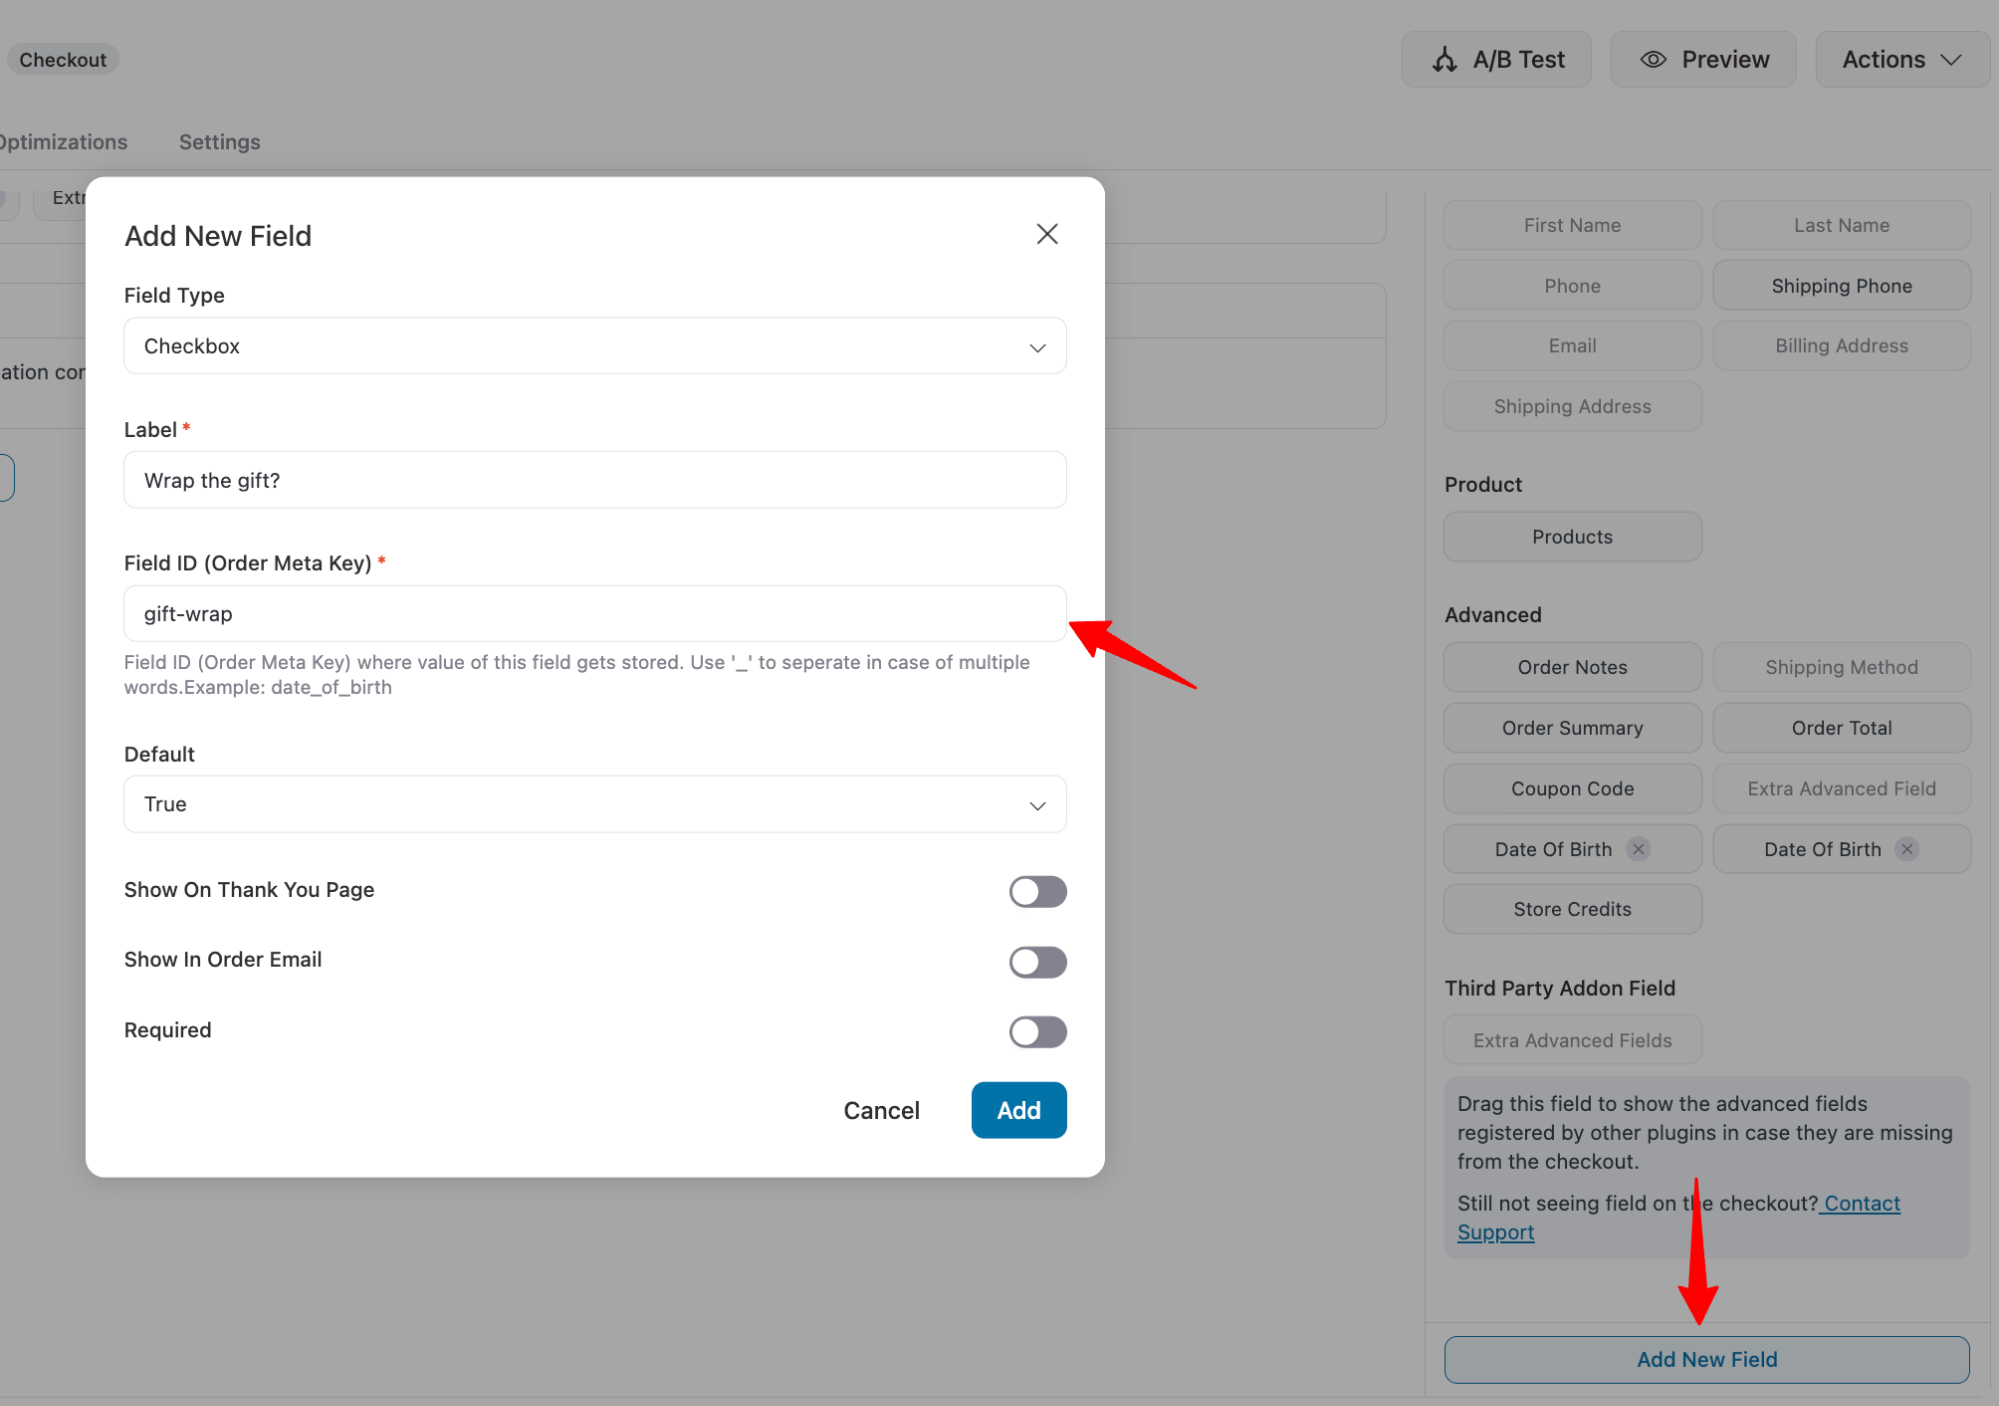
To do this, edit the checkout page, scroll down, and click on “Add New Field” to add the custom field.
Then set up the field you want to add. For example, here we are asking users if they want the order to be wrapped.
Step 2: Add the custom field on the thank you page
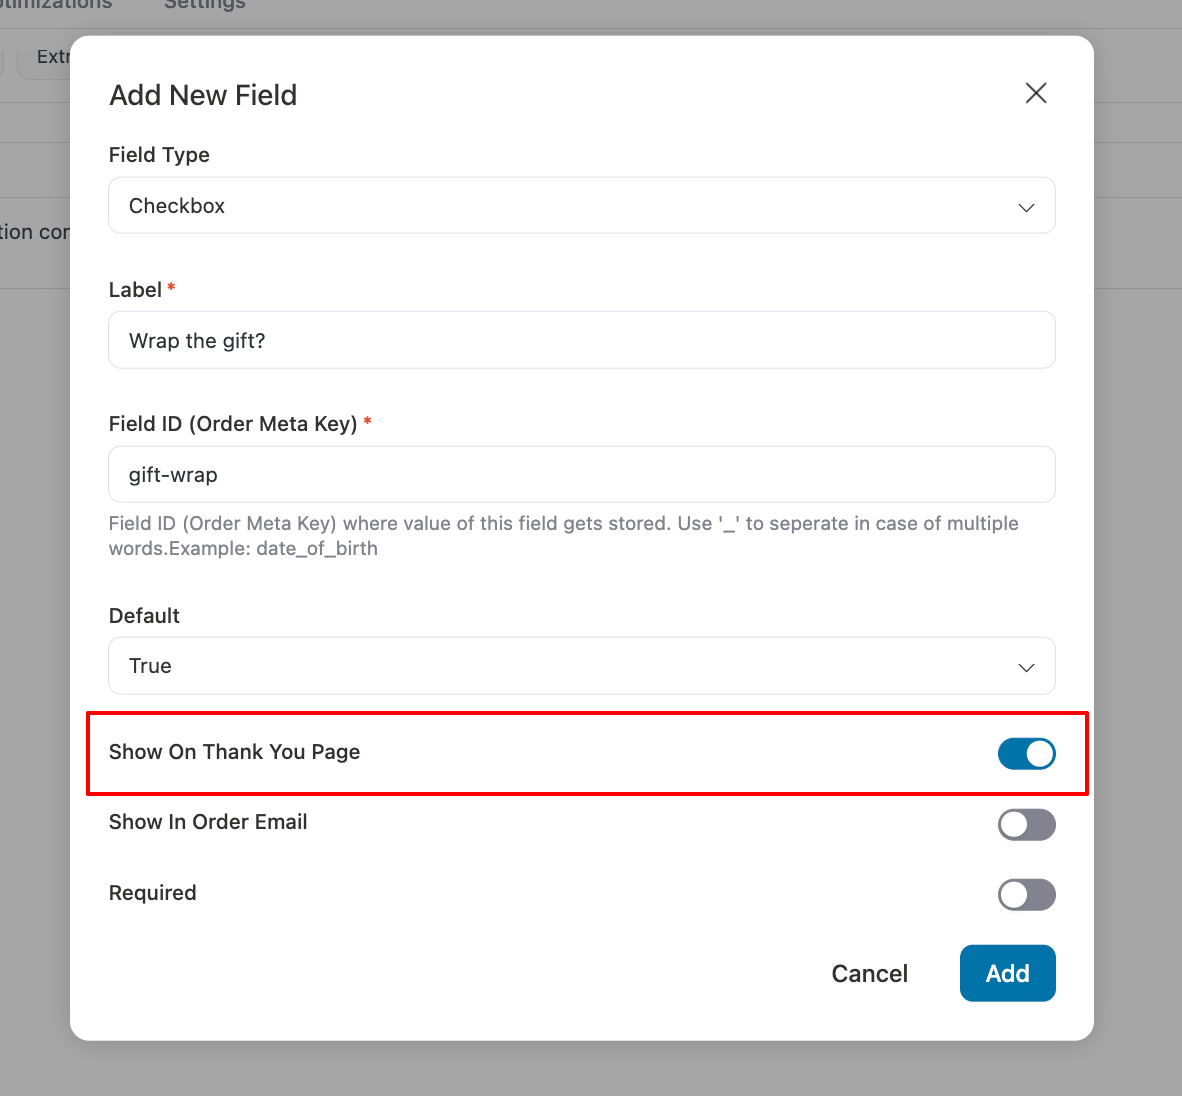
Now, to ensure the custom field you just built is available on the thank you page, turn the toggle button for the option “Show On Thank You Page”.
You can make the field required if you want. After setting up, click on “Add.” Remember to update the template.
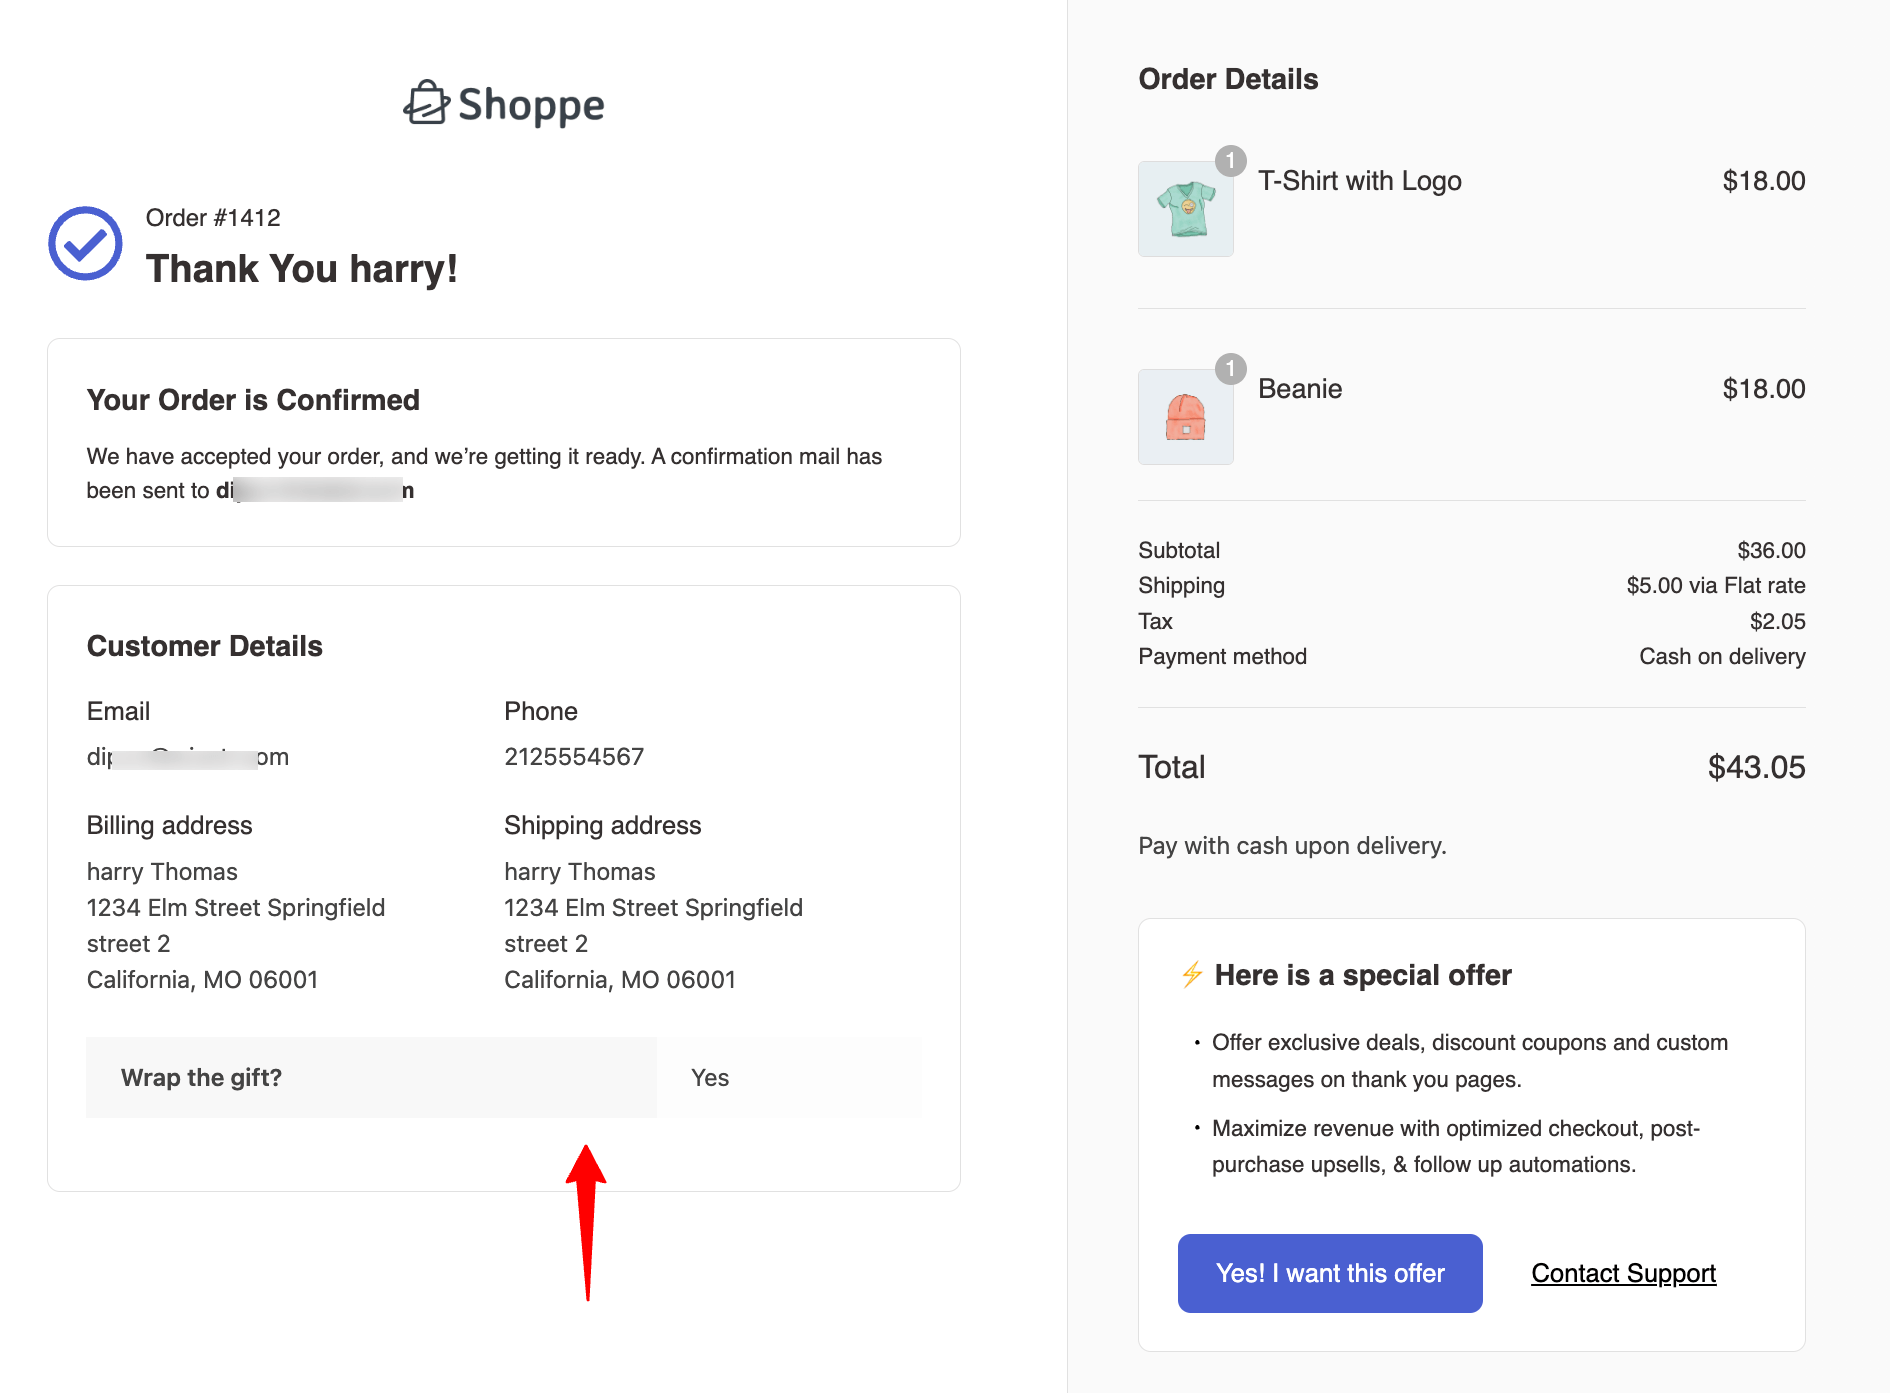
Step 3: Test the thank you page with the custom field
Now, if you place a test order, the thank-you page will display the custom field.