Here is how you can customize the final page of the funnel to leave a lasting impact on the customers:
Step 1: Edit the Thank You page
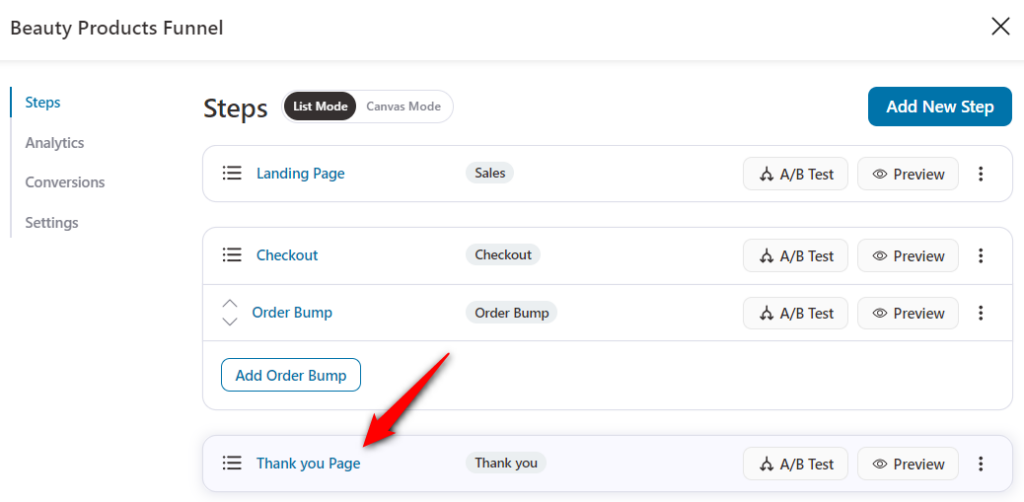
Click on the name of your “Thank You page” on the main funnel builder page to begin customizing it.
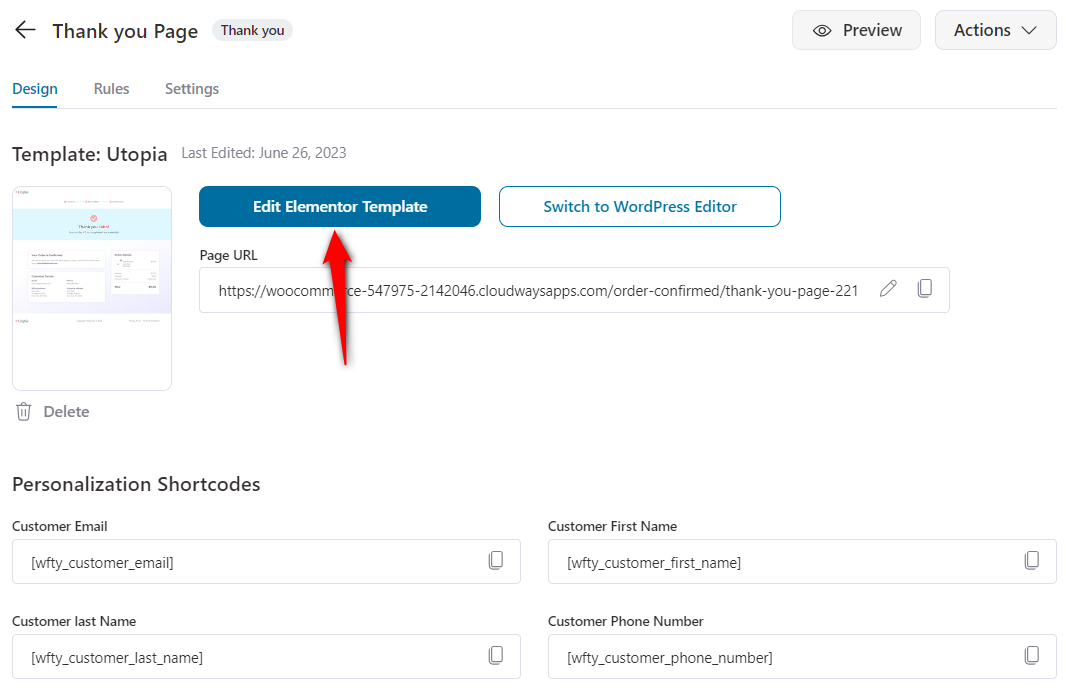
It'll take you to the Design tab of your Thank you page.
You can either click on Edit Elementor Template to start customizing your Thank you page. Or remove the current template and import a new thank you page template.
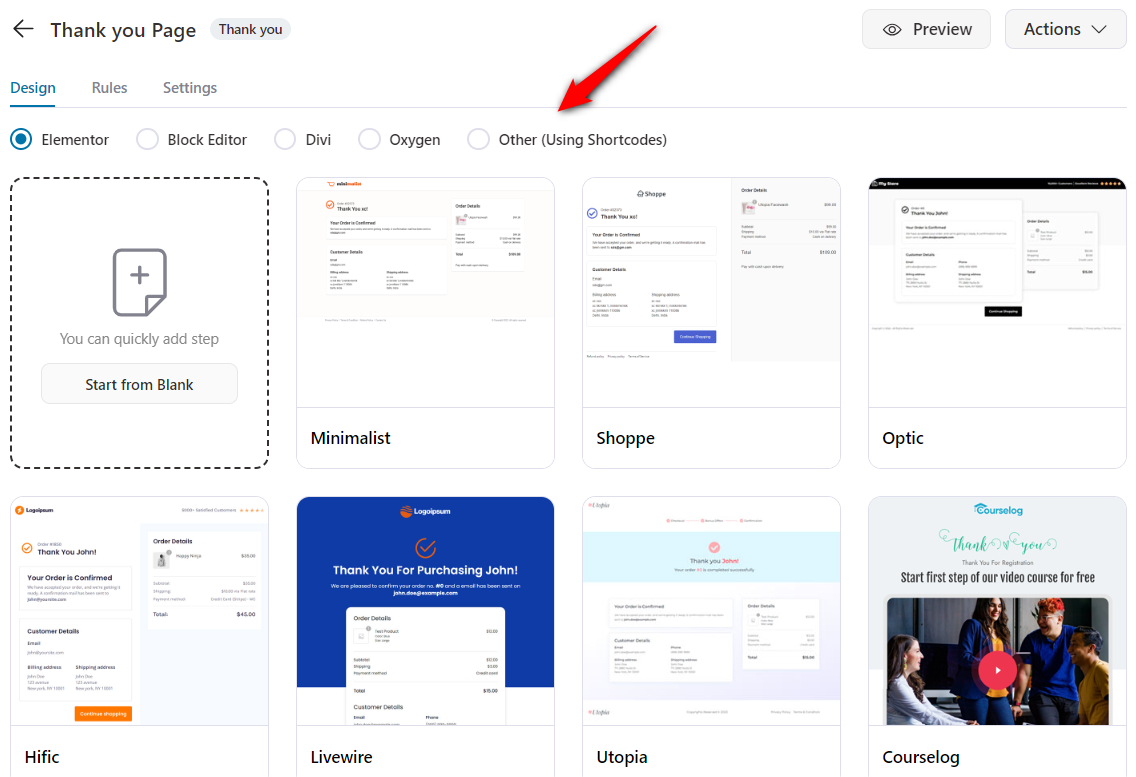
Once you've removed the existing template, you'll get directed to the templates page.
FunnelKit deeply integrates with Elementor, Divi, Gutenberg, Oxygen, and other page builders using shortcodes.
Select the page builder and choose the template you want to import.
Next click on the Edit Template button to begin editing the page using your preferred page builder.
It'll load the page in the respective page builder you've selected.
Step 2: Customize your Thank You Page with Widgets
Customize the page using the specially designed widgets for the page – Customer Details and Order Details.
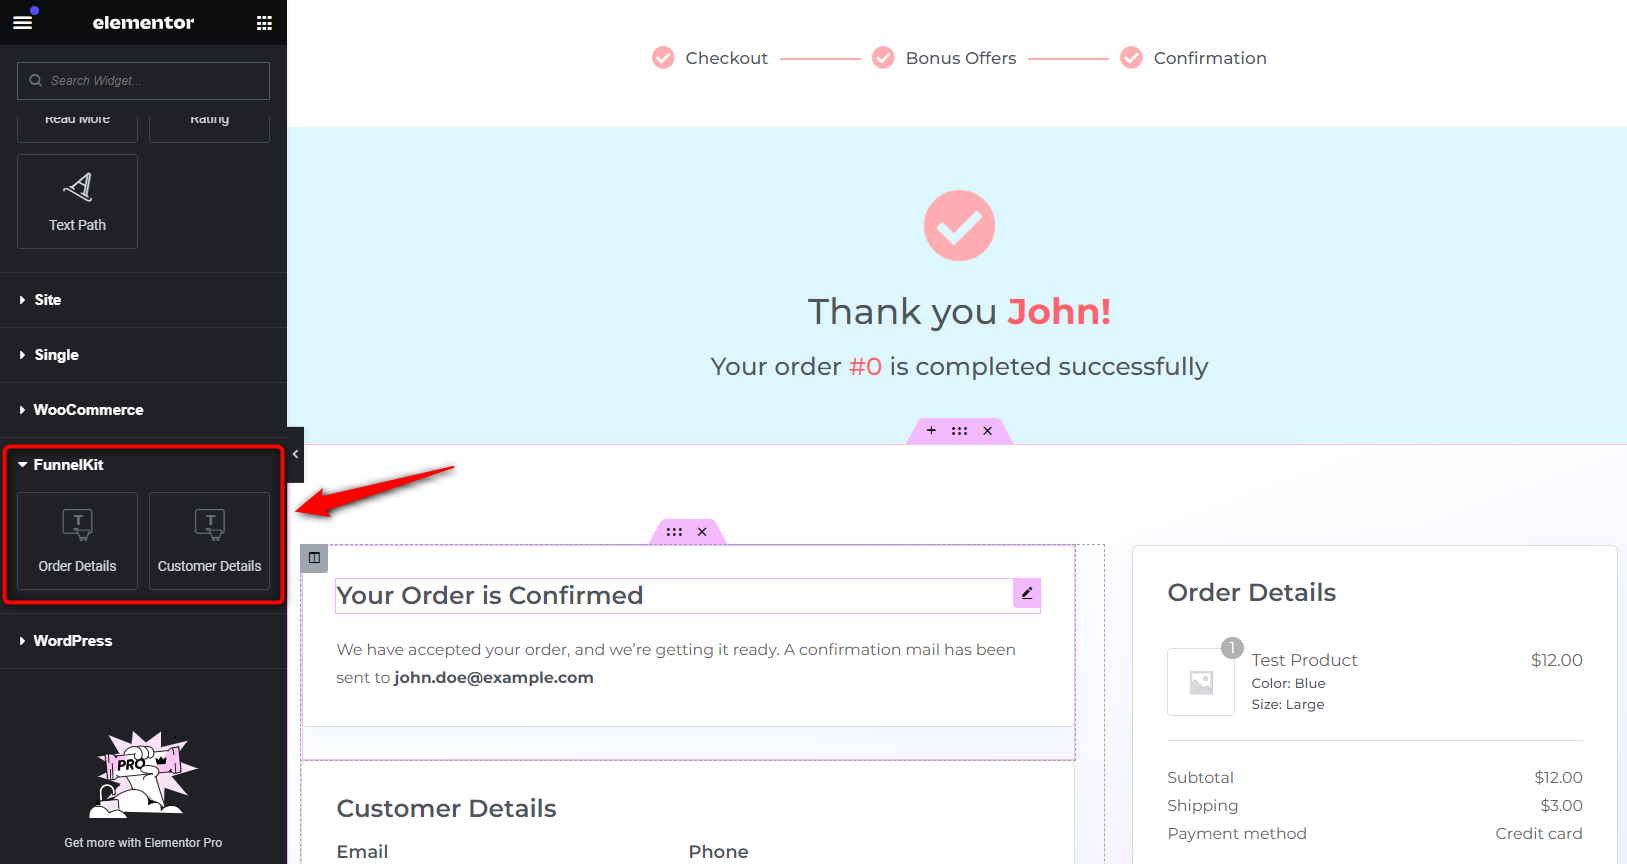
Drag and drop the widgets you wish to add to the page.
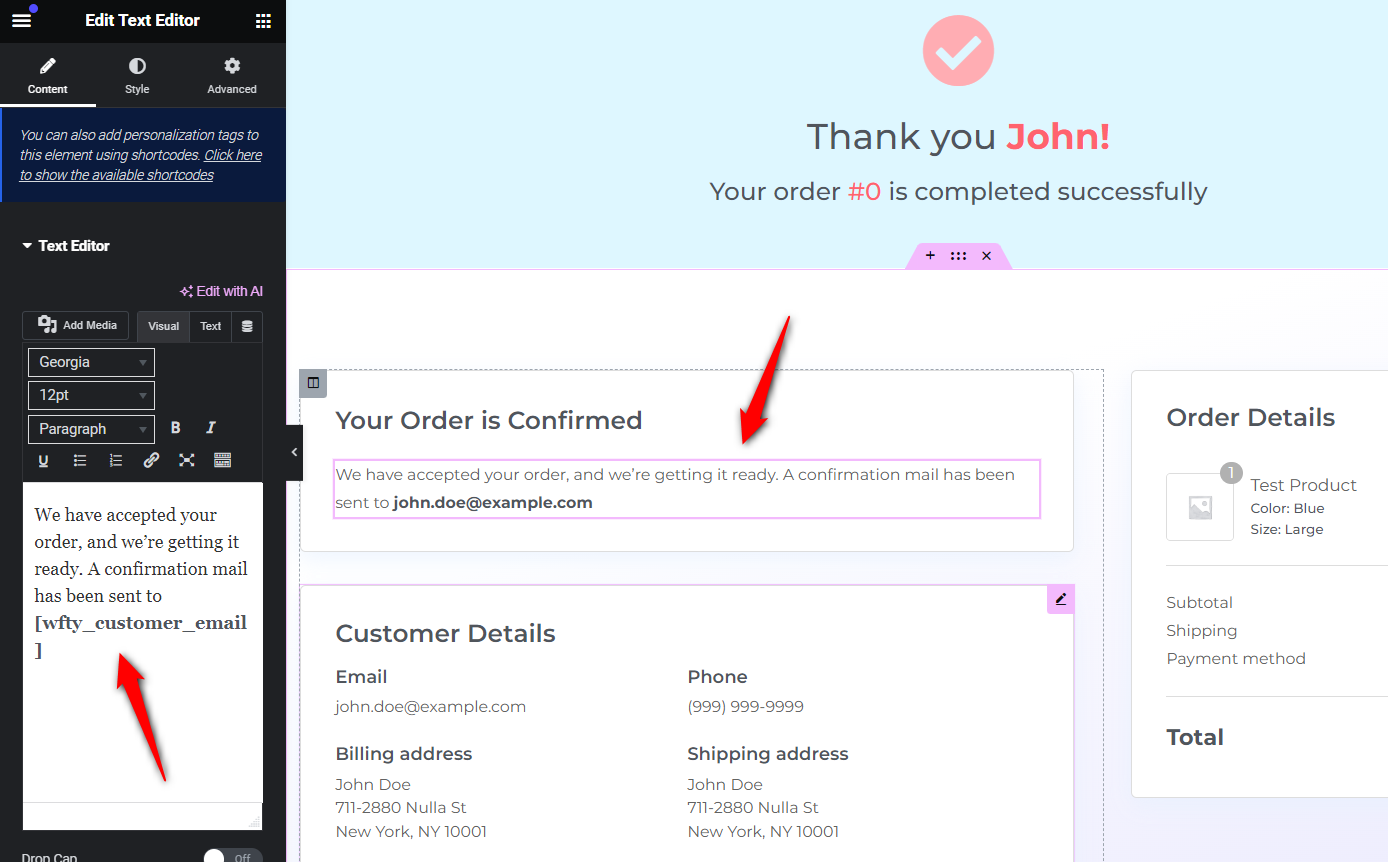
Step 3: Customize the Content
Change the copy displayed in the widgets under the content tab. You can also choose if you want the image of the product purchased to be shown on the page or not.
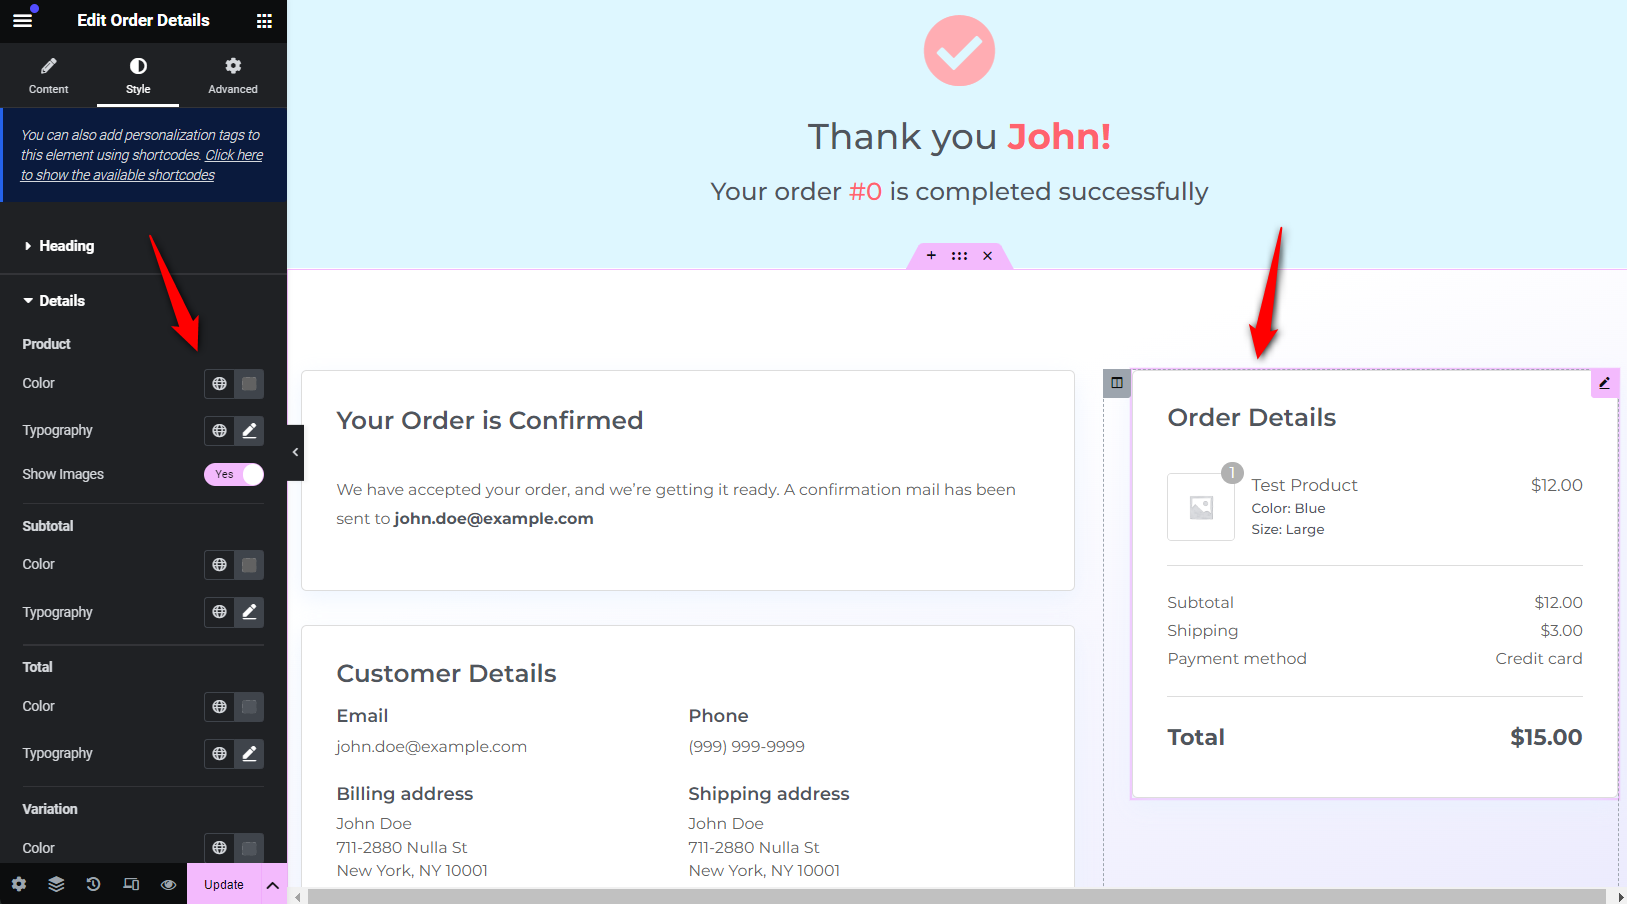
Step 4: Style the Widgets
Select the added widget, or any pre-designed one to change the color and typography in the Style tab.
Once you’re satisfied with how the page looks, click on the Update button at the bottom of the page to save the changes made.
This is how you can design your very own sales funnel that is extremely easy to put together, and highly converting.


