
Do you want to create an email course that converts leads into buyers?
With the right free offer and a tempting copy, you can get users to hit the signup button.
However, building authority or converting them into buyers is painfully difficult.
They have no idea if your product will be a right fit for them or if you’re the right person to learn from.
To achieve that goal, delivering valuable and actionable content dripped over a time period is the key!
This is where an email course can be the real deal for you.
In this post, we will look at what an email course is, what you need to create one, and of course, how to set it up for your mailing list.
Table of Contents
- 1 What is an Email Course?
- 2 A Masterfully-done Email Course Example
- 3 Why Create a Free Email Course?
- 4 7 Tips to Create an Exemplary Email Course
- 4.1 #1: Make your course highly actionable
- 4.2 #2: Send your first email within 5 minutes after the opt-in
- 4.3 #3: Hard sell your paid program in the closing emails
- 4.4 #4: Encourage a response
- 4.5 #5: Follow a simple structure in your email course
- 4.6 #6: Create an email course with a maximum of 7 emails
- 4.7 #7: Go beyond textual emails
- 5 How to Set Up Your Email Course in WordPress?
- 6 Why Use FunnelKit Automations to Create your Email Course?
- 7 Step 1: Install and activate FunnelKit Automations
- 8 Step 2: Add a new automation
- 9 Step 3: Select the 'Form Submits' Event
- 10 Step 4: Specify the action
- 11 Step 5: Add more emails to the sequence
- 12 Now It’s Your Turn!
What is an Email Course?
An email course is a series of lessons or instructions sent via emails over a period of time.
Most marketers often use email courses as freebies that encourage visitors to sign up for the email list.
Once the user is signed up for the free email course, what matters is the value delivered inside.
Use it as a channel to not just introduce yourself but also gain credibility and authority over a time period.
You can plan your sequence in a way that after value-adding content, you have emails that pitch your paid product and get sales from your subscribers.
Email marketing generates $38 in ROI for spending every $1 - that’s how powerful email marketing is!
And that’s why real business takes place on emails.
If you happen to make people open and interact with your emails (of course except for your family and friends), that is when you’ve established a relationship with them!
A Masterfully-done Email Course Example
In this section, we will look into AWeber’s Everyday Email, which is a 30-day email course.
Take a look at their signup page:
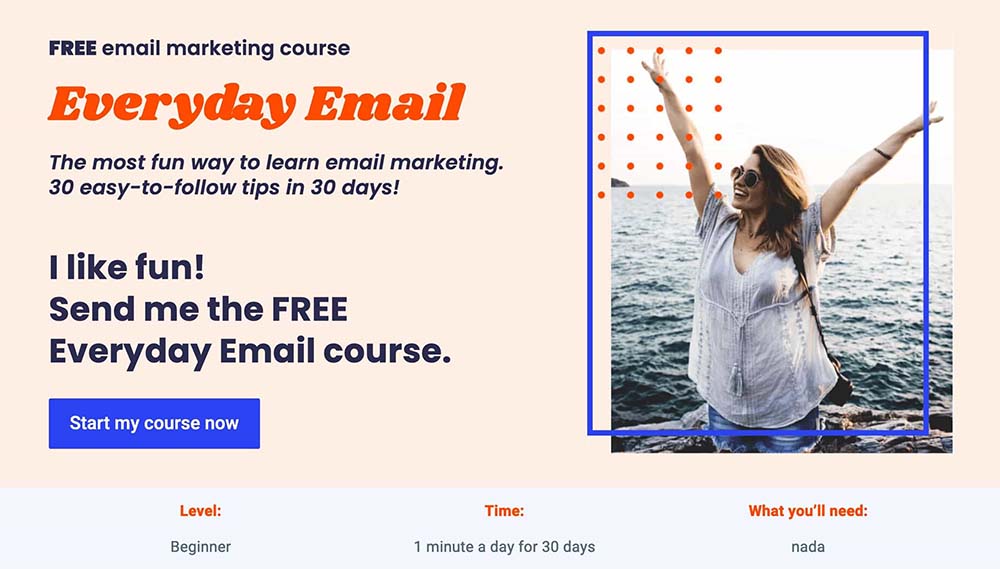
It is a wonderful example to take inspiration from and create your own content.
Notice how interactive their content is. They have done a great job of telling readers that:
- It’s a free email course - a perfect lead magnet
- What they can expect when they sign up
- The time it’ll take to read the email and understand a topic
- The prerequisites
They have set the context by making users understand the offer well.
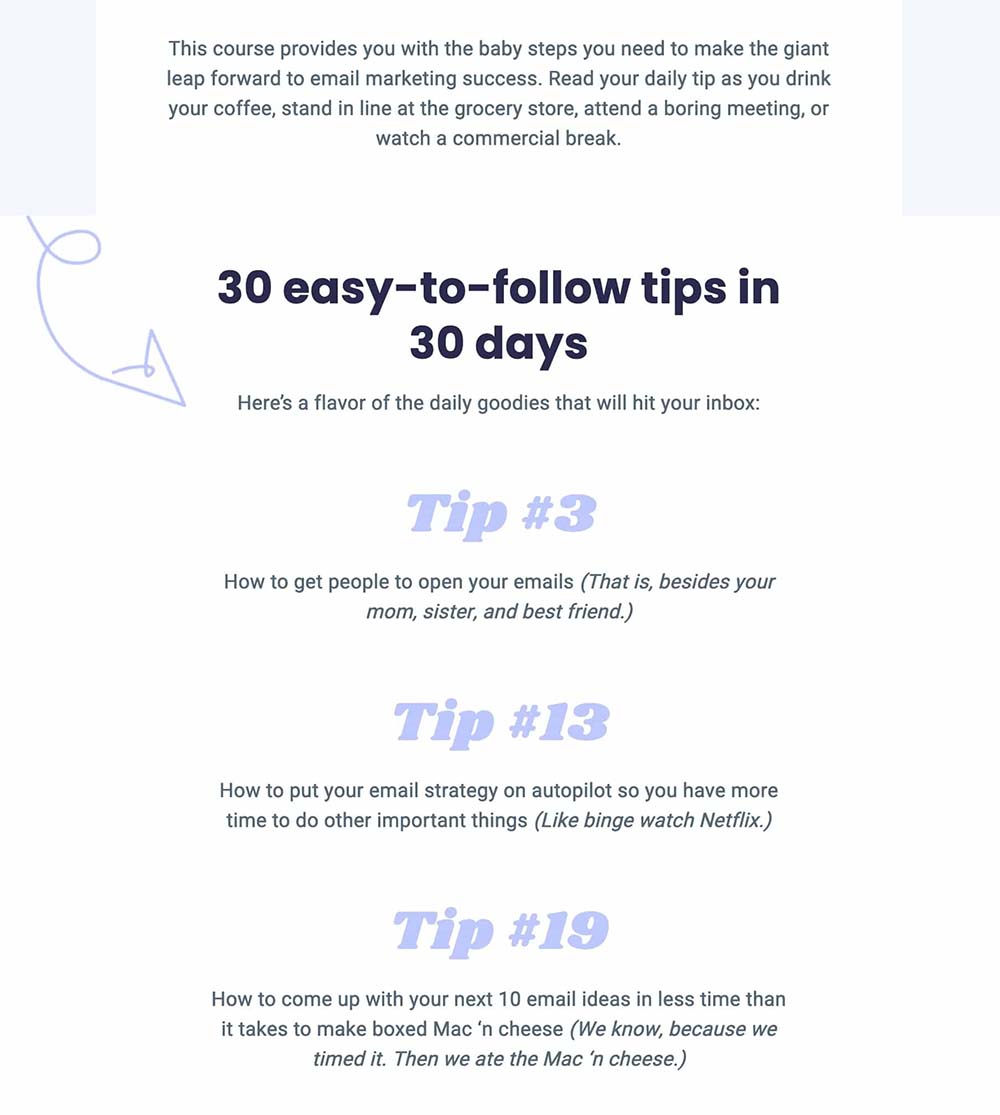
If you scroll down to this page, they have built the curiosity by revealing some details about the daily tip:
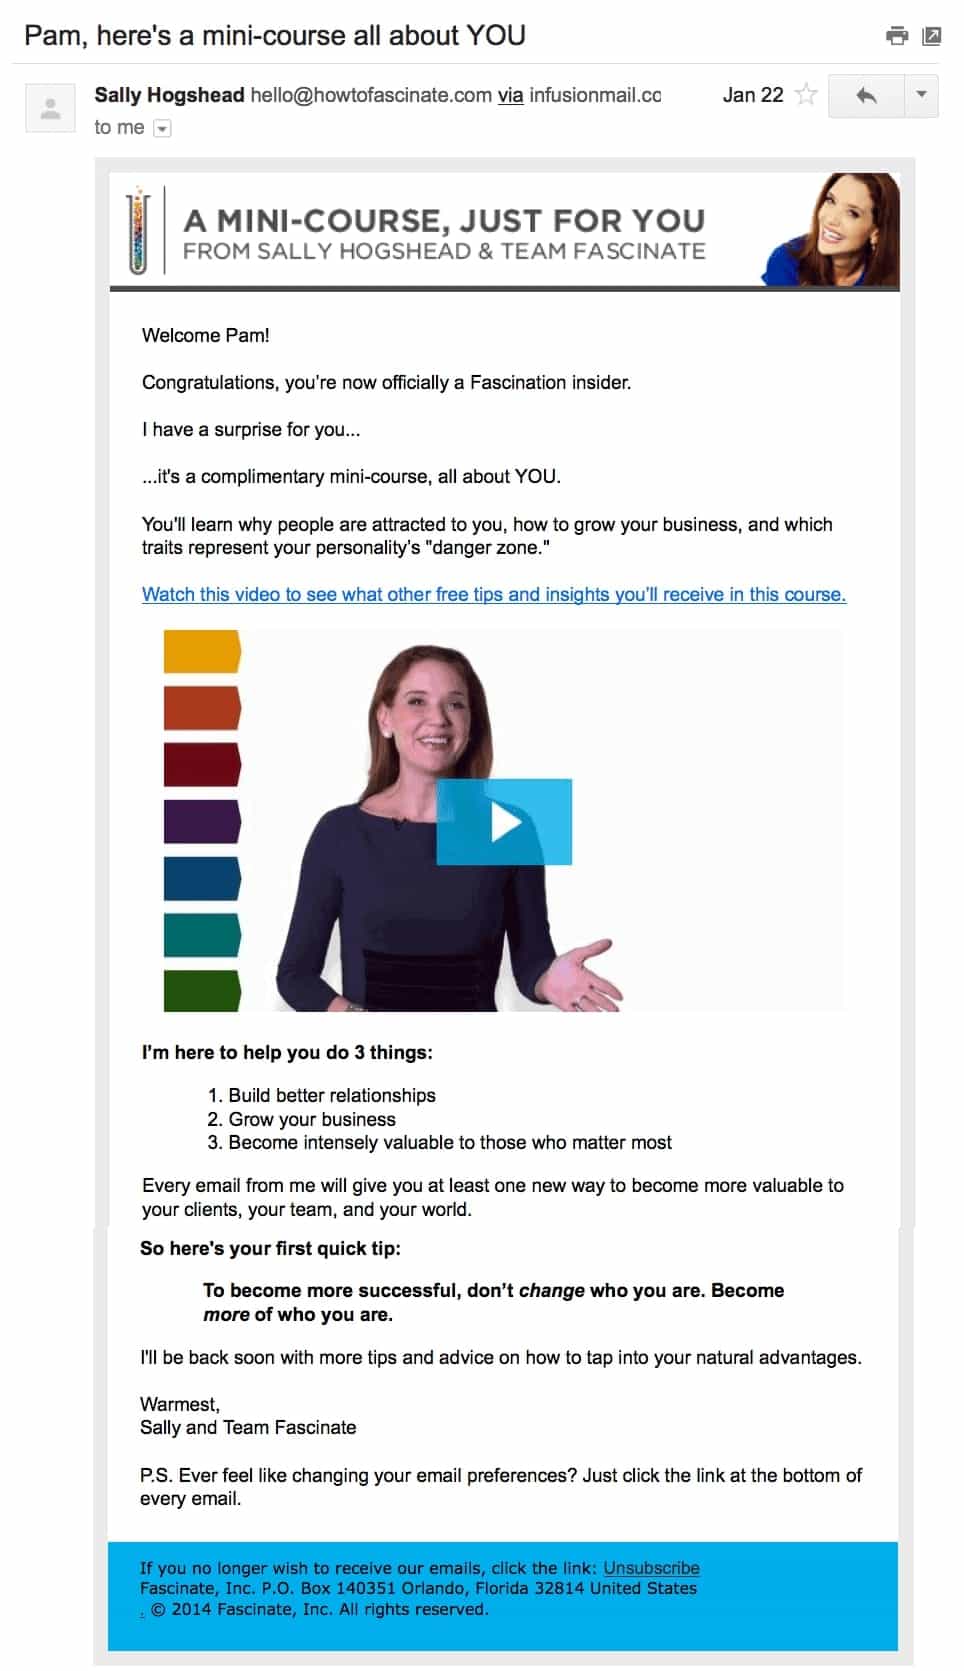
After you opt-in for their course, this is the first welcome email that you’ll receive instantly:
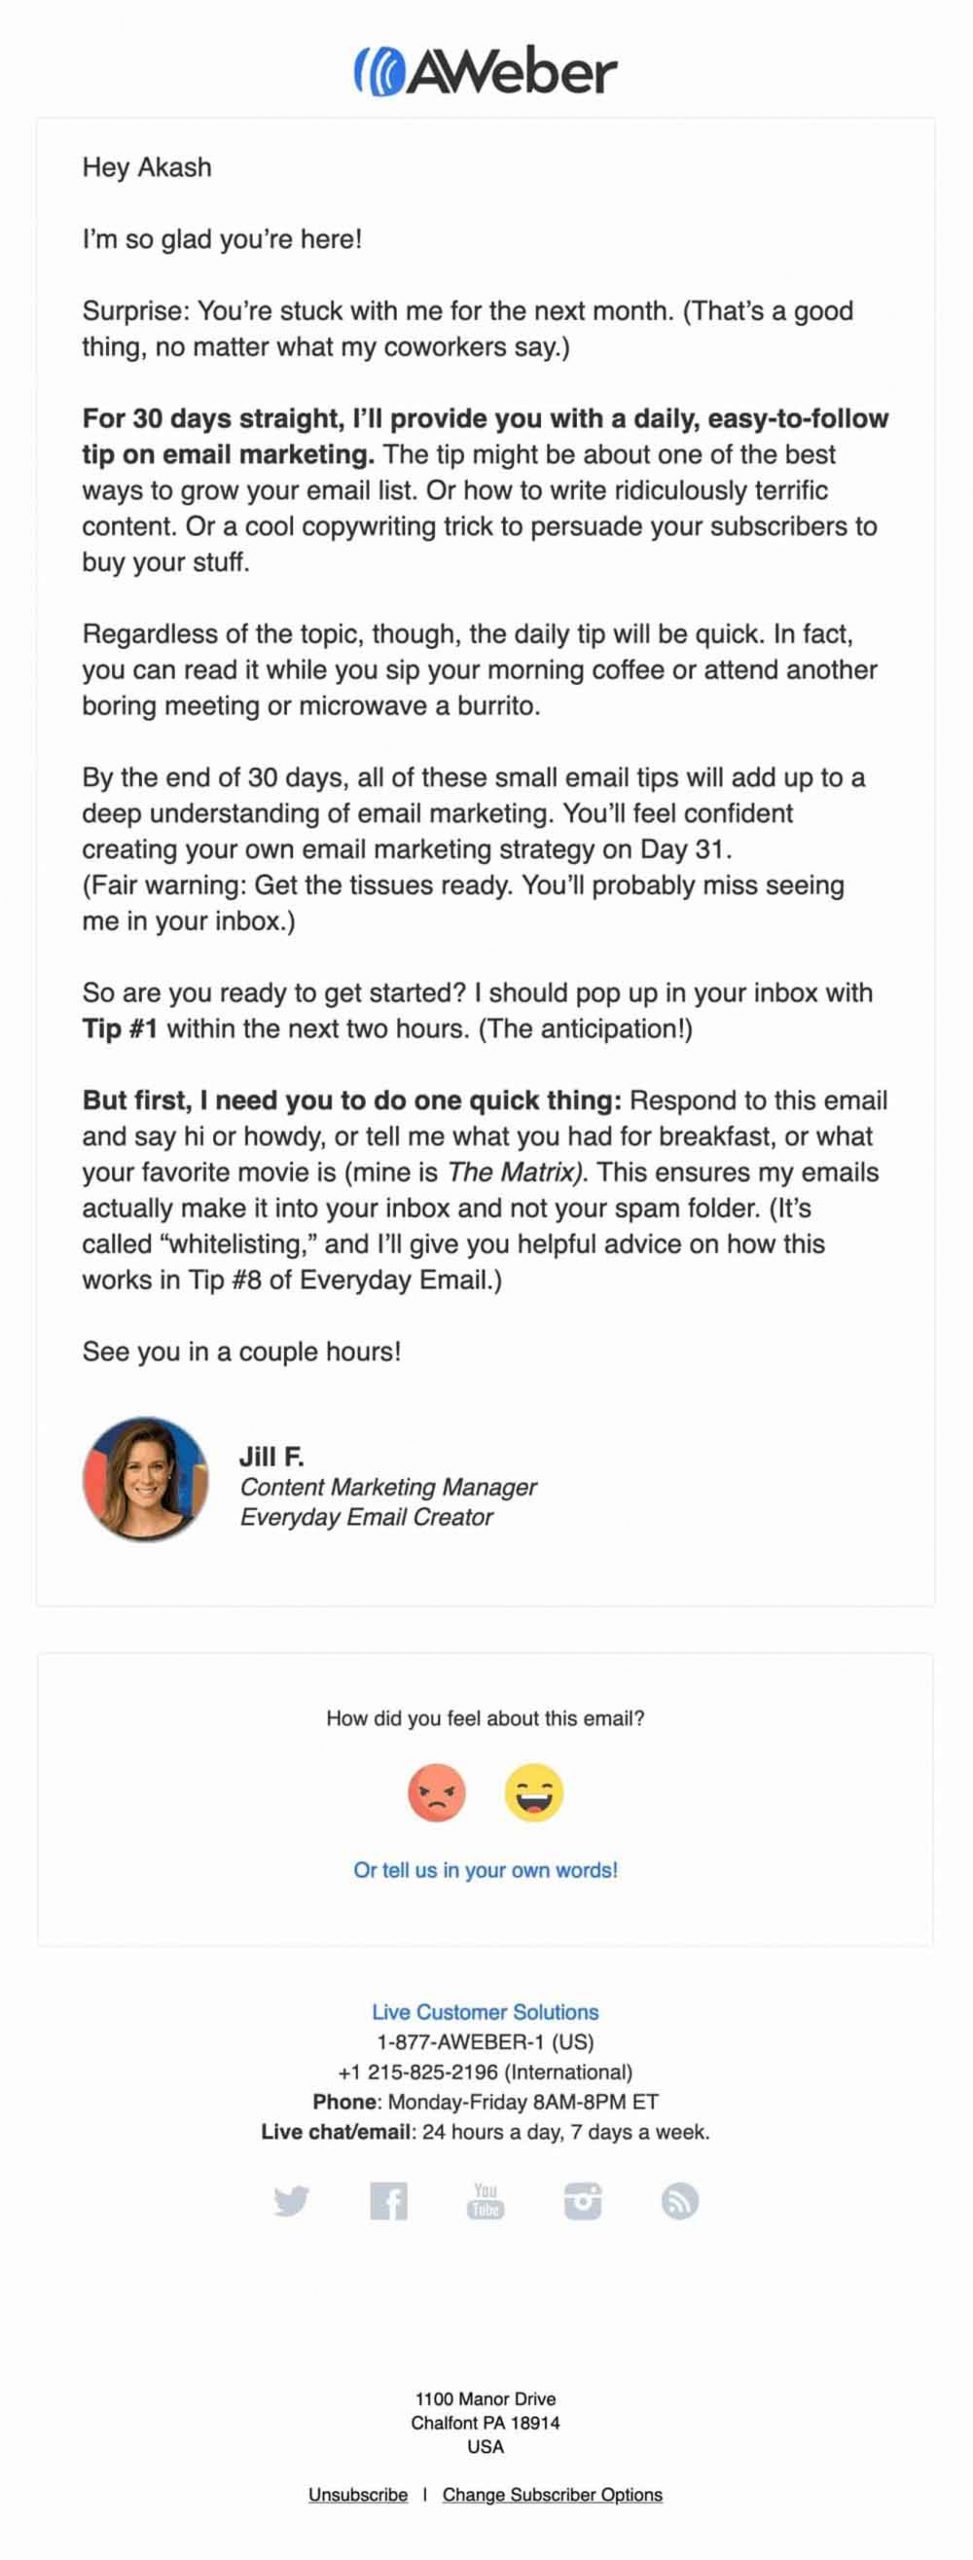
Right before your first lesson, this personalized welcome email fills the subscribers with more details of what’s coming their way.
Here are a few strong points about this email:
- Sets the context - “For 30 days straight, I’ll provide you with a daily, easy-to-follow tip on email marketing”
- Briefs people on how to consume the content - “In fact, you can read it while you sip your morning coffee or attend another boring meeting or microwave a burrito”
- Makes a specific promise - “By the end of 30 days, all of these small email tips will add up to a deep understanding of email marketing”
- Evokings a response - “Respond to this email and say hi or howdy, or tell me what you had for breakfast, or what your favorite movie is (mine is The Matrix)”
- Builds anticipation - “See you in a couple hours”
So, if you're wondering 'how do I write a good email course?', you can take inspiration from this example - which is our personal favorite!
Why Create a Free Email Course?
There are many reasons why creating an email course would be highly beneficial for you.
But do email courses really work?
The answer is a big yes!
Let's look at some of the reasons that work:
- You’re in control of delivery - When you drip content with an email course, people don’t feel overwhelmed. You’re teaching them something new each day as per your plan.
- Emails are personal and mobile-friendly - More than 50% of emails get opened on mobile devices. People prefer reading emails on the go.
- Sharing valuable content - Each email in your email course can have a key takeaway that people can implement.
- Deliver value in their inbox - You may natively deliver content without requiring users to click through and leave their inbox.
- Pitching your paid program becomes easy - An email course lets you seamlessly pitch your paid product after delivering value! Authority persuades!
- Reason to open your emails every day - With well-crafted and connected lessons, you give your subs a new reason to open your email every day.
Now that we have covered the reasons, let's look at some quick tips to create a perfect email course.
7 Tips to Create an Exemplary Email Course
A lot of people have asked what to include in their email courses and this section is what deals in.
Let’s look at the 7 techniques that you can implement when crafting your email course.
#1: Make your course highly actionable
When your lessons intend to fix the pain, you create value for your readers.
This, in turn, builds relationships and helps gain trust.
Finally, when people really trust you, they're able to take action.

#2: Send your first email within 5 minutes after the opt-in
Welcome emails perform better with 42% higher open rates than average emails.
Your first email doesn’t necessarily have to be the first lesson or a tip in your email course.
Instead, you can just go for sharing the road map or giving a preview of what's coming through your email course.
Research suggests that follow-up emails should be sent "between 10 am to 11 am Eastern time for North American and European audiences".
Generally, Tuesdays have the highest open rate of 18.3% and a low unsubscribe rate of 0.2%.
We do not advise sending emails at midnight or during the weekends.
#3: Hard sell your paid program in the closing emails
If you’re planning a series of 7 emails, the first four emails should educate your leads.
From the fifth email onwards, you must start including details about your paid program, the goal it helps to achieve, and more.
A great email course doesn’t put too much pressure on the prospect.
Simply tie the program into your teaching.
You can also include discount coupons or provide limited-time offers to create urgency.
#4: Encourage a response
Subscribers who reply to your emails are more receptive to your sales messages than others.
By going through the email response rate, you can know how many subscribers are engaging with your content and are more likely to purchase your product than others.
One of the best ways to ask your subscribers to respond to your messages is to give them suggestions or choices.
This means you ask them a question and give them three possible options. The result you get is more responses to your emails.
Start implementing this question-answer technique in each of your email courses; thus, creating an atmosphere of interactive learning.
#5: Follow a simple structure in your email course
You have an average 51-second window to capture the attention of your audience.
Therefore, you don’t want your email to look like a block of unstructured text.
Here's a simple structure that you can follow:
- 1st Paragraph: Remind your subscribers of what you have covered in the last email
- 2nd Paragraph: Lay out the current day’s topic with a supporting content
- 3rd Paragraph: Get them excited about what you’ll cover in the next email
These elements help establish engagement so your subscribers eagerly look forward to your email course.
The P.S. (or written after) is an excellent place to put content that evokes curiosity.
79% of people who open your emails read the P.S. before anything else on your email.
#6: Create an email course with a maximum of 7 emails
The main purpose of creating your email course is to make sales.
If you try covering comprehensive tutorials on the topic, you may end up overwhelming your subscribers.
Instead, you show your readers that they have a problem that needs to be solved almost immediately.
Establishing yourself as an expert who can solve their problems - is why you’re focusing on your email course.
Joshua Earl, a successful entrepreneur and email marketer, recommends a minimum of 5 and a maximum of 10 emails in your email course.
Just remember that the real objective is not to cover everything here; instead, deliver some value in the eyes of your subscribers within a tight timeframe.
#7: Go beyond textual emails
Research shows that including videos within your emails increases the open rate by 19% and reduces unsubscribe rates by 26%.
Delivering lessons through video content skyrockets the engagement of your email course.
Obviously, you don’t need all of your lessons in video format, but you can create key topics in it.
As humans process visuals better than text, these video lessons will surely help you retain your customers.
Adding video to your emails gives you a 300% increase in click rates.
As we cannot watch videos on our emails, you can take your subscribers to a landing page where they can watch your videos.
Adding a call to action button next to these videos will allow you to place your paid program that solves their problems.
Now that you know what to include in your email course, it’s time to learn how to create it.
How to Set Up Your Email Course in WordPress?
In this section, we will answer your query - 'how do I start an email course?'.
We’ll be using FunnelKit Automations for setting up our email course in WordPress.
FunnelKit Automations is the most powerful email marketing and Automation engine for WordPress.
Here we will look at some reasons why FunnelKit Automations stands out from other WordPress-based CRMs.
Why Use FunnelKit Automations to Create your Email Course?
FunnelKit Automations lets you send broadcast campaigns as well as create automated sequences.
Not just emails, you can even send SMS-based campaigns by integrating it with Twilio.
It opens up a world of possibilities by talking to other plugins such as Learndash, WooCommerce, AffiliateWP, WP Fusion, and more.
Not just this, FunnelKit Automations also communicates with other SaaS-based solutions and CRMs you use such as ActiveCampaign, Drip, Convertkit, and others.
Here are some reasons why you should use FunnelKit Automations to create your email course:
- Schedule your Emails - Set the delay in minutes, hours, and days to create well-planned sequences for your email course.
- Drag & Drop Builder - Create professional-looking emails by dragging and dropping components such as columns, images, products, CTA buttons, and more.
- Merge Tags - Personalize your emails by using merge tags for the contact’s first name, email, data from the fields filled out on a form, and more.
- Dynamic Coupon Codes - Trigger urgency through personalized and time-bound coupon codes for paid products. For example, a coupon code that lasts for 3 days.
- Link Triggers - Perform actions such as adding a tag, subscribing to a list, adding to an automation, and more - when the user clicks a link in an email of your course.
- In-depth Analytics - Go beyond measuring the open/click-through rates of your campaigns by analyzing the orders placed, revenue generated, engagement by the day/hour, and more.
Having said that, let's look at the step-by-step instructions on how you can create your email course with FunnelKit Automations by FunnelKit (formerly WooFunnels).
Step 1: Install and activate FunnelKit Automations
First thing first. Get a copy of FunnelKit Automations.
Please note that there is a free (Lite) version of the Funnel Builder, but we will be using the Pro version here.
Once you have the license of FunnelKit Automations, go to your FunnelKit (formerly WooFunnels) account and download the following files:
1. FunnelKit Automations Lite plugin
2. FunnelKit Automations Pro
3. FunnelKit Automations Connectors
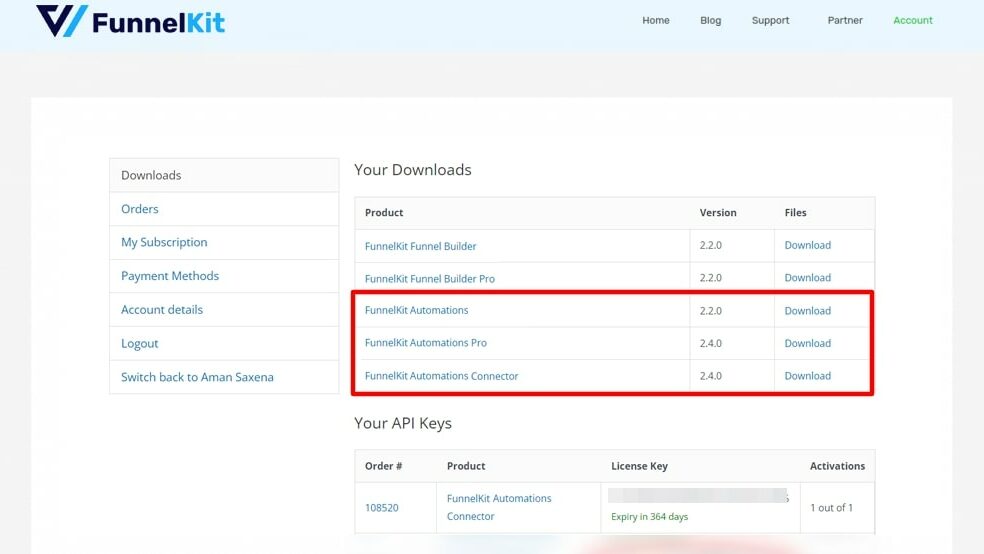
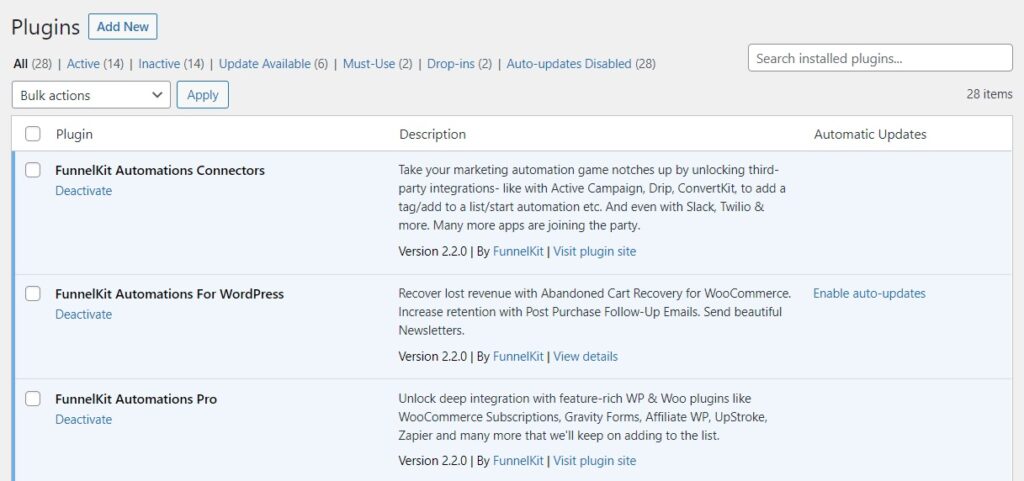
Install and activate all three plugins on your WordPress website.
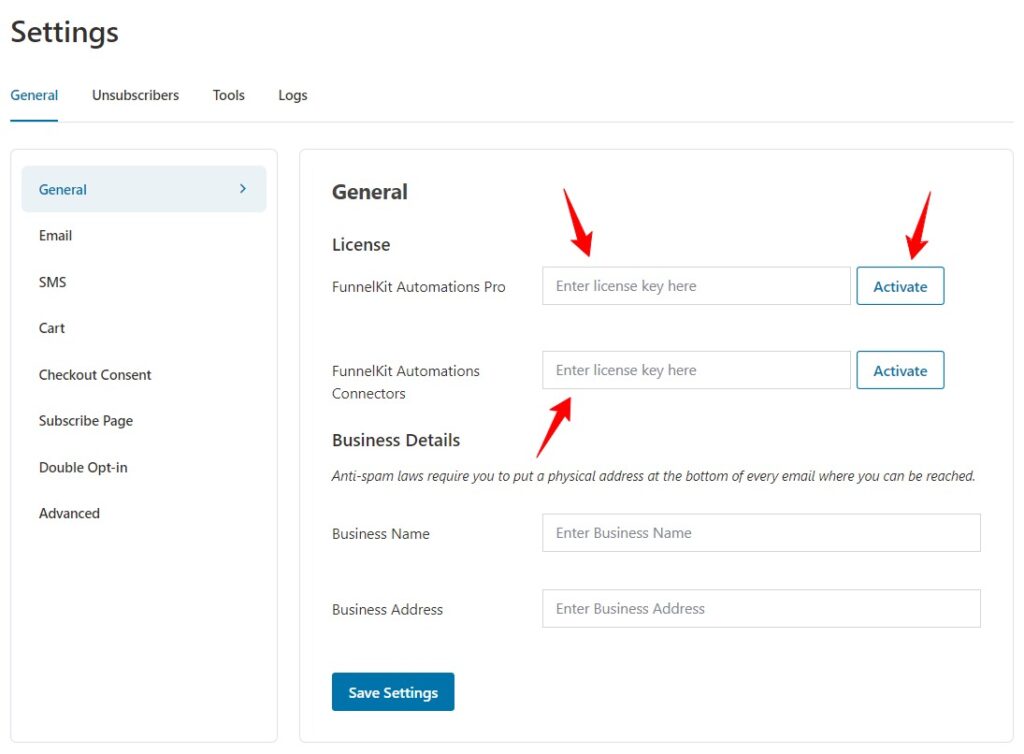
Now, go to your account and copy the license code of the FunnelKit Automations Pro and Connectors plugin.
Paste the license in the settings section to activate FunnelKit Automations.
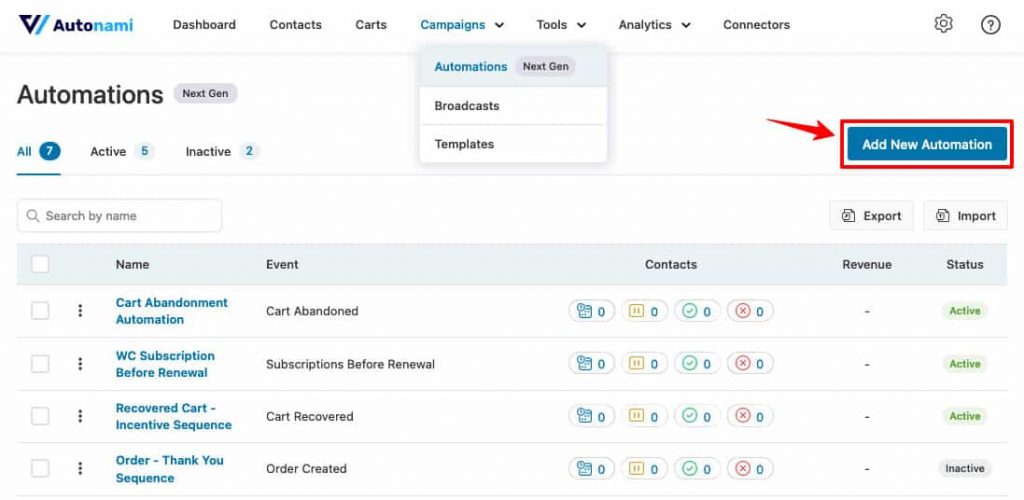
Step 2: Add a new automation
Go to Automations under Campaigns and click on Add New Automation.
Choose Start from Scratch and name your automation - ‘Email Course’.
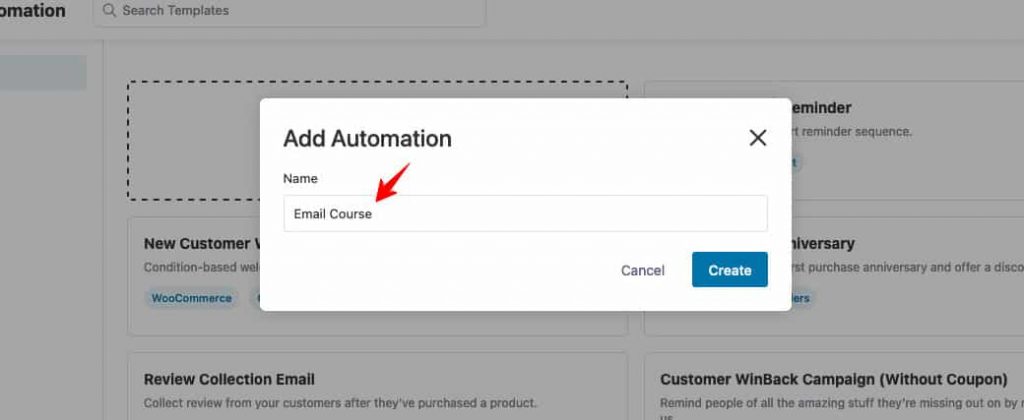
Click on Create to add your automation.
Step 3: Select the 'Form Submits' Event
FunnelKit Automations allows you to capture your leads and take a specific action.
Select the event ‘Form submits’ under the FunnelKit (formerly WooFunnels) Optin form.
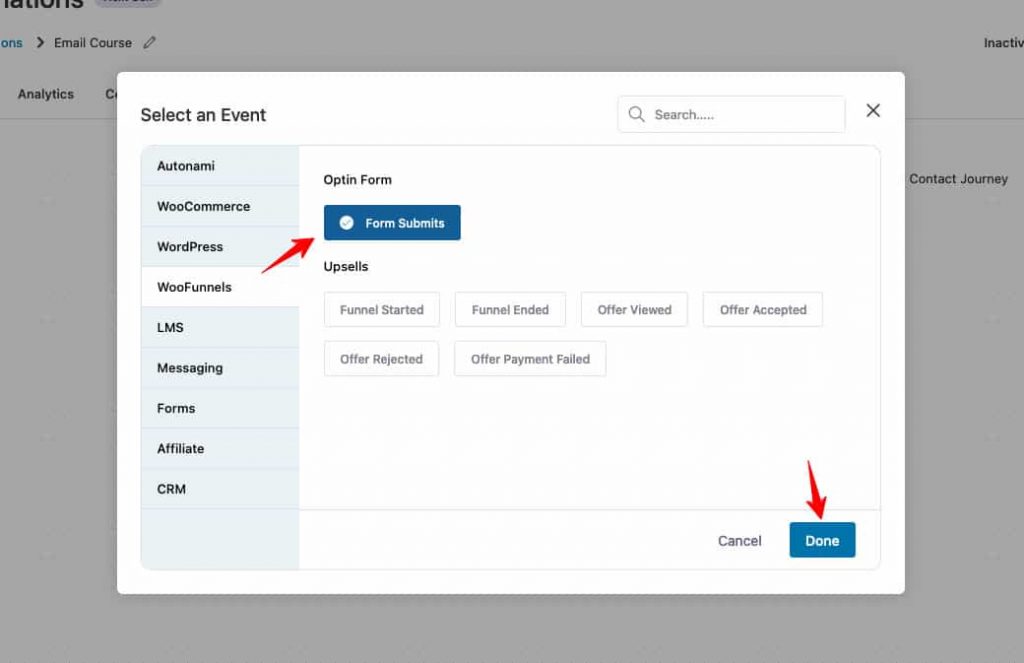
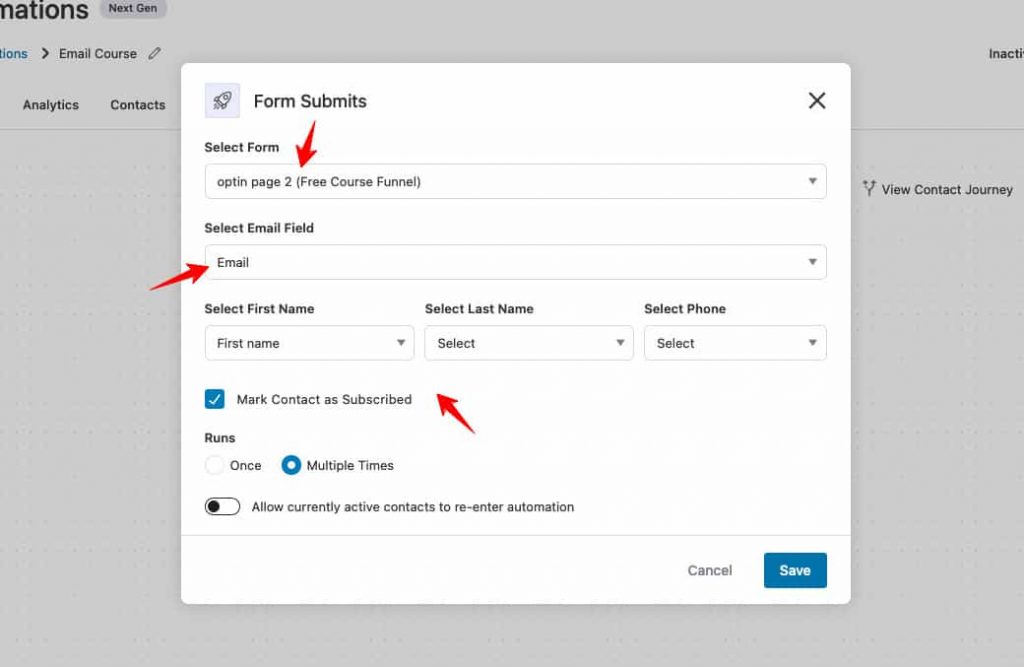
Now configure your form by clicking on the event trigger.
Specify the form name and map the fields.
Step 4: Specify the action
Click on the plus sign and add the 'Action' node here.
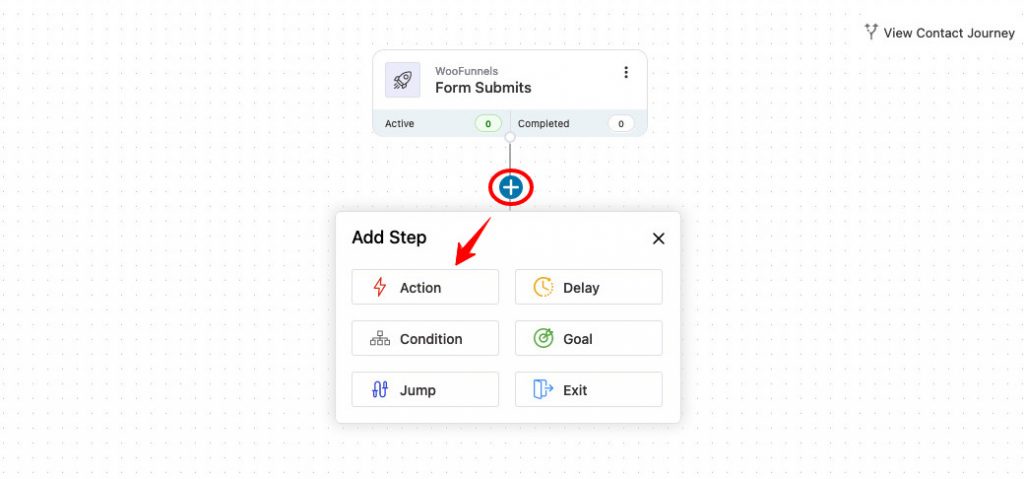
Select the ‘Send Email’ action.
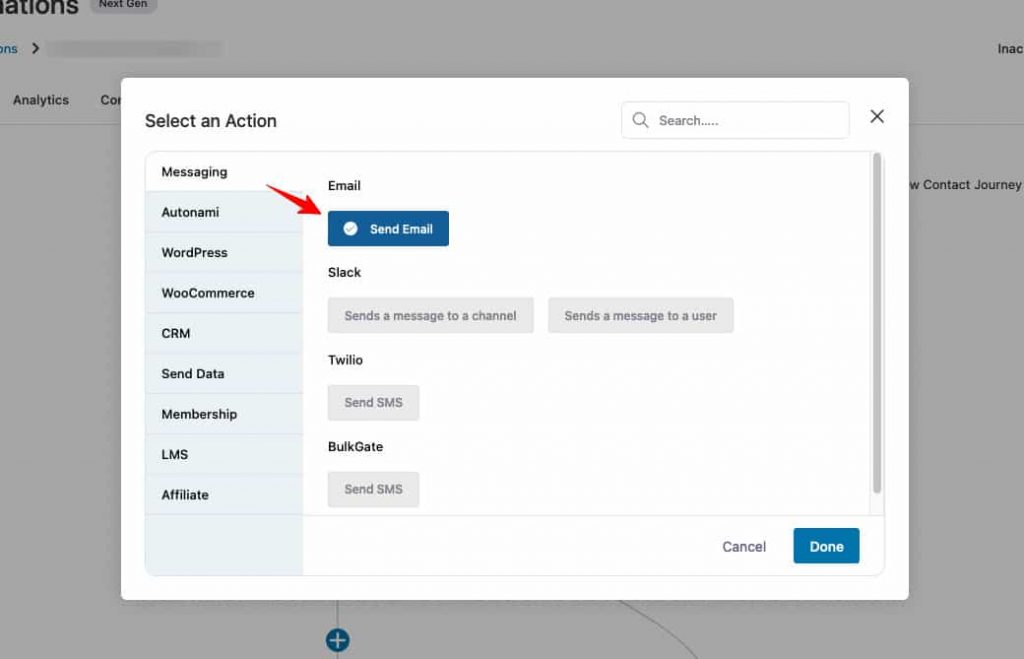
Now, start creating the content of your first email.
Write subject lines to arouse curiosity and create the course content for your email.

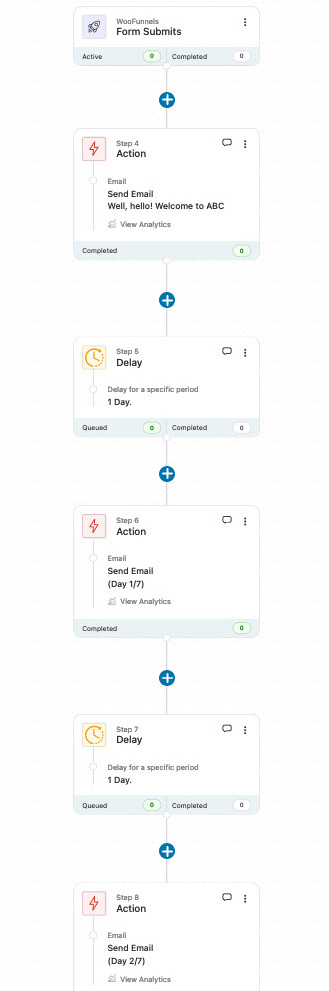
We will not be adding any delays here because we want to send our first email instantly when the user signs up.
Step 5: Add more emails to the sequence
Now, add more emails to your email course sequence such as:
- Teaching them lessons or topics as per your plan
- Creating link triggers and making them download the freebie or checklist
- Offering them your paid program for potential purchase
- Giving them a personalized discount code for their first purchase
- Adding them to your weekly/monthly newsletters
- Inviting them in your live Q/A session, and so much more.
Once you’re all set, click on the toggle to make your automation live.
There you go! This is how you can successfully set up your email course with FunnelKit Automations.
Now It’s Your Turn!
In this post, we together looked at what an email course is and why you should build one for your business.
Not just that, we also covered some digestible tips that you can use to create an email course no matter what you're selling.
Finally, we went over FunnelKit Automations that helped you create automated sequences for your own email course.
Now it's upon you to take these insights and build an actionable email course.
Be sure to make every email sound fun and engaging, deliver a ton of value, and drive people to take action!
We hope you really enjoyed this post.
Go ahead and explore more about FunnelKit Automations >>
Editorial Team
July 3, 2026Discover how a canceled order doesn't have to mean a lost customer, and how the right WooCommerce canceled order email can turn it into a second chance. WooCommerce canceled order...
Editorial Team
July 3, 2026Choosing the right WooCommerce HubSpot integration is harder than it looks because HubSpot has no first-party WooCommerce sync and every third-party option handles data differently. Pick the wrong connector and...
Editorial Team
July 1, 2026WooCommerce custom emails per product let you send a different message to customers based on the exact item they buy. To send a different email depending on what someone buys...


