
WooCommerce email hooks give you powerful control over the emails your store sends, without touching the core files.
From order confirmations to shipping updates, these hooks let you customize content, add dynamic elements, and trigger additional actions with ease.
Whether you're a developer or a store owner looking to personalize your customer communication, email hooks offer advanced flexibility.
In this guide, we will walk you through every WooCommerce email hook available, explain what each one does, and show you how to use them.
We will also share a no-code alternative using a visual builder for store owners who want to customize their WooCommerce email notifications without writing PHP.
Table of Contents
- 1 What Is a WooCommerce Email Hook?
- 2 15 Common WooCommerce Email Hooks and Their Usage
- 3 Don't Want to Use WooCommerce Email Hooks? Here's a Better Way to Customize Emails (Without Coding)
- 4 How to Customize and Send Beautiful WooCommerce Emails? (Step-by-Step)
- 5 Email Customizer vs. Hooks: When to Use What
- 6 7 Best Practices for Using WooCommerce Email Hooks
- 7 Troubleshooting Common WooCommerce Email Hook Issues
- 8 Frequently Asked Questions on WooCommerce Email Hooks
- 9 Start Customizing Your WooCommerce Email Hooks Today!
What Is a WooCommerce Email Hook?
A WooCommerce email hook is a predefined point inside an email template where you can inject custom code without editing core plugin files.
Whether it's an order confirmation, a shipping update, or any other kind of notification, these hooks let you add content, change data, or alter how an email looks and behaves.
WooCommerce uses two types of hooks in its email system:
- Actions
- Filters
Let's go through these actions and filter hooks in detail.
WooCommerce email action hooks
Action hooks let you add content or trigger functions at specific points in the email.
For example, you can use an action hook to automatically include a thank-you message or a discount code in order confirmation emails.
Example: Including a thank-you message in the order confirmation email
add_action( 'woocommerce_email_order_details', 'add_custom_thank_you_message', 20, 4 );

function add_custom_thank_you_message( $order, $sent_to_admin, $plain_text, $email ) {
    // Only show in customer-facing emails
    if ( $sent_to_admin ) {
        return;
    }

    if ( $plain_text ) {
        echo "\nThank you for your purchase! Enjoy 10% off your next order with the code: THANKYOU10.\n";
    } else {
        echo '<p>Thank you for your purchase! As a token of appreciation, enjoy 10% off on your next order with the code: <strong>THANKYOU10</strong>.</p>';
    }
}
Here, the woocommerce_email_order_details action hook appends a thank-you message to the order details email. The order information and the customer's discount code will appear below.
WooCommerce email filter hooks
Through email filter hooks, you can change existing content. For instance, you can alter the email's subject line, adjust the footer, or modify any part of the email text before its dispatch.
Example: Change the subject line of the "New Order" email sent to the admin.
add_action( 'woocommerce_email_after_order_table', 'custom_message_after_order_table', 10, 4 );

function custom_message_after_order_table( $order, $sent_to_admin, $plain_text, $email ) {
    // Skip admin-facing emails
    if ( $sent_to_admin ) {
        return;
    }

    if ( $plain_text ) {
        echo "\nIf you have any questions, feel free to contact us at [email protected].\n";
    } else {
        echo '<p>If you have any questions, feel free to contact us at <a href="mailto:[email protected]">[email protected]</a>.</p>';
    }
}
The woocommerce_email_subject_new_order filter hook alters the default subject line of the "New Order" email before it is sent to the store admin.
Both action and filter hooks deliver powerful methods to personalize your store’s emails without changing the core code of WooCommerce!
Other Useful Email Hooks
- Email-specific hooks: These are tailored to individual WooCommerce emails, such as new order, completed order, or canceled order emails.
Example: After adding this woocommerce_email_after_order_table hook, you can add a custom message to the email after the order details table.
add_action( 'woocommerce_email_after_order_table', 'custom_message_after_order_table', 10, 4 );
function custom_message_after_order_table( $order, $sent_to_admin, $plain_text, $email ) {
    echo '<p>If you have any questions, feel free to contact us at [email protected].</p>';
}
You can see that a helpful message appears after the order table, directing the customer to the support team.
- Admin email hooks: These help you customize email notifications sent to the store administrator, such as new order alerts.
Example: Let’s add the woocommerce_email_recipient_new_order hook to change or add recipients for the "New Order" email sent to admins.
add_filter( 'woocommerce_email_recipient_new_order', 'custom_admin_email_recipient', 10, 2 );

function custom_admin_email_recipient( $recipient, $order ) {
    // Bail on admin settings screen where $order is null
    if ( ! $order instanceof WC_Order ) {
        return $recipient;
    }

    // Append extra recipients instead of replacing
    $recipient .= ', [email protected]';

    return $recipient;
}
Here, the "New Order" email will be sent to both the admin and the warehouse team to ensure everyone is informed.
- Customer email hooks: These are specific to customer-related emails, allowing you to modify emails such as order confirmations, shipment notifications, and refunds.
Example: The woocommerce_email_footer hook allows you to customize the footer text in WooCommerce emails sent to customers.
add_action( 'woocommerce_email_footer', 'custom_email_footer' );

function custom_email_footer( $email ) {
    // Only show on customer-facing emails
    $admin_emails = array( 'new_order', 'cancelled_order', 'failed_order' );

    if ( in_array( $email->id, $admin_emails, true ) ) {
        return;
    }

    echo '<p style="text-align: center; font-size: 13px; color: #888;">Thank you for choosing our store. We hope to see you again!</p>';
}
This custom thank-you message for the customer is added to the footer of every email. It reinforces a positive brand experience.
Using WooCommerce custom email hooks lets you personalize, automate, and enhance your store's emails, without editing core files. They help improve branding, customer experience, and workflow efficiency by giving you full control over email content and behavior.
15 Common WooCommerce Email Hooks and Their Usage
WooCommerce provides a variety of email hooks that allow developers to customize emails sent to customers and administrators.
These hooks help you modify email content, adjust recipients, or even add custom information to emails.
Below are 15 common WooCommerce email hooks and their usage:
1. woocommerce_email_header
You can use this hook to add content, such as a custom message or branding, to the top of the email.
add_action( 'woocommerce_email_header', 'custom_email_header_content' );
function custom_email_header_content( $email_heading ) {
    echo '<p>Welcome to our store! Here’s your order summary.</p>';
}
2. woocommerce_email_footer
Email footers can have custom content with this hook.
add_action( 'woocommerce_email_footer', 'custom_email_footer_content' );
function custom_email_footer_content() {
    echo '<p>Thank you for shopping with us!</p>';
}
3. woocommerce_email_before_order_table
It adds text to an email before the order table.
add_action( 'woocommerce_email_before_order_table', 'add_custom_message_before_order_table', 10, 4 );
function add_custom_message_before_order_table( $order, $sent_to_admin, $plain_text, $email ) {
    echo '<p>Your order is being processed. Here are the details:</p>';
}
4. woocommerce_email_after_order_table
Increases the email's content after the order table.
add_action( 'woocommerce_email_after_order_table', 'custom_message_after_order_table', 10, 4 );
function custom_message_after_order_table( $order, $sent_to_admin, $plain_text, $email ) {
    if ( $plain_text ) {
        echo "If you have any questions, feel free to contact us.\n";
    } else {
        echo '<p>If you have any questions, feel free to contact us.</p>';
    }
}
5. woocommerce_email_order_meta
Includes custom information below the email's order details.
add_action( 'woocommerce_email_order_meta', 'add_custom_meta_to_order_email', 10, 4 );
function add_custom_meta_to_order_email( $order, $sent_to_admin, $plain_text, $email ) {
    $customer_note = $order->get_customer_note();
    if ( $customer_note ) {
        if ( $plain_text ) {
            echo "Order Notes: " . $customer_note . "\n";
        } else {
            echo '<p>Order Notes: ' . esc_html( $customer_note ) . '</p>';
        }
    }
}
6. woocommerce_email_subject_new_order
Changes the subject line of an email with the subject "New Order."
add_filter( 'woocommerce_email_subject_new_order', 'custom_new_order_email_subject', 10, 2 );
function custom_new_order_email_subject( $subject, $order ) {
    return 'New Order Received: ' . $order->get_order_number();
}
7. woocommerce_email_customer_details
This makes the email more personal by including the customer's name and contact information.
add_action( 'woocommerce_email_customer_details', 'add_custom_customer_details_to_email', 10, 3 );
function add_custom_customer_details_to_email( $order, $sent_to_admin, $plain_text ) {
    $billing_email = $order->get_billing_email();
    if ( $plain_text ) {
        echo "Customer Email: " . $billing_email . "\n";
    } else {
        echo '<p>Customer Email: ' . esc_html( $billing_email ) . '</p>';
    }
}
8. woocommerce_email_before_order_items_table
Makes the order table display text before the list of ordered items.
add_action( 'woocommerce_email_before_order_items_table', 'add_custom_before_order_items', 10, 4 );
function add_custom_before_order_items( $order, $sent_to_admin, $plain_text, $email ) {
    if ( $plain_text ) {
        echo "Here’s a breakdown of your order items:\n\n";
    } else {
        echo '<p>Here’s a breakdown of your order items:</p>';
    }
}
9. woocommerce_email_after_order_items_table
After the list of ordered items, this command adds an item to the order table.
add_action( 'woocommerce_email_after_order_items_table', 'custom_message_after_order_items', 10, 4 );
function custom_message_after_order_items( $order, $sent_to_admin, $plain_text, $email ) {
    $item_count = $order->get_item_count();
    if ( $plain_text ) {
        echo "Total Items: " . $item_count . "\n";
    } else {
        echo '<p>Total Items: ' . esc_html( $item_count ) . '</p>';
    }
}
10. woocommerce_email_recipient_new_order
Sets up the recipient of the "New Order" email.
add_filter( 'woocommerce_email_recipient_new_order', 'custom_admin_email_recipient', 10, 2 );
function custom_admin_email_recipient( $recipient, $order ) {
    // Add new recipient along with existing ones
    $additional_recipient = '[email protected]';
    $recipient .= ',' . $additional_recipient;
    return $recipient;
}
11. woocommerce_email_recipient_customer_processing_order
Customizes the recipient of the "Processing Order" email.
add_filter( 'woocommerce_email_recipient_customer_processing_order', 'custom_processing_order_recipient', 10, 2 );
function custom_processing_order_recipient( $recipient, $order ) {
    return '[email protected]';
}
12. woocommerce_email_order_items_table
Modifies the order items table, allowing you to change how items are displayed.
add_action( 'woocommerce_email_before_order_items_table', 'custom_message_before_order_items', 10, 4 );
function custom_message_before_order_items( $order, $sent_to_admin, $plain_text, $email ) {
    if ( $plain_text ) {
        echo "Custom Order Items Layout\n\n";
    } else {
        echo '<p>Custom Order Items Layout</p>';
    }
}
13. woocommerce_email_styles
Customizes the CSS for WooCommerce emails.
add_filter( 'woocommerce_email_styles', 'custom_email_styles' );
function custom_email_styles( $css ) {
    $css .= '.email-footer { color: #ff0000; }';
    return $css;
}
14. woocommerce_order_item_name
Modifies the product name displayed in the email order item table.
add_filter( 'woocommerce_order_item_name', 'customize_order_item_name', 10, 2 );
function customize_order_item_name( $item_name, $item ) {
    return 'Special: ' . $item_name;
}
15. woocommerce_email_subject_processing_order
It customizes the subject line of the "processing order" email.
add_filter( 'woocommerce_email_subject_processing_order', 'custom_processing_order_email_subject', 10, 2 );
function custom_processing_order_email_subject( $subject, $order ) {
    return 'Your Order is Being Processed: ' . $order->get_order_number();
}
Adding the default WooCommerce email hooks
Adding default WooCommerce email hooks is a simple process. To do this, you have to use your theme’s functions.php file.
Below is a step-by-step guide on how to add default WooCommerce email hooks to customize various parts of the WooCommerce emails:
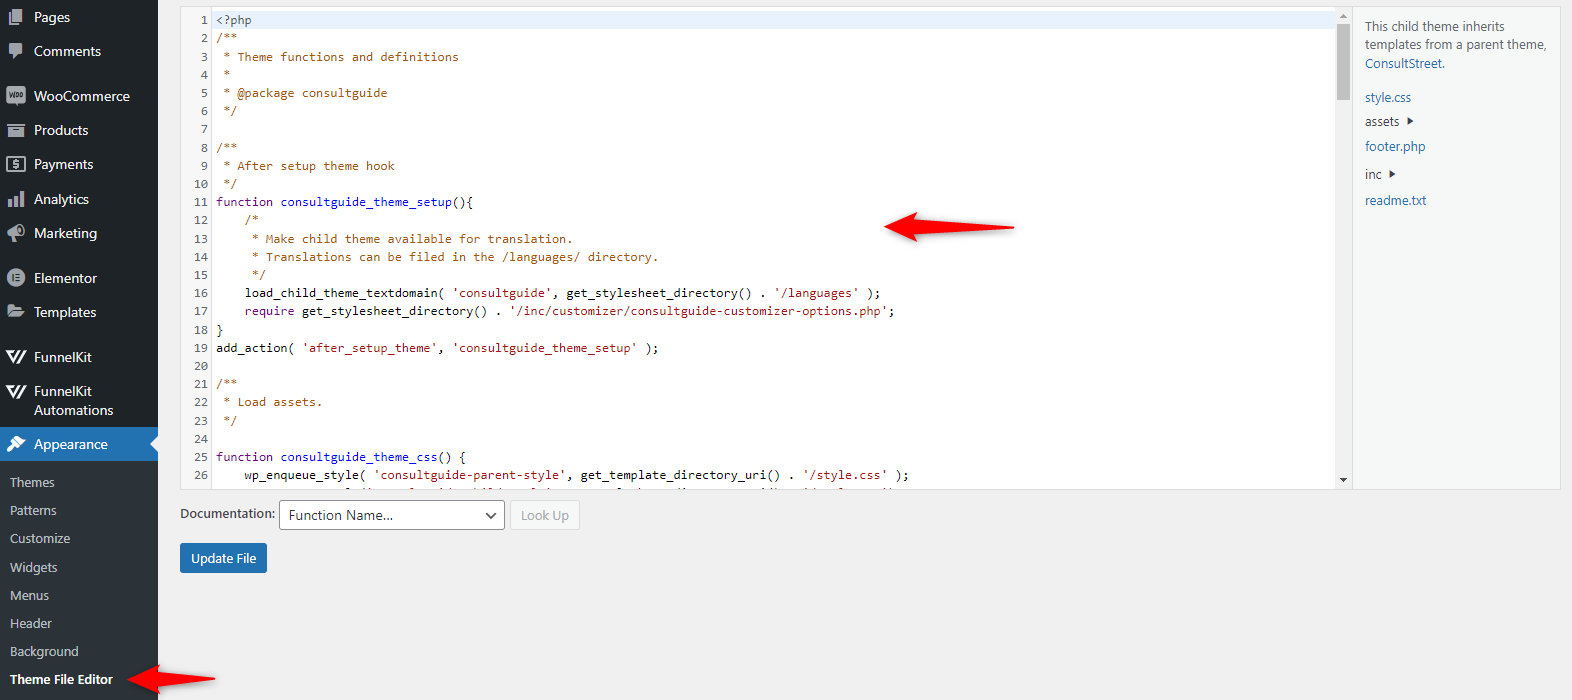
1. Access your theme’s functions.php file
- First, log in to your WordPress dashboard.
- Navigate to Appearance > Theme Editor.
- Open your theme’s functions.php file (or, if you’re using a child theme, open the child theme's functions.php file to avoid overwriting changes during theme updates).
2. Add the hook you want to customize
After accessing the functions.php file, you can add WooCommerce email hooks to modify email content.
Method 1: Suppose you want to add a custom message or branding at the top of WooCommerce emails.
For that, you can use the woocommerce_email_header hook. It will add a message to every WooCommerce email just below the header.
add_action( 'woocommerce_email_header', 'custom_email_header_content' );
function custom_email_header_content( $email_heading ) {
    echo '<p>Thank you for choosing our store! We value your business.</p>';
}
Let’s consider another example.
Suppose you want to include customer-specific details, like their email address, in the order confirmation email.
You need to use the woocommerce_email_customer_details hook. This hook adds the customer's email address below the order details in the email.
add_action( 'woocommerce_email_customer_details', 'add_custom_customer_details_to_email', 10, 3 );
function add_custom_customer_details_to_email( $order, $sent_to_admin, $plain_text ) {
    echo '<p>Customer Email: ' . $order->get_billing_email() . '</p>';
}
Removing the default WooCommerce email hooks
You can remove the hooks using the same process you used to add them. This is particularly useful if you wish to prevent a specific hook from functioning in your WooCommerce email.
Let’s see how to do it:
1. Access Your Theme’s functions.php File
- Log in to your WordPress dashboard.
- Go to Appearance > Theme Editor.
- Open the functions.php file in your theme, or preferably in your child theme, to prevent issues during theme updates.
2. Remove the WooCommerce Hook
To remove a WooCommerce hook, you’ll use the remove_action() or remove_filter() function, depending on whether the hook is an action or a filter. Below are examples of how to remove different types of WooCommerce email hooks.
Let's say you wish to remove the content added by the default email header hook (woocommerce_email_header). For instance, you need to use the remove_action() function.
This will remove the default header content from all WooCommerce emails. It will also leave the header blank or allow you to replace it with custom content.
remove_action( 'woocommerce_email_header', 'woocommerce_email_header', 10 );Method 2: Remove the order details from an email
If you want to remove the order details table, which lists the purchased items, use the woocommerce_email_order_details hook.
It will remove the table that displays the list of products ordered in WooCommerce emails.
remove_action( 'woocommerce_email_order_details', 'woocommerce_email_order_details', 10, 4 );Don't Want to Use WooCommerce Email Hooks? Here's a Better Way to Customize Emails (Without Coding)
The examples above show how to add custom text to WooCommerce emails using hooks.
However, this might feel overwhelming if you're uncomfortable working with custom code or adding snippets to your WordPress site.
Even if you understand the process, it can still be time-consuming, and you may not have the flexibility to implement complex customizations, such as automating email sequences based on customer behavior.
Hiring a professional developer for minor changes or customizations can also be costly.
But don’t worry! There’s a much simpler way to create custom transactional and marketing emails without needing any coding skills.
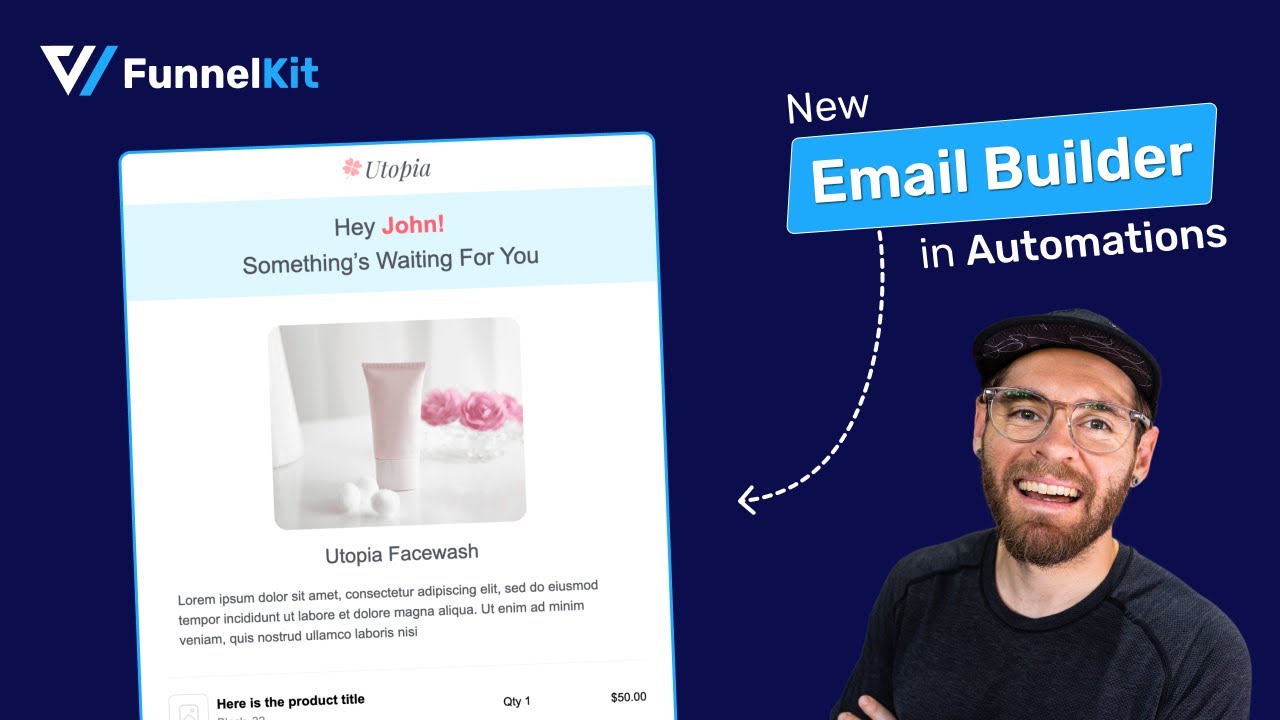
Introducing FunnelKit Automations, a powerful CRM designed for WooCommerce stores. It lets you easily set up marketing automations and email/SMS broadcasts in minutes.
It has both the free (lite) and premium versions. Its powerful, enhanced visual email builder enables you to design and customize emails without any coding skills.
Check out this video to learn more about this awesome email builder tool as an alternative to manual WooCommerce email hooks.
Are you prepared to revamp your store's email correspondence? Let's start building beautifully customized email workflows, no coding is required!
How to Customize and Send Beautiful WooCommerce Emails? (Step-by-Step)
This section will demonstrate how to create, customize, and send beautiful emails from your WooCommerce store directly in the WordPress dashboard, without any code.
Step 1: Go to the transactional emails section
Let's customize the transactional email. To do so, navigate to FunnelKit Automations ⇨ Emails and you'll land on the transactional emails page.
From there, click on the email you want to customize.
Step 2: Customize your WooCommerce email
Enter your from name, from email and reply-to email.
Next, fill in your subject line and preview text.
Next, you’ll land on the email customizer workspace.
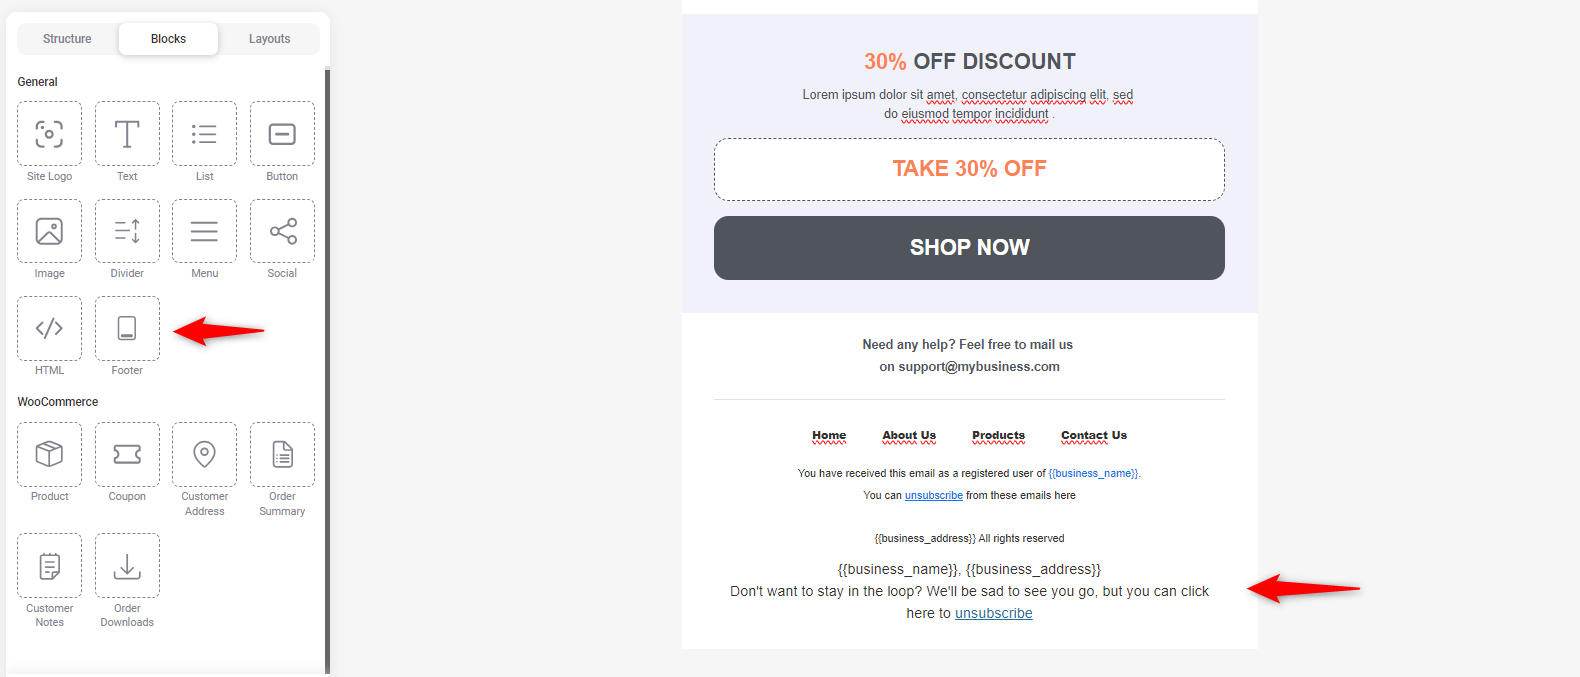
Let’s see how to customize each section using the “Visual Email Builder” of FunnelKit Automations.
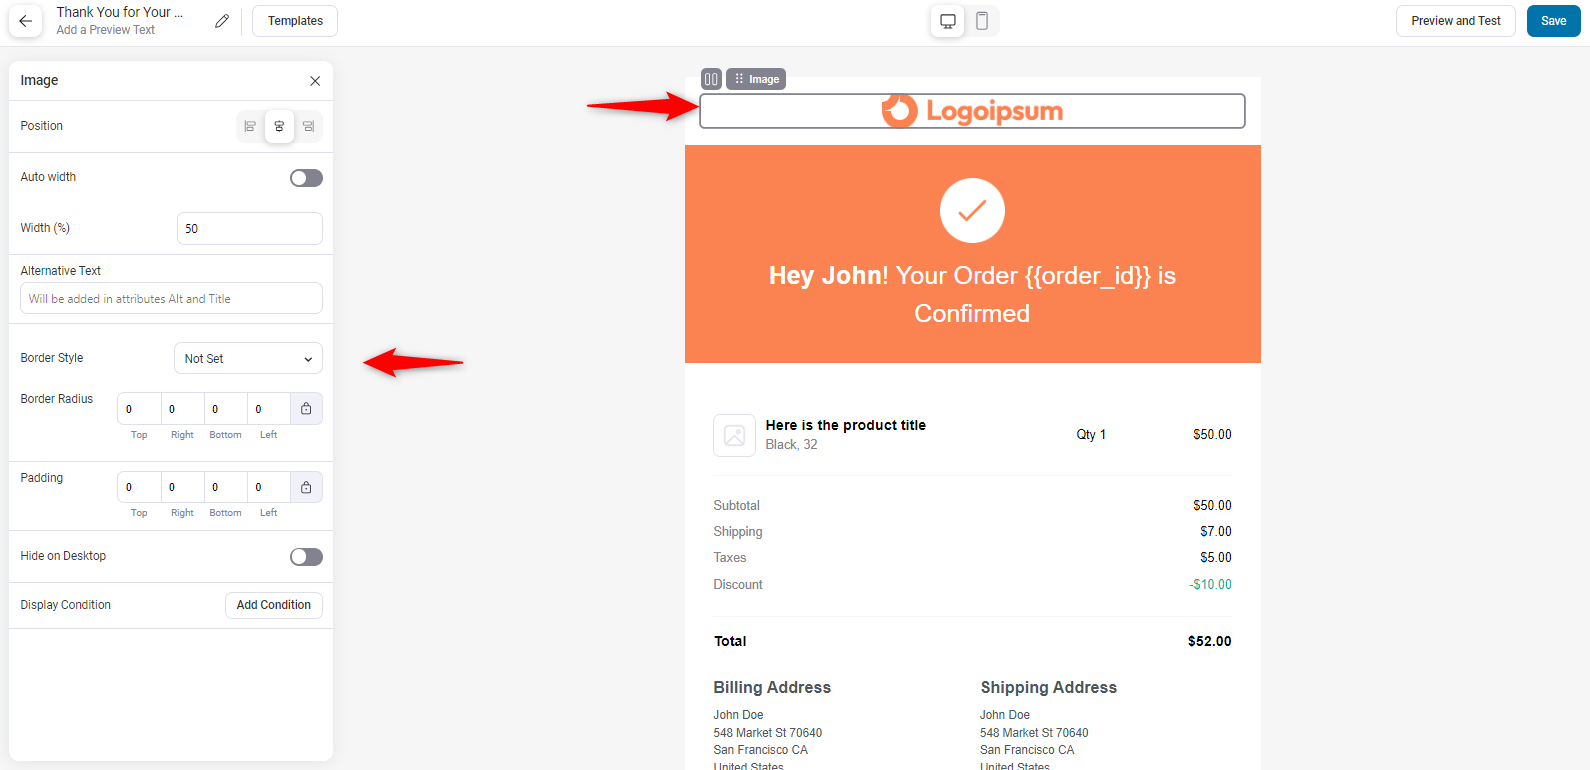
Logo
Click the logo to open the options on the left.
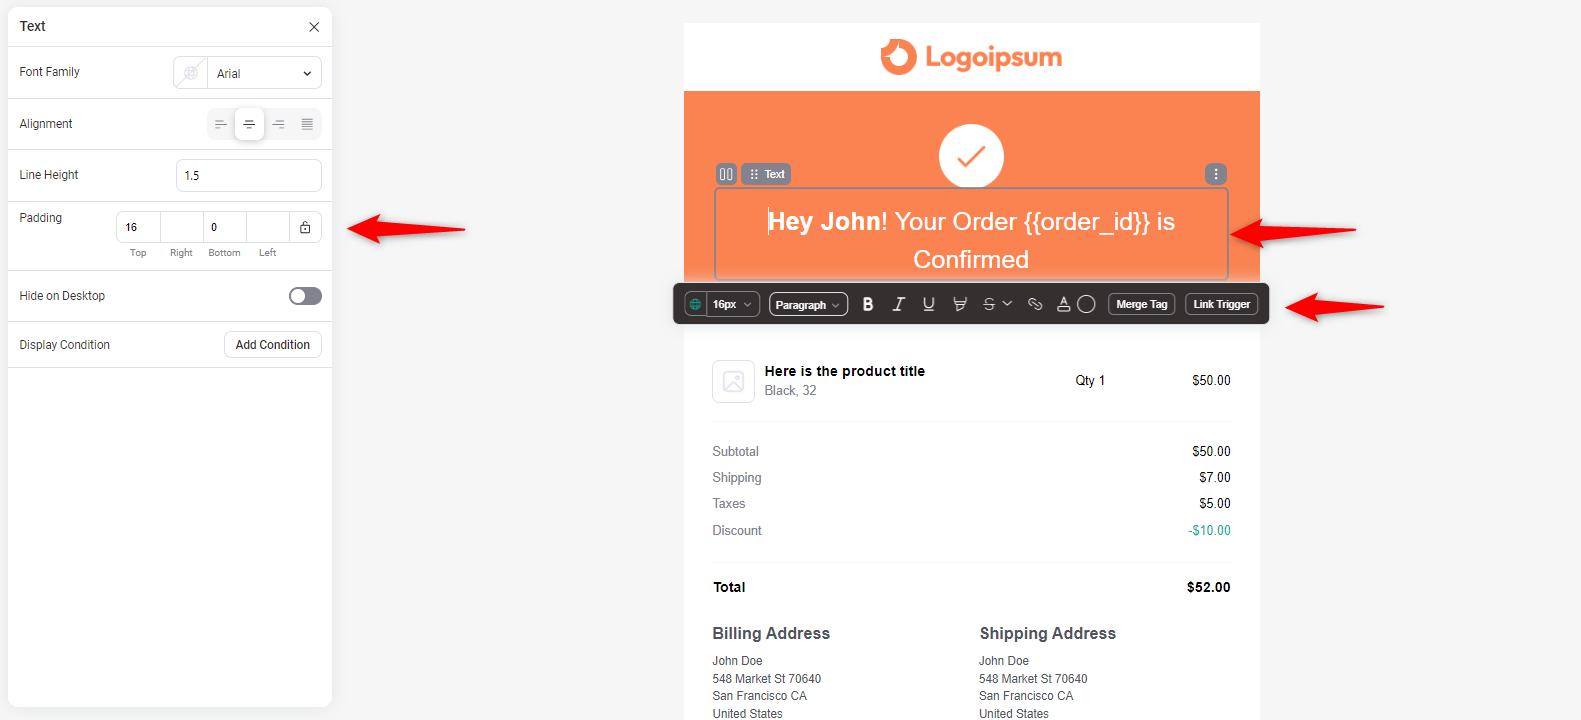
Header
Click on the email header portion. You can see the options are available on the left side.
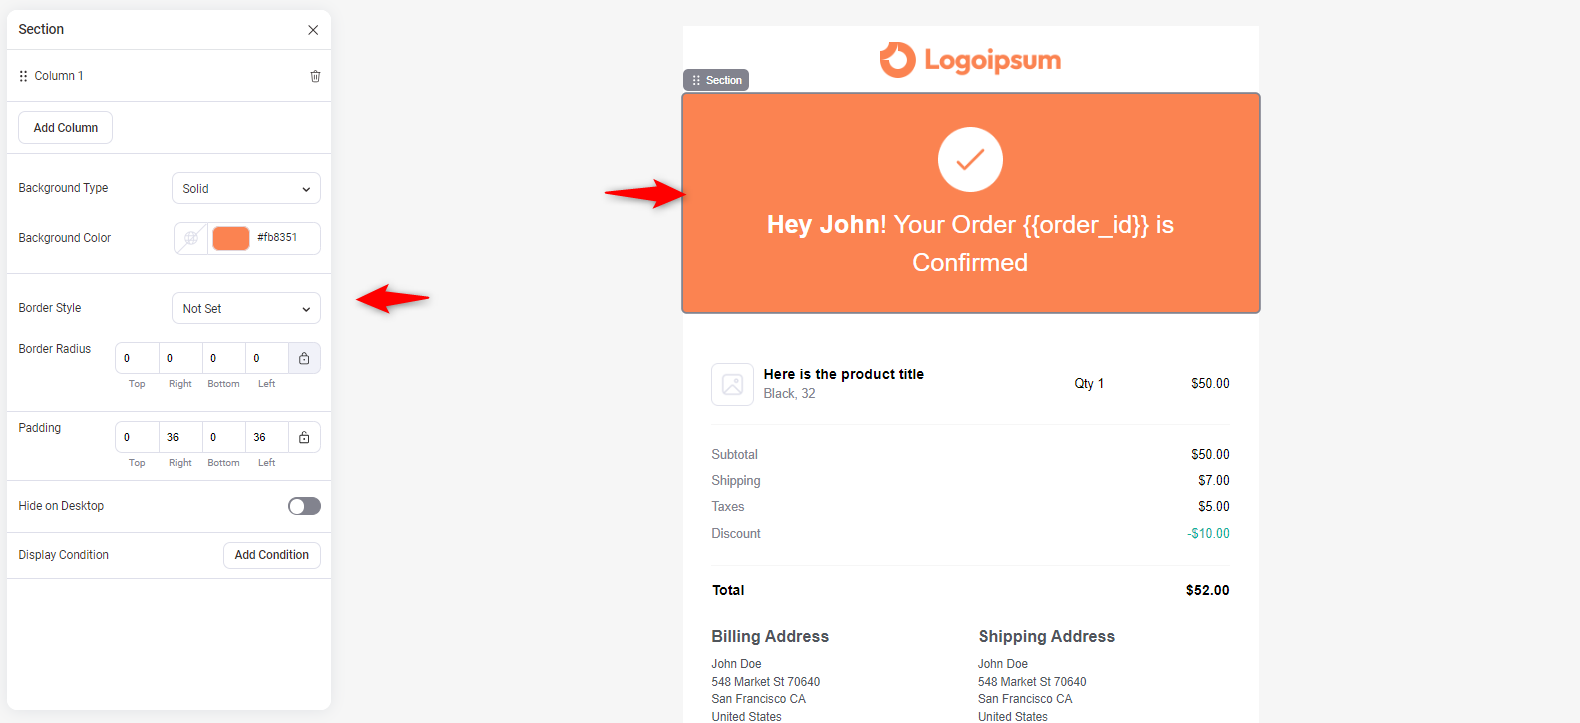
You can add text to the heading and customize it.
For example, you can align its position, color, font, and line, add personalized merge tags & links, and do more.
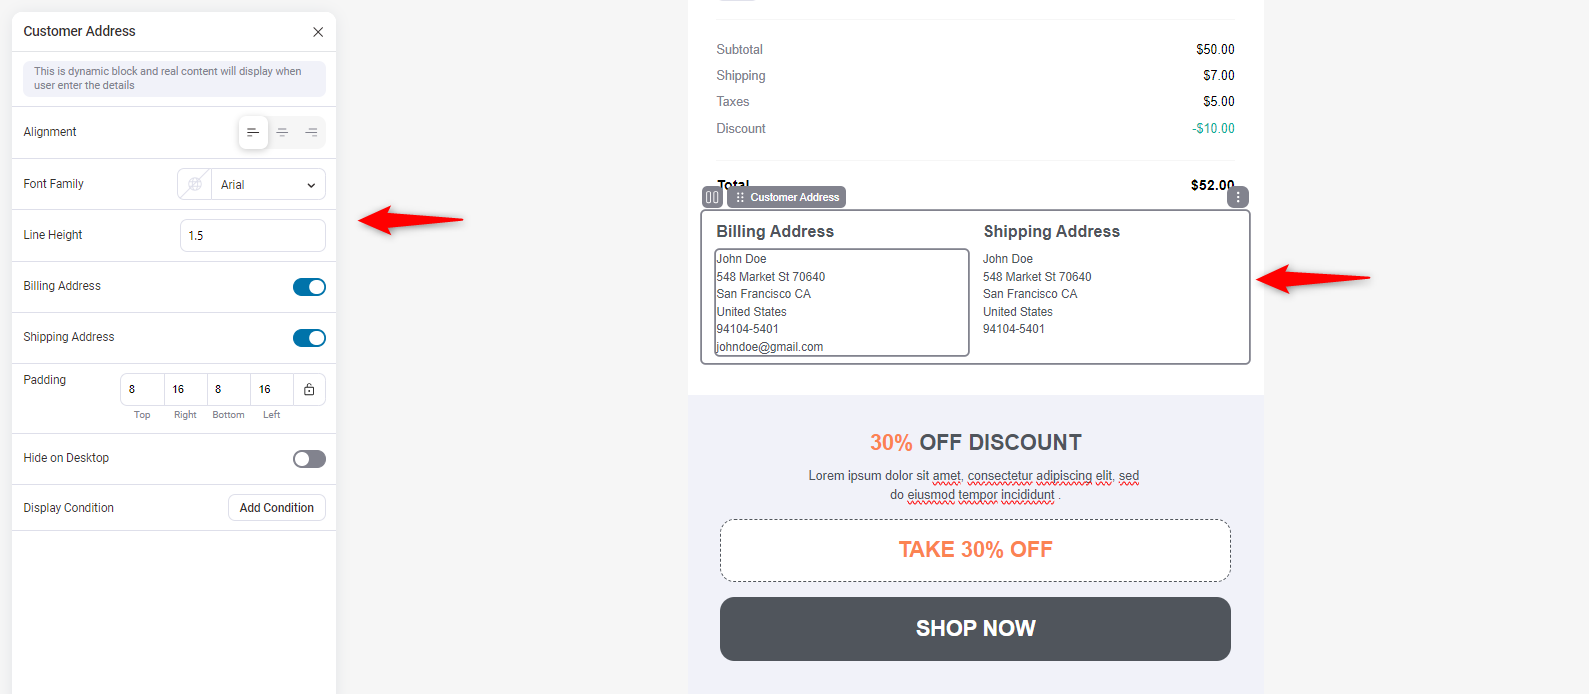
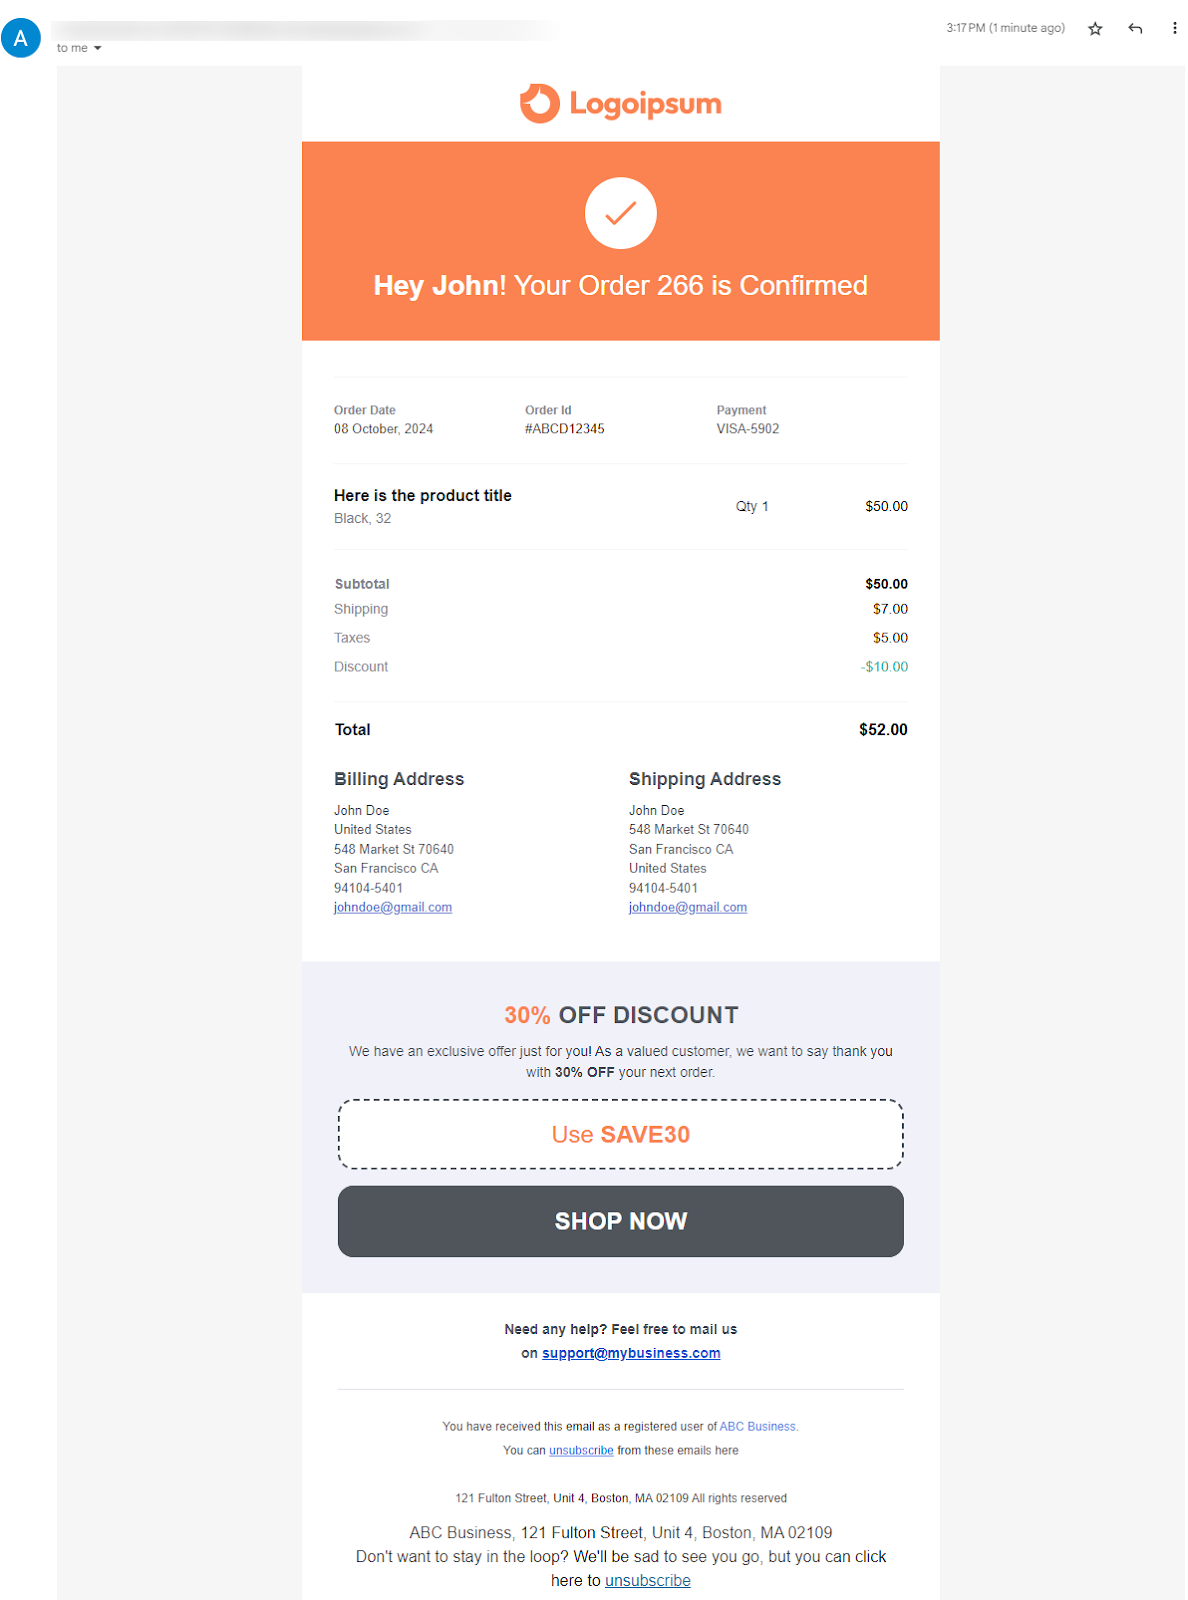
Order details
Click the order details table to access customization options.
Check them one by one and adjust them as needed for your website.
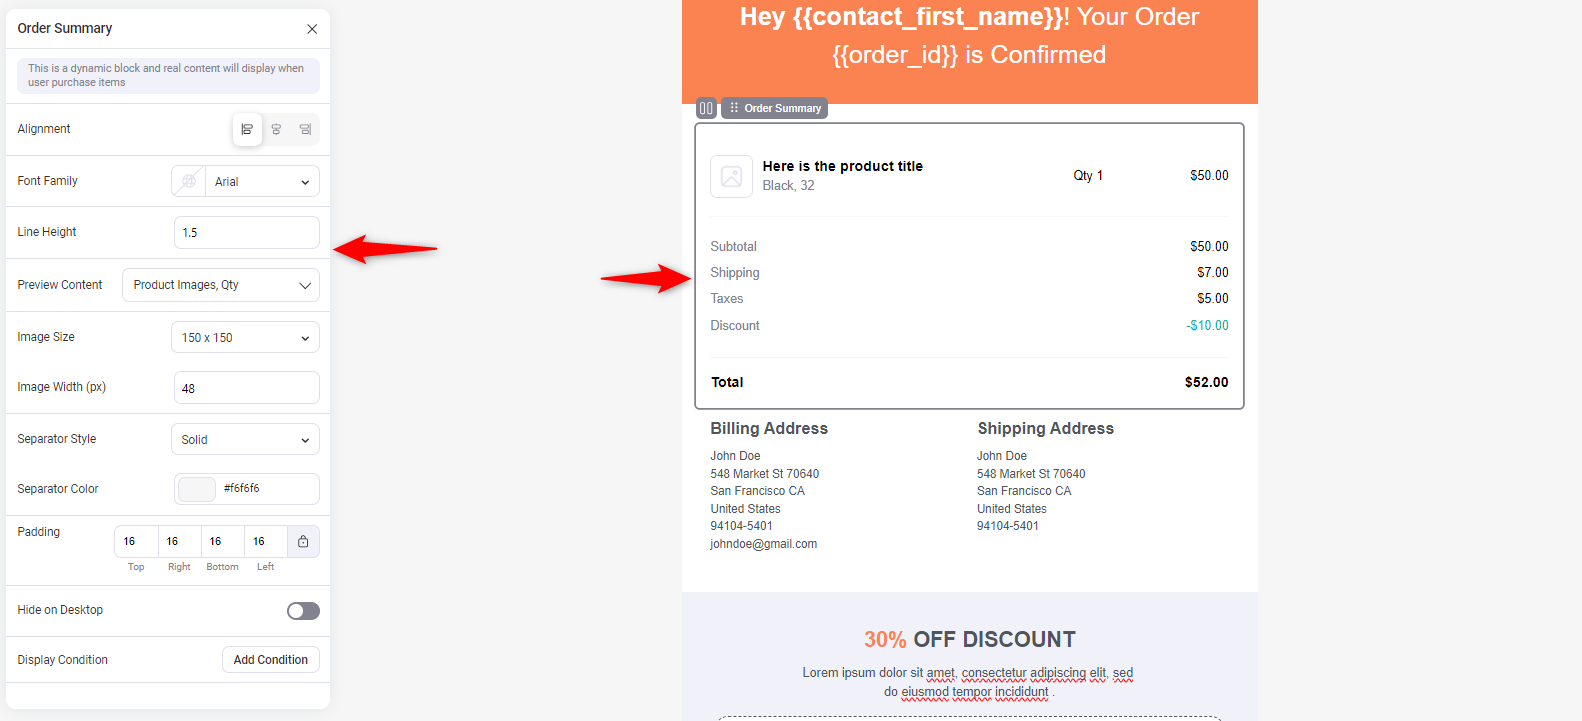
Here, you can see the WooCommerce-related blocks. You can just add them by dragging and dropping them.
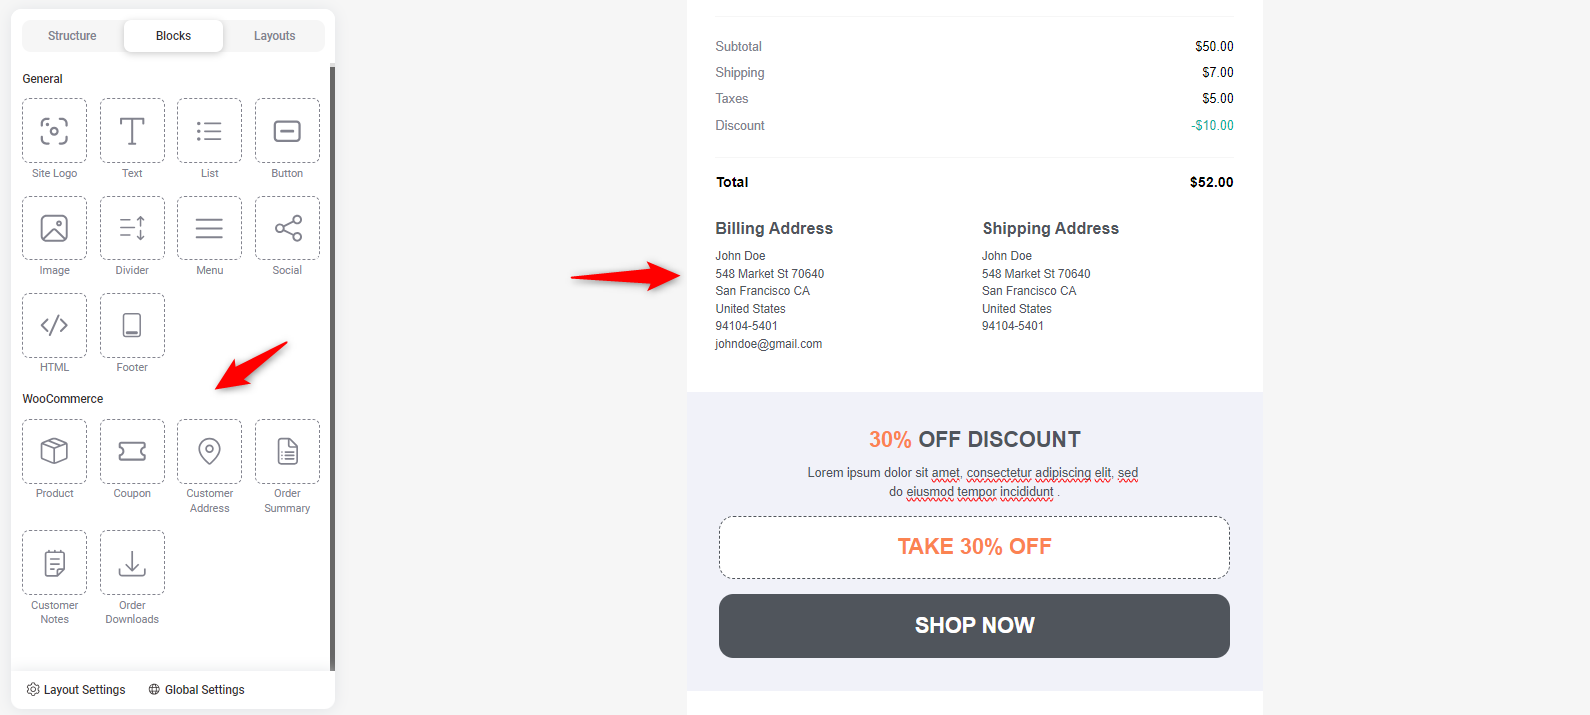
Here, we are customizing the customer address block.
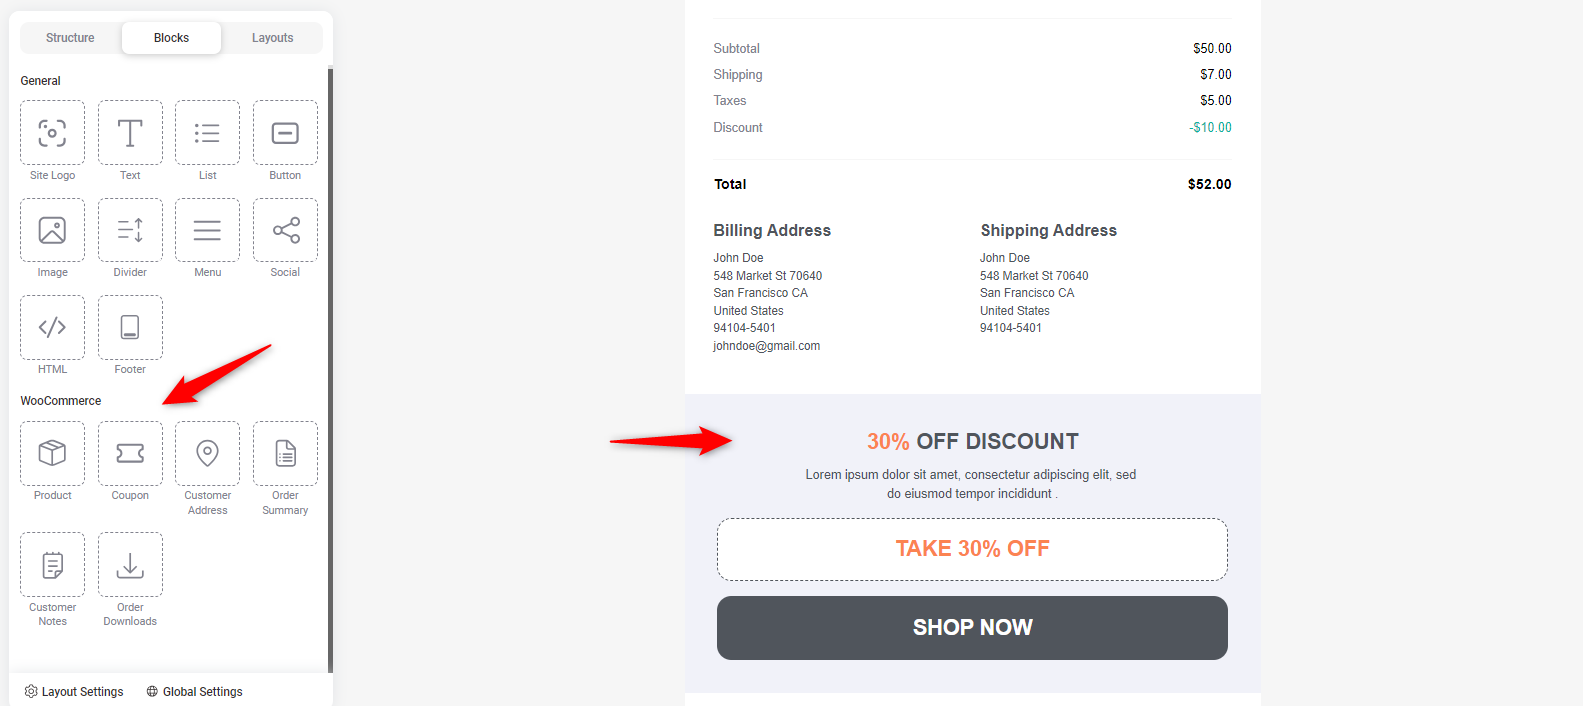
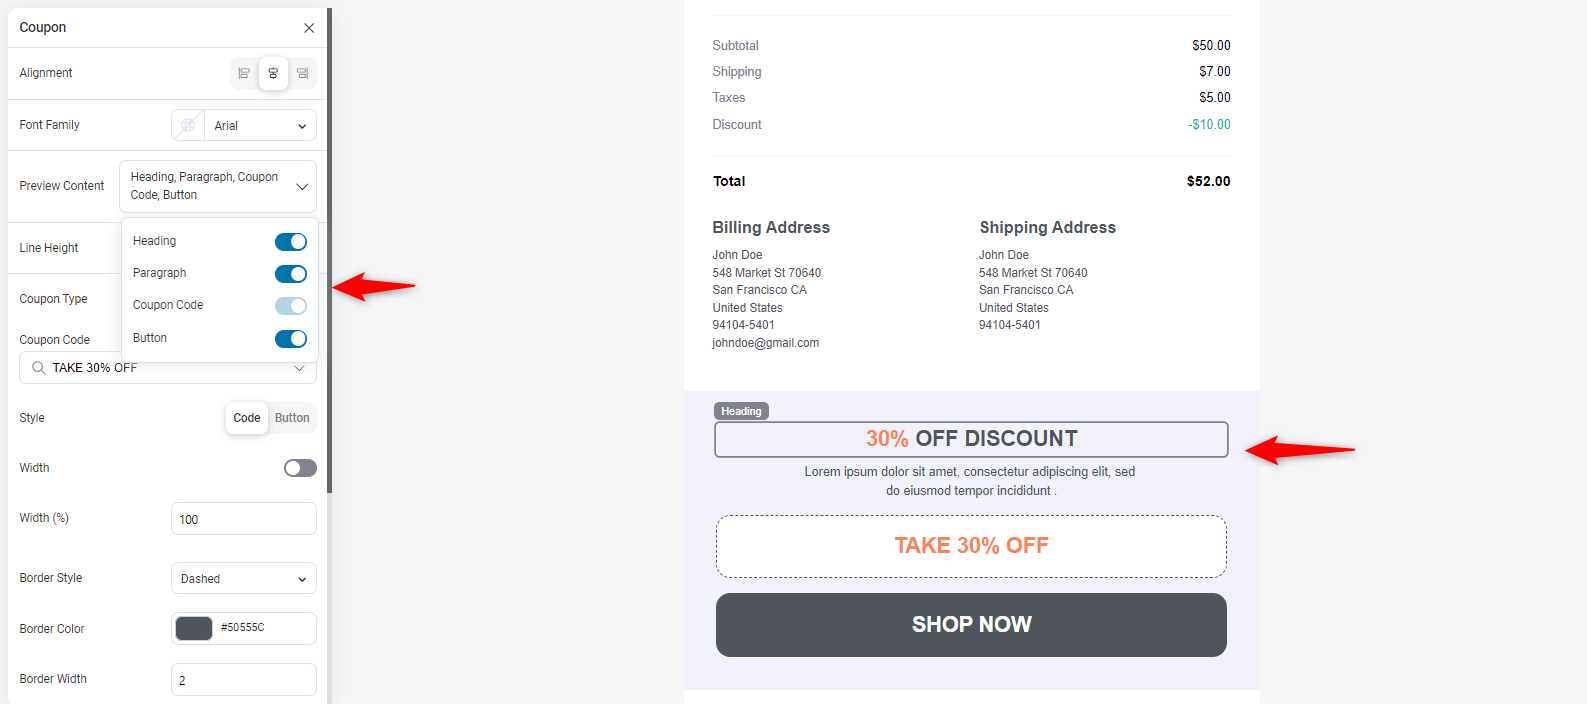
Coupon code
You can add a coupon code block to the email to give your customers an additional benefit.
Check out the screenshot below:
You can add your coupon code in the email body. Check out the options and configure it based on your requirements.
Email footer
You can add an email footer from the general block.
After completing everything, save your template and settings and return to the automation page.
It offers practical tips for enhancing engagement with your store's emails.
Step 3: Enable and test your email
On the automation page, you need to enable the automation.
Now, every time a user places an order in your store, they will receive an email about the order.
This is how you can customize emails using FunnelKit Automations without using hooks or custom code.
Email Customizer vs. Hooks: When to Use What
Here's a quick look at when you can use the two methods to customize your emails.
| Scenario | Email Hooks | FunnelKit Automations |
|---|---|---|
| Add a single line of text to an email | ✅ Quick code snippet | ✅ Drag-and-drop |
| Redesign the entire email layout | ❌ Tedious, fragile, requires template overrides | ✅ Visual builder |
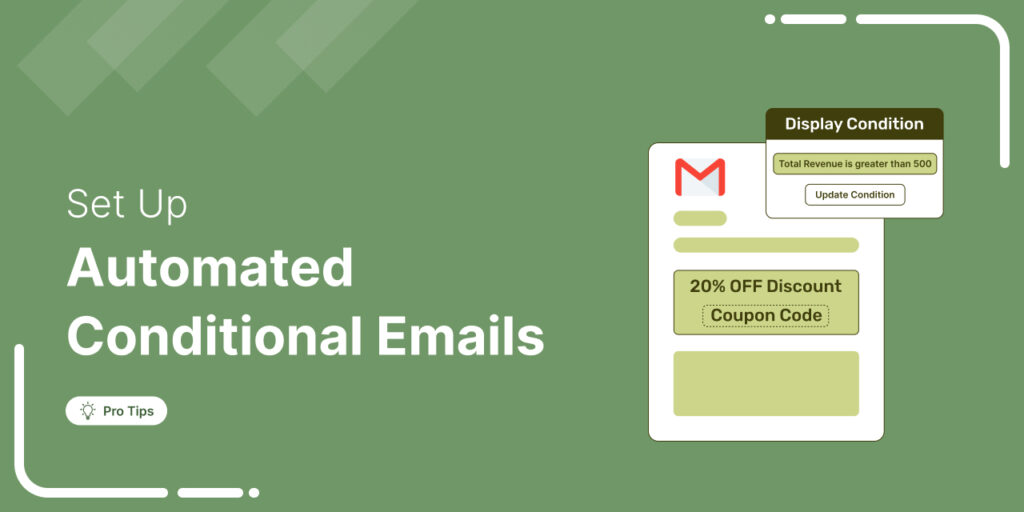
| Conditional content based on order data | ⚠️ Requires PHP logic | ✅ Built-in visual conditions |
| Attach PDF invoices to emails | ✅ Simple filter hook | ✅ Built-in attachment options |
| Post-purchase email sequences | ❌ Not possible with hooks alone | ✅ Full automation engine |
| Abandoned cart recovery emails | ❌ Not a hook feature | ✅ Built-in automation |
| Shipping update notifications | ⚠️ Requires custom email class | ✅ Visual workflow builder |
| Non-developer store owner | ❌ Needs a developer | ✅ No code needed |
| One-off advanced logic (API calls, webhooks) | ✅ Full PHP flexibility | ⚠️ May still need hooks |
| Email A/B testing | ❌ Not possible | ✅ Built-in split testing |
7 Best Practices for Using WooCommerce Email Hooks
To make the most out of WooCommerce email hooks, it’s important to follow some best practices.
Here are seven key tips to ensure your customizations are efficient, reliable, and simple to maintain:
- Use a child theme or a custom plugin
Always add your custom email hooks to a child theme or a custom plugin rather than directly modifying the core WooCommerce files or your theme's main files.
This ensures your changes are preserved during updates and maintains a clean, organized setup.
- Test on a staging site before going live
Before implementing email hooks on your live store, test them on a staging environment.
This will help you catch errors or conflicts without affecting your live customers. Testing ensures that the emails behave exactly as intended.
- Keep code organized and documented
When adding multiple hooks, keeping your code well-organized and simple to understand is crucial. Add a comment above your code to explain what each hook does.
This simplifies future adjustments and helps other developers understand your work when necessary.
- Monitor email deliverability
After making changes using hooks, monitor your email deliverability.
Over-customization or additional content can occasionally cause mail servers to handle emails differently or flag them as spam.
Regularly check email performance to ensure they reach your customers’ inboxes.
- Avoid hardcoding data and use personalization
Use dynamic data whenever possible. Instead of hardcoding customer names or order numbers, utilize WooCommerce functions to pull this information automatically.
This ensures that your emails are accurate and personalized for each customer.
- Stay updated with WooCommerce changes
WooCommerce regularly updates its system, and sometimes, hooks can change or become deprecated.
Stay up to date with the latest WooCommerce documentation and releases to ensure your customizations remain compatible and functional over time.
- Keep email file size under 100KB
Large emails with heavy images get clipped by Gmail, which truncates messages over 102KB.
Optimize images, use web-safe fonts, and keep your custom HTML lean to ensure the full email renders for every recipient.
Troubleshooting Common WooCommerce Email Hook Issues
When customizing WooCommerce emails using hooks, developers and store owners may encounter several common issues.
1. Hook content not appearing in emails
If a hook has the incorrect priority or no priority at all, your custom email content may appear in the wrong place or not at all.
Double-check your $email->id condition against the email types table above.
Another frequent issue is incorrect priority. If your content is being overridden by another function hooked at a higher priority, try lowering your priority number.
Also, verify that your code is actually running by adding a temporary error_log() call inside your hook callback.
Alternatively, use a good email customizer plugin that assists you without requiring you to establish priorities. Drag and drop content blocks wherever you want, with no technical constraints.
2. Compatibility issues with third-party plugins
WooCommerce email customization hooks frequently clash with other plugins, leading to unintended behavior or errors in your email content.
Change your priority to 15 or 25 to avoid collisions. You can also use has_action() to check if a specific callback is already registered.
Alternatively, with email customizer plugins like FunnelKit Automations, you can manage the entire email design process without facing any compatibility issues with other plugins.
You can reduce the risk of plugin conflicts and provide a more seamless experience.
3. Content appearing in all email types instead of one
This happens when you forget to add the $email->id check inside your callback function. Without it, your hook callback will run on every WooCommerce email.
Always wrap your output in a conditional that checks the specific email type you want to target.
4. Emails are not sending after the custom hook code
A fatal error inside a hook callback will prevent the email from being sent.
Check your PHP error log for any notices or errors.
Common mistakes include calling methods on a null $order object (which happens in non-order emails, such as password resets) or using echo instead of return inside a filter callback.
Filters must always return a value.
5. Custom content is not showing in plain-text emails
WooCommerce sends both HTML and plain text versions of its emails.
If your hook callback only outputs HTML content, the plain text version will be empty at that location.
Always check $plain_text and provide a text-only alternative.
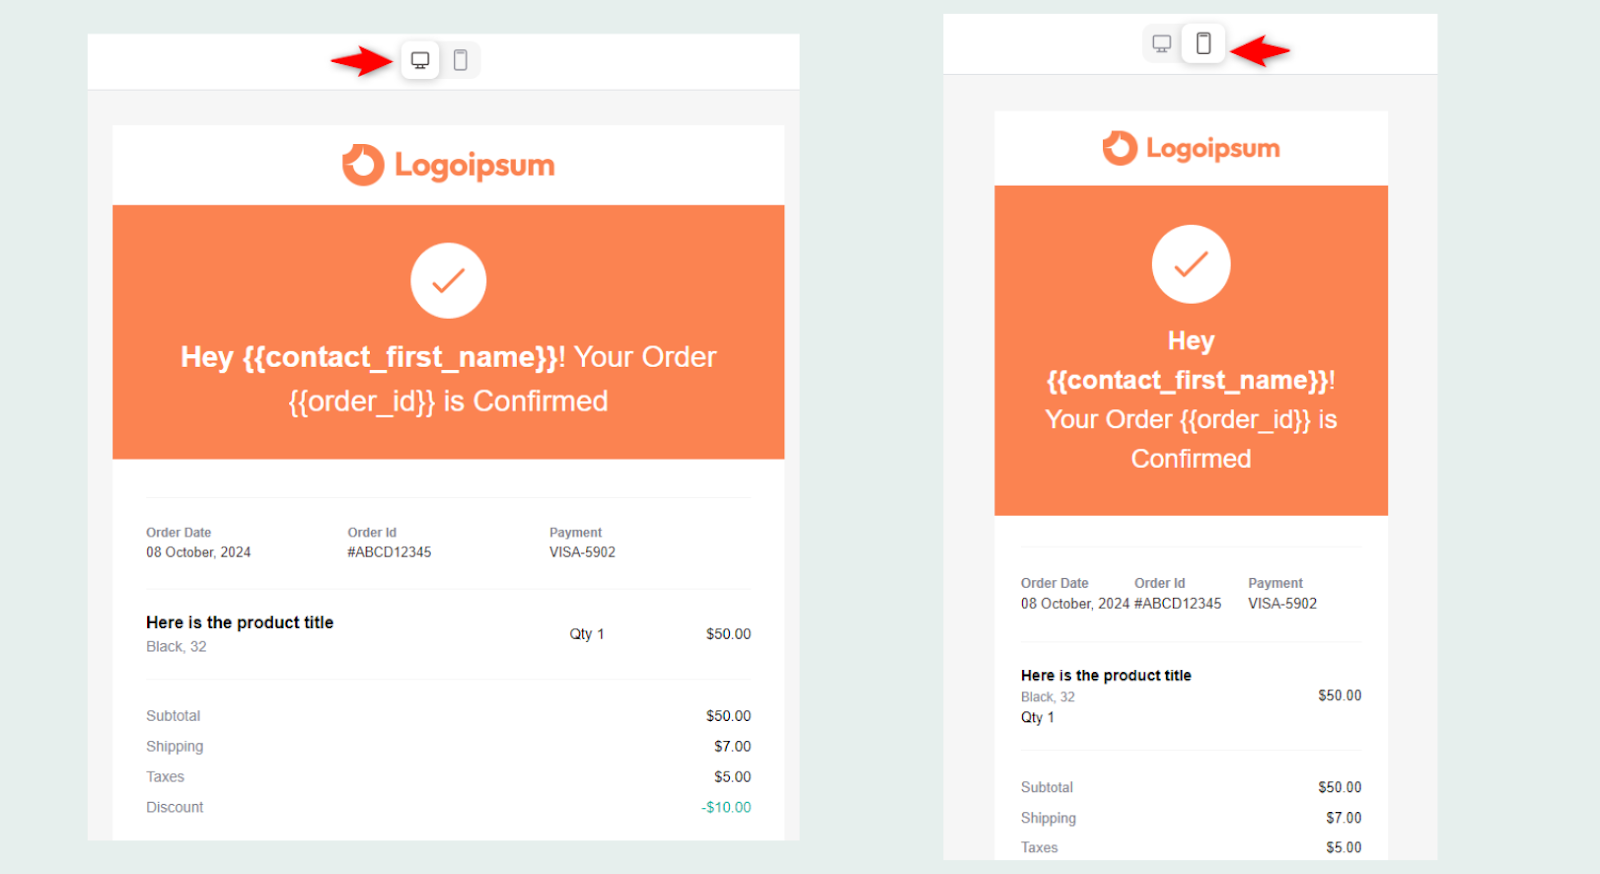
If you're using the drag-and-drop builder, the plugin ensures that your emails are automatically responsive and correctly formatted across different devices.
It removes the need for manual HTML or CSS tweaking. Plus, you can see real-time previews to verify formatting before sending.
6. Unhooked actions still appearing
If remove_action() is not working, the most likely cause is that you are calling it too early, before WooCommerce has registered its actions.
Wrap your remove_action() calls inside an init action or a woocommerce_init action to make sure the mailer object exists.
Frequently Asked Questions on WooCommerce Email Hooks
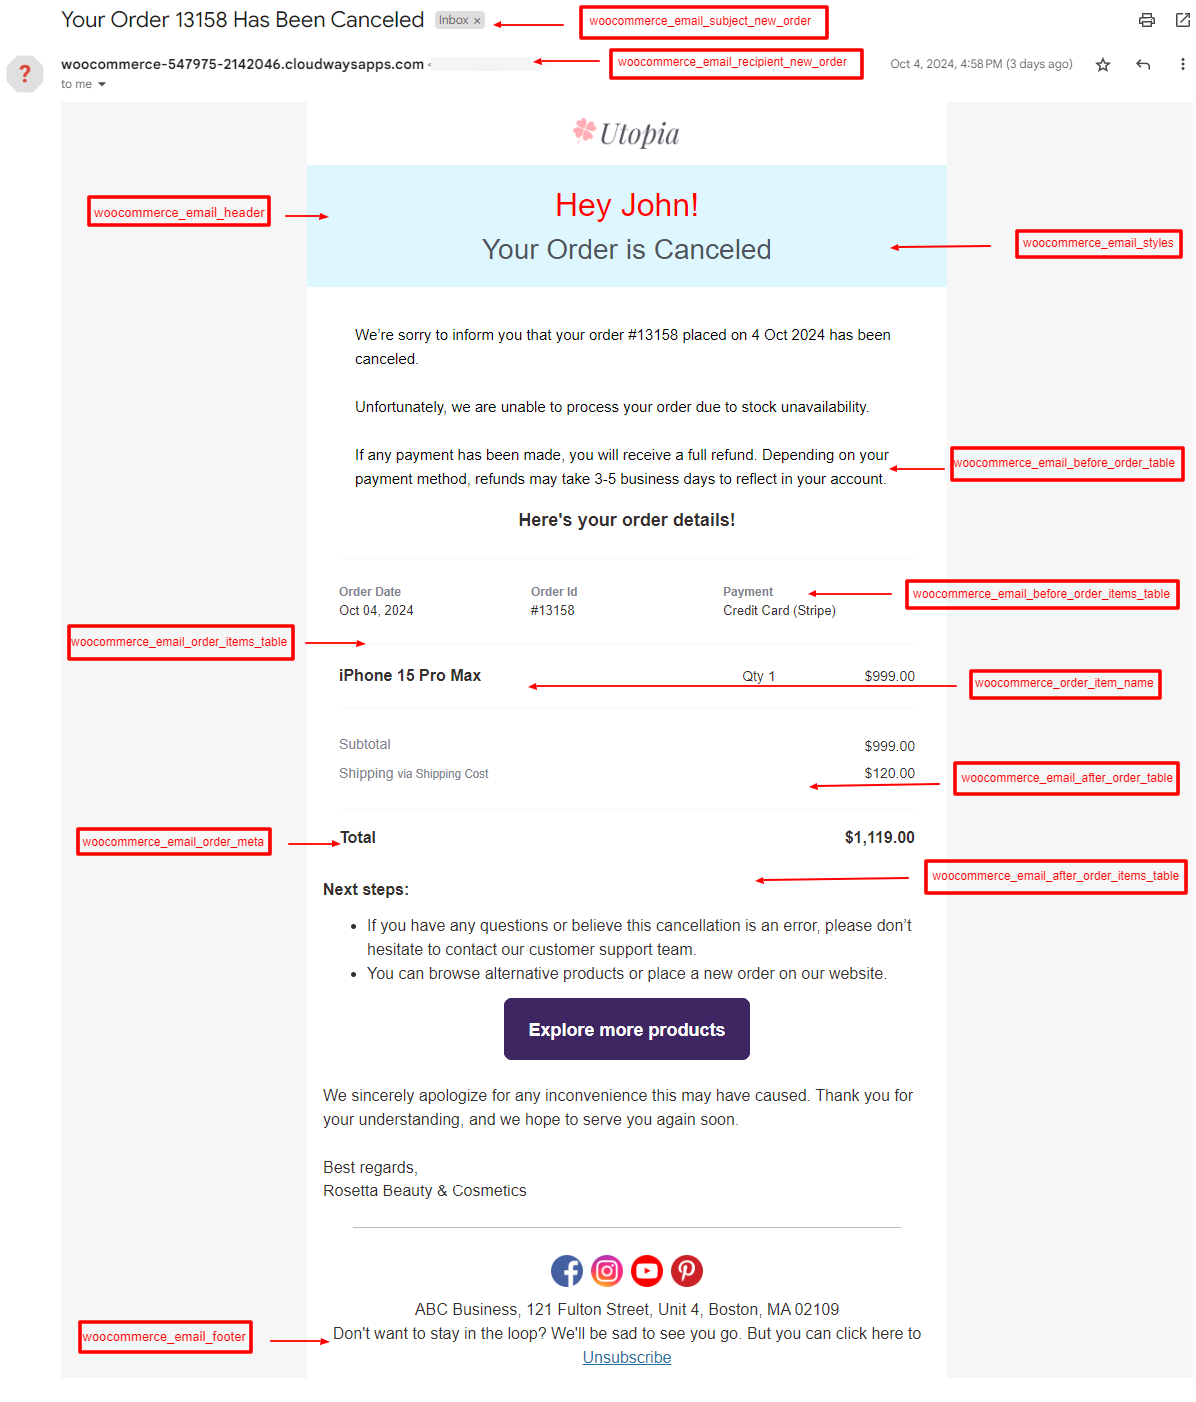
The easiest way is to refer to a visual hook guide in this article. It shows a screenshot of a WooCommerce email with each hook name labeled at its exact position.
Alternatively, you can open the WooCommerce email template files in wp-content/plugins/woocommerce/templates/emails/ and search for do_action and apply_filters calls to see where each hook fires.
No. WooCommerce email hooks only fire for existing transactional emails tied to order events.
Abandoned cart recovery requires a separate automation tool, such as FunnelKit Automations, that includes built-in cart tracking and recovery sequences.
No, email hooks in WooCommerce are not necessary for everyone. Basic customizations (colors, logo, subject lines, footer text) can be done through WooCommerce settings without any code. Hooks become necessary when you need dynamic content, conditional logic, file attachments, or custom functionality.
If you prefer a visual approach, there are many CRMs and email customizers available that can replace the need for hooks entirely.
Use the woocommerce_email_headers filter to add CC or BCC headers. Inside the callback, append 'Bcc: [email protected]\r\n' to the $headers string. You can conditionally target specific email types by checking $email_id (the second parameter).
This is different from woocommerce_email_recipient_{email_id}, which changes the To: field rather than adding CC/BCC.
WooCommerce doesn’t include a built-in shipping update email. You can create a custom email class using the woocommerce_email_classes filter and trigger it when shipping data is updated.
Alternatively, use FunnelKit Automations, AutomateWoo, or another CRM to create a visual shipping-update email triggered by order status changes.
Start Customizing Your WooCommerce Email Hooks Today!
WooCommerce email hooks give you complete control over how your emails look and behave. It enables a seamless personalization experience without altering core WooCommerce functionality.
Utilizing these hooks can enhance customer communication, maintain brand consistency, and increase engagement with every email you send.
For store owners who prefer a visual approach, we recommend FunnelKit Automations.
Its drag-and-drop email builder handles everything WooCommerce email hooks can do, without requiring PHP, and it adds full marketing automation on top.
Whether you use hooks or opt for a visual solution, personalized emails will help you strengthen customer relationships.
So why wait? Get FunnelKit Automations today and start creating beautiful automated emails now!

Editorial Team
July 6, 2026Discover how to collect birthdates and share personalized birthday coupons automatically in WooCommerce. Want loyal customers who keep coming back? WooCommerce birthday coupons let you offer personalized discounts or gifts,...
Editorial Team
June 29, 2026Discover why sending the same email to everyone can hurt engagement and how WooCommerce conditional emails help you deliver personalized messages for better results. Not every customer should get the...
Editorial Team
June 25, 2026There are two things most people get wrong about the WooCommerce order confirmation email. First, they don't realize it's the Processing order email they need to switch on and not...


