
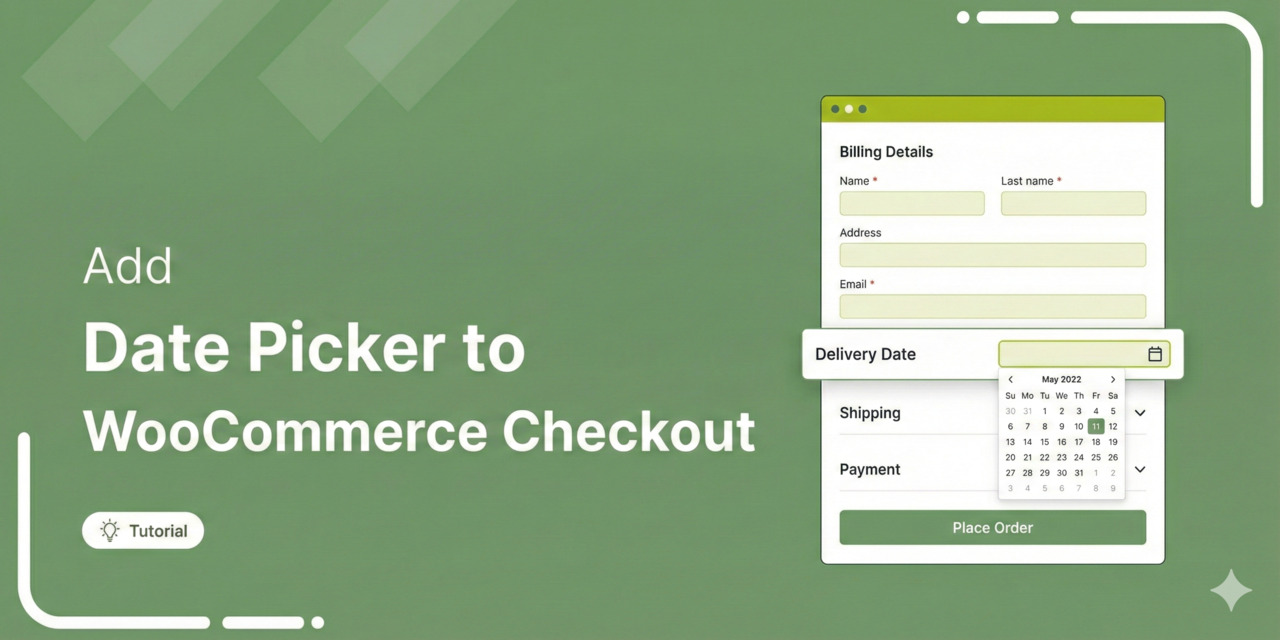
A customer is ready to buy. They hit your checkout page, can't pick a delivery date, and leave.
Cart abandonment is a major ecommerce challenge, with the average rate sitting at 70.19% (Baymard Institute). While pricing and unexpected fees play a role, a confusing or inflexible checkout experience is often what causes customers to walk away.
For WooCommerce stores such as bakeries, flower shops, catering services, and rental businesses, this issue is even more costly.
Customers expect to choose when they receive their order. If they can’t, they’ll look for a store that gives them that option.
Adding a date picker to your WooCommerce checkout removes this friction. It gives shoppers control, sets clear expectations, and makes the checkout process feel easier and more trustworthy.
In this guide, you’ll learn how to add a date picker to WooCommerce checkout using reliable, user-friendly methods.
Whether you’re a beginner or a developer, these approaches work seamlessly on both desktop and mobile and can increase conversions by up to 37% for stores offering delivery scheduling or pre-orders.
Table of Contents
- 1 Why Add Date Picker Fields to Your WooCommerce Checkout?
- 2 Method Comparison: Choose Your Approach
- 3 Method-1: Add Date Picker to WooCommerce Checkout (No-Code Plugin Solution)
- 4 3 Best WooCommerce Date Picker Plugins
- 5 Method-2: Add Date Field to WooCommerce Checkout (Using Custom Code)
- 6 5 Tips to Optimize Your Date Picker for a Better Checkout Experience
- 7 Frequently Asked Questions (FAQs) About WooCommerce Date Pickers on the Checkout Page
- 8 Ready to Add a Date Picker Field to WooCommerce Checkout?
Why Add Date Picker Fields to Your WooCommerce Checkout?
Delivery timing plays a key role in purchase decisions. When customers can’t confirm when they’ll receive or collect an order, uncertainty increases, and uncertainty leads to abandonment.
In fact, research shows that 96% of online shoppers consider delivery options important when making a purchase.
If customers can’t choose or confirm timing at checkout, doubt creeps in, and many simply abandon the cart.
Solution? Offer date pickers.
Date fields allow customers to select delivery dates, pickup times, appointment slots, or rental periods directly at checkout.
When shoppers know exactly when an order will arrive or can schedule it around an event, they’re far more likely to complete checkout.
Checkout data from ecommerce case studies shows that enabling date selection can reduce checkout abandonment by 23% and improve customer satisfaction by 41%.
In real WooCommerce optimizations, adding a checkout date picker often results in:
- 15-25% lower cart abandonment
- 30-40% fewer support tickets about delivery timing
- Higher customer satisfaction and repeat purchases
If your store relies on timing, a date picker is an essential element on the checkout page.
Businesses That Need Date Fields the Most
From five years of working with WooCommerce stores, I found that date pickers are essential for the following businesses:
- Food and Beverage: Bakeries (custom cakes), caterers, meal prep, and perishable goods.
- Service-Based Businesses: Equipment rentals, event services, photography, and salons.
- Gifts and Flowers: Scheduled florist deliveries and time-sensitive gifts.
- Rentals and Subscriptions: Tools, party supplies, and subscription boxes with flexible delivery dates.
This is essential for stores where timing affects order fulfillment or customer expectations.
Method Comparison: Choose Your Approach
Here are two ways that let you add a date picker field to your WooCommerce checkout page:
| Feature | Method 1: Plugin | Method 2: Custom Code |
|---|---|---|
| Skill level | Beginner or Intermediate | Expert |
| Setup time | 5-10 minutes | 30-60 minutes |
| Customization | Drag-and-drop customization, limited to plugin features | Full customization control |
| Mobile responsive | Usually included | Requires testing |
| Updates | Automatic | Manual |
| Best for | Quick setup, non-technical | Legacy sites, custom needs |
Method-1: Add Date Picker to WooCommerce Checkout (No-Code Plugin Solution)
For most WooCommerce store owners, using a plugin is the fastest and safest way to add a date picker. This method requires no coding and works well for delivery-based stores.
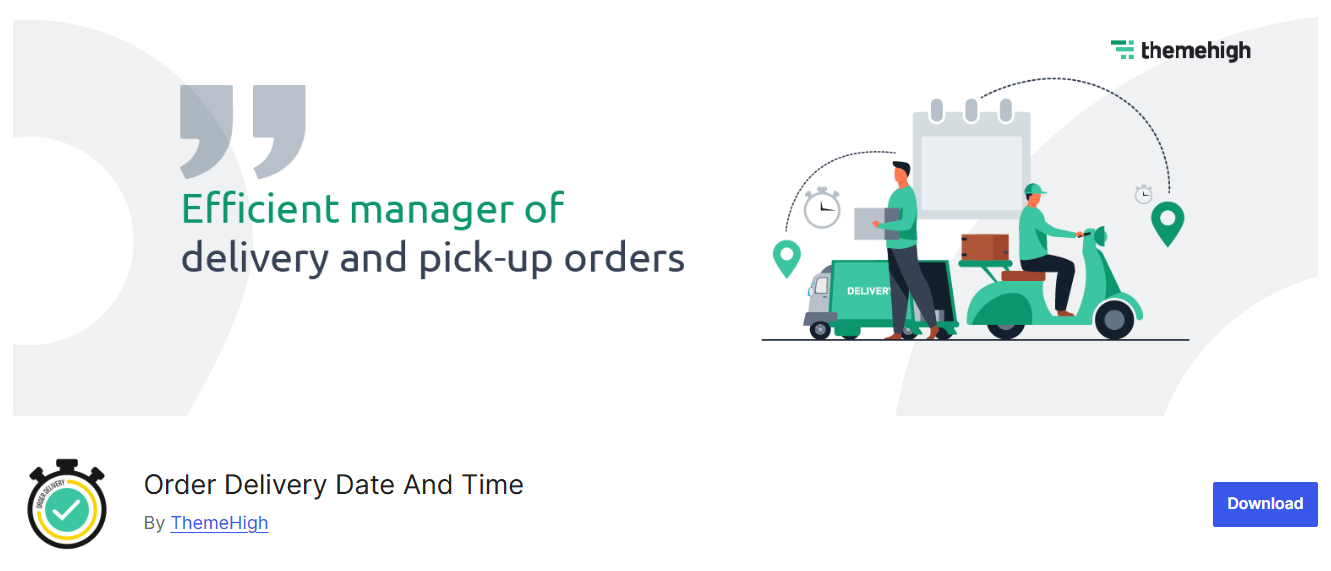
Before you begin, install and activate the Order Delivery Date and Time plugin by ThemeHigh.
Step 1: Configure the delivery date settings
Navigate to WooCommerce ⇨ Date and Time Scheduler and enable it on the WooCommerce checkout page.
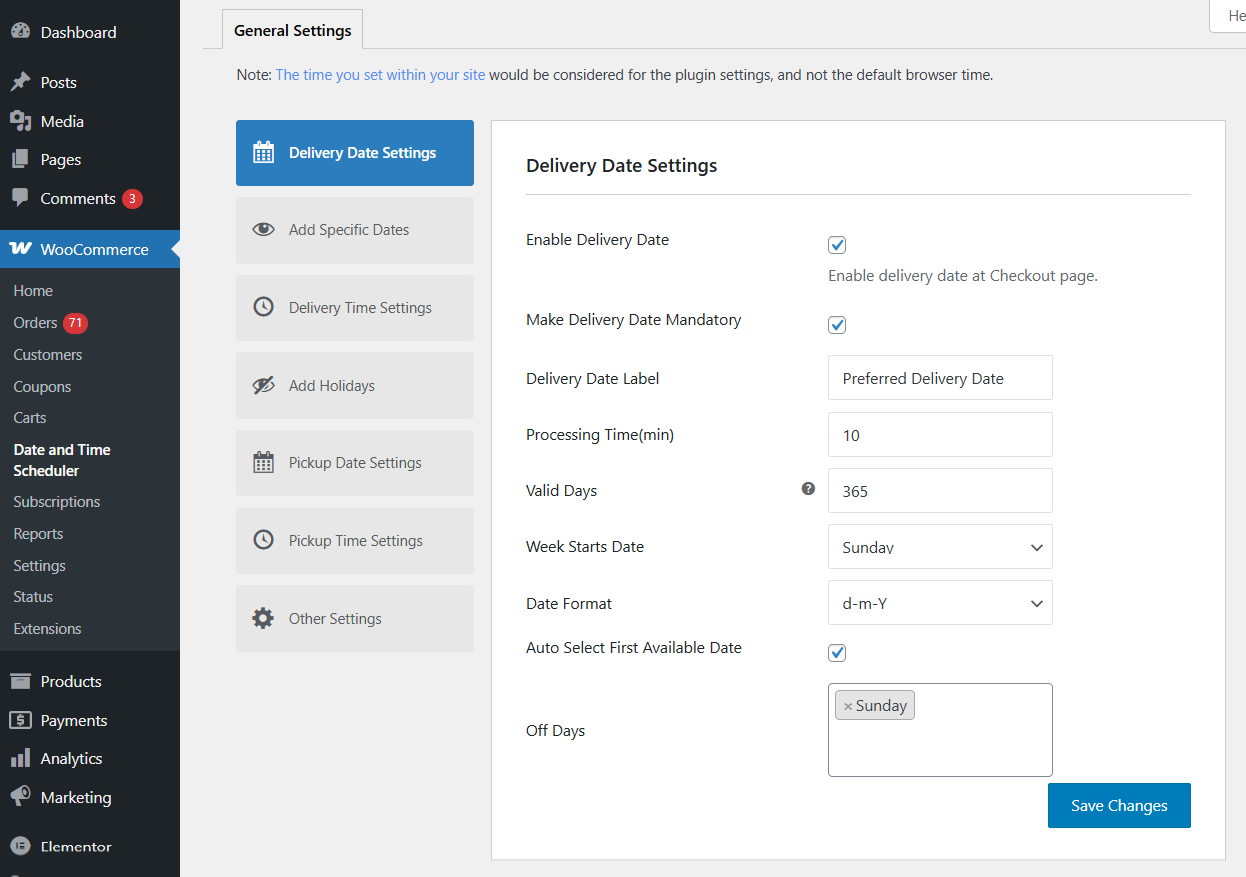
Configure the additional options based on your delivery workflow:
- Make delivery date mandatory: Prevents customers from placing an order without selecting a date.
- Delivery date label: Customize the field label shown to customers (for example, Preferred Delivery Date).
- Processing time (min): Set the minimum number of days required to prepare an order.
- Valid days: Select the weekdays when delivery is available.
- Week starts on: Choose the first day of the week (Sunday or Monday).
- Date format: Define how the date appears (for example, Y-m-d).
- Auto-select first available date: Automatically preselect the earliest valid delivery date.
- Off days: Disable specific weekdays such as Sundays or non-working days.
Click on ‘Save Changes’ when done.
Once saved, the date picker will appear in the WooCommerce checkout, allowing customers to select a valid delivery date before placing their order.
Step 2: Add your delivery time slots
Next, configure delivery time options so customers can choose a preferred time slot during checkout.
- Enable delivery time: Displays the delivery time selector at checkout.
- Make delivery time mandatory: Requires customers to select a time slot before placing the order.
- Delivery time label: Customize the field label displayed at checkout (e.g., Preferred Delivery Time).
- Processing time (min): Set the minimum time required to prepare an order before delivery.
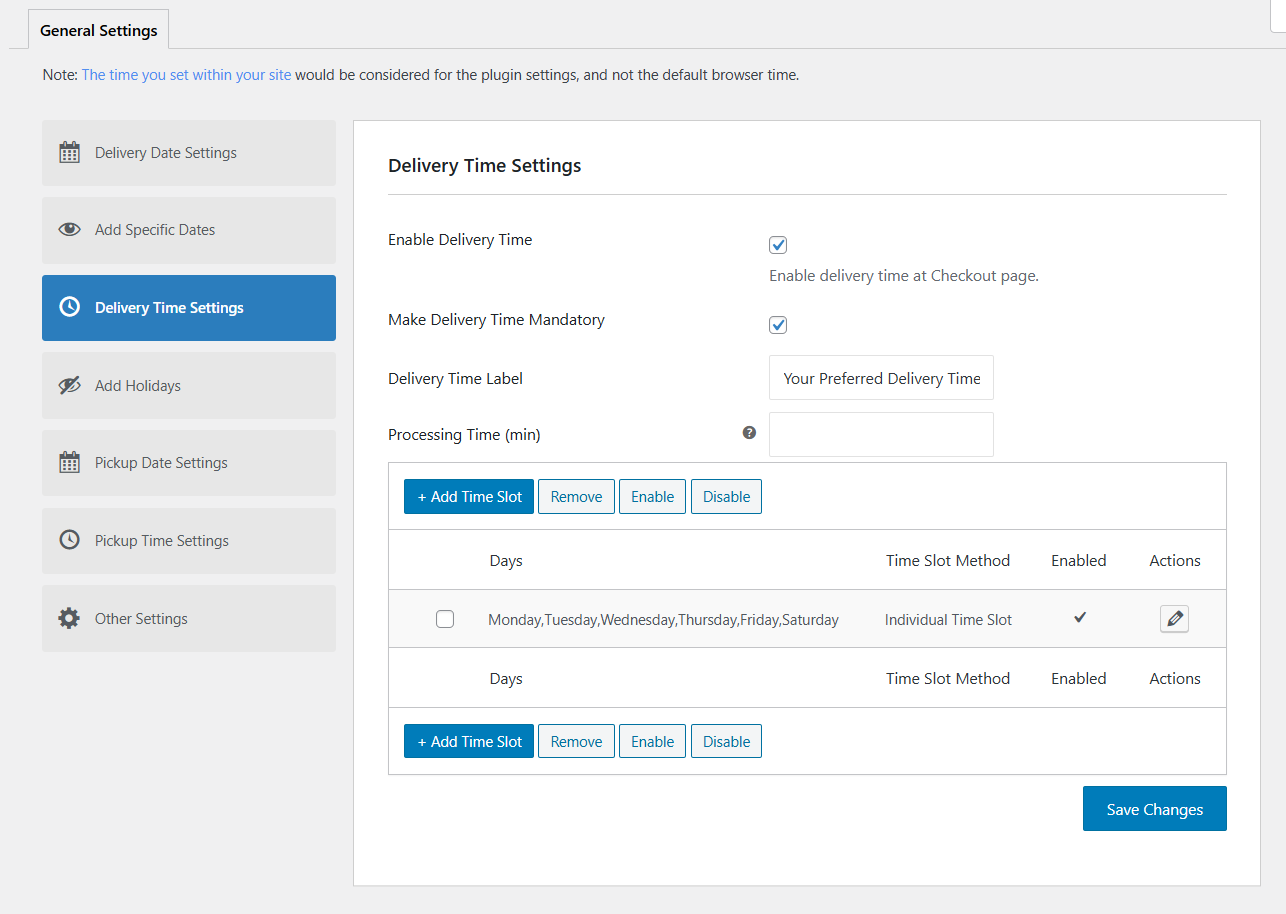
Below the main settings, click on the ‘+ Add Time Slot’ button to define when deliveries are available.
- Enable delivery time: Activates this specific delivery time slot.
- Time slot type: Select Individual Time Slot.
- Time slot for: Choose Week Days.
- Select delivery weekdays: Pick the days when this time slot applies (for example, Monday to Saturday).
- Time from - to: Set the delivery window (example, 09:00 AM - 12:00 PM)
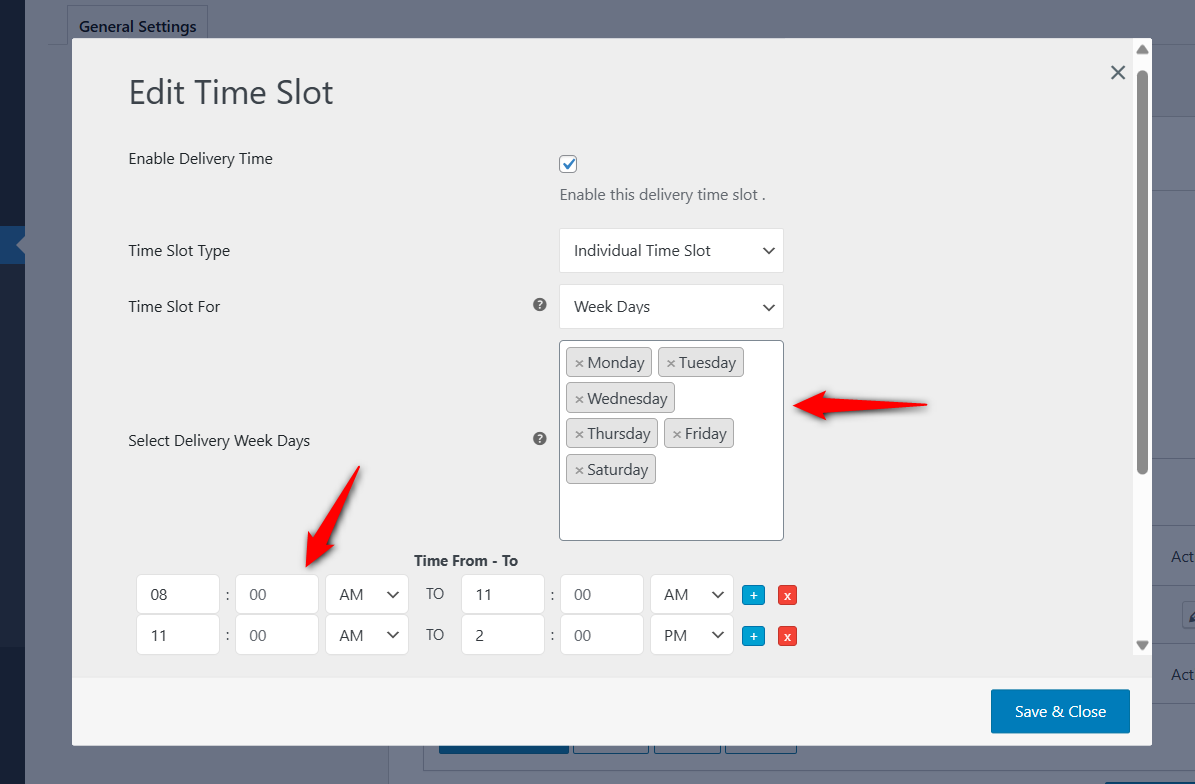
Once saved, this time slot will appear at checkout only for the selected days, ensuring customers choose from valid delivery windows.
This setup ensures customers only see valid delivery times based on your availability, reducing failed deliveries and order-related support requests.
Step 3: Preview the delivery date and time on the WooCommerce checkout page
Once your date and time settings are saved, visit your WooCommerce checkout page to confirm everything is working correctly.
You’ll see a delivery date picker with valid dates available and a time selector showing the configured slots.
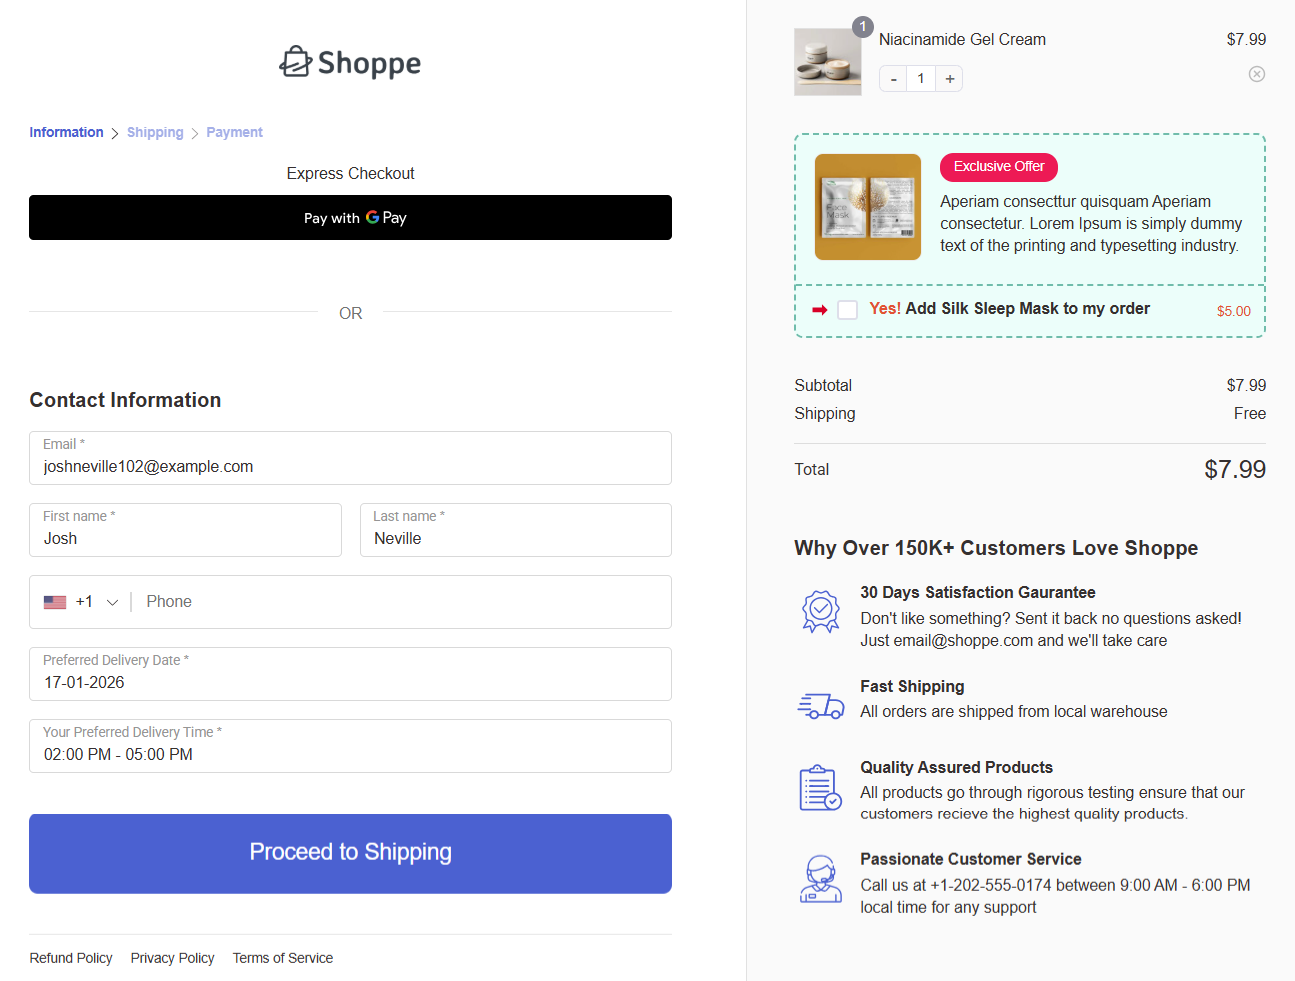
This checkout layout is built using FunnelKit, which helps create clean, conversion-focused checkout pages. It allows you to customize field placement, optimize the layout for mobile users, and maintain a distraction-free checkout experience, all without writing code.
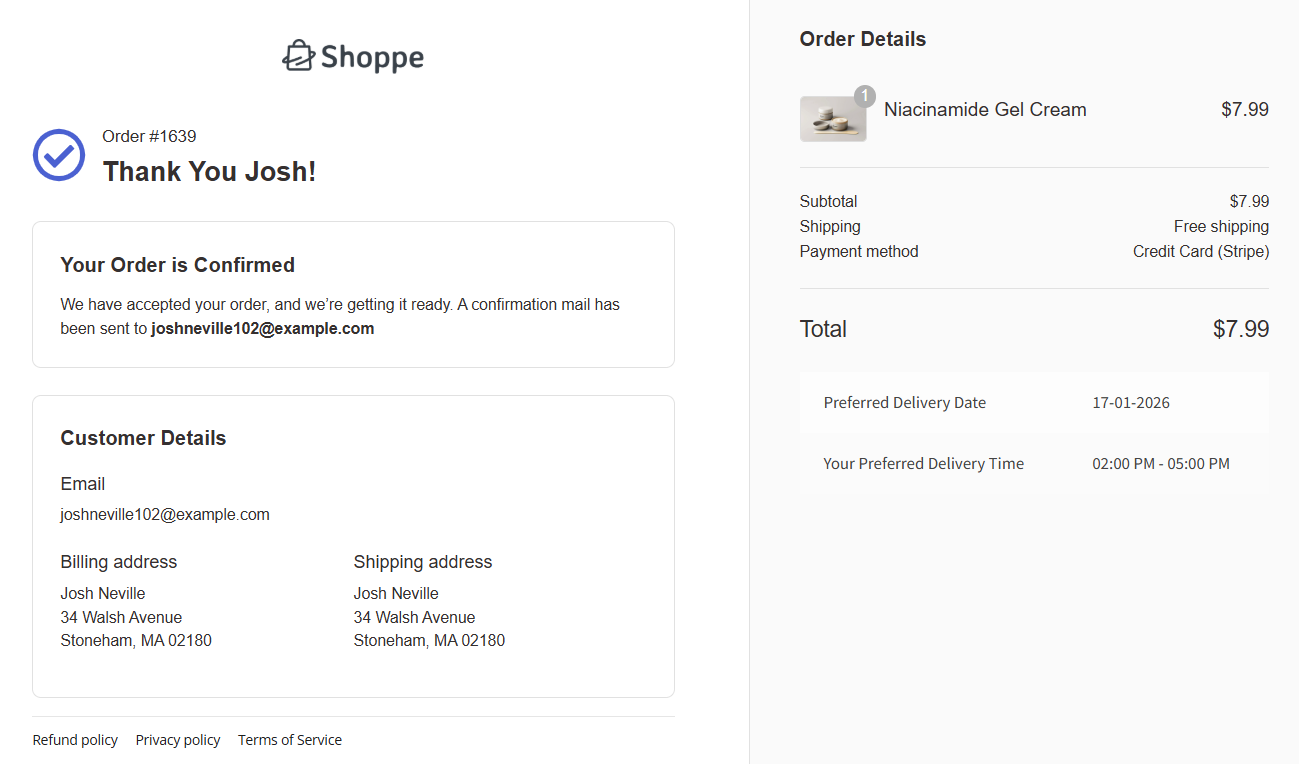
Place a test order to ensure the selected delivery date and time appear correctly in the order details and admin panel. This final check confirms the setup is ready for customers.
The delivery date and time will be displayed on the thank you page.
You’ll be able to see the selected delivery date and time in the order meta details within the WooCommerce admin.
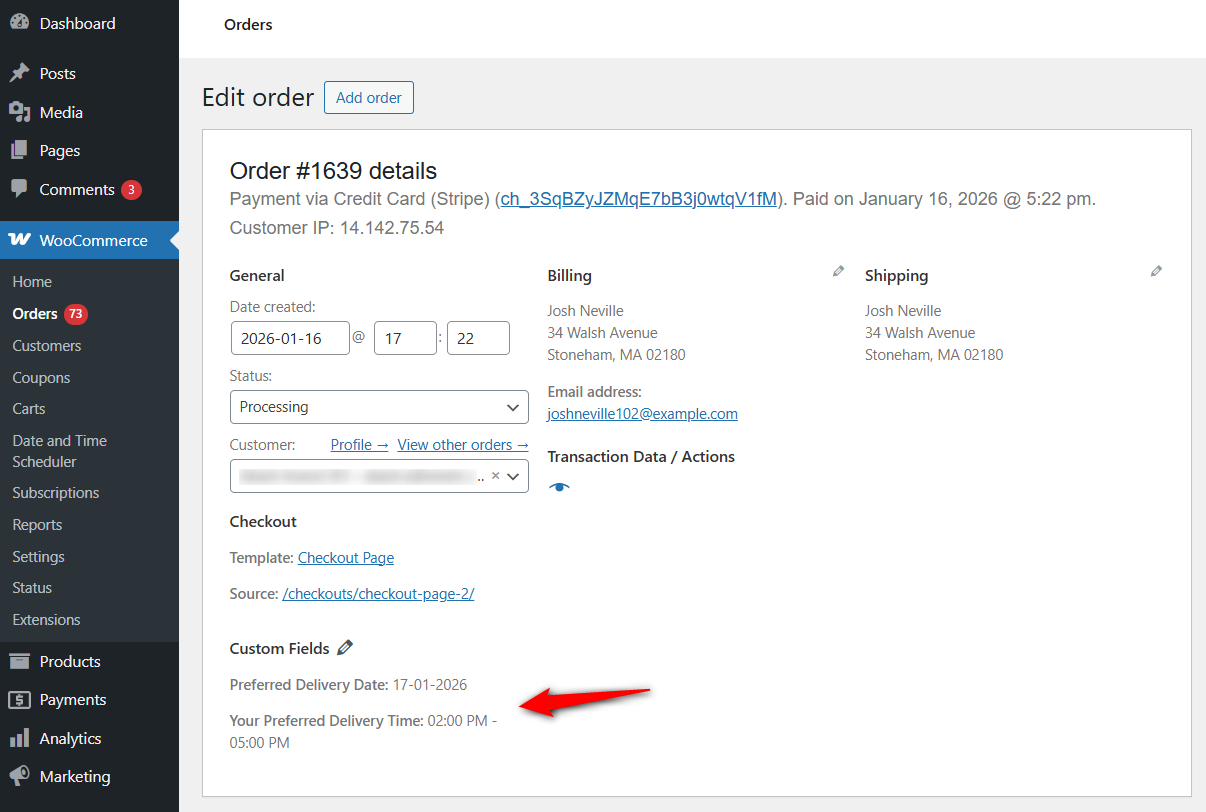
These custom fields ensure that both you and your customer have a clear record of the chosen delivery schedule.
If you want to include delivery date and time fields in emails, you can use FunnelKit Automations to create beautiful emails and add the order data merge tag to bring in these values into your marketing or transactional email.
3 Best WooCommerce Date Picker Plugins
Here are the top 3 WooCommerce date picker plugins with key features:
1. Order Delivery Date and Time by ThemeHigh
Order Delivery Date and Time by ThemeHigh is a reliable plugin for adding delivery date and time selection to the WooCommerce checkout.
It’s well-suited for stores that need simple, rule-based delivery scheduling without custom development.
Here are the notable features of this plugin:
- Add delivery date and time fields to the WooCommerce checkout
- Set delivery rules such as minimum preparation days and cutoff times
- Disable specific dates (holidays, weekends, non-working days)
- Supports both delivery and local pickup workflows
- Compatible with the latest WooCommerce versions
Price: Free version available. This product is bundled inside the Checkout Field Editor for WooCommerce Pro, which starts at $49/year.
2. Flexible Product Fields by WPDesk
Flexible Product Fields allows you to add date pickers at the product level, not just at checkout. This makes it ideal for bookings, rentals, pre-orders, and custom products that require date input before checkout.
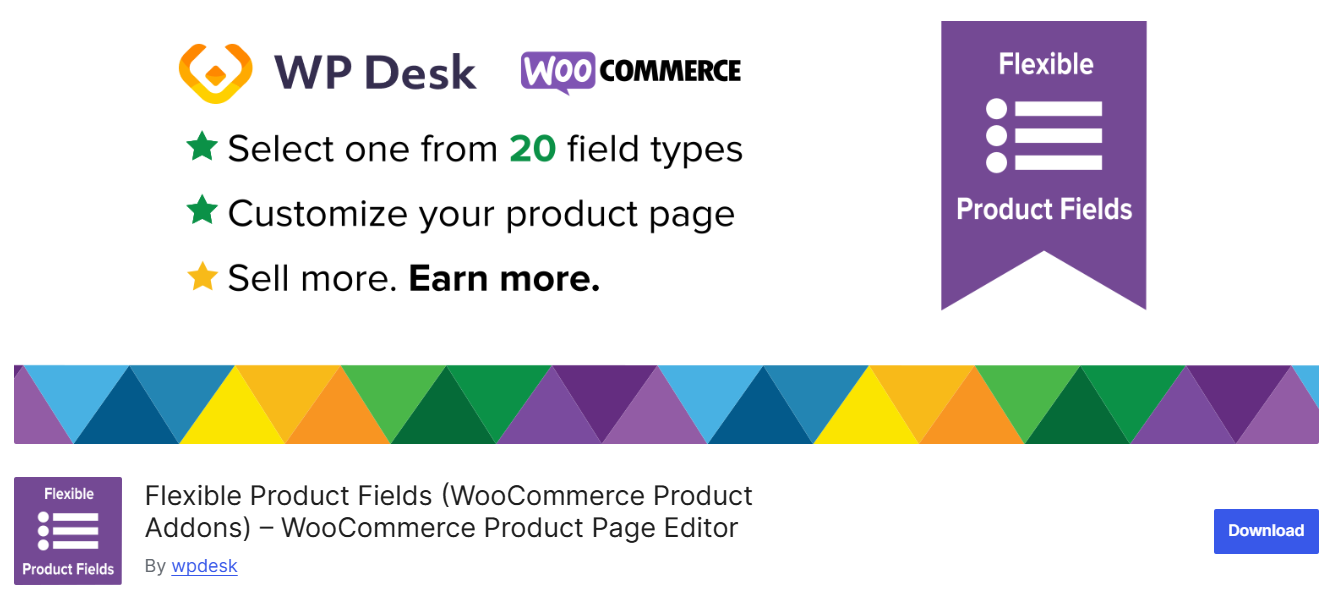
Here are some of the key features:
- Add date picker fields to product pages (available in Pro)
- Supports per-product configuration and conditional logic
- Works with variable and simple products
- Mobile-friendly and compatible with modern themes
- Integrates smoothly with the WooCommerce cart and checkout
Price: Limited free version available. Paid plans start at $59/year.
3. Order Delivery Date by Tyche Softwares
The Order Delivery Date plugin is a popularly used WooCommerce delivery date plugin. It focuses on date selection at the checkout level with advanced scheduling controls.
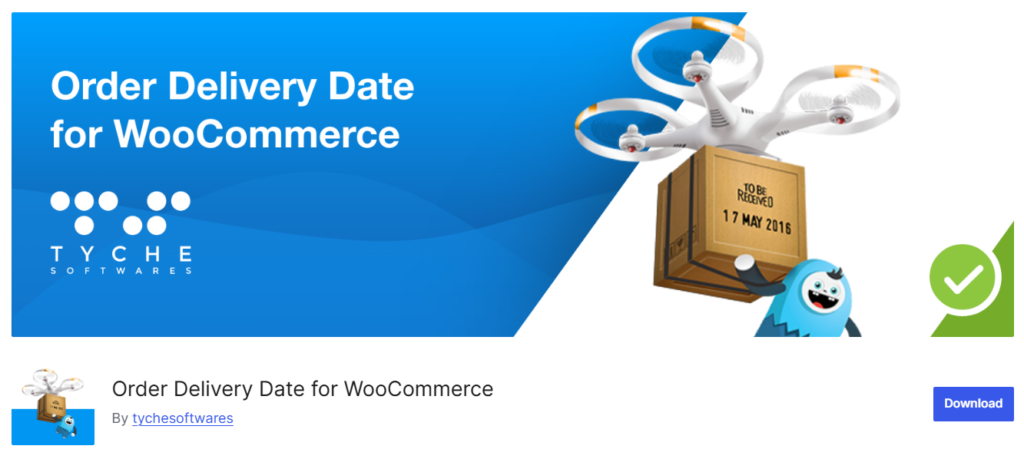
Here are the key features:
- Add a delivery date picker to the WooCommerce checkout
- Control delivery days, preparation time, and holidays
- Supports shipping-method-based date availability
- Displays selected delivery date in order emails and admin
- Compatible with the latest WordPress and WooCommerce versions
Price: Free version available. Premium version starts at $119/year.
My Recommendation
All three plugins add date-picking functionality to WooCommerce, but the right choice depends on where you need the date field.
- Choose ThemeHigh or Tyche Software if you need to select a delivery date at checkout.
- Choose Flexible Product Fields by WPDesk if date input is tied to specific products, rentals, or bookings.
For most delivery-focused WooCommerce stores, Order Delivery Date and Time by ThemeHigh offers the best balance of flexibility, usability, and pricing, making it a strong choice for production-ready stores.
Method-2: Add Date Field to WooCommerce Checkout (Using Custom Code)
If you prefer not to use a plugin and are comfortable editing theme files, you can add a standard jQuery date picker using WooCommerce hooks.
Note: This method requires access to your child theme’s functions.php file.
Step 1: Add the code snippet to your functions.php file
Copy and paste the following code into your functions.php file:
// Add Date Picker Field to Checkout
add_filter( 'woocommerce_checkout_fields', 'custom_add_date_picker_field' );

function custom_add_date_picker_field( $fields ) {
    $fields['order']['order_delivery_date'] = array(
        'label'     => __('Delivery Date', 'woocommerce'),
        'placeholder'   => _x('Select a date', 'placeholder', 'woocommerce'),
        'required'  => true,
        'class'     => array('form-row-wide'),
        'clear'     => true,
        'priority'  => 25, // Adjust position
        'type'      => 'date' // Browser native date picker
    );
    return $fields;
}
You can even use a WP code snippet plugin to add this code directly. Just make sure to run the snippet everywhere when activating.
This is safer than editing your theme’s functions.php file directly, as it prevents your site from breaking if there is a syntax error and ensures your changes aren’t lost when you update your theme.
Step 2: Save and test the date field on checkout
Check your checkout page in an incognito window to ensure the field appears and functions correctly.

But this custom field (delivery date) will not show inside order meta or invoice emails:
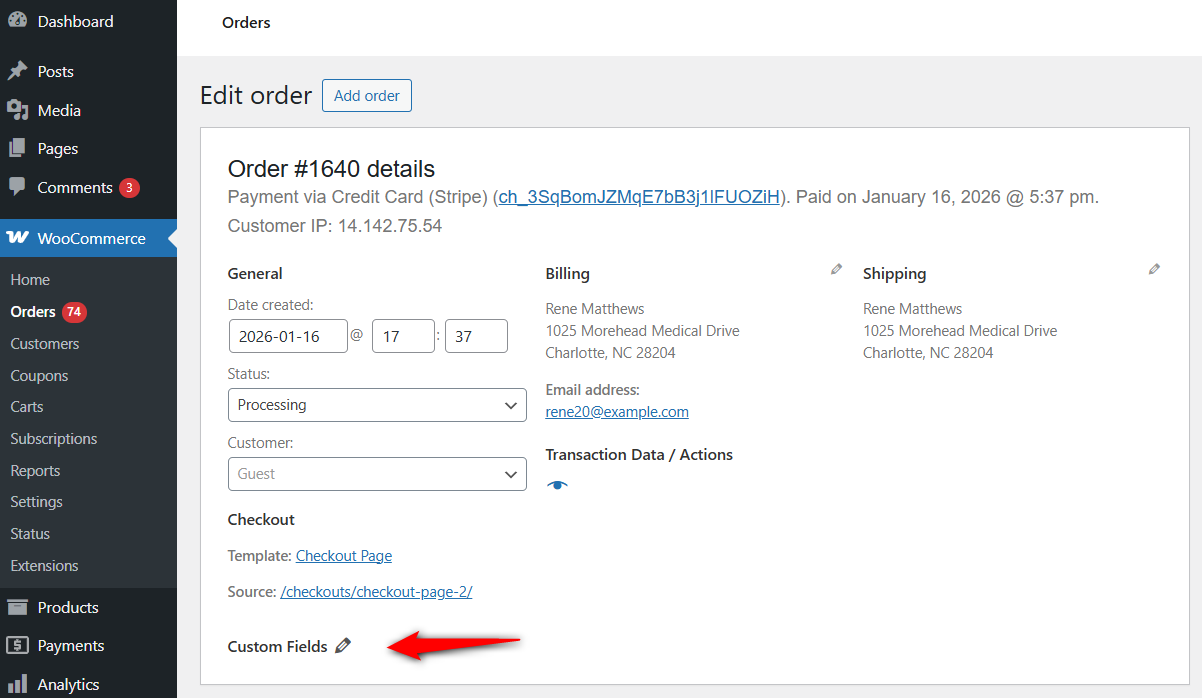
This is how you can add a date field to your WooCommerce checkout page.
Important: How to Save and Display the Date in Admin and Emails
By default, adding the field above shows it to the customer, but you need a little extra code to ensure it saves to the order and appears in your admin dashboard and notification emails.
Add this snippet below your previous code to make the date visible to you and the customer after purchase:
/**
 * Display the custom date field in the order edit screen.
 */
add_action( 'woocommerce_admin_order_data_after_billing_address', 'show_date_in_admin_order', 10, 1 );
function show_date_in_admin_order( $order ) {
    $order_delivery_date = $order->get_meta( 'order_delivery_date' );
    if ( ! empty( $order_delivery_date ) ) {
        echo '<p><strong>' . __( 'Delivery Date' ) . ':</strong> ' . esc_html( $order_delivery_date ) . '</p>';
    }
}
Use this code to add the date field to your order emails in WooCommerce:
*/ add_filter( 'woocommerce_email_order_meta_fields', 'add_date_to_emails', 10, 3 );
function add_date_to_emails( $fields, $sent_to_admin, $order ) {
$date = $order->get_meta( 'order_delivery_date' );
if ( $date ) {
$fields['Delivery Date'] = array( 'label' => __( 'Delivery Date' ), 'value' => $date, );
}
return $fields;
}
This code will display the date field in WordPress order admin dashboard and invoice emails.
5 Tips to Optimize Your Date Picker for a Better Checkout Experience
Adding the date field is just step one. To truly boost conversions and prevent customer frustration, you need to optimize how that date picker behaves.
A poorly configured date field can increase cart abandonment by causing confusion or leading to post-purchase cancellations.
Here are 5 best practices to ensure your date selection process is seamless:
1. Block out non-delivery days
Nothing frustrates a customer more than booking a delivery for Sunday, only to receive an email later saying, “Sorry, we’re closed.”
To fix this, configure your plugin or code to automatically disable weekends, national holidays, and specific non-working days.
The date picker should simply grey these dates out so they cannot be clicked.
2. Set a minimum preparation time
If you sell custom cakes or handmade goods, you can't deliver an order within 1 hour of placing it.
For this, set a lead time or preparation buffer.
For example, if you need 24 hours to prepare an order, the date picker should automatically block today’s date. If it’s 4 PM and your cutoff is 2 PM, the system should automatically set the next available slot to the day after tomorrow.
3. Use clear date/time labels and placeholders
Don’t assume customers know why you are asking for a date.
Use a specific label like “Select Preferred Delivery Date” instead of just “Date”.
Add a brief description or placeholder text, such as “We require 2 days for processing your order”, to manage customer expectations immediately.
4. Default to the first available date
Reduce the number of clicks required to check out.
Instead of showing a blank field, pre-fill the date picker with the earliest possible delivery date. This guides the user and saves them a decision if they simply want their order as soon as possible.
5. Keep the date picker mobile-friendly
Over 60% of WooCommerce traffic comes from mobile devices. If your calendar pops up off-screen or is too small to tap, customers will leave.
If using custom code, stick to the type="date" attribute (native browser picker) as shown in Method 2.
This triggers the iPhone or Android native wheel picker, which is much easier to use than a tiny JavaScript calendar.
By refining these settings, you prevent support tickets before they happen and ensure every order you receive has a realistic, achievable delivery date attached.
Frequently Asked Questions (FAQs) About WooCommerce Date Pickers on the Checkout Page
Yes. If you are using a plugin like ThemeHigh, there is a setting to disable days, where you can uncheck Saturday and Sunday. If you are using custom code, you will need to add a JavaScript snippet to target the specific days in the jQuery datepicker function.
No. WooCommerce does not offer a built-in delivery or pickup date selector. You’ll need a plugin or custom code to add date picker fields to your checkout page.
Yes. The browser-native date picker (used in the custom code method) uses the mobile phone’s default calendar interface, which is very user-friendly. Plugin solutions like FunnelKit are also fully responsive and optimized for touchscreens.
Yes. Advanced delivery date plugins allow date availability to be based on shipping methods, such as local pickup or flat-rate delivery.
Yes. Studies and WooCommerce case data show that allowing customers to choose delivery dates can reduce checkout abandonment by 20-30%.
Ready to Add a Date Picker Field to WooCommerce Checkout?
Adding a WooCommerce checkout date picker is one of the quickest wins for improving customer experience.
Whether you run a bakery, a flower shop, or a rental business, allowing customers to choose their delivery date eliminates uncertainty and creates a smoother path to purchase.
If you want a quick, code-free solution with advanced rules (such as holiday blocking), the plugin method is your best bet.
However, for developers seeking a lightweight solution with minimal overhead, the custom code method is a powerful alternative.
But why stop at just a date field?
With FunnelKit, you can go beyond basic edits and fully optimize your entire checkout experience.
From adding date pickers and custom fields to designing a frictionless, high-converting checkout page, FunnelKit gives you the complete toolkit to turn more visitors into happy customers.
Ready to upgrade your store? Get started with FunnelKit today to take control of your delivery scheduling and stop cart abandonment in its tracks.

Editorial Team
July 7, 2026Are shoppers adding products to their cart and leaving before they buy? According to Baymard Institute research on checkout usability, 18% of shoppers who abandon their cart do so because...
Editorial Team
July 3, 2026Sometimes, the difference between a visitor leaving and placing an order comes down to something surprisingly small, like a better headline, a cleaner checkout, or a more compelling offer. That's...
Editorial Team
July 1, 2026Are you leaving money on the table by not fully leveraging your customers’ shopping behavior? Many store owners don’t realize that every time a customer adds a product to the...


