

Looking for the WooCommerce thank you page so you can edit it, but can’t find a page anywhere in your dashboard? You’re not alone.
WooCommerce doesn't show this page like the Cart or Checkout pages. Instead, it lives at a special order-received endpoint.
But you can fully customize your thank you page using three different ways, such as the free WordPress block editor (no code), a few lines of code via hooks, or a plugin for upsells and per-product pages.
In this guide, we'll walk you through all three methods, show what content to put on the page to drive repeat sales, and fix the common thank you page not showing problem.
Feel free to pick the method you want.
Short on time? Watch this video to customize the thank you page in minutes 👇

Table of Contents
- 1 What Is the WooCommerce Thank You Page?
- 2 3 Ways to Customize the WooCommerce Thank You Page (Compared)
- 3 Method 1: Customize With the WordPress Block Editor (No Code)
- 4 Method 2: Create a WooCommerce Thank You Page With a Plugin
- 5 Method 3: Customize the Thank You Page With Code (Hooks and Template Override)
- 6 Redirect to a Custom Thank You Page (Rule-Based Pages)
- 7 Top 5 Best WooCommerce Thank You Page Plugins
- 8 5 Ways to Encourage Brand Loyalty and Repeat Purchases on Your WooCommerce Thank You Page
- 9 Thank You Page Conversion Tracking (GA4 & Meta Pixel)
- 10 WooCommerce Thank You Page Not Showing? Common Fixes
- 11 4 Inspiring WooCommerce Thank You Page Examples to Enhance Your Conversions
- 12 Frequently Asked Questions (FAQs)
- 13 Are You Ready to Create Your WooCommerce Custom Thank You Page?
What Is the WooCommerce Thank You Page?
The WooCommerce thank you page is the “Order received” screen a customer lands on immediately after completing checkout.
By default it provide the following information about your order purchase:
- Order number for easy tracking
- Date of purchase for reference
- Customer email to send a confirmation receipt via email
- Items purchased with product details
- Total amount spent on the order
- Billing and shipping address for verification
- Payment method used for the transaction
- Shipping fee or any other charges
This is how the default WooCommerce thank you page looks like:
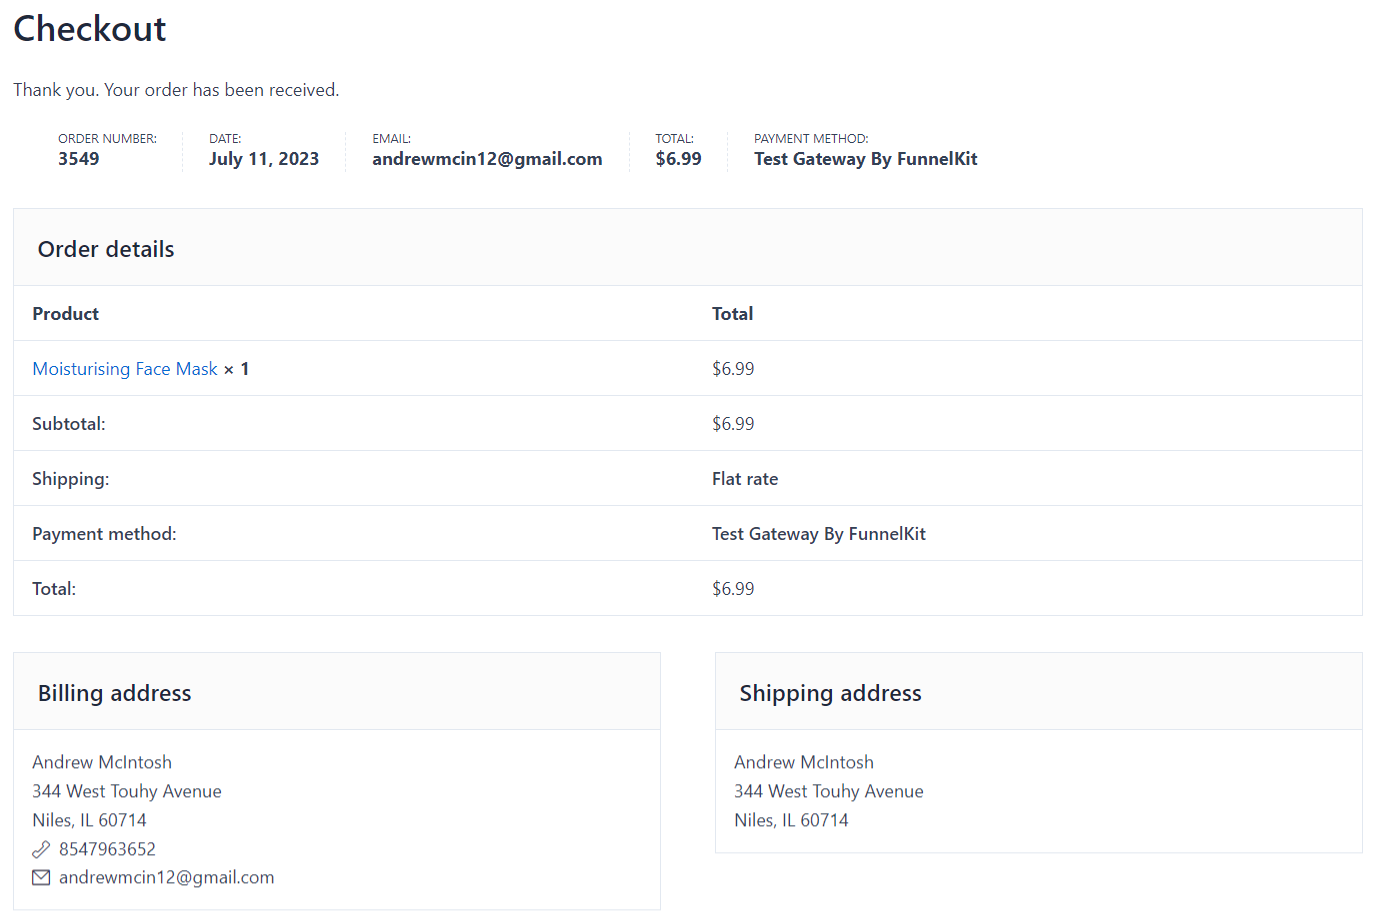
Out of the box it's a plain confirmation, not a marketing surface.
However, with a few changes it can thank customers properly, reduce post-purchase support tickets, recommend the next product, and turn a one-time buyer into a repeat one.
The WooCommerce thank you page URL (where can you find it):
WooCommerce renders this page dynamically at the order-received endpoint rather than as a standalone WordPress page.
A typical thank you page URL looks like:
https://yourstore.com/checkout/order-received/1234/?key=wc_order_AbCdEf123456Here, 1234 is the order ID and the key is a unique order key WooCommerce uses to securely match the page to the order.
You can rename the endpoint itself under WooCommerce → Settings → Advanced. Under the "Checkout endpoints" tab, you'll find the 'order received' option.
You can easily change this to thank-you or order-confirmed. These changes only appears in the address bar URL, but not the page's design.
That endpoint-based design is exactly why you can't find a thank you page to edit under Pages. Here’s how to customize it anyway.
The style of your thank-you page may differ depending on the WordPress theme you have installed.
3 Ways to Customize the WooCommerce Thank You Page (Compared)
Customize the order thank you page depends on your comfort with code or no-code and how far you want to take it.
Here's how the three methods stack up so you can pick before you scroll.
| Parameters | Method 1: Block Editor | Method 2: Plugin | Method 3: Code (Hooks) |
|---|---|---|---|
| Best for | Store owners who want a quick visual refresh, no code | Marketers who want branded designs, A/B tests, and rule-based pages | Developers who want precise, lightweight control |
| Cost | Free (built into WooCommerce) | Free and paid (depending on your requirements) | Free |
| Effort | Low | Low | Medium-High |
| Coding required | None | None | Yes (PHP) |
| Design flexibility | Limited (color & typography on core blocks; free layout for added blocks) | High, with a visual builder | Full, but you build it yourself |
| Upsell offers | No | Yes | Manual |
| Per-product/Rule-based pages | No | Yes | Manual (conditional code) |
| Built-in conversion tracking | No | Yes | Manual |
If you want a basic, free refresh, use Method 1.
Want to actually grow revenue per order with upsell offers and page targeting? Use Method 2.
Need surgical control and proficient in coding? Use Method 2.
Method 1: Customize With the WordPress Block Editor (No Code)
Since WooCommerce moved order confirmation into a block-based template, you can redesign the thank you page visually in the Site Editor no plugin, no code.
This is the fastest free path and the right starting point for most stores on a block (FSE) theme. But it offers quite basic customization.
Step 1: Open the order confirmation template
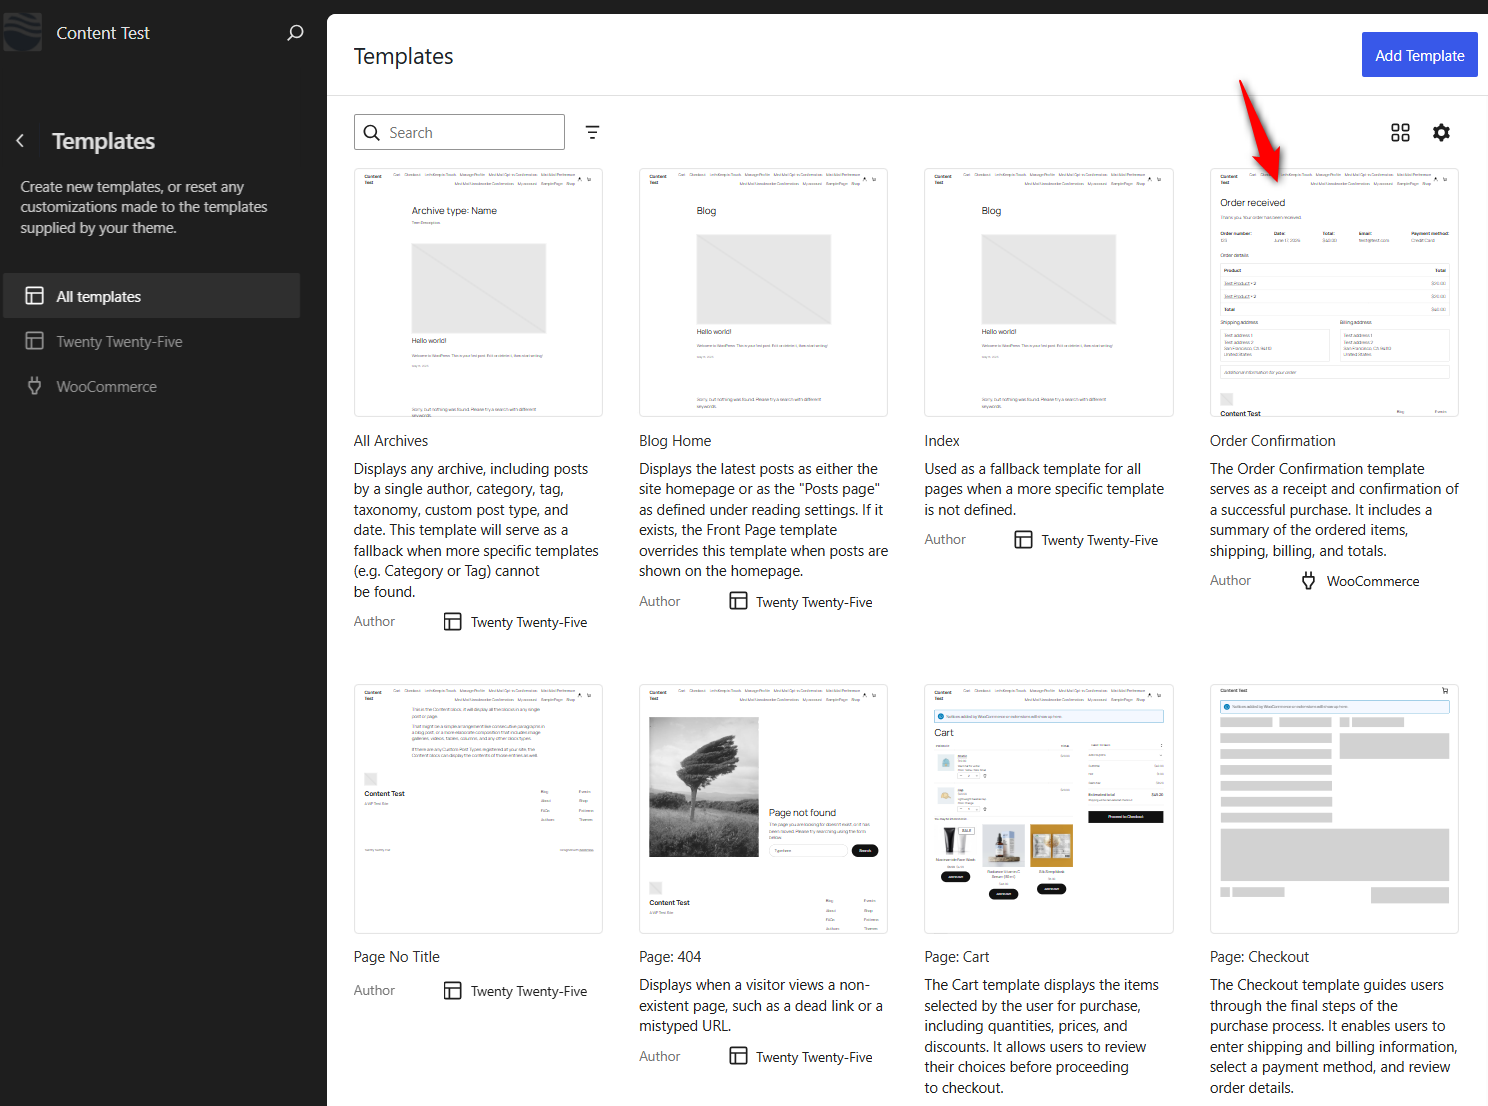
From your WordPress dashboard, go to Appearance → Editor → Templates.
Open the 'Order Confirmation' template.
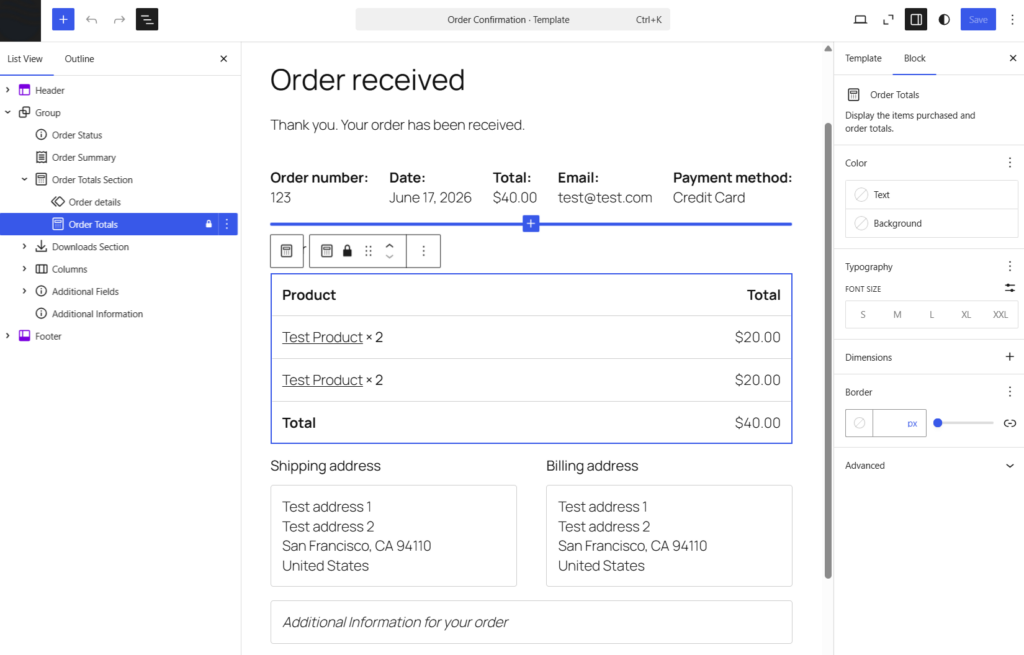
Step 2: Edit the order confirmation blocks
Use the 'List View' (the layered-icon button) to see every block, such as (order status, order summary, totals, downloads, and the shipping/billing details) and customize them on the page.
Adjust the color and typography of the core order-confirmation blocks, and click the + inserter to add your own blocks above or below.
You can add a custom thank-you heading, an image, a coupon, an instructions section, or product recommendations.
- The special Order Confirmation blocks (order status, items, totals, etc.) only let you change color and typography, not their internal layout. The blocks you add around them are fully editable.
- If you'd rather use the classic order-confirmation template, open the List View, delete the parent group holding the special blocks, then insert the single Order Confirmation Block placeholder and save (for block themes only).
Once done, hit 'Save'.
This is how you can customize your thank you page in WooCommerce with WordPress block editor.
Method 2: Create a WooCommerce Thank You Page With a Plugin
The block editor and hooks are great for design and one-off tweaks. But if you want the thank you page to be engaging and grow revenue with A/B testing or upsells, and different pages for different products, a dedicated plugin is the fastest, most flexible route.
FunnelKit is built specifically for this. It gives you a visual builder, rule-based thank you pages, A/B testing and upsell offer setup with page builder support.
Before we start, make sure to install and activate FunnelKit Funnel Builder on your WordPress site.
Now follow these steps:
Step 1: Create a store checkout
The first step is to create a store checkout for your WooCommerce store easily. The global or default checkout page shows up independent of what the customer buys.
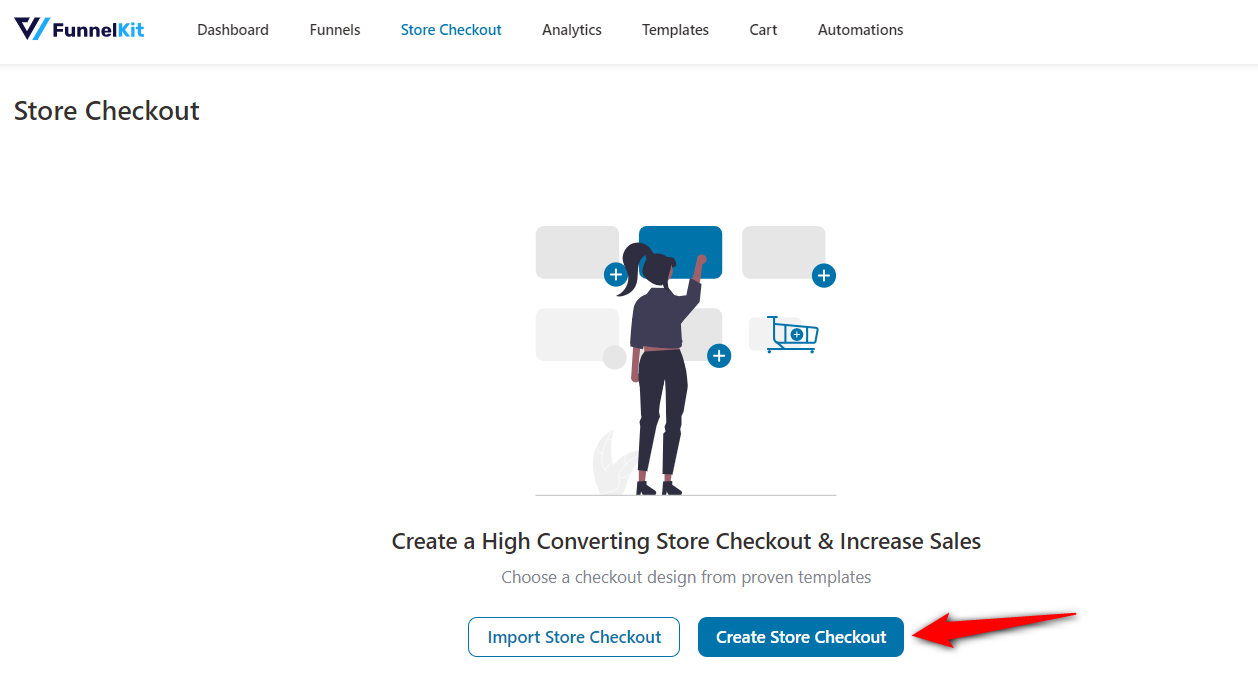
Go to FunnelKit ⇨ Store Checkout from your WordPress dashboard and hit the ‘Create Store Checkout’ button.
Select the page builder you want to use to create your WooCommerce custom thank you page.
Hover over the template you like and click on ‘Preview’.
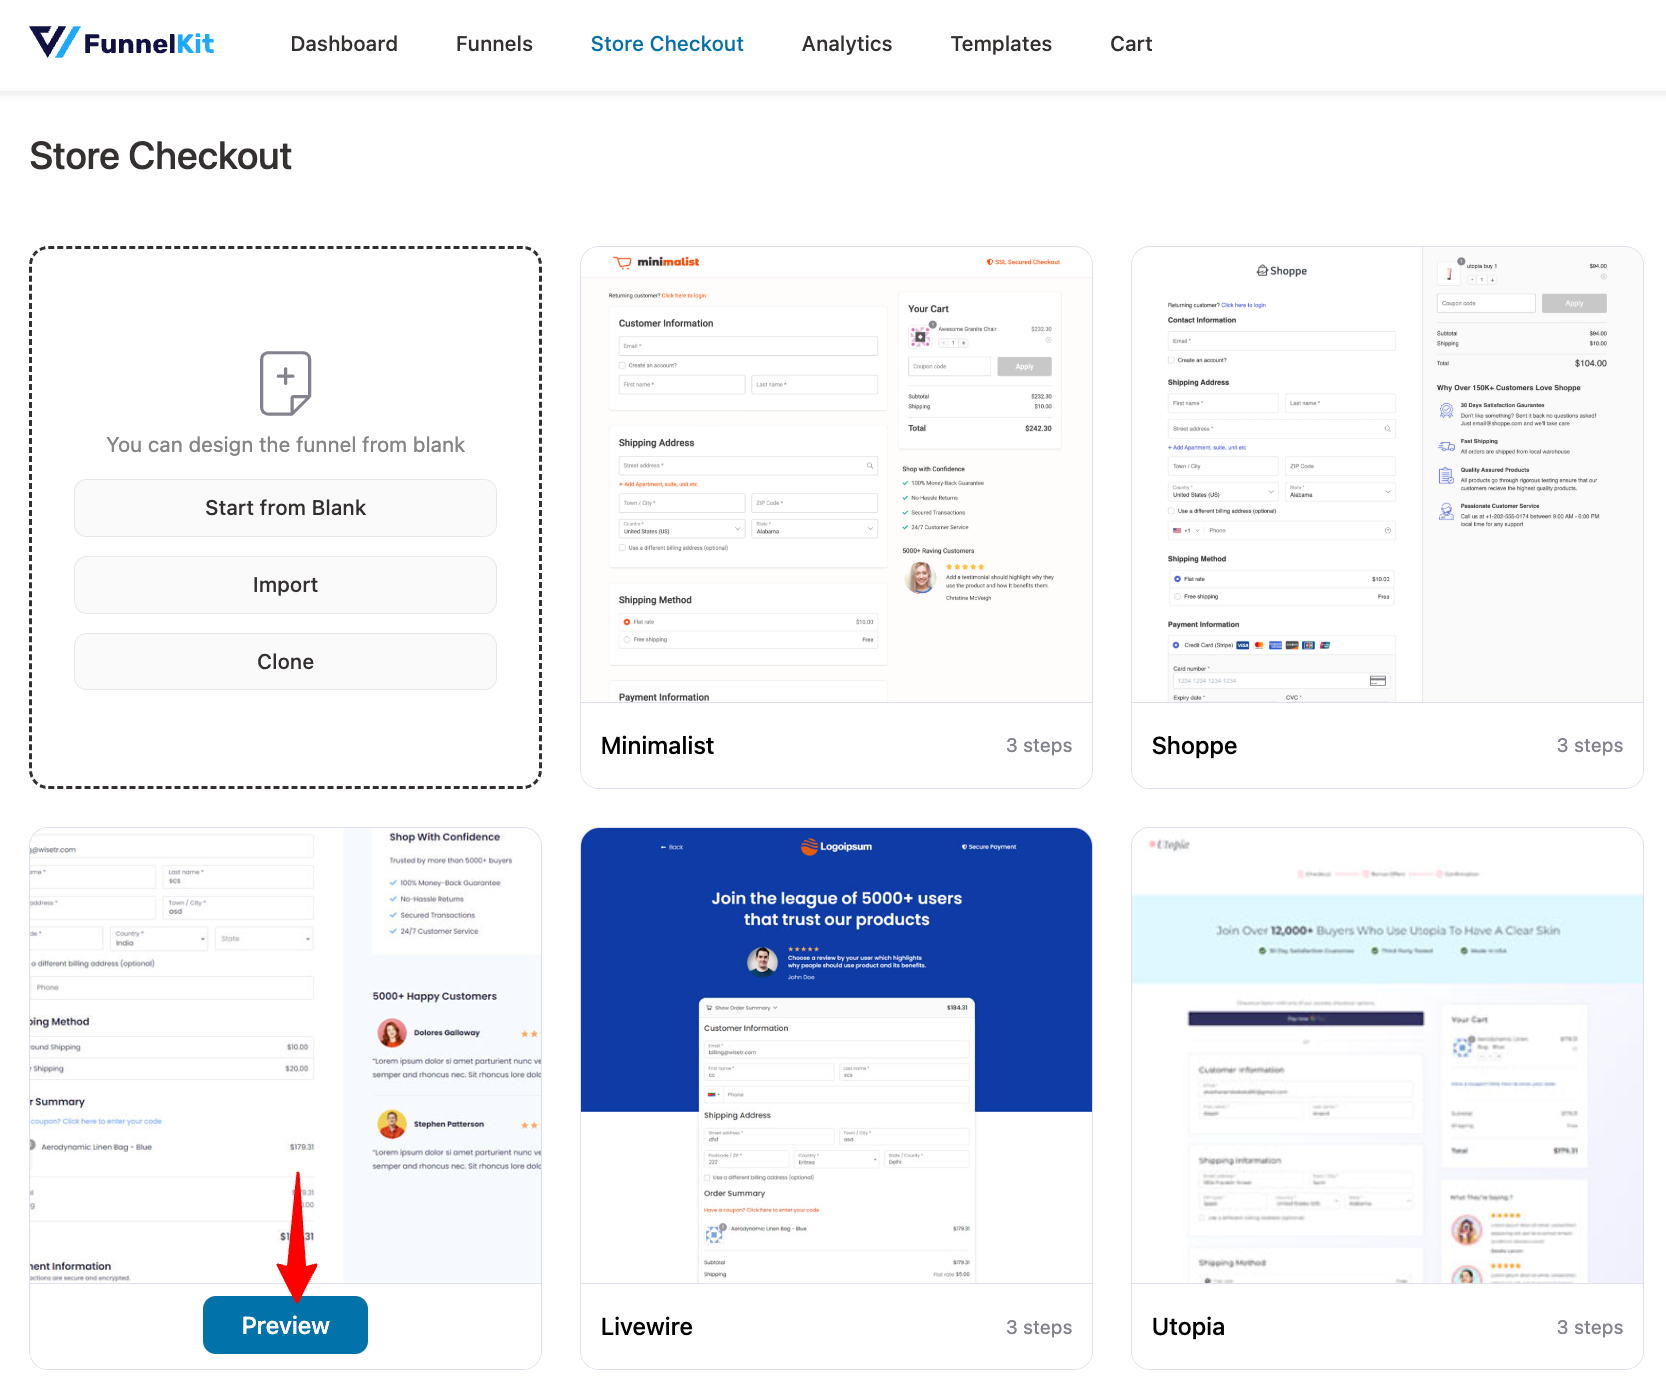
Preview and import the template that you like.
For that, hit the ‘Import This Funnel’ button and name your funnel template.
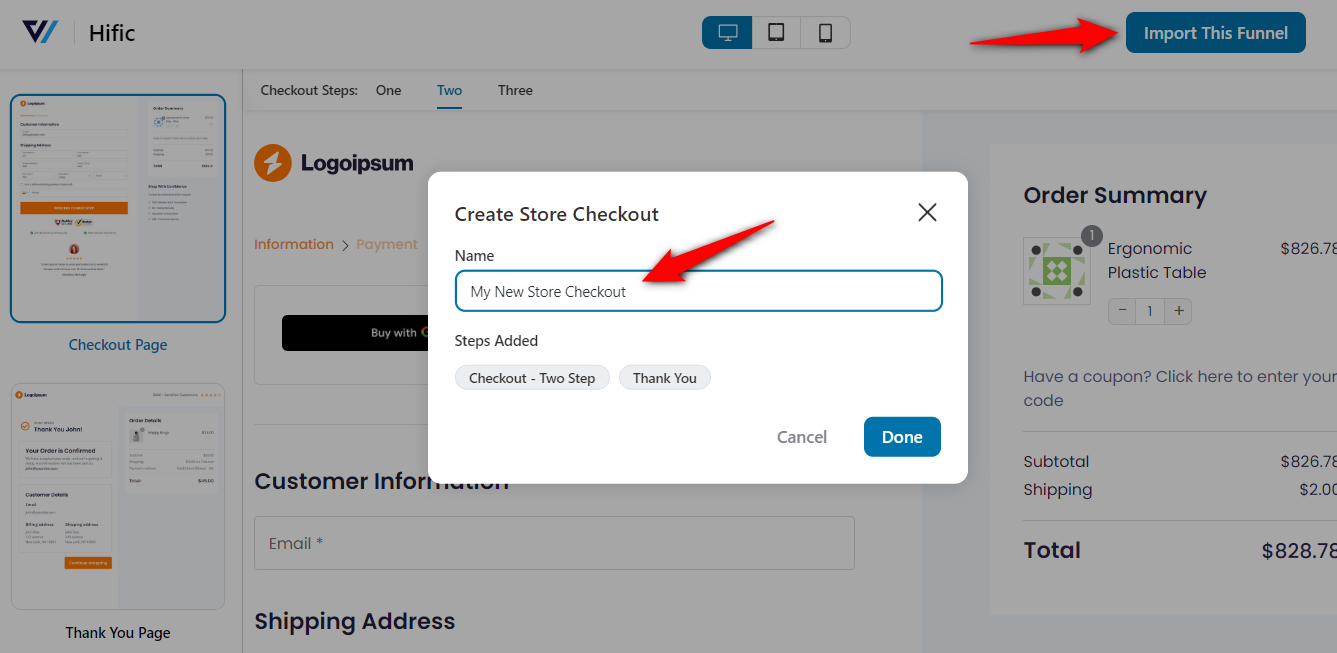
Clicking on ‘Done’ will import your store checkout with two pages in the funnel: Checkout and Thank You Page.
In this post, we will focus on the thank you page.
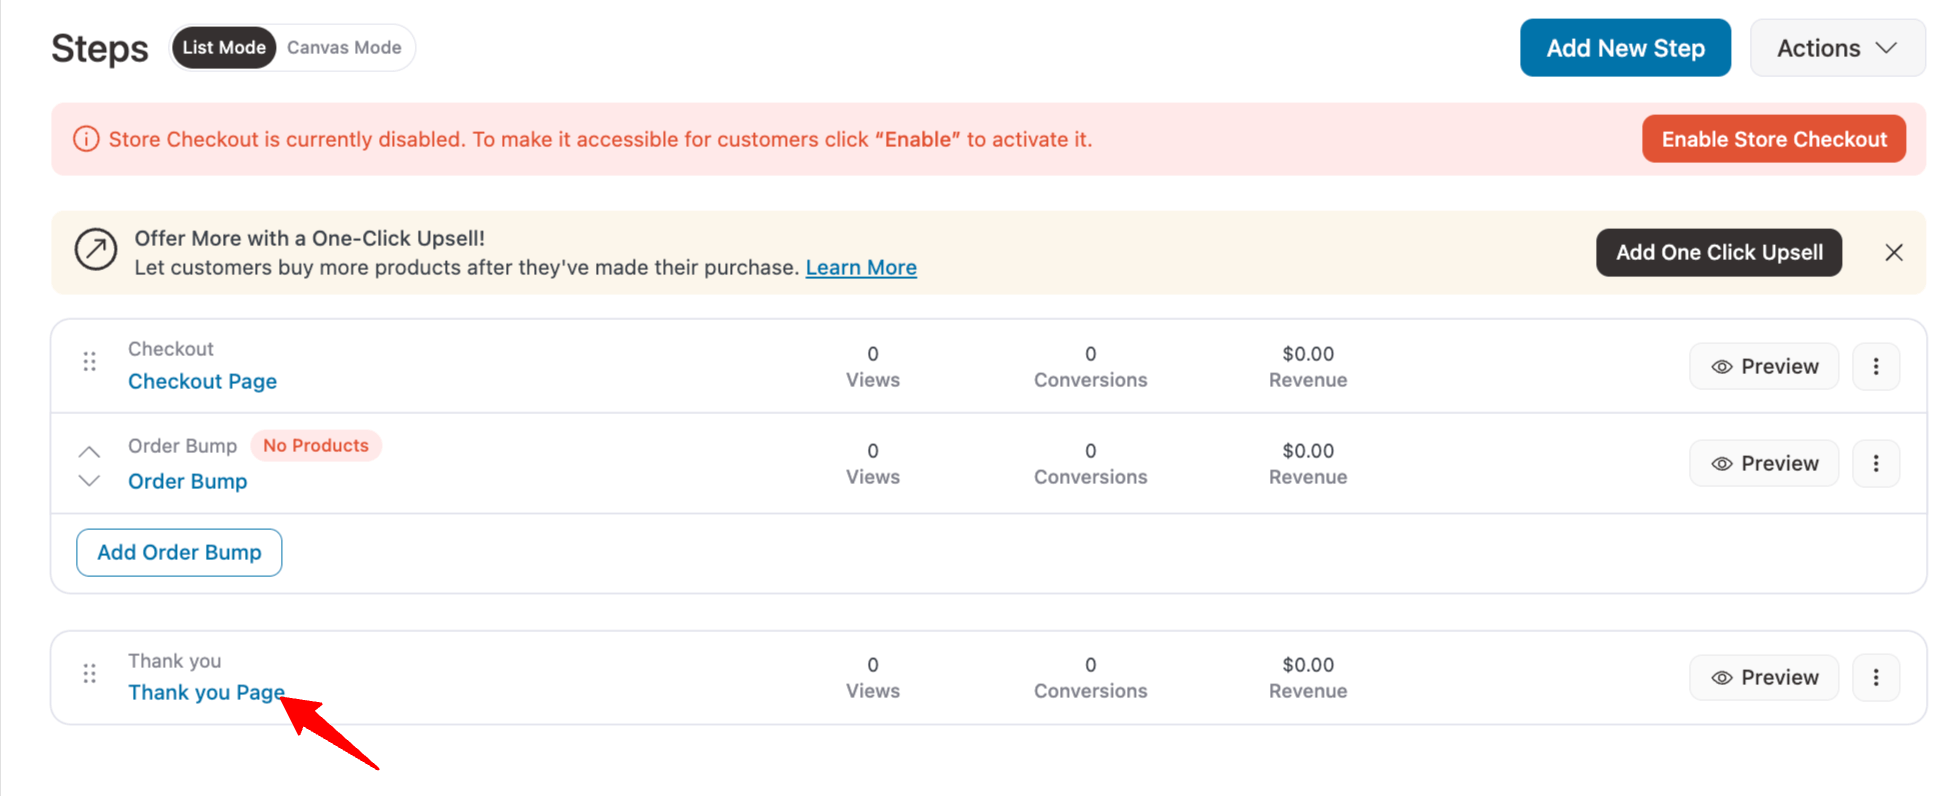
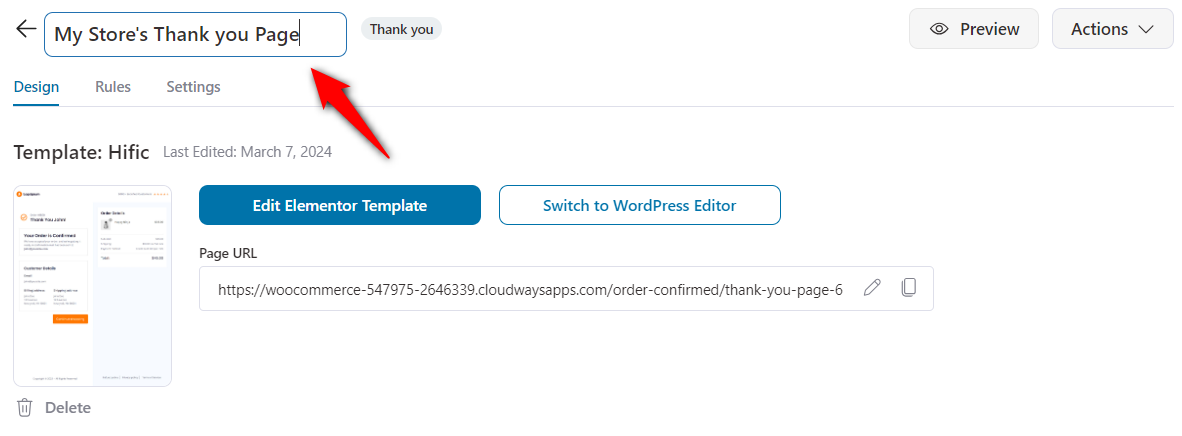
Step 2: Customize the thank you page template
Here, we’ll use Elementor to build our WooCommerce custom thank you page.
Click on the name of your thank you page to start customizing it.
Under the Design tab, click on ‘Edit Template’ to start customizing your thank you page design.
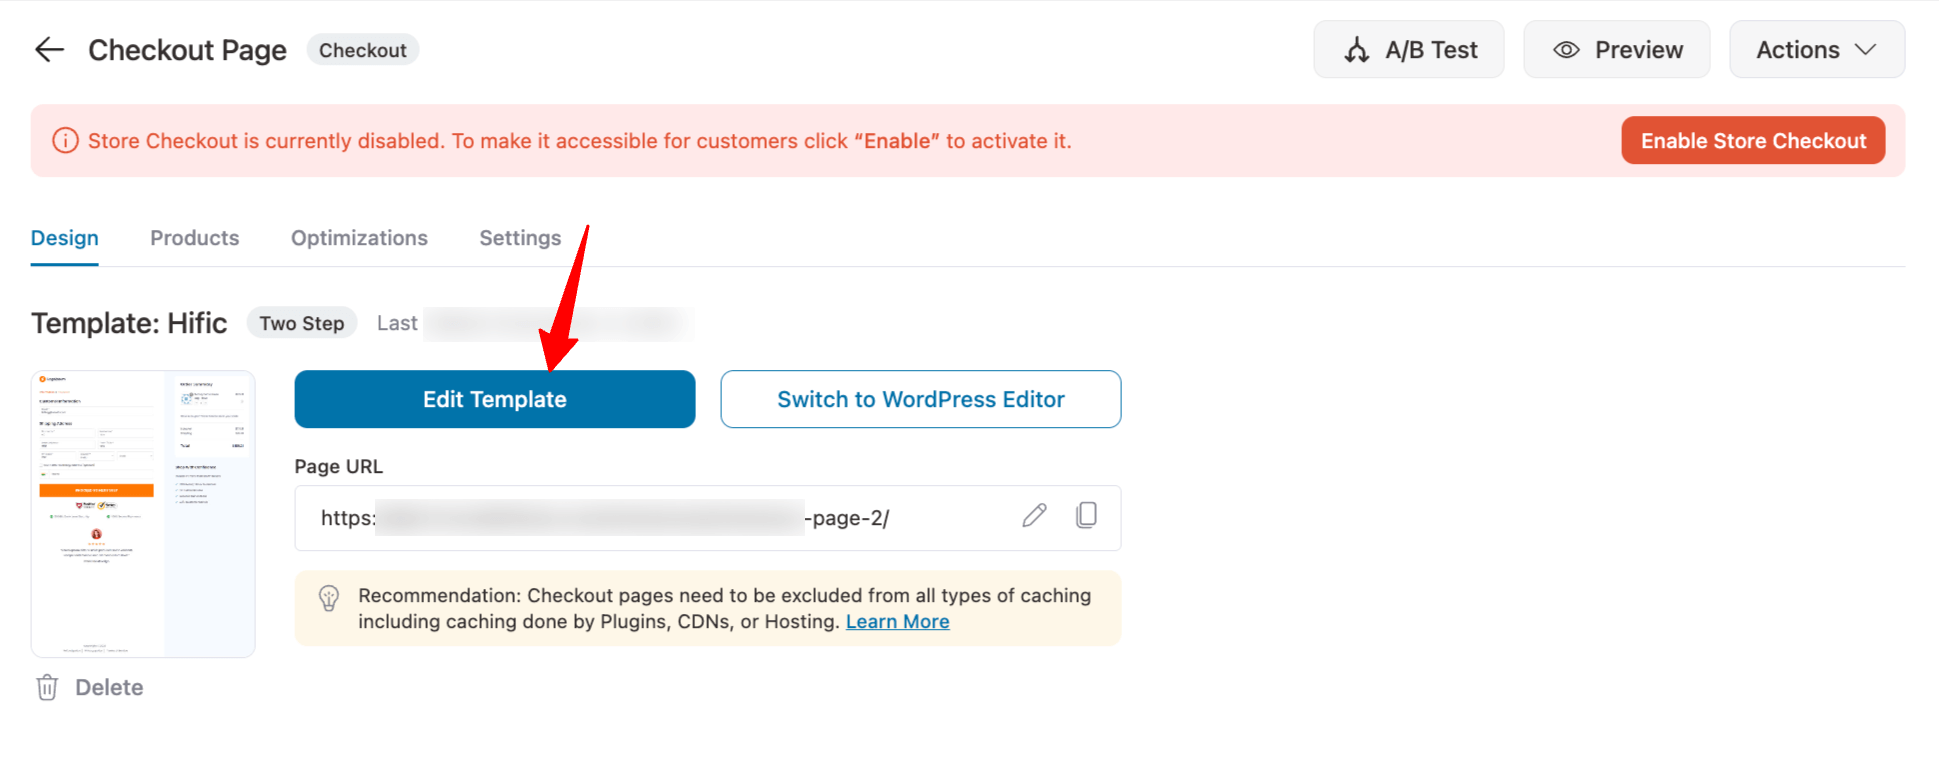
You can alter all the content of the thank you page.
Adding your business logo
Click on the logo, choose an image by inserting the media and done!
You can change the image resolution, set captions, and link it to the home or shop page of your website.
Once done, your brand logo will be up and running.
Personalizing text on the thank you page
Just click on the text you want to edit and add the new text from the Elementor dashboard on the left.
You can use personalization shortcodes to use customers' email addresses, names, order numbers, and more.
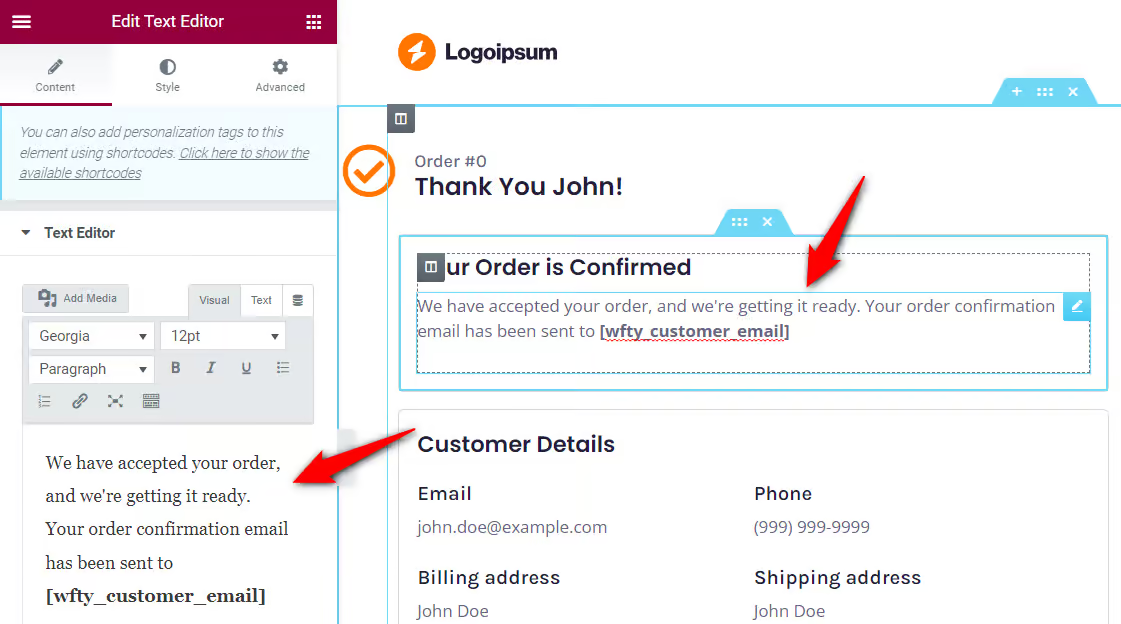
Create a high-converting copy and thank the customer for the purchase. Also, encourage them to take the next step.
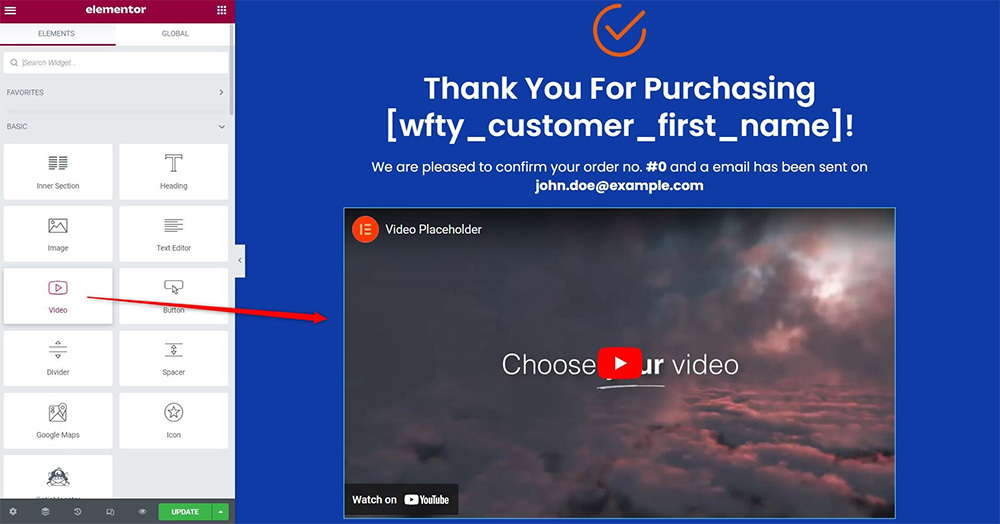
Displaying visual elements
On the WooCommerce custom thank you page, you can add a personal image or video and engage with your shoppers.
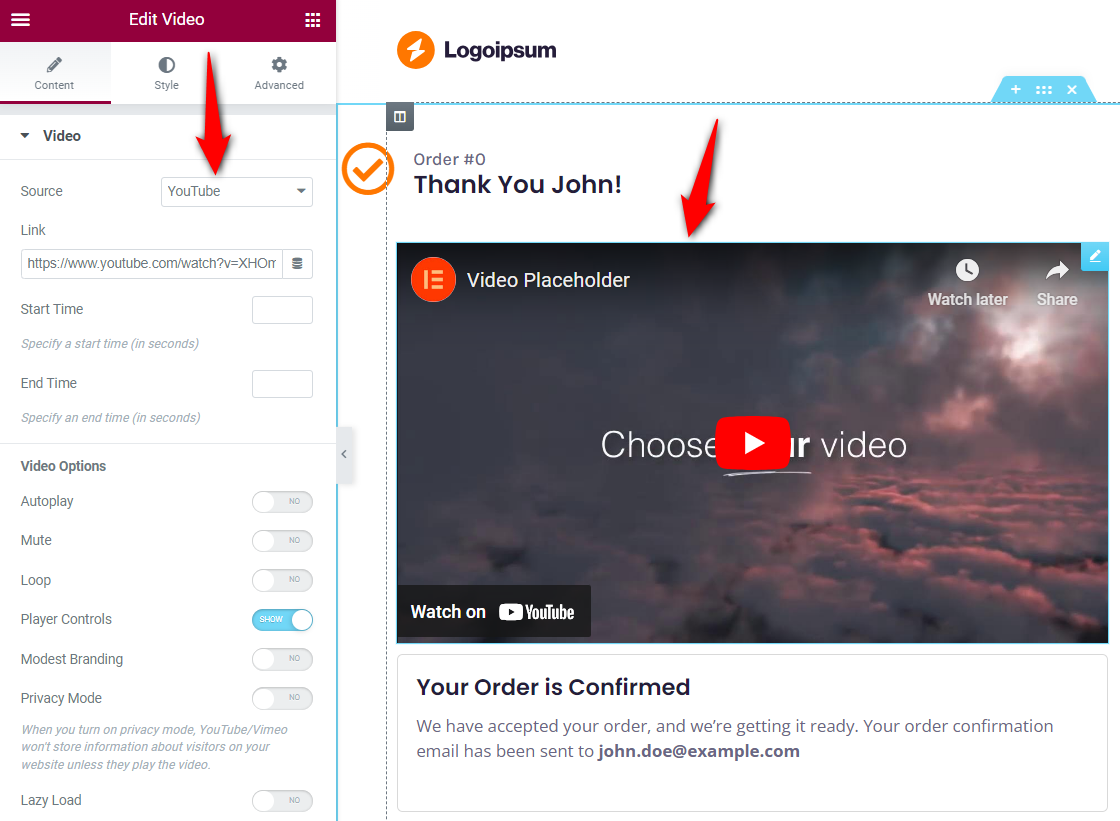
This way, you can build a healthy bond with your customers right from the beginning.
Inserting social media sharing icons
Invite your customers to your online communities and treat them to the latest offers, share cool tips and tricks, product recommendations, and more.
Just search for ‘Social Icons’ and drag the widget on the thank you page wherever you want.
You can add a text widget below the buttons and encourage people to hop into your online groups.
Customizing continue shopping or the CTA button
Click the button, set its type, enter text, add a link, update its icon, and more.
You can link the CTA to the shop or best-selling products page to explore.
If you want to add recommendations, you can set it up using your page builder.
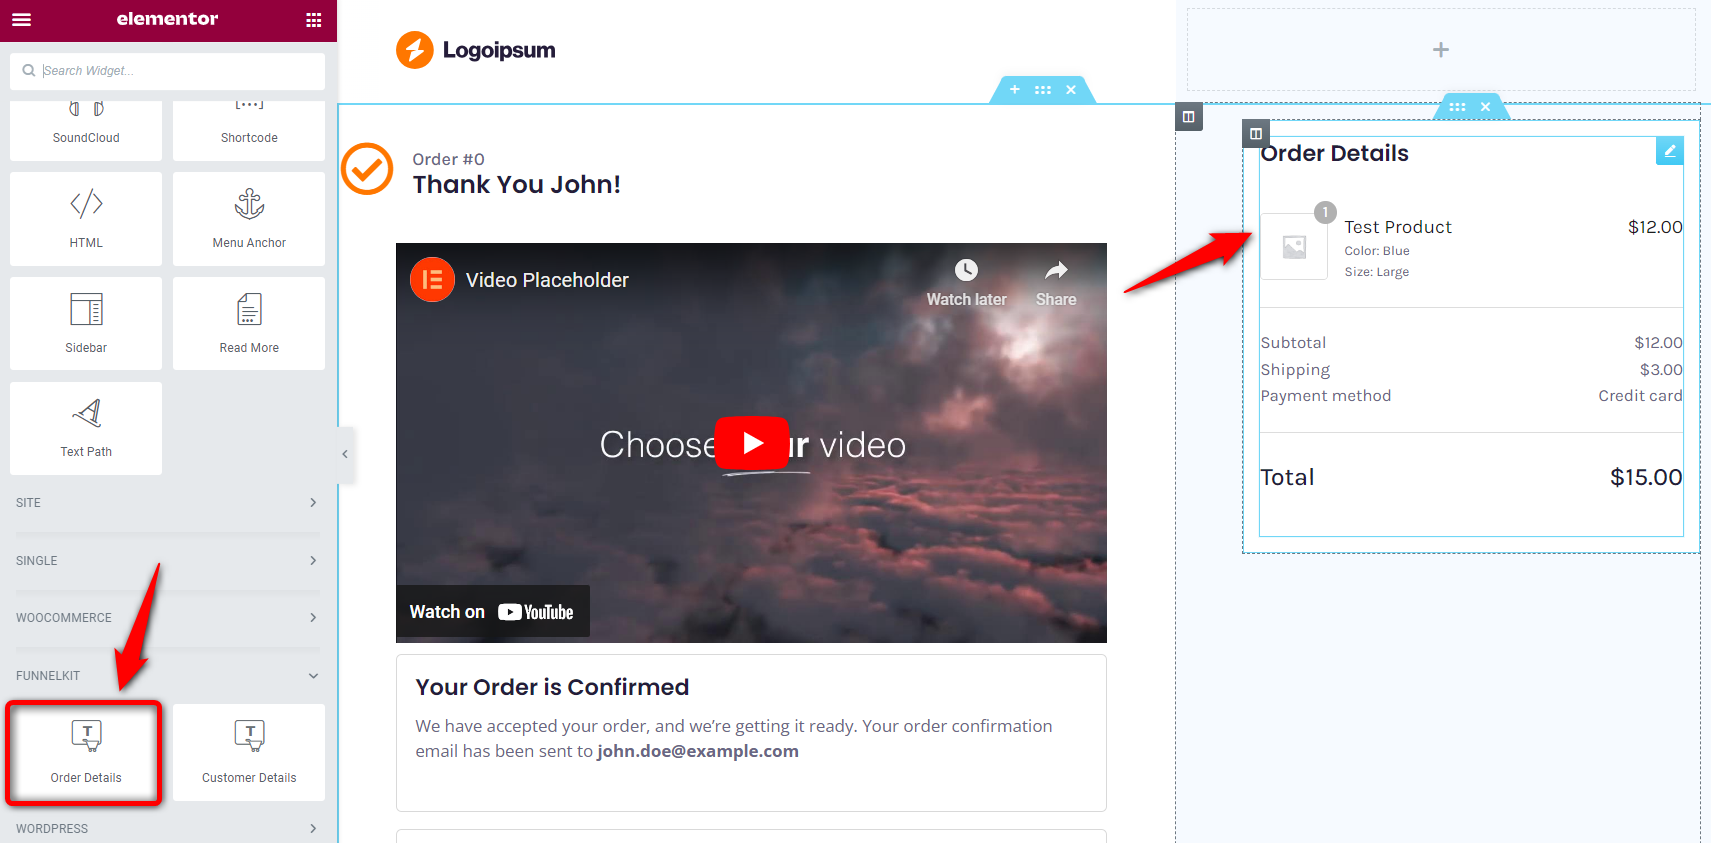
Step 3: Display order and customer details on the thank you page
Use the Order Details widget on your WooCommerce custom thank you page to display the details related to your shopper’s order, such as total cost, shipping cost, item details, and payment information.
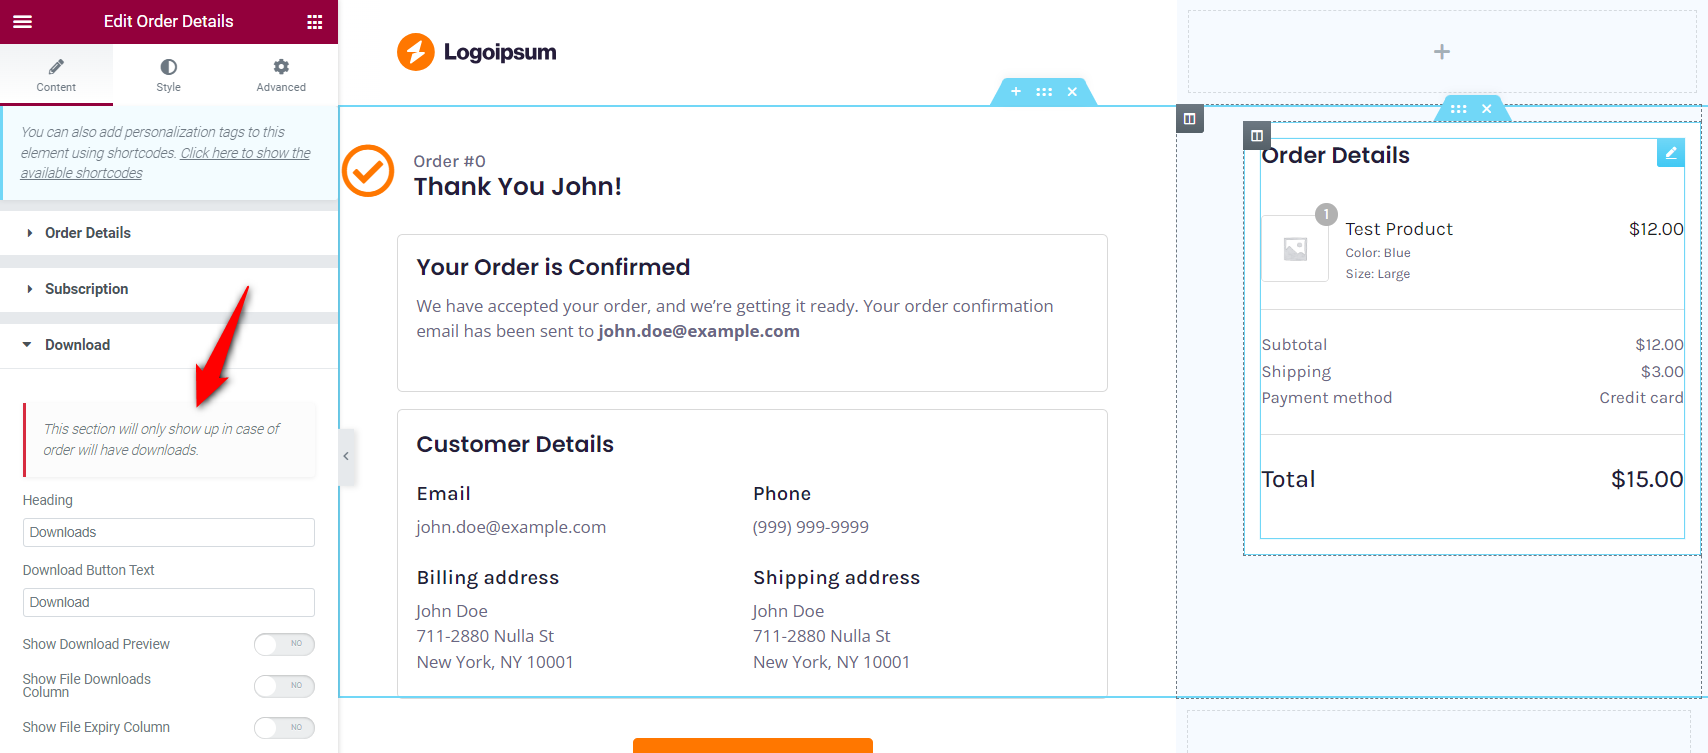
If you provide downloadable items, i.e., digital products, you can even customize settings related to that.
Show download preview, show file download column, or show file expiry column.
In addition, it also has options to display complete details of product subscriptions purchased from your store.
Next, use the Customer Details widget to display details about your customer at a glance.

You can easily customize the customer details section and display the information the way you want.
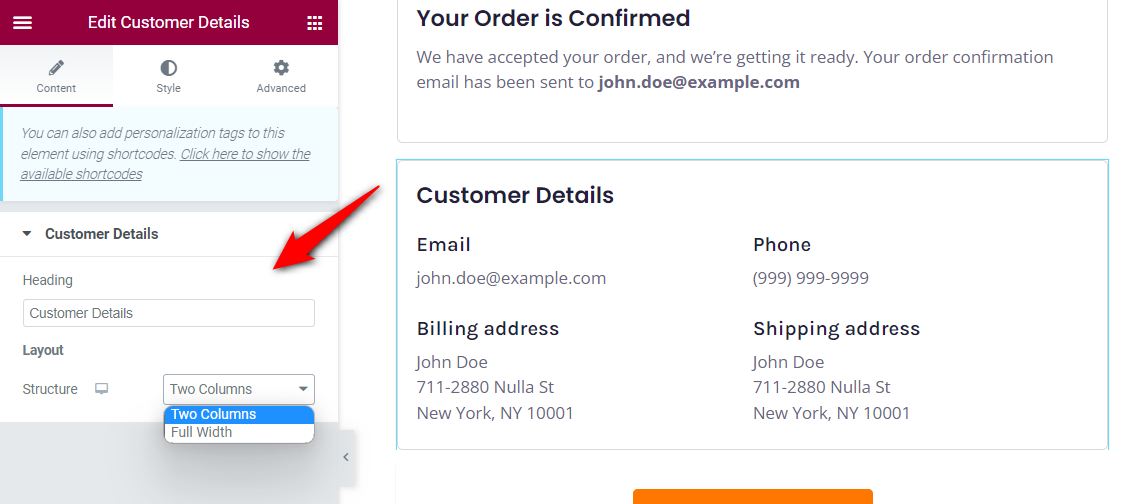
Whatever you want to do - add headings, modify the text, insert media, display socials, add a logo, cross-sell with CTA buttons, change color, and more.
One of the biggest turn-offs for any new customer would be a generic thank you page - made for robots, not humans.
That’s why it is crucial that you take the time to personalize your WooCommerce custom thank you page for each new customer.
No, you don’t have to create thank you pages for hundreds of customers. There is an easy way: Personalization Shortcodes.
Check out the WooCommerce order received shortcodes available in FunnelKit under the Design tab:
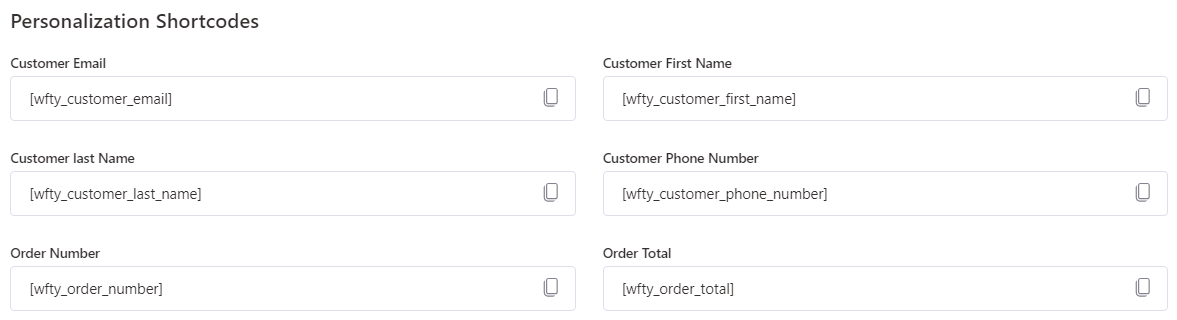
All the templates come with pre-added personalization shortcodes that fetch dynamic data from checkout form fields - first name, order number, etc.
Step 4: Optimize the custom thank you page for mobile devices
Test the appearance and functionality of your thank you page on different screen sizes to provide a seamless user experience.
Click on the ‘Responsive Mode’ and choose the mobile device when editing your thank you page:
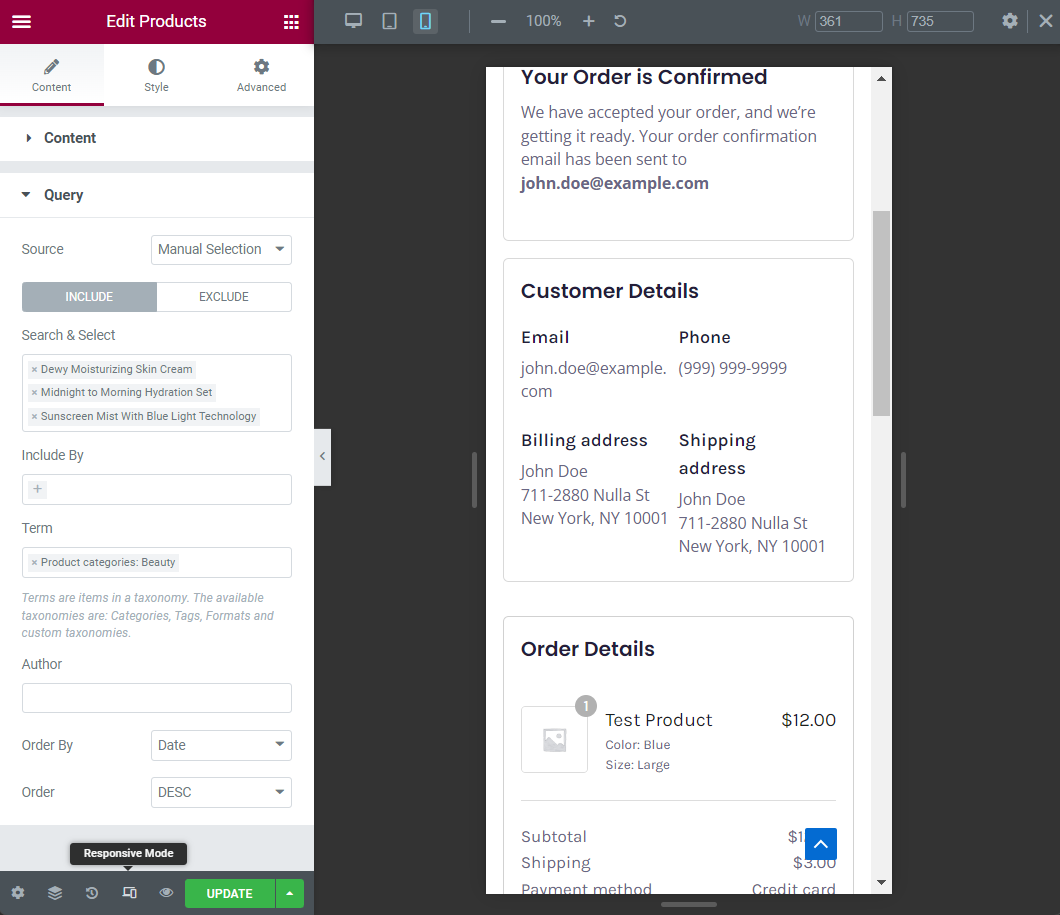
Make sure to hit ‘Update’ to save all your changes.
Step 5: Activate the store checkout
Now, it’s time to make your store checkout go live.
For that, go back to the funnel and hit the toggle to ‘Enable Store Checkout’ from there:
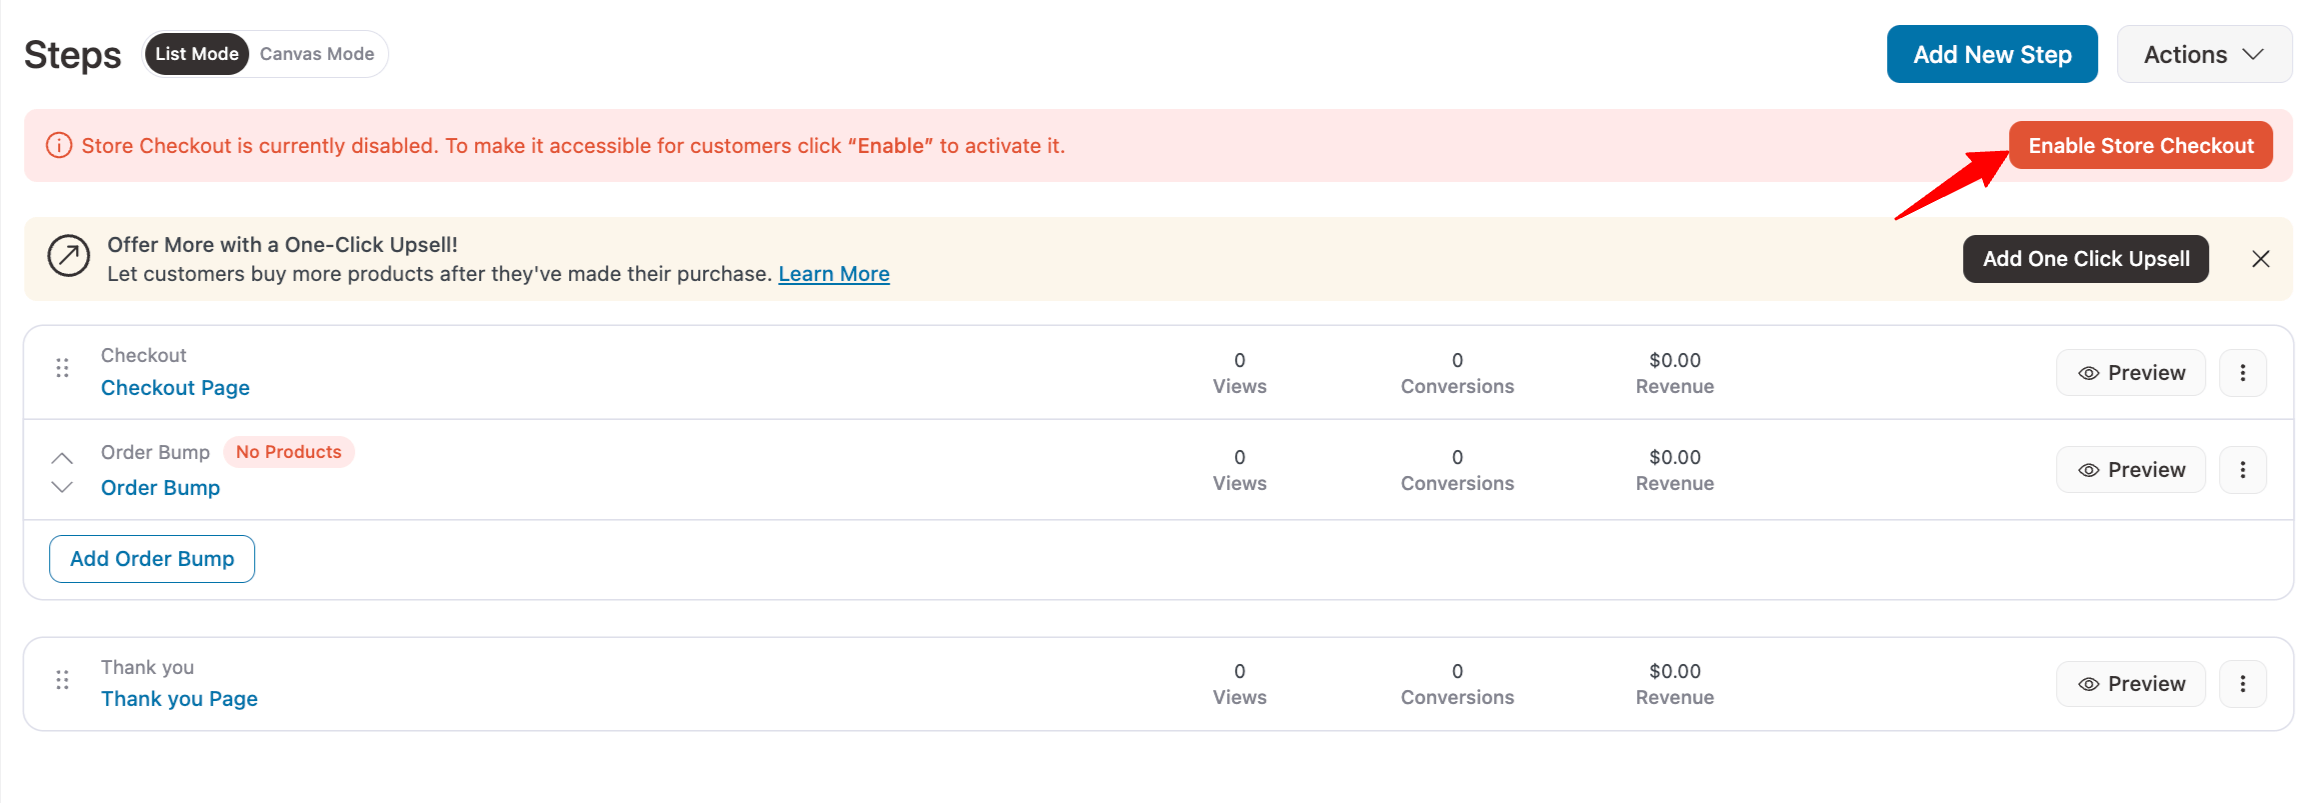
This is what the preview looks like:
That’s it! You have successfully created the WooCommerce thank you page.
Method 3: Customize the Thank You Page With Code (Hooks and Template Override)
If you’re comfortable with PHP, WooCommerce gives you precise control over the thank you page through hooks and template overrides.
This is the lightest-weight approach without any extra plugin and it’s how developers add custom logic like product-specific messages or campaign tracking.
Add the snippets below to your child theme’s functions.php or a code-snippets plugin (never edit core or parent-theme files directly).
The woocommerce_thankyou hook
The main action hook fires on the order-received page and passes the $order_id, so you can output anything you want and pull order data when needed:
add_action( 'woocommerce_thankyou', 'custom_thankyou_message', 20 );

function custom_thankyou_message( $order_id ) {
    if ( ! $order_id ) {
        return;
    }

    $order = wc_get_order( $order_id );

    echo '<div class="custom-thankyou-note">';
    echo '<h2>Thanks for your order, ' . esc_html( $order->get_billing_first_name() ) . '!</h2>';
    echo '<p>Here is 10% off your next purchase — use code <strong>THANKS10</strong> at checkout.</p>';
    echo '</div>';
}
Changing the “Order received” text
If all you want is to reword the default heading, use the dedicated filter. There's no need to touch the whole page:
add_filter( 'woocommerce_thankyou_order_received_text', 'custom_order_received_text', 10, 2 );

function custom_order_received_text( $text, $order ) {
    return 'Thank you! Your order is confirmed and on its way. 🎉';
}
Confirm you’re on the thank you page
When you’re running logic on template_redirect or in a shortcode, gate it with the endpoint check so it only fires on the order-received page:
if ( ! is_wc_endpoint_url( 'order-received' ) ) {
    return;
}
Override the template file
For deeper structural changes, copy WooCommerce’s template into your child theme and edit the markup there.
Copy:
wp-content/plugins/woocommerce/templates/checkout/thankyou.phpto:
wp-content/themes/your-child-theme/woocommerce/checkout/thankyou.phpBecause WooCommerce loads the theme version first, your copy takes over while staying update-safe. Make sure to re-check it after major WooCommerce releases in case the source template changes.
Redirect to a Custom Thank You Page (Rule-Based Pages)
Sometimes you don’t want to edit the default page. You want to send customers to a different page entirely, and a different one depending on what they bought.
This feature offers a fantastic opportunity for WooCommerce store owners to enhance customer engagement and drive more sales.
If you've created a thank you page with specific content, such as tutorials or product recommendations like a makeup kit and moisturizing cream, you can set up rules to display this page specifically for customers who purchase products from the beauty product category.
1. With a plugin
There are various matrices available to create rules in FunnelKit, such as:
- Products: With this rule, you can show product-specific custom thank you pages per product. This is where you can instruct them to take the next steps or show them how to unbox or use the product.
- Order total: Customers who buy a lot from you deserve a special thank you, don’t they? Give them that with a thank you page for customers with a high order total.
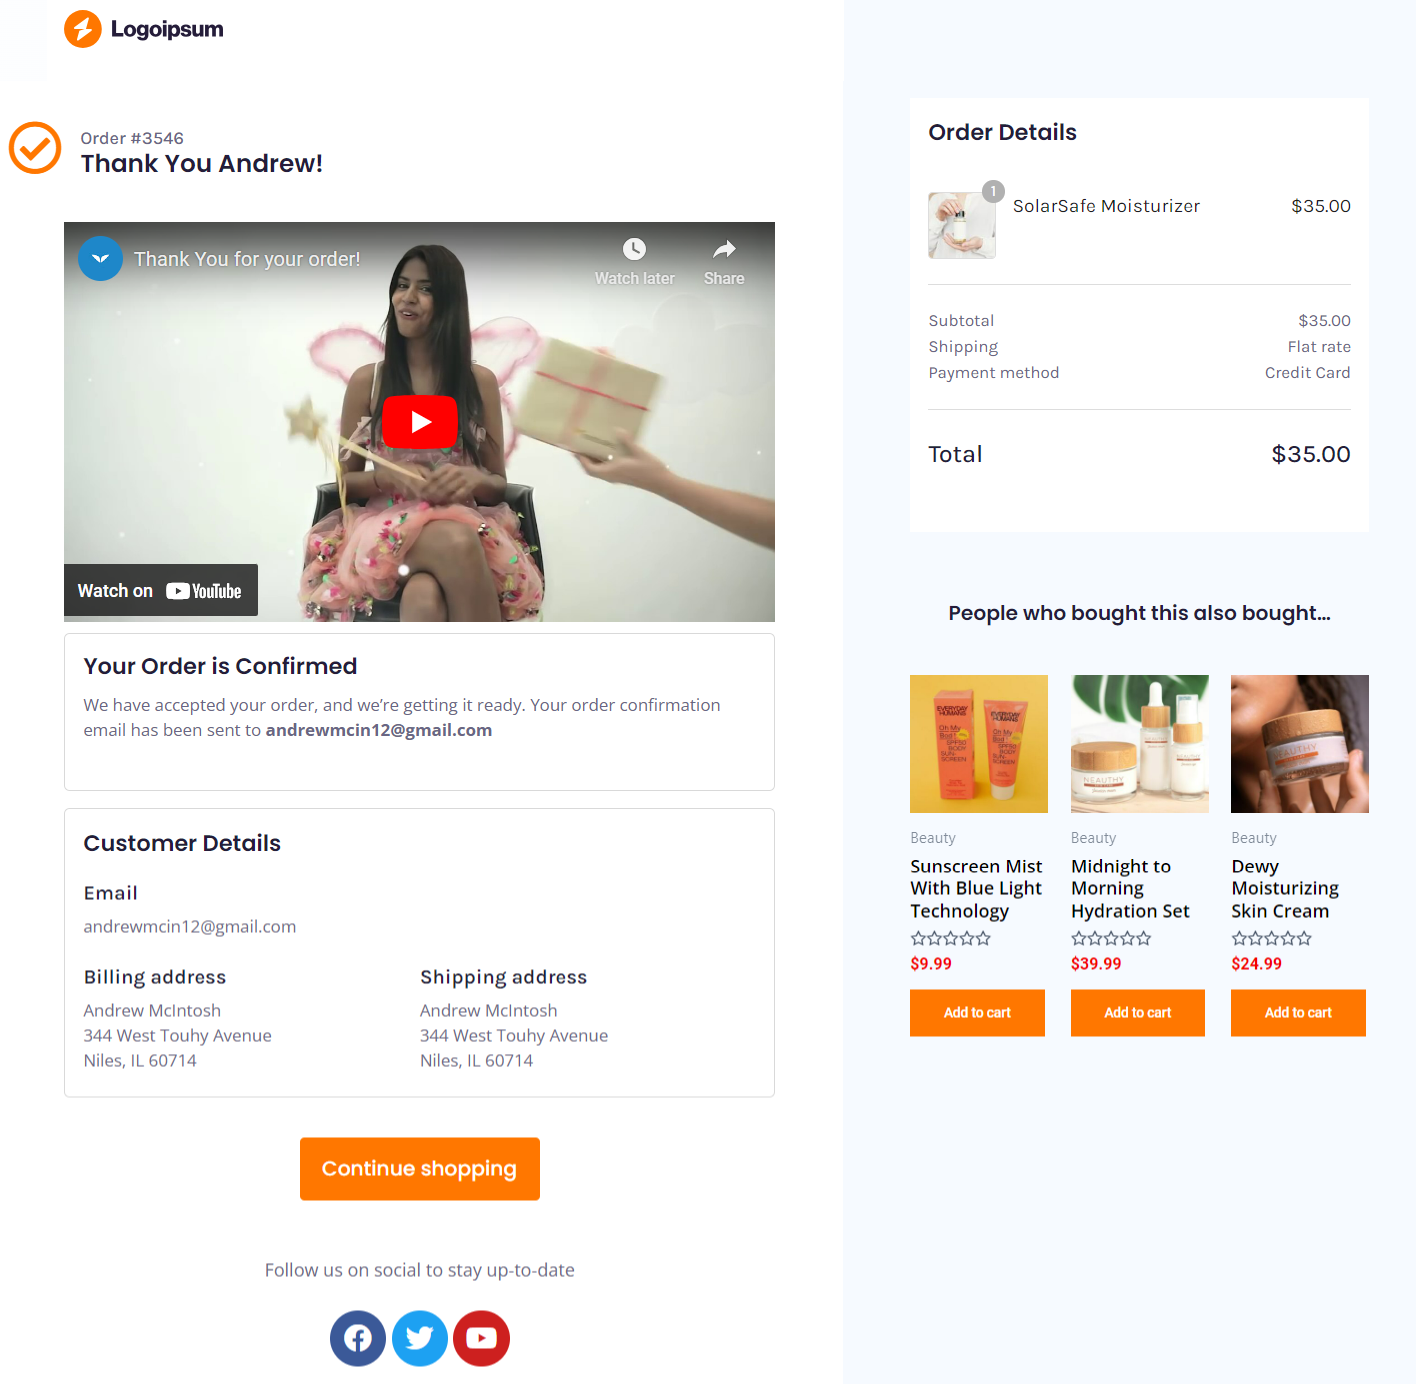
- Customer’s first order: Show a thank you page with a personalized video to welcome your first-time customers onboard your brand.
- Shipping country: Thank your international customers in their native language and build a strong relationship with them.
You can apply many more rules to your thank you pages, such as product category, payment method, shipping method, guest checkout, coupons used, and more.
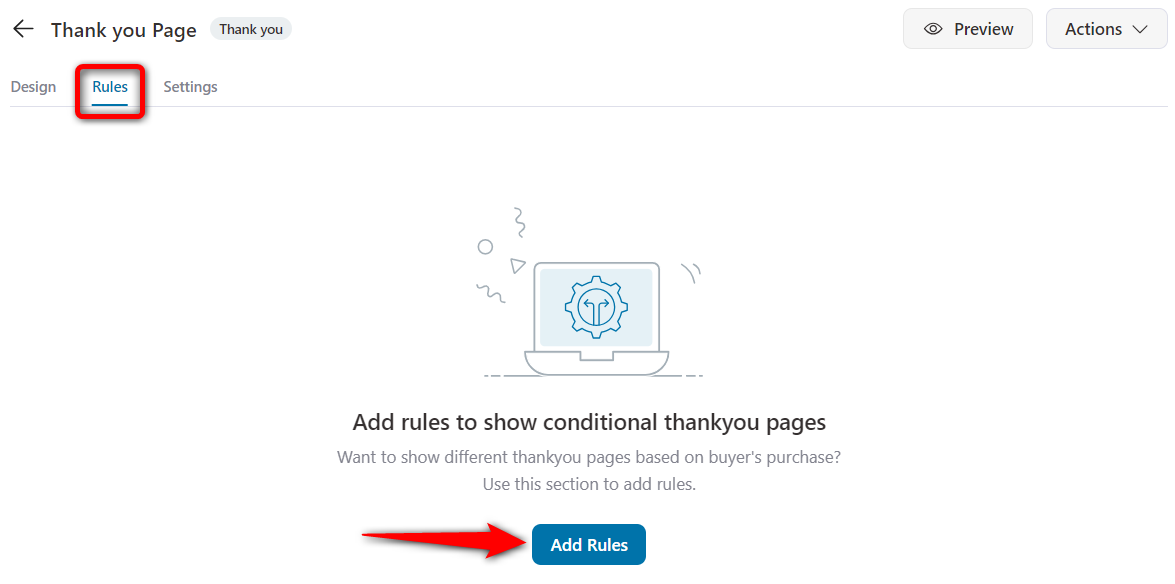
To add rules, go to the 'Rules' tab when editing your thank you page.
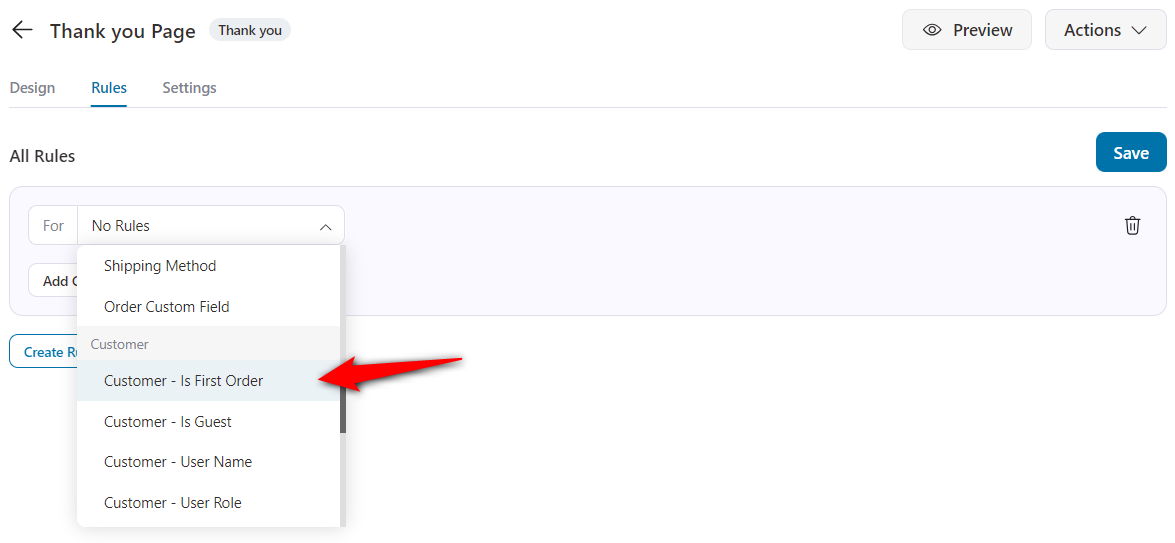
In this example, we will create a rule-based thank you page for your first-time customers.
For that, select the ‘Customer - Is First Order’ rule.
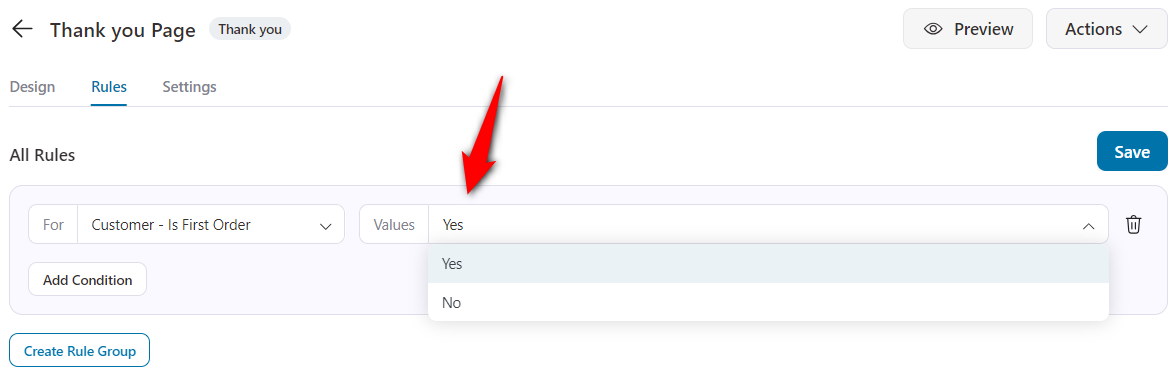
Next, click on ‘Yes’ and save the changes.
Next, go to the ‘Design’ tab and customize your thank you page for your first-time customers.
You can add a video from the widget to the top of the page; that’s the space that gets the most eyeballs.
Paste your video's YouTube/Vimeo link, or upload a self-hosted video. Toggle the settings on and off as you prefer.
You can even create custom thank you per product pages.
All you have to do is create a thank you page and set the ‘Products’ rule under the Order category.
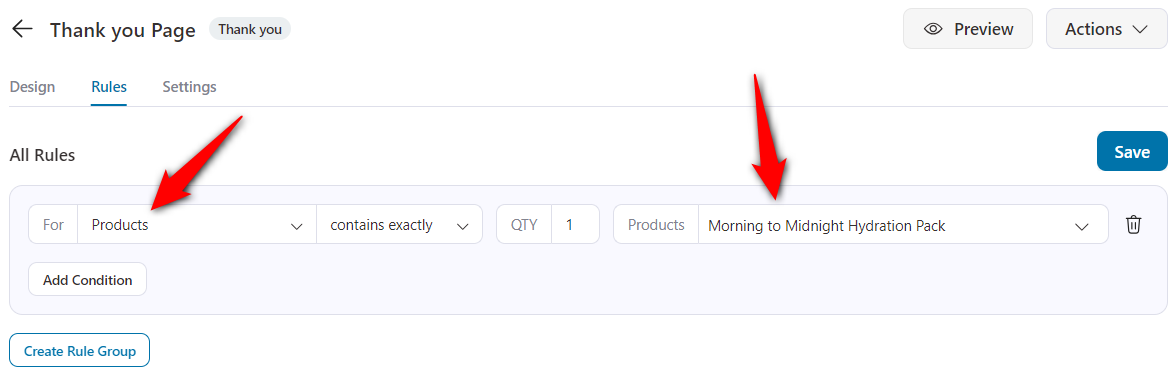
This means you can have multiple thank-you pages, maybe one for a smartphone purchase, another for a home appliance, and more.
Need inspiration? Look at this thank you page example of how Dave from Kindlepreneur is doing so.

You can add multiple rule-based WooCommerce custom thank you pages for your different audiences on the store.
You can import various thank you page templates as per your need and customize them according to the set of audience you want to thank.
2. With code
Use the template_redirect hook gated by is_wc_endpoint_url( 'order-received' ), or redirect inside the woocommerce_thankyou hook, to send buyers to a custom URL.
You can read the order from the key parameter and branch on the products purchased.
Top 5 Best WooCommerce Thank You Page Plugins
Here are five highly rated WooCommerce thank you page plugins that can help you enhance your customers’ post-purchase experience.
We've thoroughly tested these plugins to let you customize thank-you pages without coding skills.
1. FunnelKit Funnel Builder
FunnelKit Funnel Builder is the most powerful sales funnel builder plugin for WordPress and WooCommerce.
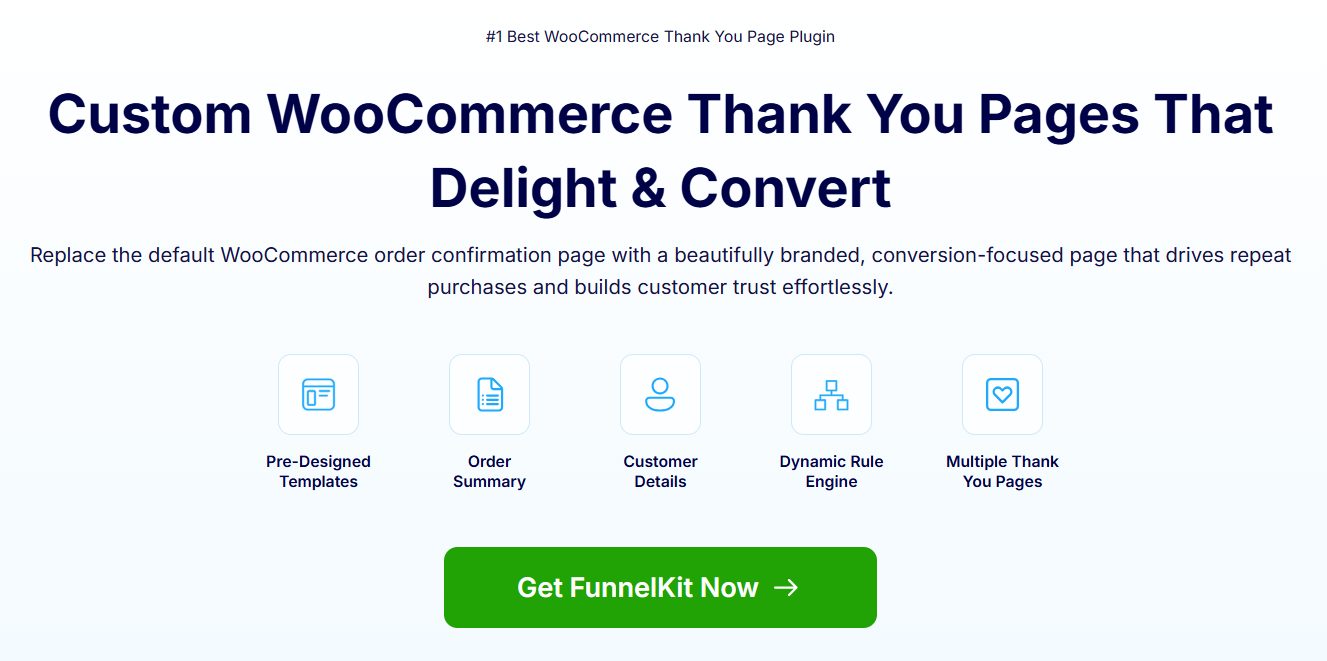
It lets you design high-converting opt-in pages, beautiful checkouts, sales pages, order bumps, one-click upsells, and thank you or order received pages.
The plugin has a wide array of pre-designed templates that you can import and customize with your favorite page builders.
Here are some of its key features:
- Pre-designed templates: It has many pre-designed templates for each page in your sales funnels, including WooCommerce thank you pages. Import and start customizing as per your brand. Not only that, you can even design your own custom template from scratch.
- Works with every page builder: Customize your WooCommerce thank you page templates with your favorite page builder. Use Elementor, Divi, Oxygen, Gutenberg, or any other page builder. Drag and drop the different widgets or modules and style them the way you want (without any coding!).
- Add images, videos, upsells, coupons, and more: Enhance your customer experience with visual elements. Additionally, add product upsells and offer discount coupons to incentivize customers on their next purchase. This helps in providing a unique experience and carries the conversation forward.
- Link your social media profiles: Add social media icons and link them to your business profile. This way, you can direct your customers to your social media accounts to know about your business’s latest launches and daily news.
- Thank you page widgets: FunnelKit Funnel Builder offers two widgets or elements: order details and customer details sections with ease. You get all the corresponding options to customize these widgets and make your thank you page stand out.
- Personalized thank you messages: FunnelKit offers various personalization shortcodes that you can use to create personal messages on the thank you page. This way, you can tailor your messages based on your customers.
- Woocommerce custom thank you page per product: Add rules to your thank you pages and create different pages per product. Not just that, there are various rules such as product category, coupon used, order total, payment gateways, first customer, shipping country, and more. You can use any of the rules to create thank-you pages tailored to different sections of the audience, ensuring the best possible experience.
Pricing:
The thank you page component is available inside the complete FunnelKit Funnel Builder plugin.
Funnel Builder is available in both the lite (free) and premium versions (starts at $99.50/year)
2. NextMove - WooCommerce Custom Thank You Pages
The NextMove WooCommerce thank you pages allow you to build custom thank you pages that help you turn your one-time buyers into repeat customers.
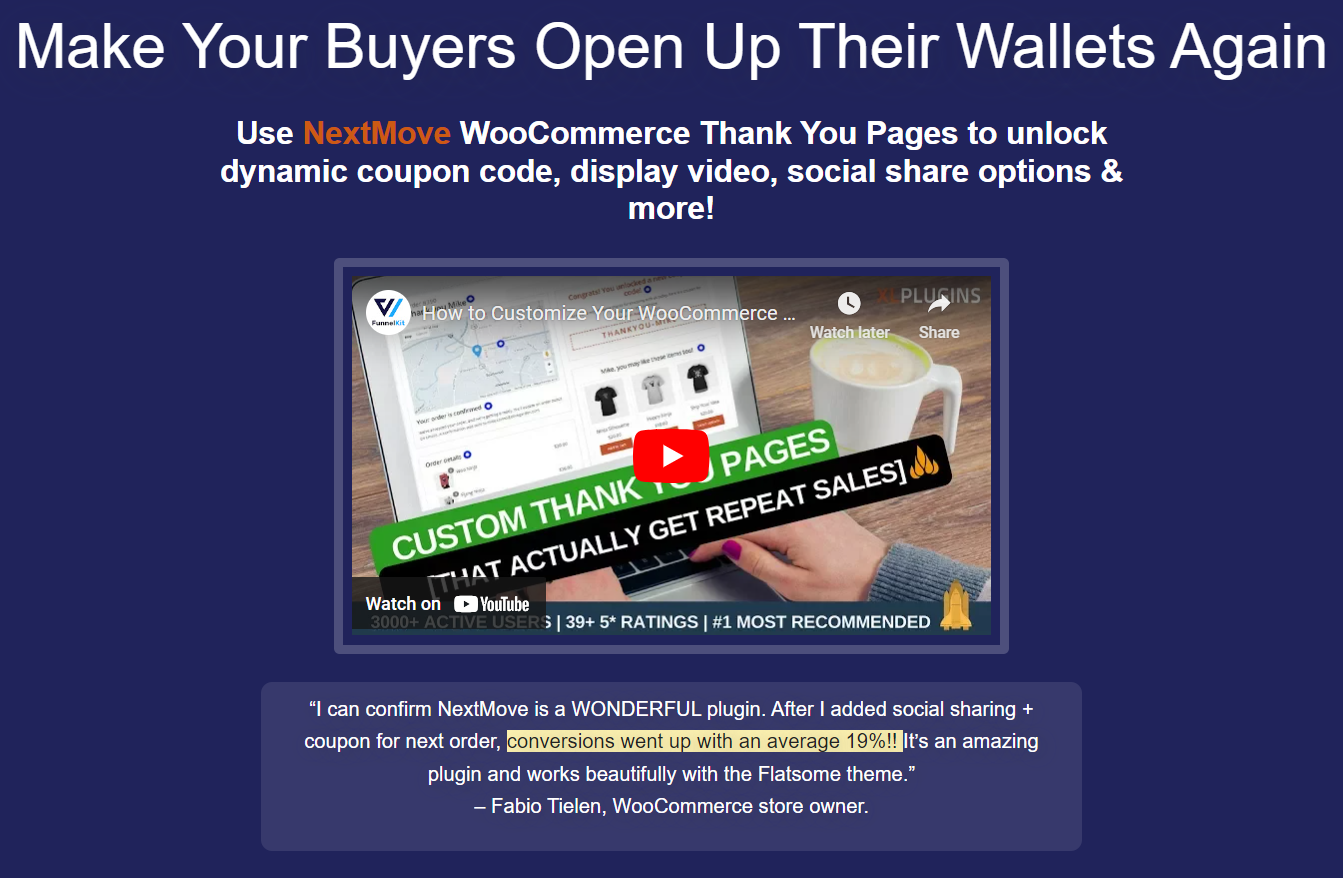
You get access to 17+ building blocks, such as dynamic discount coupons, display videos, social share options, and more, to enhance your customer’s experience.
It has been used by over 30,000 WooCommerce store owners, helping them drive more sales and generate customer loyalty.
Core features of this WooCommerce custom thank you page plugin:
- Show product recommendations: Display upsell recommendations on the thank you page that encourage buyers to revisit and reconsider the products they like. Display recently viewed or custom products based on your customer’s purchase.
- Offer discounts in return for a social share: Reward your customers with a personalized coupon code when they share your brand with their friends on social media platforms.
- Unlock personalized time-bound coupon codes: Offer personalized, limited-time coupon codes on the thank you pages. The fear of missing out (FOMO) rekindles customers’ desire to buy again from your WooCommerce store.
- Add visual elements: Add elements like images and videos to deliver a warm thank you message and build goodwill among your customers. This way, you can transform the relationship you share with your customers.
- Get buyers to spread the word about your brand: Nextmove lets you add social share buttons on the thank you page. This allows customers to share their new purchases with family and friends.
Pricing plan:
NextMove is available both in free (lite) and premium versions. Its basic plan starts at $29 a year.
3. Custom Thank You Pages for WooCommerce
This custom thank-you page plugin lets you optimize your order confirmation page for the best experience.
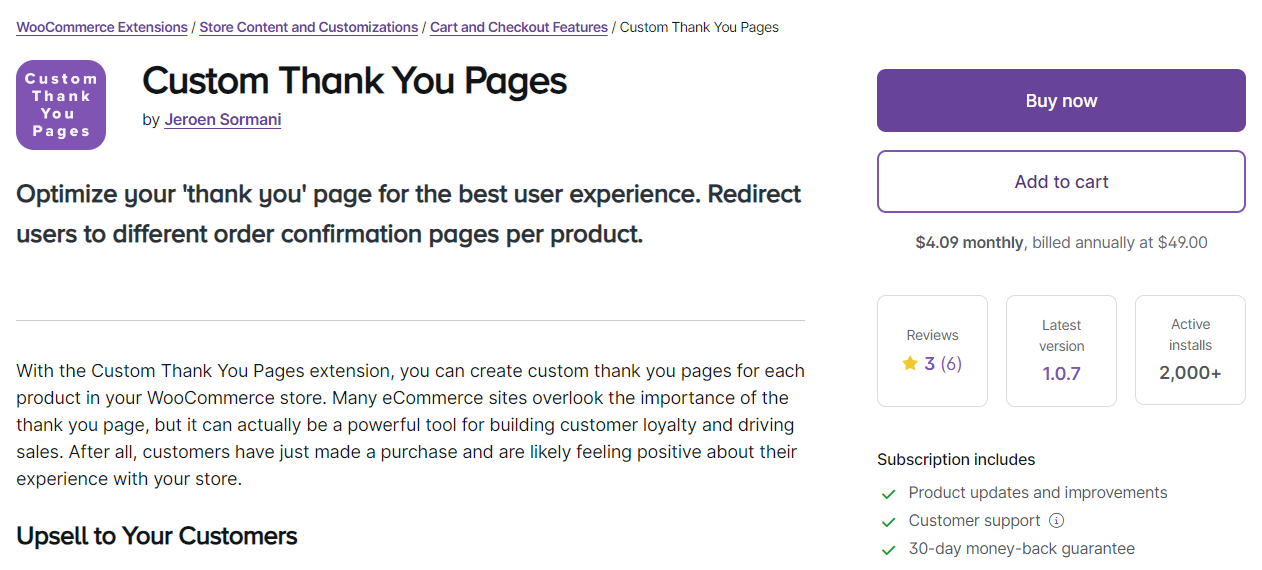
You can even redirect users to different thank you pages per product. Plus, there are many more things you can do!
These are some of its features:
- Show related products: Add upsell product recommendations that encourage your customers to purchase again. It lets you show related products based on customers’ purchases, which helps in product visibility and urges them to shop the next time they visit your store.
- Add personalized content: Add details about the purchased product and offer tips on how to use it. Not just that, you can even allow users to download your digital products or add a newsletter sign-up pop-up form right from your thank-you page.
- Custom per product pages: Create custom thank you pages for each product in your online store. And display these specific thank you pages once the customer purchases those items.
Pricing plan:
The custom thank-you pages for the WooCommerce plugin cost $49 annually. It does not include any free version or demo plan for testing.
4. Thank You Page for WooCommerce
This thank you page plugin lets you customize and redirect customers to a custom thank you page after a successful purchase.
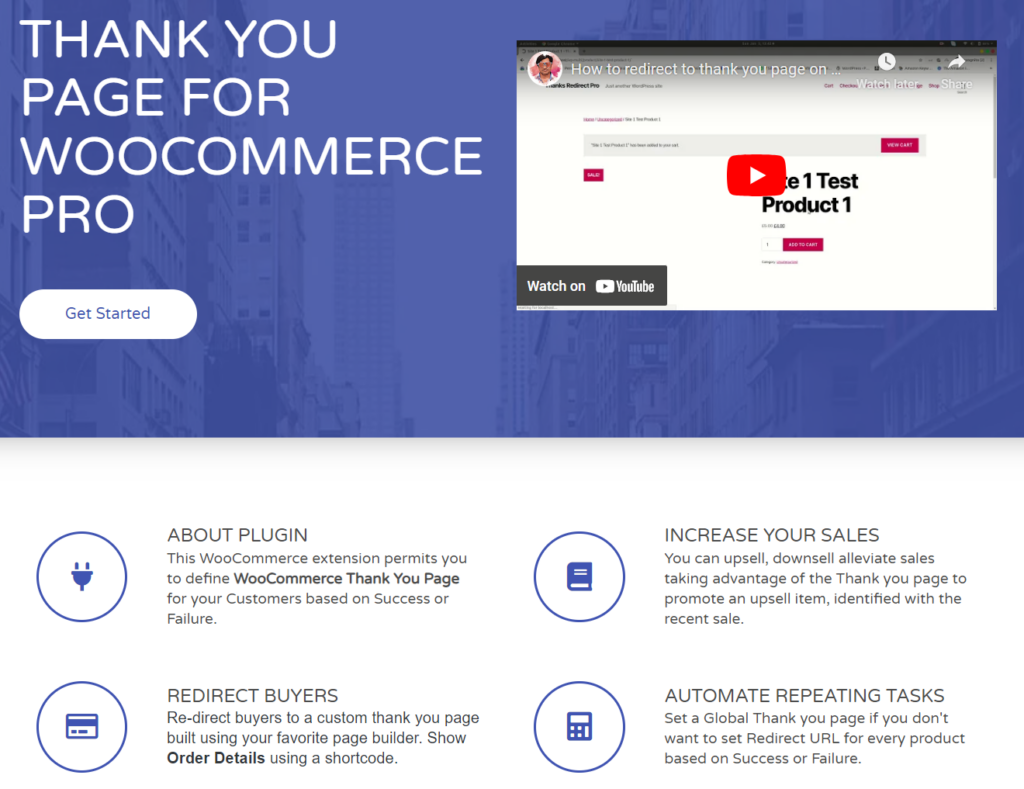
It allows you to provide a tailored post-purchase experience to your customers with order details and personalized messages.
You can add any content you wish to provide or set per product URLs based on your business needs.
Take a look at some features:
- Customized thank you page experience: Create a customized thank you page that lets you display order details, personalized messages, and any other content you want to provide.
- Set per-product redirect URLs: Set custom WooCommerce thank you page redirect URLs and order details based on different products. This way, you can display custom order confirmation pages for different products.
- Add any promotions or messages: Add additional information or promotions, reinforce your brand identity and tailor messages to your thank you pages.
Pricing:
The Thank You Page for WooCommerce is available for free with limited features. The premium version costs $6.99 a year.
5. WooCommerce Thank You Page Customizer
This WooCommerce Thank You Page Customizer lets you customize your order confirmation pages the way you want.
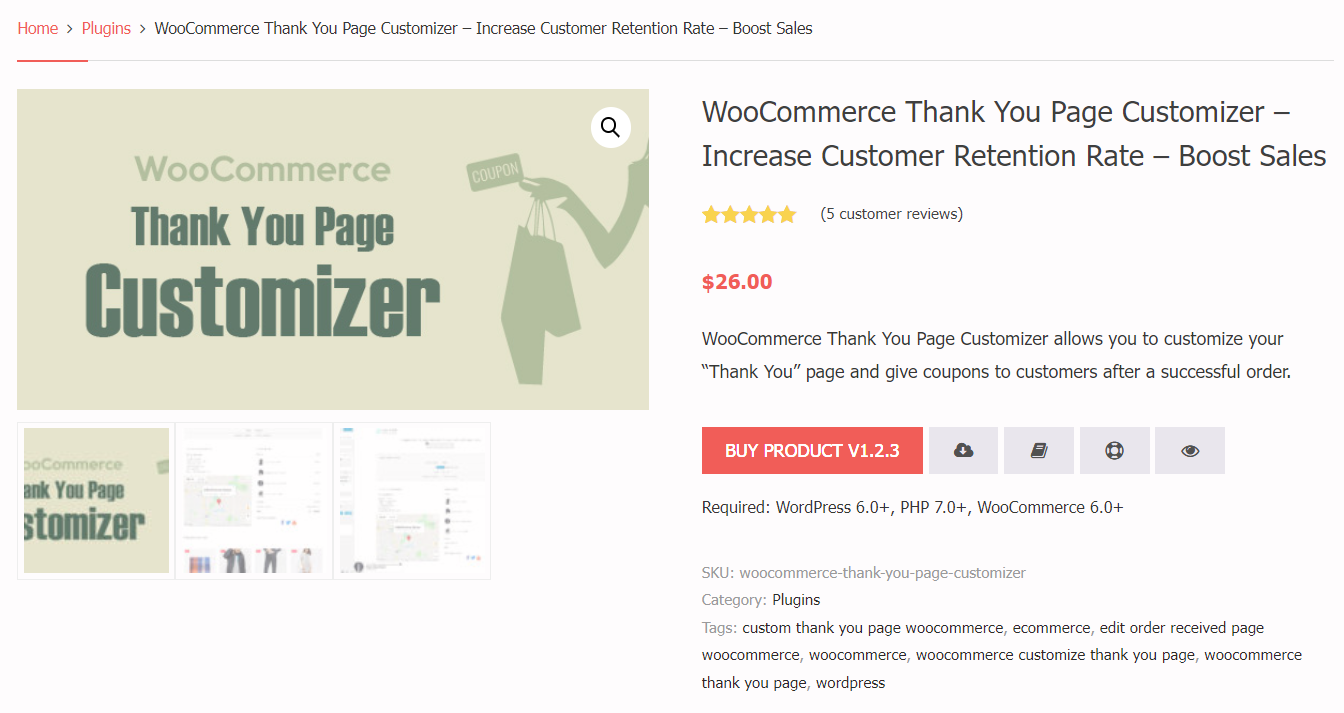
It lets you offer coupons to your customers and show product upsells right on the thank you page after a successful purchase.
Features of WooCommerce Thank You Page Customizer:
- Easy customization: This plugin allows you to drag and drop elements to craft your own custom thank you page. You can edit and see the live changes in real-time, saving you much time.
- Offer coupons: Generate unique coupons for every order and display them on the thank you page. You can even use an existing WooCommerce coupon and offer it on the thank you page to incentivize your customers’ next purchase.
- Add upsells: Display upsells and cross-sell products relevant to the customer’s purchase on the thank you page. You can show recent products, top-rated products, best-selling products, featured products, and more on the thank you page.
Pricing:
The WooCommerce Thank You Page Customizer has a free and pro version that costs around $26.
Which one to pick?
Select the plugin based on how far you want to go.
If you want a fully-branded, engaging page with tracking depth, FunnelKit is the best pick.
If you want a basic page, you can go with Next Move, WooCommerce Thank You Page Customizer, and Thank You Page for WooCommerce plugins.
5 Ways to Encourage Brand Loyalty and Repeat Purchases on Your WooCommerce Thank You Page
Here are simple yet effective ways to encourage brand loyalty and repeat purchases with your custom WooCommerce thank you pages.
1. Invite customers to join your online communities
Social communities are a great asset for your business. They are more likely to buy from you time and again. Also, they will spread good word of mouth about your products and services.
Who doesn’t want free marketing? In exchange, you can exclusively share discount coupons, festive deals, and more with them.
So, it’s a win-win for both. Thus, display social media handles on your WooCommerce custom thank you page and invite the customers to join.
Invite your customers to join your online communities on Facebook, YouTube, Twitter, Pinterest, and more.
2. Build customer relationships with a personalized thank-you video
Displaying a simple, all-text thank you page feels outdated and boring.
It’s the new era of digital presence, and in this era, you need to have captivating media (images, videos, or GIFs) to grasp your customer’s attention for a little longer.
As we discussed above, you can record yourself greeting your customers and welcoming them onboard your brand.
Or, you can display a walkthrough video where you unbox the item and show them how to use it.
This one cool hack can significantly boost your WooCommerce custom thank you page conversions.
3. Encourage repeat purchases with a discount coupon
Who doesn’t like discount coupons?
In fact, according to Statista, 92% of shoppers used discount coupons while buying something last year.
So, if you give people what they love - discount coupons.
Create static discount coupons inside WooCommerce and paste the code on your thank you page. Create a rule-based thank you page, and you are good to go.
This strategy works really well with first-time buyers. They get a good discount, and you get a repeat sale.
4. Promote frequently bought together products and boost sales
Remember when we said that the WooCommerce thank you page is not just about thanking your customers and confirming their order details?
This is what we meant - promote upsell and cross-sell offers on your thank you page and boost sales.
Some businesses even promote their high-ticket products on the thank you page, generating higher revenue from the same lead.
You can create multiple rule-based thank you pages and display frequently bought items together according to the product the customer has purchased.
5. Provide clear instructions on how to use the product
Mention clear instructions or guidelines on what your customers should expect next.
Include information about how to use the product and any instructions you want to provide to get the best out of your product.
For this, you can create a custom WooCommerce thank you page per product rule in FunnelKit.
This way, you can eliminate confusion and uncertainty by educating your customers through the step-by-step instructions you’ve provided for using the product.
Thank You Page Conversion Tracking (GA4 & Meta Pixel)
The thank you page is the natural place to fire purchase-conversion events, because it only loads after a completed order.
Make sure to get these two things right:
- GA4: Fire the purchase event on the order-received page with the order value, transaction ID, currency, and items. Many WooCommerce-GA4 integrations handle this automatically. If you’re firing it manually via the woocommerce_thankyou hook, pull the values from the order object so they’re accurate.
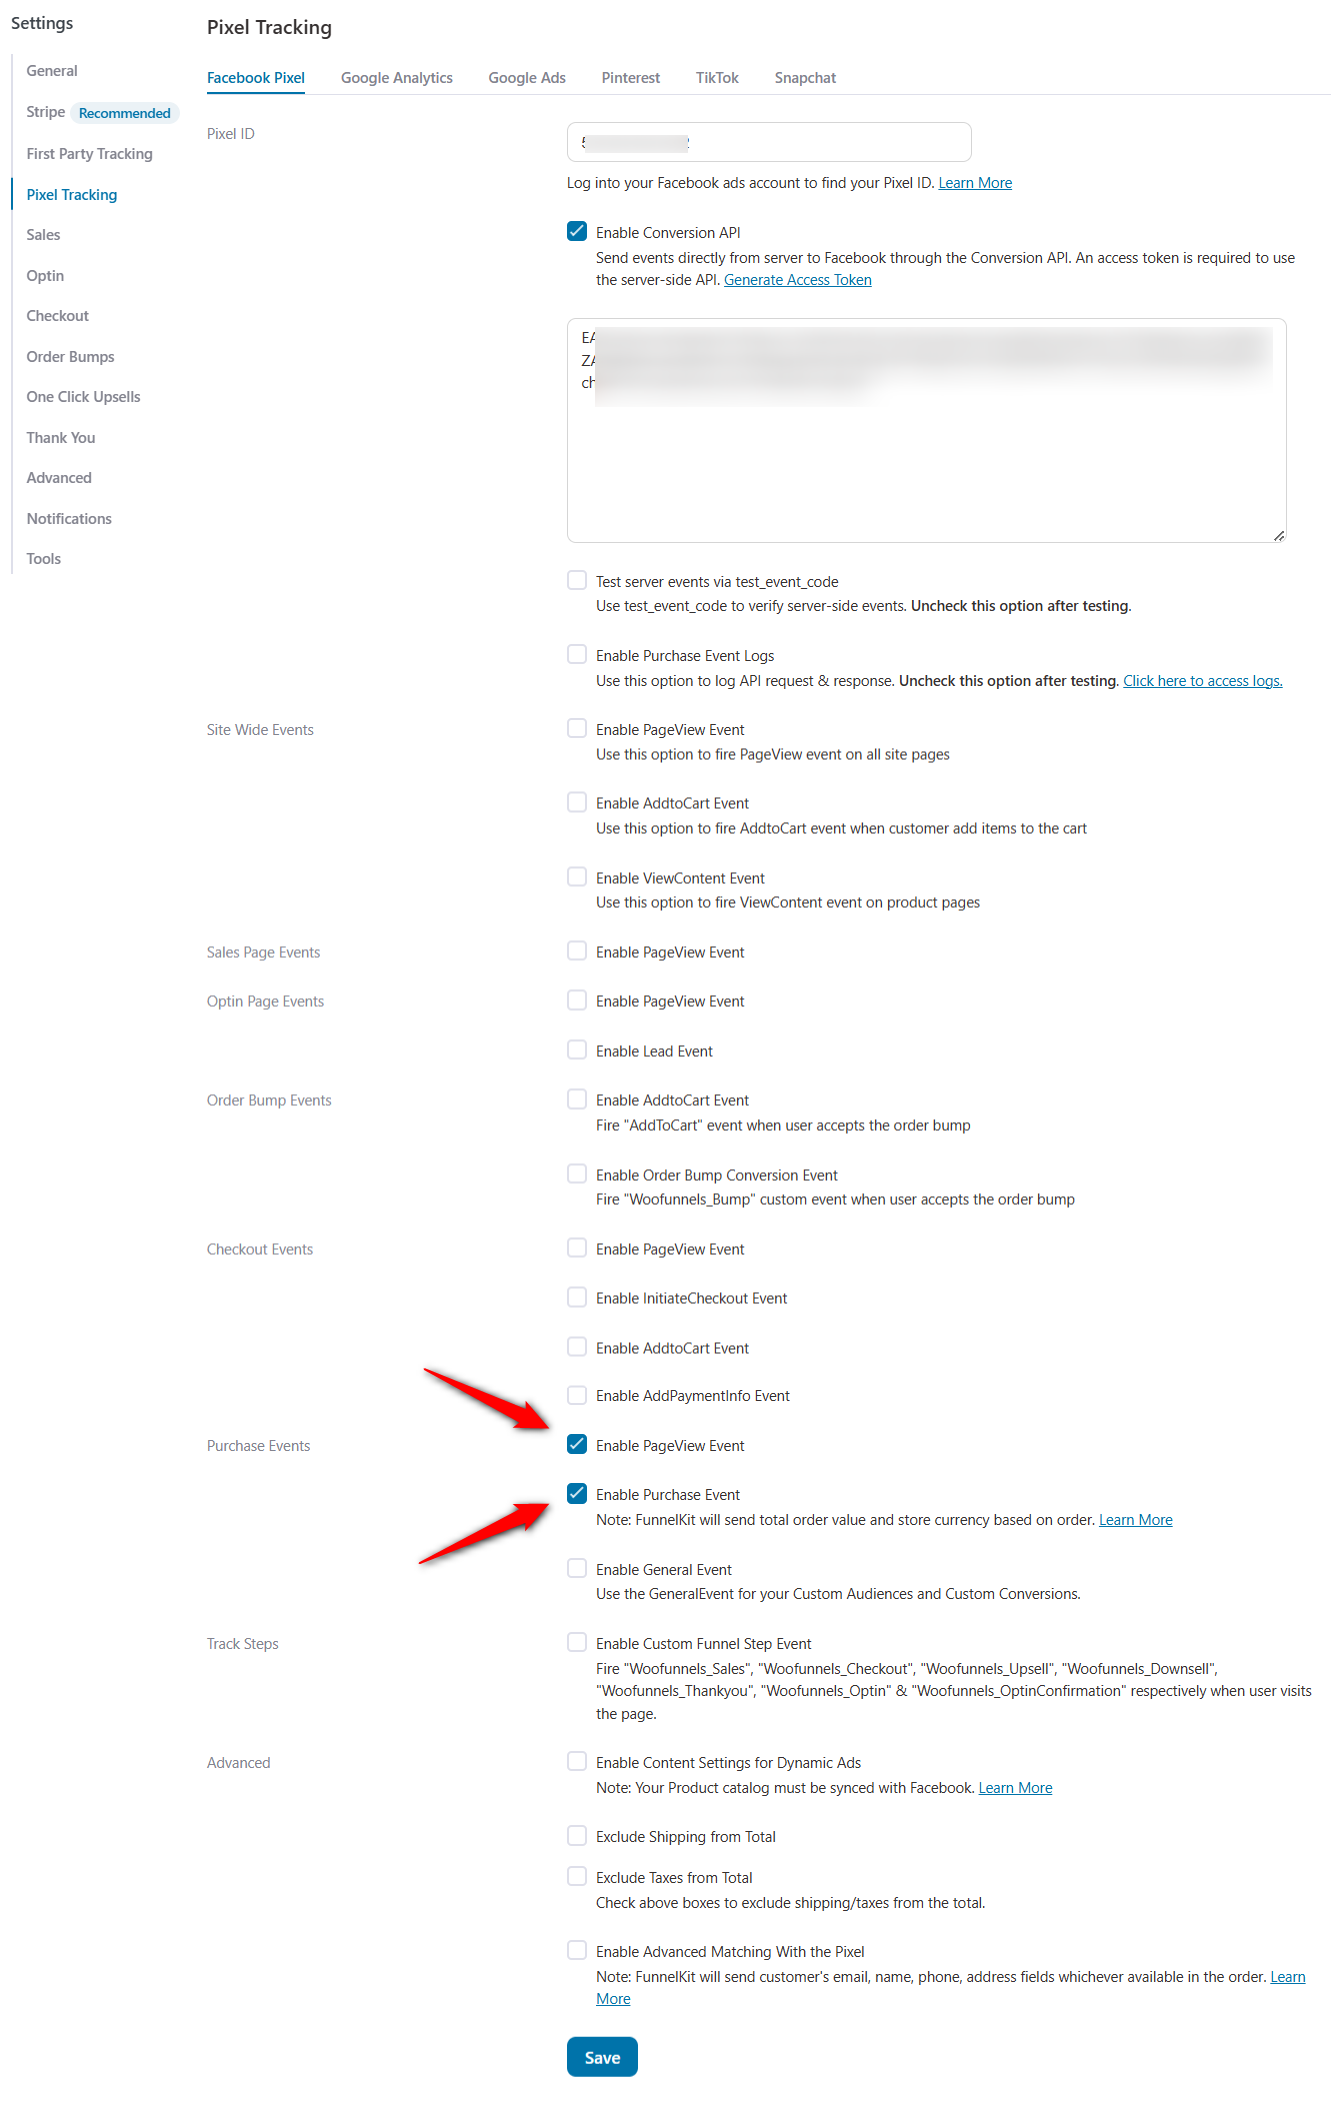
- Meta (Facebook) Pixel, TikTok Pixel, Snapchat, Pinterest, etc.: Fire the Purchase standard event with value and currency on the same page.
If your thank you page is slow or heavily script-laden, tracking pixels can fail to fire before the customer leaves, quietly under-reporting conversions and corrupting your ad data.
Therefore, keep the page lean, load tracking early, and test that events actually fire (use GA4 DebugView and the Meta Pixel Helper) on a real test order.
Server-side tracking (e.g., the GA4 Measurement Protocol or Meta's Conversions API), triggered on the order status change rather than the page load, is the more robust long-term setup because it doesn't depend on the browser rendering the page at all.
If you don't want to use external plugins, FunnelKit lets you track pixels and integrate with GA4.
WooCommerce Thank You Page Not Showing? Common Fixes
If customers complete checkout but never see the order-received page — or see a broken/blank one — work through these in order:
- Flush permalinks: Go to Settings → Permalinks and click Save Changes (no edits needed). This re-registers the order-received endpoint, which is the single most common fix.
- Clear caching: Page caches, object caches, and CDNs can serve a stale or wrong version of a dynamic, order-specific page. Exclude the order-received endpoint from caching.
- Check for redirect conflicts: A custom redirect plugin, a funnel/upsell rule, or a security plugin may be intercepting the endpoint. Temporarily disable redirect logic to isolate it.
- Test for a plugin/theme conflict: Switch to a default theme and deactivate non-essential plugins, then re-enable one at a time to find the culprit.
- Confirm the order actually completed: A failed or pending payment won’t show the standard thank you page. Verify the order exists and its status under WooCommerce → Orders.
If tracking is the real problem (the page shows but conversions aren’t recorded), see the conversion-tracking section above. It’s usually a pixel firing too late, not the page itself.
4 Inspiring WooCommerce Thank You Page Examples to Enhance Your Conversions
Here are some excellent thank you page examples from the experts that improve customer retention and boost conversions:
1. Conduct surveys to find your customers’ preferences
Conducting surveys on the thank you page by asking questions helps you understand your customers’ preferences.
Here’s a thank you page example done right from Harry’s:
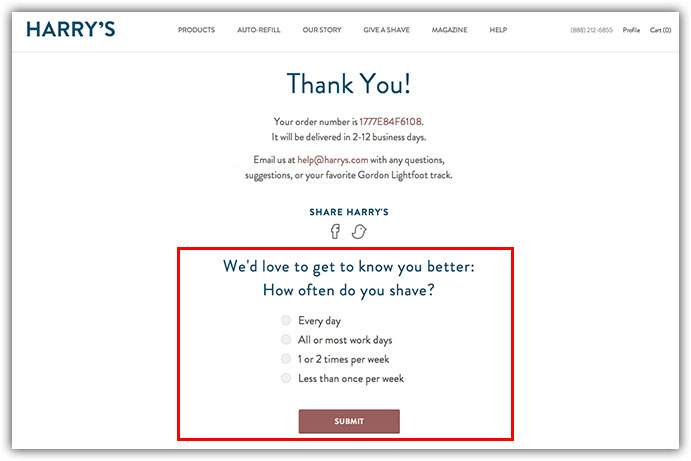
Harry’s has done a great job of finding their customers' likes. It covers a basic question with four options and includes a submit CTA button.
This lets them pitch their products based on their customers’ preferences. They have also provided their social sharing buttons to encourage them to send their purchases to friends and family.
2. Educate customers with an instruction guide
Educating the customers on how to use your product right is crucial. This helps them get the most out of your products.
Look at this thank you page example from Scott Oldford:
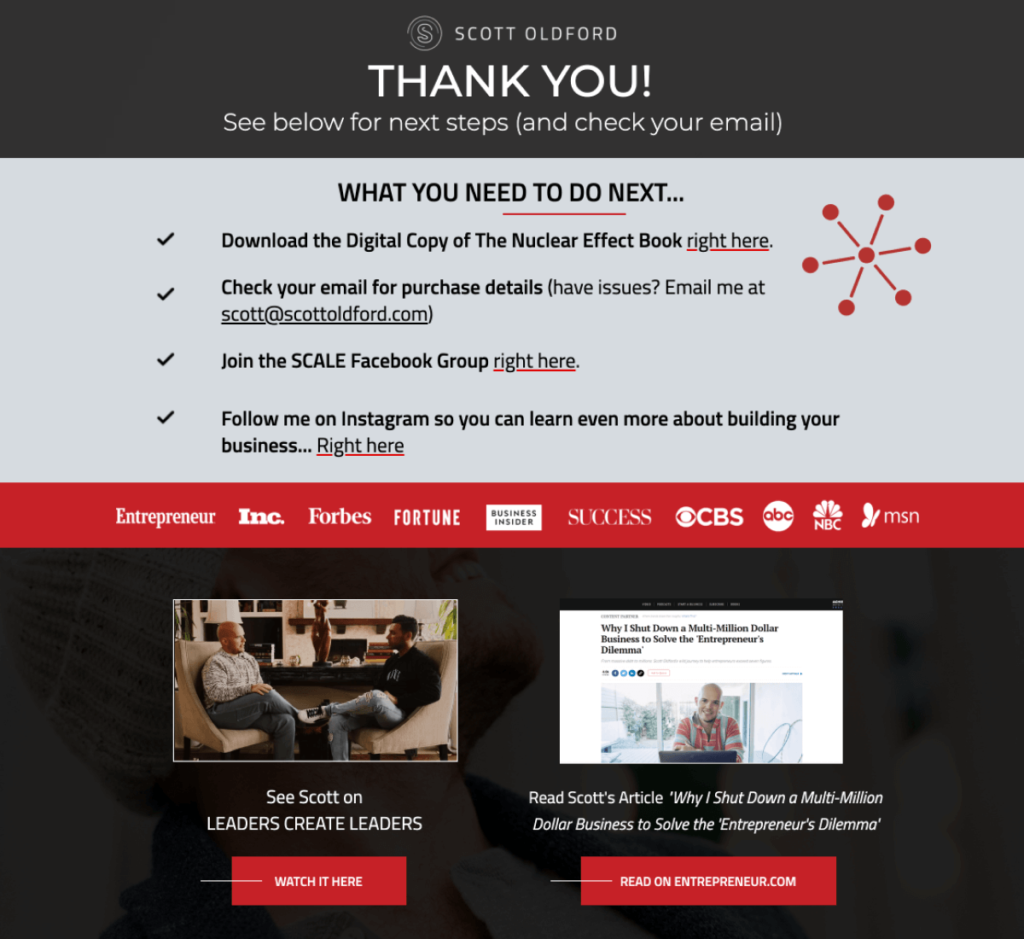
Scott has laid out what the buyer must do next. It also lists credibility markers to demonstrate his authority on the subject.
3. Offer a discount coupon to encourage repeat purchases
Providing discounts to your customers on the thank you page surely helps encourage future purchases.
Look at this thank you page with a discount:
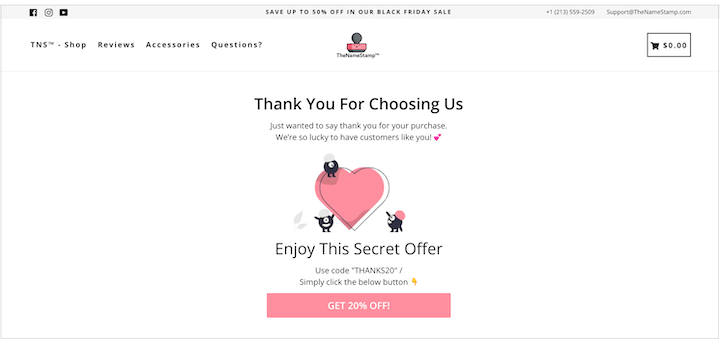
They have gone generous with their offer, offering a 20% discount code that customers can use on their next purchase.
4. Provide relevant items as upsells and cross-sells
Showing relevant product recommendations in the form of upsells and cross-sells works in your favor. It helps your customers to explore more items in your store and boosts sales in the process.
Here’s a classic thank you page example:

They have added a personalized item recommendation section listing relevant items based on their customer’s purchases.
You can replicate these WooCommerce thank you page examples in your store and measure the results.
If you're in doubt, you can always A/B test multiple variations of your thank you pages with FunnelKit and find out which one drives better sales and engagement.
Frequently Asked Questions (FAQs)
In this section, we have answered some of the commonly asked questions related to the WooCommerce thank you page.
To customize the WooCommerce thank-you page for digital products, use a plugin like FunnelKit Funnel Builder. Add download links, a personal thank-you message, and instructions for the product. You can also show order details, recommend related products, and set different pages for specific products or customers.
- A genuine thank-you message and what happens next instructions: Set expectations on delivery or access. Reassuring a customer right after they've spent money cuts anxiety and support tickets.
- Order details and tracking: Keep the order number, items, and totals visible, and add delivery estimates or a tracking link where you can. Surfacing this here is one of the simplest ways to reduce “where's my order?” emails.
- A next-purchase incentive: A discount coupon for the next order, or a one-click upsell on a complementary product, captures buyers while intent is highest.
- Social proof and connection: Invite a review, a social follow, or a referral. The moment right after purchase is when goodwill peaks.
- Account or content links: Point digital buyers to downloads, course access, or setup guides so they get value immediately.
Treat the thank you page as the start of the next sale, not the end of the last one. This is the mindset behind every high-converting version.
Yes, it is. Most marketers underestimate the potential of a thank you page. These are not just for showing order confirmation messages but to make a lasting impression on a customer.
An optimized modern thank you page pitches after-sale upsell offers, adds visual elements, engages with customers, and encourages buyers to join your online communities.
A custom thank you page helps you achieve:
- Maintain a consistent brand experience with your colors, fonts, and logo
- Personalize messages using the customer's name and order details
- Add upsells, cross-sells, and recommended products
- Display testimonials, security icons, and social links for trust
- Share tracking details, return info, and support resources
- Offer exclusive discounts to encourage repeat purchases
A customized thank you page turns a simple confirmation into a powerful moment for building trust, increasing engagement, and boosting repeat sales.
You can customize your thankyou page in WooCommerce using three processes:
1. Use the WordPress block editor
2. With a plugin like FunnelKit that is compatible like Elementor, Bricks, Oxygen, Block Editor, etc. (without any code)
3. Use CSS customization to edit your thank you page template on the thankyou.php file with the custom code
You can change the custom thank you page URL in WooCommerce when editing your page in FunnelKit. On the top, click on the name of your order confirmation page and edit it the way you want.
Once done, click on the edit button next to your Page URL.
This is where you can change your WooCommerce thank you page slug and URL.
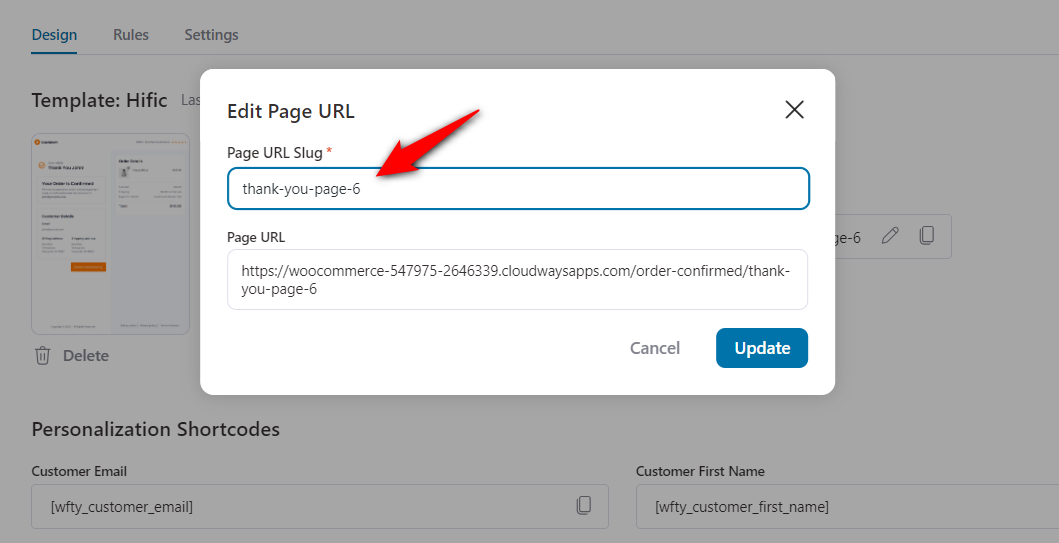
Once done, hit 'Update' to save your changes.
You can manually customize the WooCommerce thank you page by editing template files or using WooCommerce hooks in a child theme.
Manual customization involves:
- Using a child theme
Never edit WooCommerce core files or a parent theme directly. - Overriding the thank you page template
Copy thankyou.php from
wp-content/plugins/woocommerce/templates/checkout/
to
wp-content/themes/your-child-theme/woocommerce/checkout/. - Editing the template
Update the order confirmation message, add custom HTML such as shipping details or support information, and adjust layout elements as needed. - Styling via CSS
Add or modify styles in your child theme’s style.css for any new classes you introduce. - Using WooCommerce hooks (optional)
Add conditional content like coupons or order-based messages using hooks such as woocommerce_thankyou in your child theme’s functions.php.
This manual approach requires ongoing maintenance, can break during WooCommerce updates, and isn’t covered under WooCommerce support, which is why we recommend using the safer, update-friendly method outlined earlier in this blog instead.
Are You Ready to Create Your WooCommerce Custom Thank You Page?
A thank you page is the final step of your sales funnel and the point where the customer relationship truly begins. Every successful order is a chance to build long-term loyalty and increase customer lifetime value.
By creating an optimized WooCommerce thank you page, you go beyond simple order confirmation and unlock powerful post-purchase growth opportunities.
In this post, we've shown you three ways to create that.
Use the free block editor for a quick, no-code brand refresh. Use a plugin when you want the page to actively grow revenue with upsells, A/B tests, and per-product targeting. Or reach for hooks and a template override when you want precise, lightweight control.
Whatever you choose, make sure the page thanks the customer, sets expectations, reduces support tickets, and tees up the next purchase.
That’s the difference between a confirmation screen and a conversion surface.
If you need a thank you page plugin, there's no match to FunnelKit Funnel Builder’s drag-and-drop builder that design high-converting thank you pages without code.
Ready to turn your default WooCommerce thank you page into a revenue-generating asset? Start building with FunnelKit today.
Editorial Team
July 7, 2026Are you looking for WooCommerce checkout optimization hacks to streamline your users' shopping experience? 7 out of 10 shoppers who reach a WooCommerce checkout leave without paying; according to Baymard...
Editorial Team
July 6, 2026A WooCommerce order form lets customers select multiple products, set quantities, and choose variations from a single page instead of visiting individual product pages. There are two ways to add...
Editorial Team
July 6, 2026The Bricks WooCommerce builder is built directly into the Bricks theme. Activate the free WooCommerce plugin, and Bricks unlocks more than 30 store-specific elements plus visual templates for every part...


