Cash App Pay is a digital payment method that allows customers to pay using their Cash App balance or linked payment methods through Square.
Customers are redirected or prompted in Cash App to approve the payment, making checkout faster and more mobile-friendly.
In this guide, we’ll walk you through how to set up Cash App payments in WooCommerce using Square.
Configuration
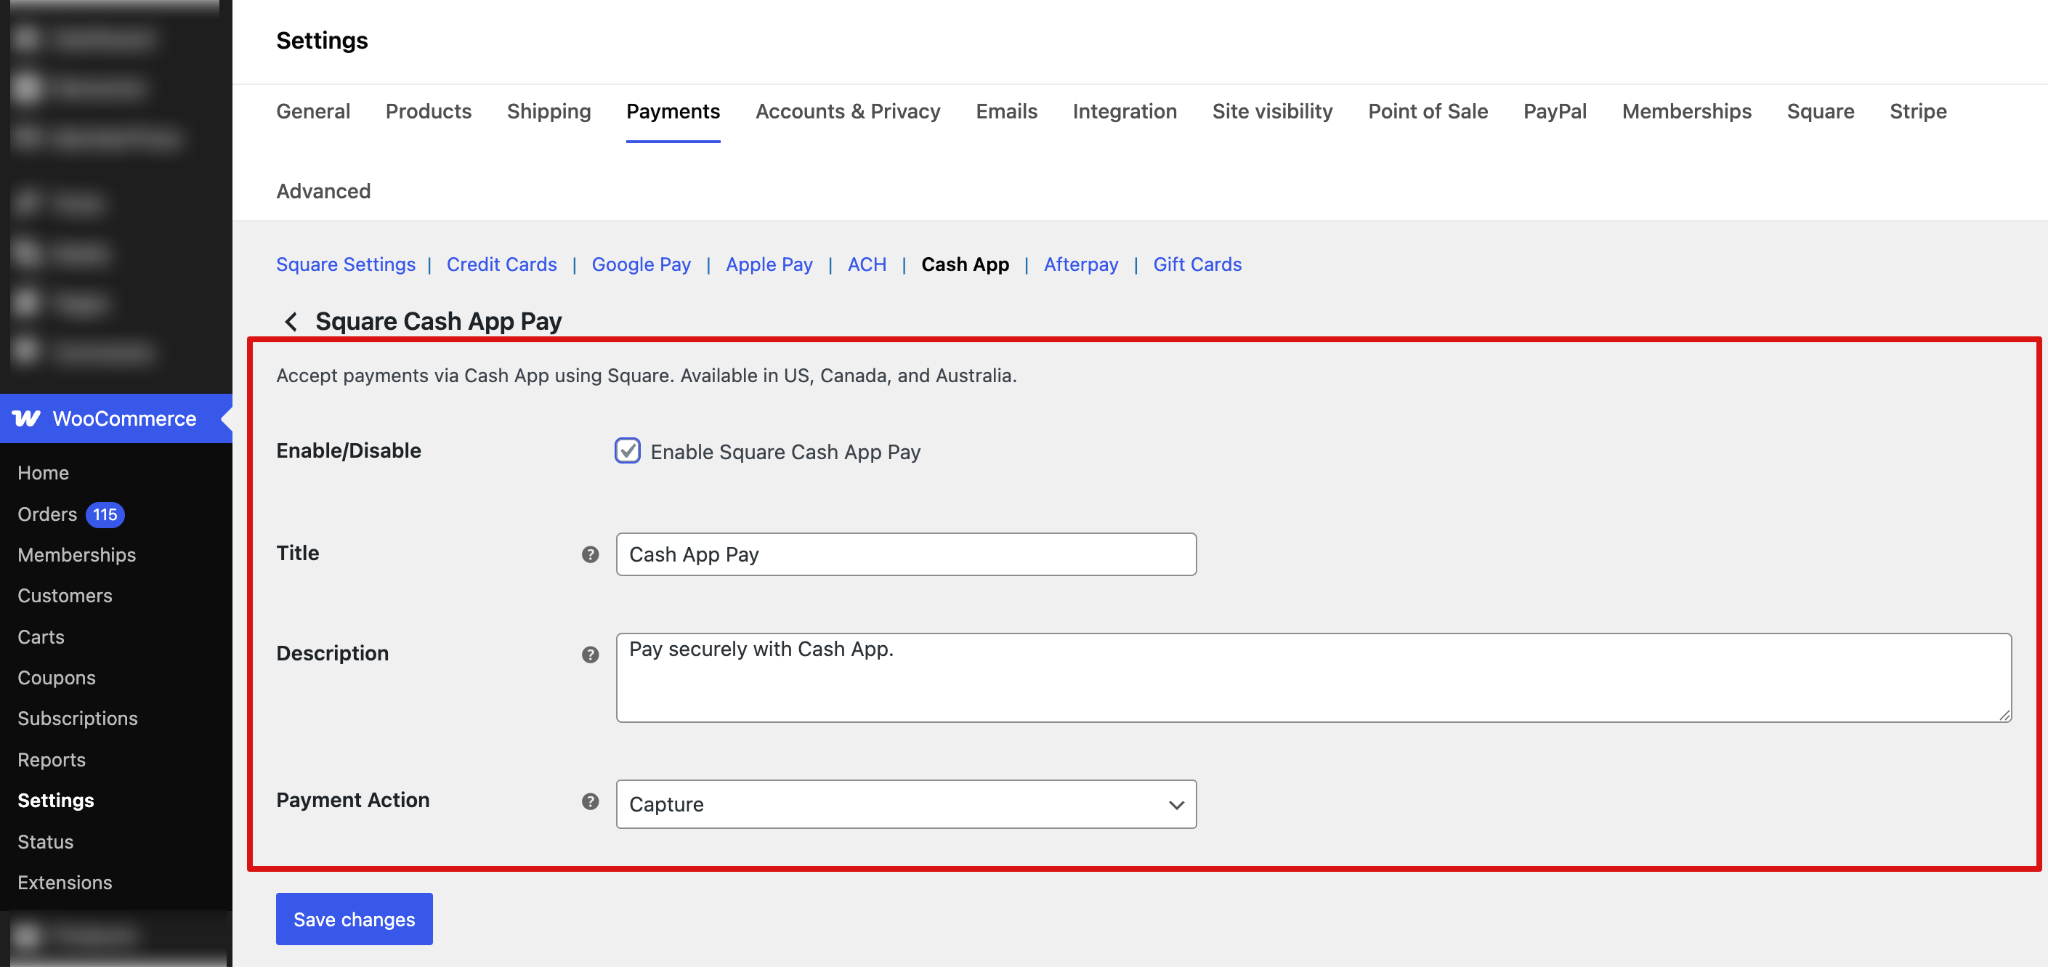
Step 1: Go to the Cash App Pay section under Square
Navigate to WooCommerce ⇨ Settings ⇨ Square and click on the Cash App Pay tab.

Step 2: Configure the Cash App Pay option
Next, configure all the Cash App Pay settings:
- Enable/Disable: Enable this option to allow customers to pay using Cash App Pay at checkout.
- Title: This controls the payment method title displayed to customers during checkout. Default: Cash App Pay
- Description: This controls the description shown to customers at checkout. Default: Pay securely with Cash App.
- Payment Action: Choose how you want to process payments:
- Capture: Funds are charged immediately when the order is placed.
- Authorize: Funds are reserved and can be captured later manually before settlement.
Make sure to hit “Save Changes.”
Testing
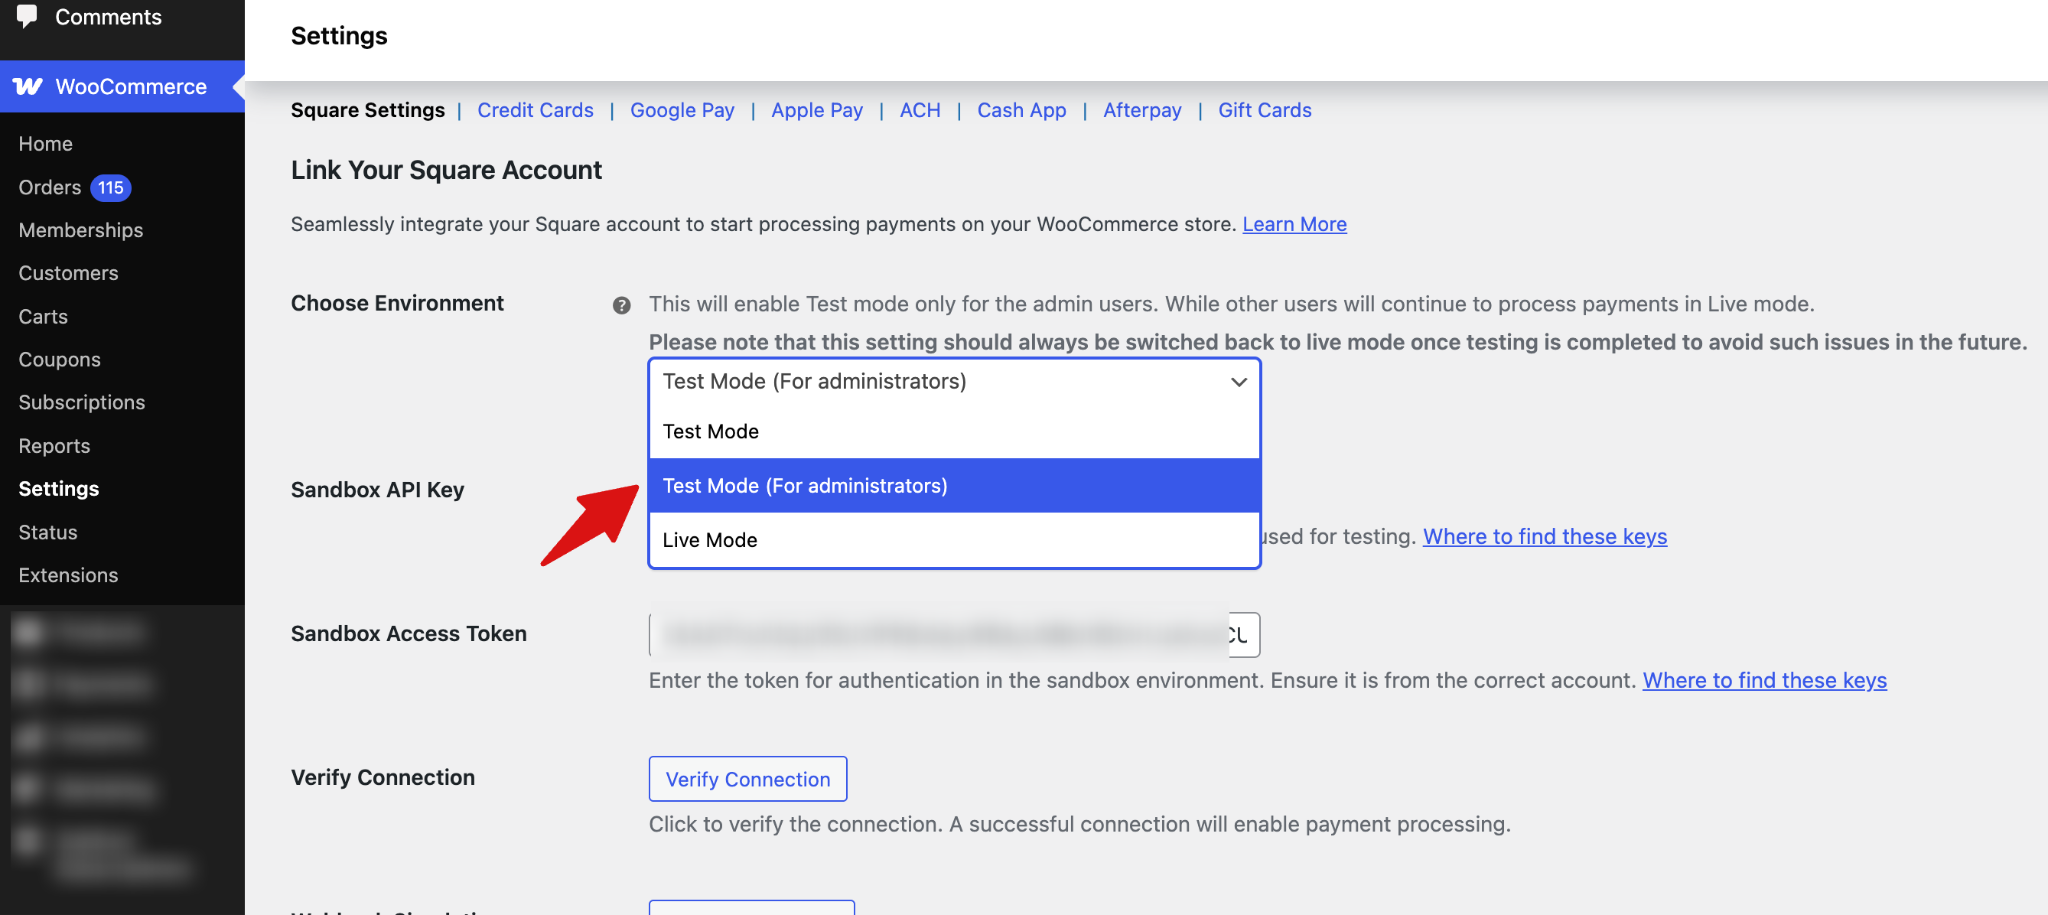
Ensure you’ve enabled test mode. With FunnelKit Square Gateway for WooCommerce, you can enable administrator-only mode so that payment processing is restricted to admin users during testing.
This does not affect the customer experience. Customers continue to see and use the live checkout as normal, while only admins are able to test transactions in a controlled environment.
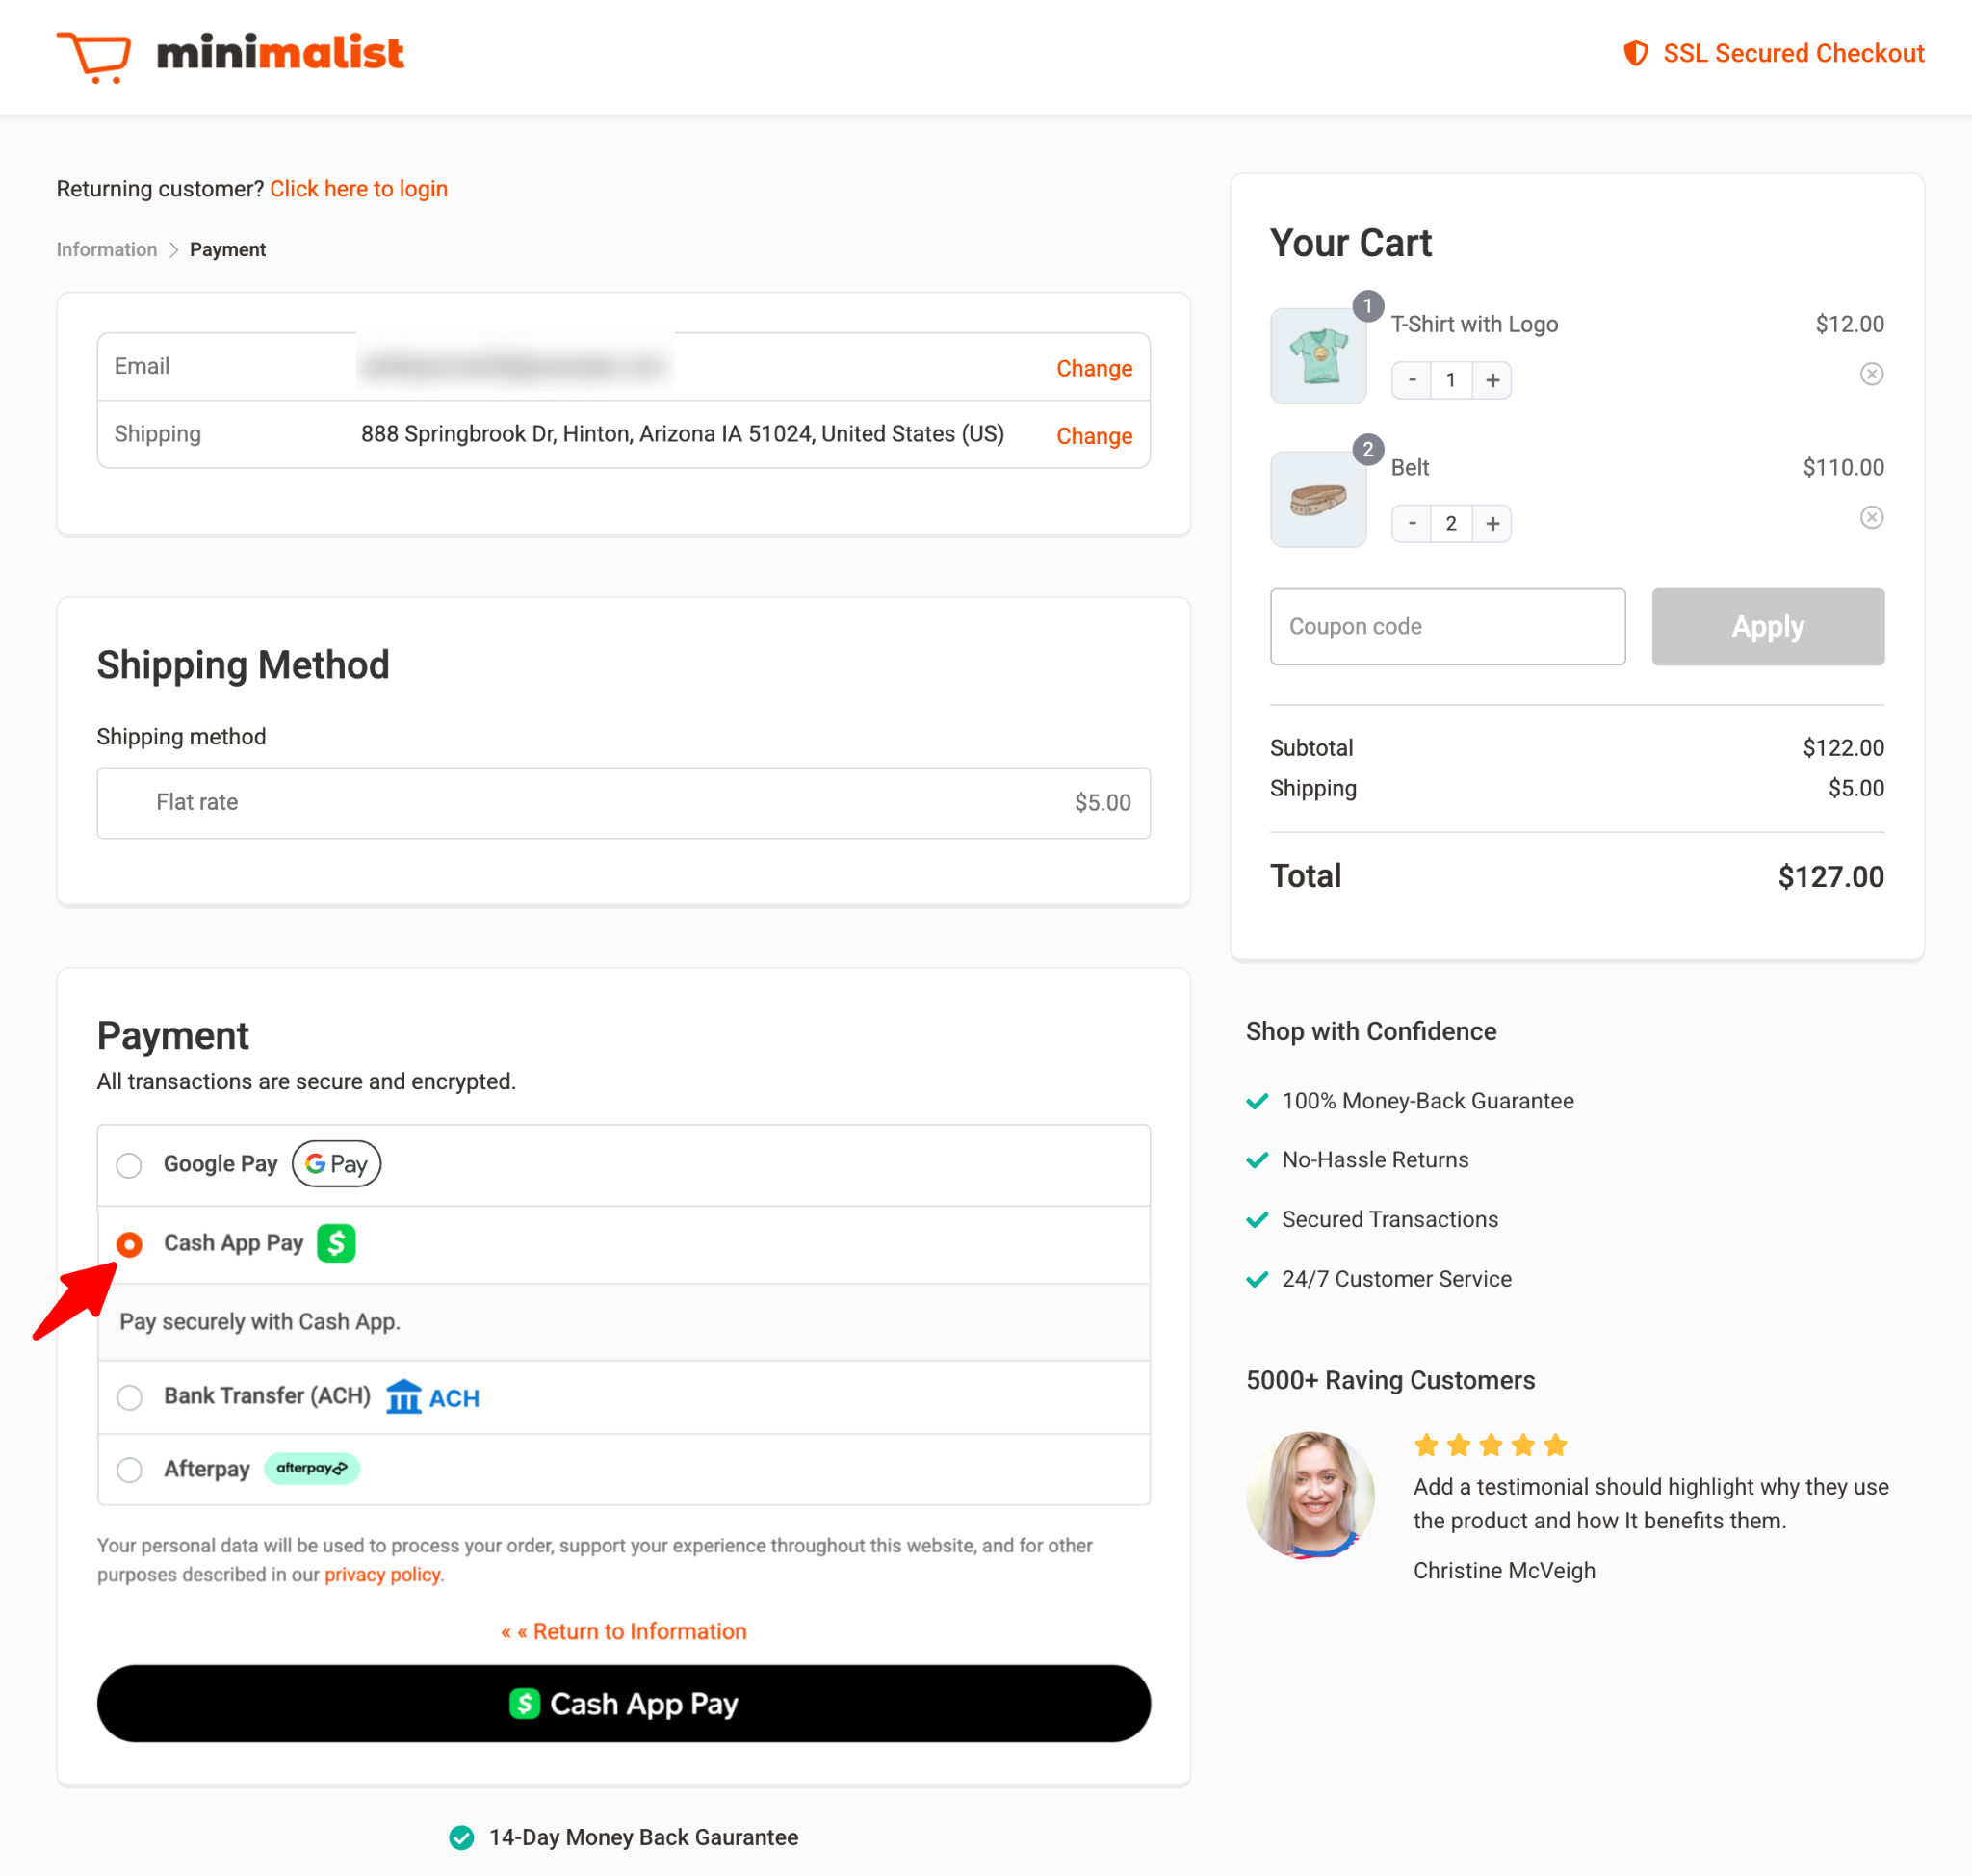
Next, place a test order to check if the payment option is working properly. While checking out, select “Cash App Pay.”
After a successful test order, monitor the transaction logs and Square’s transaction history for test transactions.
Switch from Sandbox to Live Mode by changing the environment in Square settings.
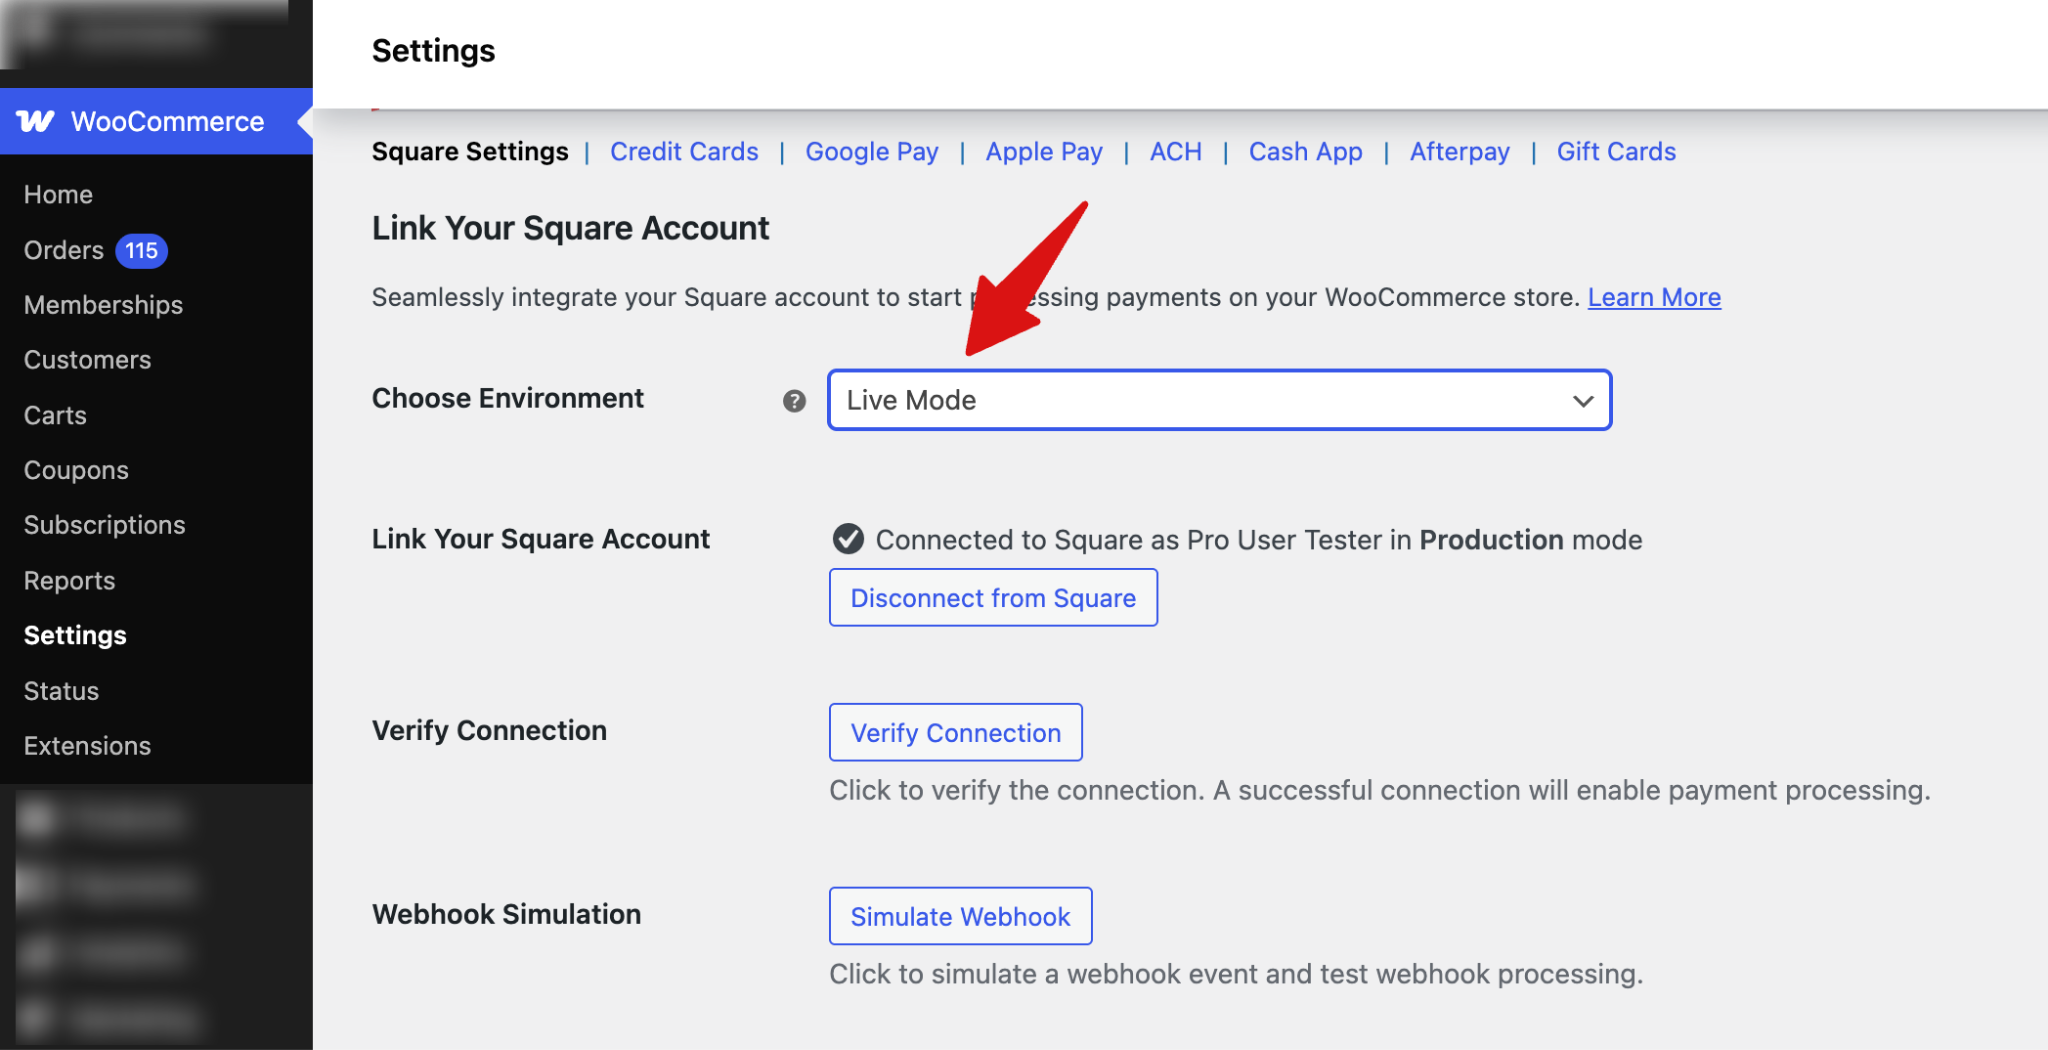
Save the changes when done.
This is how you can set up and test Cash App payments through the Square WooCommerce gateway.


