Follow the instructions below for the setup and onboarding process for the Stripe Gateway for WooCommerce.
Here's the video tutorial of our full onboarding process and enabling express payments in your WooCommerce store:
Step 1: Start the onboarding process
Once you’ve installed and activated Stripe Gateway for WooCommerce, click on the Start Onboarding Wizard button.
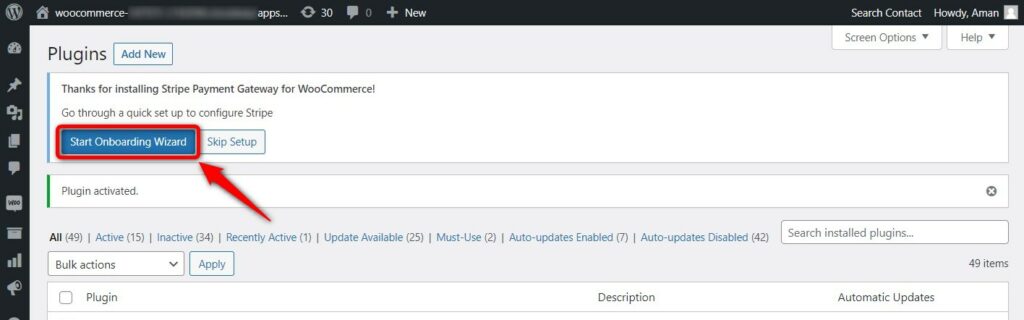
It’ll take you to the connection process.
Step 2: Log in to your Stripe account
Click on Connect with Stripe.
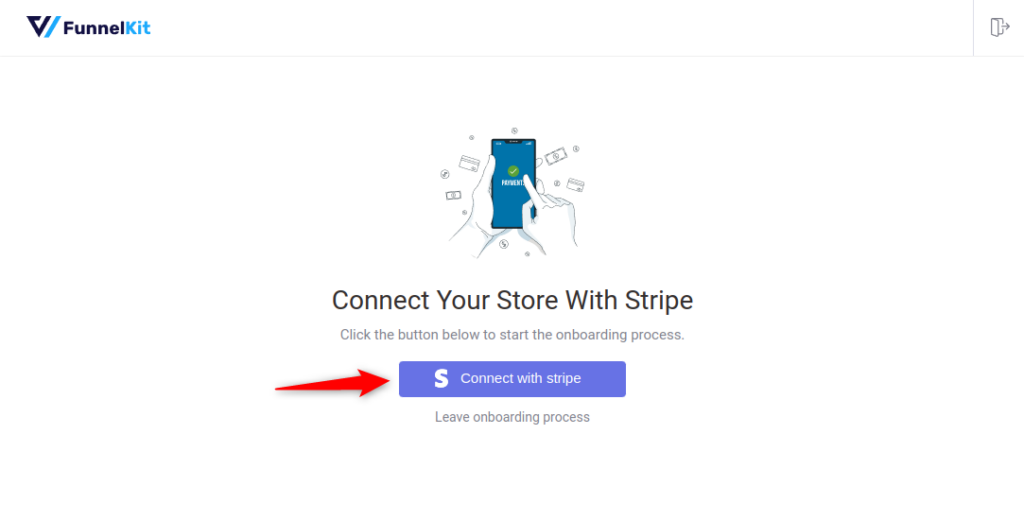
It’ll take you to the authorization page.
Enter the email address for your Stripe account and click on Next.
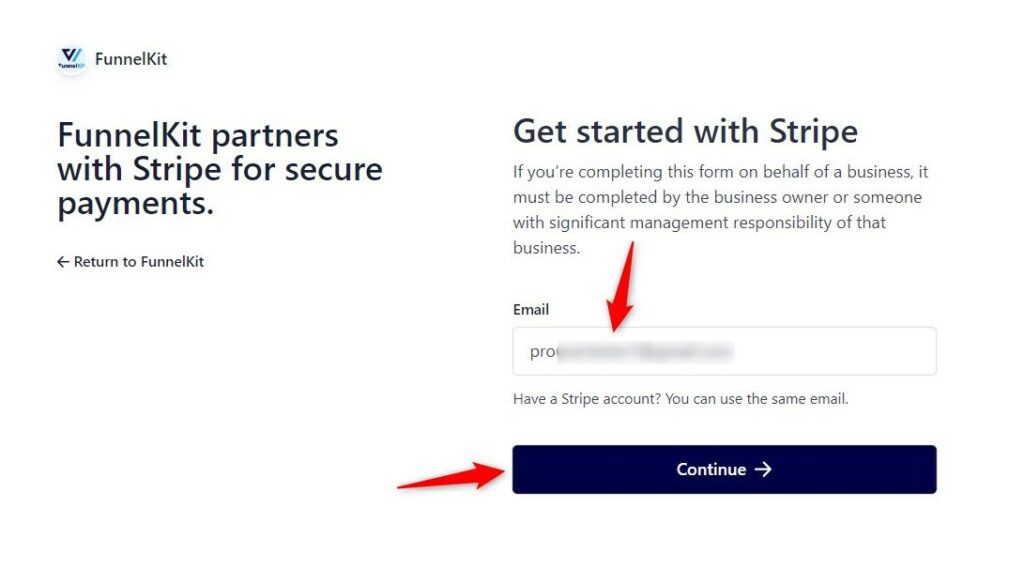
Enter the password and log in to your Stripe account.

Verify the login by entering the 6-digit verification code sent to your registered phone number.
Step 3: Select your account to connect with Stripe Gateway for WooCommerce
Next, select the account you’d like to connect with Stripe Gateway for WooCommerce.
Once done, hit Connect.

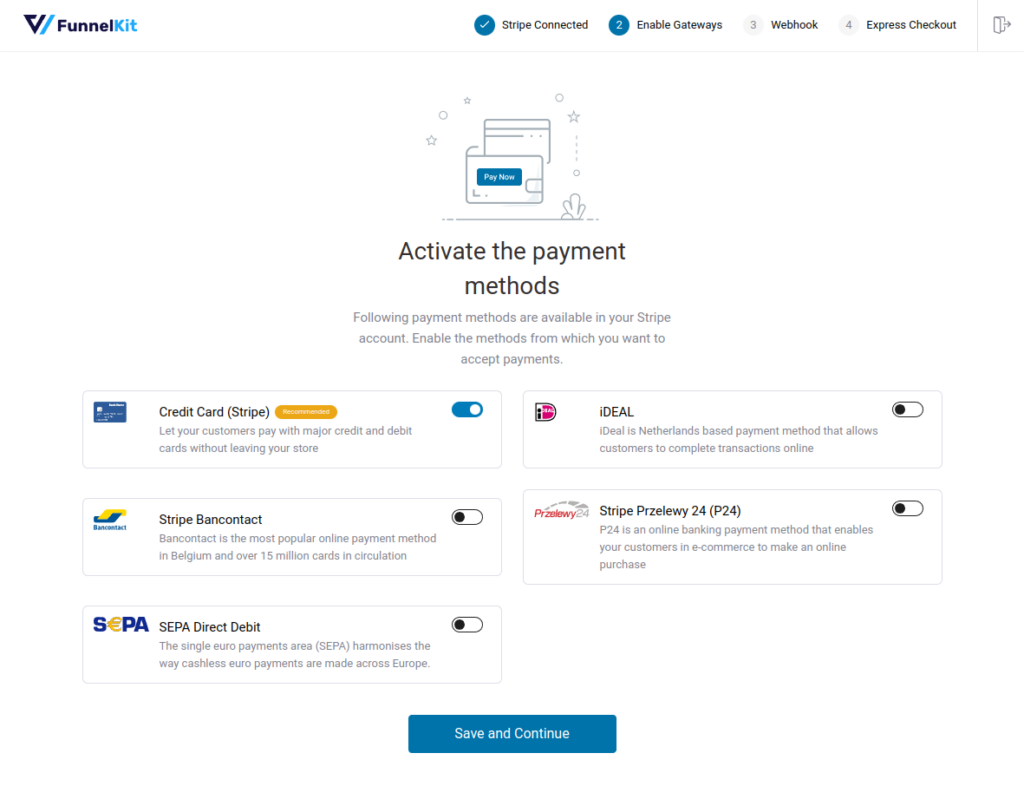
Now, enable all the payment gateways you want to offer in your WooCommerce store.
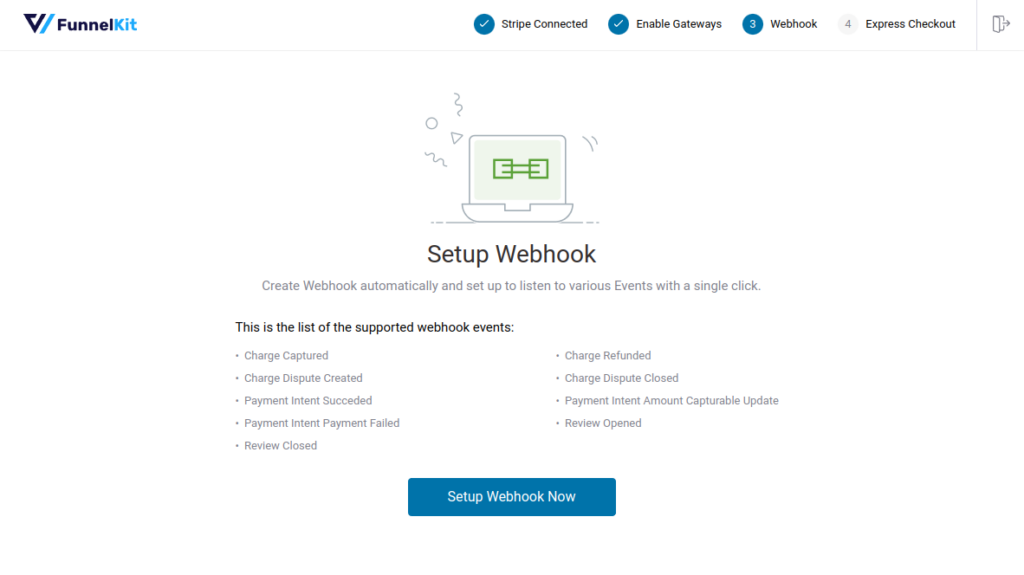
You’ll need to require webhooks.
Click on Setup Webhook Now.
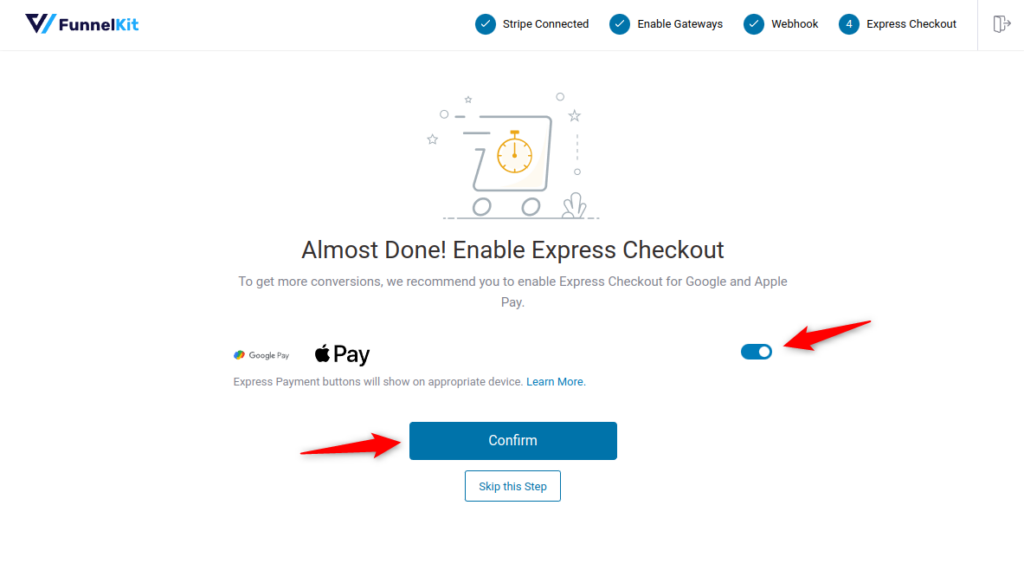
Now the plugin will ask for your confirmation whether you want to enable the express checkout or not.
You can choose to confirm or skip this step for now.
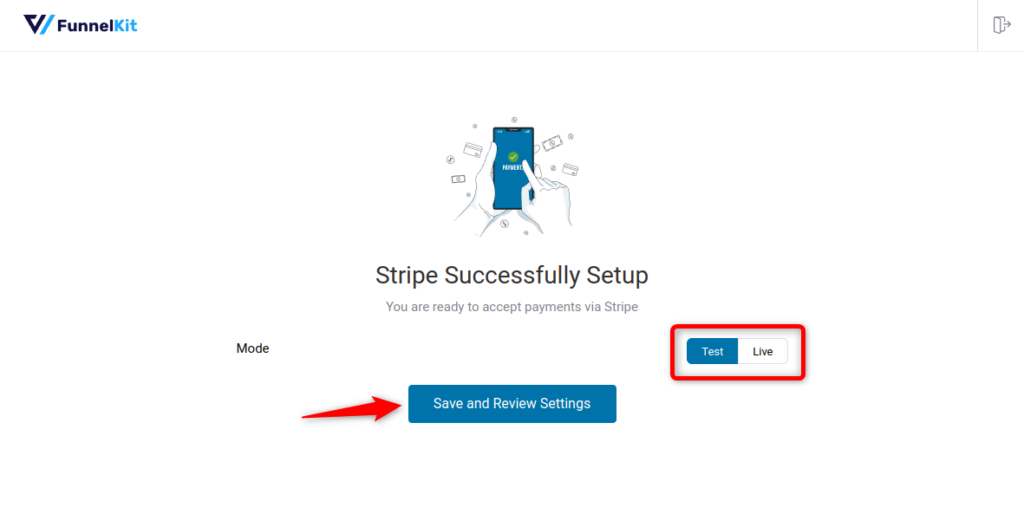
Next, confirm the mode you want to run.
For now, we will be running on test mode. Once done, click on the Save and Review Settings button.
Now that Stripe is successfully connected with the plugin, all the details from your account will be fetched here including:
- Webhook ID
- Webhook URL
- Live and test webhook secret
- Debug log URL
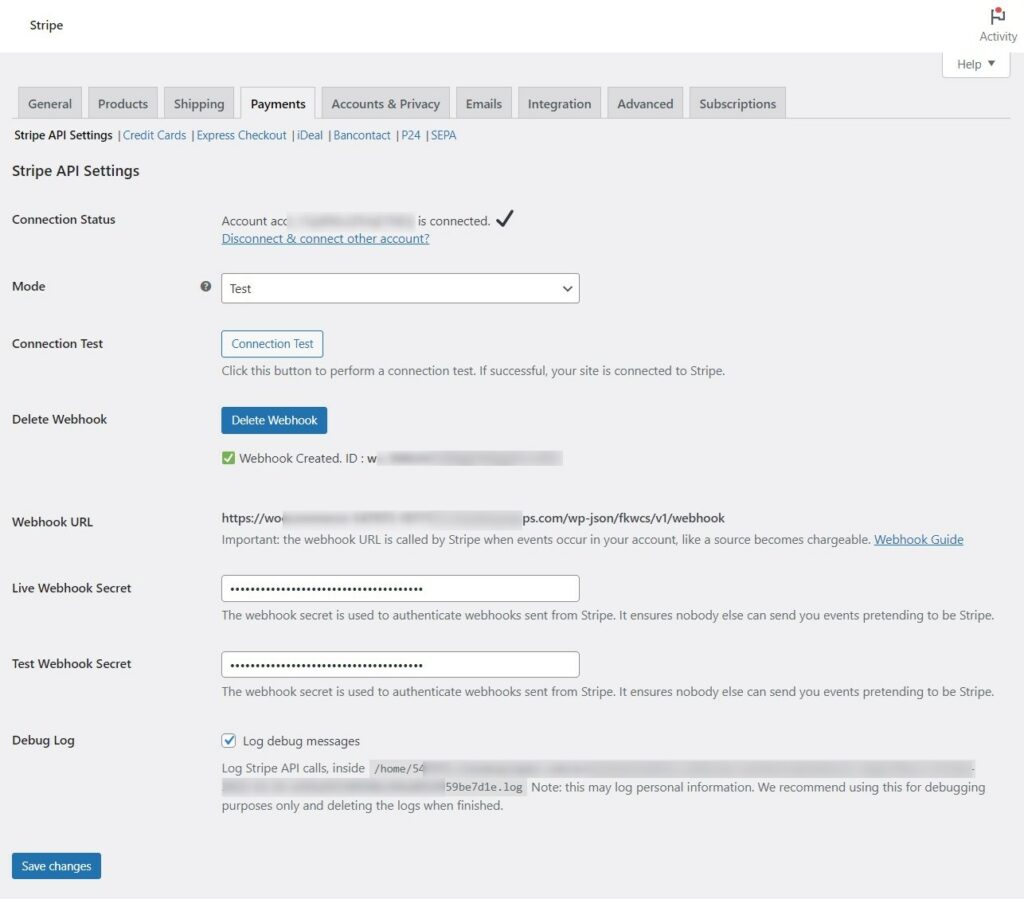
It’ll successfully connect Stripe with the plugin.
That’s it! You have successfully set up the Stripe Gateway for WooCommerce.
Please note that if by any chance, you’re not able to connect your Stripe account with the setup and onboarding process, you can manually configure your API Settings.
This was all about the setup and onboarding process for the Stripe Gateway for WooCommerce.
You can now start setting up the payment methods in your WooCommerce store.


