Configuration
Stripe Gateway for WooCommerce supports all major credit and debit cards including Visa, MasterCard, Discover, Diners Club, American Express, JCB, UnionPay, and many more.
Follow the step-by-step instructions to set up credit card payment options:
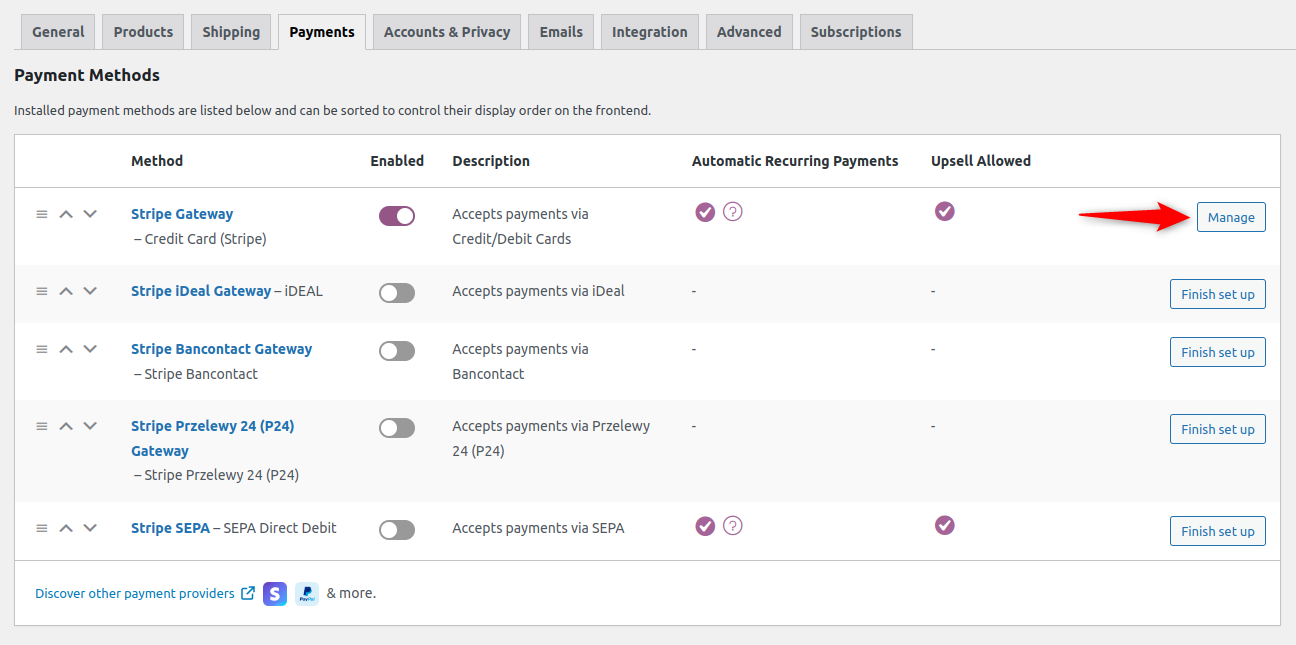
Step 1: Navigate to the Payments under WooCommerce Settings
Go to WooCommerce ⇨ Settings ⇨ Payments tab.
Click on Manage next to Stripe Gateway - Credit Card (Stripe).
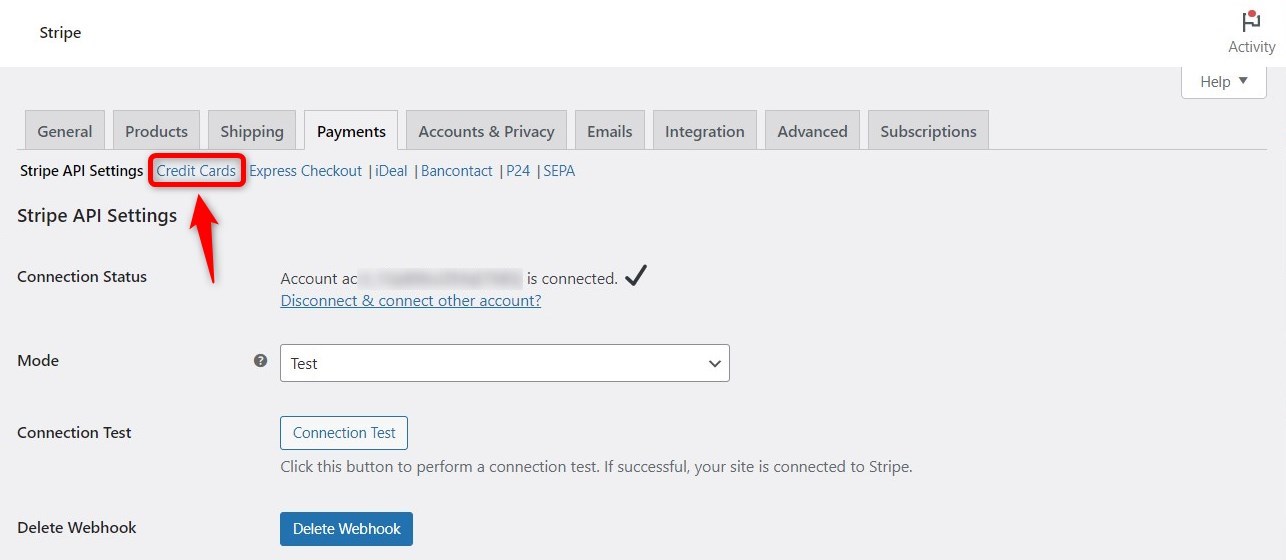
Step 2: Configure the Credit Cards option
Click on the Credit Cards section.
Check the box next to Enable Stripe Gateway.
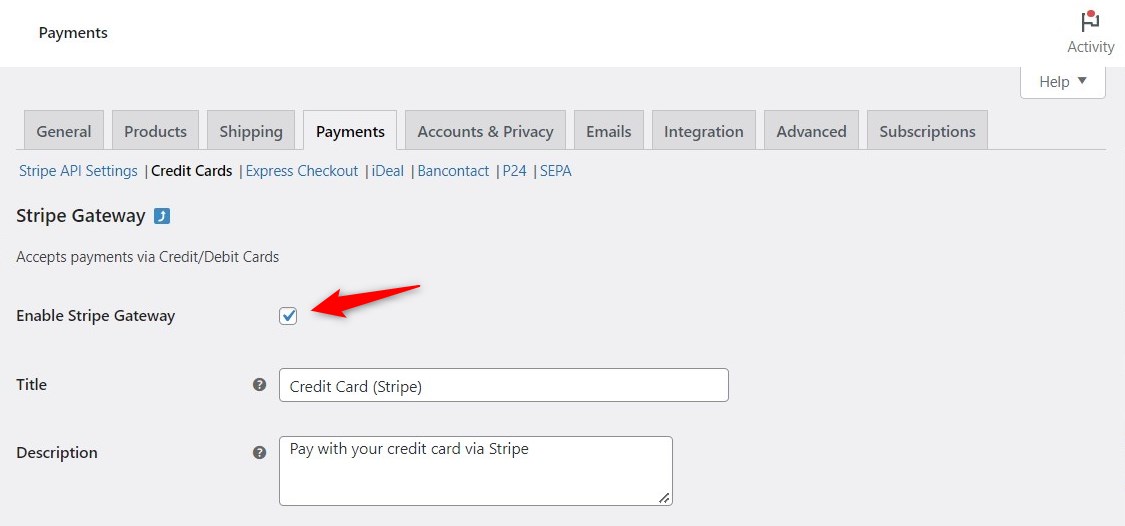
Make sure to enter the title and description that will appear on the checkout page.
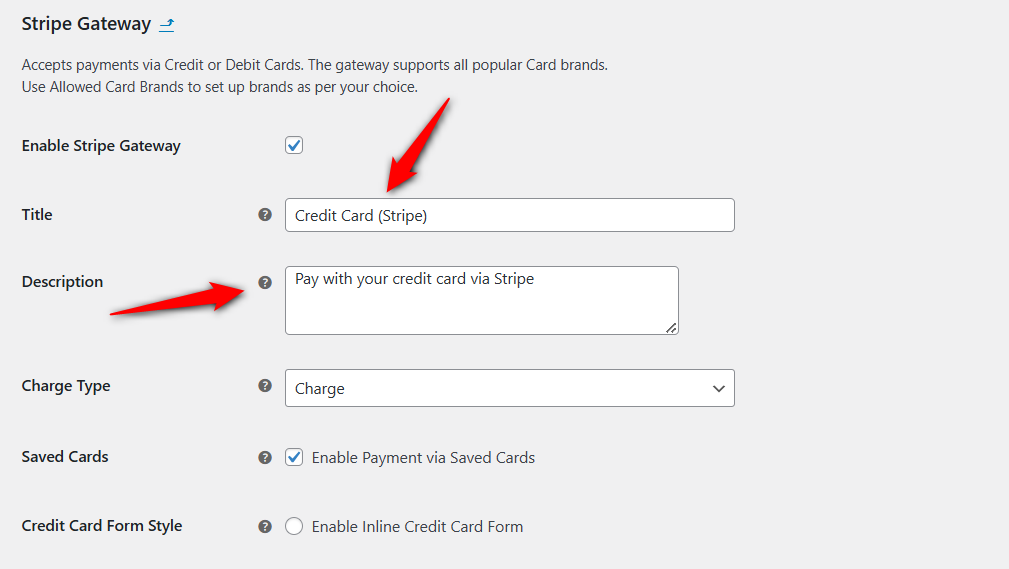
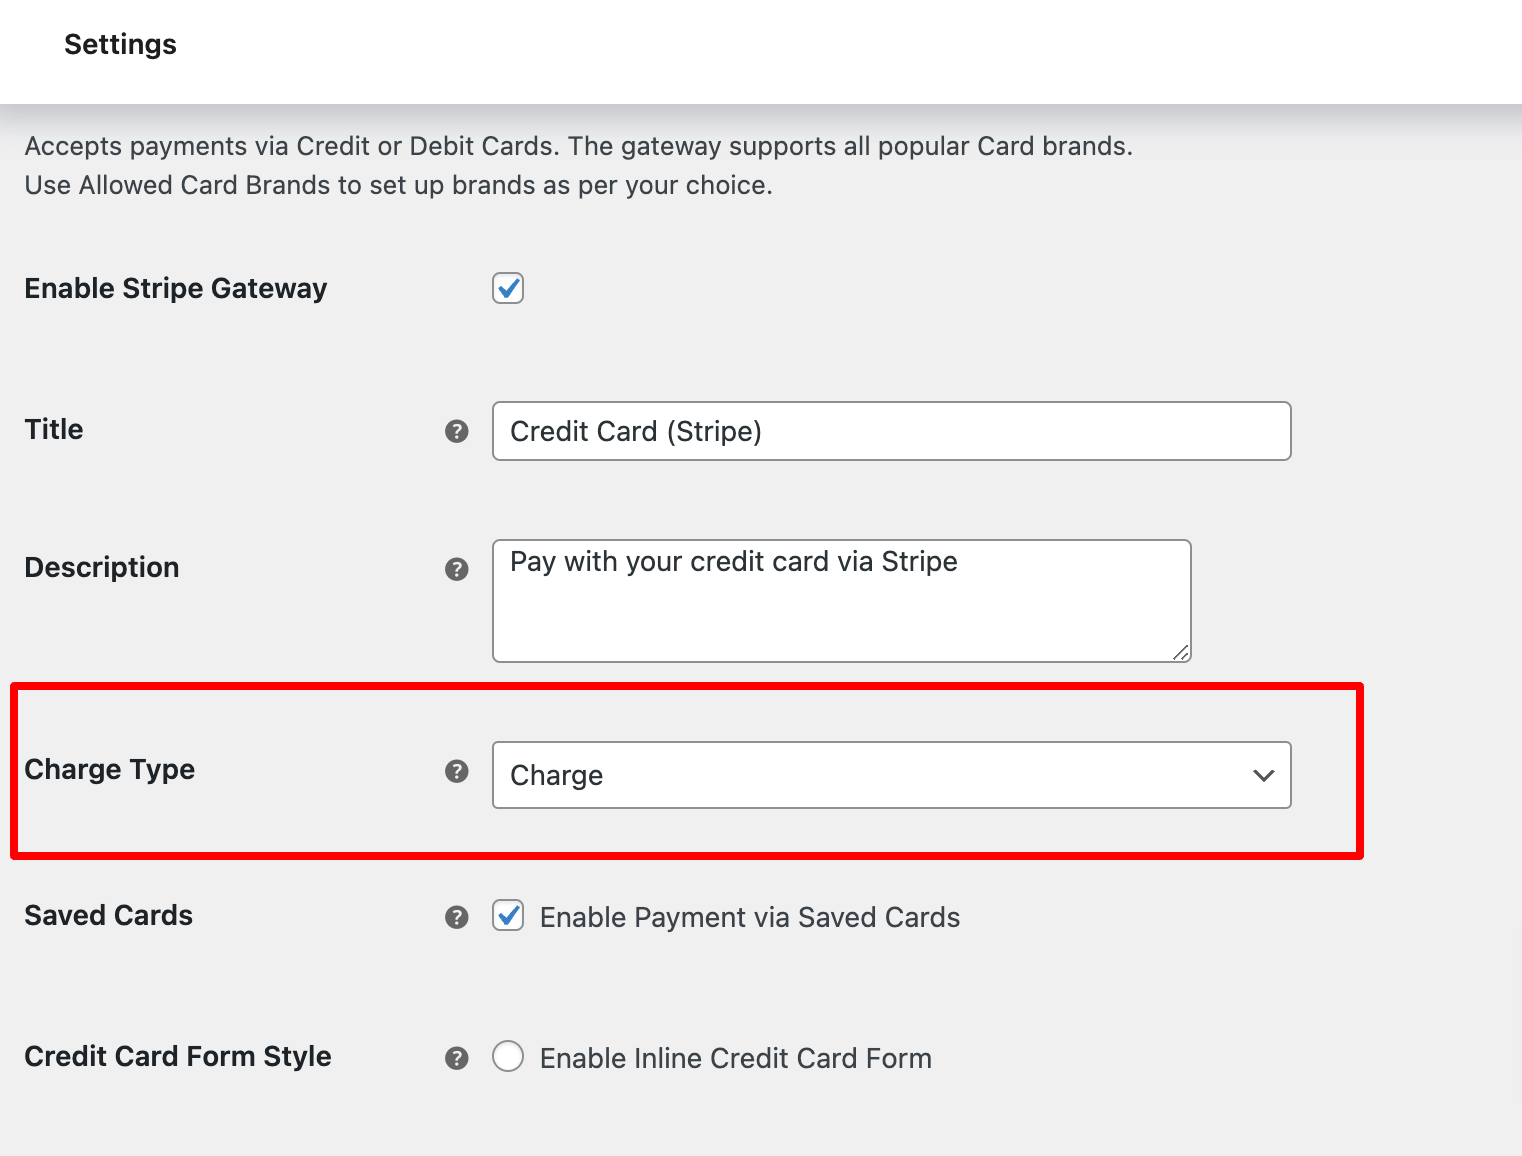
Step 3: Specify charge type for credit card payments
Here are the additional settings you need to do:
- Charge type: Two charge types are available.
- Charge: Select this option to charge your customers immediately
- Authorize: Select this option for your customers to approve each payment within a few days (max up to 7 days) - this option requires webhook integration
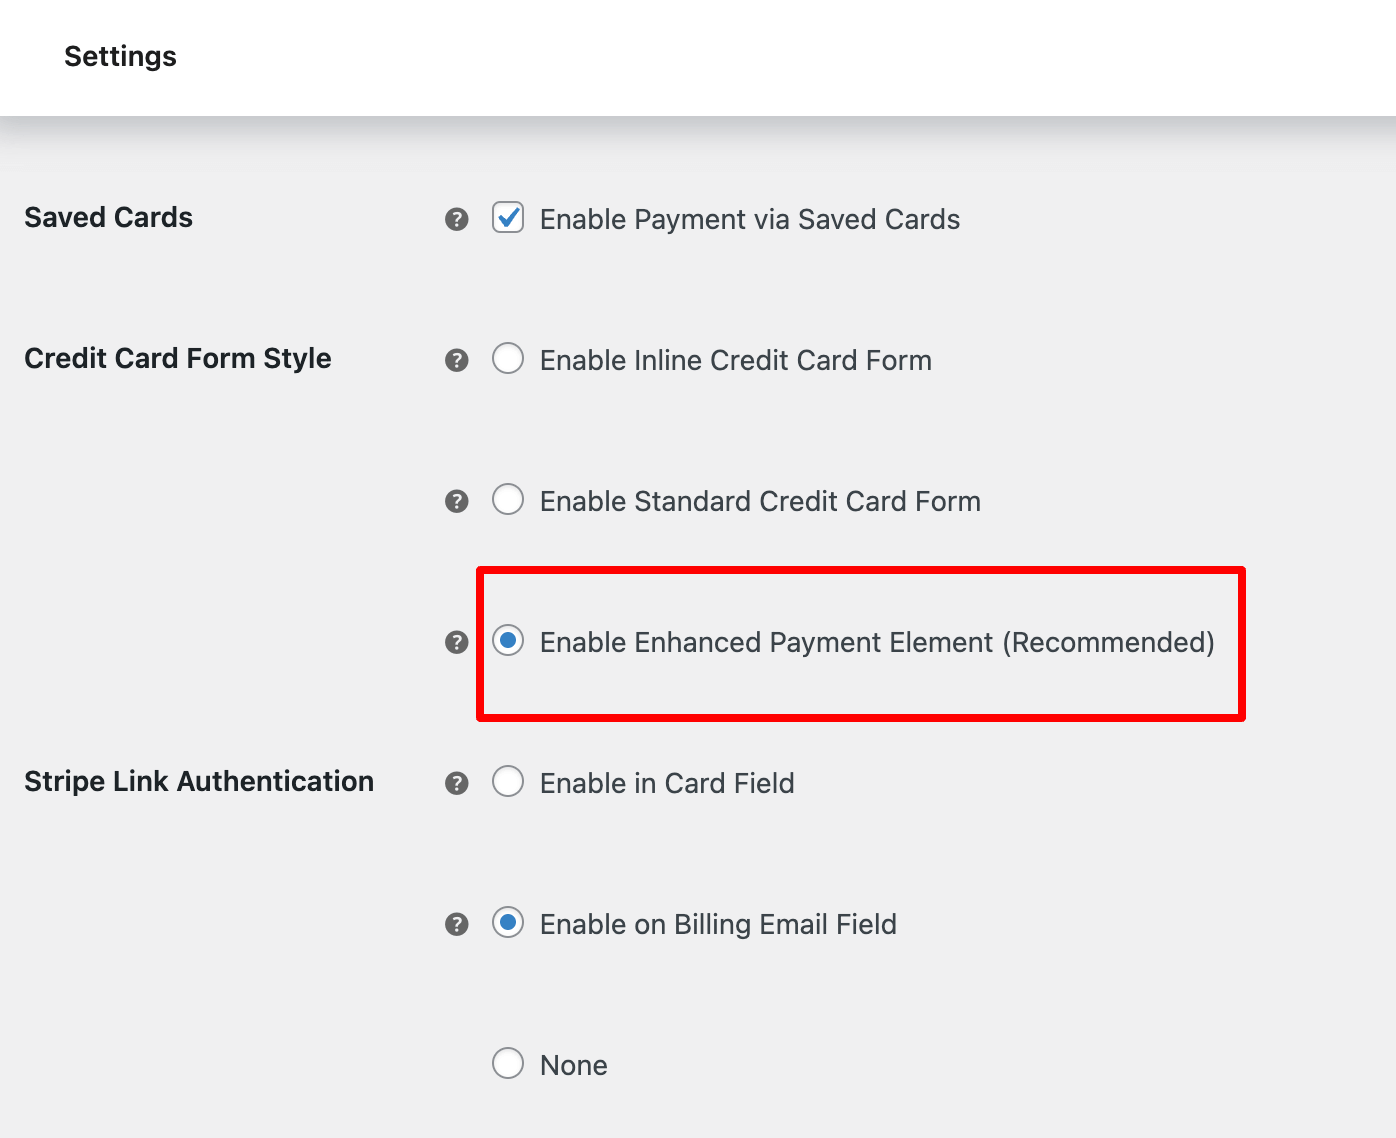
Step 4: Choose card form style
You get three options.
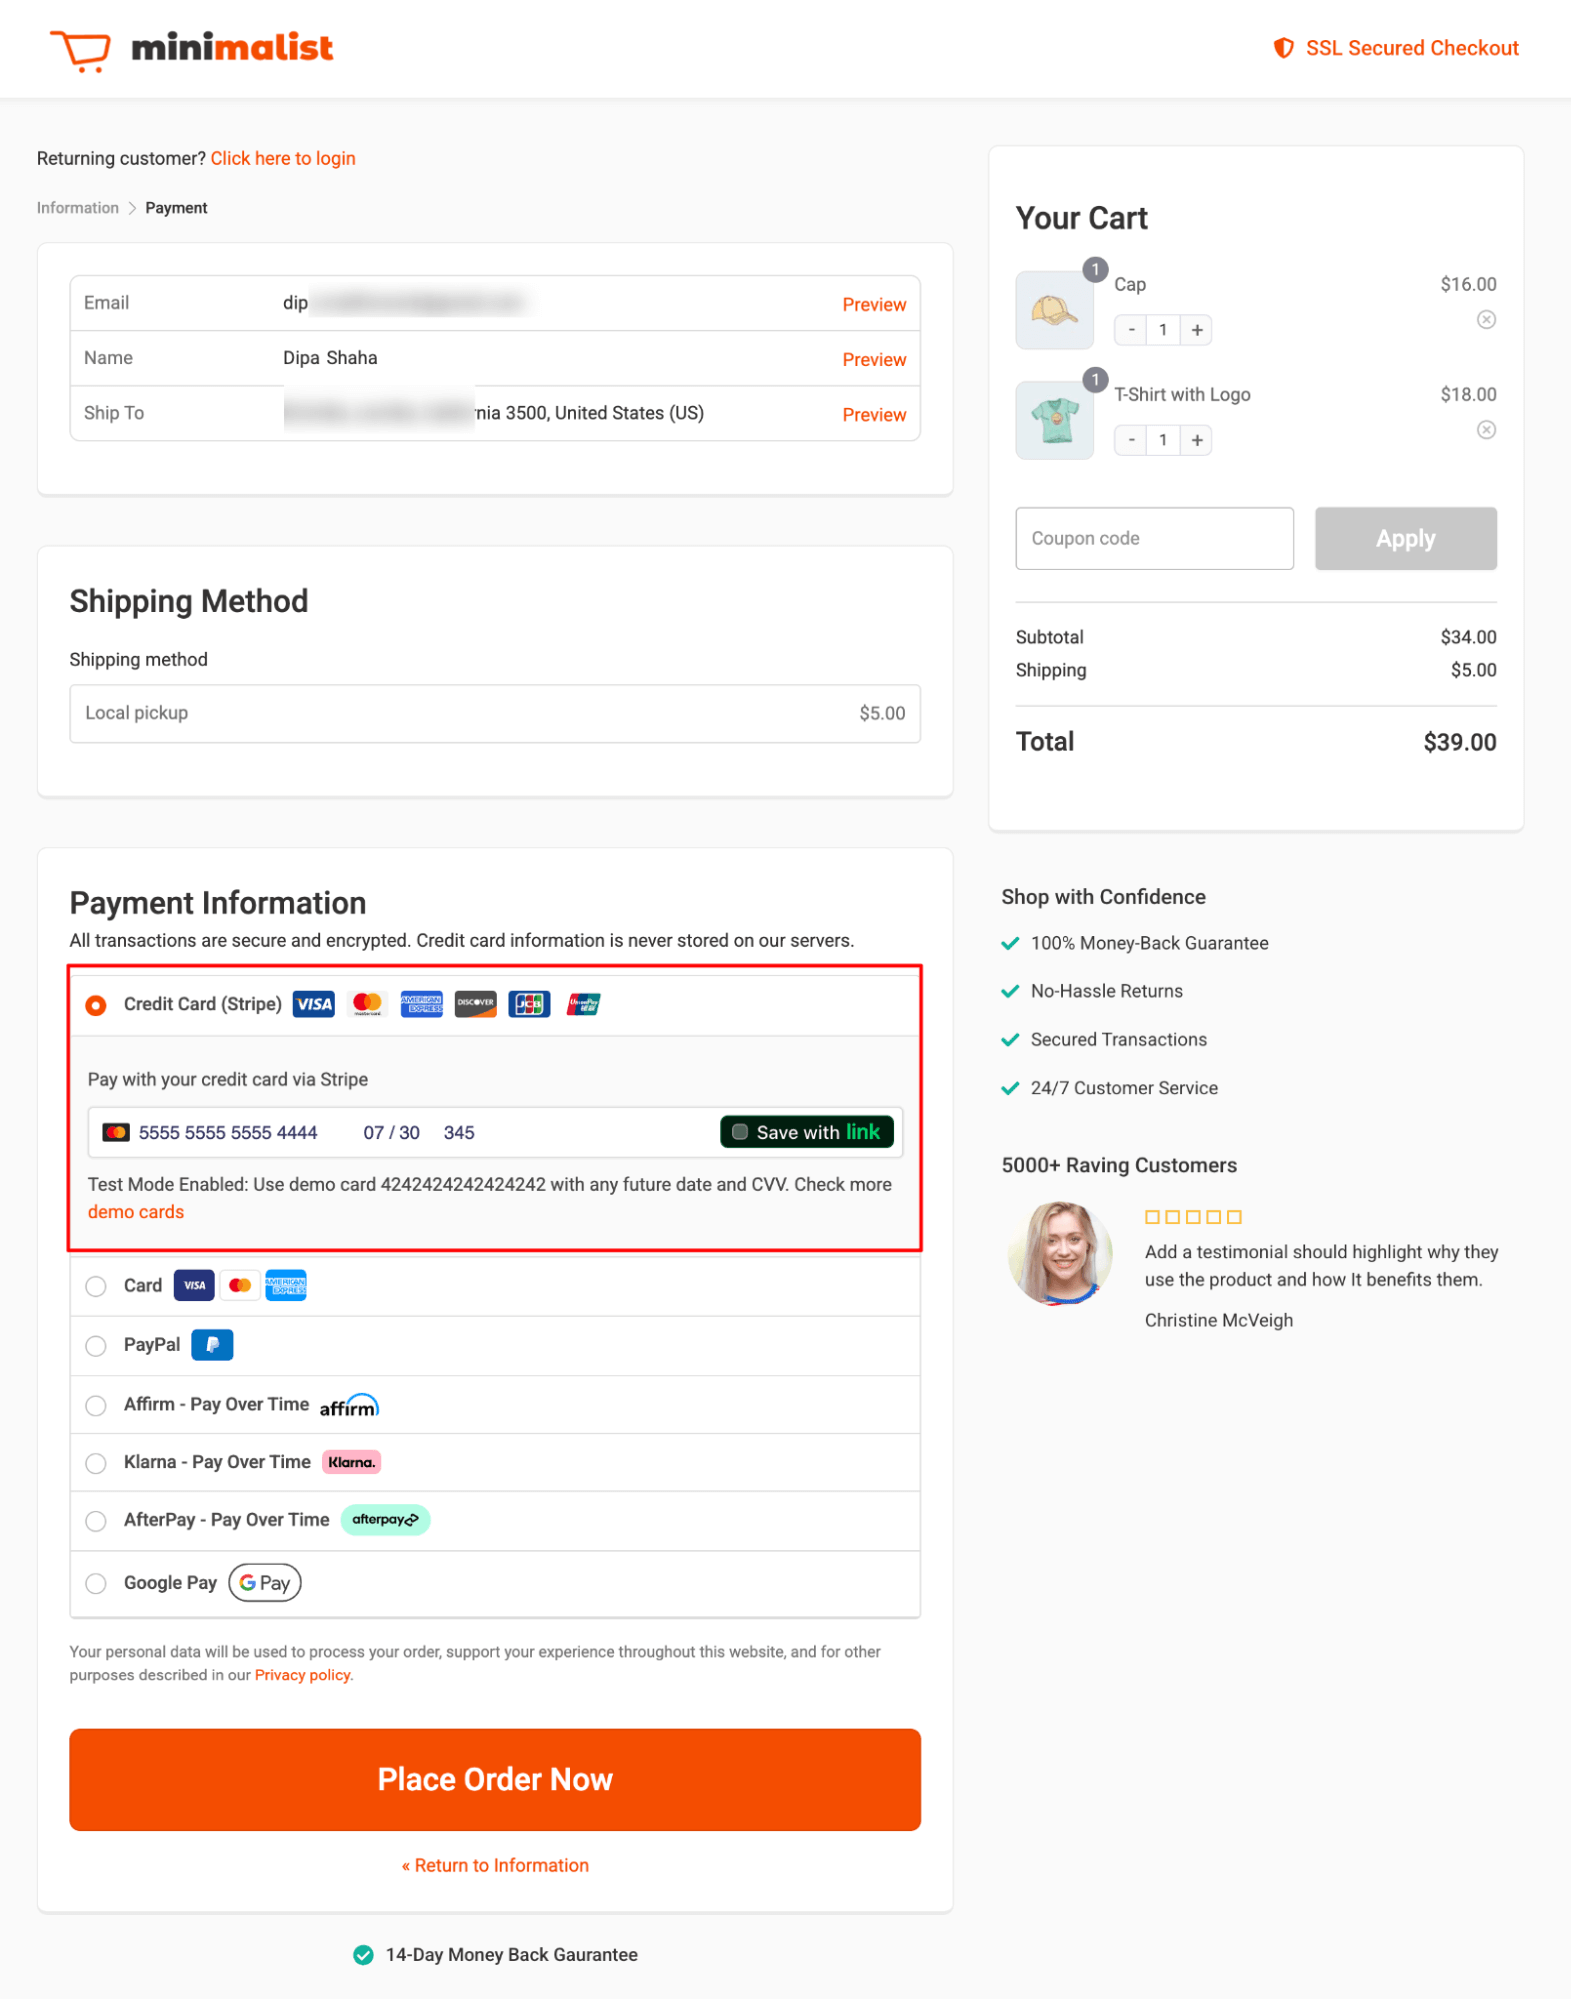
- Inline credit card form
To choose Inline Form, check the option “Enable Inline Credit Card Form”.
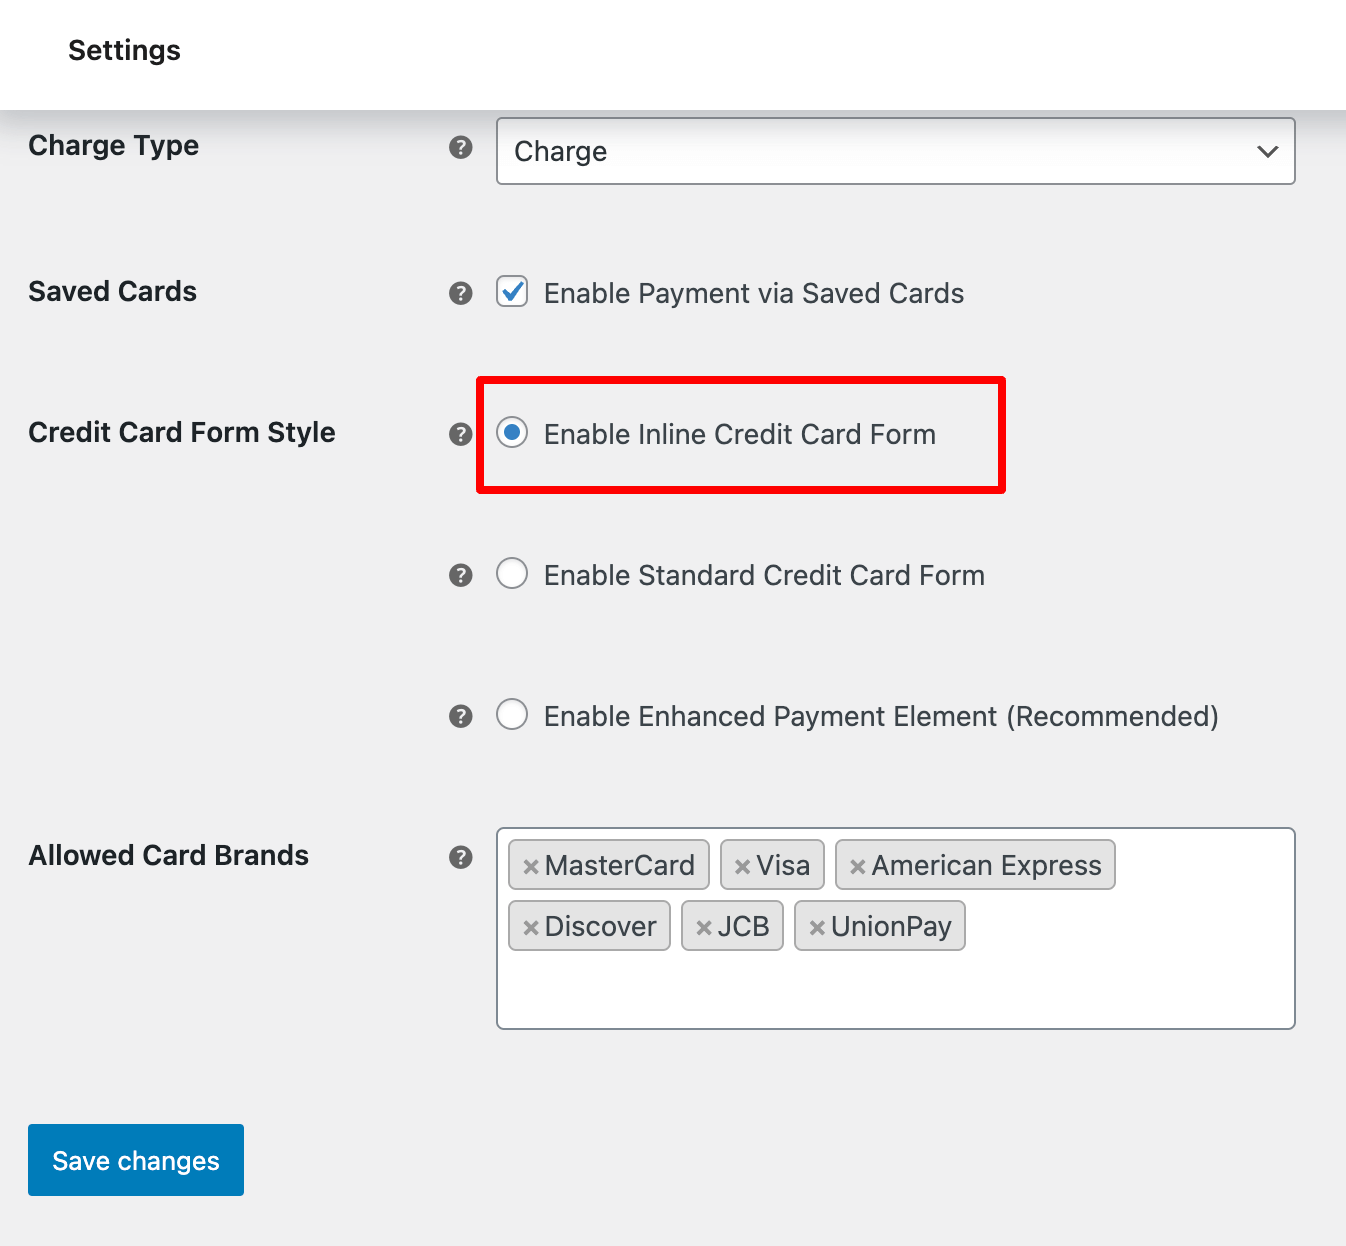
Here is what the inline credit form looks like:
- Standard credit card form
To choose a traditional look, you can select “Enable Standard Credit Card Form”.
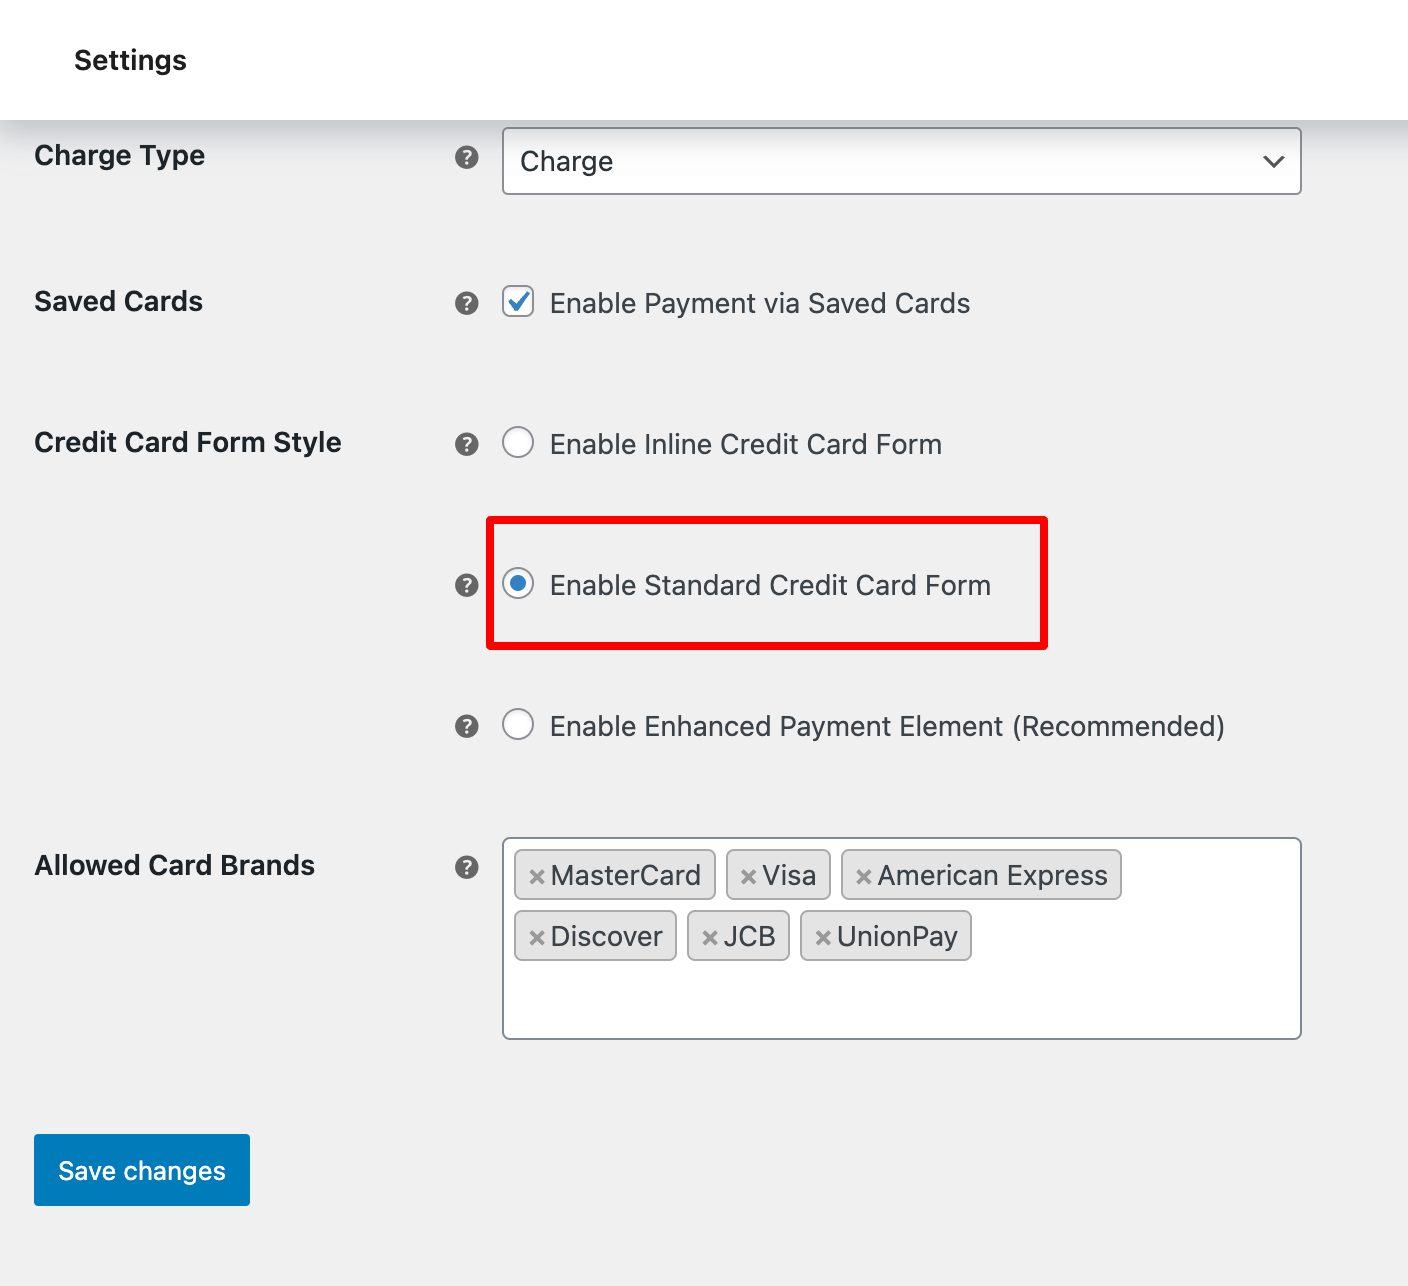
Here is how the Standard option looks like:
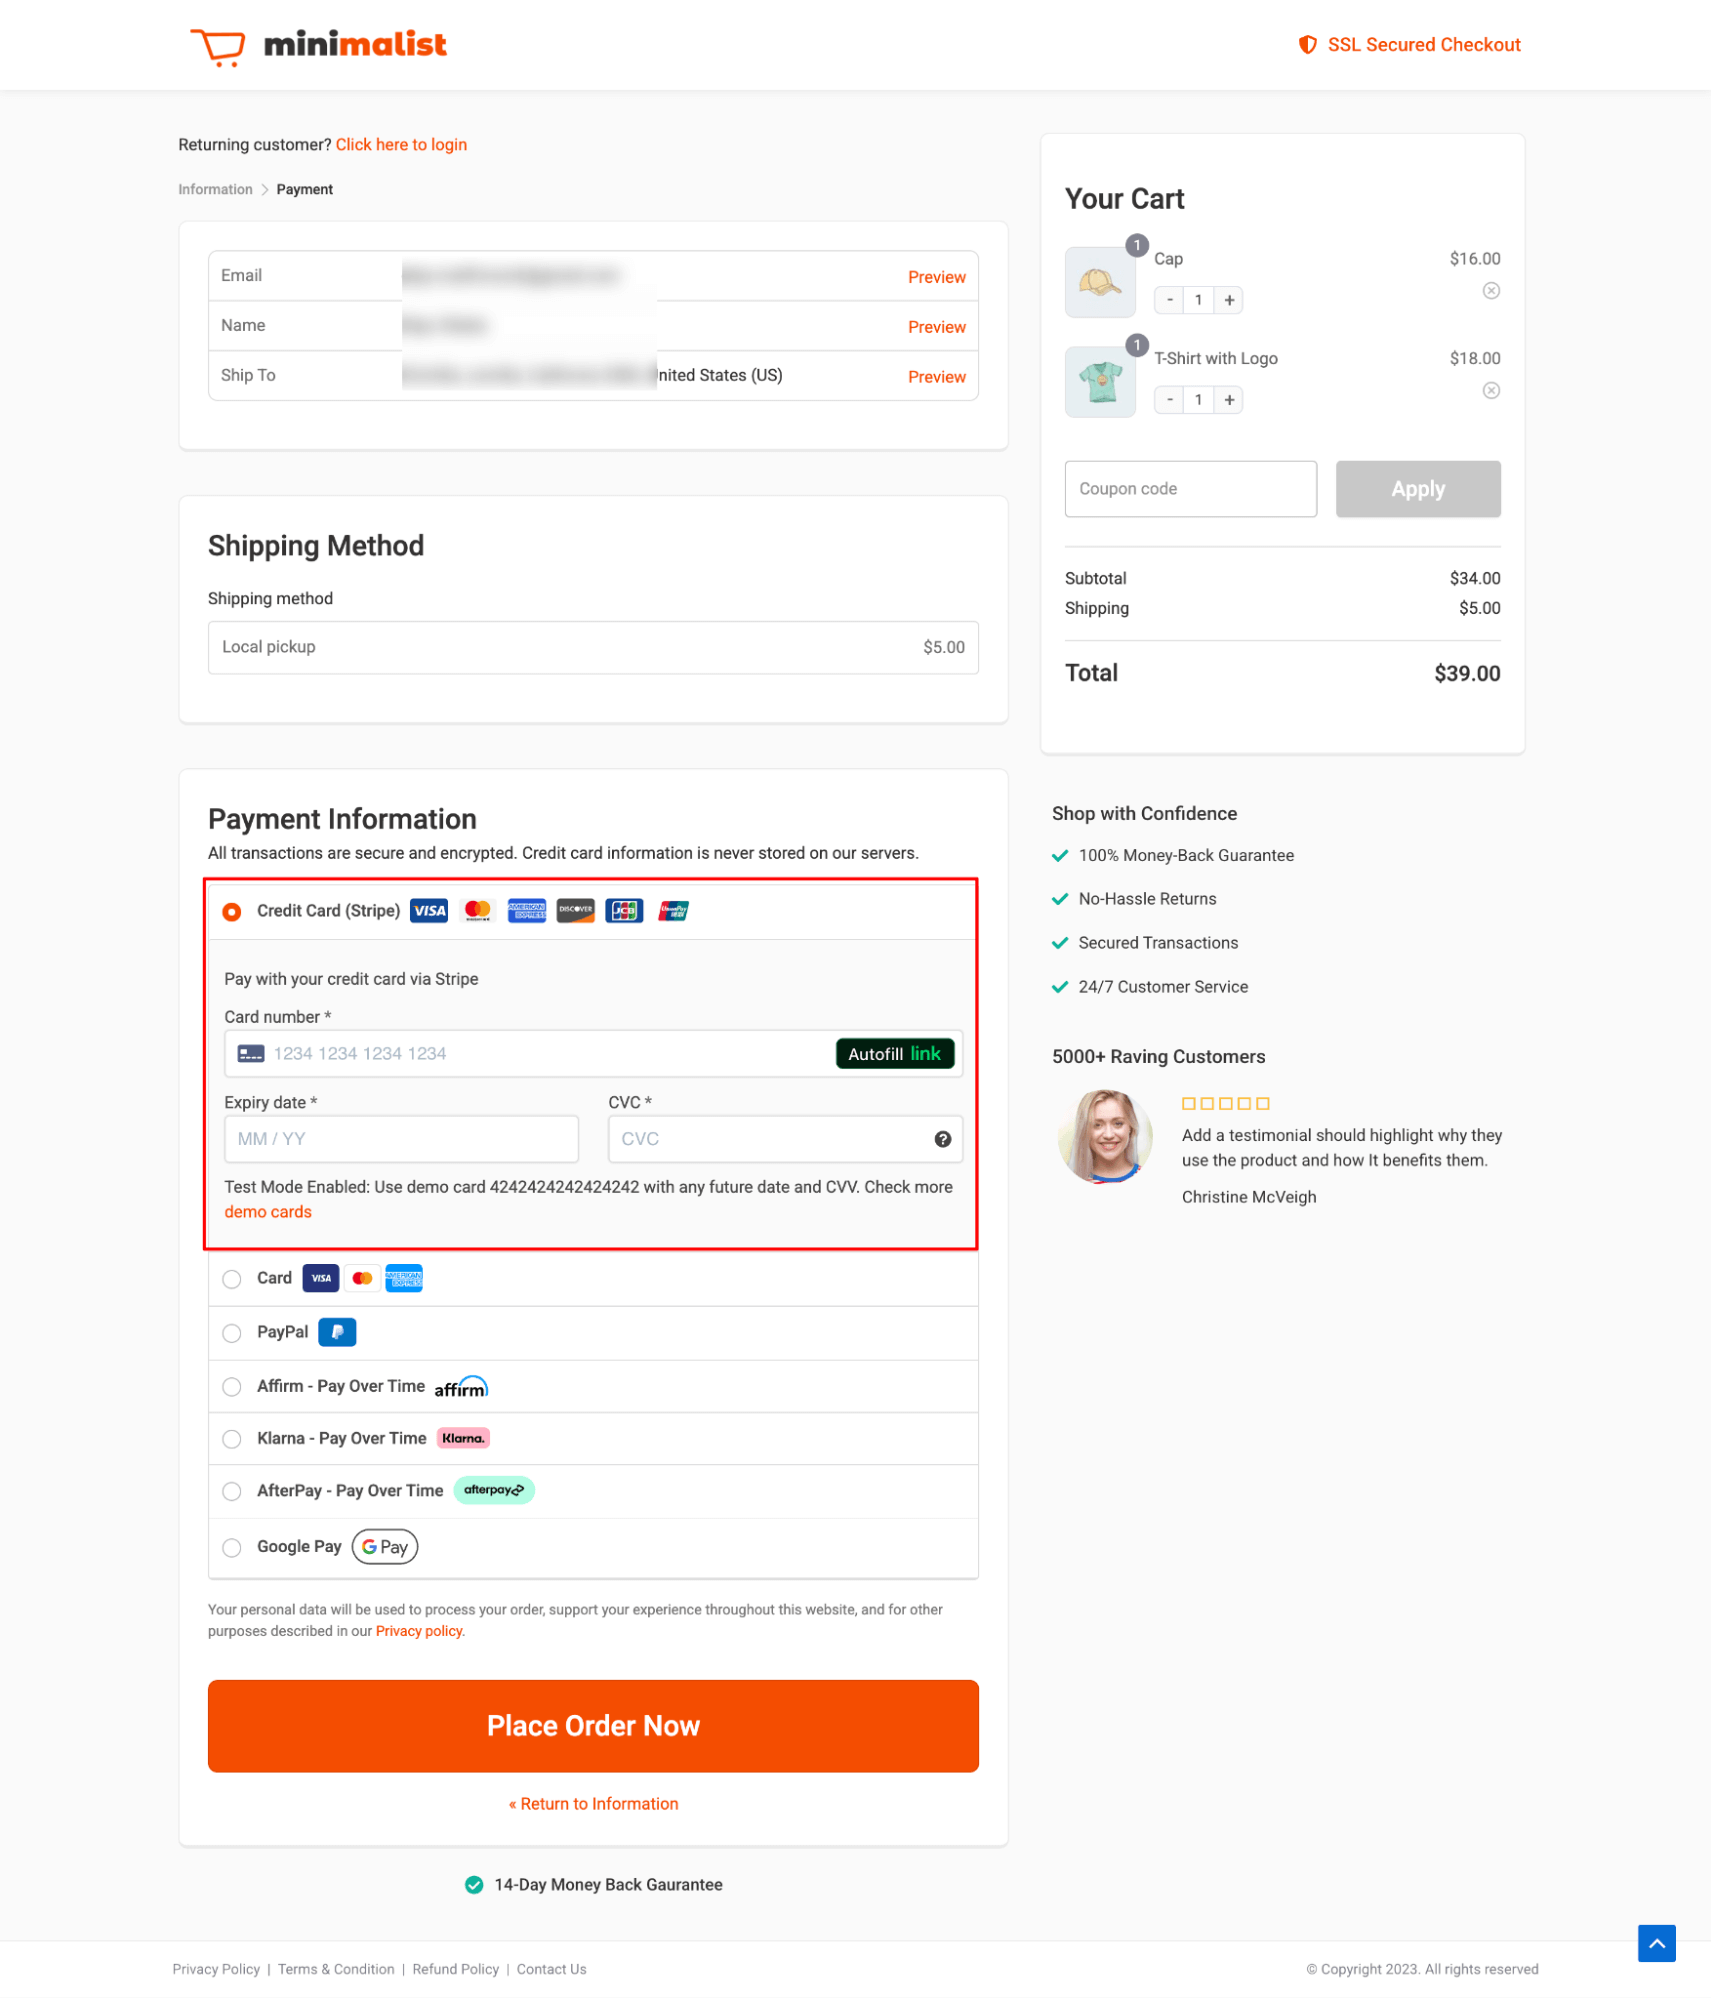
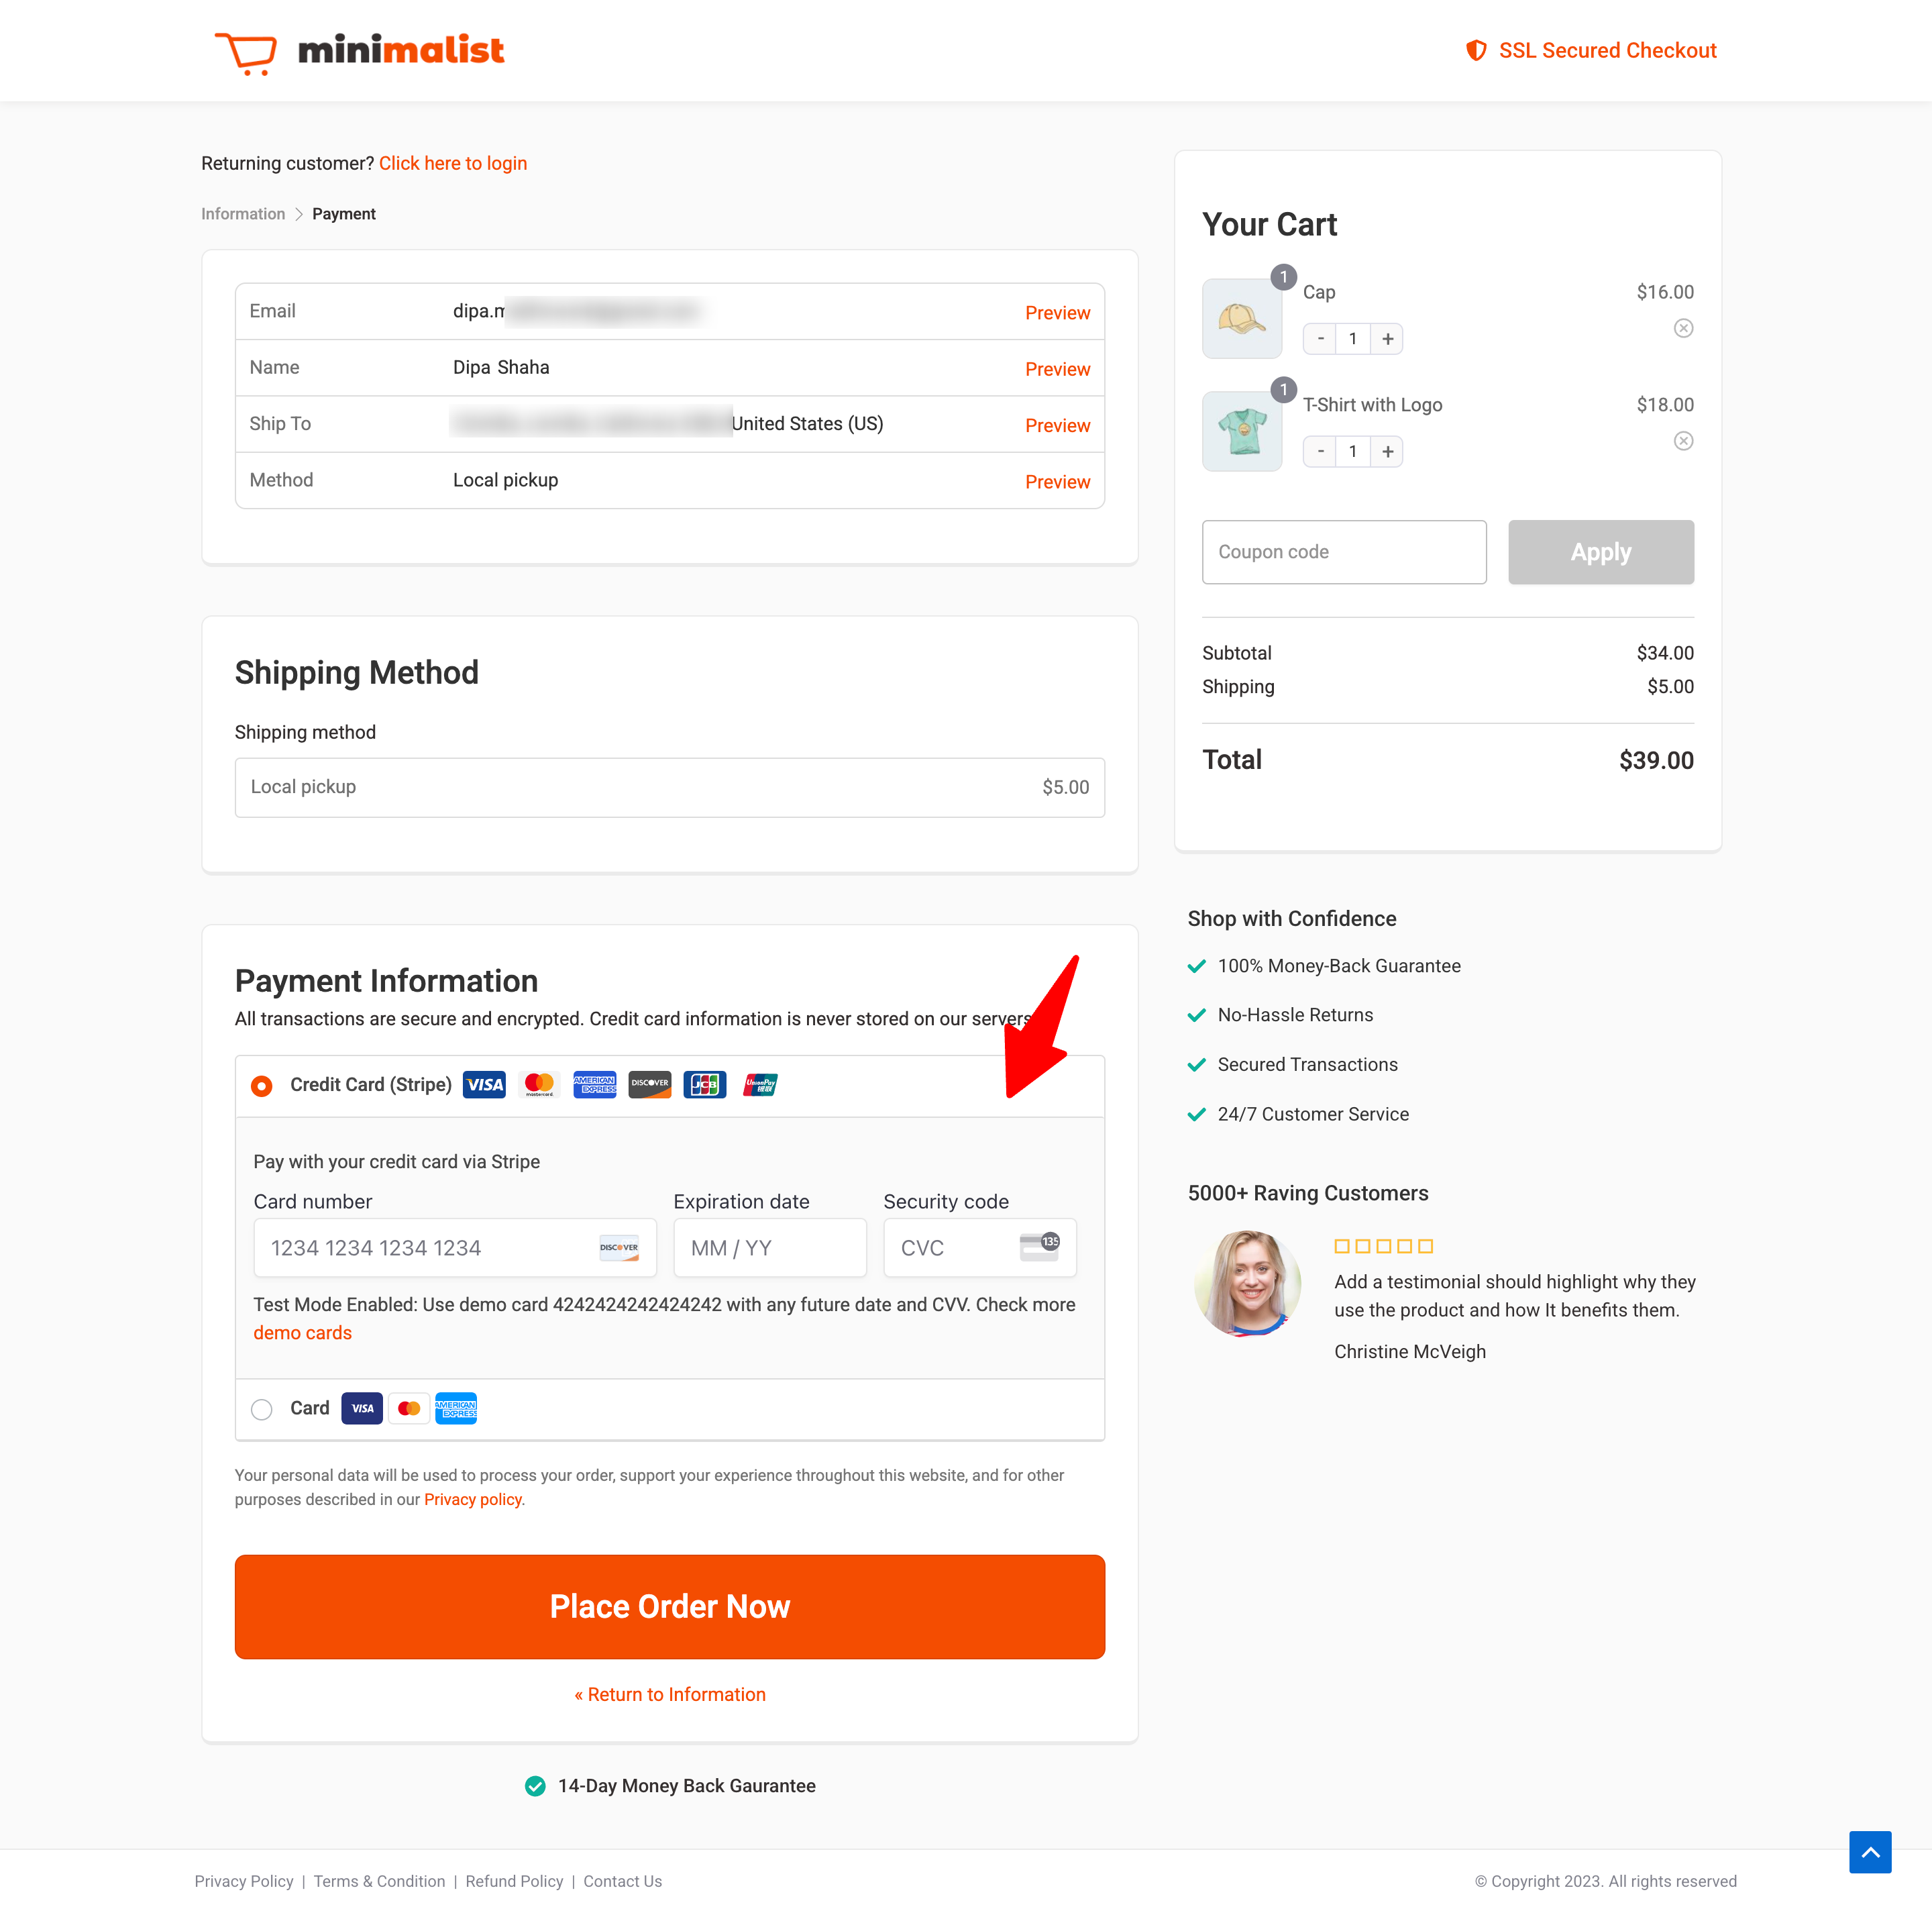
- Enhanced Payment Element
The recommended option is Enhanced Payment Element. With this option, you can also enable authentication in the Card Field, or Billing Email Field, or choose None to disable authentication.
Here how the recommended option looks like:

Pick the one you like.
Step 5: Configure the Stripe Link Authentication
Stripe Link Authentication makes repeat purchases faster and more seamless by allowing returning customers to securely access their saved payment details.
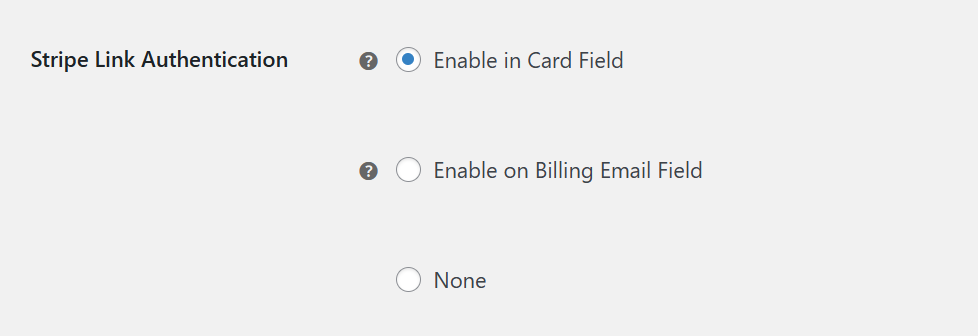
You get three options for enabling Stripe Link authentication:
- On the Card Field: This option displays a subtle login prompt directly within the card input field. Customers can log into their Stripe Link account and instantly retrieve saved payment methods for quick checkout.
- On the Billing Email Fields: This option shows a prominent login option when the customer enters their billing email. Once authenticated, their saved payment details are auto-filled, enabling a one-click checkout experience.
- None: Disables Stripe Link Authentication entirely. Choose this option if you prefer not to offer quick login or if your audience is less likely to use Stripe Link for repeat purchases.
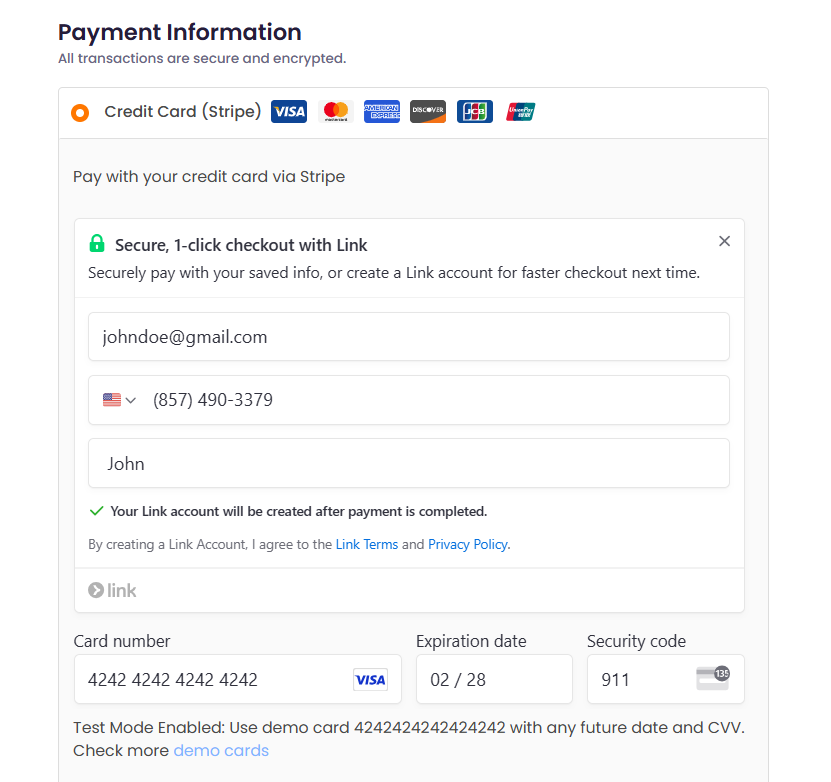
This is how the Stripe Link shows up on the card field:
This is how you can enable the Card payment options in Stripe Gateway for WooCommerce.
Testing
Make sure to test your payments on your store first before going live.
By default, your Stripe API settings will have the Test mode enabled.
It means you can actually test your payments by placing orders with the help of demo cards.
Visit Stripe’s testing document to get information about demo card numbers.
Once you’ve set everything up and tested your payments, we recommend you switch to live mode.
You can do this by going to the WooCommerce Settings ⇨ Payments tab.
Continue to Stripe Woo Payment Gateway > Stripe API Settings and change the mode from “Test” to “Live”.
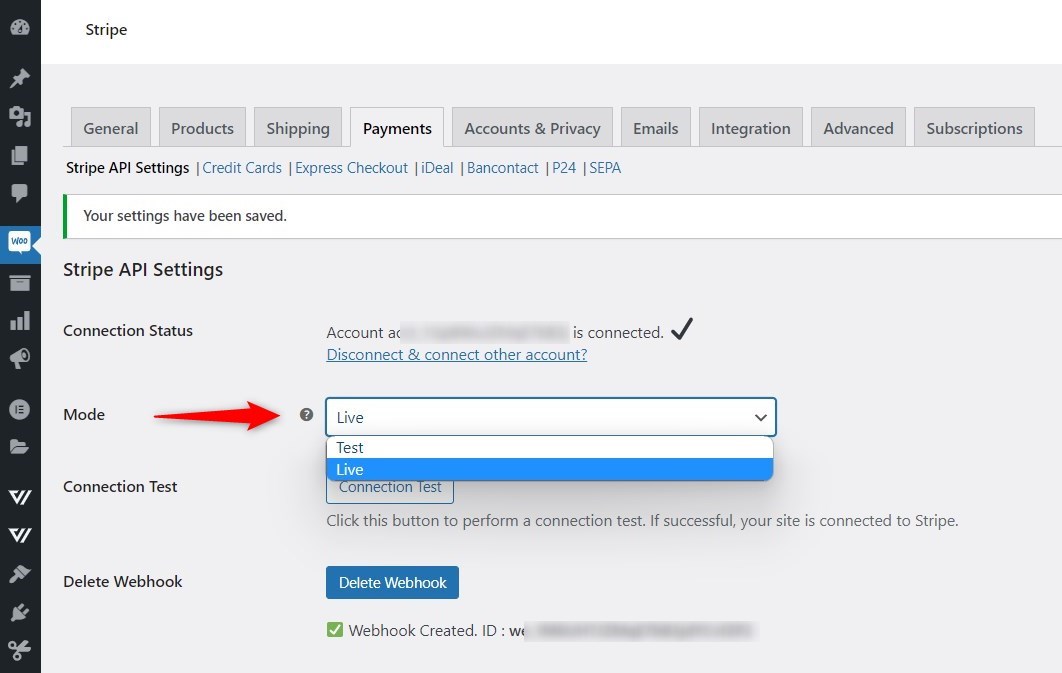
Save the changes once done.


