Products
Funnel Builder
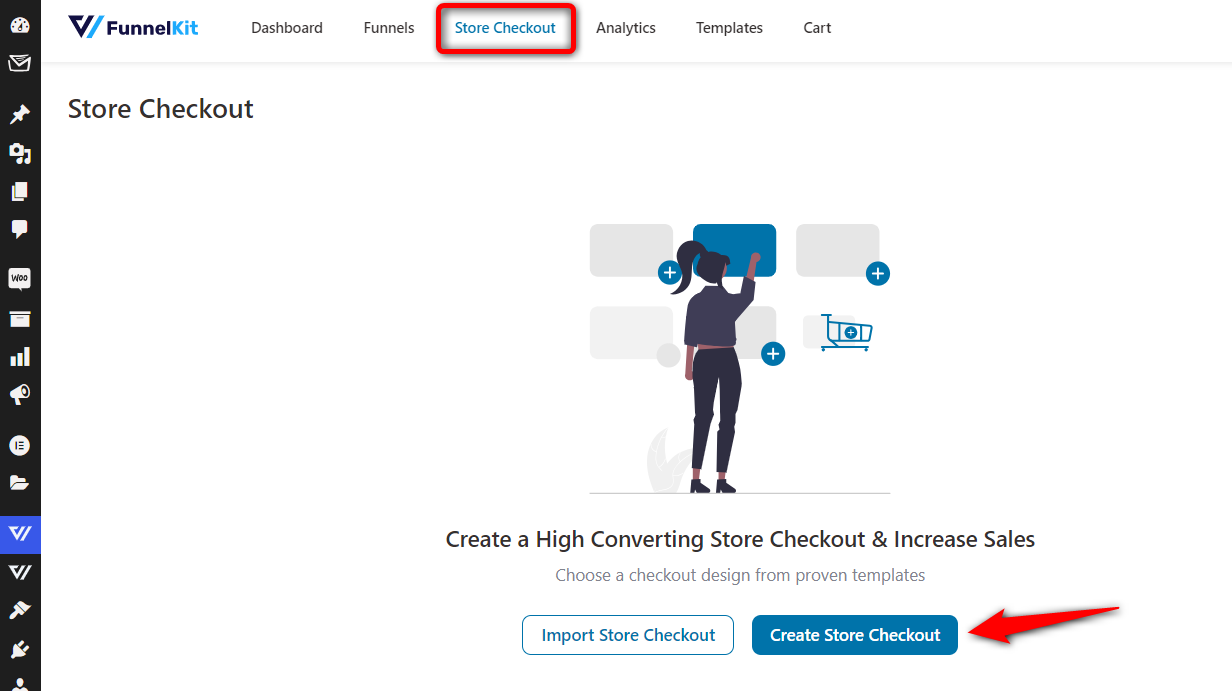
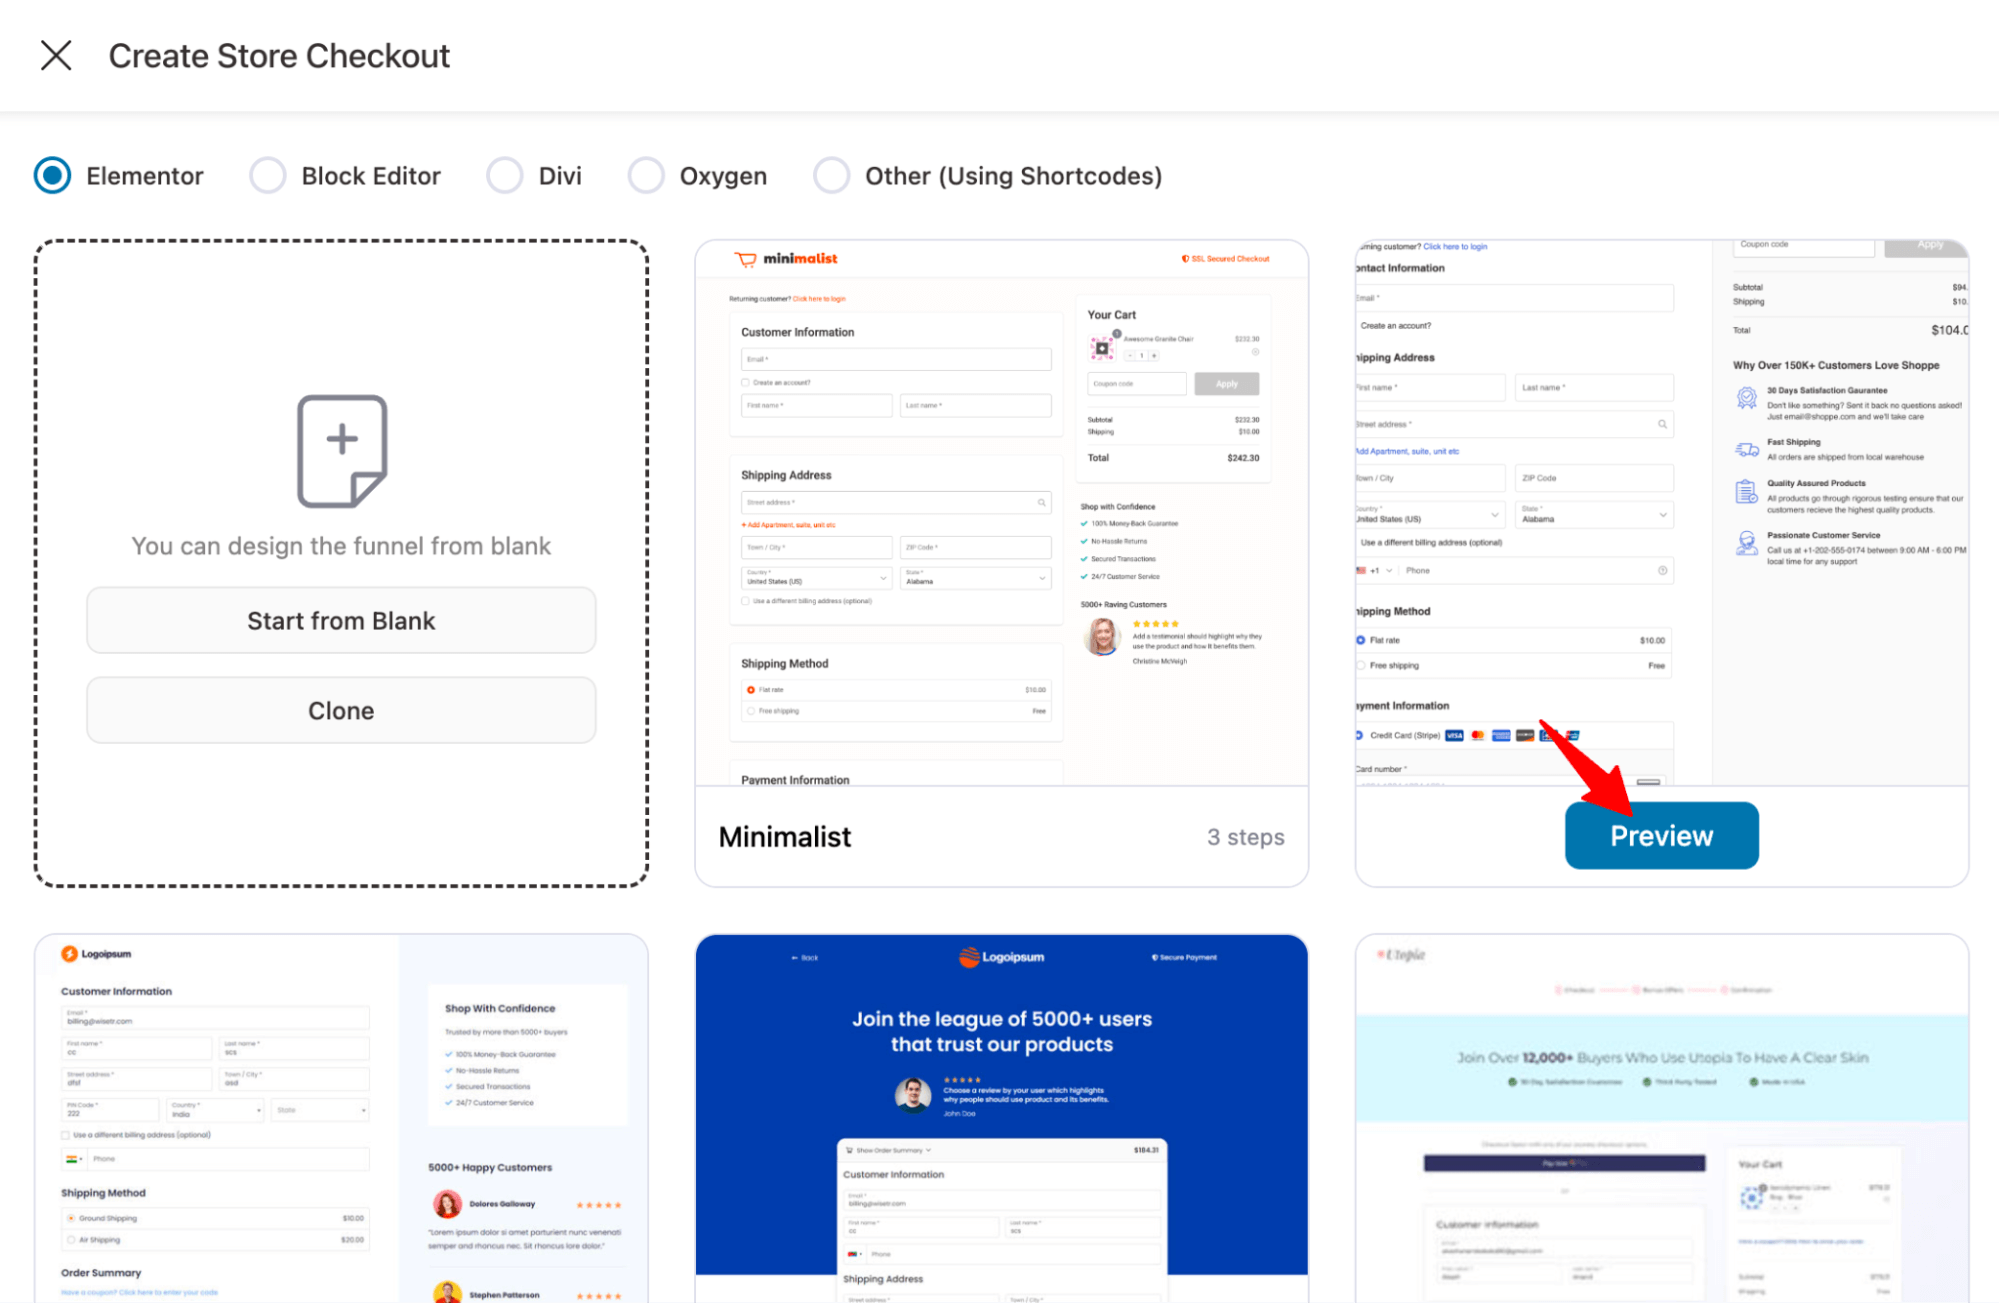
Build profitable funnels using conversion-friendly templates, analyse performance.
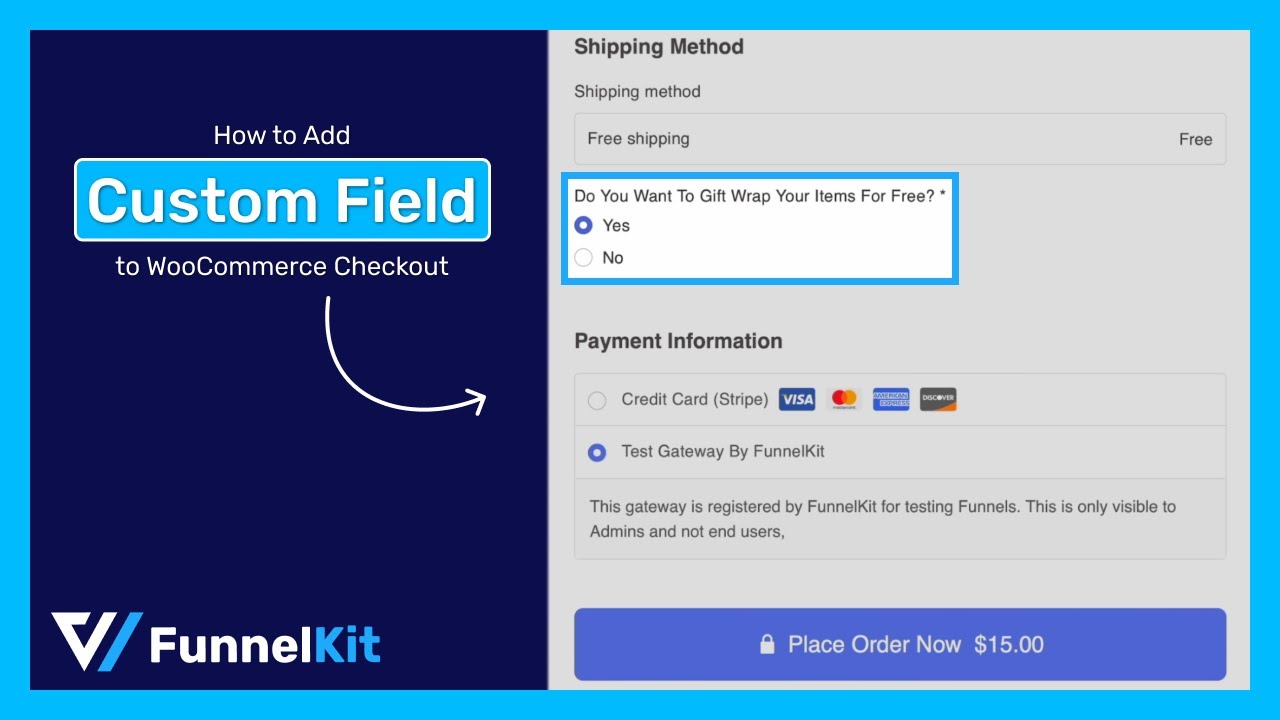
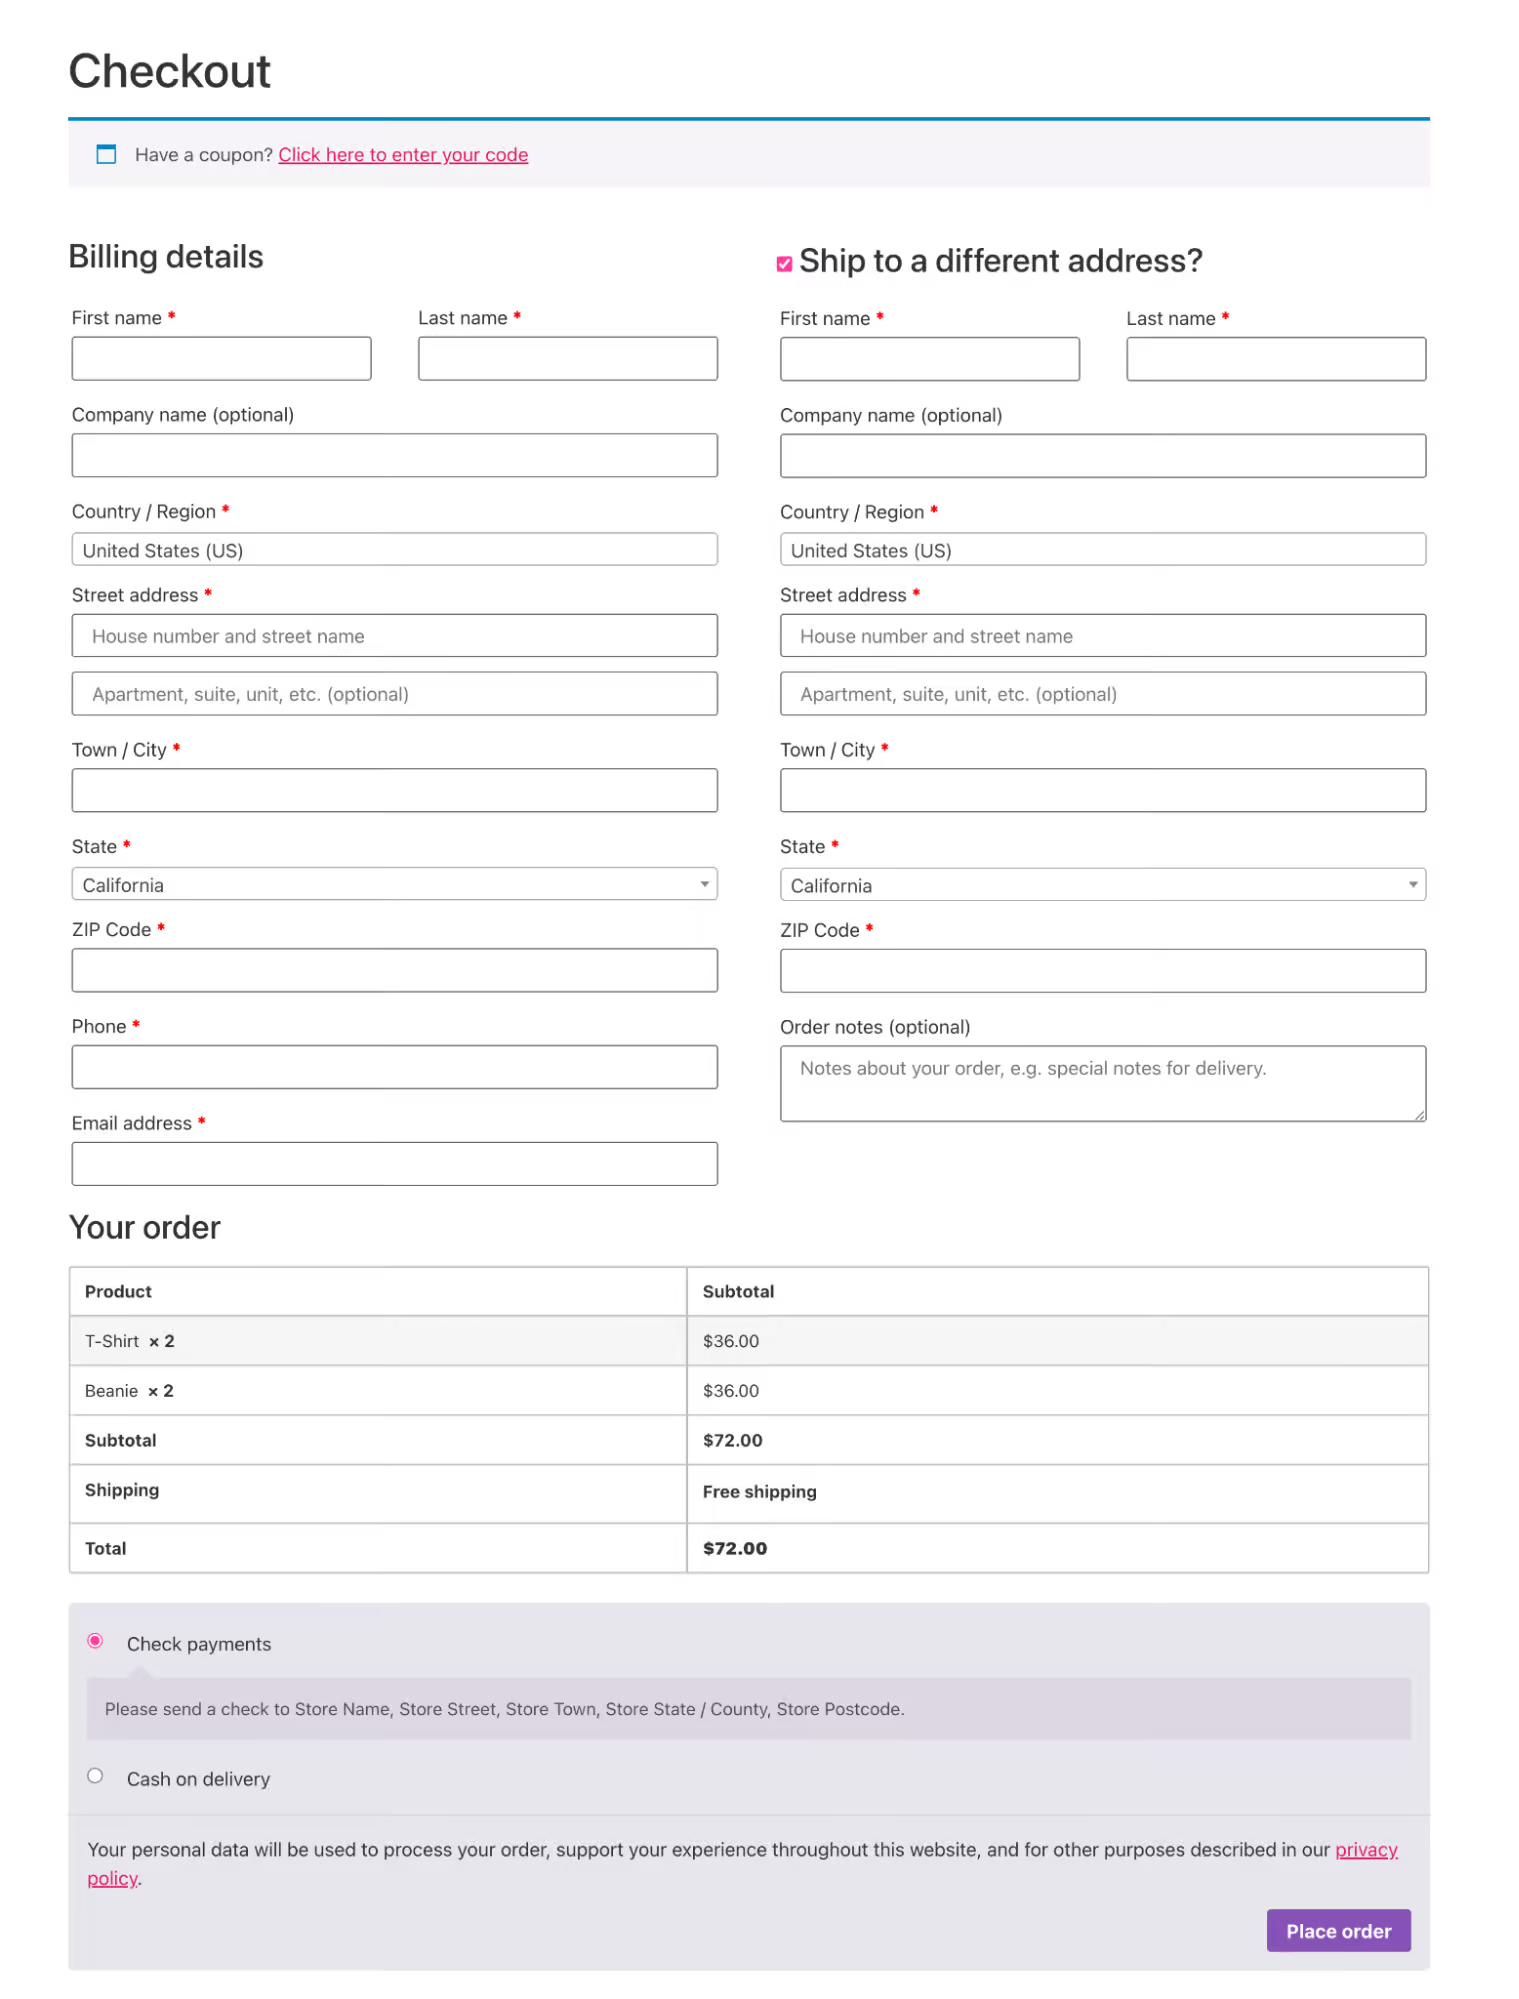
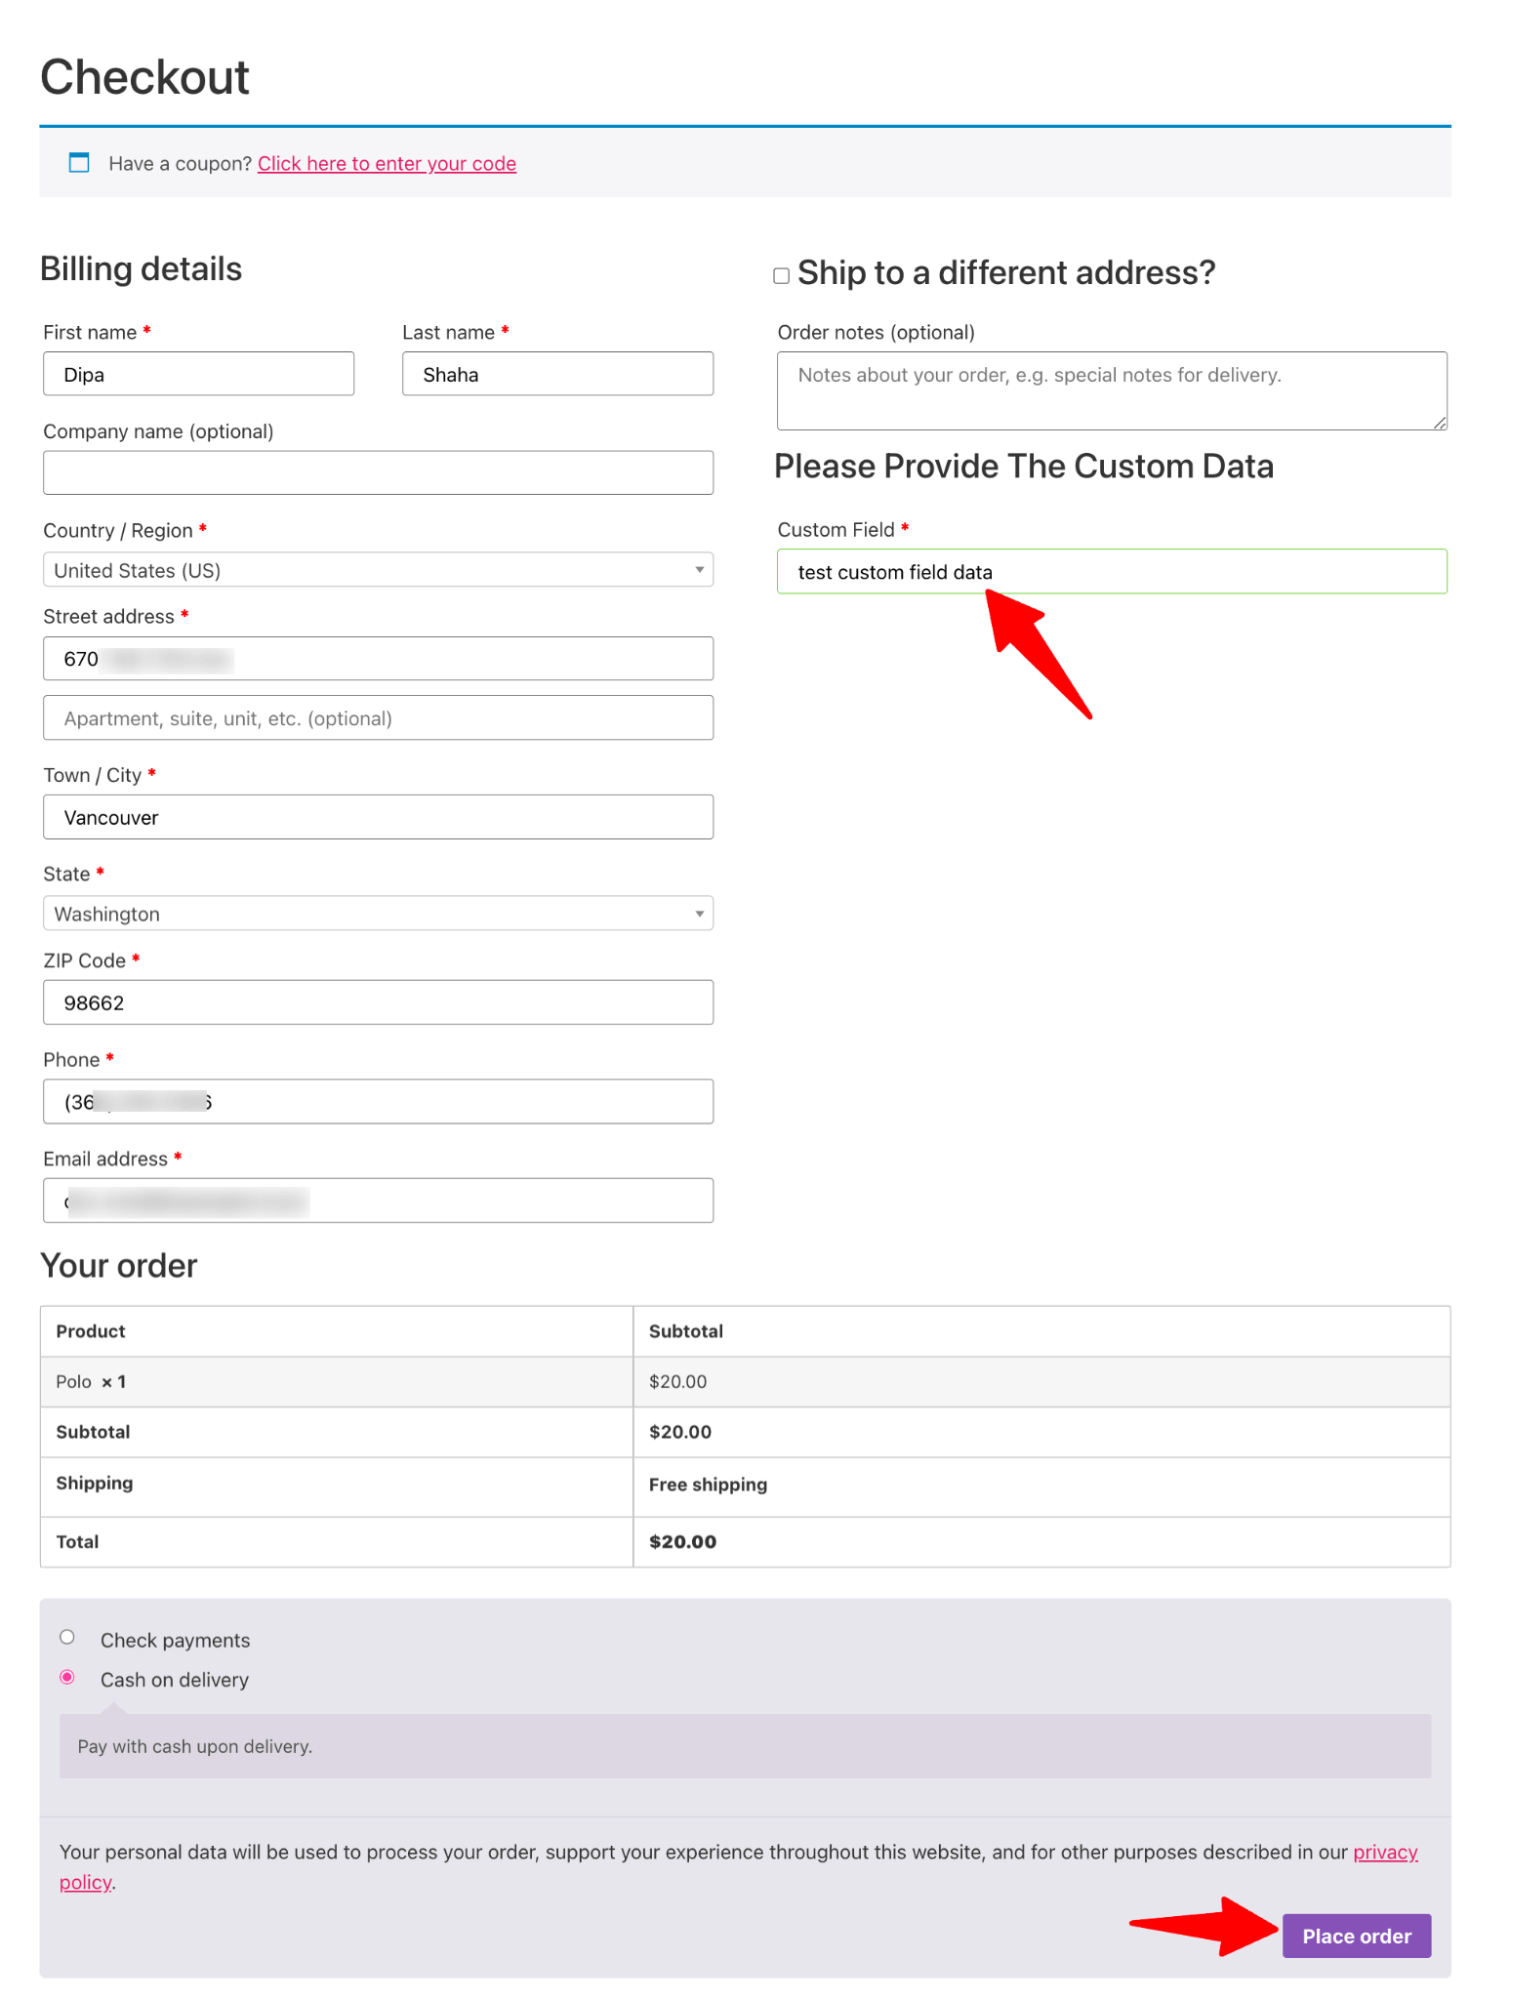
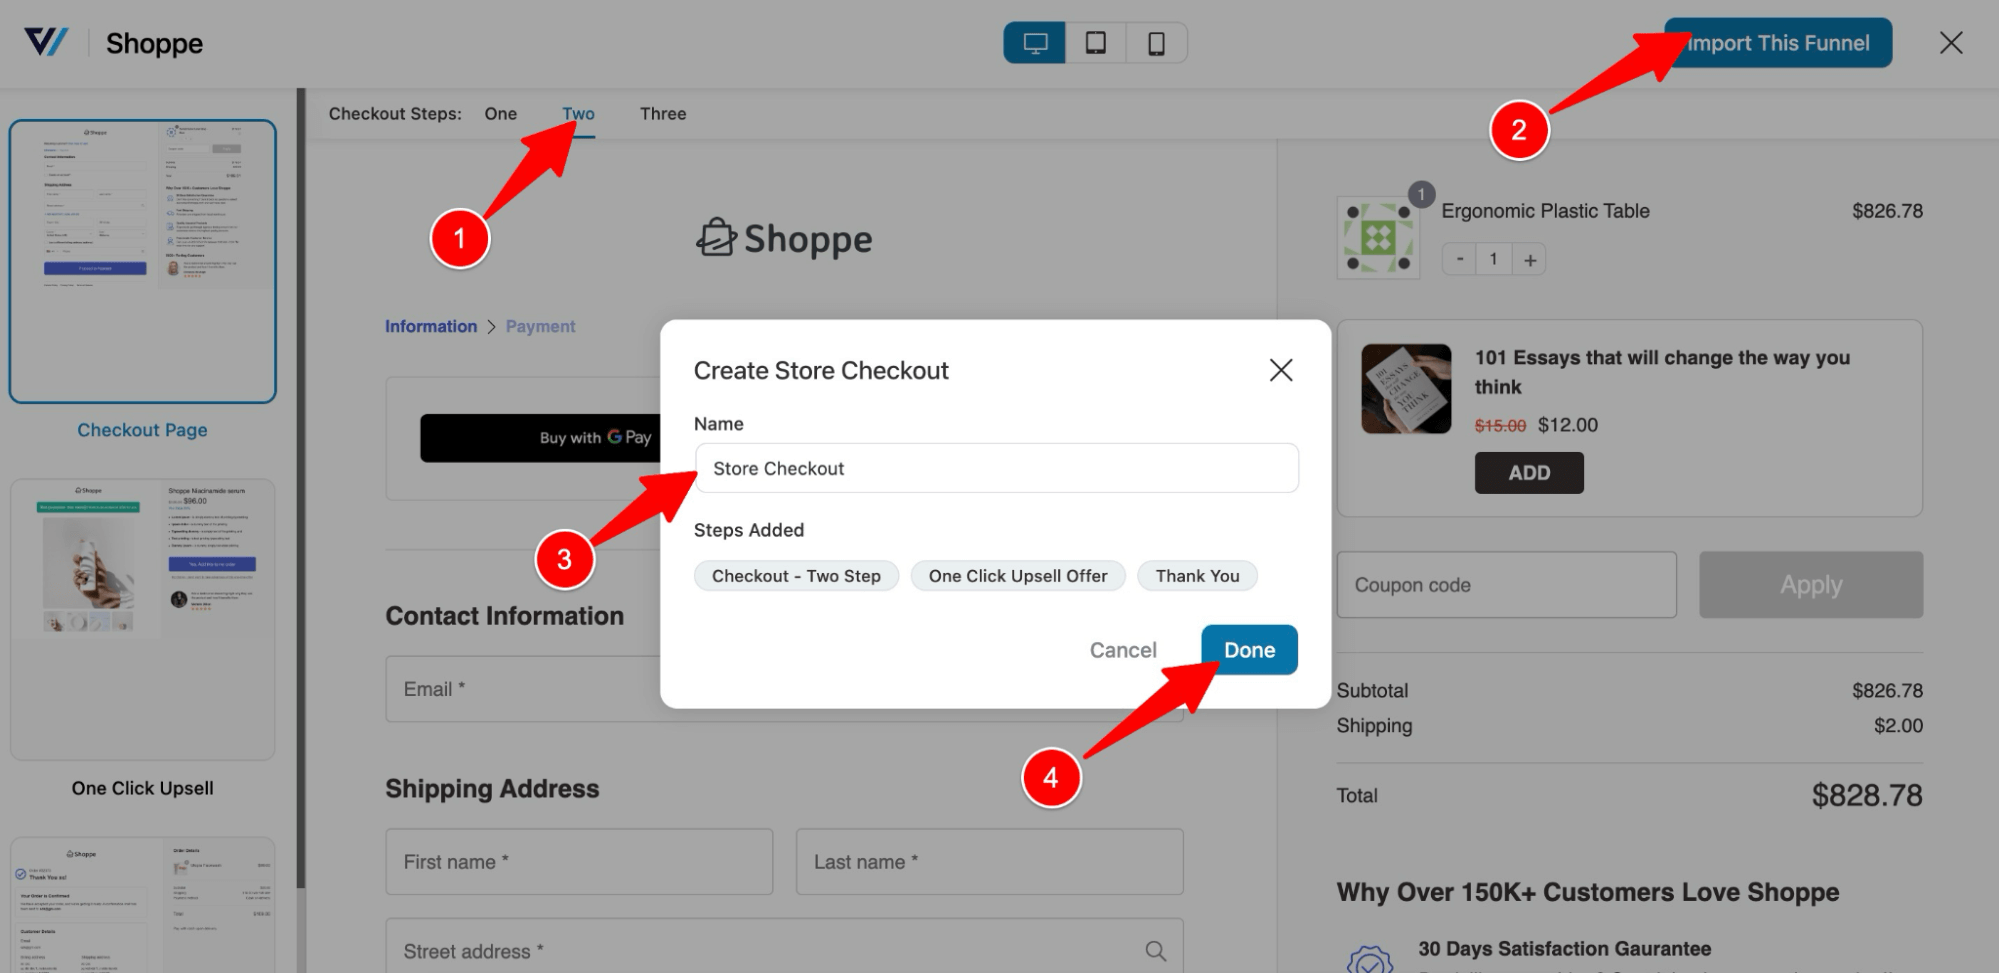
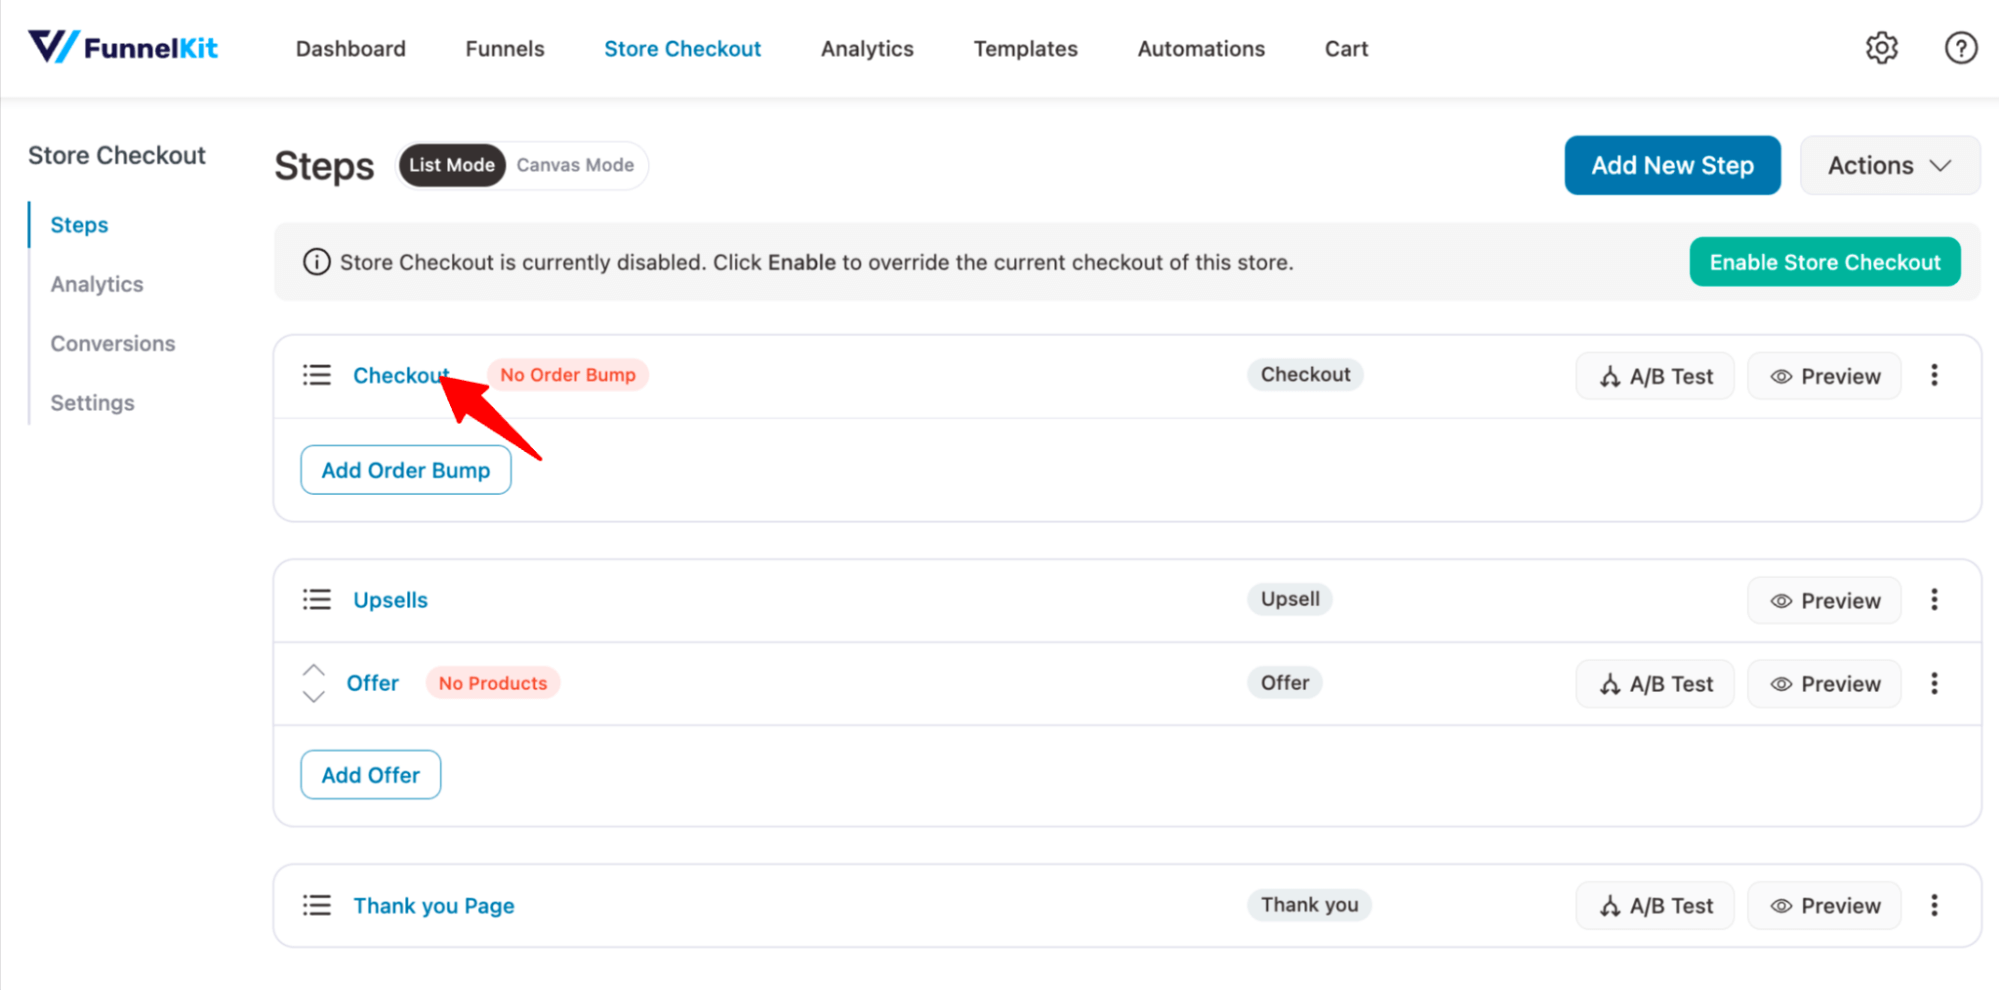
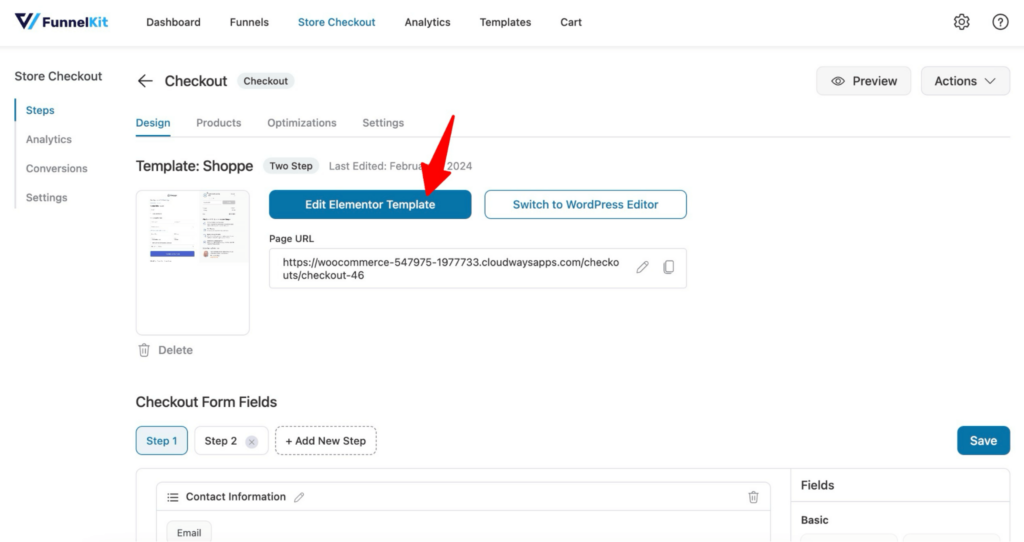
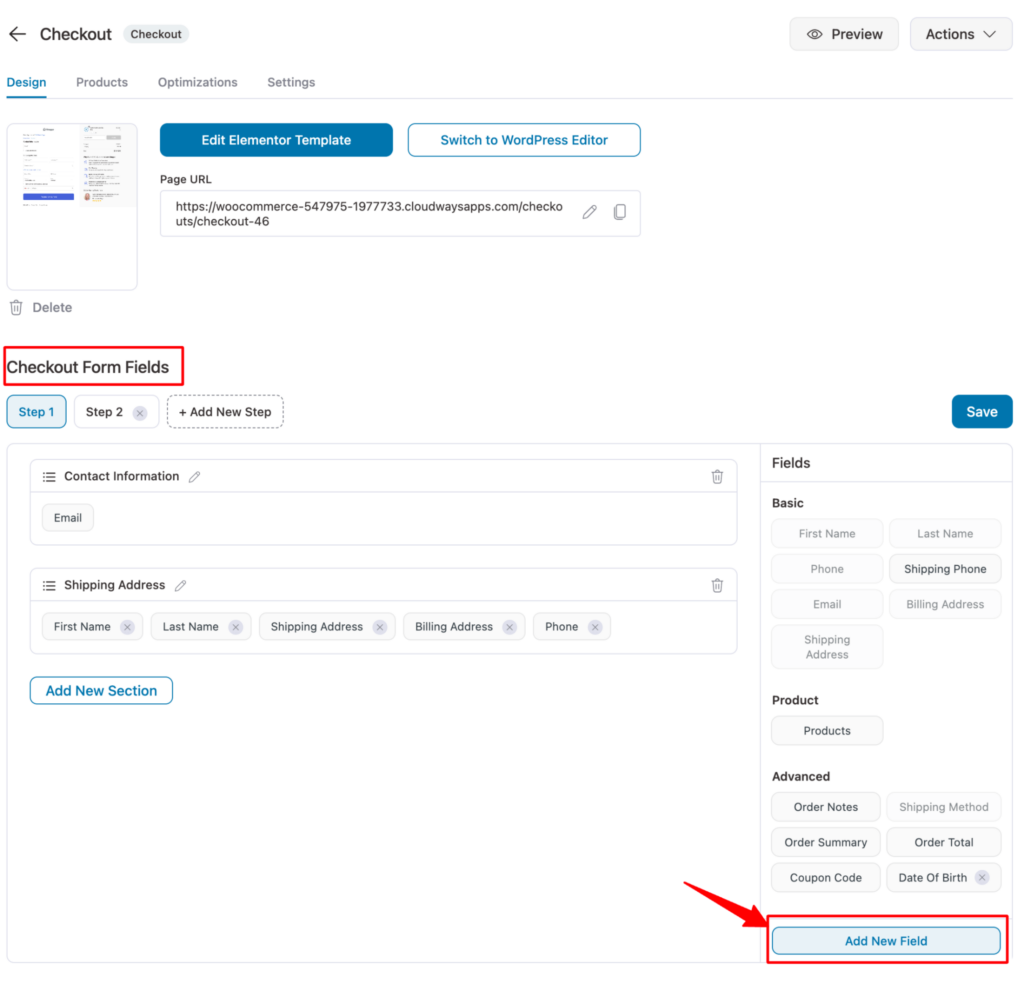
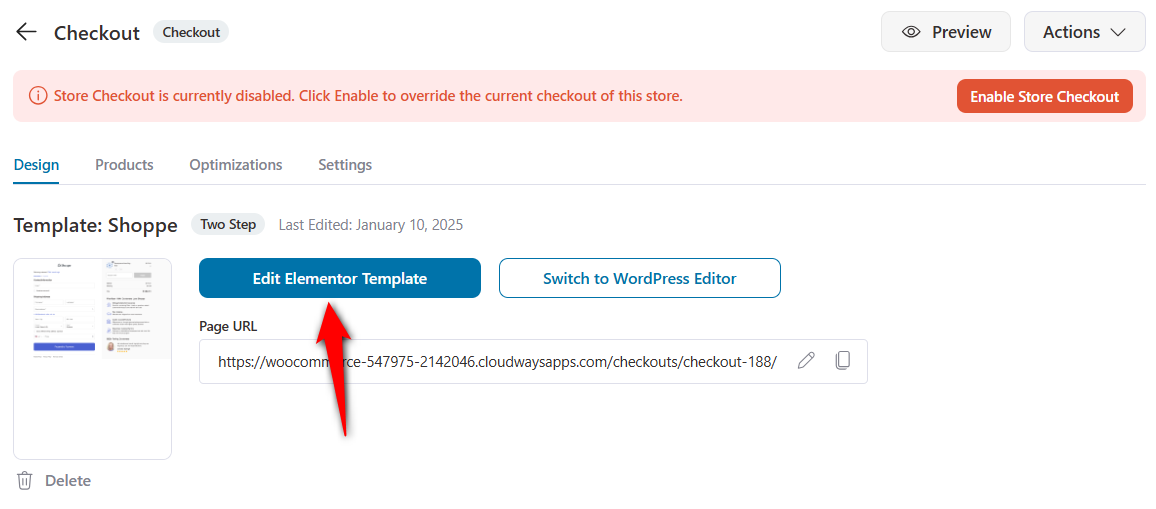
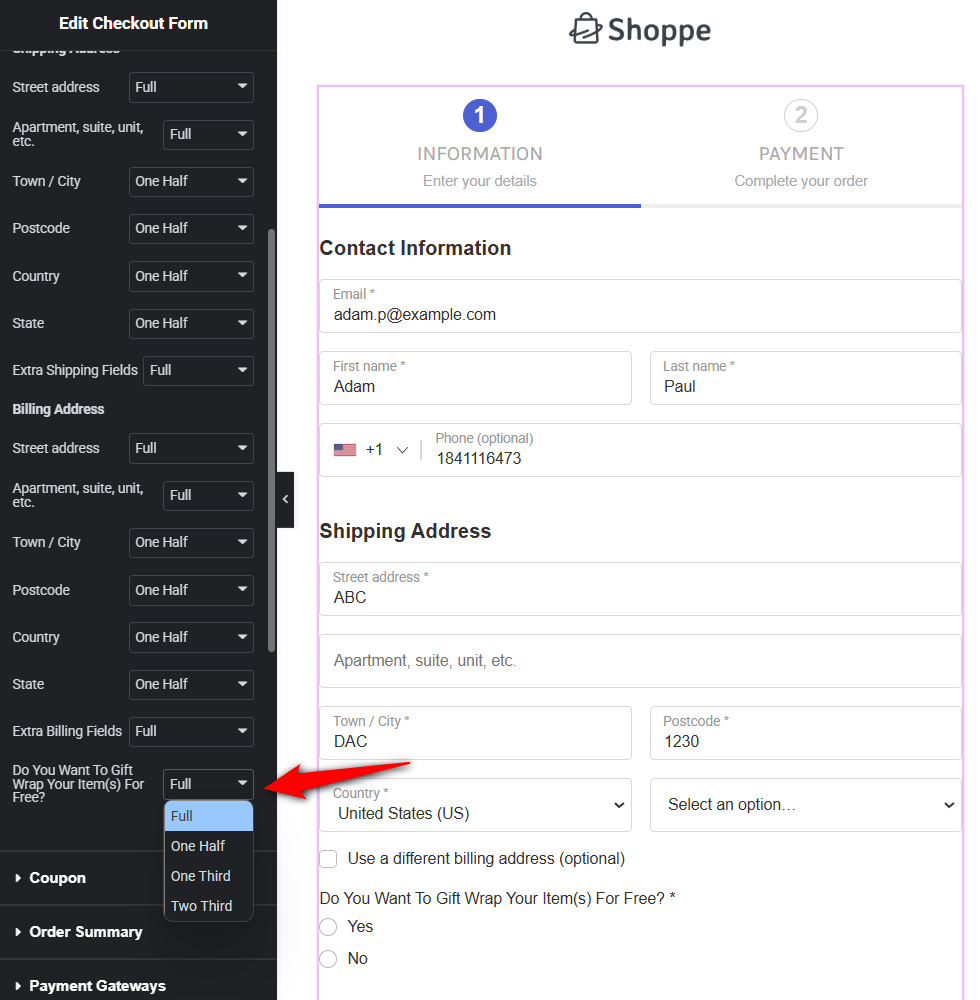
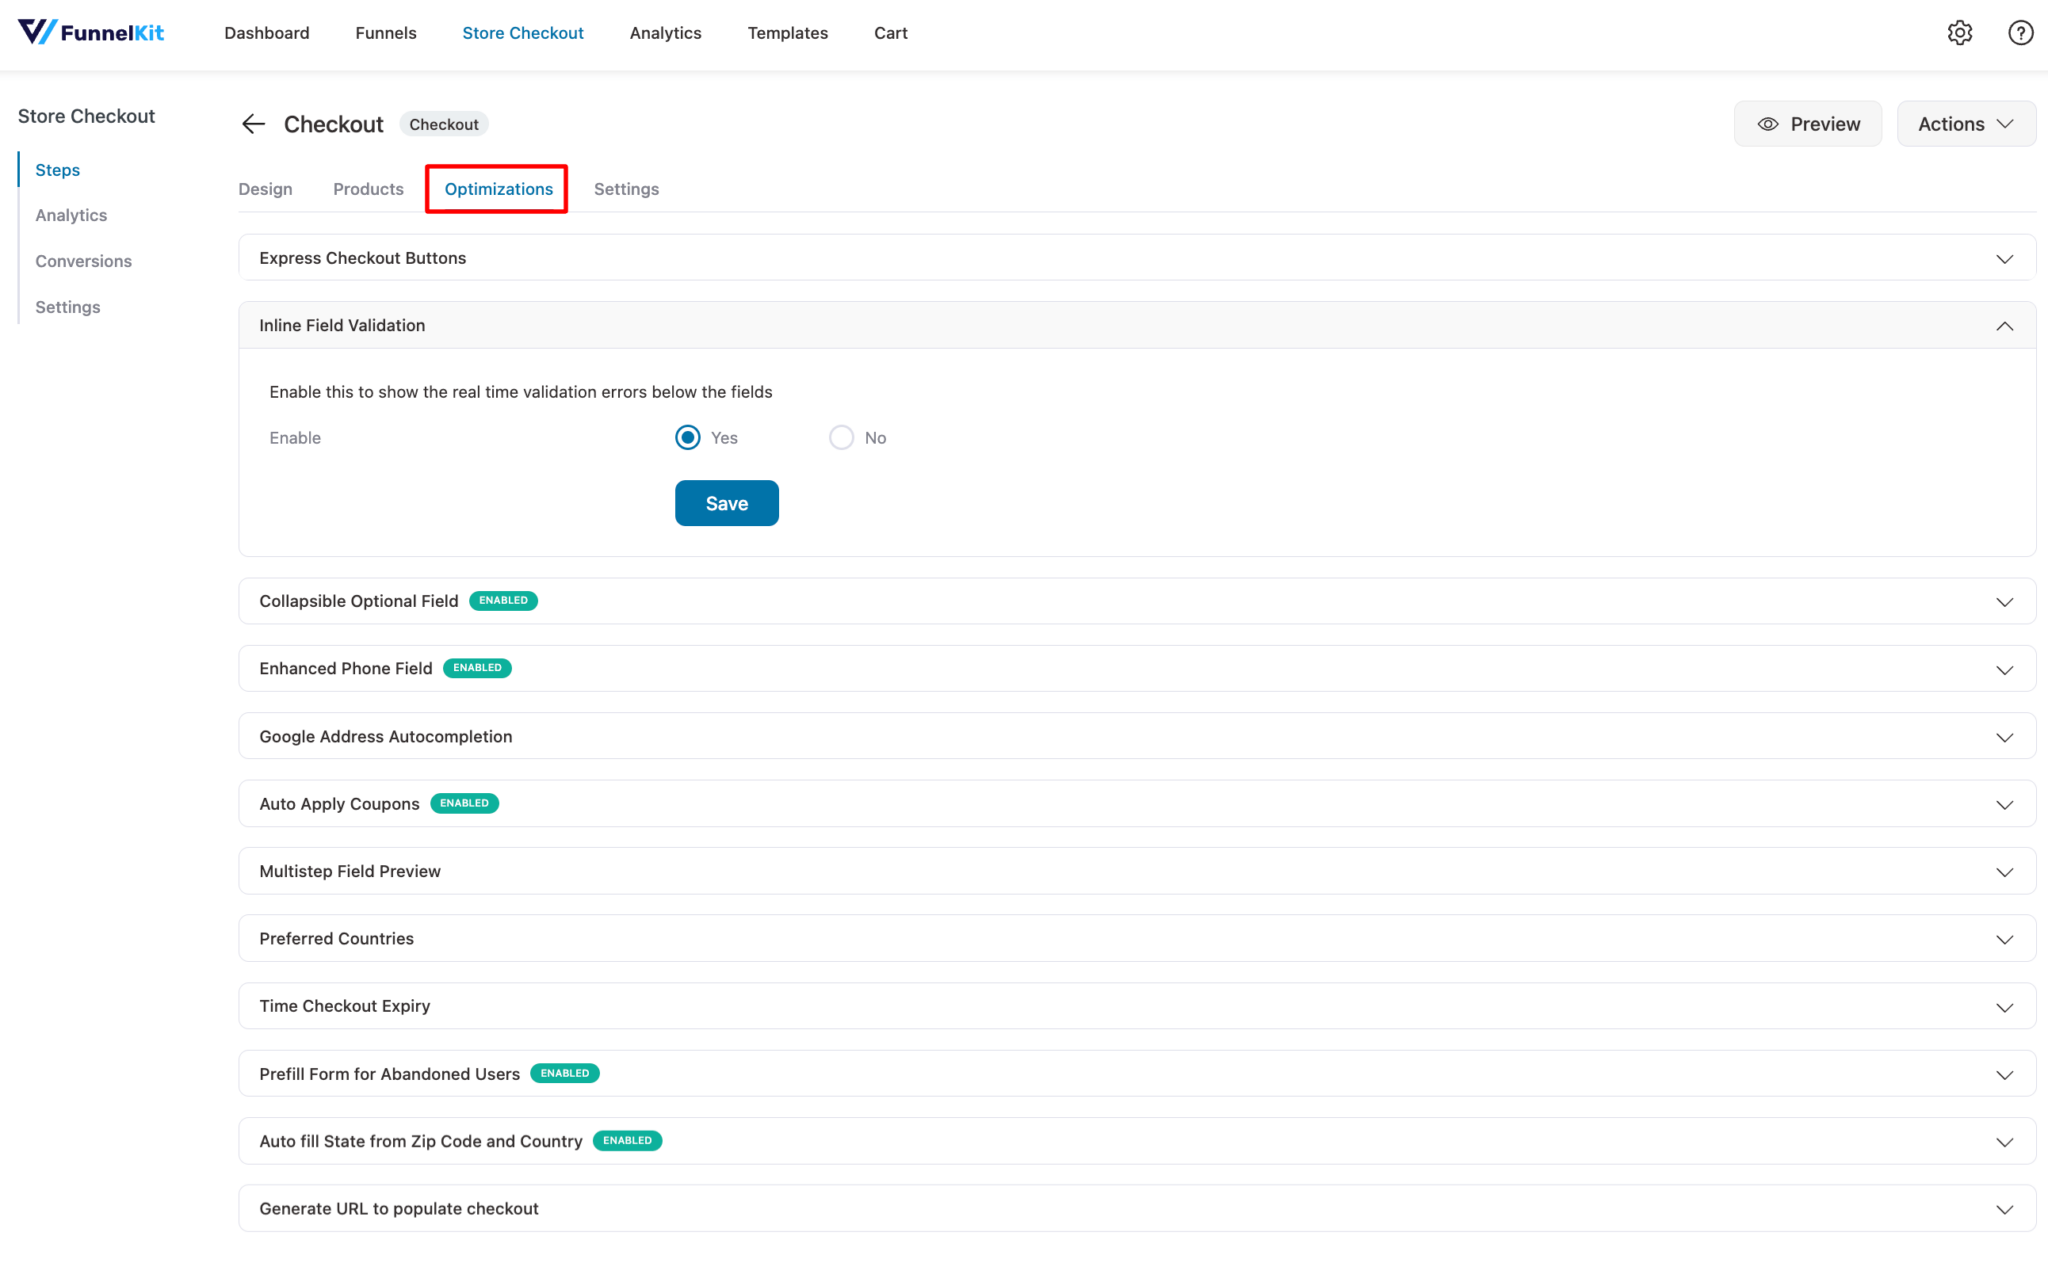
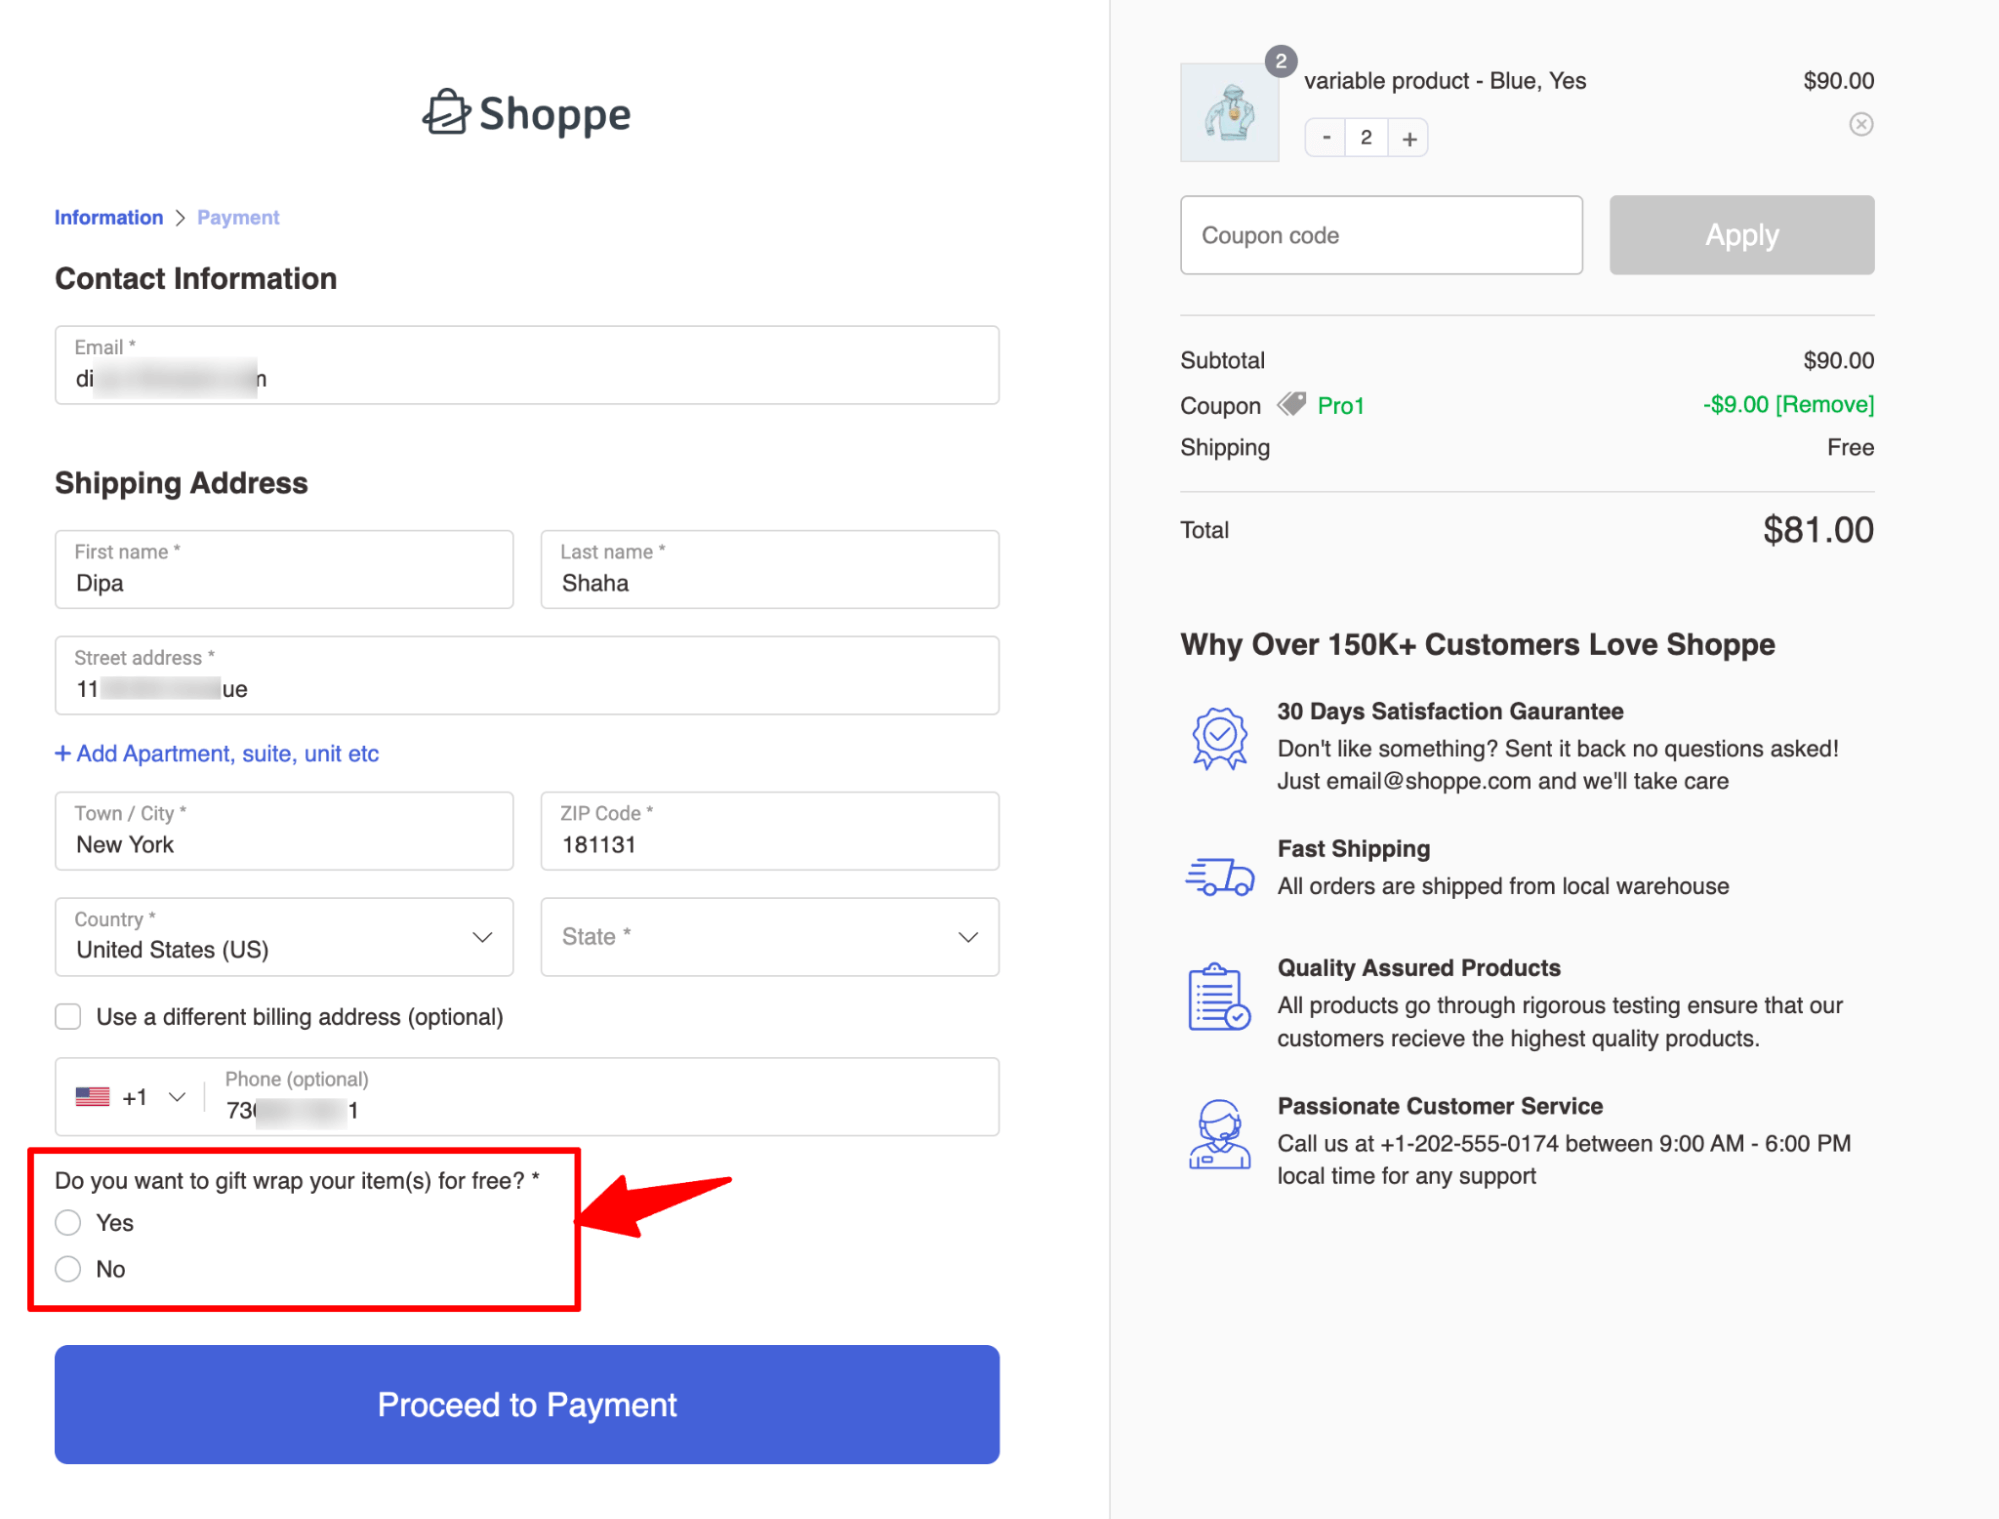
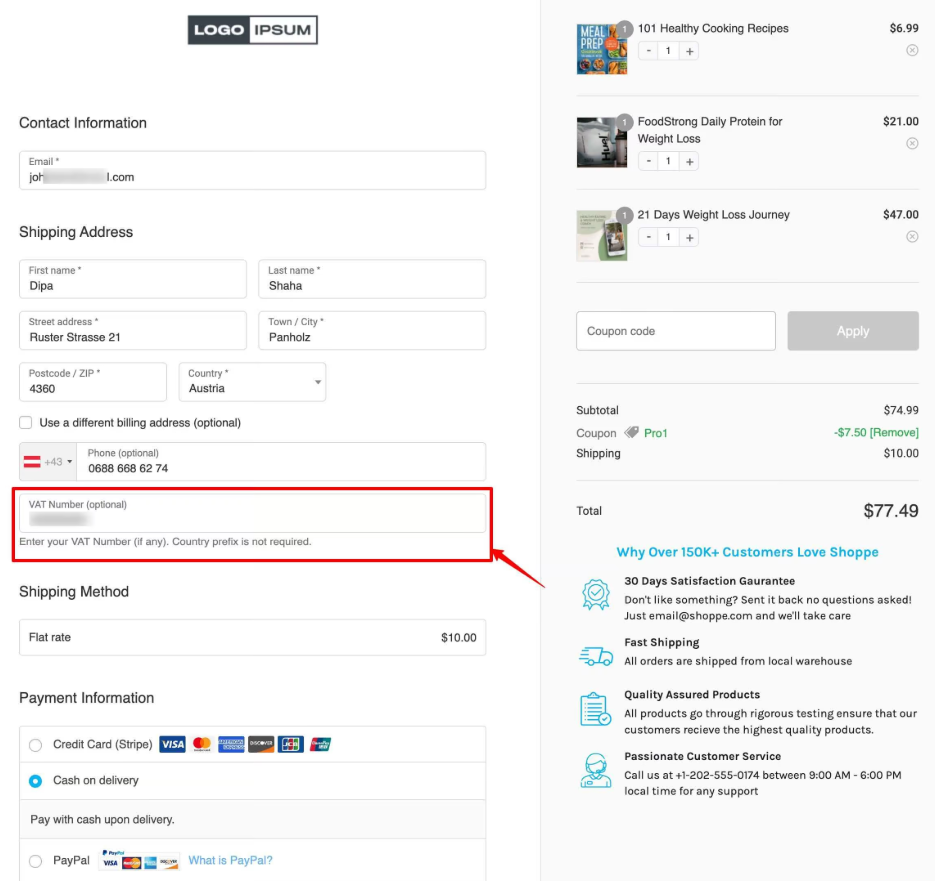
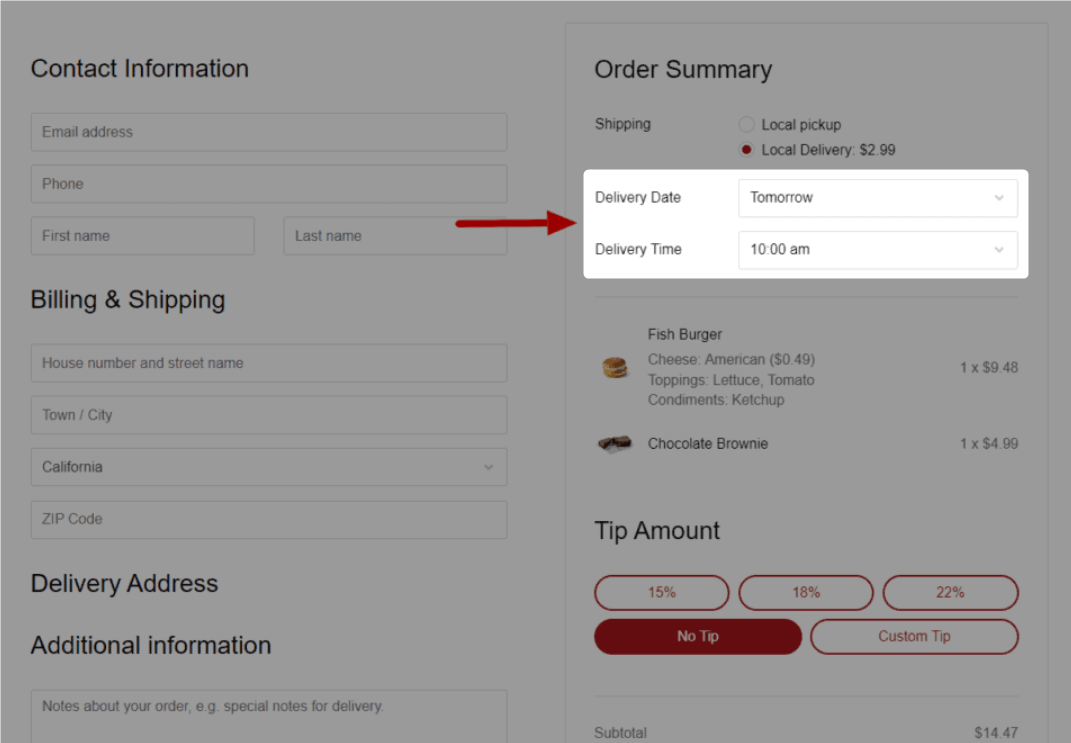
Optimized WooCommerce Checkout
One Click Upsells
Order Bumps
A/B Testing
Lead Generations
Analytics
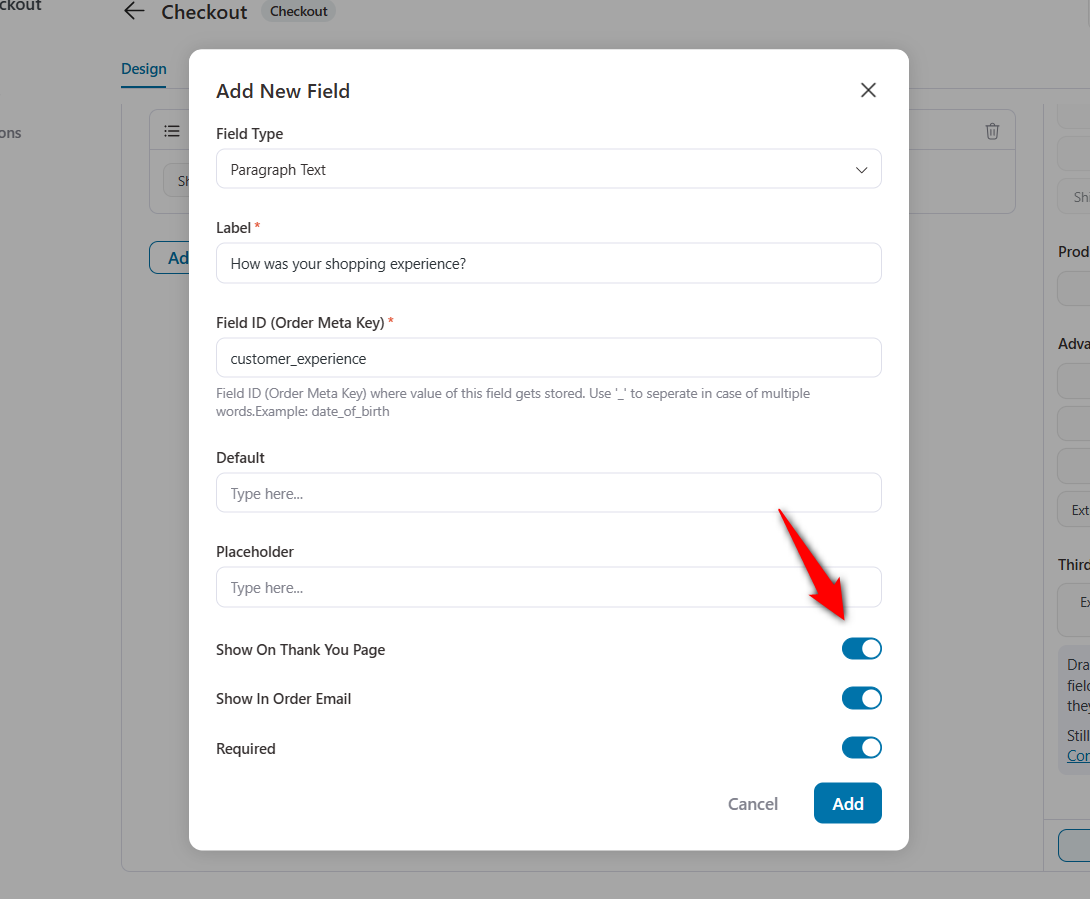
Thank You Page
Marketing Automations
Create broadcast and automated campaigns without leaving WordPress.
Email & SMS Marketing
Rich Contact Profiles
Workflow and Integrations
Segmented Broadcast
Revenue Tracking
Transactional Email
Abandoned Cart Recovery
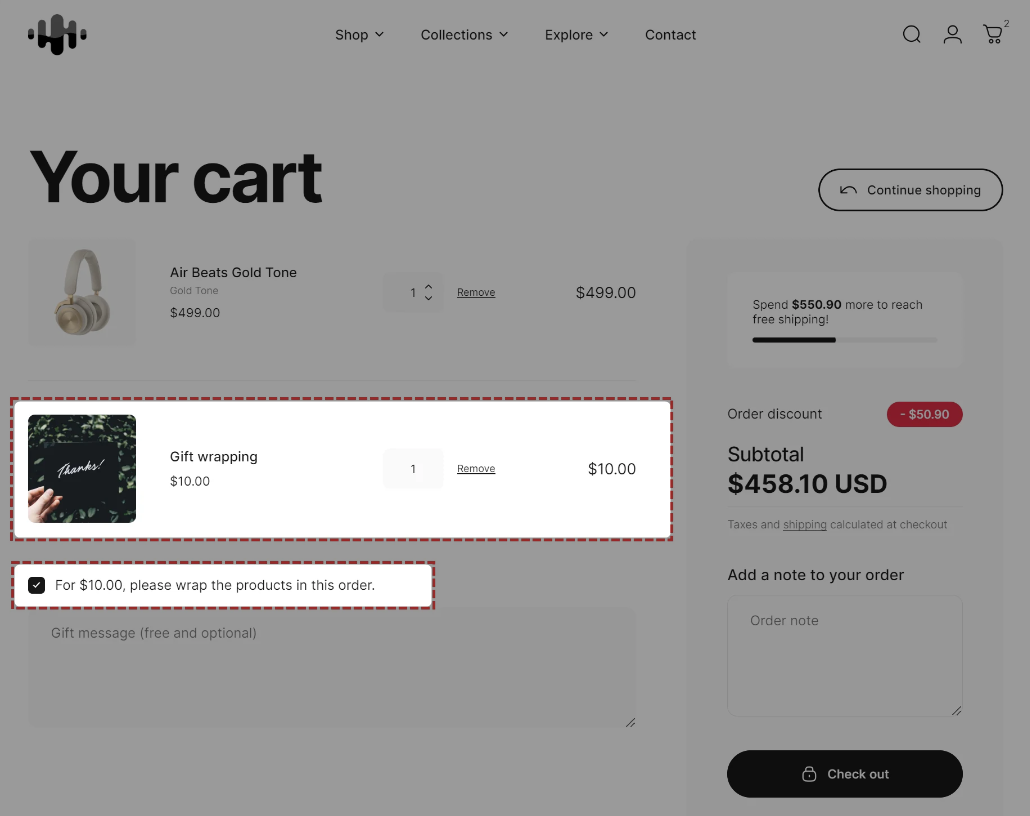
Sliding Cart
Meet FunnelKit's dynamic side cart—no more redundant pages!
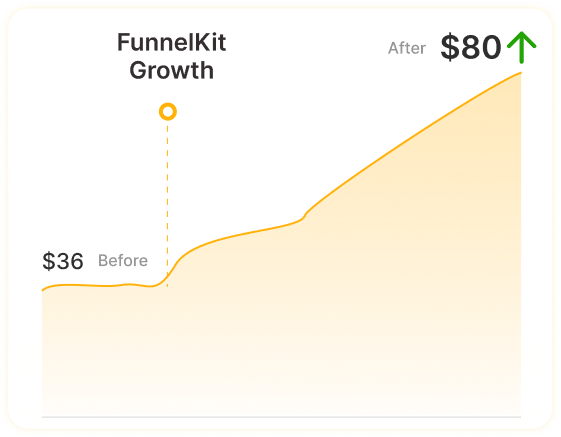
Boost Profits with Funnels & Automations
Over 899+ 5 star reviews show that FunnelKit users trust our top-rated support for their online business.
Pricing
Templates
Resources
Testimonials
Support


Leave a Reply
You must be logged in to post a comment.