
Dealing with VAT rules in the EU can be complicated.
For domestic transactions (B2B or B2C), VAT is charged at checkout.
However, in cross-border B2B transactions within the EU, VAT-registered businesses are exempt from paying VAT at checkout.
Instead, they're responsible for self-assessing and paying VAT in their own country through the reverse charge mechanism.
Failing to comply with VAT regulations can lead to fines and legal issues.
That's why adding an EU VAT number field at checkout is essential. It validates B2B transactions and ensures compliance with EU VAT rules.
In this blog, we'll compare the plugins that can add this field to your WooCommerce checkout, then walk you through the setup step by step.
Table of Contents
- 1 EU VAT Number: What It Is and How It Works?
- 2 Best WooCommerce EU VAT Number Field Plugins
- 3 How to Add the VAT Number Field in WooCommerce Checkout
- 4 Frequently Asked Questions About the EU VAT Number Field in WooCommerce
- 5 Can I add a VAT number field and charge tax for non-EU countries?
- 6 How can I exempt regular B2B customers from VAT in WooCommerce for the EU?
- 7 Why Adding an EU VAT Number Field to WooCommerce Checkout is Crucial?
- 8 Do I need a VAT number field on my WooCommerce checkout?
- 9 Does this validate UK VAT numbers?
- 10 Can I charge VAT to non-EU countries too?
- 11 Is VAT the same as the tax setting in WooCommerce?
- 12 Ready to Add the WooCommerce EU VAT Number Field To Your Checkout?
EU VAT Number: What It Is and How It Works?
VAT compliance is crucial for domestic and international purchases for businesses operating within the European Union.
Here’s a breakdown of the EU VAT number and how it works.
What is an EU VAT Number?
The EU VAT number, or the European Union Value Added Tax identification number or VAT ID, is a unique identifier assigned to businesses and individuals registered for Value Added Tax (VAT) purposes within the European Union (EU).
Each EU member state issues VAT numbers to businesses and traders within their jurisdiction.
The primary purpose of the EU VAT number is to facilitate the collection and tracking of VAT on goods and services within the EU.
It allows businesses to engage in cross-border trade with other EU member states while ensuring proper VAT compliance.
A typical VAT number consists of:
- A country code (two letters representing the EU member state)
- A unique number (digits or a combination of letters and numbers assigned by the tax authority)
For example:
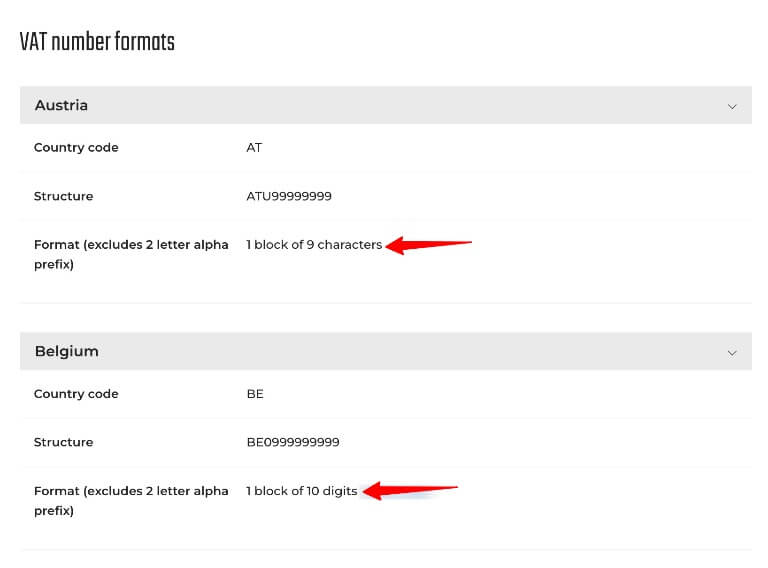
- Austria (AT): ATU99999999 (Prefix AT, followed by U and 8 digits)
- Belgium (BE): BE09999999999 (Prefix BE, followed by 10 digits)
It's important to note that the format and specific requirements for EU VAT numbers may vary from one EU member country to another.
Here, you can see the difference between the VAT number formats of two EU countries: Austria and Belgium.
How Does the EU VAT Number Work?
The EU VAT number is essential for determining how VAT is applied in EU and non-EU transactions.
Here’s when and why a VAT number is required:
1. Domestic Transactions (Same Country)
VAT treatment varies depending on whether the buyer is a business or an individual. Businesses may be eligible for VAT deductions, while consumers always pay VAT at checkout.
- B2B (Business-to-Business): VAT is charged unless an exemption applies. A VAT number is required for proper invoicing, VAT deduction eligibility, compliance with tax regulations, and qualifying for exemptions or reduced rates.
- B2C (Business-to-Consumer): VAT is always charged based on local VAT rates. Consumers don’t need A VAT number, as they cannot reclaim VAT.
2. Cross-Border Transactions (Within the EU)
When goods or services are sold between EU member states, VAT rules depend on whether the buyer is a VAT-registered business or a consumer.
- B2B Sales: If the buyer provides a valid VAT number, the seller does not charge VAT, and the reverse charge mechanism applies. The buyer self-assesses VAT in their own country. The seller must validate the VAT number through the VIES system and maintain records for tax compliance.
- B2C Sales: VAT is charged based on the buyer’s location under the One-Stop Shop (OSS) scheme. The seller must collect and remit VAT in the destination country. A VAT number is not required for B2C sales.
3. Transactions with Non-EU Countries
VAT rules differ when trading with businesses or consumers outside the EU. Exports are typically VAT-exempt, while imports are subject to VAT.
- Exports (EU to non-EU Buyers): VAT is not charged at checkout, as exports are zero-rated. However, the seller must retain proof of export (such as shipping documents) to justify the VAT exemption.
- Imports (Non-EU to EU Businesses): VAT-registered businesses must pay import VAT when bringing goods into the EU. They may reclaim this VAT using their VAT number through their country’s VAT return system, provided they meet the requirements.
Now you know why an EU VAT Number is so important for VAT compliance in EU transactions. To ensure compliance with EU VAT rules for WooCommerce stores, adding and validating an EU VAT Number field on the checkout page is very important.
Best WooCommerce EU VAT Number Field Plugins
| Plugin | Free Validation | Price | Validation Source | UK support | Best For |
|---|---|---|---|---|---|
| EU VAT Number (by Woo) | No | $39/year | VIES | No | First-party WooCommerce solution for EU-only stores |
| European VAT Compliance Assistant | No (Premium Feature) | €69.00/year | VIES, HMRC, VatSense | Yes | Compliance-focused B2B stores that need advanced VAT reporting and validation |
| YITH EU, OSS & IOSS VAT | No | €79,99/year | VIES | No | Businesses that need OSS and IOSS VAT scheme support |
Here are the details about the plugins:
1. EU VAT Number for WooCommerce (by Woo)
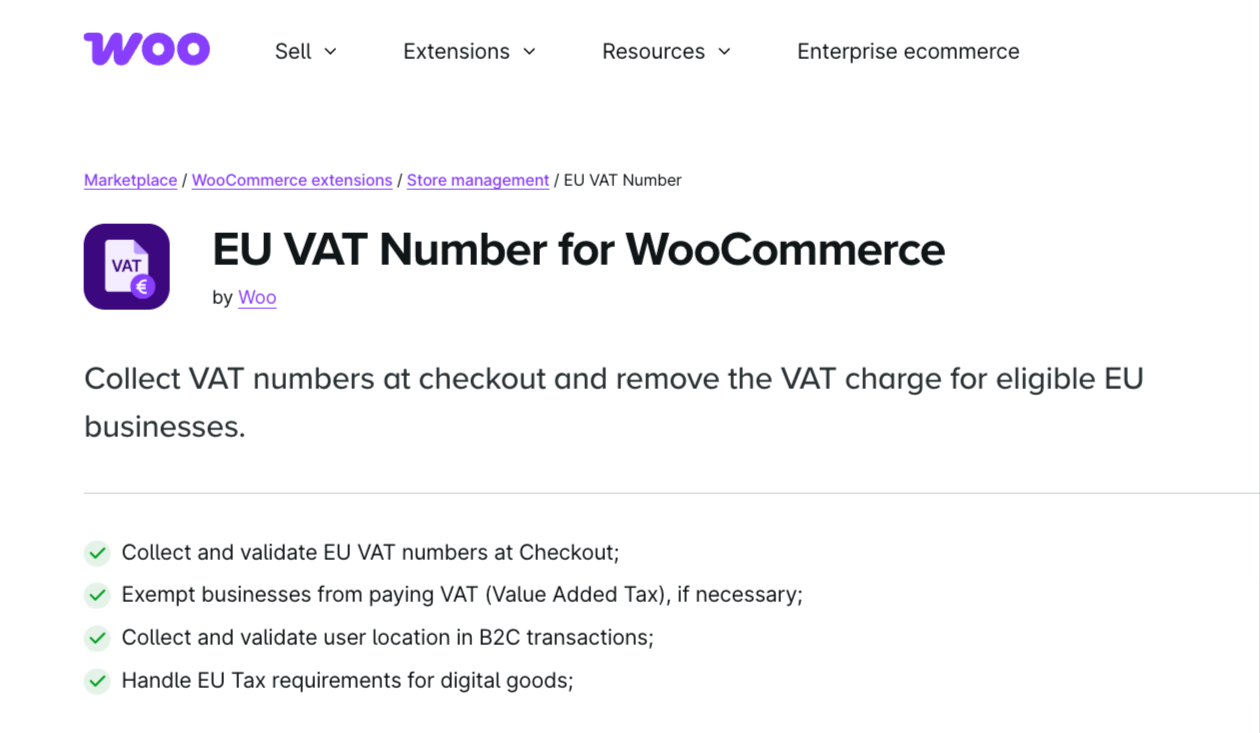
The official first-party extension is the one this tutorial uses. It collects and validates EU VAT numbers at checkout through the European Commission VIES API and automatically exempts eligible businesses. It is the most-installed option here, with over 30,000 active installs.
Two things to be upfront about. Due to recent HMRC API changes it can no longer validate UK VAT numbers, so it is EU-only, and reviews are mixed at 2.8 out of 5, with some users reporting occasional VIES server timeouts. For a store selling within the EU that wants the official Woo extension, it does the core job cleanly.
Price: $39 for one year, or $62.40 for two. No free version.
Best for: EU-based stores that want the official first-party plugin with simple VIES validation at checkout, and do not need UK support or reporting.
2. European VAT Compliance Assistant for WooCommerce
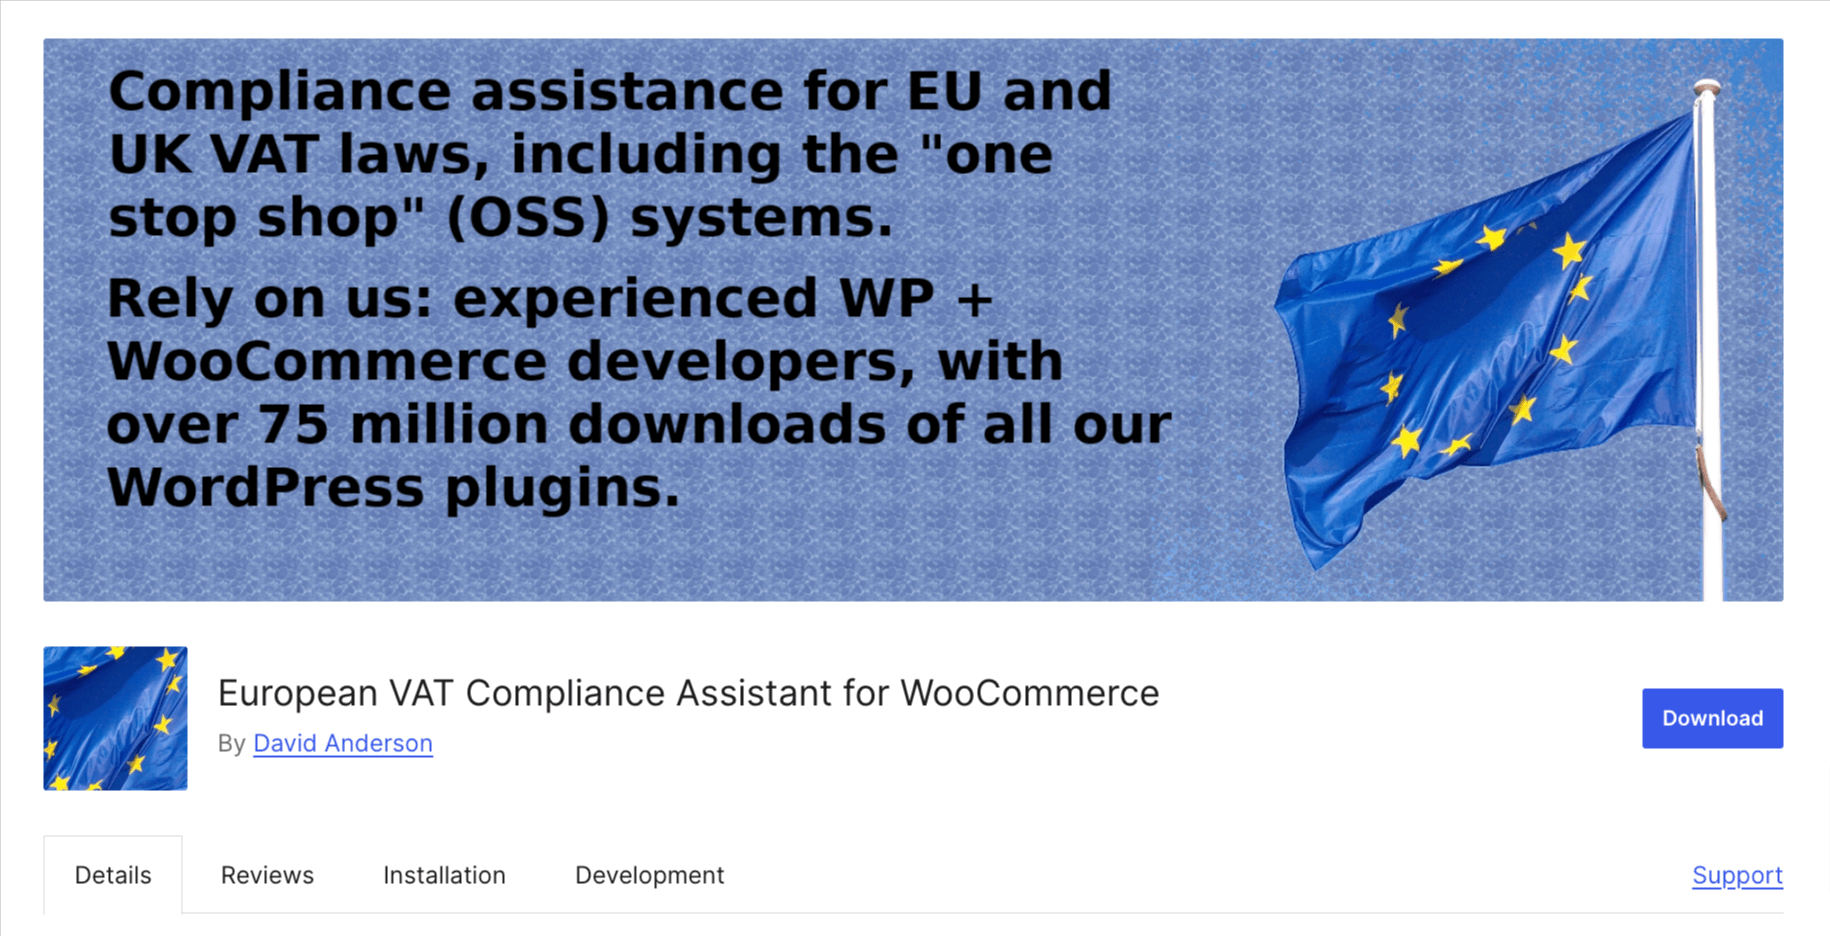
The most thorough compliance option, built by David Anderson of Team Updraft, the UpdraftPlus developer. It is actively maintained at version 1.36.6, updated within the last month, and holds a 4.8 out of 5 rating. The free version handles location evidence, VAT rate entry, and OSS, MOSS and IOSS reporting with CSV export, and it works with both classic and block checkout.
The thing to know is that VAT number validation and exemption are premium-only features, validated via VIES, HMRC or VatSense. So the free tier alone will not validate the field at checkout. Its strength is being the one option here that still covers UK numbers and gives you proper audit-ready reporting.
Price: free. Pro starts at €69.00/year.
Best for: B2B stores that need UK validation plus OSS and IOSS reporting.
3. YITH WooCommerce EU, OSS, and IOSS VAT
The pick to highlight if OSS and IOSS handling matters more than the field itself. It manages country-based rates, mandatory and optional field rules, and real-time validation messages, and ranks in the SERP for this query.
Price: € 79,99/ year.
Best for: stores that need OSS or IOSS scheme handling alongside the VAT field.
How to Add the VAT Number Field in WooCommerce Checkout
To follow along, you will use EU VAT Number for WooCommerce (the official Woo extension), which handles the core job. It adds the VAT number field to your checkout and validates each entry against the European Commission's VIES service, automatically removing VAT for eligible EU businesses.
Install and activate before you start.
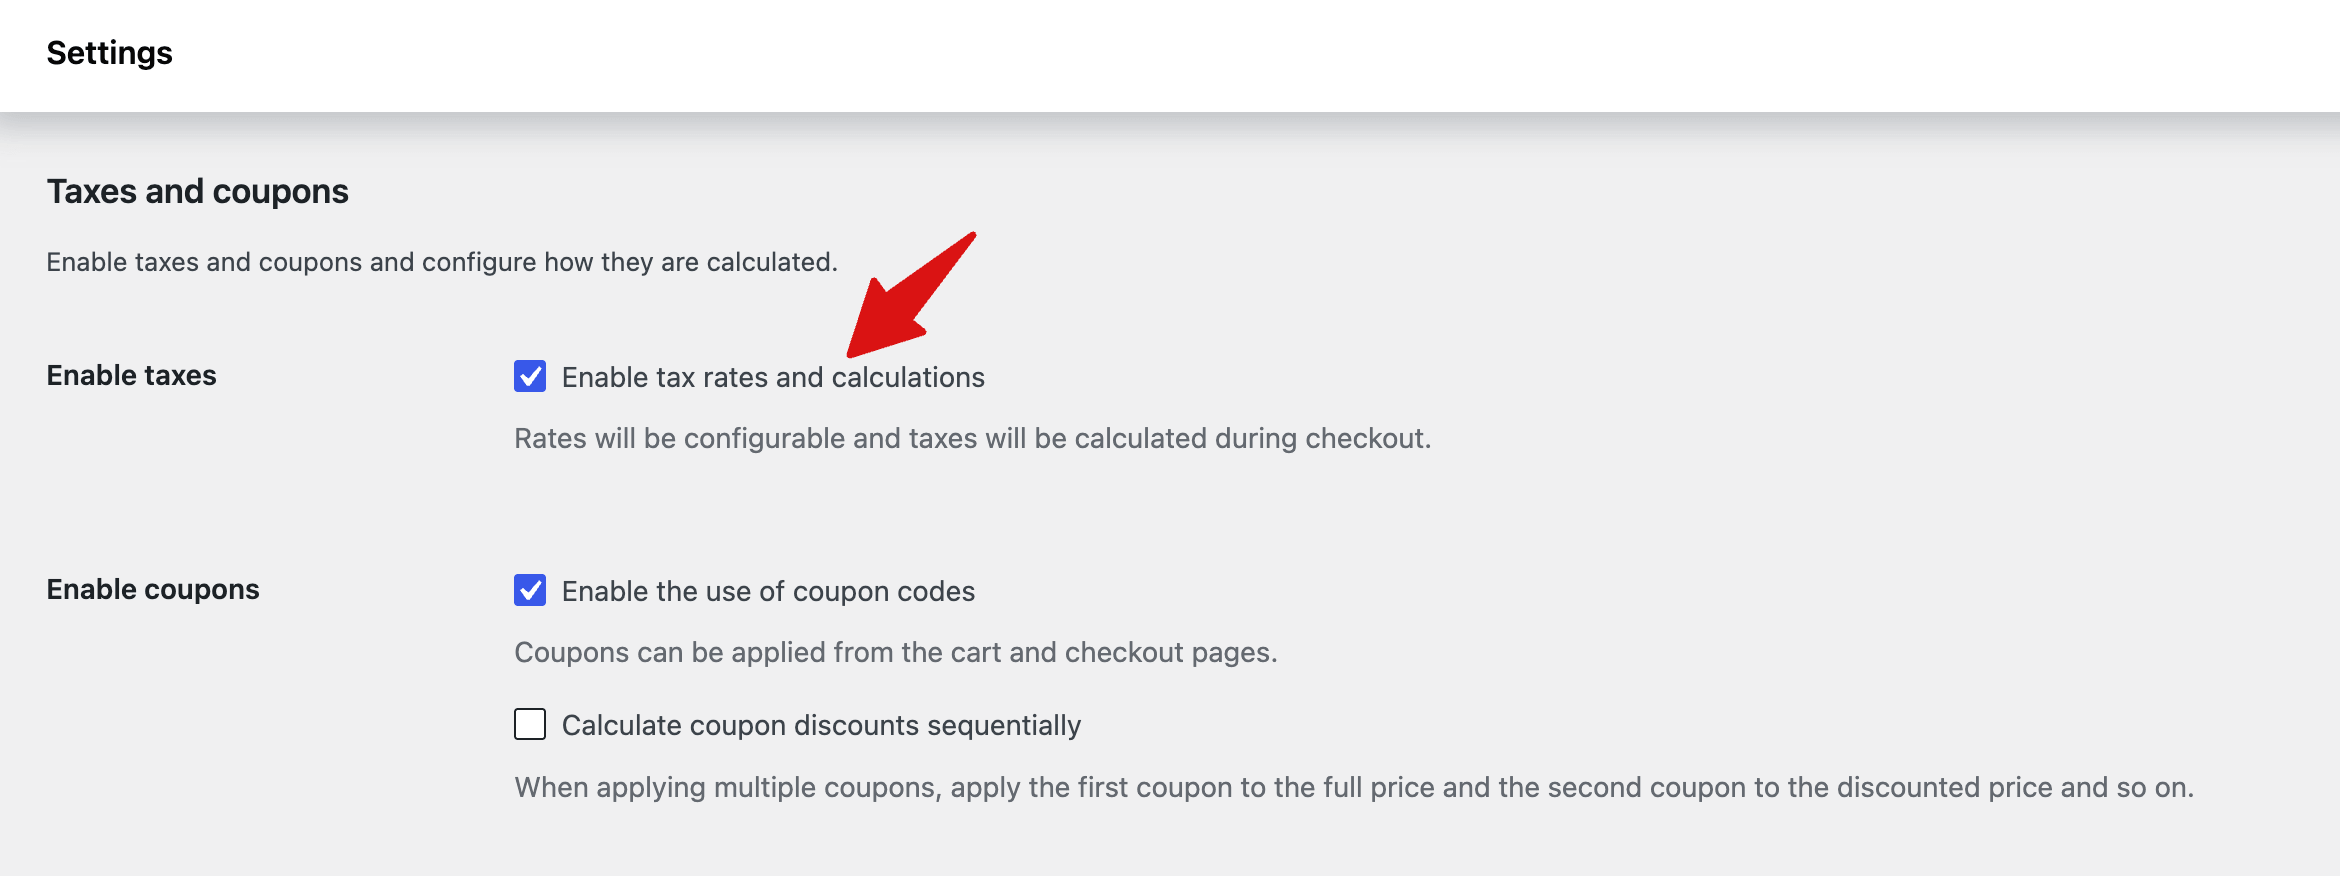
Step 1: Enable taxes in WooCommerce
Go to WooCommerce ⇒Settings ⇒General, and tick "Enable tax rates and calculations," then save. This turns on the Tax tab where your VAT rates live. Without it, WooCommerce will not calculate tax at checkout, so the VAT field will have nothing to apply or remove. If taxes are already on, skip ahead.
Step 2: Configure the VAT field and validation
Go to WooCommerce, Settings, Tax, and open the EU VAT Number section. Configure these options:
- VAT Number Field Label: Set the label for the VAT field at checkout.
- VAT Number Field Description: Set the description text that will be shown at checkout.
- Remove VAT for Businesses in Your Base Country: Exempts VAT even for customers in your own country. Off by default.
- Failed Validation Handling: Choose "Reject the order and show an error message" to block invalid numbers.
- Use shipping address for validation: Validates against the shipping country instead of billing. Enable only if you tax by shipping address.
- Require that VAT number includes country code: Set to "Yes, require country prefix" (e.g. PL0123456789), recommended for proper VIES validation.
- Enable B2B Transactions: Forces all customers to enter a VAT number. Use only for B2B-only stores.
Note: For digital sellers, also set your Tax Classes for Digital Goods (Standard, Reduced, or Zero rate) under EU VAT Digital Goods Handling, then enable Collect and Validate Evidence to check the customer's IP against their billing address. This applies only to digital goods and services.
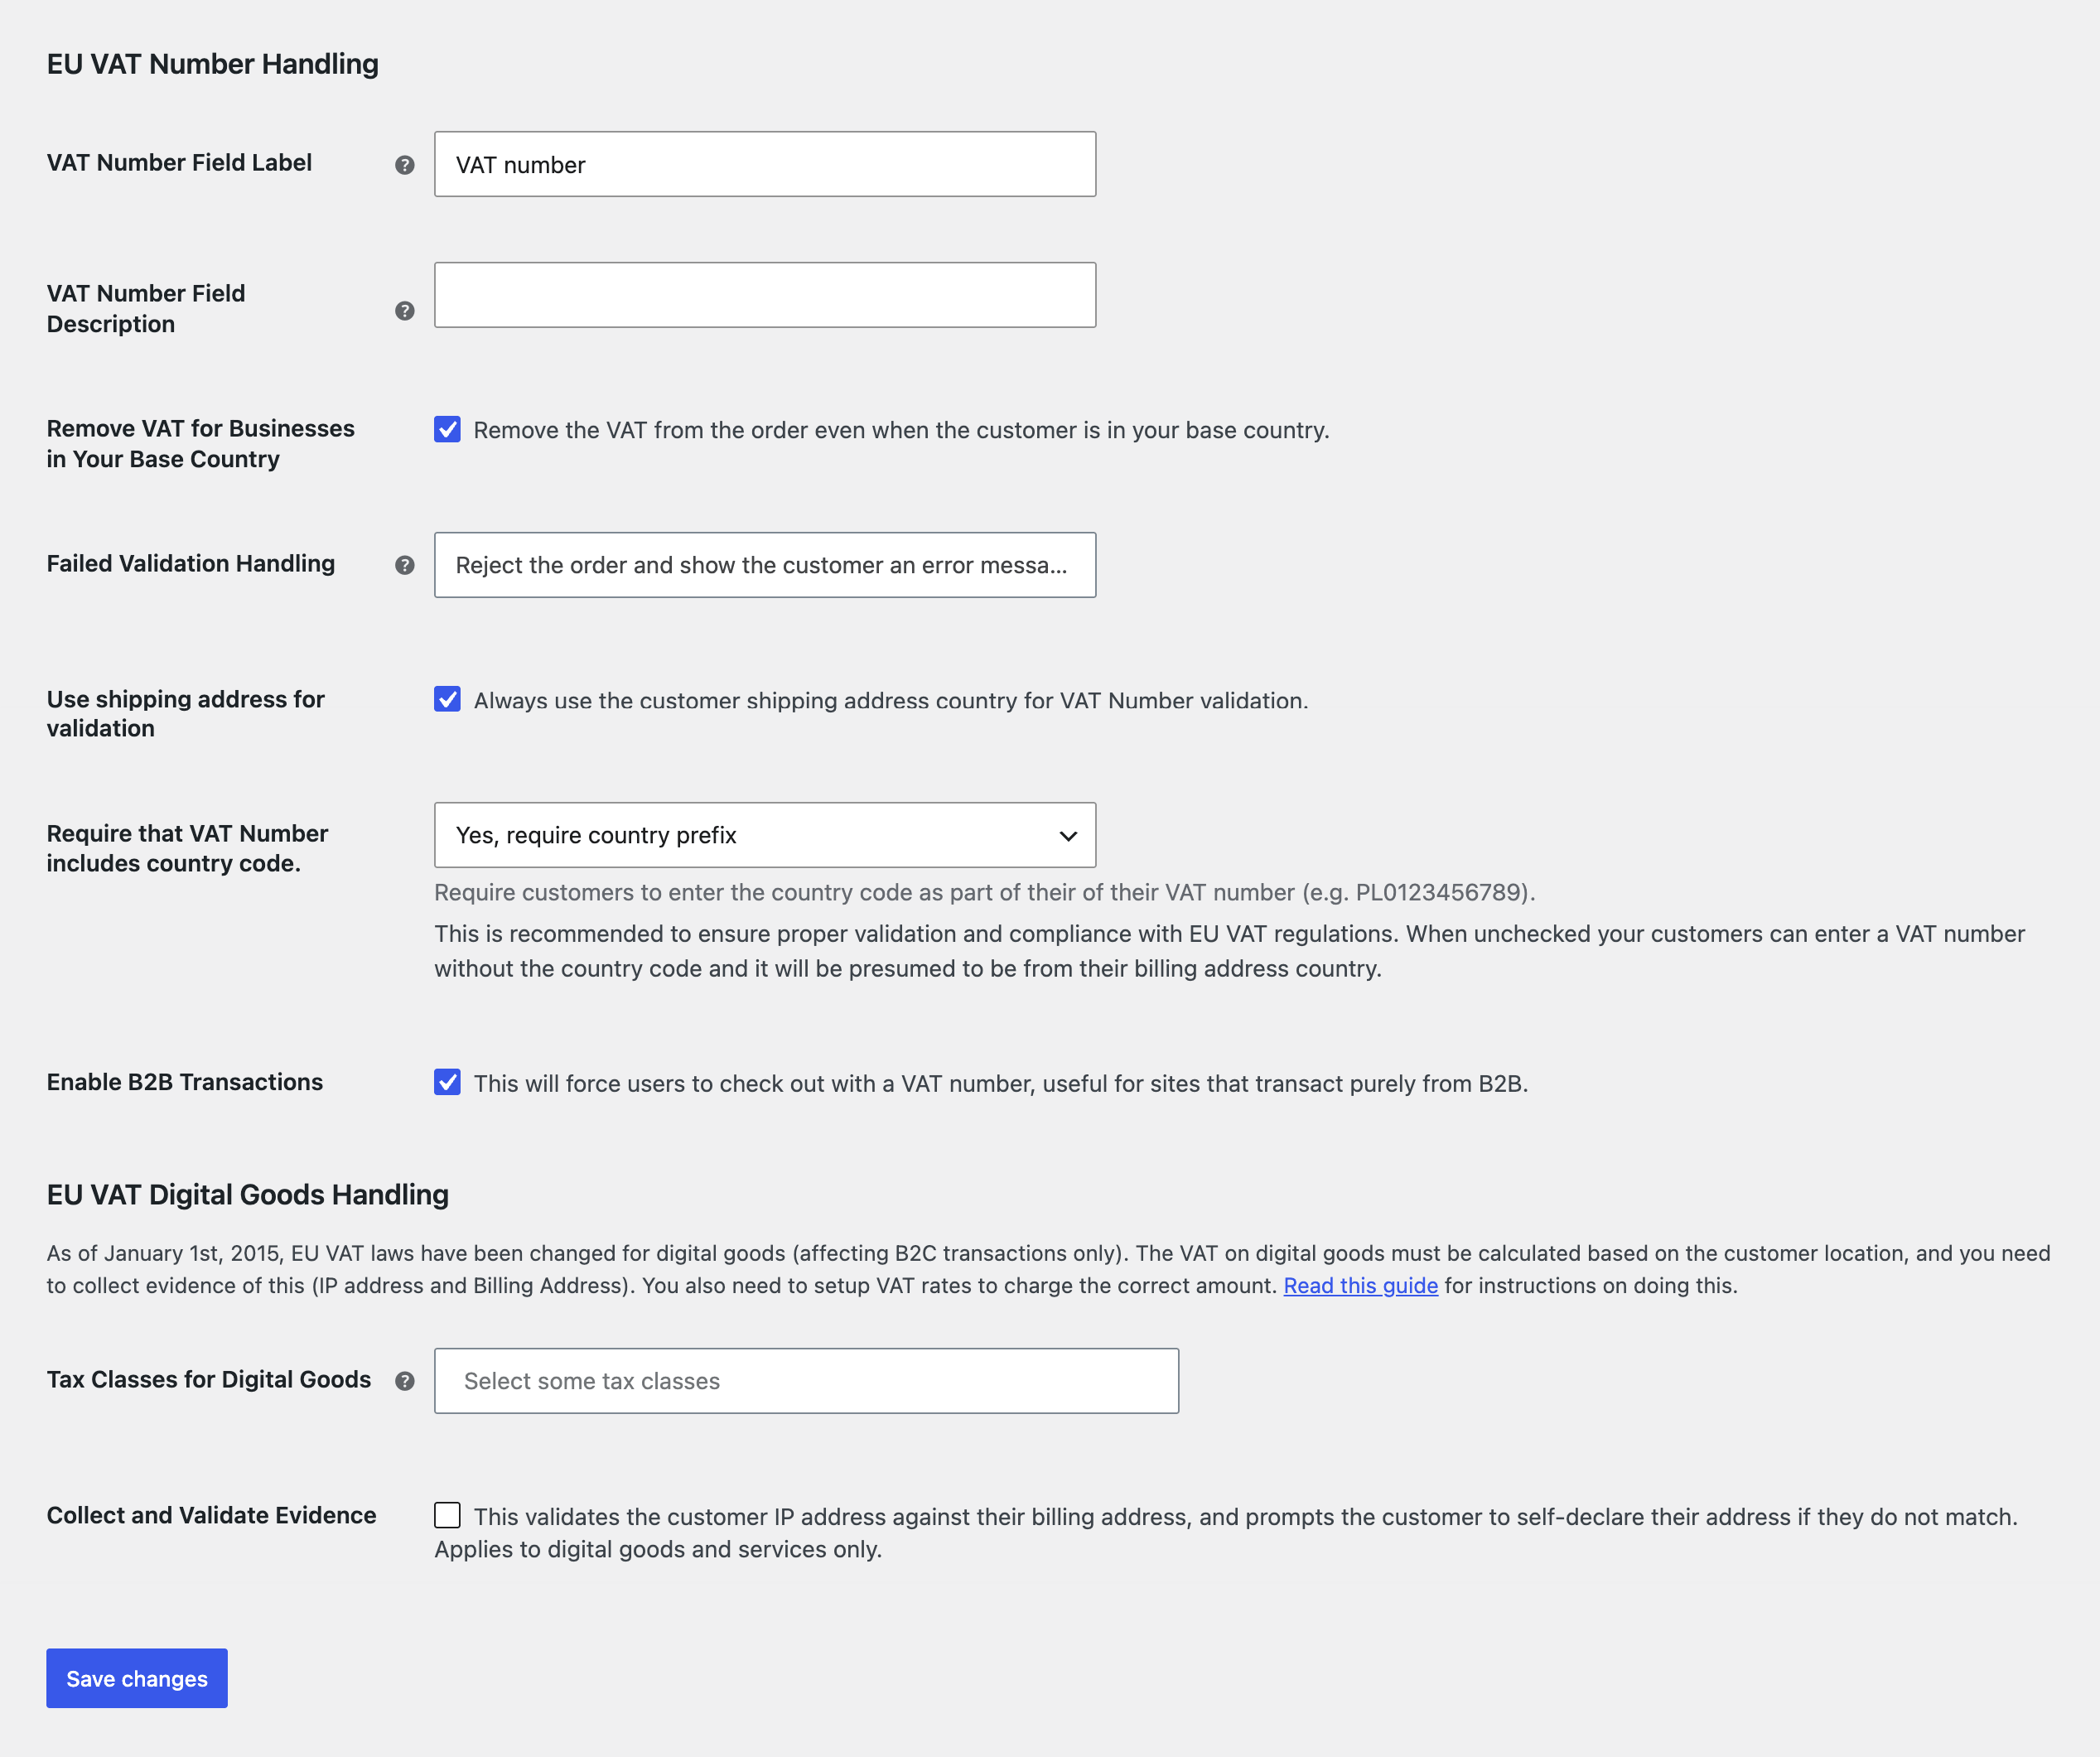
Hit, Save changes.
The extension now adds the VAT field to the checkout, validates entries against VIES, and automatically applies the exemption when a number is valid.
Step 3: Add your EU VAT rates
The extension validates numbers and applies exemptions, but it does not set how much VAT to charge. That comes from your WooCommerce tax rates. Go to WooCommerce ⇒ Settings ⇒ Tax, and add a rate for each EU country you sell to, so the correct VAT is charged wherever an exemption does not apply.
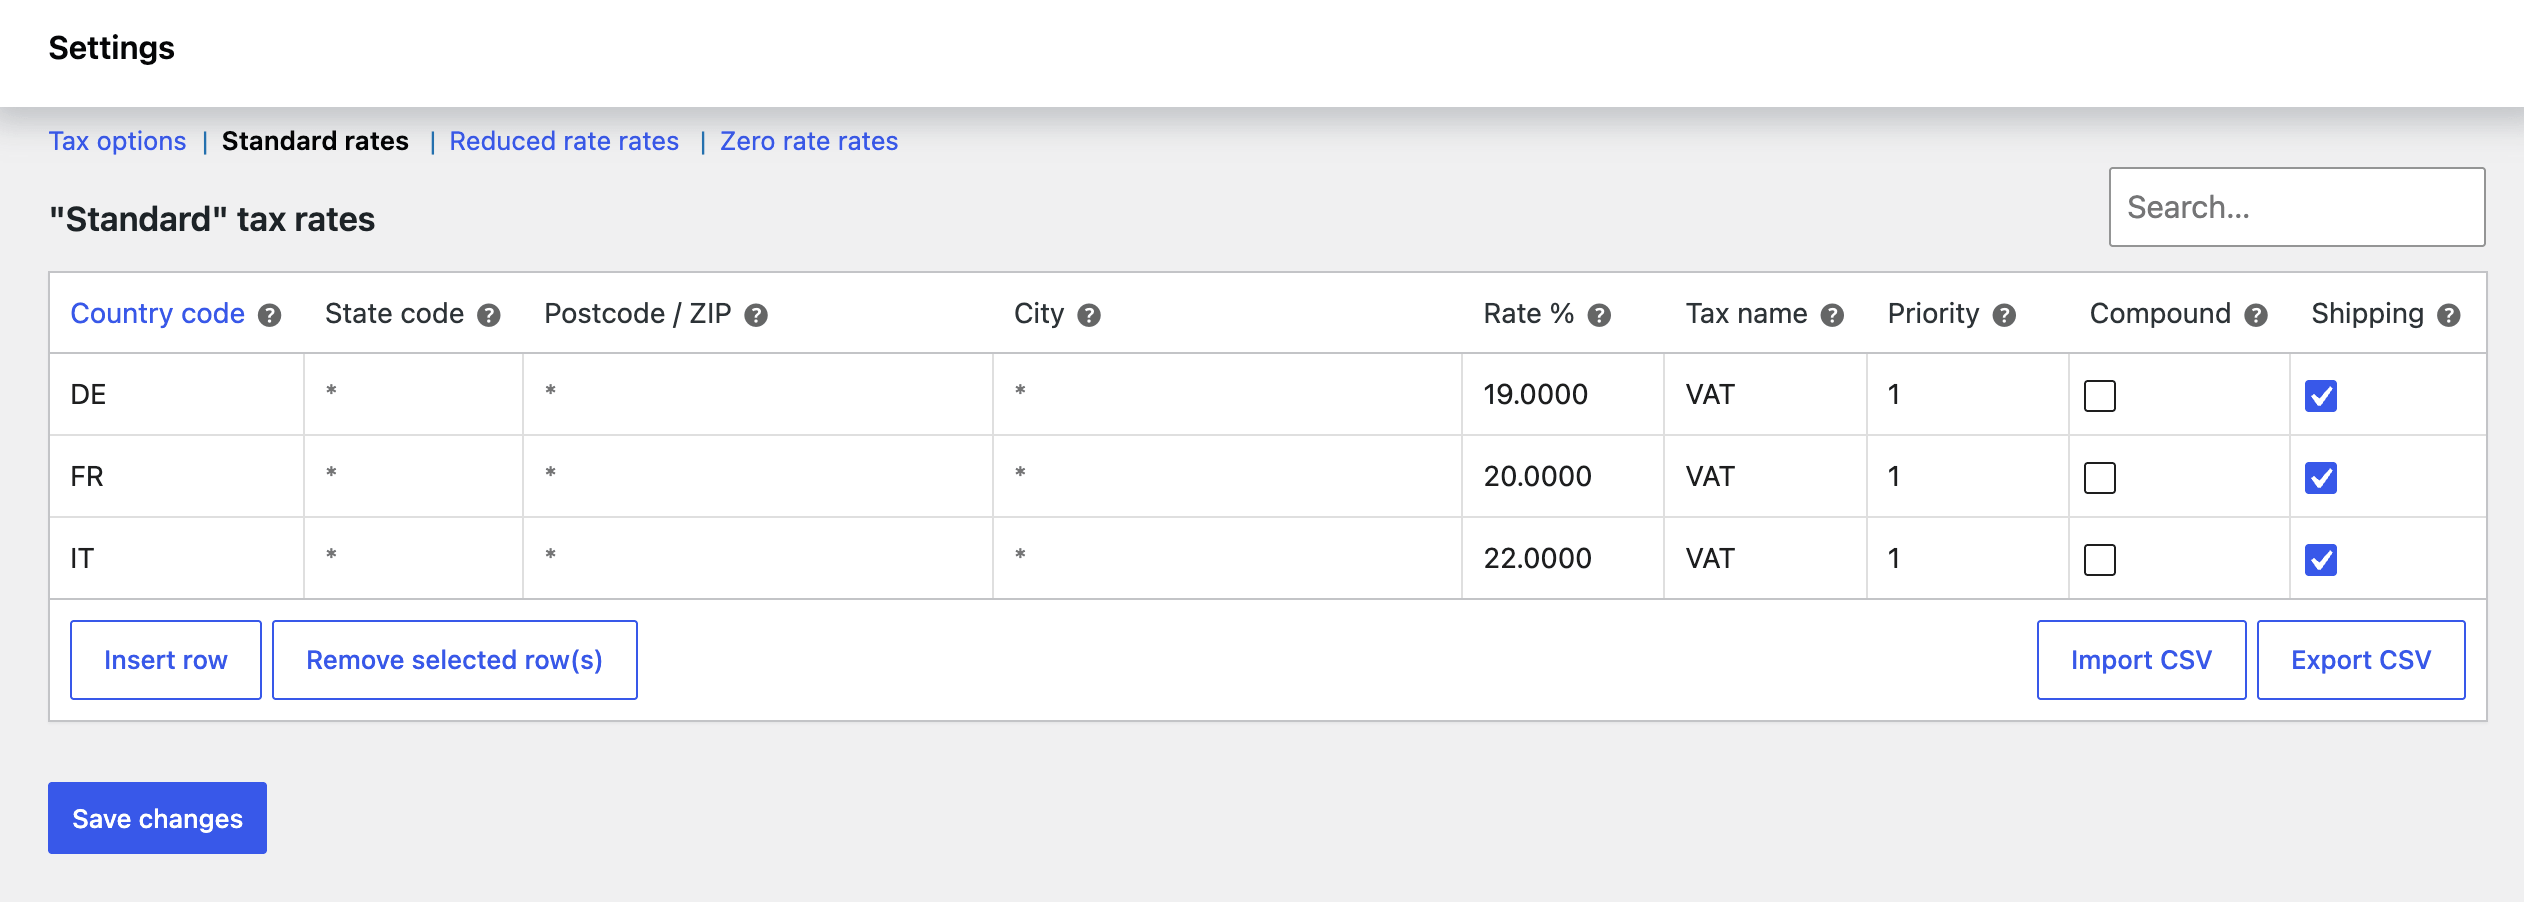
That keeps it accurate. VAT is the tax, WooCommerce tax rates set the amount, and the extension handles the exemptions on top.
Step 4: Test a valid and an invalid number
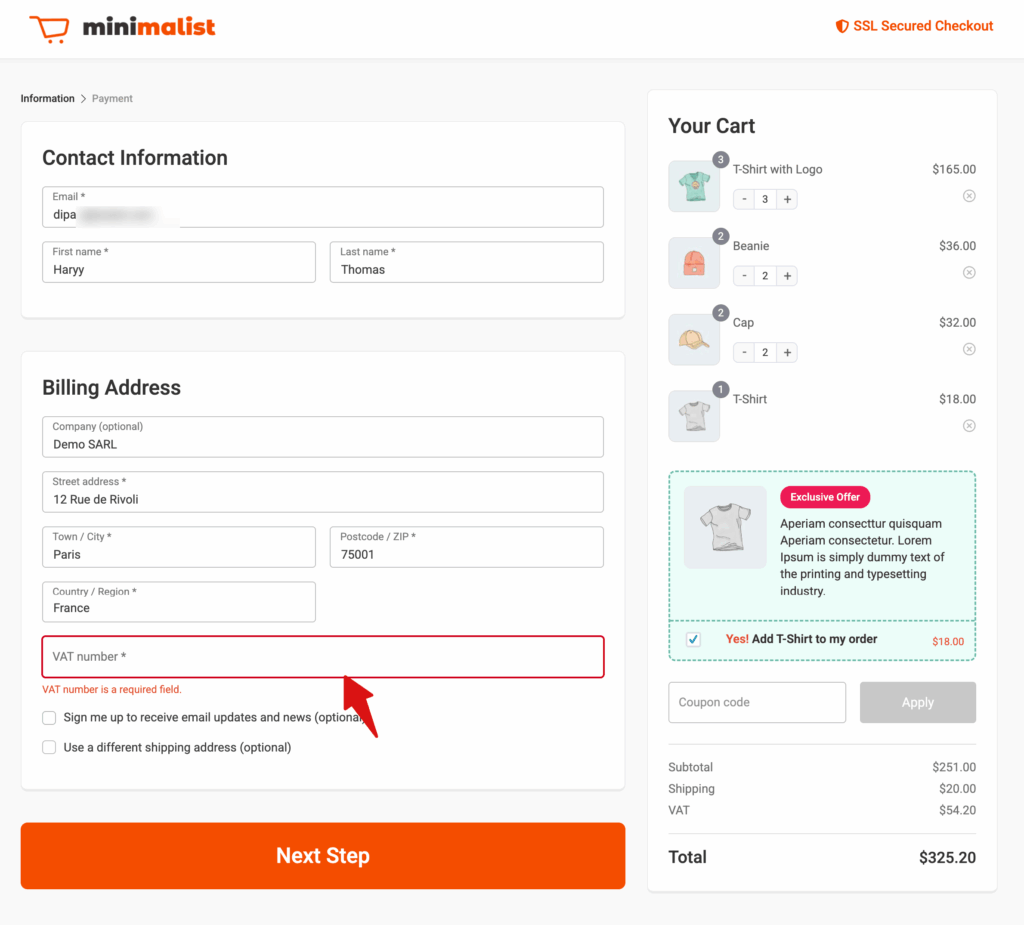
Place a test order and check that the VAT field appears on the checkout. If you made it required, skipping it shows a "required" warning.
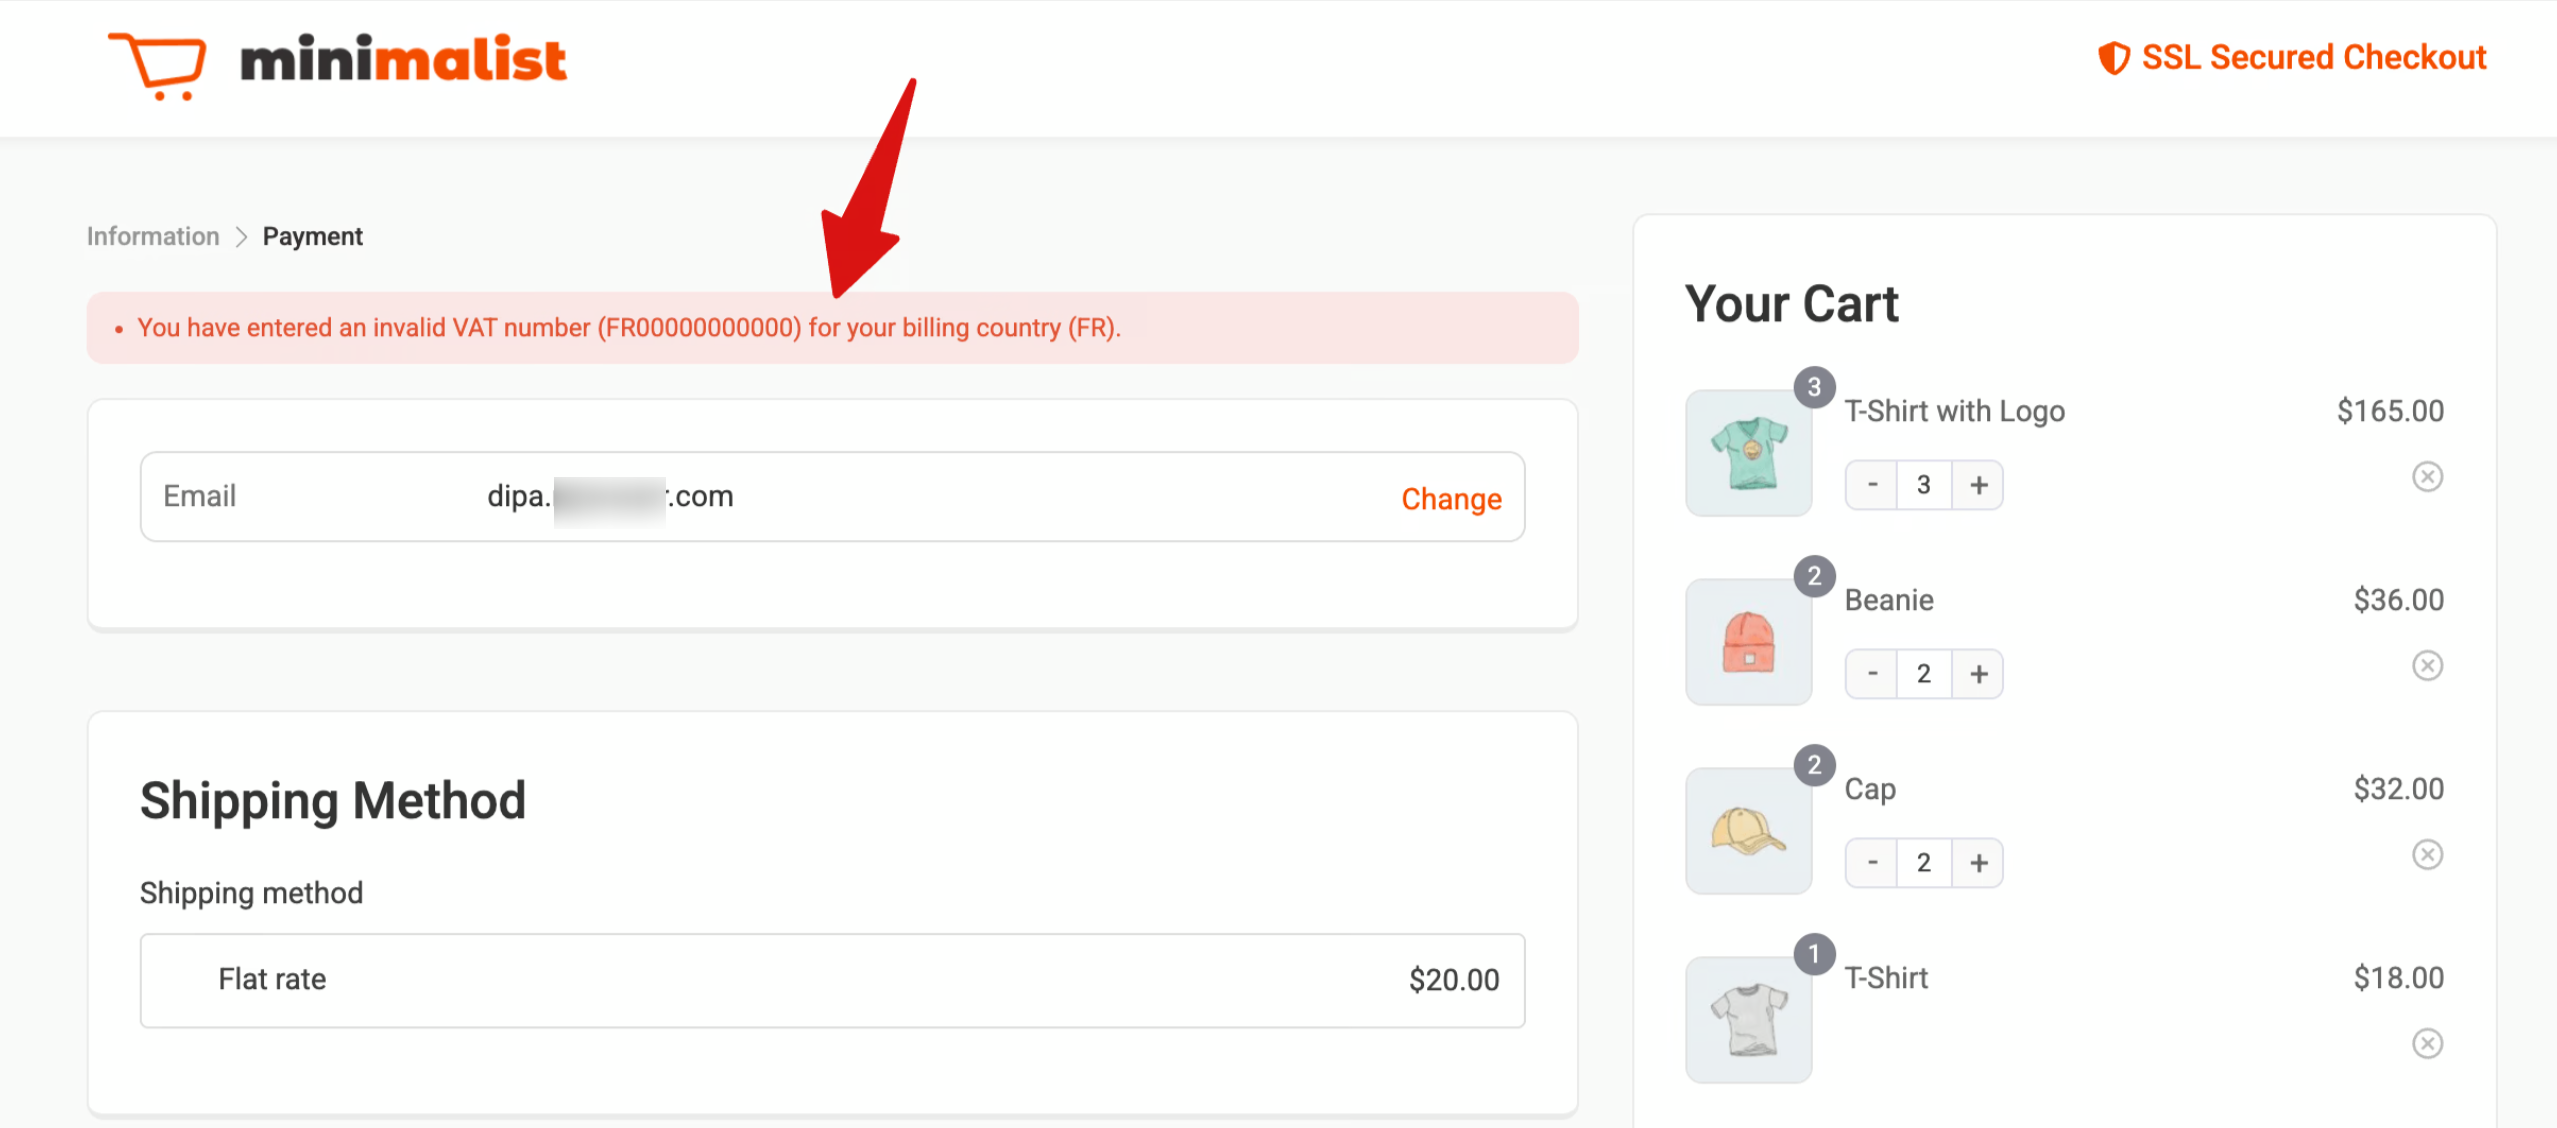
Enter a valid EU VAT number along with a matching EU billing address. The checkout validates the number against VIES, and once it passes, the VAT line in the order summary updates, and the tax is removed from the total. If invalid, it shows a message that the VAT number field is invalid.
Note: VAT is removed only when the billing country is an EU country other than your store's base country, since reverse charge applies to cross-border B2B sales.
That’s it. That is how easily you can add an EU VAT Number field to WooCommerce checkout.
Frequently Asked Questions About the EU VAT Number Field in WooCommerce
Have a look at some of the commonly asked questions:
Can I add a VAT number field and charge tax for non-EU countries?
Yes, you can add a VAT number field in WooCommerce and configure tax settings to charge tax for non-EU countries.
In this blog, we shared how you can collect VAT numbers at checkout. To charge tax for non-EU countries, configure tax rates under WooCommerce > Settings > Tax and define rates for specific regions. You can read our blog on WooCommerce taxes.
In this case, the VAT number field should be optional, as non-EU customers will not have an EU VAT number.
How can I exempt regular B2B customers from VAT in WooCommerce for the EU?
To exempt B2B customers from VAT in WooCommerce for the EU, use a plugin like EU/UK VAT Manager for WooCommerce.
This plugin adds a VAT number field at checkout and validates VAT IDs through the VIES system. If the VAT number is valid, the customer is automatically exempt from VAT.
You can configure these settings under WooCommerce > Settings > Tax to apply exemptions based on VAT validation results.
Why Adding an EU VAT Number Field to WooCommerce Checkout is Crucial?
As you know, the EU enforces specific VAT rules for both domestic and cross-border B2B transactions, and failure to follow them can result in penalties or delays.
That's why adding an EU VAT number field to your WooCommerce checkout is a crucial step to ensure your business stays compliant and avoids potential issues.
Not only does this help you meet legal requirements, but it also improves your customers’ shopping experience by providing transparency and simplifying the checkout process.
Here’s why you should add an EU VAT number field to your WooCommerce store’s checkout:
Ensure compliance with EU VAT regulations
Adding a VAT number field helps your business comply with EU VAT rules, ensuring accurate VAT application and preventing errors in VAT calculation.
Avoid penalties
A VAT number field reduces non-compliance risk, helping you avoid fines or legal trouble for improper VAT handling.
Improve transaction transparency
Displaying VAT information during checkout builds trust with EU customers, reduces cart abandonment caused by unexpected charges, and provides greater price transparency.
Streamline the checkout process
A VAT number field helps calculate VAT correctly, ensuring a smooth purchasing experience for B2B customers and reducing errors in pricing.
Simplify invoicing
Collecting VAT numbers helps streamline invoicing, especially when operating across multiple EU countries with varying VAT rates.
By adding a VAT number field to your checkout page, you ensure VAT compliance while providing a better experience for your customers, keeping your business running smoothly within the EU.
Does the WooCommerce Checkout Have a VAT Number Field by Default?
No, unfortunately, WooCommerce, by default, does not offer any option to add a VAT number field to the checkout page.
But with the help of an additional plugin, you can easily add a VAT number field and validate it to ensure VAT compliance for transactions in EU businesses.
Do I need a VAT number field on my WooCommerce checkout?
If you sell to businesses in the EU, yes. For cross-border B2B sales, VAT-registered businesses are exempt from VAT at checkout under the reverse charge mechanism, and you are required to validate their number and keep records. A VAT field lets you collect and verify those numbers, apply the exemption correctly, and stay compliant. For purely B2C stores, it is optional.
Does this validate UK VAT numbers?
No. Since Brexit, UK VAT numbers are no longer handled by VIES and must be validated through HMRC instead. The official EU VAT Number extension is EU-only. If you need UK validation, use a plugin that supports HMRC, such as the European VAT Compliance Assistant.
Can I charge VAT to non-EU countries too?
Yes. The VAT field handles EU validation and exemptions, while your tax rates under WooCommerce, Settings, Tax control what is charged elsewhere. Add rates for any non-EU regions you sell to, and keep the VAT field optional so non-EU customers are not forced to fill it in.
Is VAT the same as the tax setting in WooCommerce?
VAT is a type of tax, not a separate system. You enter it as a tax rate under WooCommerce, Settings, Tax. The extension does not set the rate, it only validates numbers and removes VAT for eligible businesses. How much VAT is charged comes from your tax rates.
Ready to Add the WooCommerce EU VAT Number Field To Your Checkout?
Adding an EU VAT number field is a practical step toward staying compliant with EU tax rules and making B2B checkout smoother.
With the official EU VAT Number extension handling VIES validation and automatic exemptions, and your WooCommerce tax rates set correctly, your store collects and verifies VAT numbers without any manual work.
The result is fewer compliance headaches, clearer pricing for your EU business customers, and a checkout that handles reverse charge the way it should.
And if you want that field on a faster, higher-converting checkout, FunnelKit Funnel Builder turns a compliance requirement into a smoother buying experience.

Editorial Team
July 7, 2026Are shoppers adding products to their cart and leaving before they buy? According to Baymard Institute research on checkout usability, 18% of shoppers who abandon their cart do so because...

Editorial Team
July 7, 2026You’ve built your WooCommerce store, polished your product pages, and invested in marketing, but sales aren’t coming. Visitors browse, some add items to their cart, and most vanish before completing...

Editorial Team
July 3, 2026Discover how a canceled order doesn't have to mean a lost customer, and how the right WooCommerce canceled order email can turn it into a second chance. WooCommerce canceled order...


