

If you sell products online, you need to build an Elementor sales funnel to maximize sales.
A sales funnel guide helps you convert visitors into buyers through a well-charted course/well-defined path.
You can create a sales funnel using the most popular page builder, Elementor. It's easy to create different pages for your funnel using the drag-and-drop-based builder.
In this article, we’ll dig deeper and see exactly how you can design your Elementor sales funnels. We will help you build a sales funnel with Elementor that's designed to convert.
In this video tutorial, explore how you can create a WooCommerce sales funnel in WordPress:
Why Should You Use Elementor to Build a Sales Funnel?
A sales funnel can help you achieve up to 7% conversion rate.
And you, too, can achieve such high conversion rates when you create modern and beautiful pages. One of the ways is to use the Elementor plugin for WordPress to build them.
The Elementor page builder is a drag-and-drop page builder that empowers you to build a device-responsive sales funnel.
Moreover, pages built with Elementor load super fast. Page speed matters as every one-second improvement in page load time can increase the conversion rate by 2%.
Furthermore, Elementor comes with 40+ widgets that you can use to create all the important sales funnel pages while having a live preview of what it looks like.
If you want to create a sales funnel in any language other than English, then Elementor’s got you covered with that, too! That's because the page builder supports 59+ languages and is RTL-compatible.
We know this has got you super excited about sales funnels and the idea of building one with Elementor.
To learn more, move to the next section.
Table of Contents
- 1 How to Create an Elementor Sales Funnel that Converts?
- 1.1 Step 1: Import a prebuilt sales funnel template
- 1.2 Step 2: Optimize your elementor sales page
- 1.3 Step 3: Customize the checkout page to maximize conversions
- 1.4 Step 4: Add product to checkout
- 1.5 Step 5: Add a pre-purchase order bump to the checkout page
- 1.6 Step 6: Add a post-purchase one-click upsells offer to increase AOV
- 2 Frequently Asked Questions About Elementor Sales Funnel
- 3 Do I need Elementor Pro to build a sales funnel, or does the free version work?
- 4 What are the functional differences between building a sales funnel using only Elementor versus combining Elementor with FunnelKit?
- 5 Can I use an Elementor sales funnel to sell digital products as well as physical ones?
- 6 How many pages does a proper Elementor sales funnel need?
- 7 Can I A/B test my Elementor sales funnel pages?
- 8 Create Your Elementor Sales Funnel Today!
How to Create an Elementor Sales Funnel that Converts?
In this section, we’ll show you how to create an Elementor sales funnel that helps you increase conversions on your online business site and boost AOV.
For this tutorial, we’ll use the FunnelKit Funnel Builder and Elementor page builder to create a high-converting, visually appealing sales funnel.
FunnelKit Funnel Builder is the highest rating sales Funnel Builder, trusted by over 40,000 merchants worldwide.
Make sure to install and activate both the sales funnel builder and Elementor.
Then let's get started!
Step 1: Import a prebuilt sales funnel template
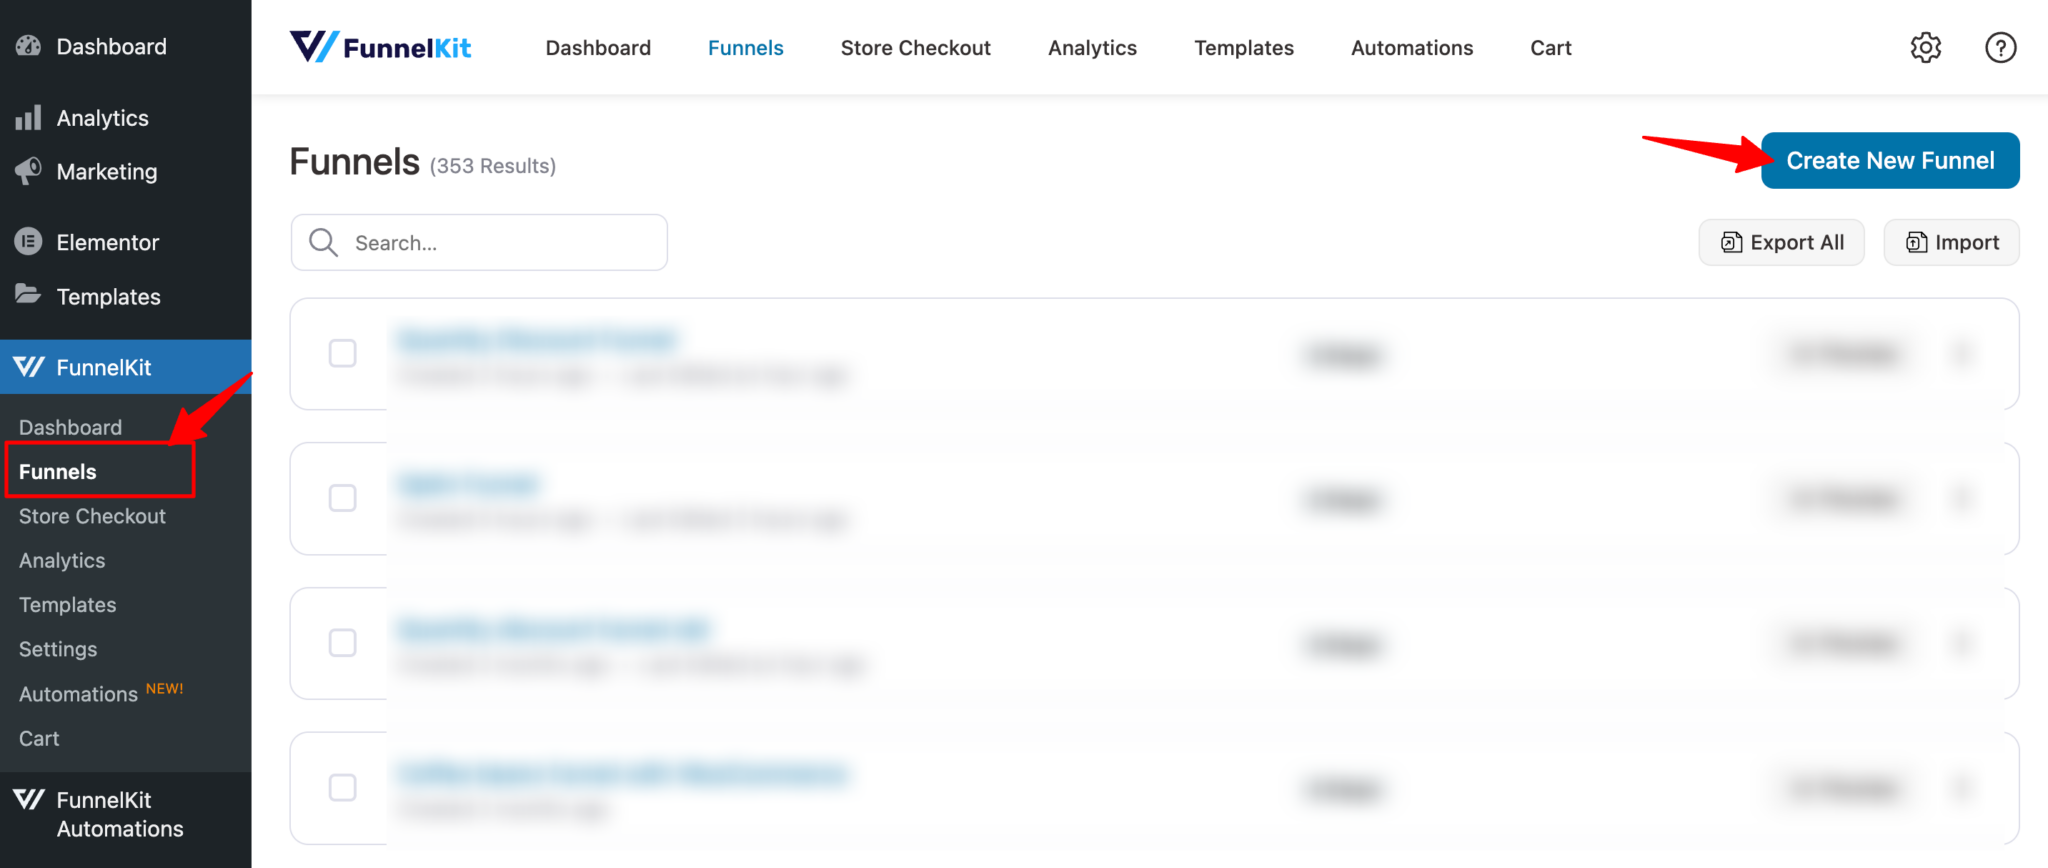
Go to FunnelKit ⇒ Funnels from the WordPress admin panel and click the Add New Funnel.
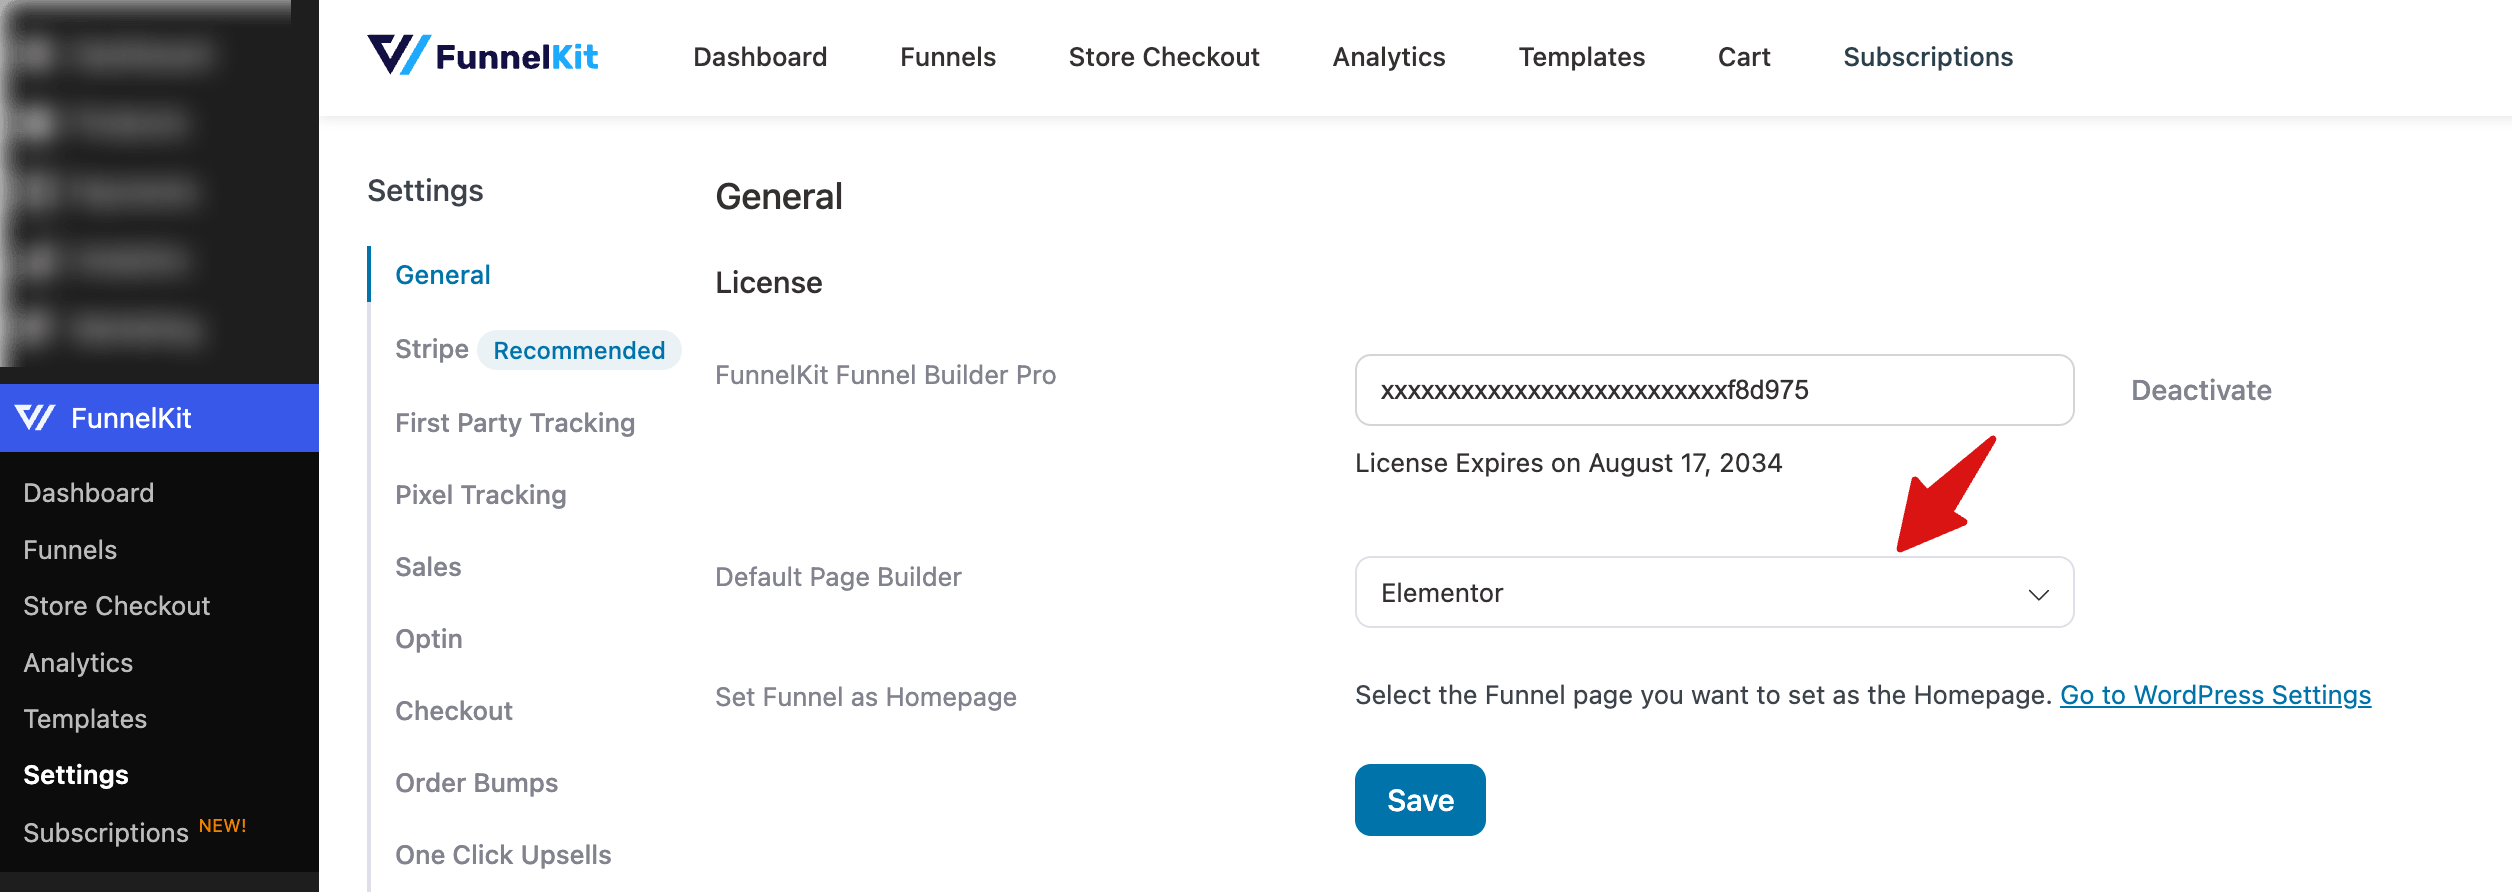
Note: FunnelKit selects the page builder automatically in the background. You can find the default page builder settigns under General tab and make sure it's Elementor.
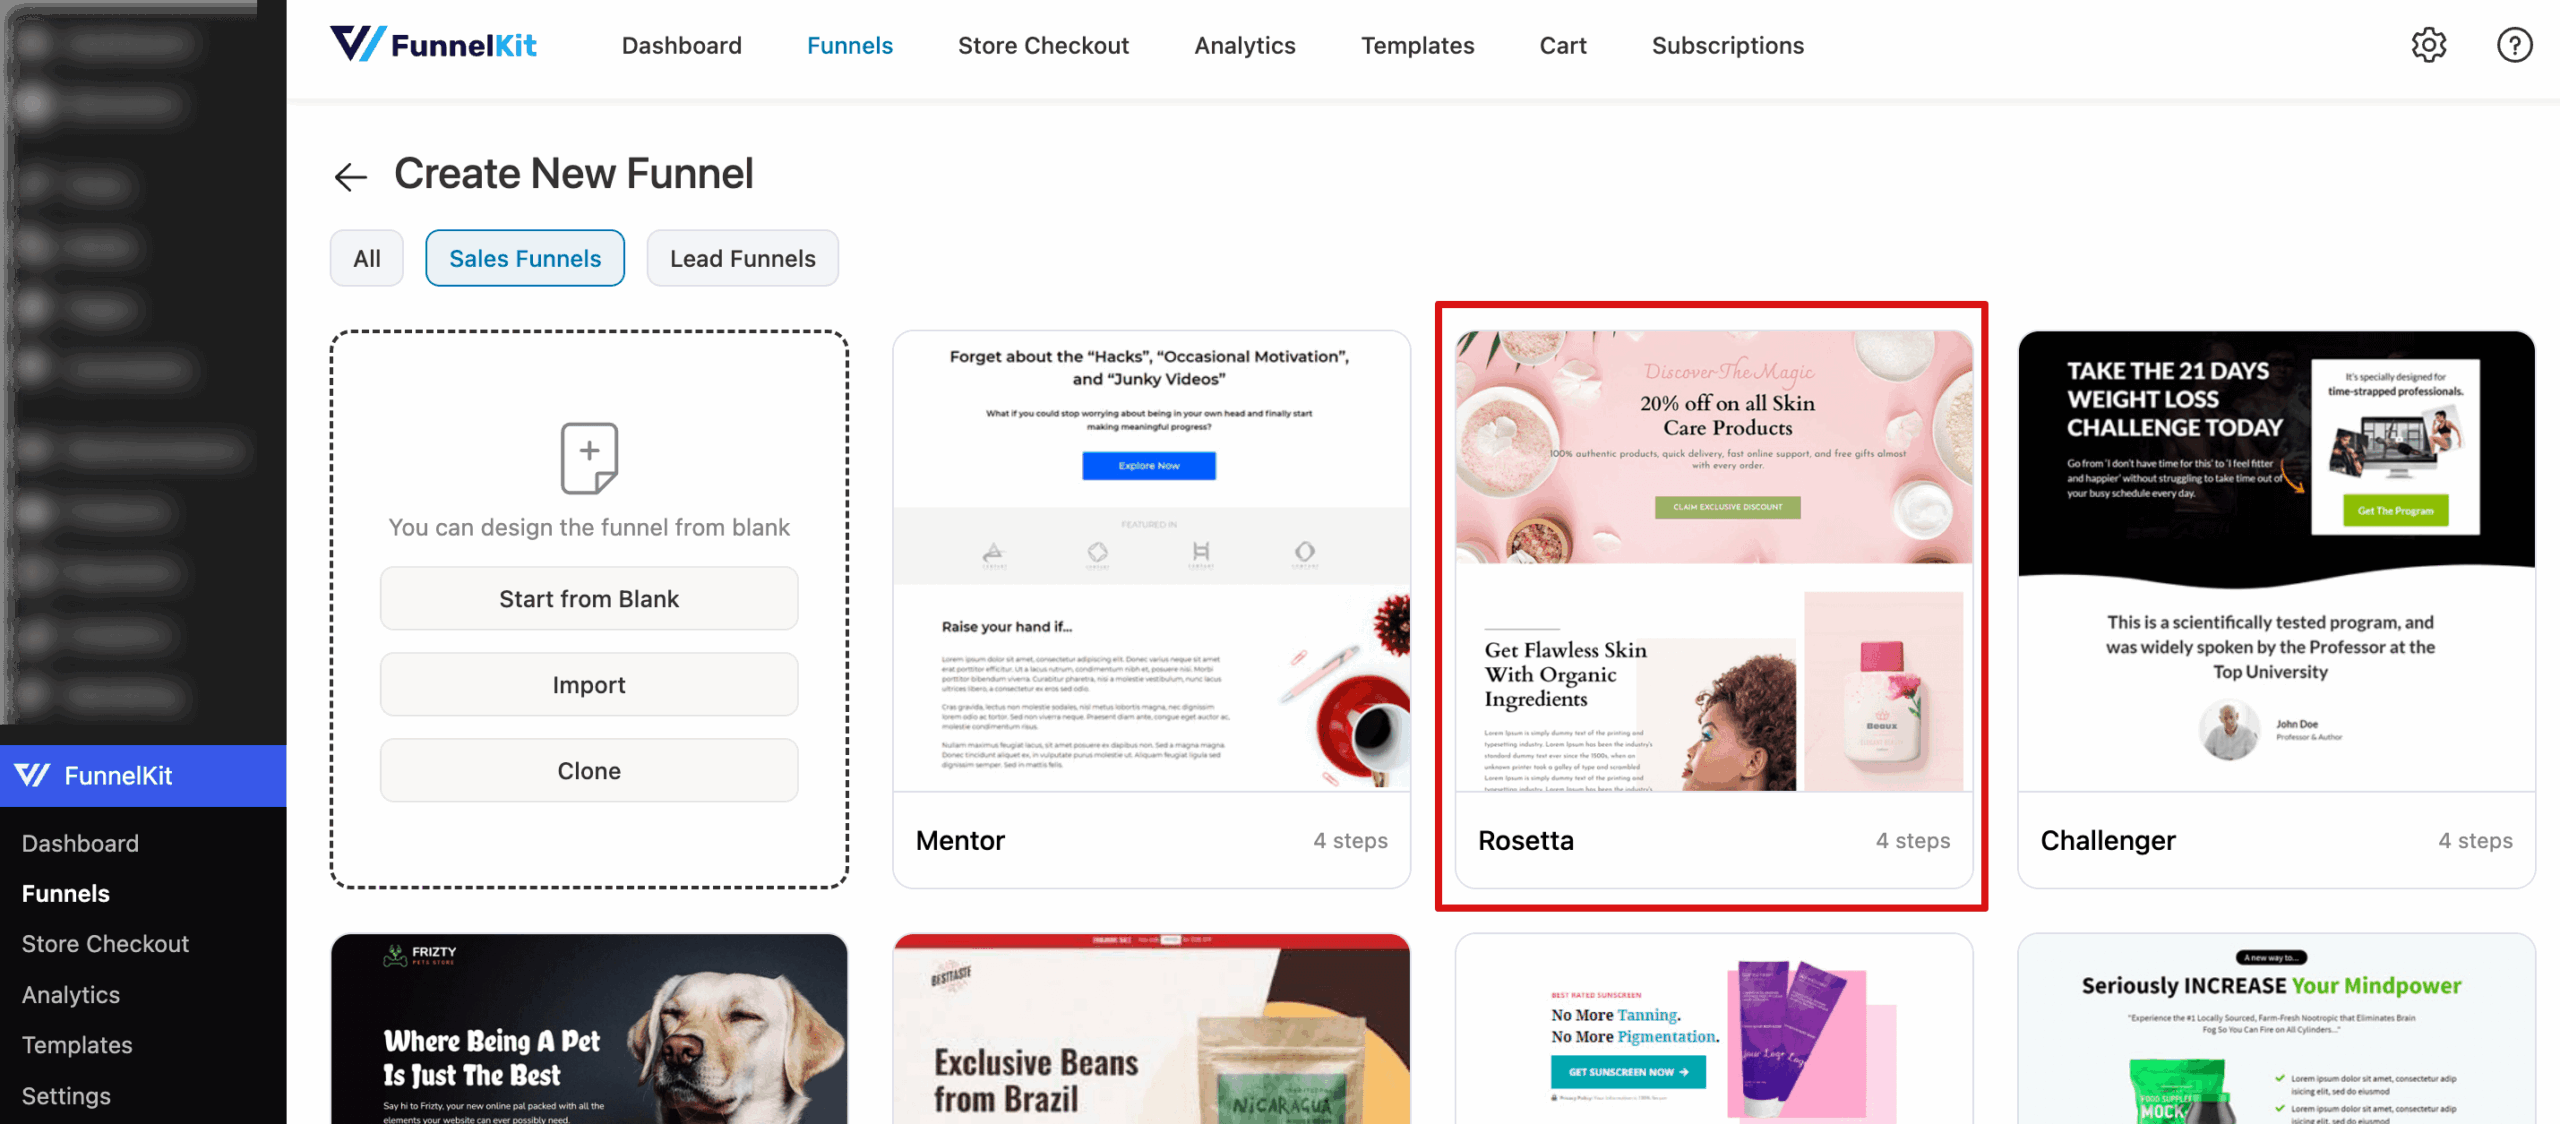
Next, view the pre-designed sales funnel templates that are built with the mentioned page builder. Hover on the template you like and click on Preview. Here, we are going with Rosetta.
You can preview the available sales funnel templates and click on the Import This Funnel button to start using the one you like. After that, provide a name for the sales funnel and click on Add.

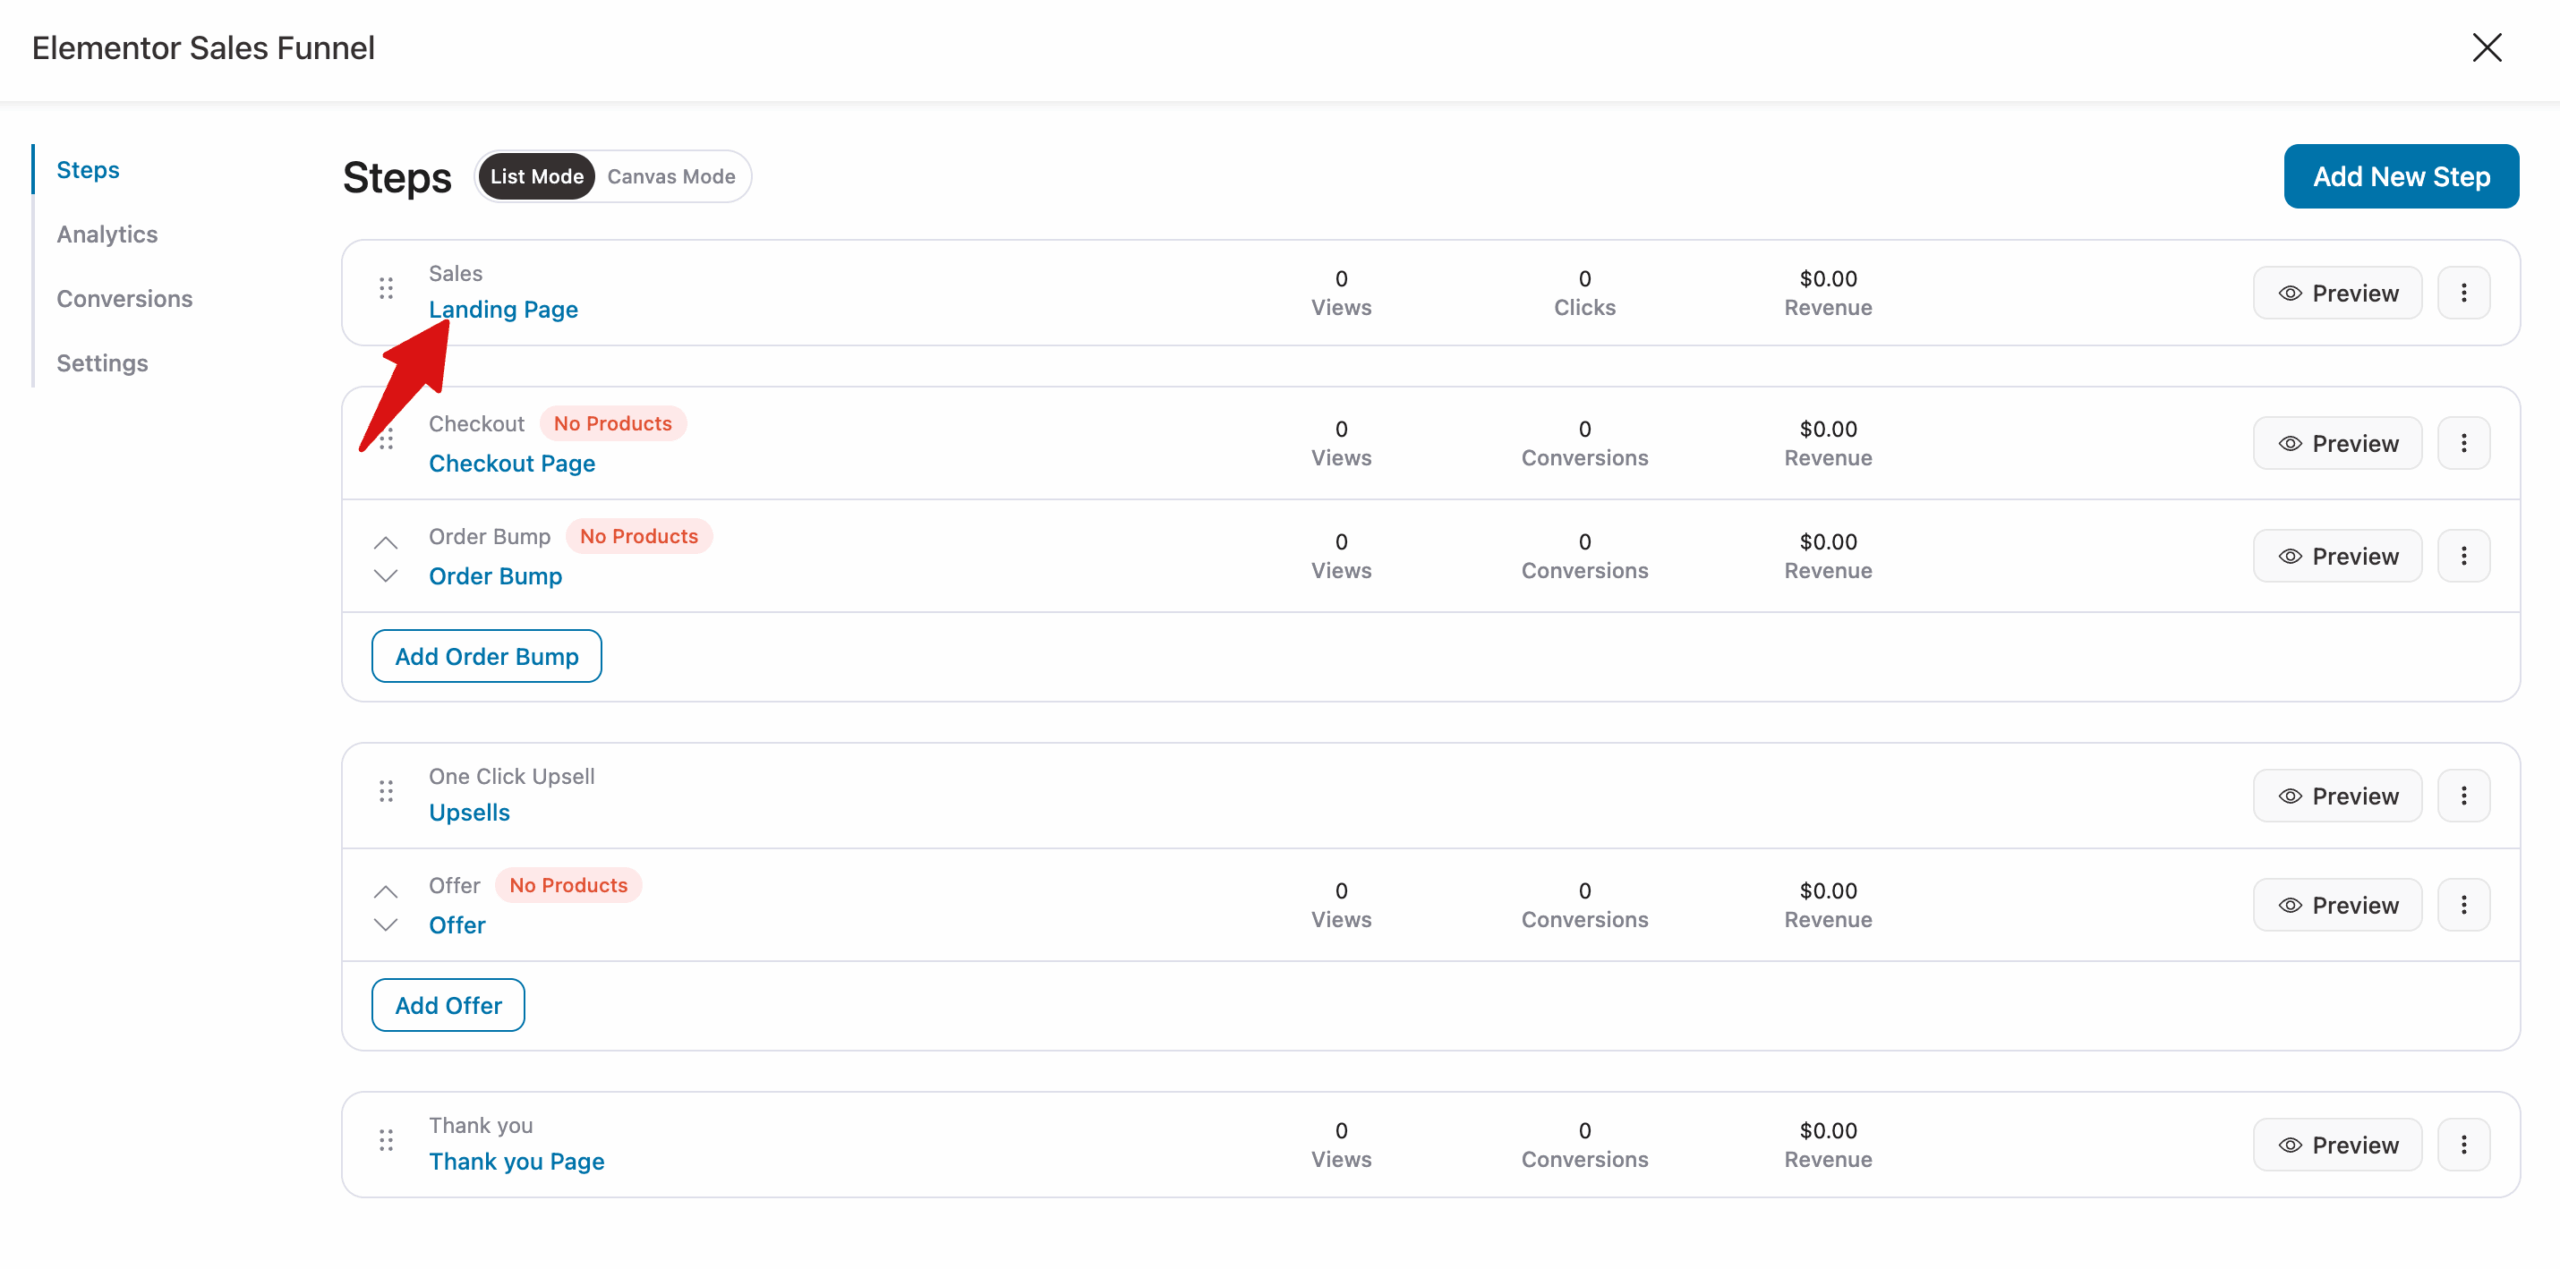
You’ll notice that a complete sales funnel with a sales page, checkout page, upsell page, and thank you page will be imported for you to start working on.
Pre-built templates make it easy to get started quickly. You simply have to modify the template’s design to achieve a unique look and feel that aligns with your brand.
The next step is to start customizing the sales funnel pages to match your branding. The best part is that you can do all of this using Elementor.
Step 2: Optimize your elementor sales page
First, we will customize the landing page. For that, click on the landing page option.
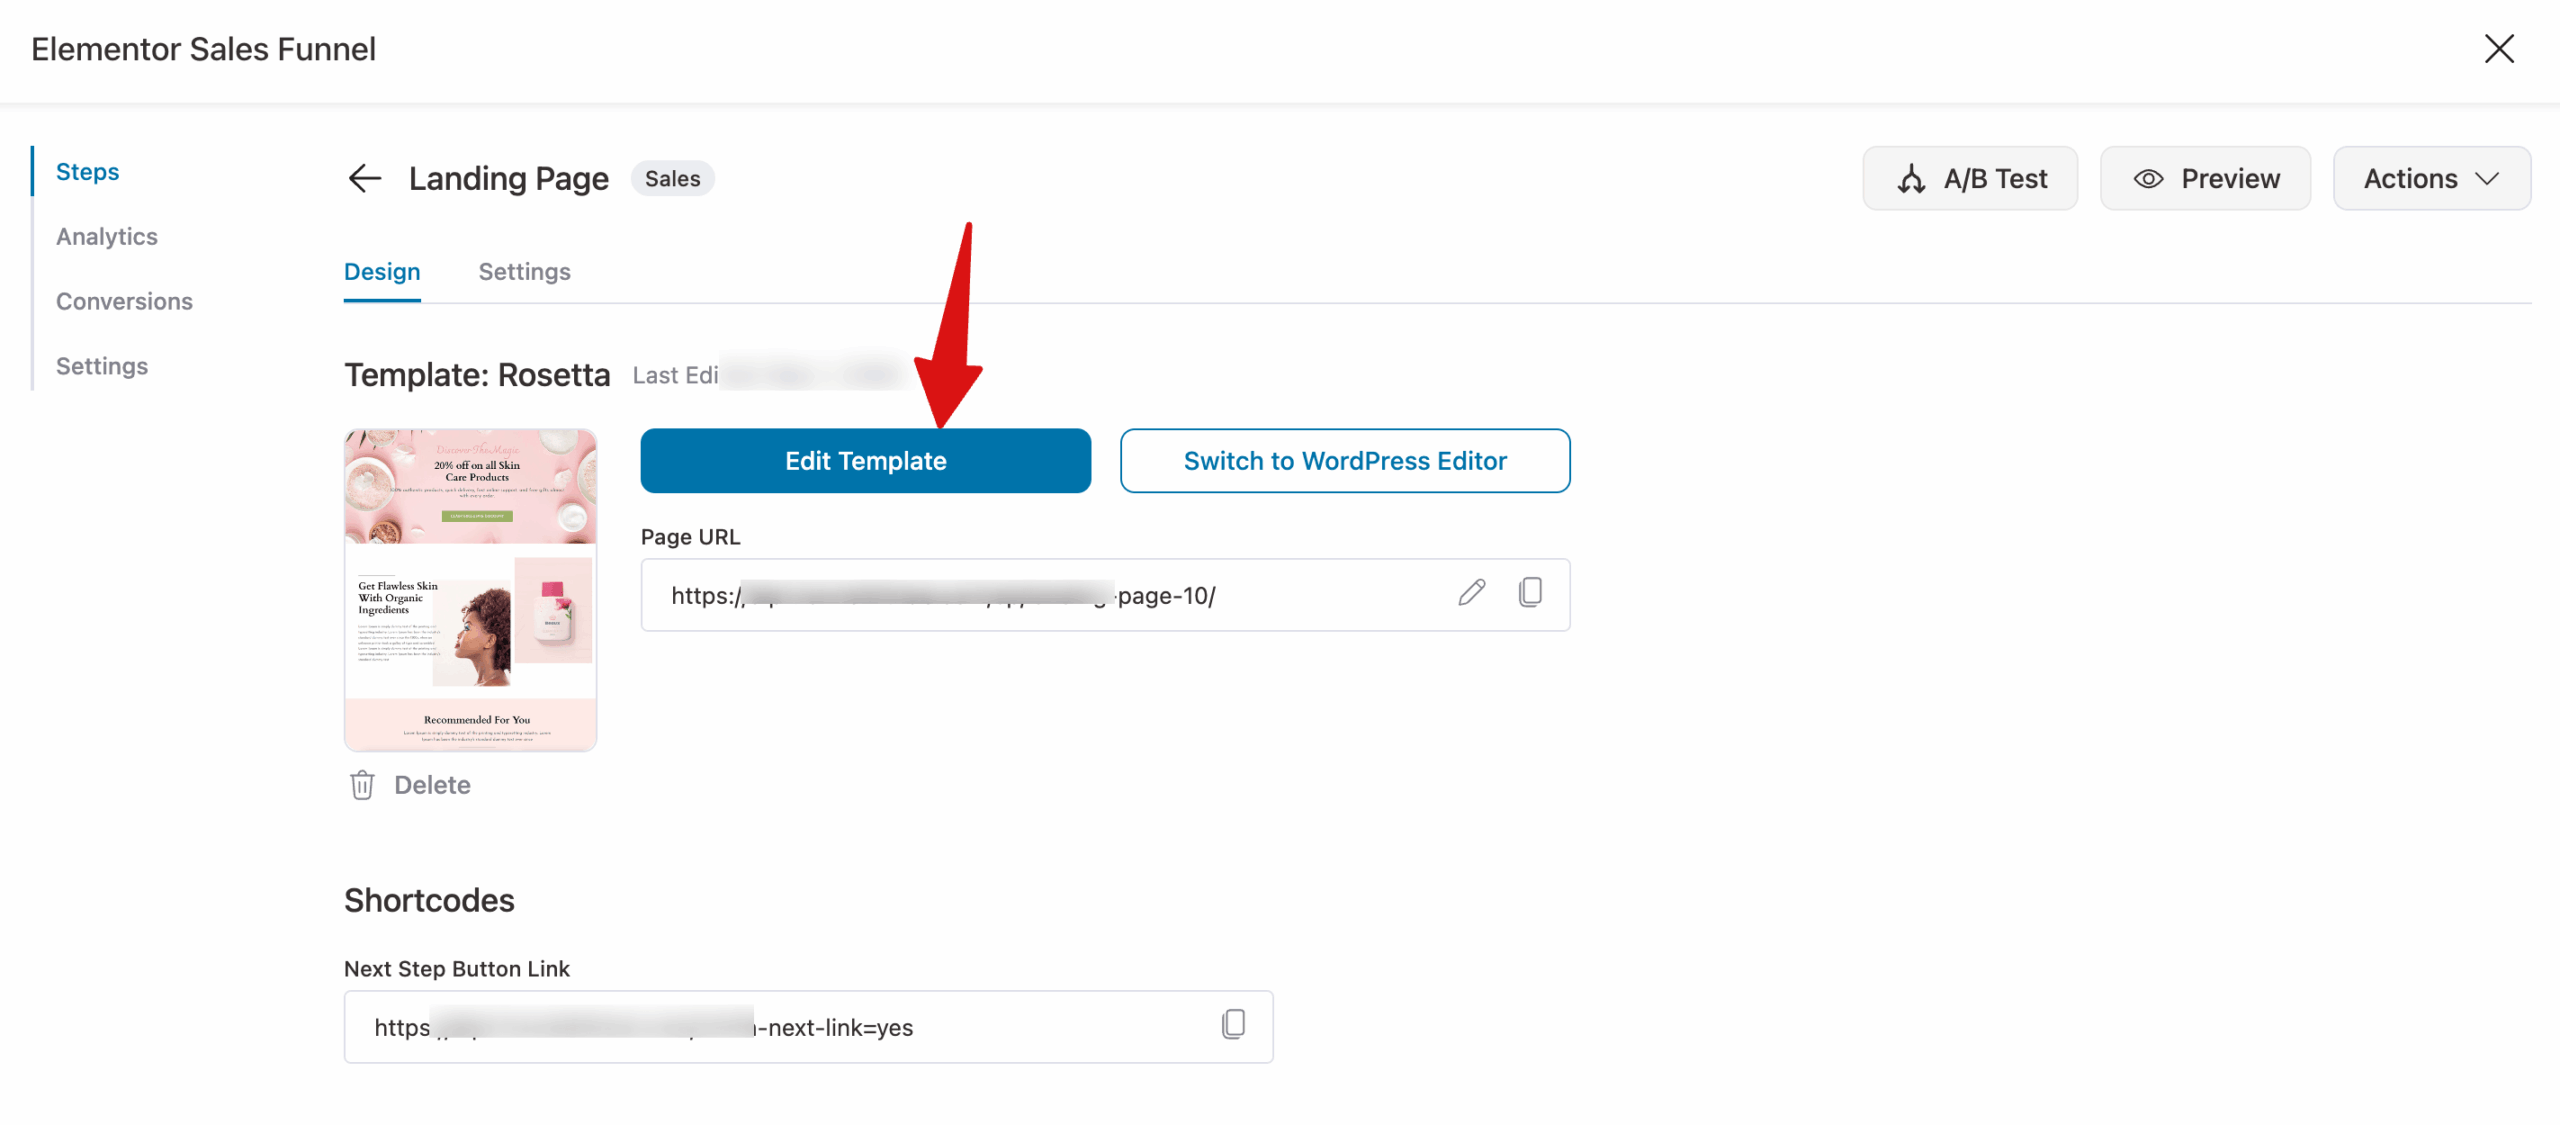
Now you can customize the content and style of the landing page with Elementor. For that, click on the "Edit Template" option.
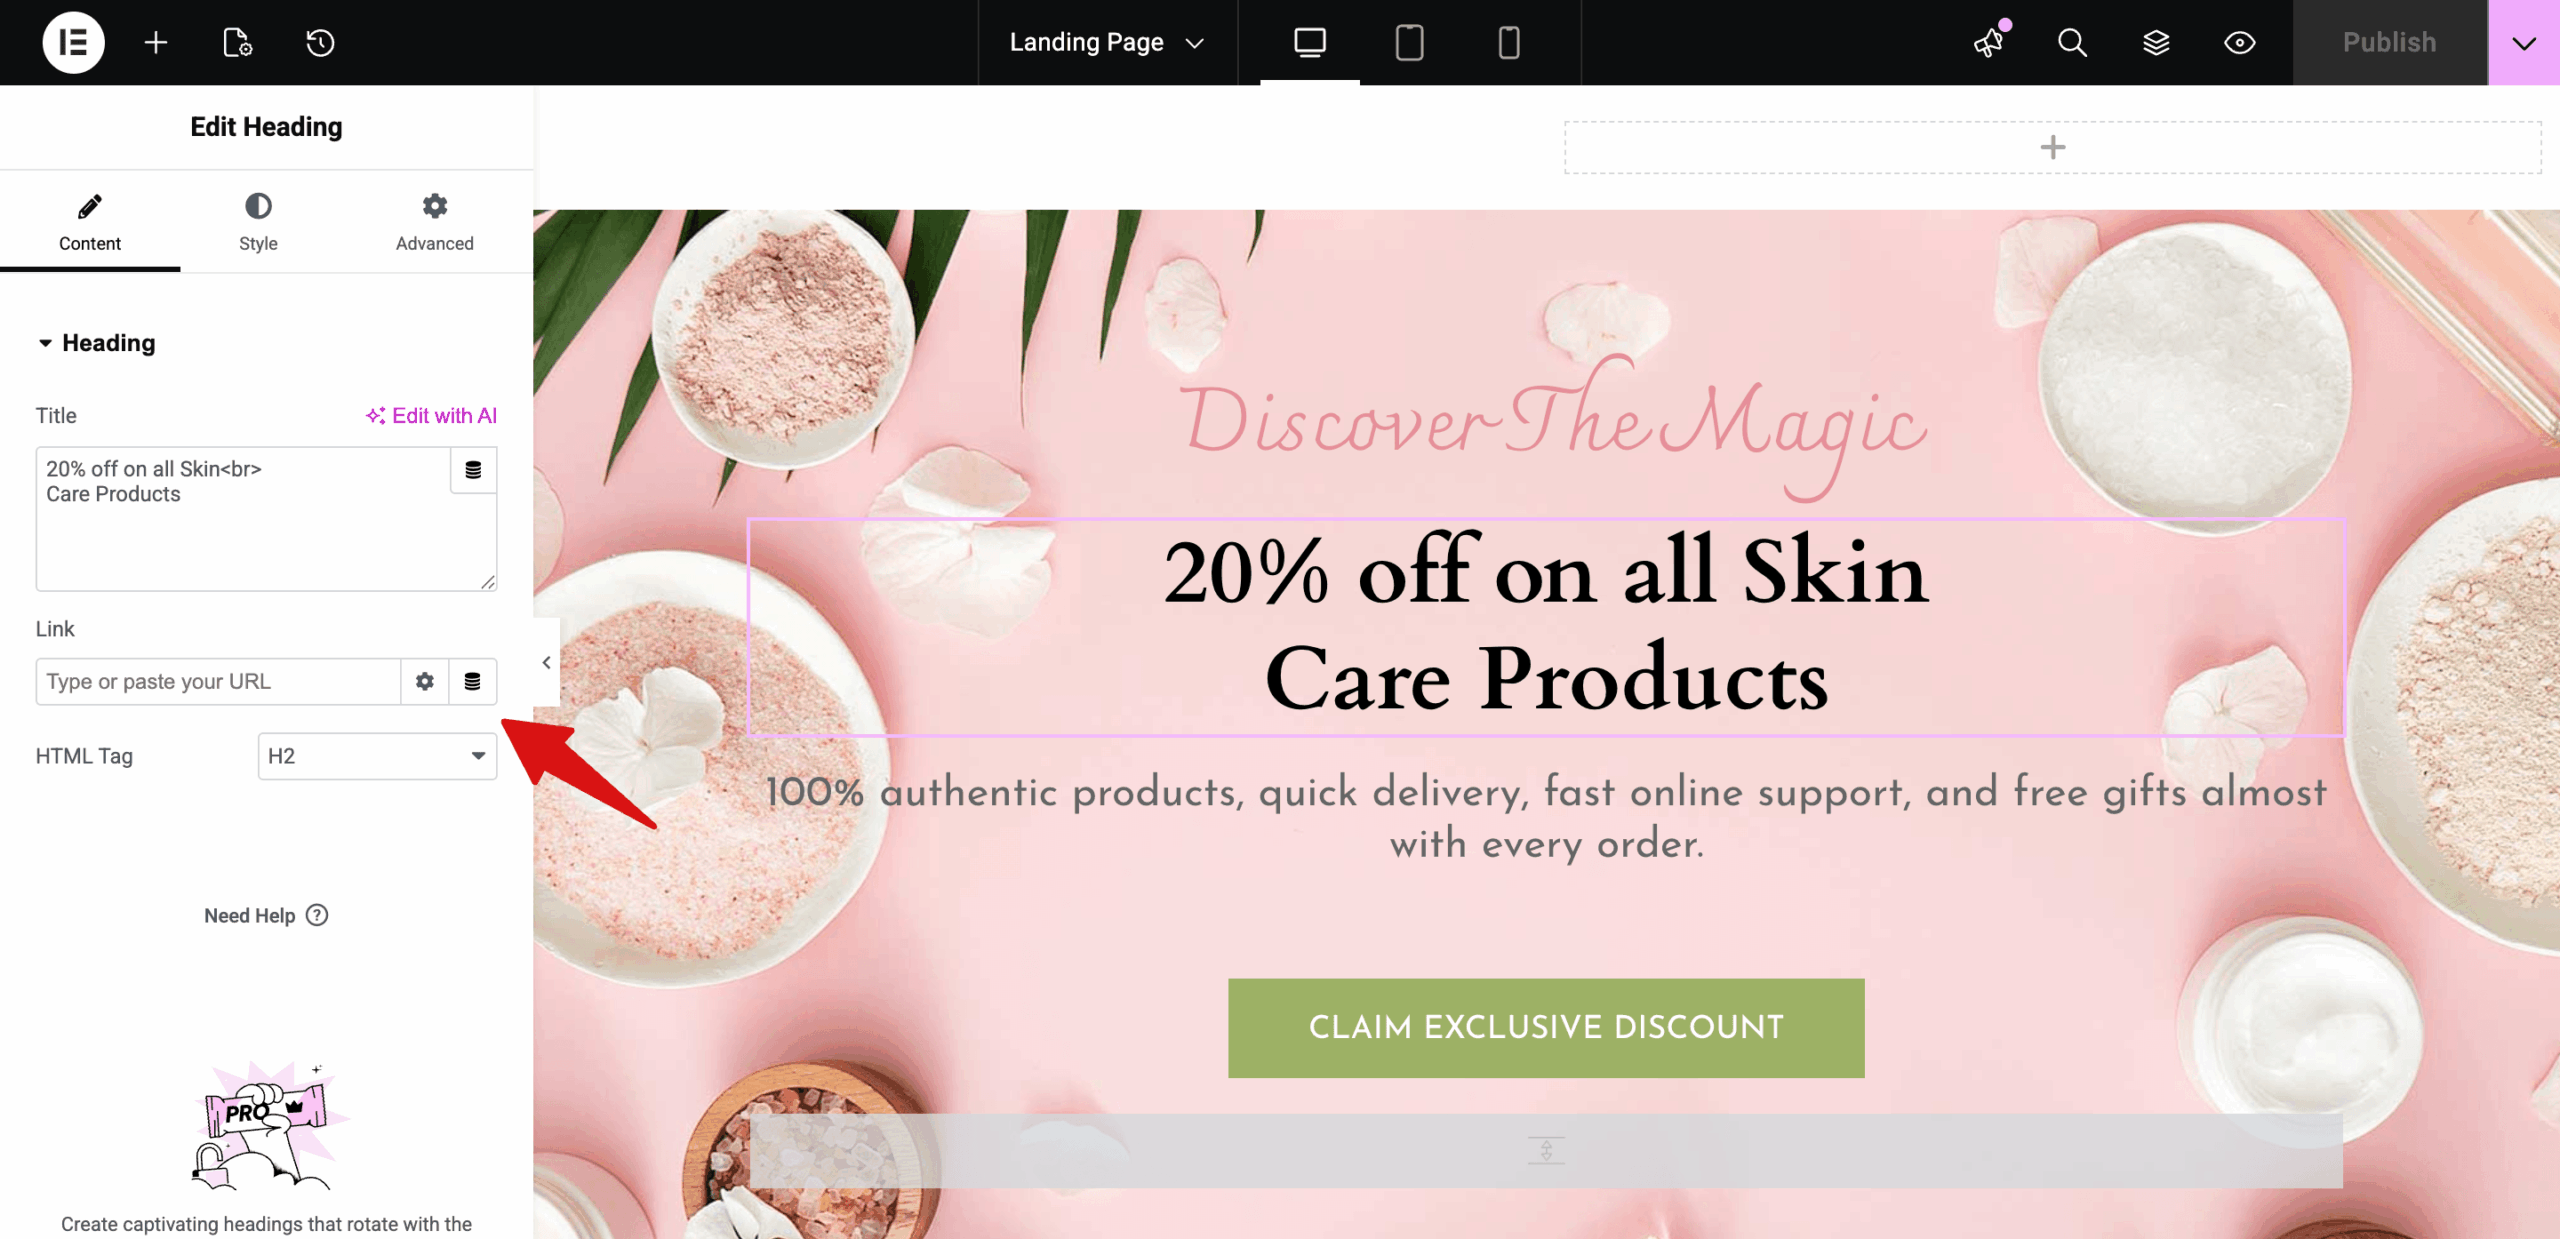
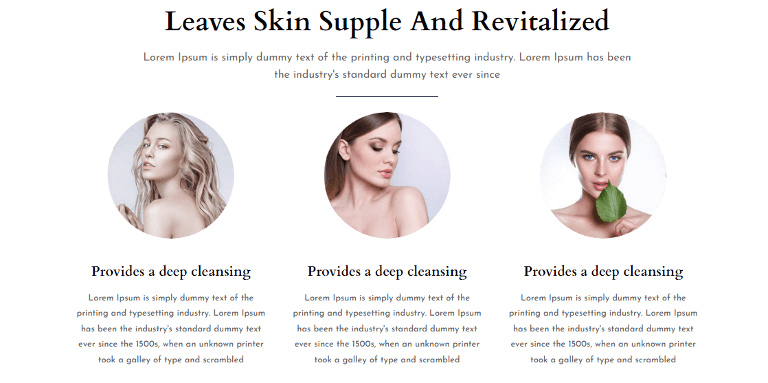
Next, you can customize each section with the Elementor widegts like shown below:
It’s important to have the right elements on the landing page or the sales page of your Elementor sales funnel.
Let’s take a look at some of the elements of a winning landing page to help inspire you:
Unique Selling Proposition
Why should the customers buy from you? How is your product any different from the other competing products?
Use your landing page to clearly highlight your product's or service’s unique selling proposition. You can break it down and showcase the reasons like this on the page:
This helps prospects scan through easily and understand your product before making an informed buying decision.
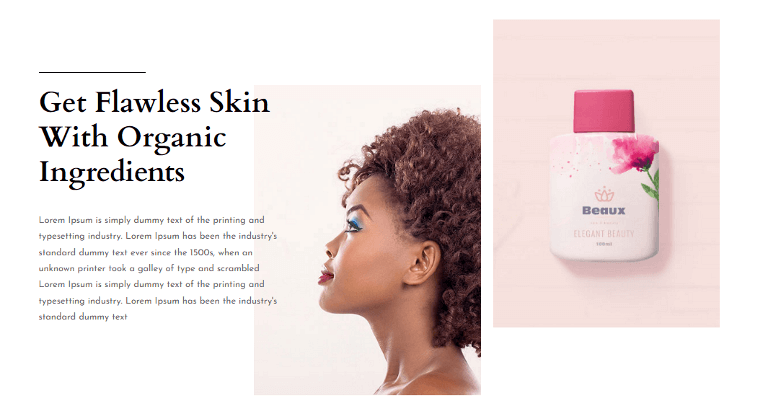
Benefits of Your Offer
List the benefits of your product or service from the customer’s point of view.
So, instead of saying “Buy our face mask”, you might want to say something like “Get glowing skin with the BeeHive Face Pack”.
Such words excite the prospects about the product and its end results.
Social Proof
You can add social proof to landing pages on your Elementor sales funnel to build trust among the users.

These social proofs can be testimonials, product reviews, or star ratings.
It’s also a good idea to display customer photos with their reviews to put a face to the name and make your brand human.
Call to Action
Make sure your landing page has a clear call to action button that tells the visitor exactly what they need to do next.

If you sell products, this button could direct them to the checkout page. And if you sell services, the call to action could lead them to a registration form.
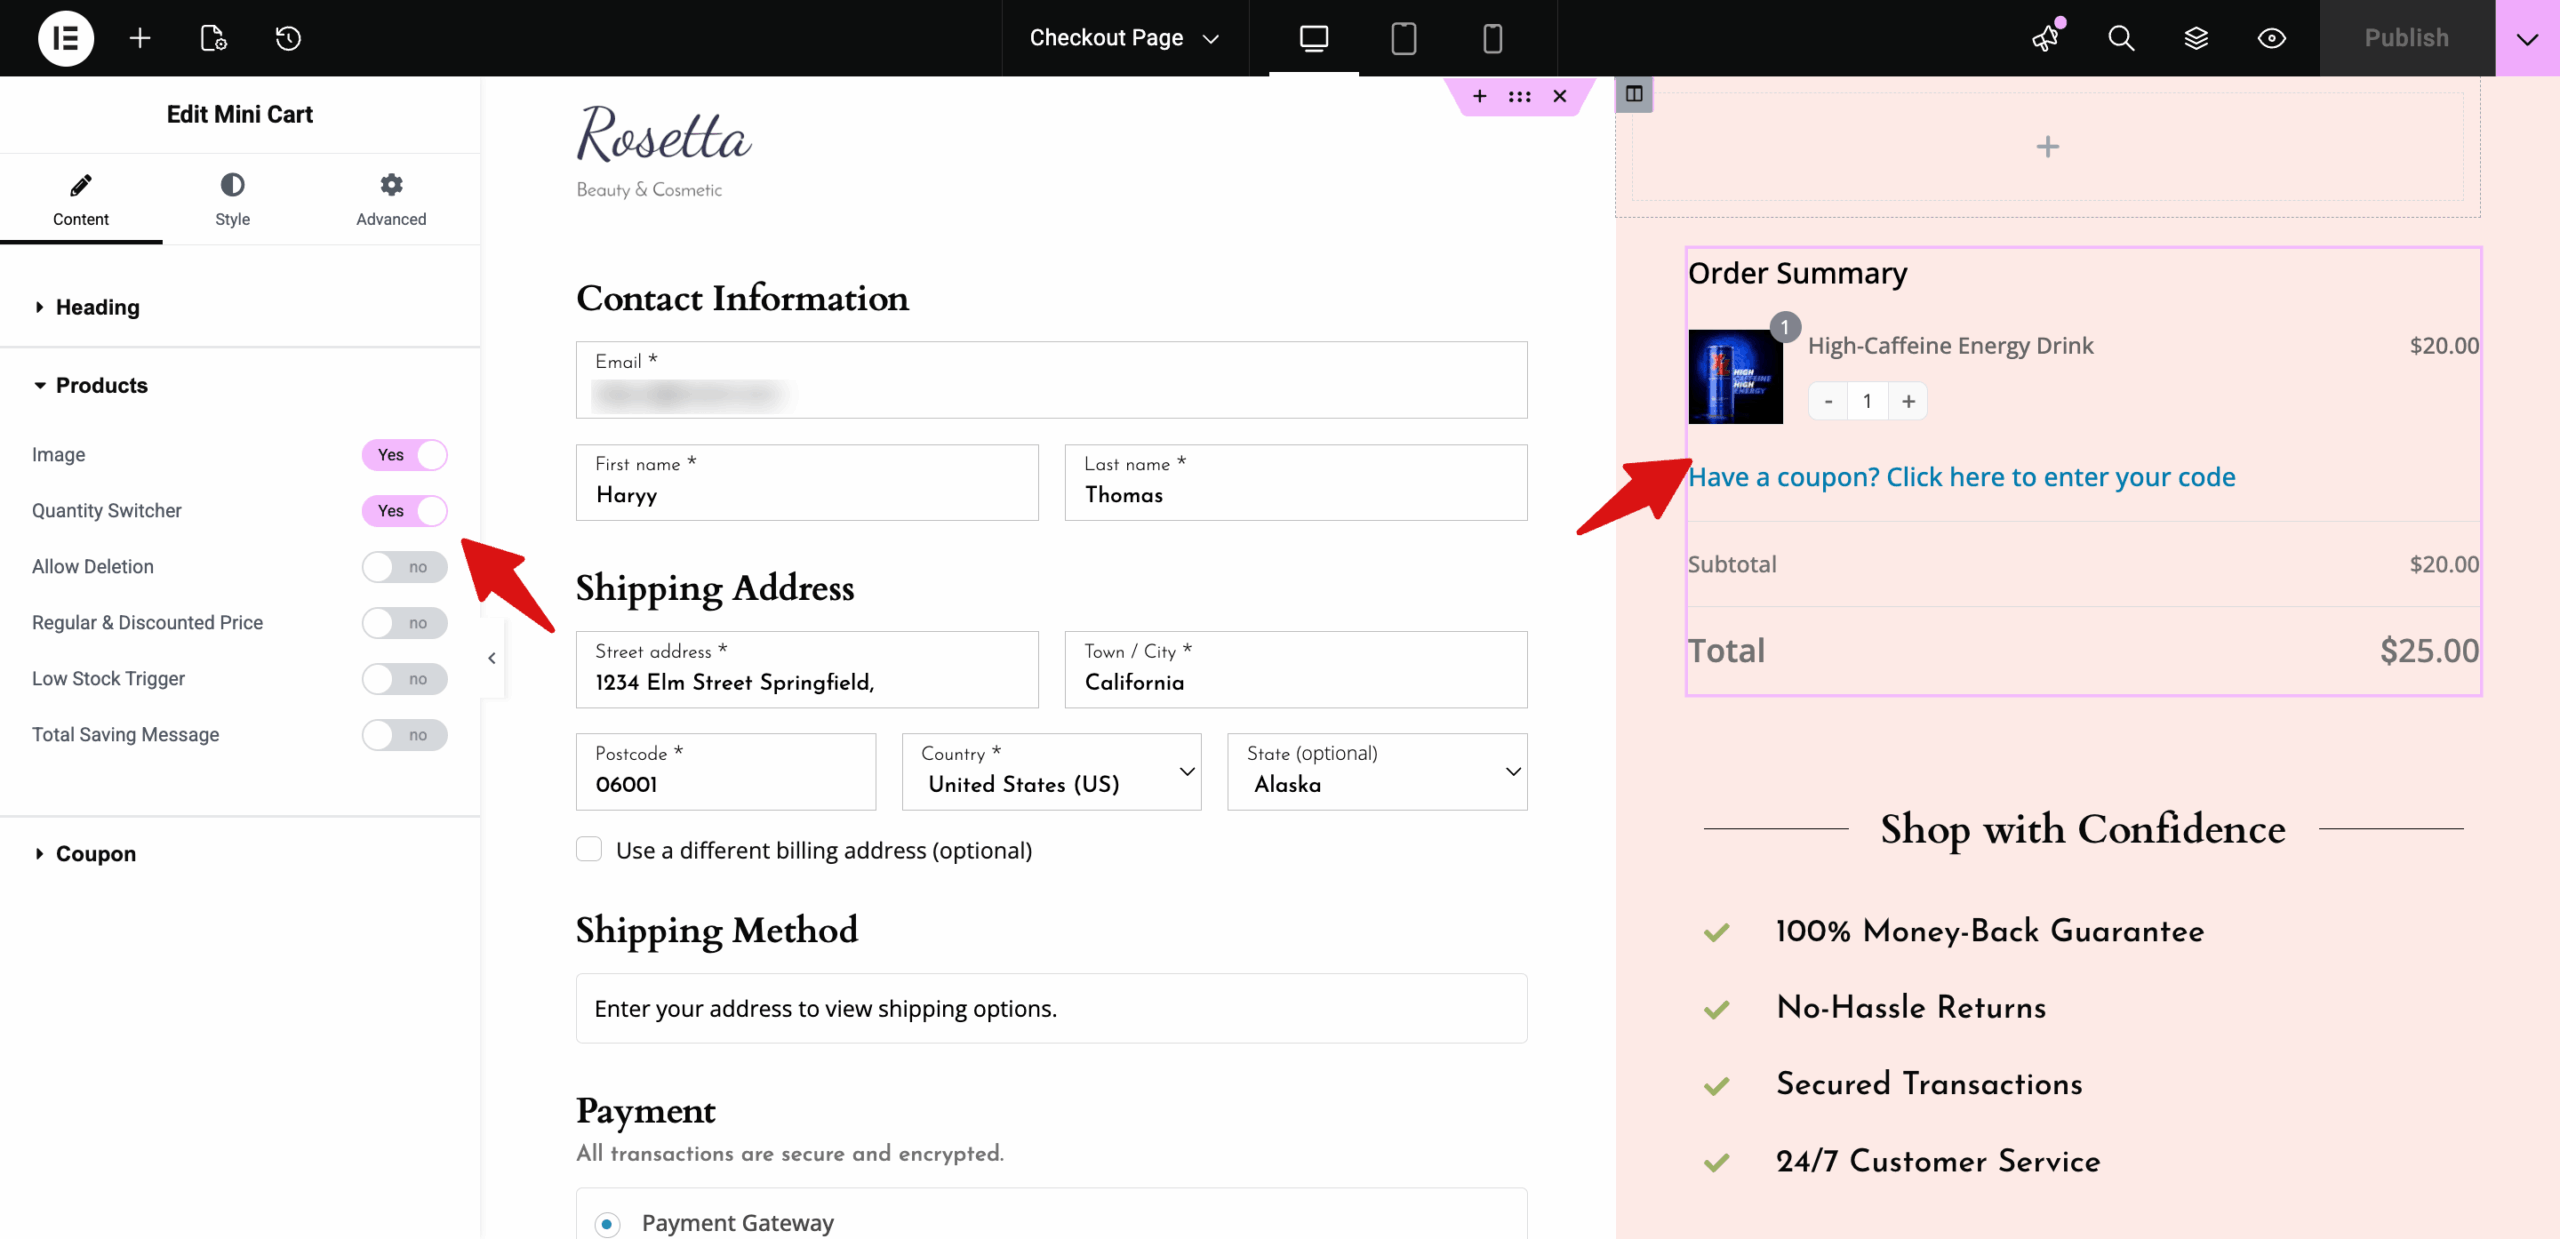
Step 3: Customize the checkout page to maximize conversions
To customize the Checkout page, click it. After that, click on "Edit Template" to customize the checkout page.
For example, you can choose to show or hide the product image on the mini cart. Moreover, you can add a coupon section and change its style.
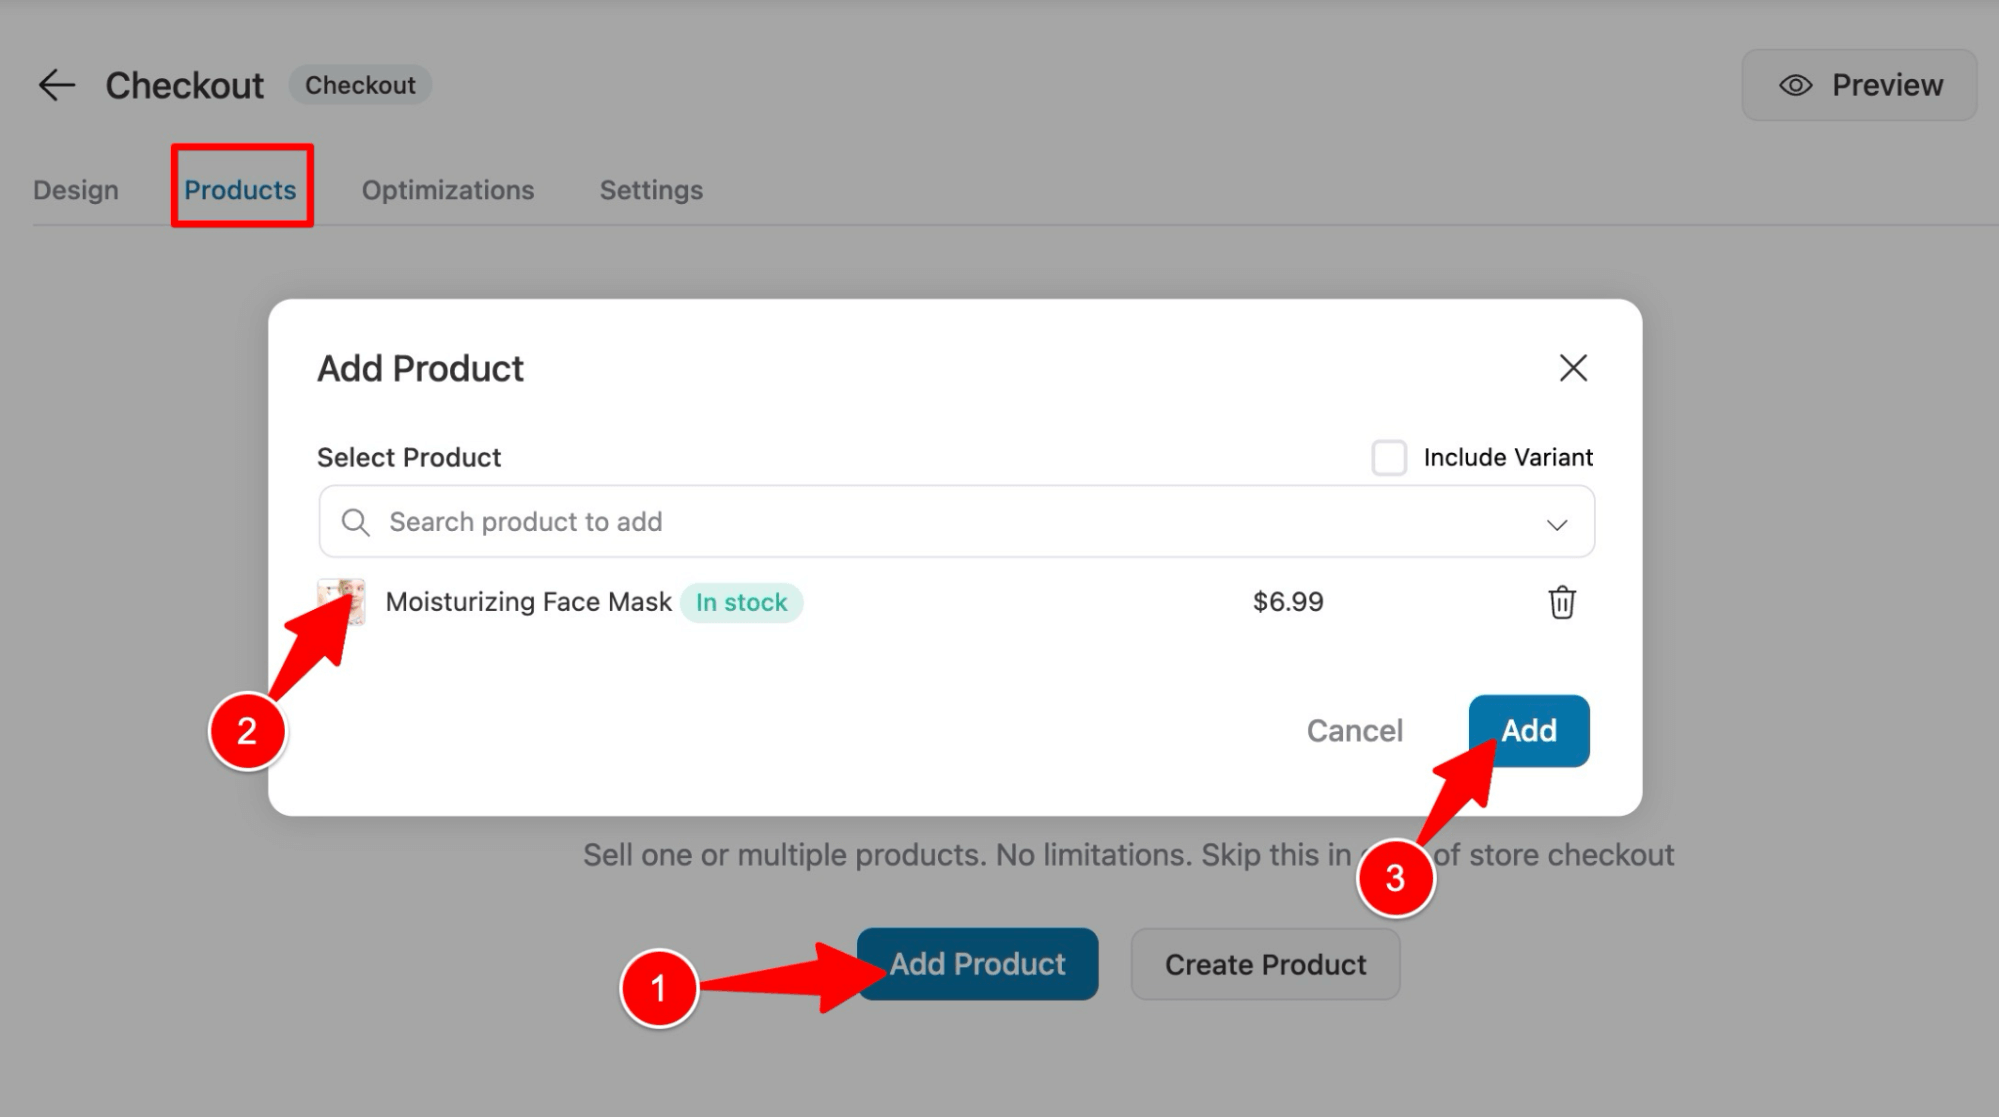
Step 4: Add product to checkout
Head over to the Products tab and click the Add Product button. Then, search for and select the product you want to add. After that, click on Add.
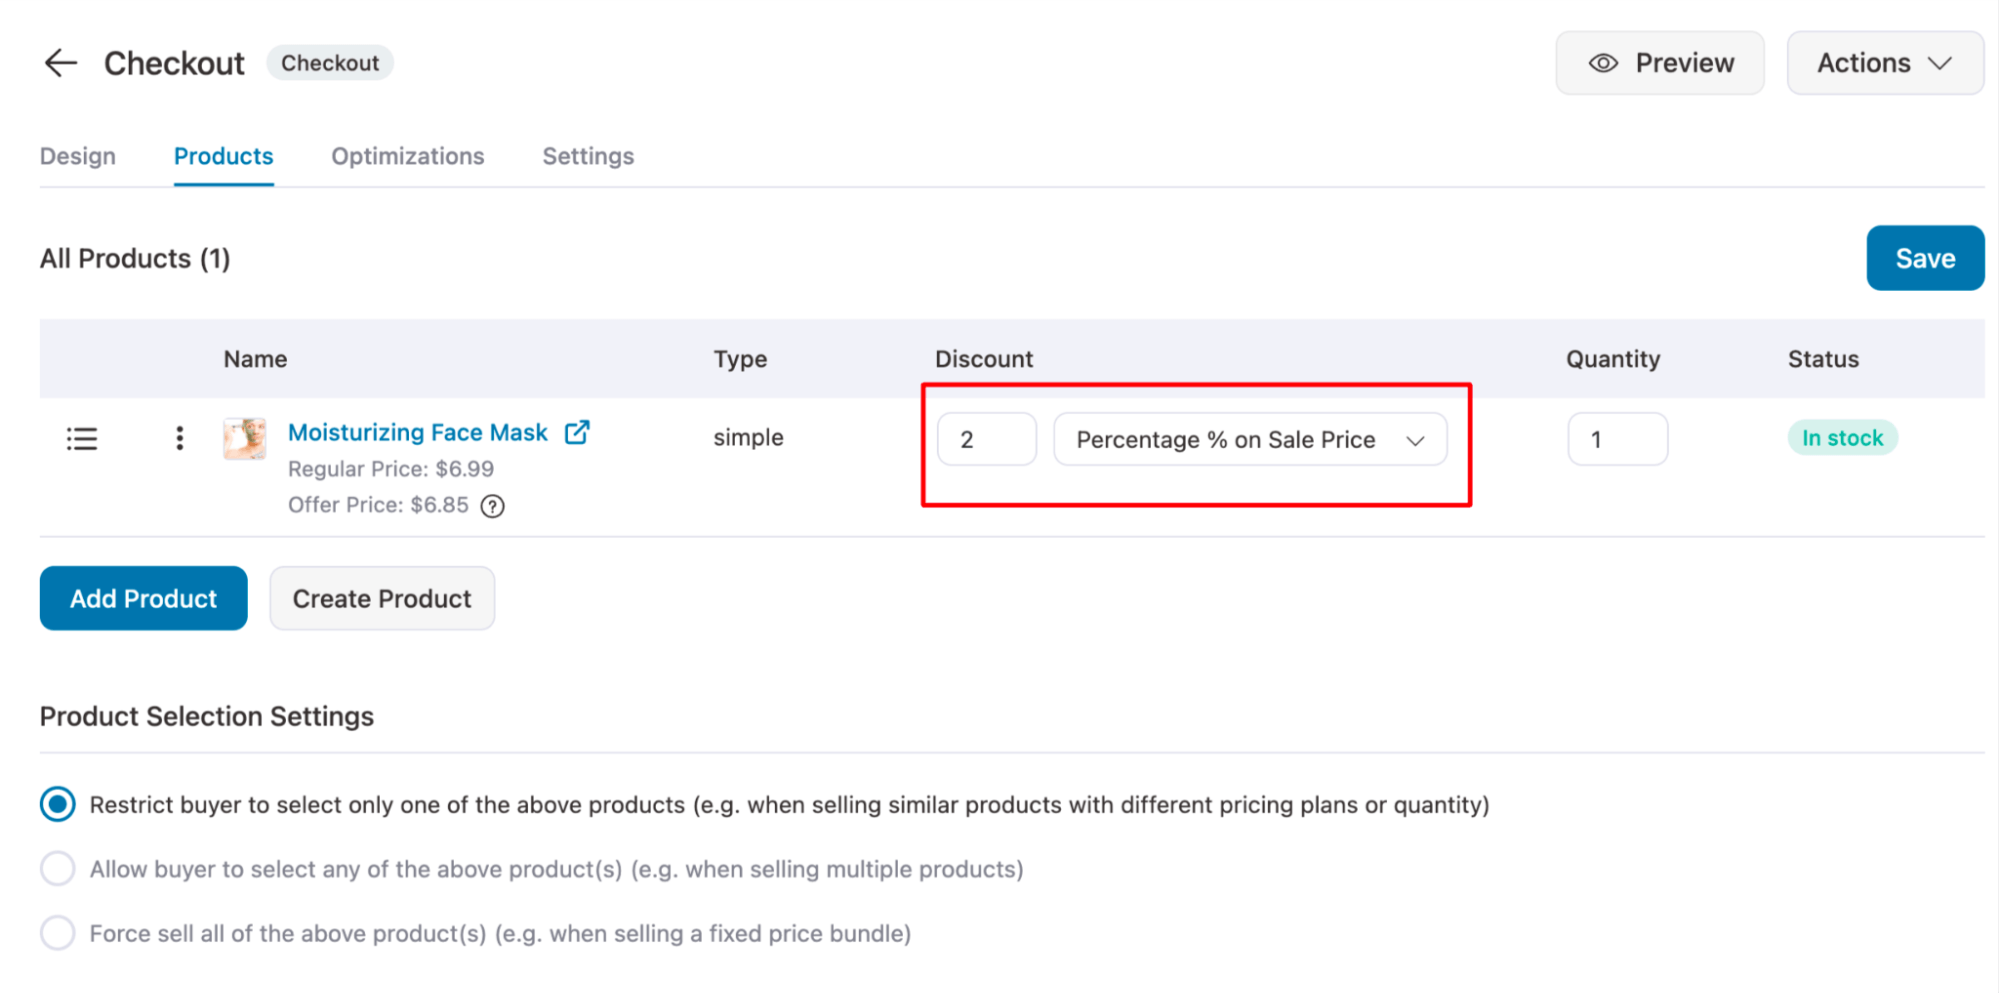
You can offer a discount on the main offer as well.
Step 5: Add a pre-purchase order bump to the checkout page
One notable advantage of an Elementor sales funnel is the ability to present tailored offers to customers at various stages of their buying journey.
providing an additional low-dollar offer on the checkout page, effectively enhancing your Average Order Value (AOV).
Order bumps are perfect for showing complementary product offers on the checkout page in your sales funnel.
Customers can add them to their cart with one click. For example, if you sell face masks, under-eye patches make an excellent order-bump offer.
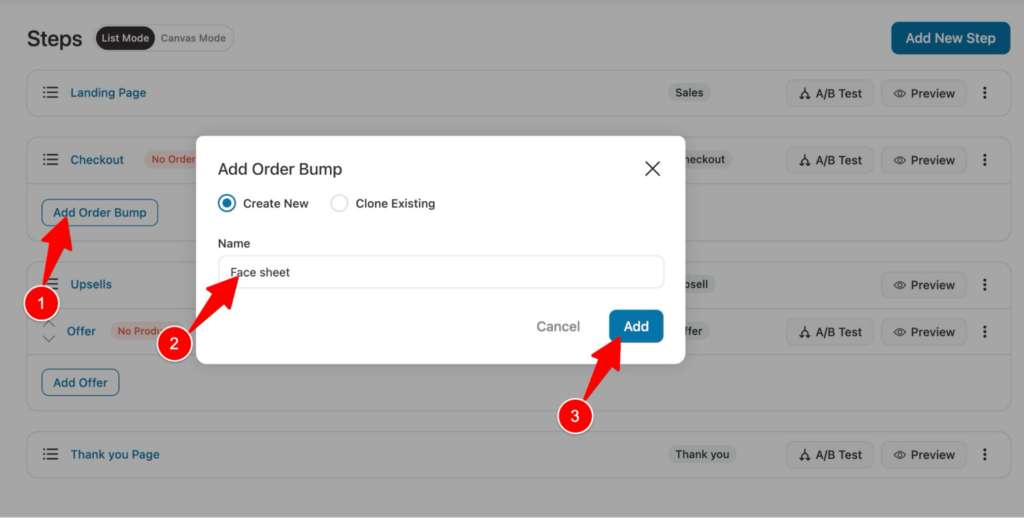
To offer an order bump, first, you need to create the step. For that, click Order Bump, enter a name, then click Add.
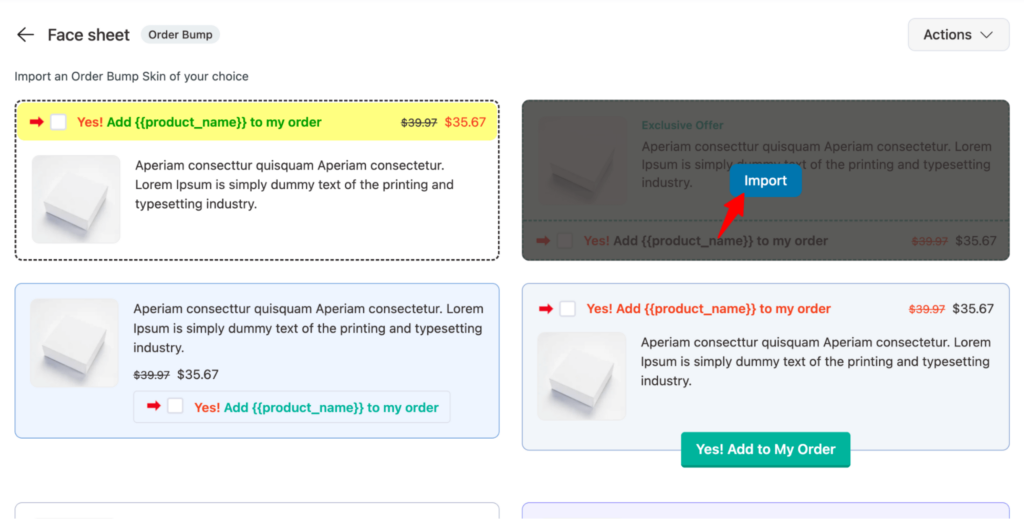
Now choose an order bump skin.
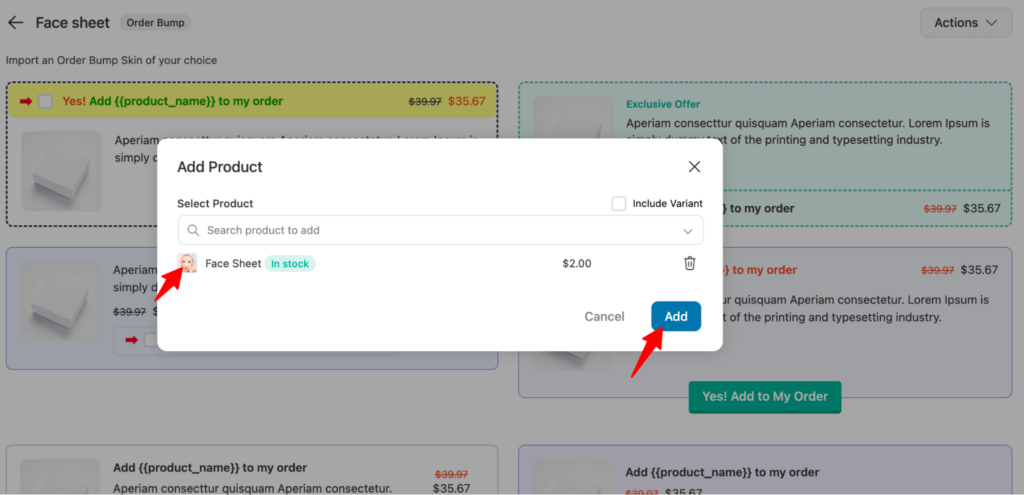
Select the product. Here we are choosing a Face Sheet as an order bump.
Here you can add the call to action, description that will show up on the checkout page. You can also add a Exclusive Offer text.
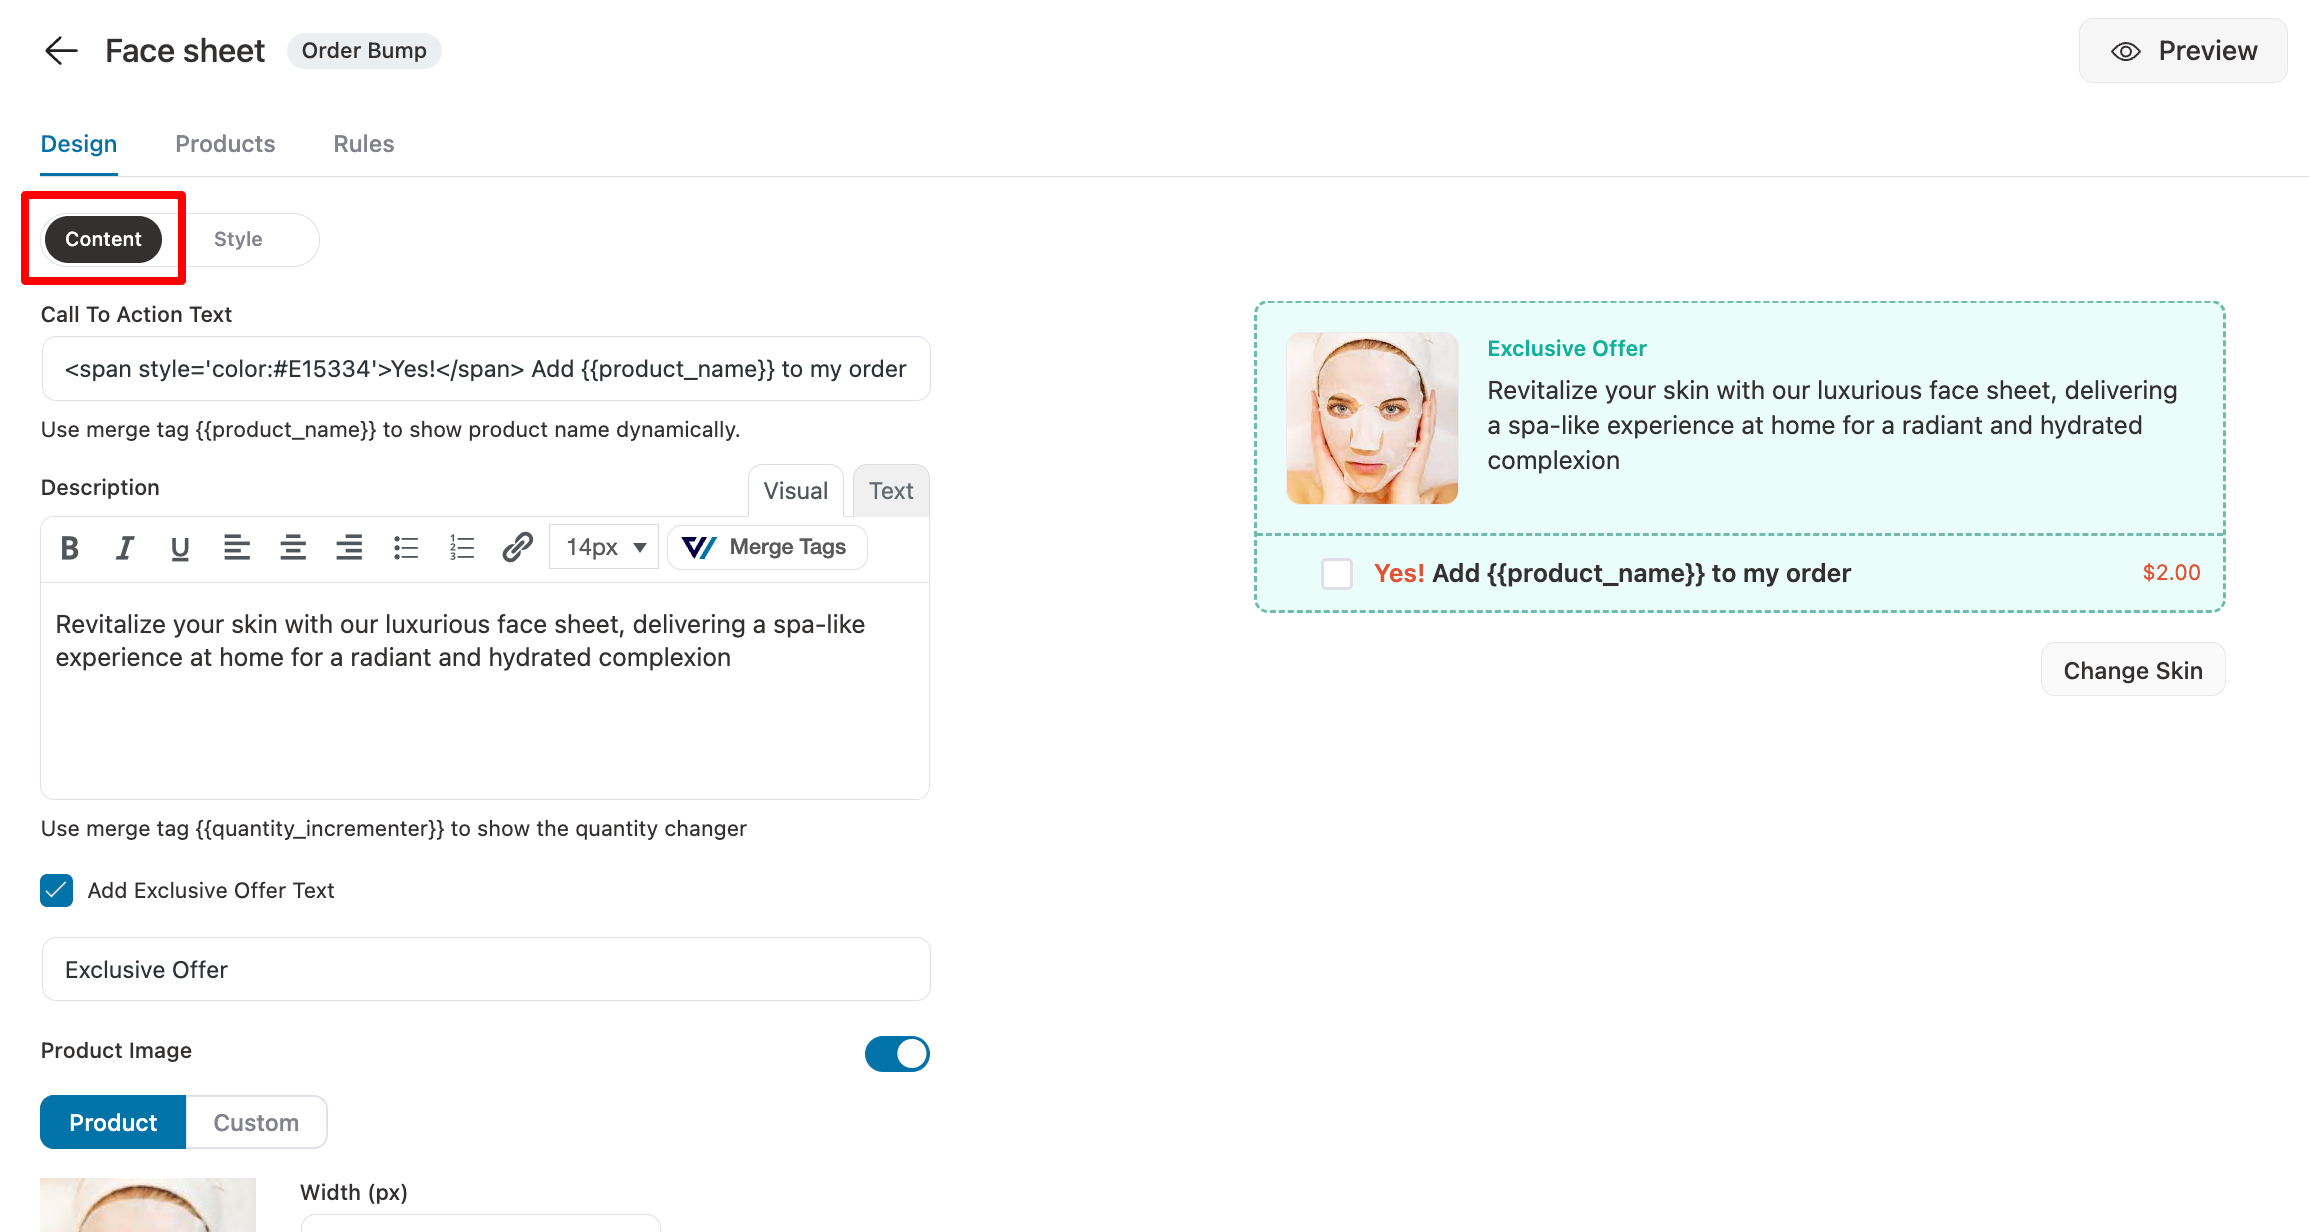
Move to the Style tab, where you can choose the position of the order bump offer on the checkout page.
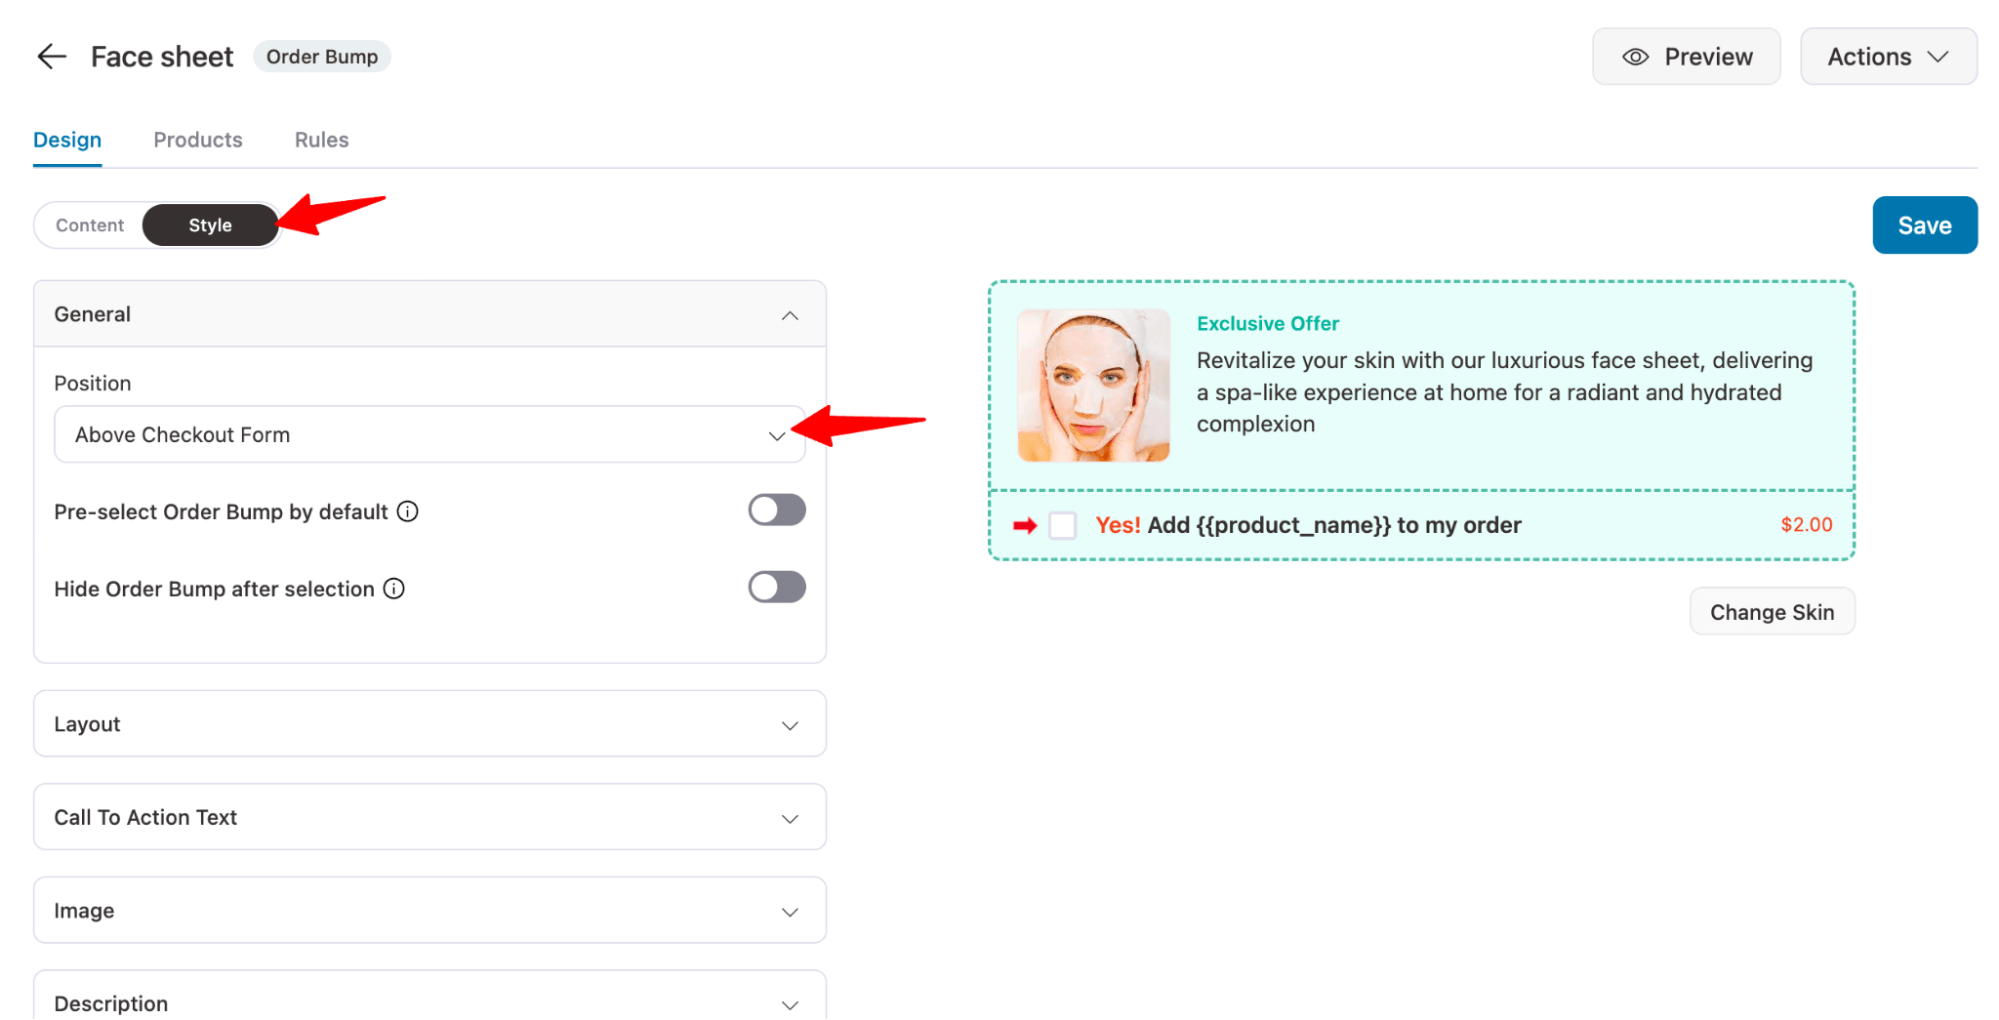
Here is what the checkout page with the pre-purchase order bump offer looks like:

Step 6: Add a post-purchase one-click upsells offer to increase AOV
WooCommerce upsells are perfect for when you want the customers to explore and purchase other relevant items you have to offer in your post-purchase offers.
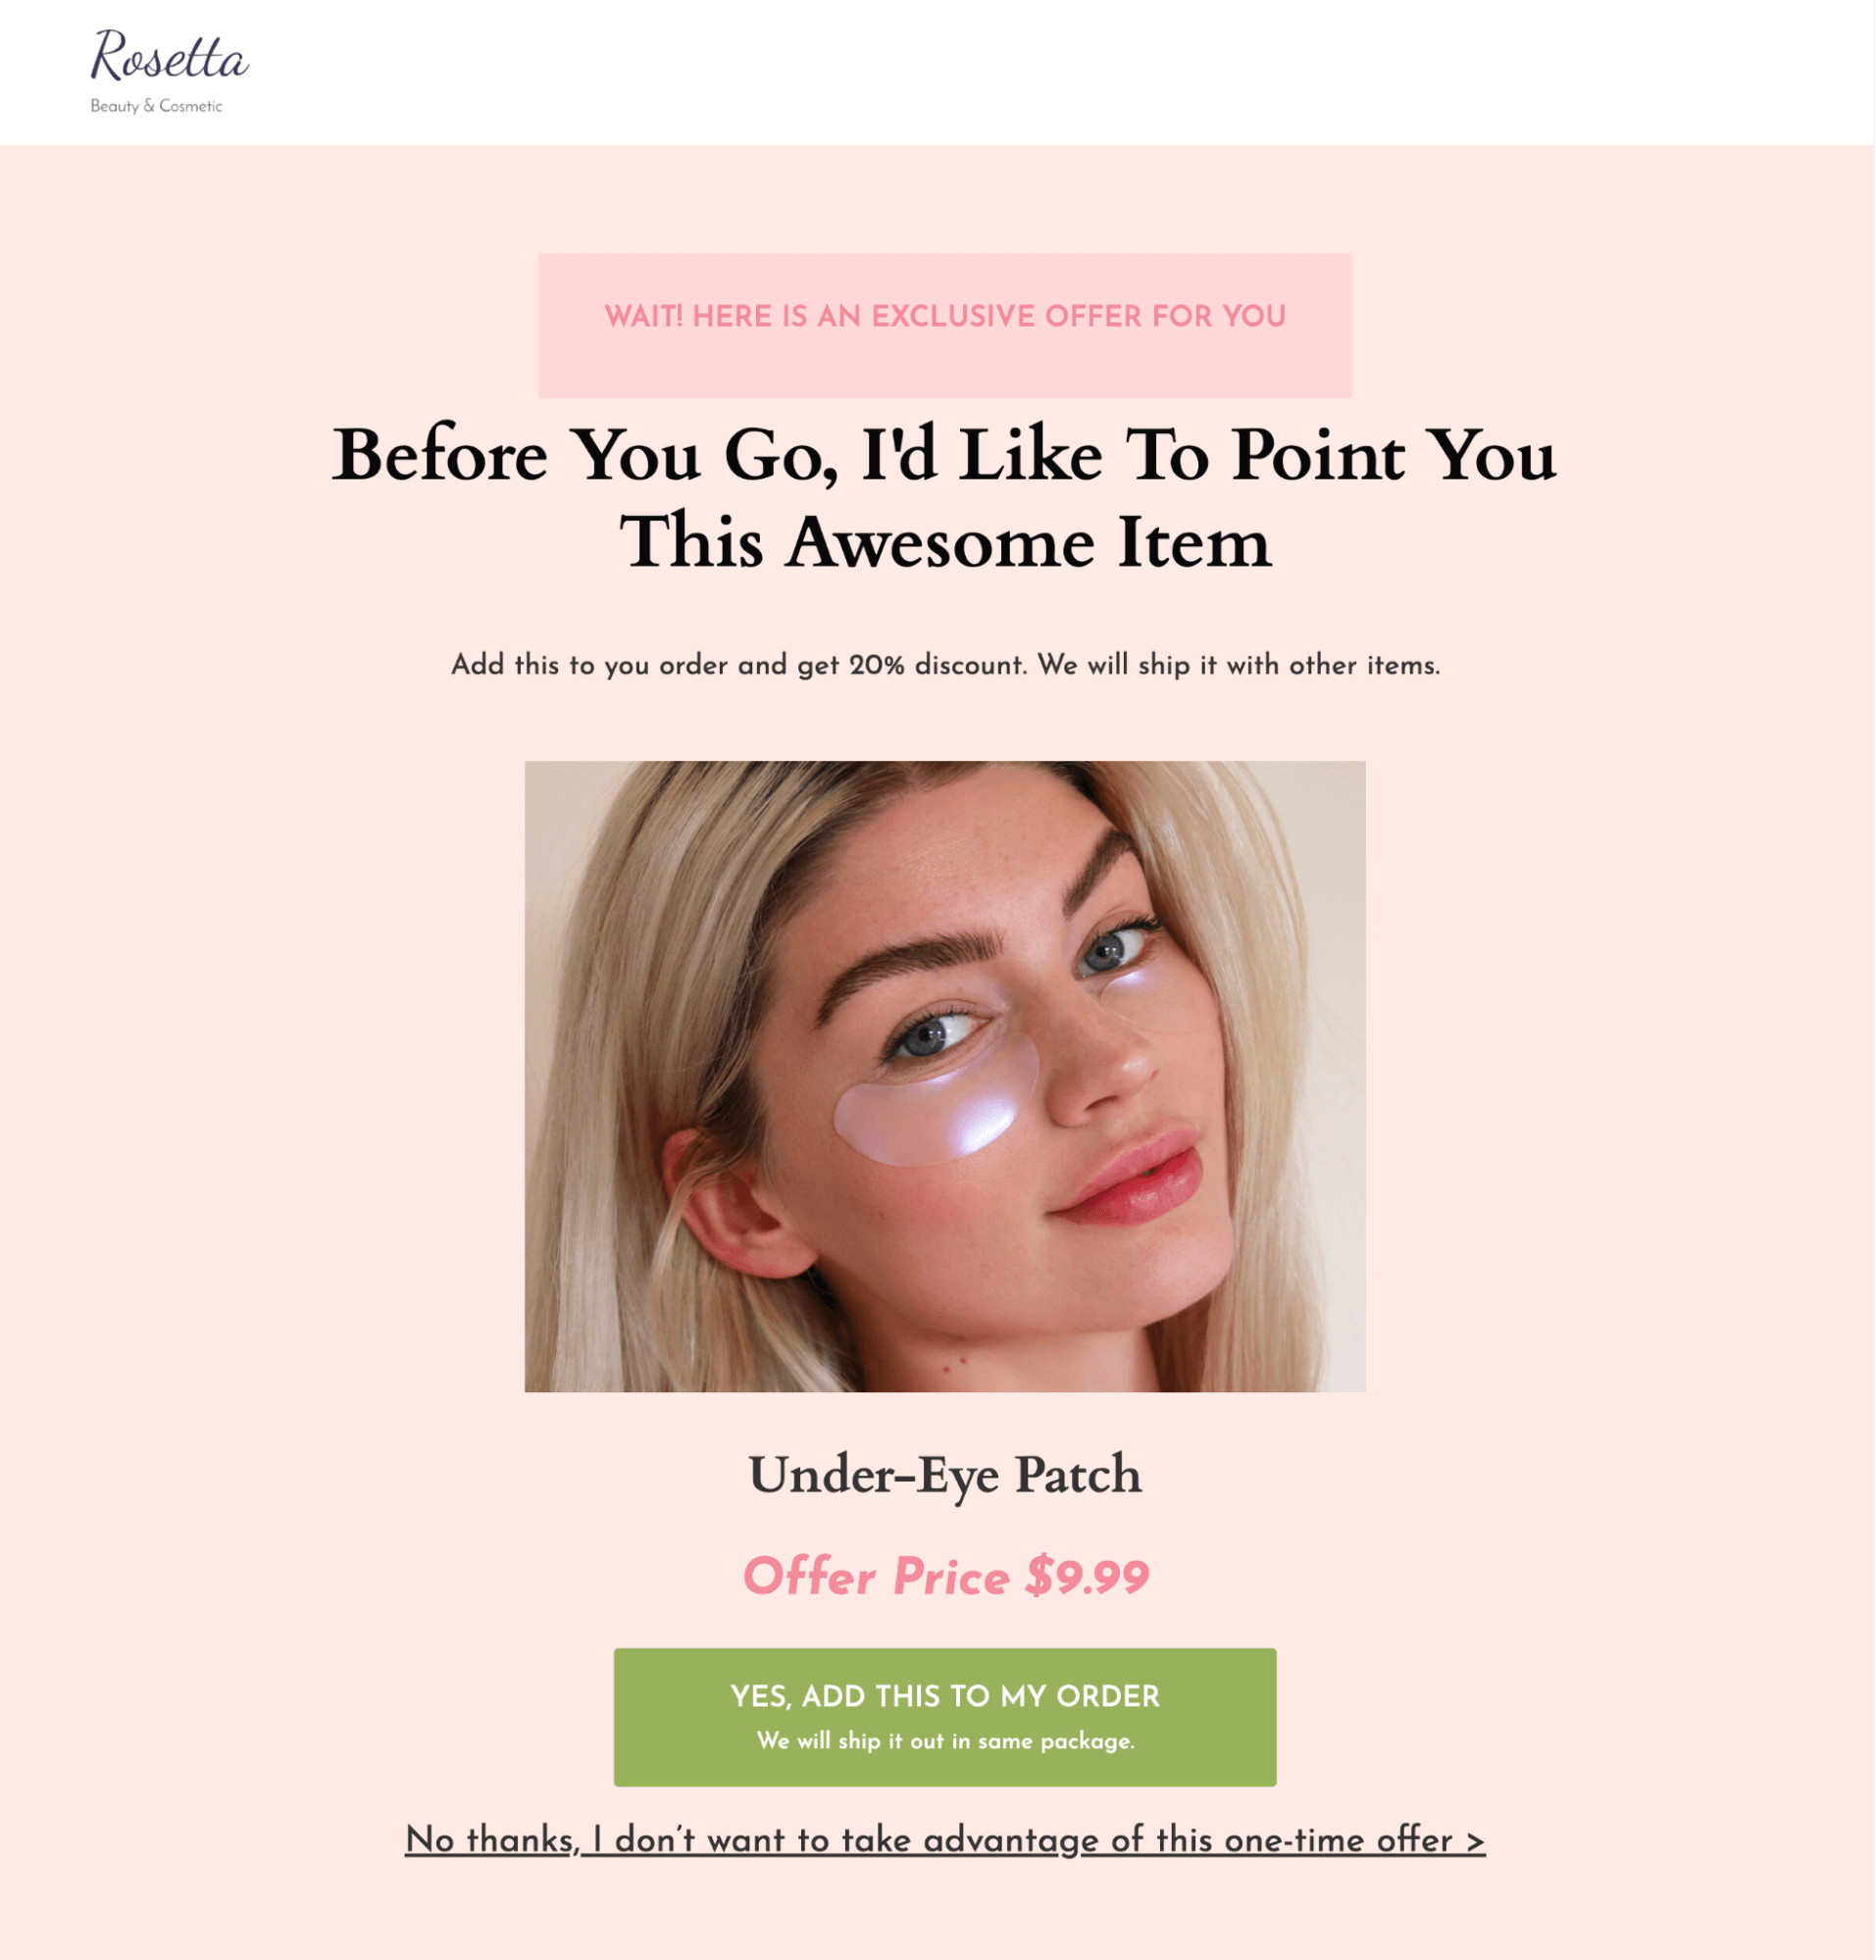
For example, if you’re selling face masks, you can offer an under-eye patch.
The Elementor sales funnel creates an upsell page for you. Click on the Offer option.
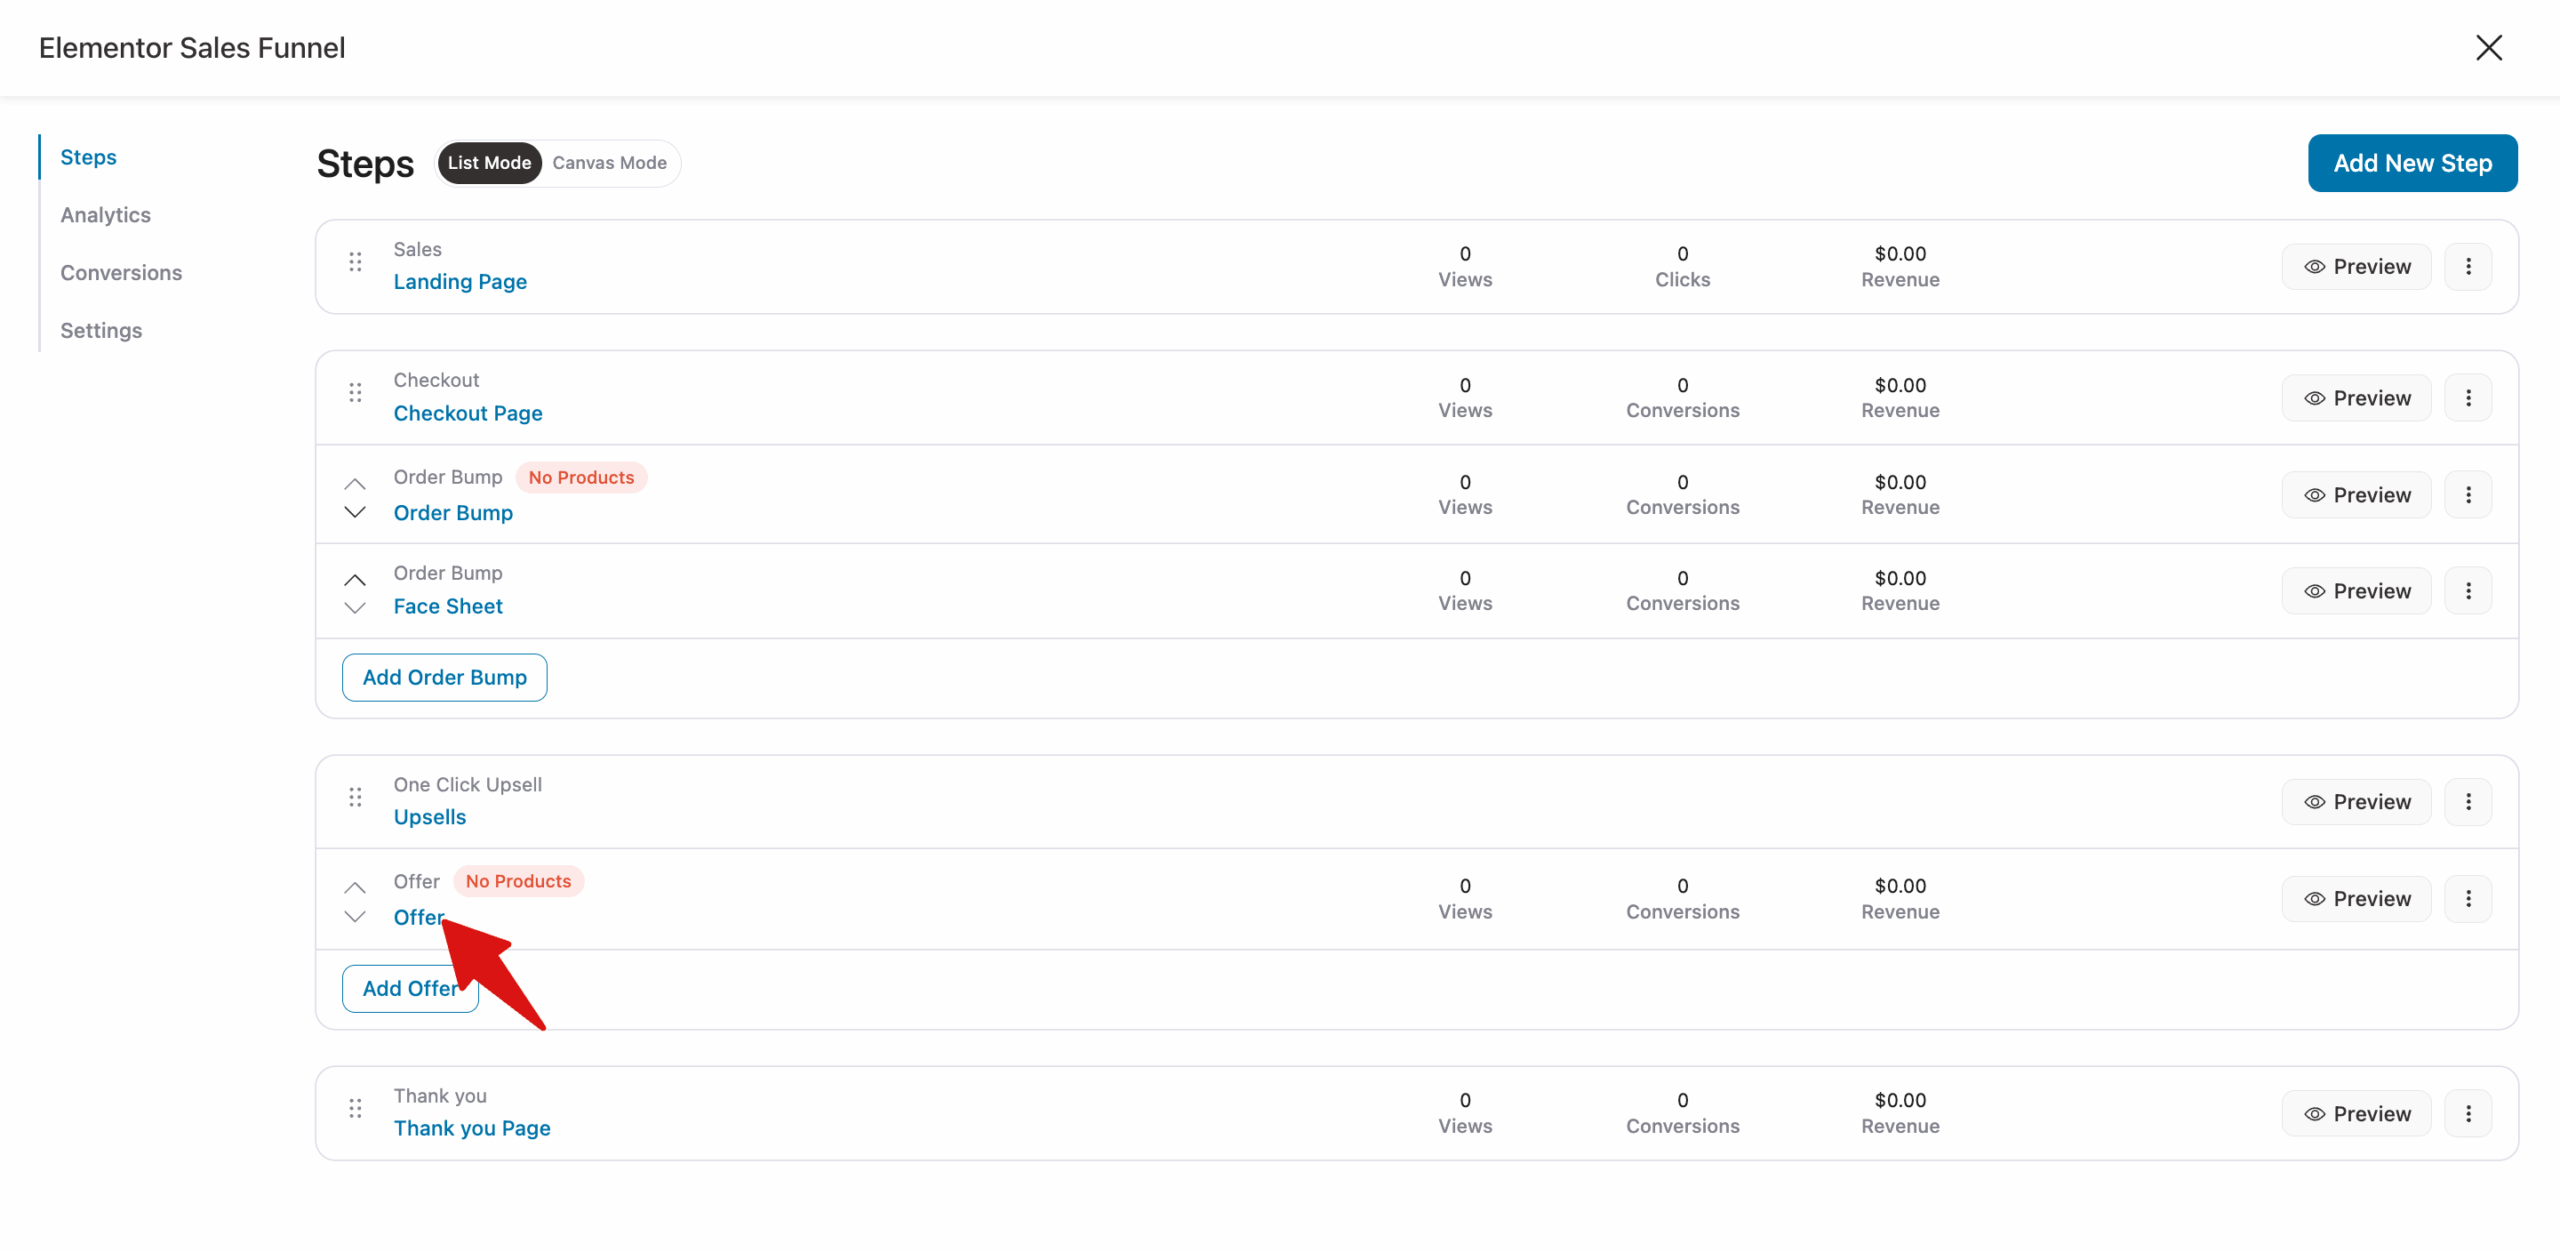
Click the "Add Product" button to add the product you’d like to upsell. You can add as many products as you’d like to each upsell offer you create.

Here is how the post-purchase offer looks:
After customizing the upsell page, you can customize the thank-you page as well.
Once done, your Elementor sales funnel will be ready to go!
Frequently Asked Questions About Elementor Sales Funnel
Here are some of the frequently asked questions about the Elementor sales funnel with answers:
Do I need Elementor Pro to build a sales funnel, or does the free version work?
The free version of Elementor is enough to design your sales funnel with FunnelKit Funnel Builder. However, you need both the free and the pro versions of the sales funnel builder.
What are the functional differences between building a sales funnel using only Elementor versus combining Elementor with FunnelKit?
Elementor is mainly used for designing pages. It helps you build clean, good-looking layouts, but it doesn’t support advanced funnel features like one-click upsells, order bumps, or post-purchase offers.
When you pair it with FunnelKit and WooCommerce, you get the full sales setup. FunnelKit Funnel Builder handles upsells, checkout flow, and conversion steps, while Elementor focuses on design.
So, Elementor is for how your pages look, and FunnelKit is for how your funnel actually sells.
Can I use an Elementor sales funnel to sell digital products as well as physical ones?
Yes, you can sell both digital and physical products using the funnel setup described in this guide. You can also sell subscription-based products by integrating a subscription plugin like Sublium Subscription with WooCommerce.
How many pages does a proper Elementor sales funnel need?
A minimum viable funnel has four pages: a landing/sales page, a checkout page, an upsell or order bump offer, and a thank you page. That's enough to capture attention, convert a buyer, increase average order value, and close the transaction
Can I A/B test my Elementor sales funnel pages?
Yes. FunnelKit has built-in A/B testing for funnel steps, so you can test two versions of a landing page, checkout layout, or upsell offer against each other and let real traffic determine the winner.
Create Your Elementor Sales Funnel Today!
Using FunnelKit and Elementor, you can create high-converting, visually appealing sales funnels for your WooCommerce store in no time. It’s perfect for selling both physical and digital products and services.
The FunnelKit Funnel Builder plugin makes it easy for store owners to increase conversions. In addition, it also helps to boost AOV by creating a one-page checkout experience and setting up one-click order bumps and upsell offers.
Wish to create an Elementor sales funnel for your online store as well? Create one with the FunnelKit Funnel Builder plugin.
Get your hands on FunnelKit today and start designing!
Editorial Team
July 7, 2026Are you looking for WooCommerce checkout optimization hacks to streamline your users' shopping experience? 7 out of 10 shoppers who reach a WooCommerce checkout leave without paying; according to Baymard...
Editorial Team
July 6, 2026A WooCommerce order form lets customers select multiple products, set quantities, and choose variations from a single page instead of visiting individual product pages. There are two ways to add...
Editorial Team
July 6, 2026The Bricks WooCommerce builder is built directly into the Bricks theme. Activate the free WooCommerce plugin, and Bricks unlocks more than 30 store-specific elements plus visual templates for every part...


