You can add express payment options to your store with Stripe Gateway for WooCommerce.
This payment option allows your visitors to directly make purchases from the product, cart, or checkout page with a single click.
This payment option is quite useful in boosting the overall conversions in your WooCommerce store.
Here's a quick tutorial on how to enable Google Pay and Apple Pay express checkout payments:
Configuration
Follow the step-by-step instructions to set up express payment options in your store.
Step 1: Navigate to the Payments tab under WooCommerce Settings
Go to the WooCommerce Settings ⇨ Payments tab.
Click on Manage next to Stripe Gateway - Credit Card (Stripe).
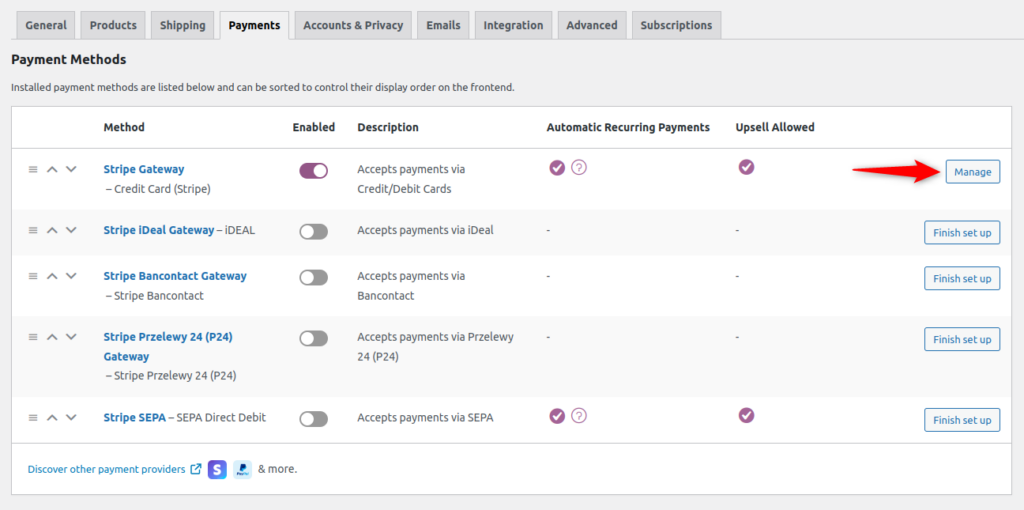
Step 2: Enable Express Payment Option
Under Express Checkout, click on Enable Express Checkout.
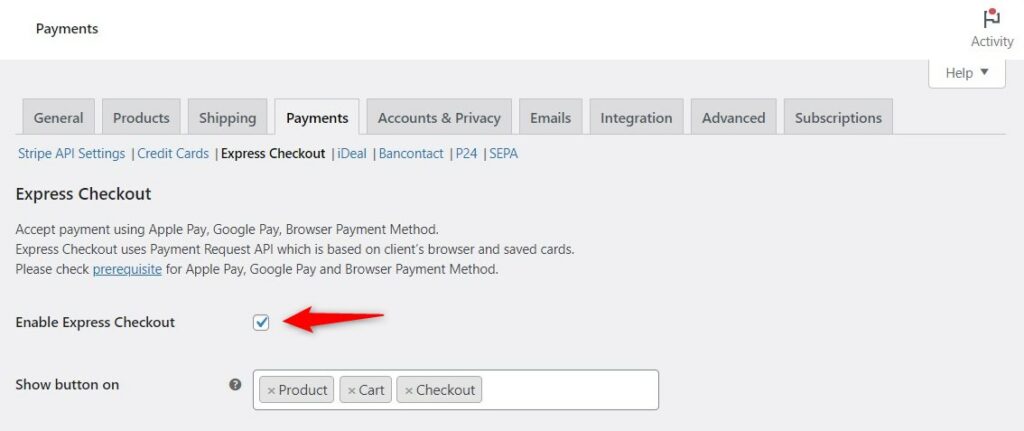
Configure the pages you want to show the express payment options.
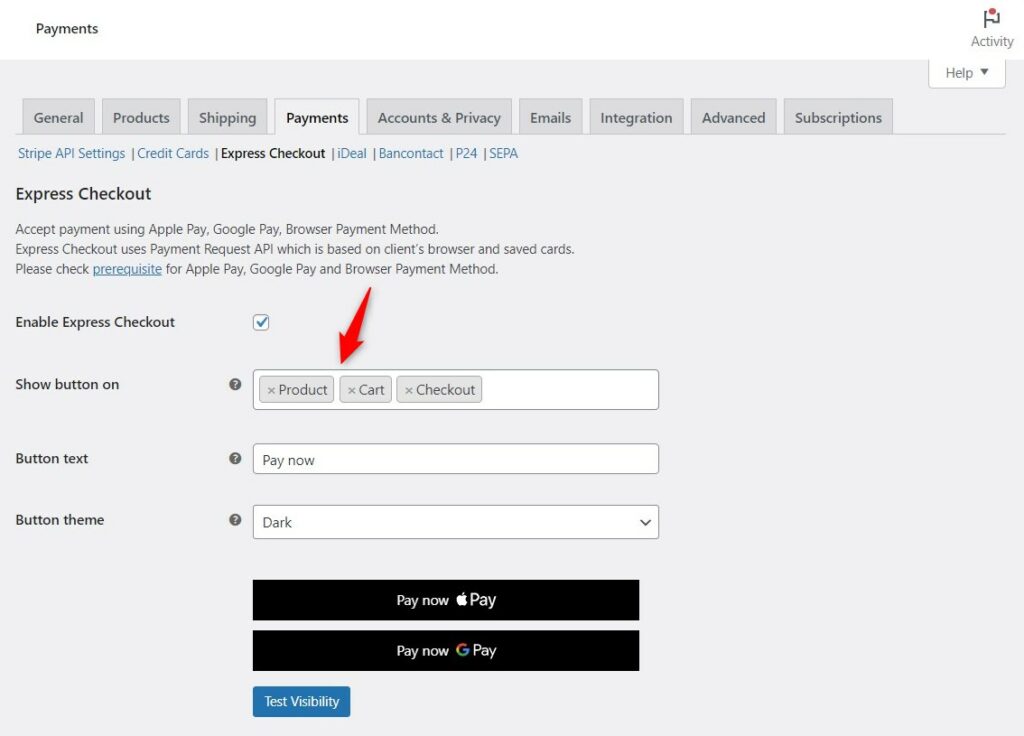
Step 3: Customize the Express Payment Buttons
Specify the basic button settings such as button text and theme here.
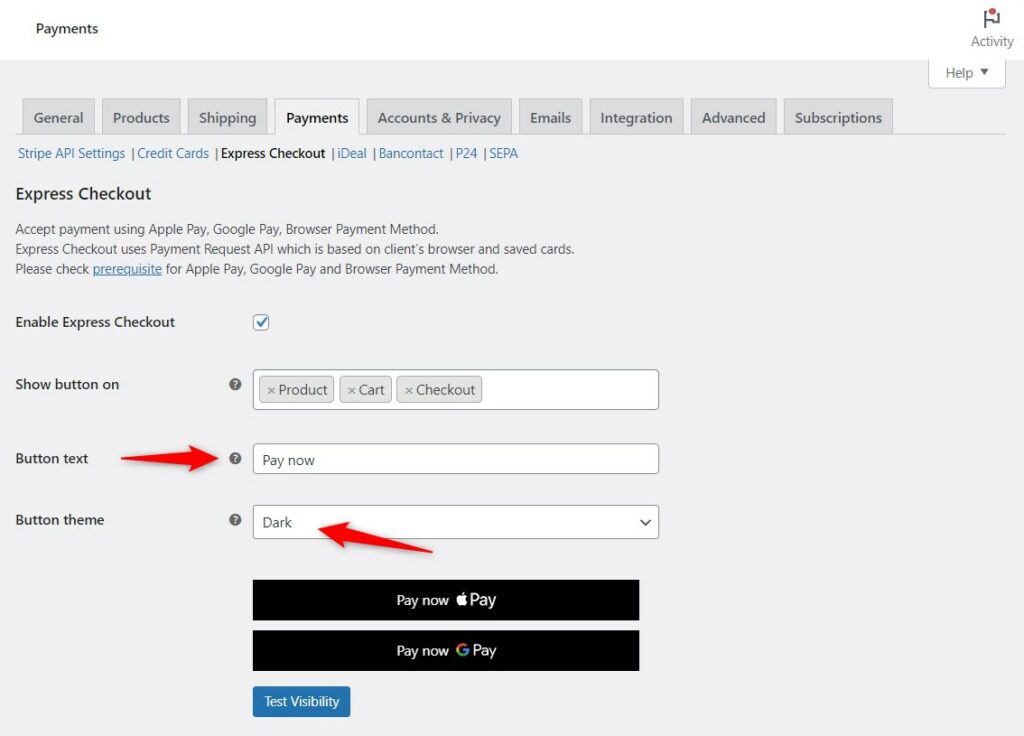
Step 4: Configure advanced customization options for express checkout
Scroll down and configure the advanced customization options for respective pages on which express checkout buttons will be visible.
Configure the button position, separator text, width, and more.
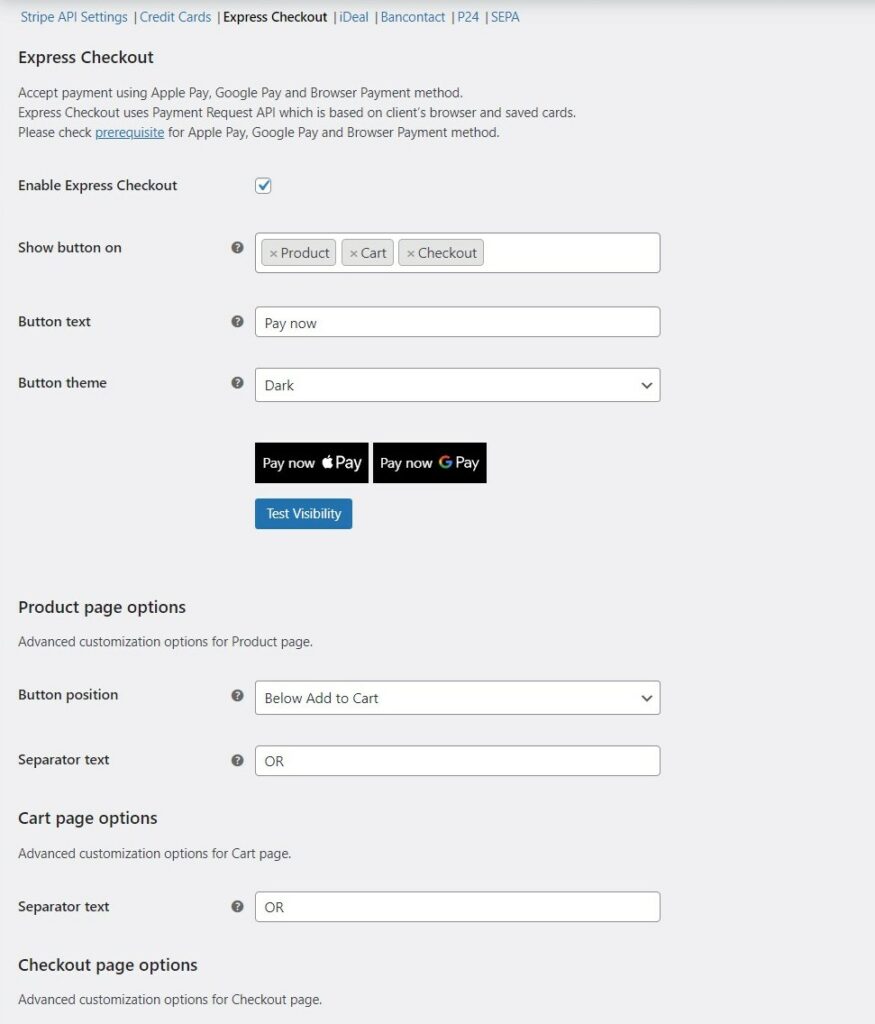
Once done, click on Save Changes.
This is how you can enable express payments in your store with Stripe Gateway for WooCommerce.
Testing
Now that you have configured all the express checkout settings, it’s time to test it on your store.
Make sure you have test mode enabled under the API settings.
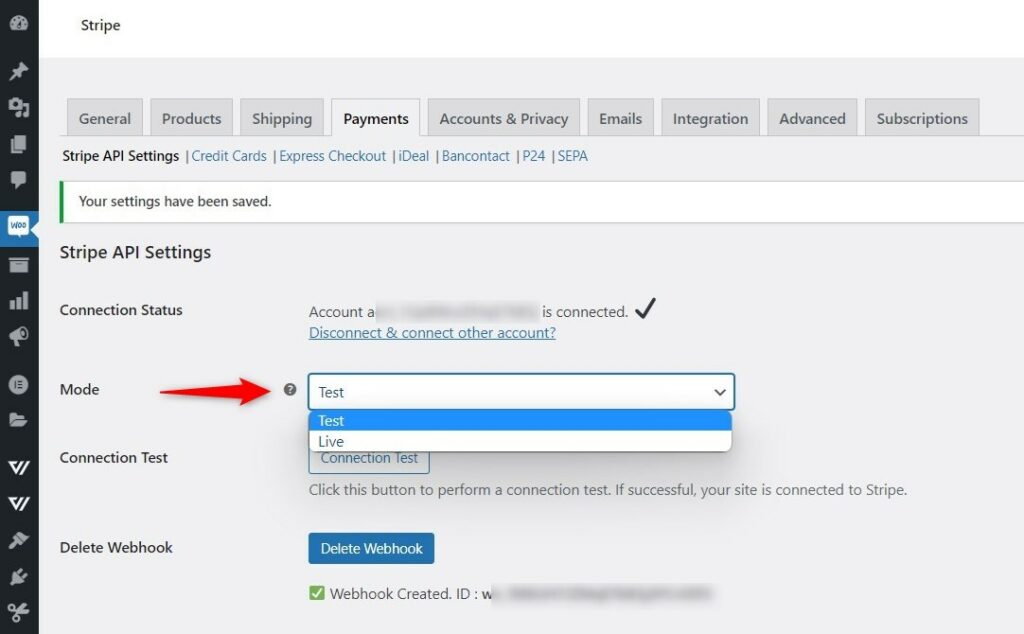
You can test your express checkout through GPay test cards.
For that, log in to your Google Account and join the GPay test group.
Now go to the product page or checkout where you have enabled this payment option, you’ll be able to see the Pay Now with GPay button.
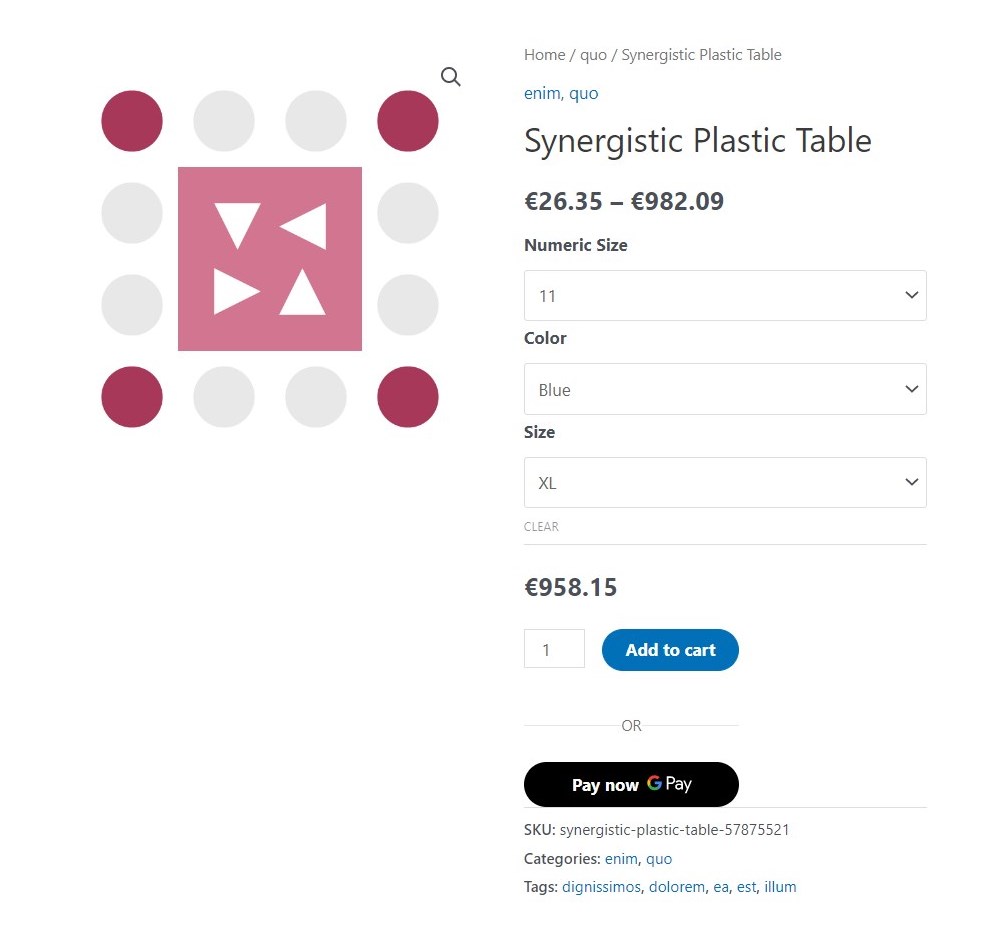
You’ll be able to see new test cards and address populated in your GPay wallet.
Test it out by completing the payment with the test cards.
If your express checkout buttons are not visible on the checkout page, refer to this troubleshooting document here.


