Before you can start accepting payments in your WooCommerce store, you need to securely connect your website with your PayPal account.
This connection ensures:
- Payments from your customers are processed securely.
- Orders are automatically verified in WooCommerce.
- Funds from completed purchases are deposited directly into your PayPal account.
How To Connect PayPal To WooCommerce Store & Enable Payments
Step 1: Open PayPal Settings in WooCommerce
Navigate to WooCommerce ⇨ Settings and switch to the PayPal tab.
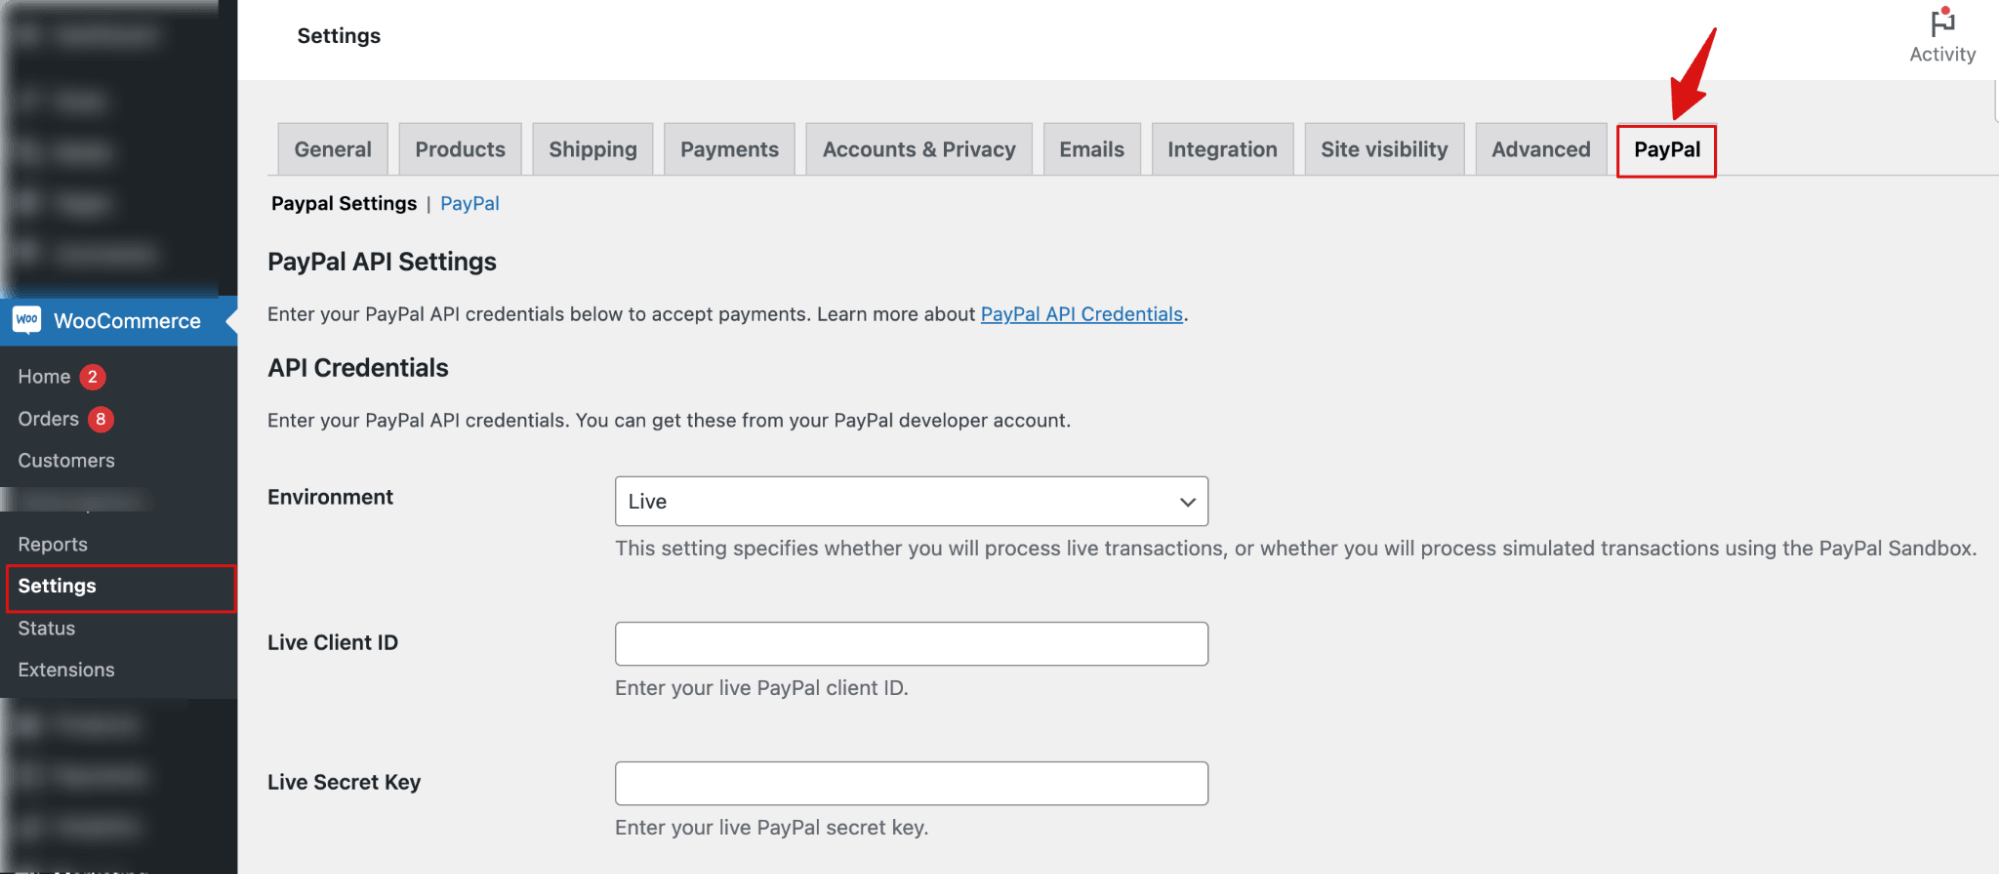
Step 2: Select the environment and add the necessary information
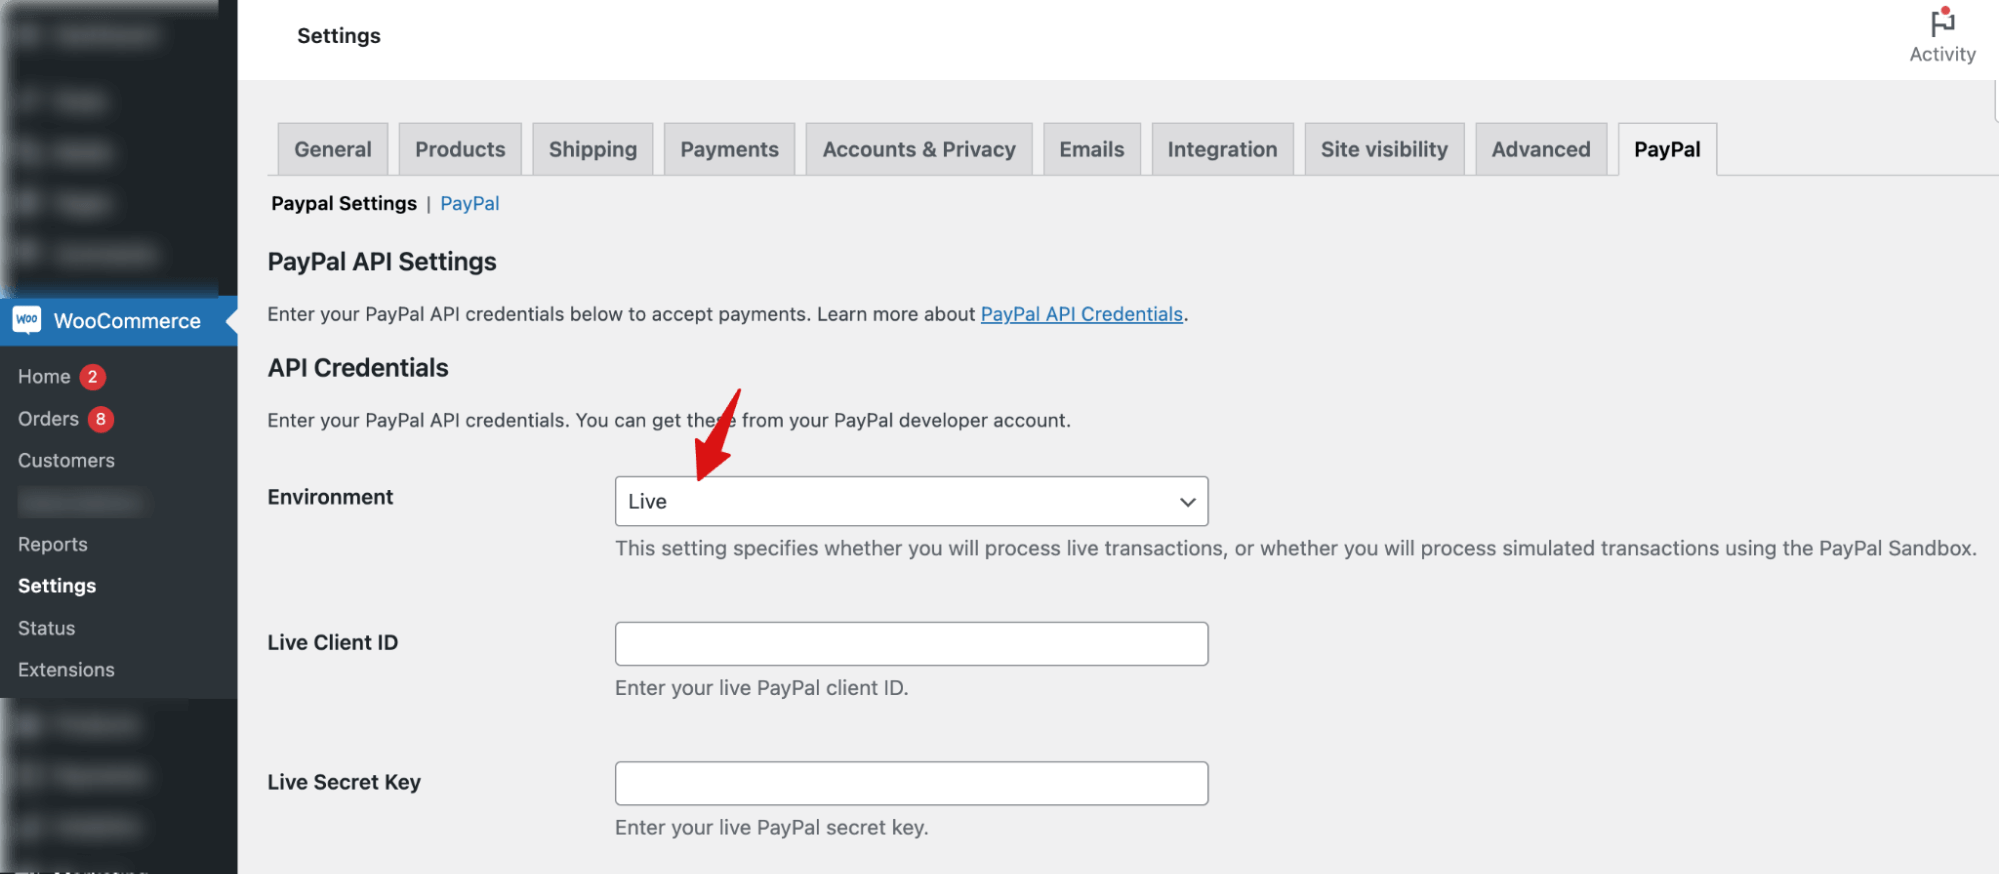
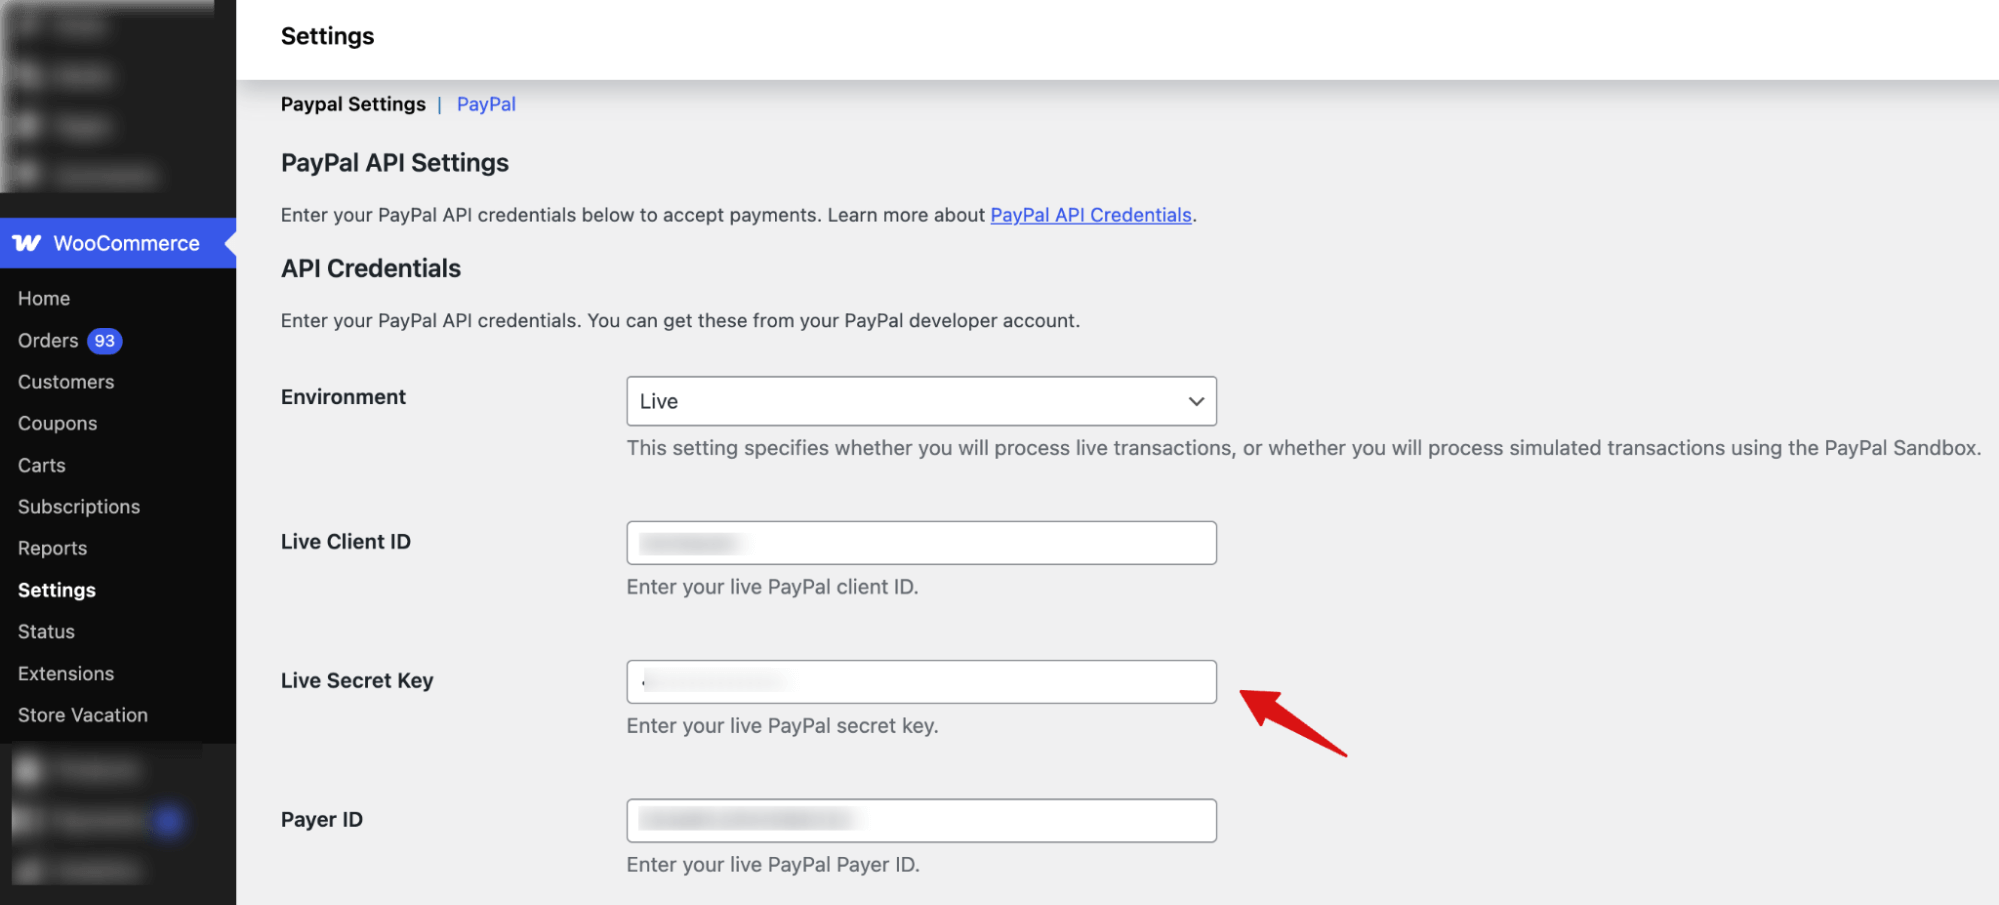
From the Environment dropdown, choose Live if you’re ready to accept live payments or select Sandbox if you’re testing your setup.
For Live mode, you need to provide
- Live PayPal client ID.
- Live Secret Key
- And Payer ID (optional)
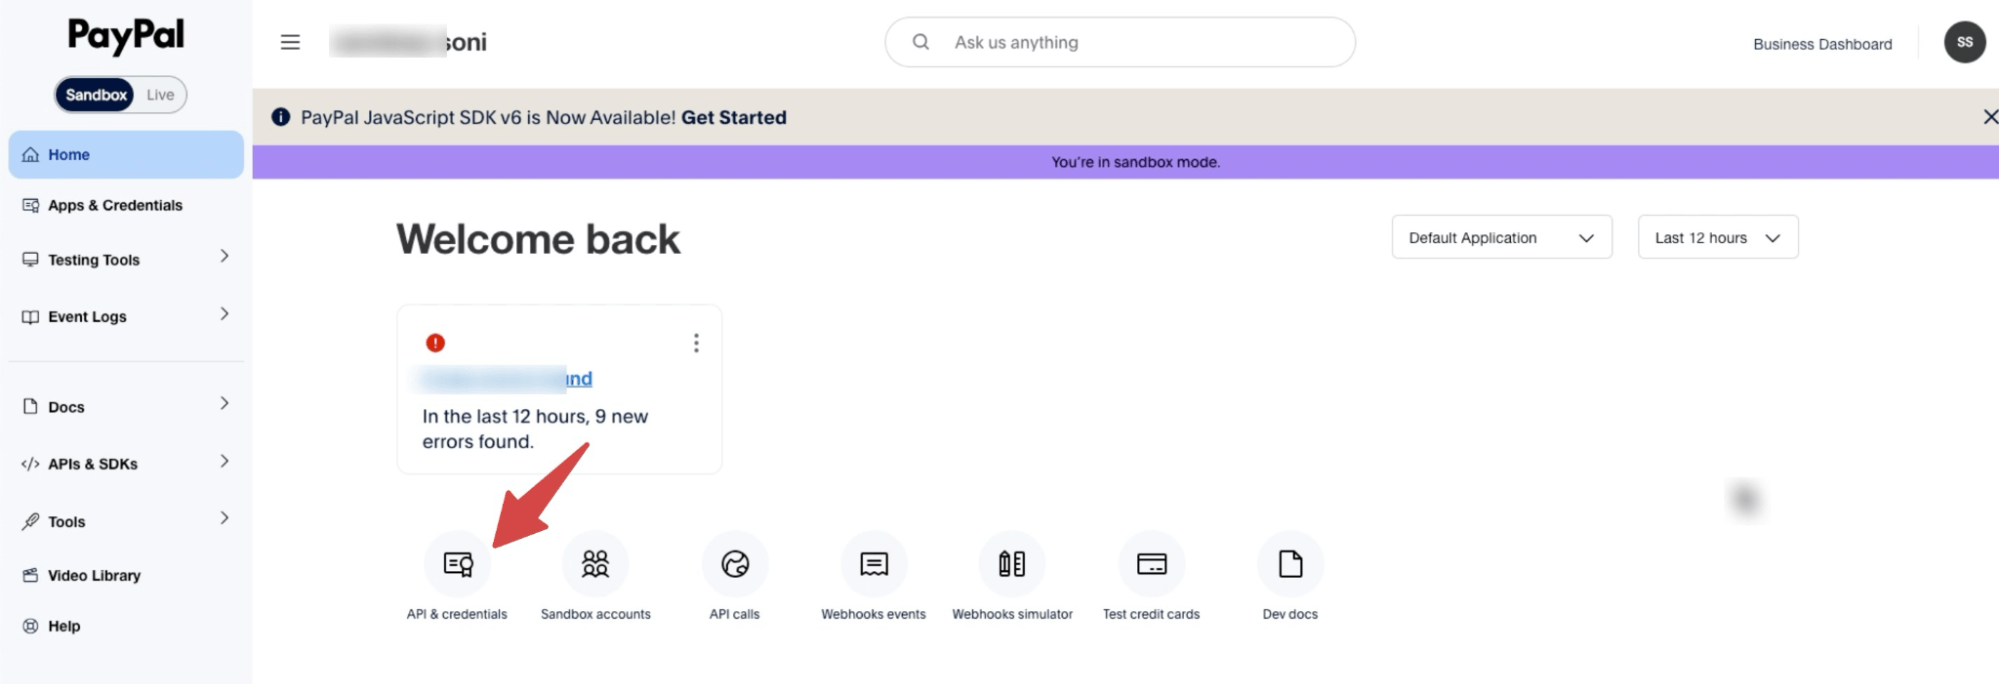
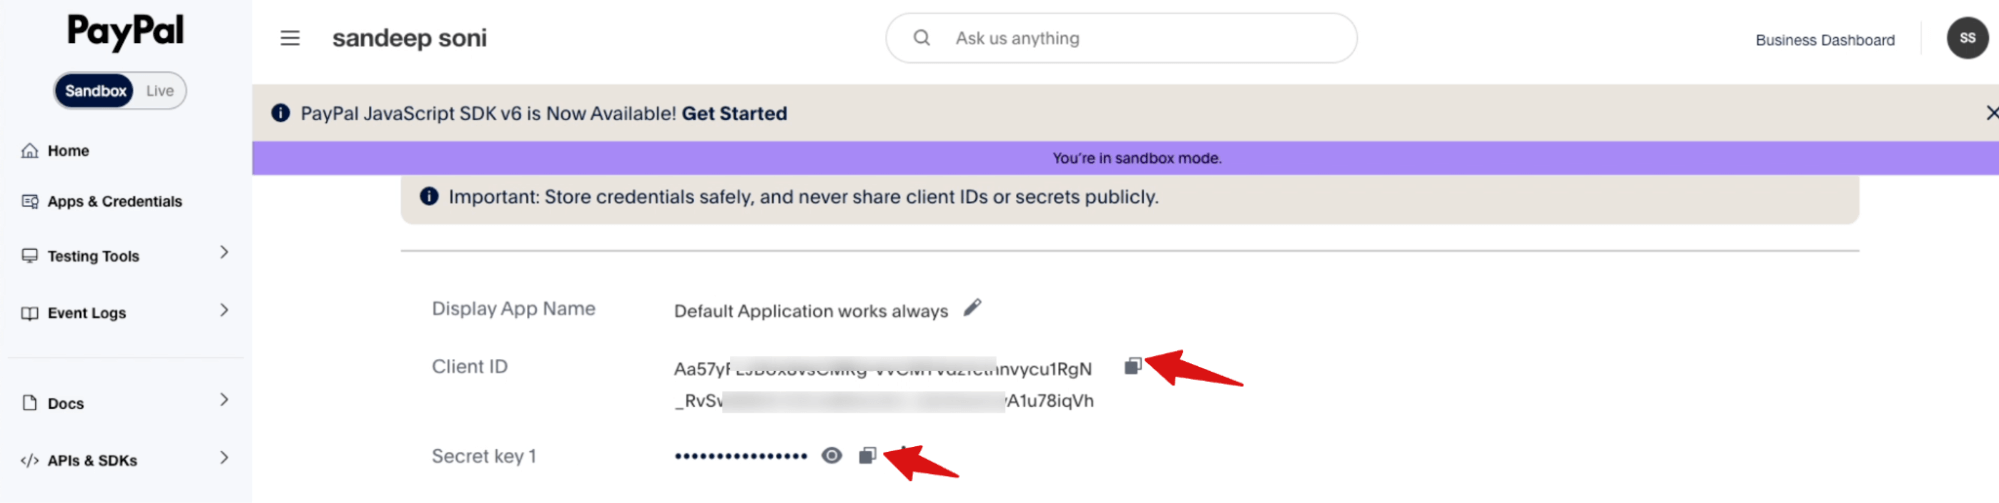
To find the essential live key and IDs, log in to https://developer.paypal.com.
Here, from the dashboard, go to API & Credentials.
Next, click on “Default Application”.
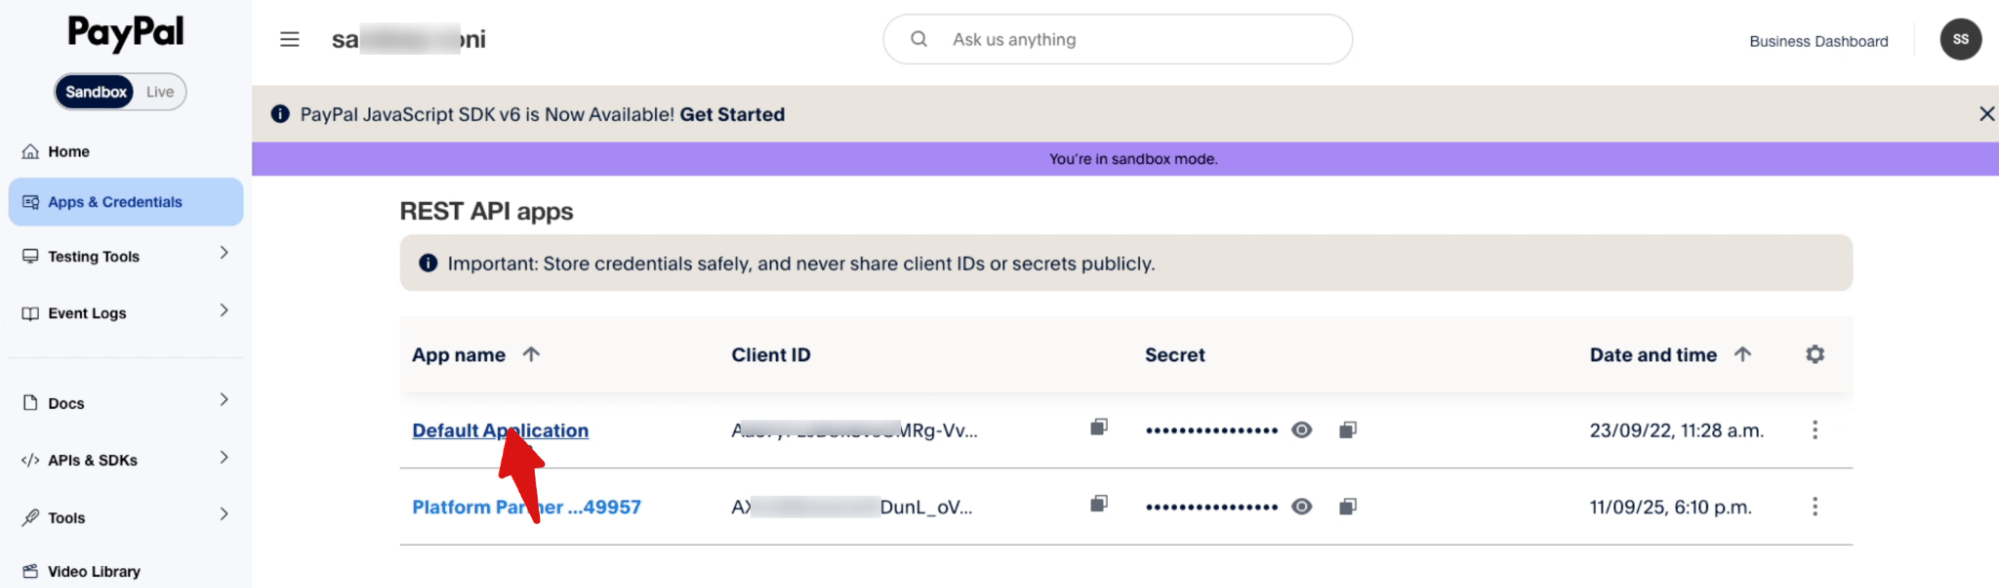
From here, you can copy the Client ID and Secret Key.
Now, come back to the PayPal settings page and paste to add all the necessary information.
Note: You can always select the Sandbox Environment and its Sandbox values to create a test mode.
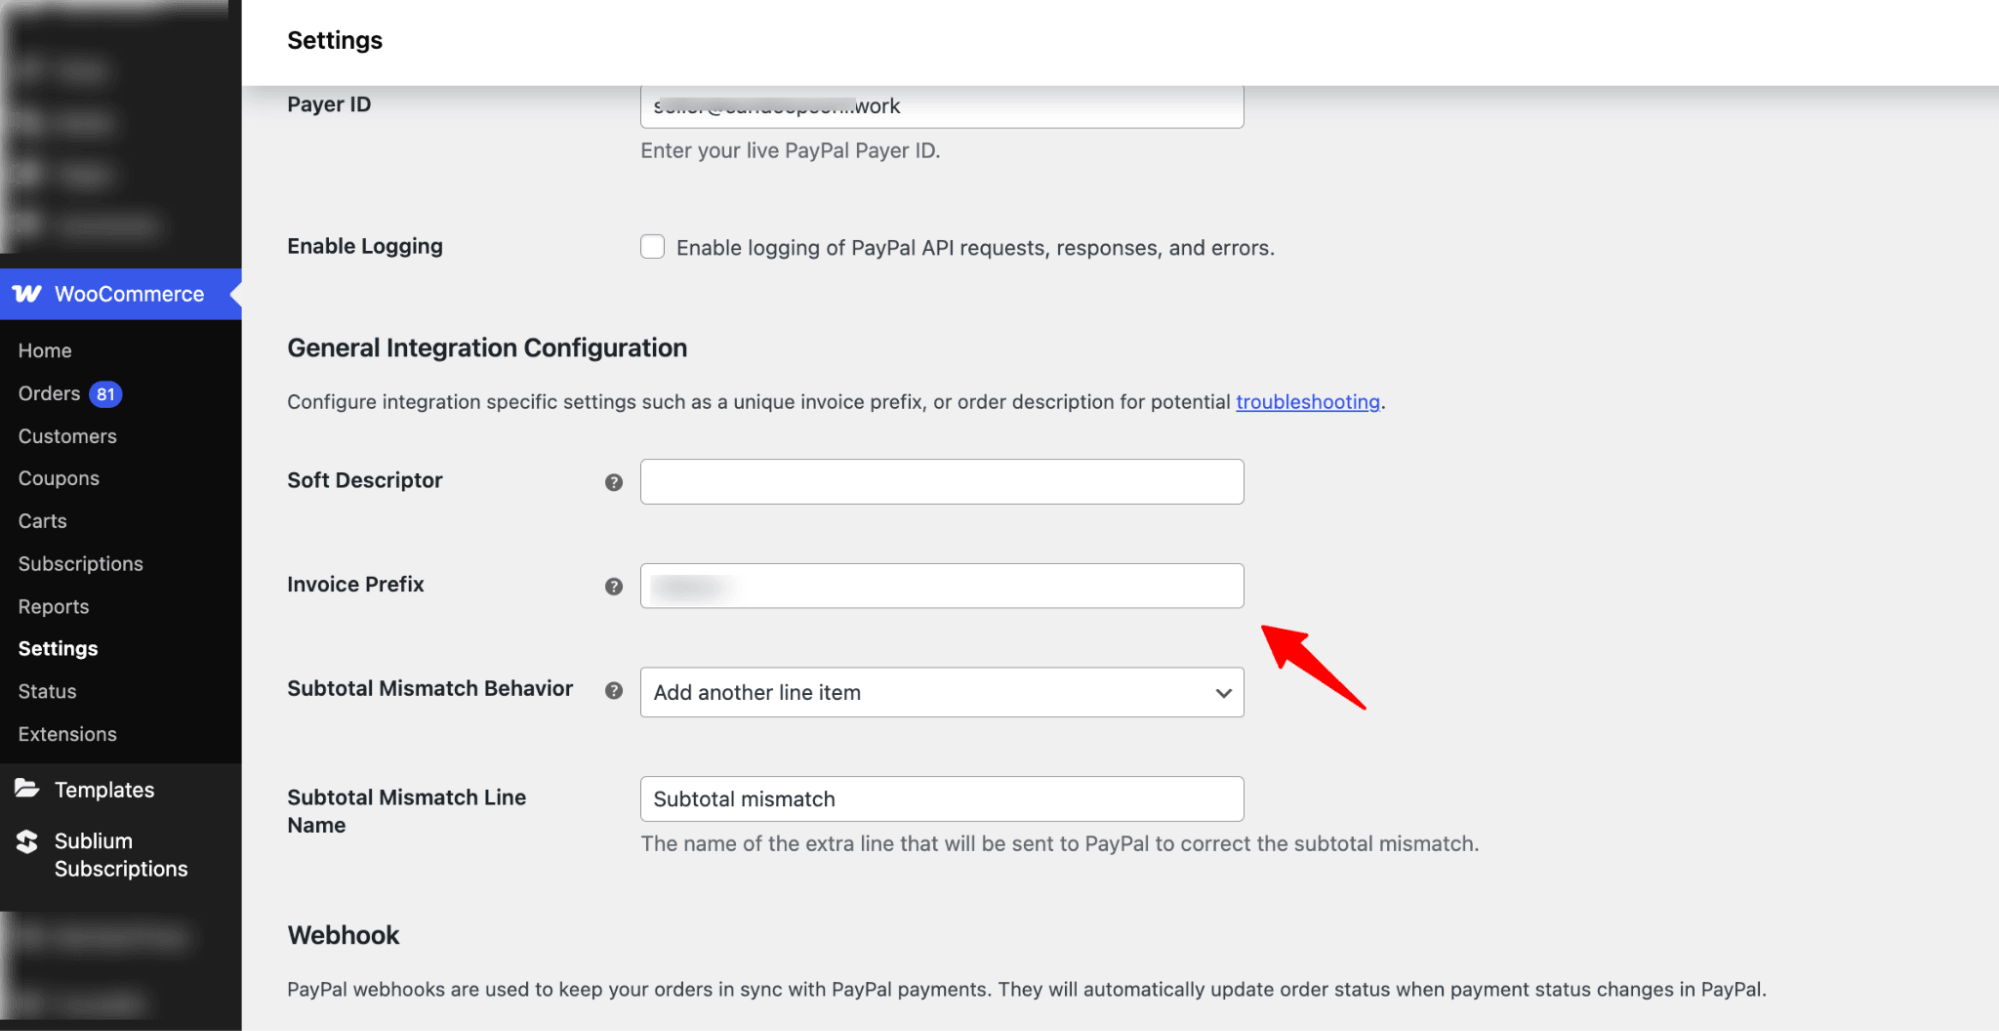
After that, under the General Integration Configuration, set Soft Descriptor, Invoice Prefix, Subtotal Mismatch Behavior, and Subtotal Mismatch Line Name.
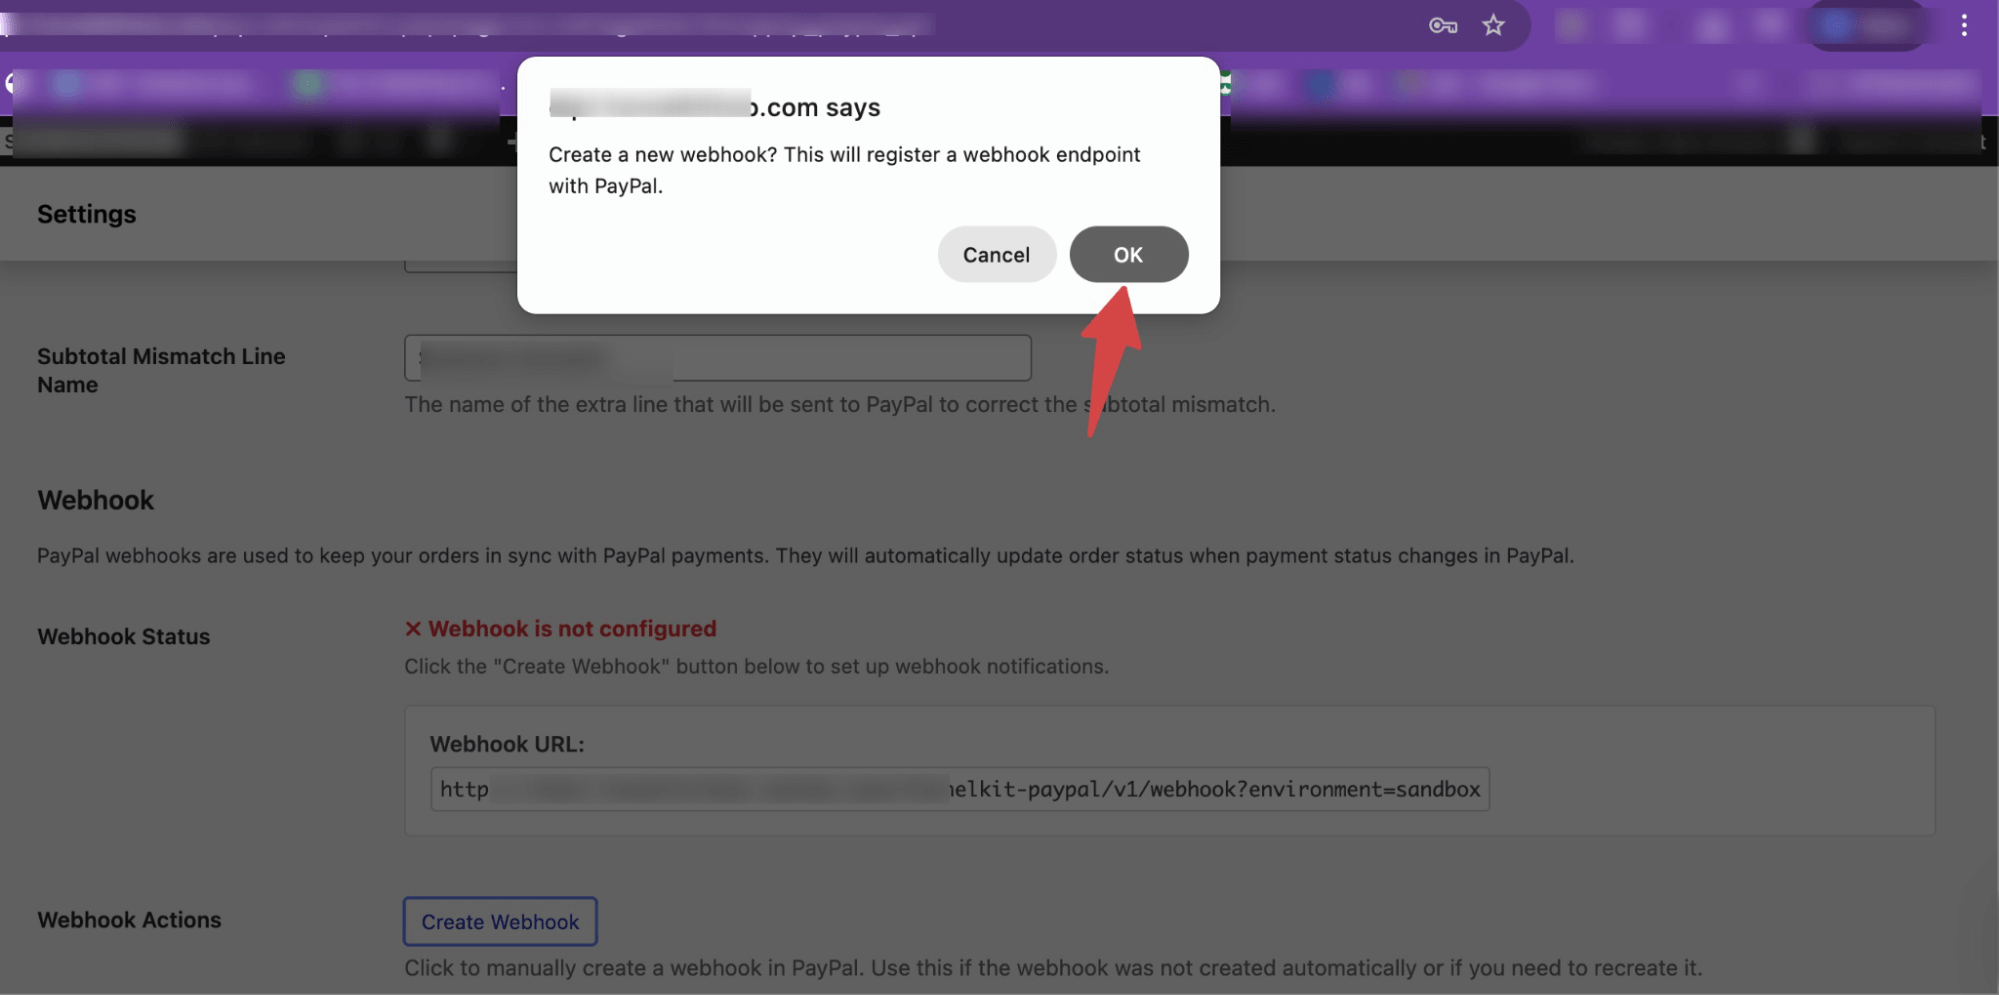
Step 3: Create a Webhook
Hit the button “Create Webhook” to start creating the webhook.
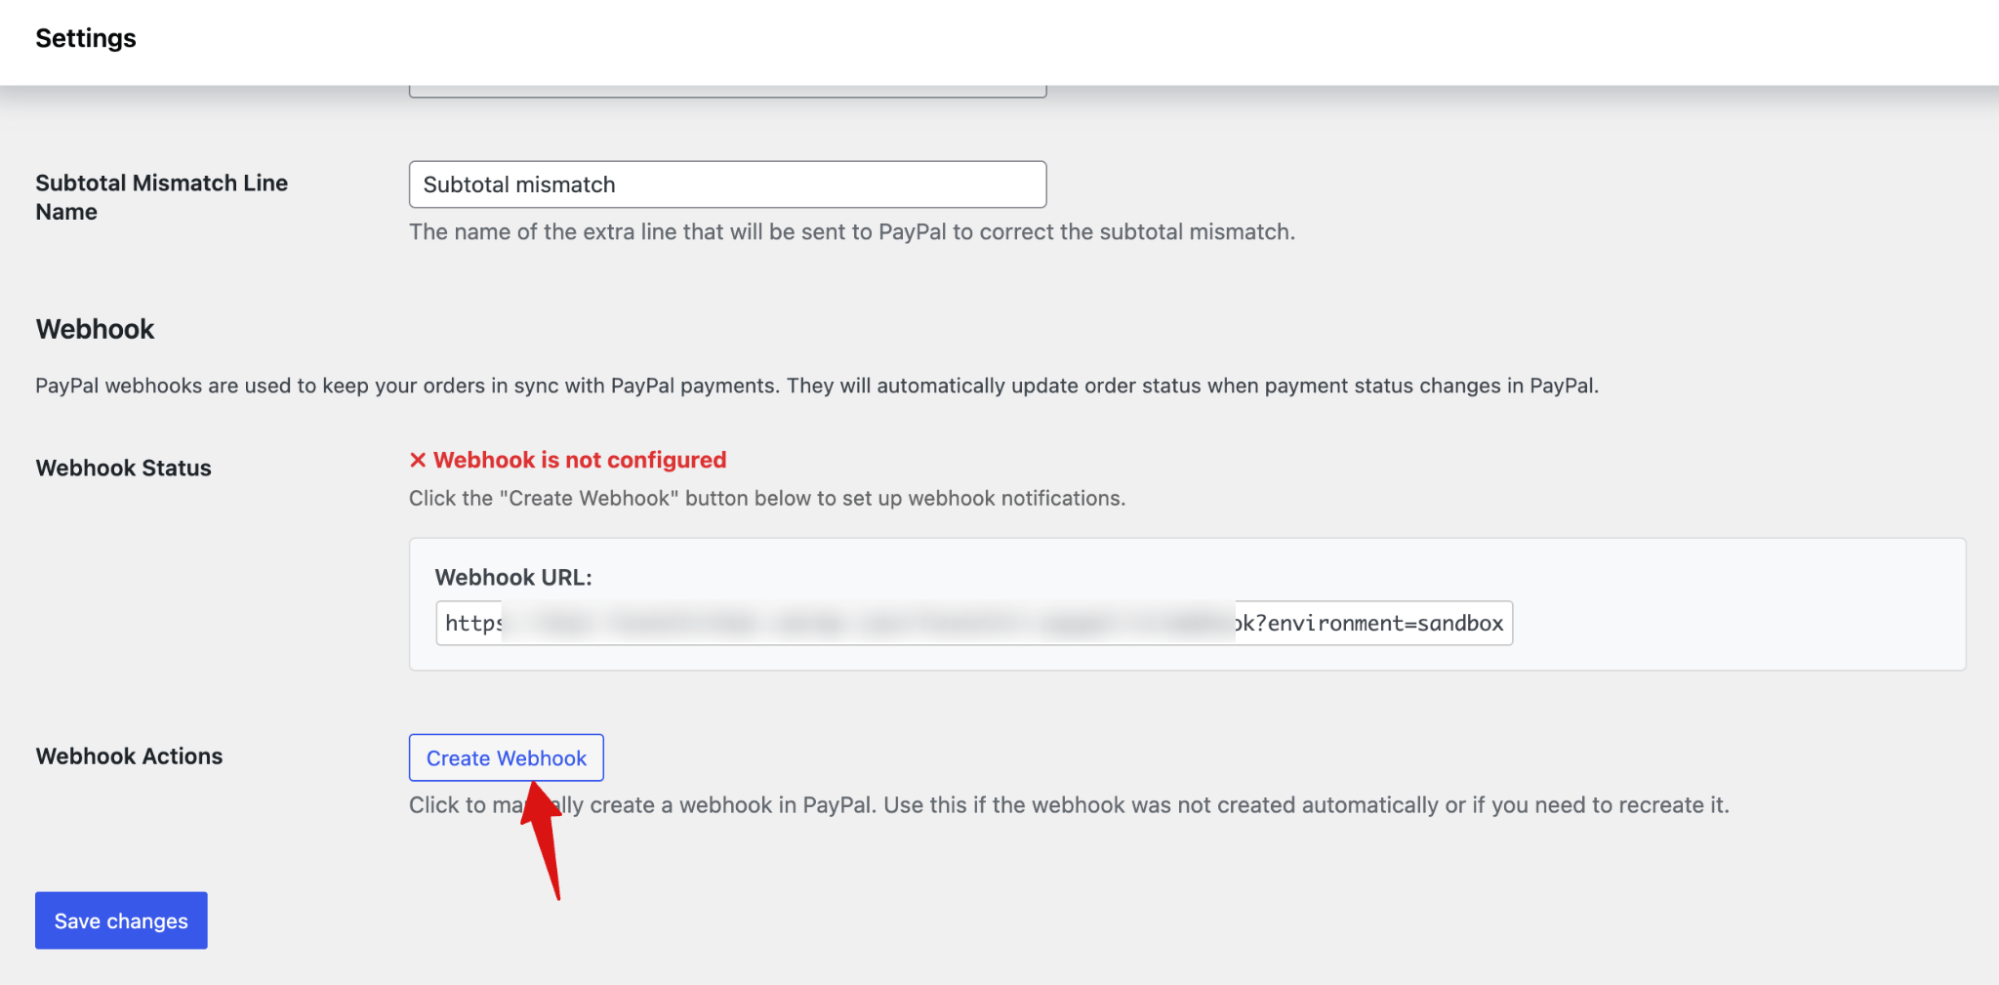
Then, confirm creating a new webhook on the pop-up.
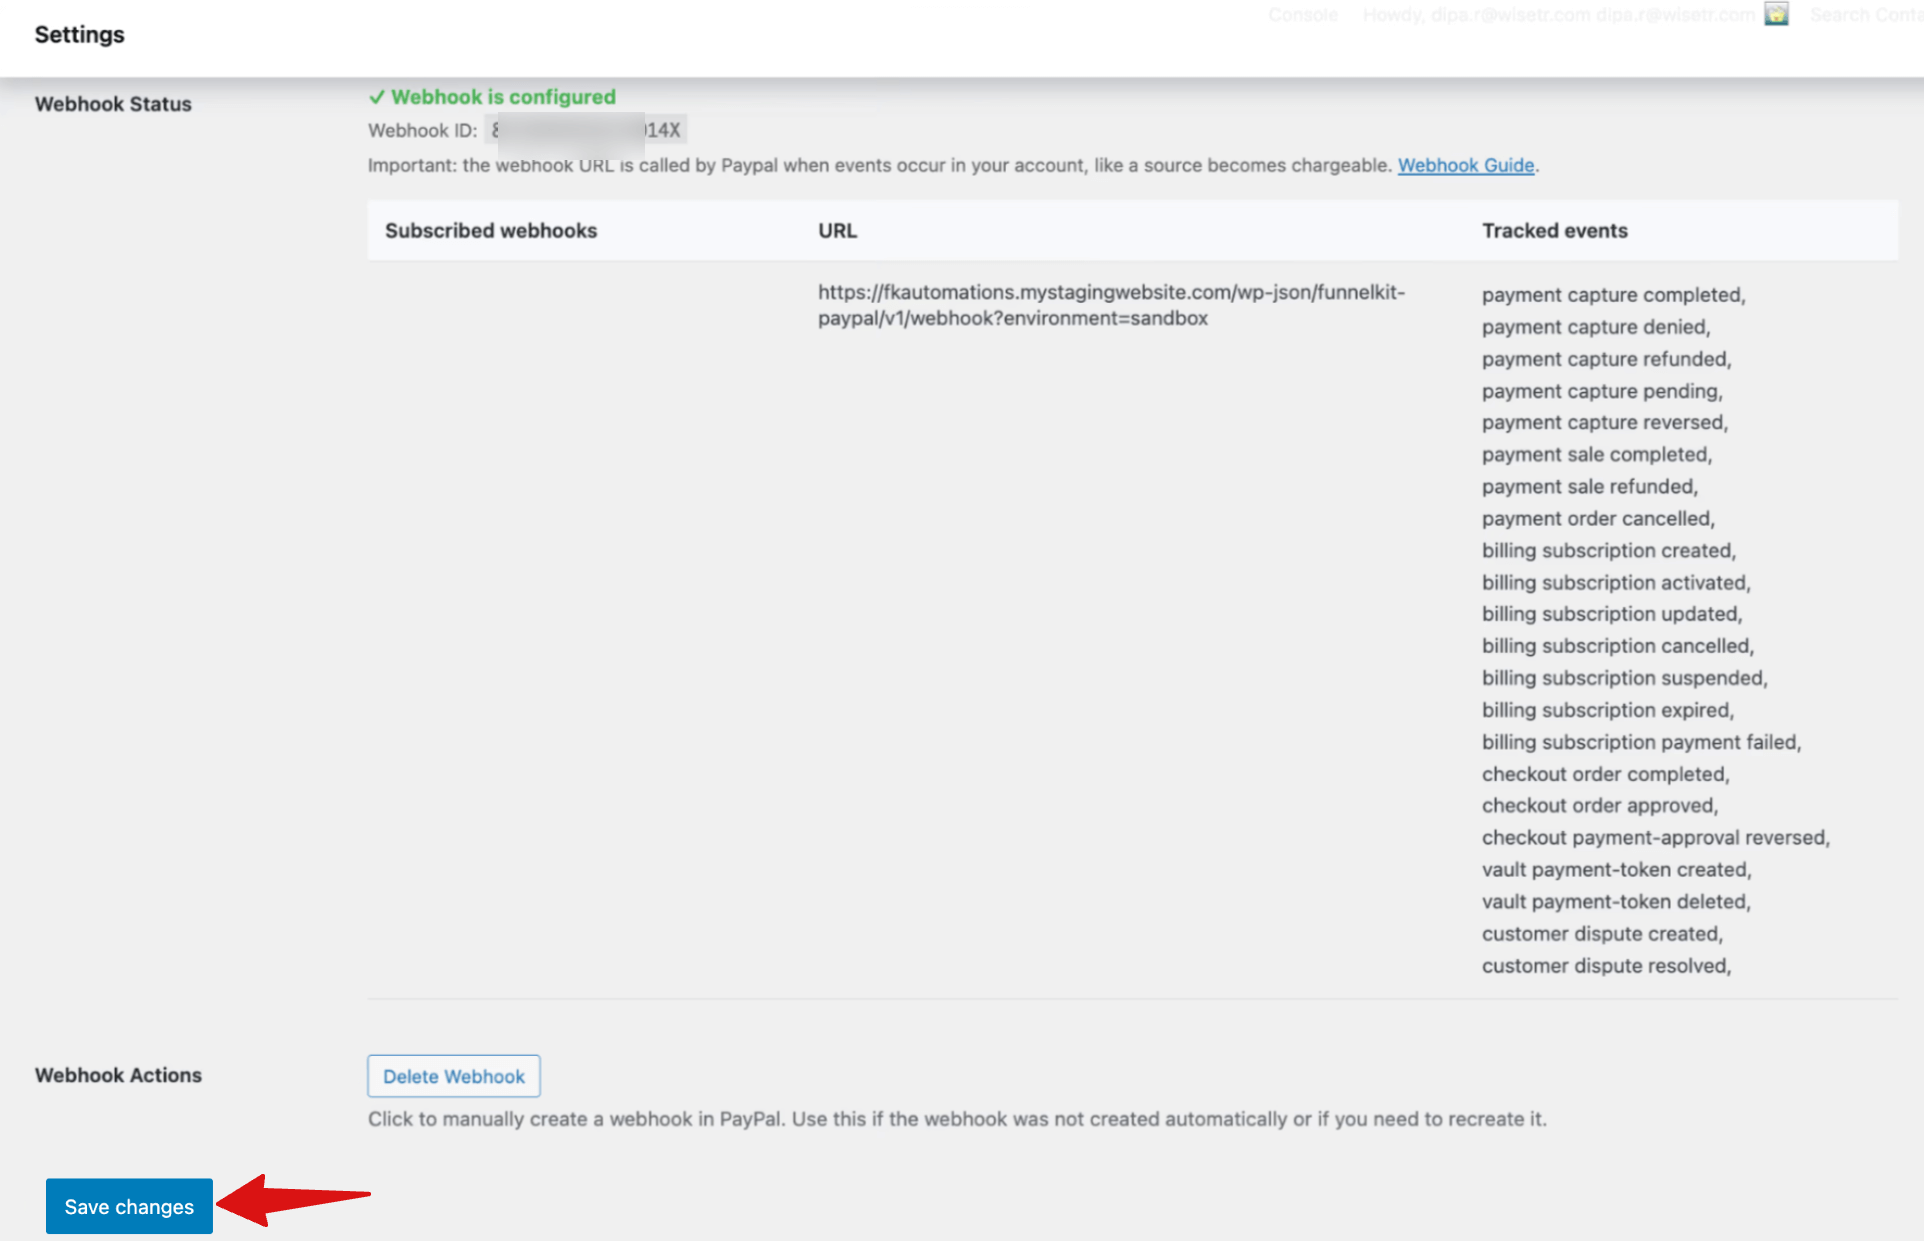
After creating the webhook, make sure to hit Save Changes.
Now PayPal is connected with your WooCommerce Store.
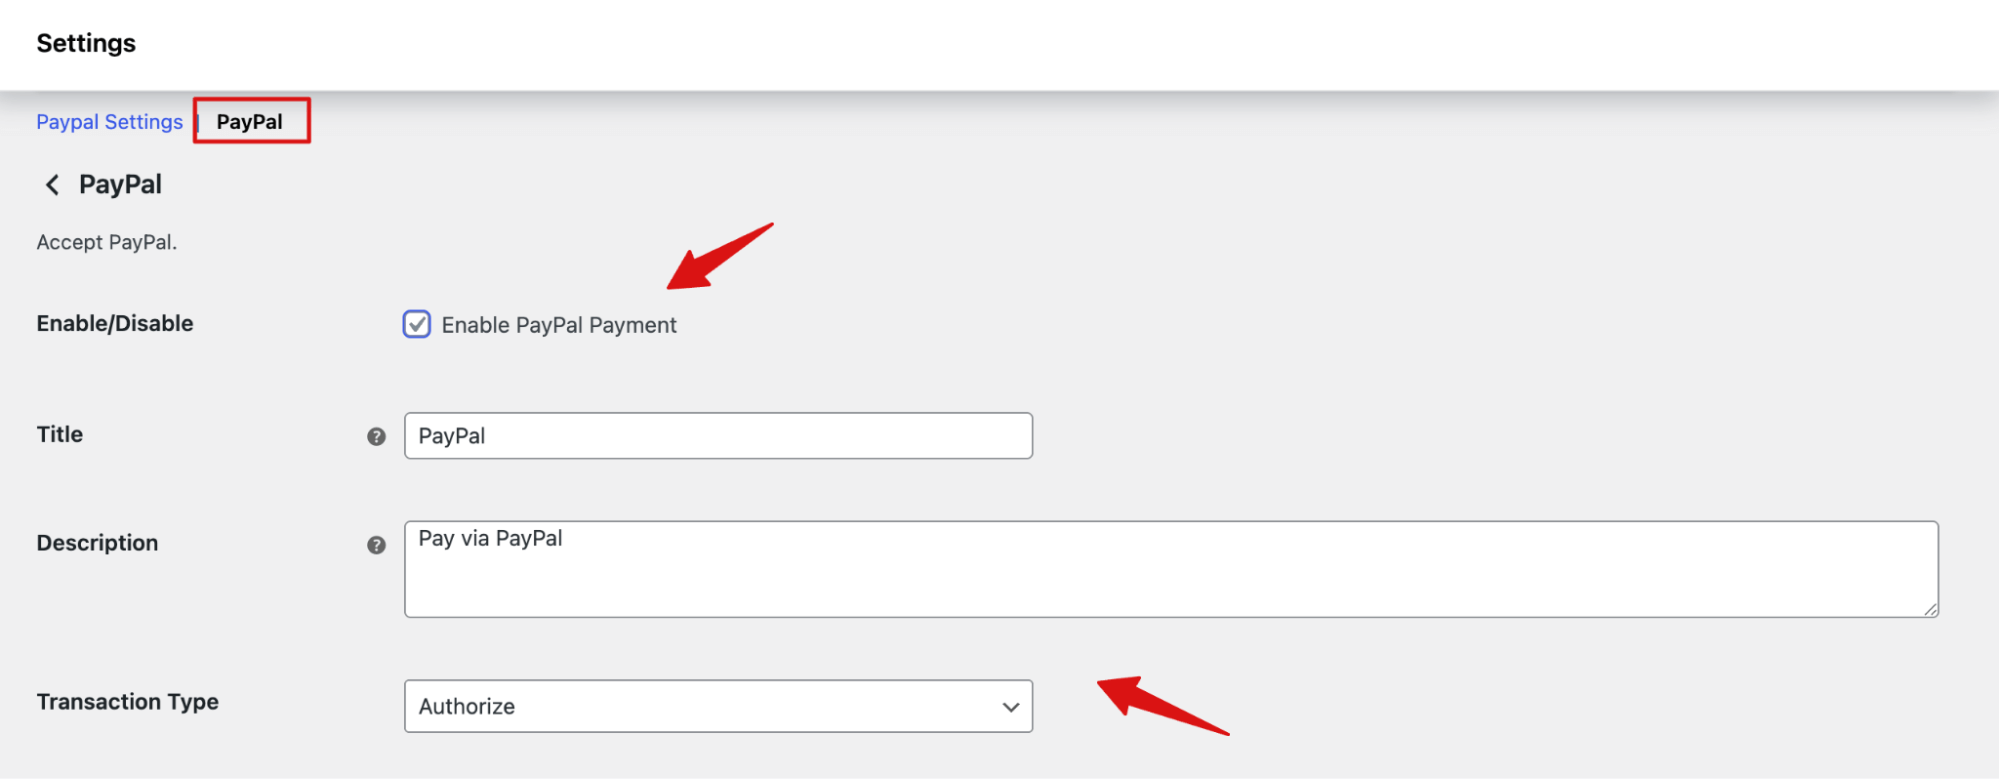
Step 4: Enable PayPal payment
Now move to the PayPal tab and enable PayPal to accept payments.
Next, customize how it appears on checkout by adding a title and description.
After that, choose the Transaction Type, either Capture or Authorize, to control when funds are collected after payment authorization.
Make sure hit Save changes.
Now PayPal is enabled on your WooCommerce store.
For more settings, check our documentation on PayPal Settings.


