
Adding trust badges to the WooCommerce checkout page is one of the fastest ways to reduce cart abandonment and recover lost sales.
Trust badges are small visual signals, such as security seals, accepted payment logos, and money-back guarantees, that reassure shoppers that their purchase is safe.
When placed near the "Place Order" button, they remove last-second doubts and push hesitant buyers to complete their orders.
The problem is that the default WooCommerce checkout lacks any trust signals. The page loads with form fields, an order summary, and a payment button, but no security icons, guarantee statements, or social proof.
According to the Baymard Institute, 19% of shoppers abandon checkout because the page does not feel secure enough, and that gap costs WooCommerce stores millions in recoverable revenue every year.
In this guide, we will show you how to add trust badges to the WooCommerce checkout page using four proven methods.
These methods include the native WordPress Block Editor, a free code snippet plugin, a dedicated checkout customizer plugin that requires no code, and a custom PHP function for developers.
Table of Contents
- 1 What are Trust Badges?
- 2 7 Types of Trust Badges That Actually Convert
- 3 Where to Get Trust Badge Images (Free + Official Sources)?
- 4 4 Ways to Add Trust Badges to WooCommerce Checkout
- 5 Method 1: Native WordPress Block Editor
- 6 Method 2: Using a Plugin (Recommended for Conversion-Optimized Checkout)
- 7 Method 3: WPCode Custom Snippet
- 8 Method 4: PHP Hooks (For Developers)
- 9 5 Proven Tips to Effectively Use Trust Badges on Your WooCommerce Checkout Page
- 10 Frequently Asked Questions
- 11 Ready to Instill Confidence in Your Buyers with Trust Badges?
What are Trust Badges?
Trust badges are small icons or symbols placed on key areas of your website, like product pages, the cart, the footer, and especially the checkout page, to show that your store is secure and trustworthy.
For example, take a look at this checkout page:
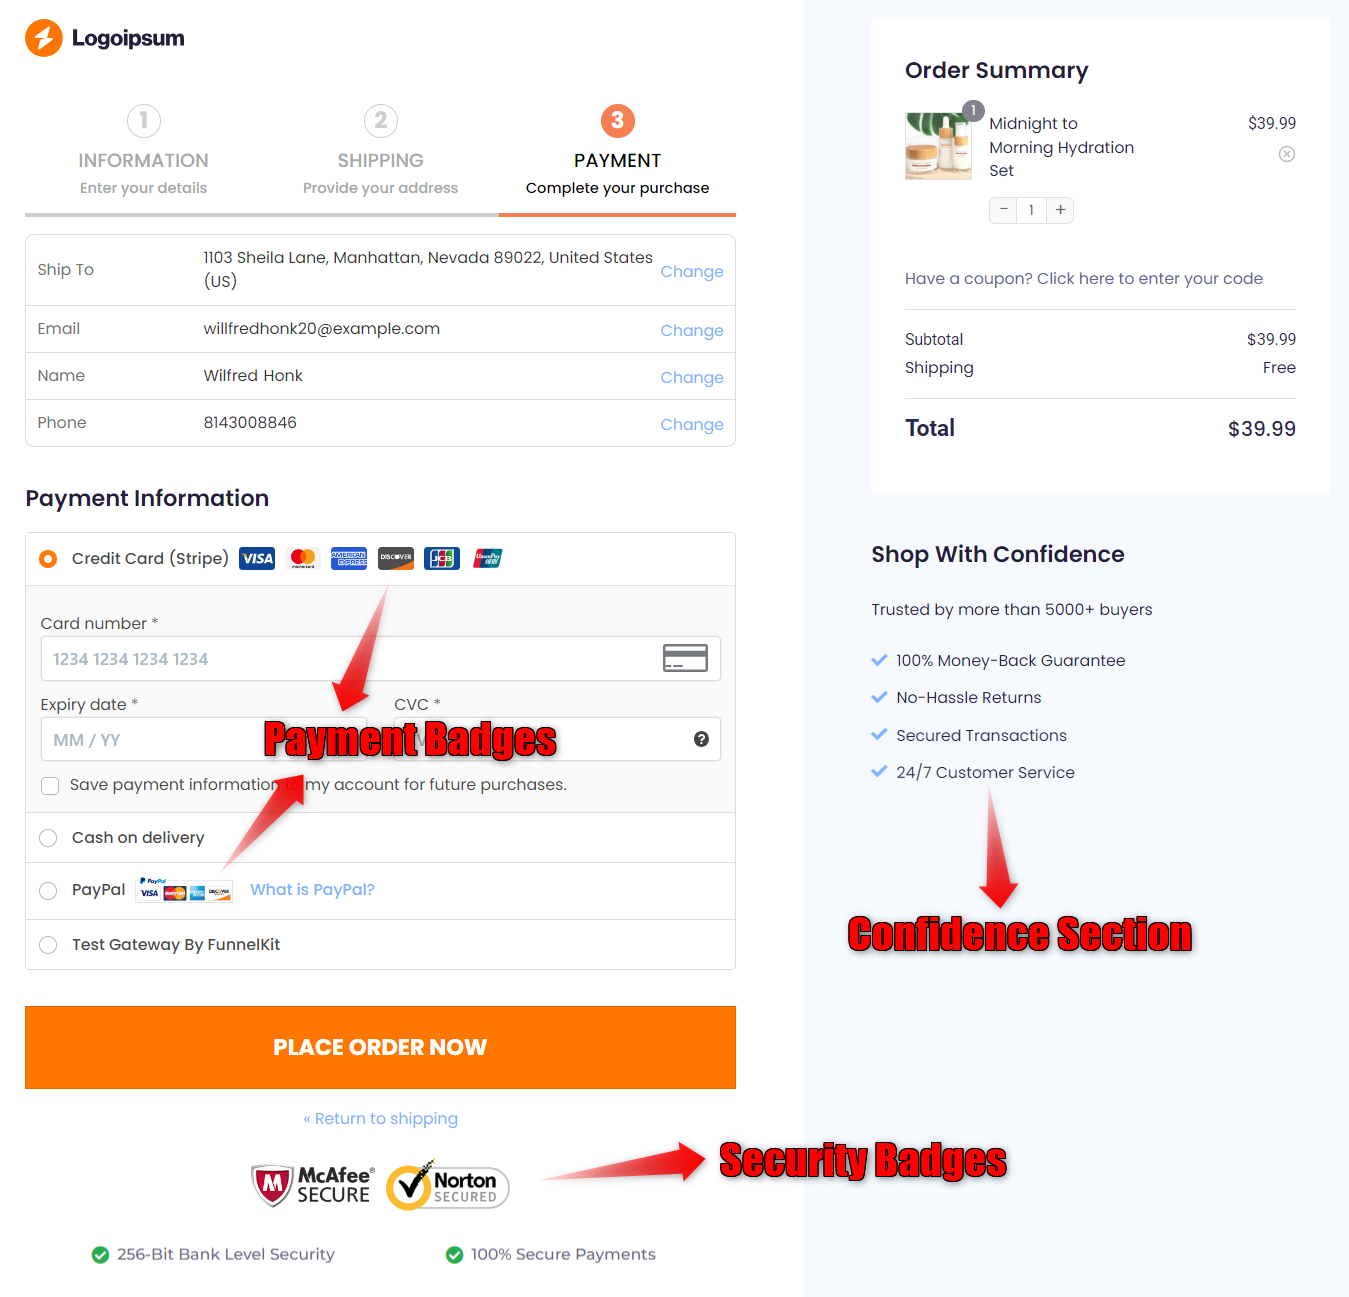
It displays security seals from McAfee and Norton, along with payment method badges. There’s also a section highlighting a money-back guarantee, easy returns, and customer support, each acting as a trust signal.
7 Types of Trust Badges That Actually Convert
You don’t need every badge ever made. The seven categories below cover virtually every conversion goal at checkout.
1. Security badges
Security badges include 'SSL Secure', 'McAfee Secure', 'Norton Secured', '100% Secure Checkout', 'End-to-End Encryption', etc.

Security badges work because they're recognizable. To use Norton Secured, you'll need a DigiCert SSL certificate (Symantec is now part of DigiCert).
For McAfee Secure, you’ll get your seal from TrustedSite after their certification scan.
2. Payment badges
Payment badges include Visa, Mastercard, American Express, Discover, PayPal, Apple Pay, Google Pay, Stripe, Klarna, Afterpay, etc.
These signals indicate that your customer's preferred payment method works on your store. The badges are legal to display from each provider's brand center.
3. Money-back guarantee badges
Money-back guarantee badges include '14-Day Money-Back Guarantee', 'Risk-Free Purchase', '30-Day Returns', etc.
A visible refund policy removes downside risk, which matters most for first-time buyers and high-ticket items.
4. Free shipping badges
Free shipping badges include 'Free Shipping on All Orders', 'Free Shipping over $50', and more.
Free shipping badges set clear expectations and add perceived value.
Surprise shipping costs are the #1 reason for cart abandonment, according to Baymard. So a clear shipping promise displayed at checkout sets expectations and adds perceived value.
5. Third-party certification badges
Certification badges include 'Better Business Bureau (BBB) Accredited Business', 'TrustedSite Verified', 'Google Certified', 'TrustPilot Verified', and more.
They communicate that your business meets industry standards and has been independently vetted.
6. Customer reviews
About 92% of shoppers read reviews before buying. Review badges offer instant social proof and remove buyer doubt.
Effective examples include ‘Rated 4.9/5 by 13,000+ Customers’, ‘Over 8,300 Verified 5-Star Reviews’, and more.
These badges show that real people trust your store, and others should, too.
7. Satisfaction guarantee badges
Satisfaction badges include '100% Satisfaction Guaranteed', 'Try It Risk-Free', etc.
Pairs powerfully with money-back-guarantee badges for digital products, courses, and SaaS, anywhere the buyer can’t physically inspect what they’re paying for.
Where to Get Trust Badge Images (Free + Official Sources)?
You can’t legally use most trust badges by right-clicking and saving the image. The sources below are either free, official, or licensable.
Free badge generators
- Canva: Search 'trust badge' for hundreds of editable templates (free tier covers most needs).
- Freepik: Large library of payment and security icon sets; attribution required on the free tier.
- Flaticon: Vector icons for payment methods and security symbols.
Official payment provider brand centers (free, license-compliant)
- Visa Brand Center: Official downloadable Visa logos.
- Mastercard Brand Center: Mastercard symbol and acceptance marks.
- PayPal Logo Center: PayPal brand assets.
- Stripe Brand Page: Stripe logos and "powered by" marks.
- Apple Pay marketing guidelines and Google Pay brand guidelines.
Paid certification badges (earned, not bought as images)
- TrustedSite: formerly McAfee Secure. Plans start around $30/month.
- DigiCert SSL + Norton Secured Seal: Included with EV and OV SSL certificates ($175+/year).
- BBB Accreditation: Annual fees based on business size, typically $500–$1,500/year for small businesses.
- Trustpilot: Free verified reviews; paid plans unlock the on-site widget.
Never display a certification badge you haven’t actually earned. It’s a federal trade practices violation in the US, it’s increasingly auto-detected by browser security tools, and one screenshot on social media is enough to do real reputational damage.
4 Ways to Add Trust Badges to WooCommerce Checkout
There are four practical methods. Select your method based on whether you’re using the new block-based checkout, whether you want to avoid touching theme files, and whether you’re rebuilding the whole checkout or just adding badges to an existing one.
Method 1: Native WordPress Block Editor
This method is best for stores using the default block-based checkout, no plugins needed.
Since WooCommerce 8.3 (November 2023), the Checkout block is the default experience for all new stores. That means you can add trust badges directly using the WordPress Block Editor without any code, no plugin, no theme edit.
Step 1: Upload your badge images
Go to Media ⇨ Add New in your WordPress dashboard and upload your trust badge images.
We recommend using an optimized SVG or compressed PNG (under 100KB each).
Step 2: Add your badge to the checkout page
Go to Pages ⇨ Checkout (or Appearance ⇨ Editor ⇨ Pages ⇨ Checkout if you’re using a block theme).
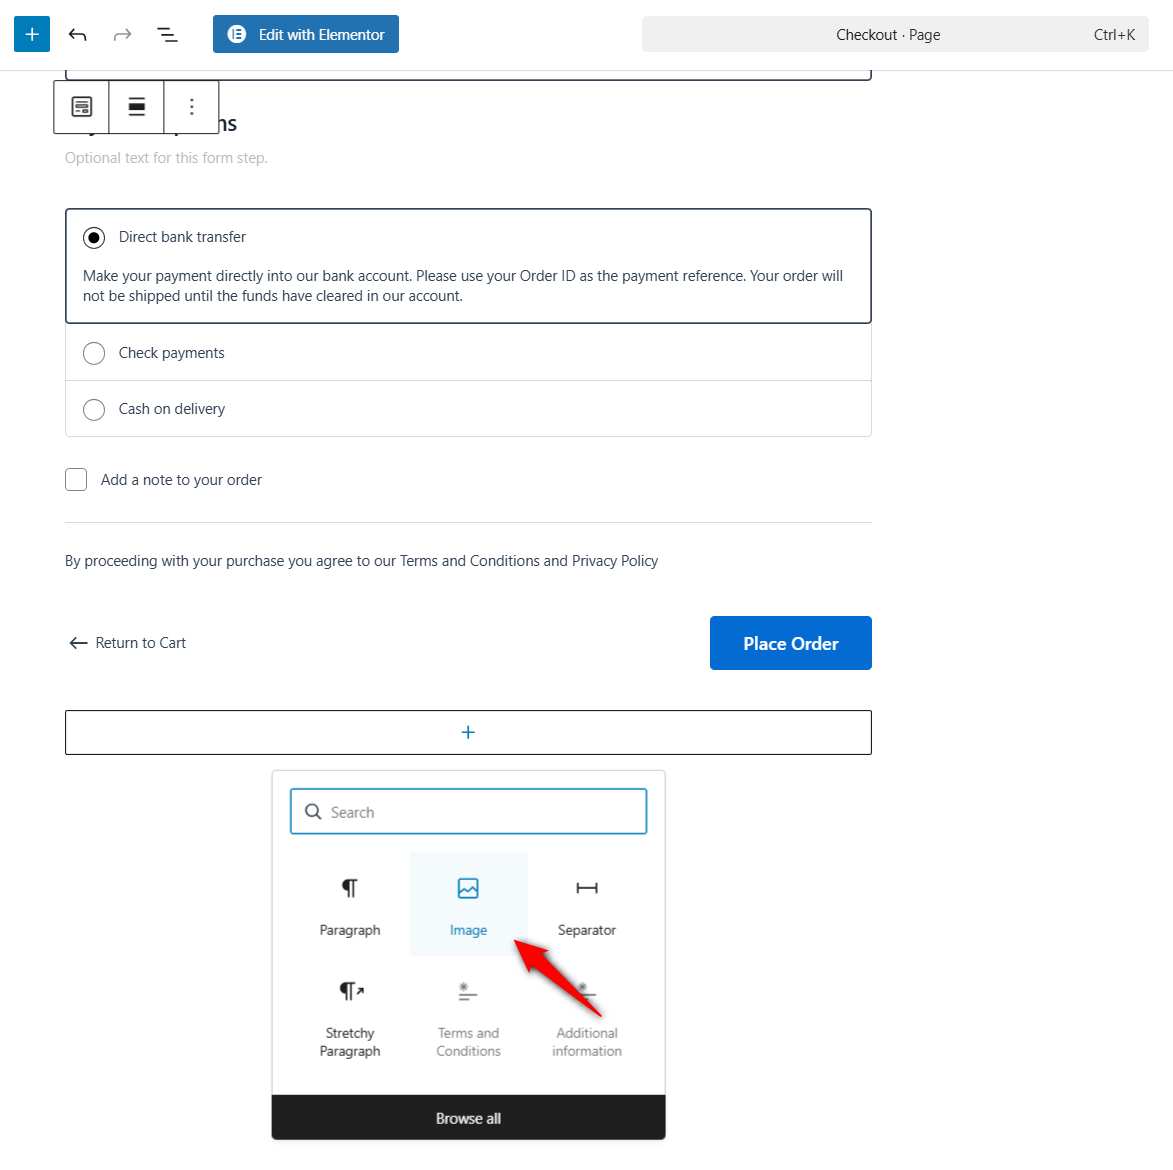
Click the area just above or below the Checkout block where you want the badges to appear. Click the + (block inserter) and add an Image block for a single badge, or a Gallery block for a row of payment logos.
Upload your badge image, set alignment to center, set max width to around 60-120px per badge, and use the Block sidebar to set alt text (important for both accessibility and SEO).
For badges inside the order summary area, use the Block Editor's "Pinned Block" feature or insert your badges as part of the cart sidebar template via Appearance ⇨ Editor ⇨ Template Parts ⇨ Order Summary.
Once done, hit 'Update' to save your changes.
Please note that the native Block Editor lets you place badges around the Checkout block, but not inside the payment field area or directly under the Place Order button without theme edits.
If you need precise placement under Place Order, use Method 2 or Method 3.
Method 2: Using a Plugin (Recommended for Conversion-Optimized Checkout)
The simplest way to add trust badges without touching code is by using a checkout customizer plugin.
FunnelKit Funnel Builder makes this easy.
It offers professionally designed checkout templates with pre-installed trust badges, letting you create a highly optimized checkout experience in minutes.
Funnel Builder is available in free (lite) and premium versions. However, we recommend using the Pro version to unlock multi-step checkout templates and various optimization options.
Get a copy of the FunnelKit Funnel Builder below.
Install and activate the FunnelKit Funnel Builder plugin on your WordPress website.
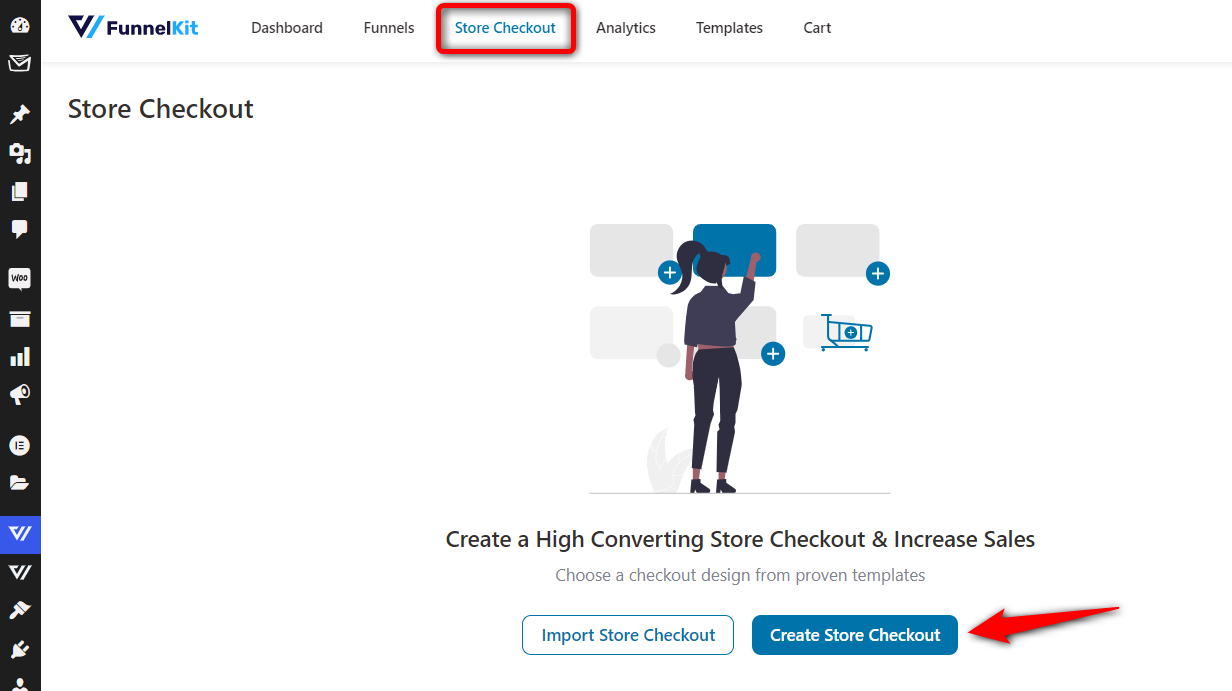
Step 1: Create a store checkout
Navigate to FunnelKit ⇨ Store Checkout and click on the ‘Create Store Checkout’ button.
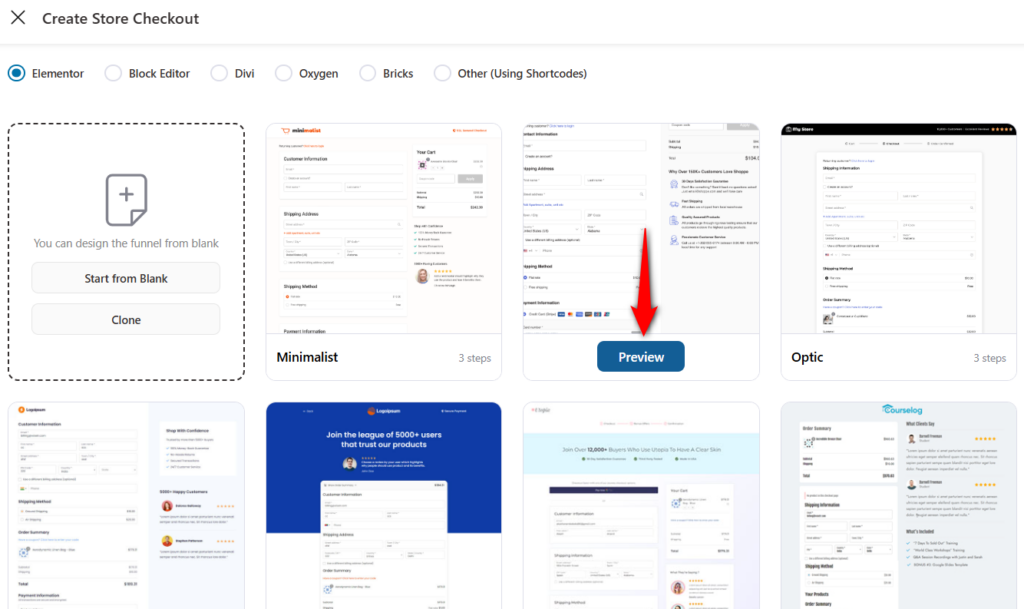
You’ll get directed to the FunnelKit checkout templates page. These are pre-designed templates that come optimized for all devices.
Choose your page builder, then hover over the store checkout template you like and hit ‘Preview’.
Next, select the number of steps you want on your checkout page and hit the ‘Import This Funnel’ button.
Enter the name of your store checkout.
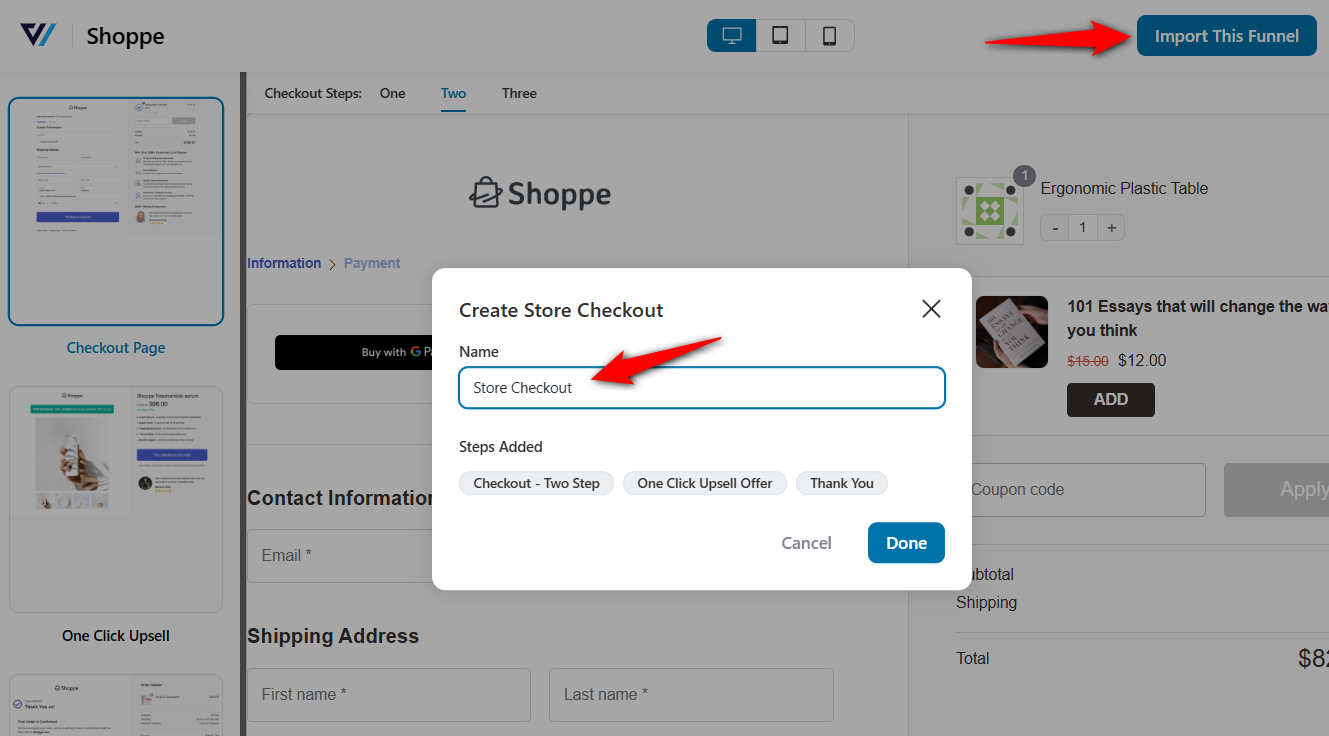
Clicking on ‘Done’ will import the store checkout funnel.
Step 2: Customize your checkout page in WooCommerce
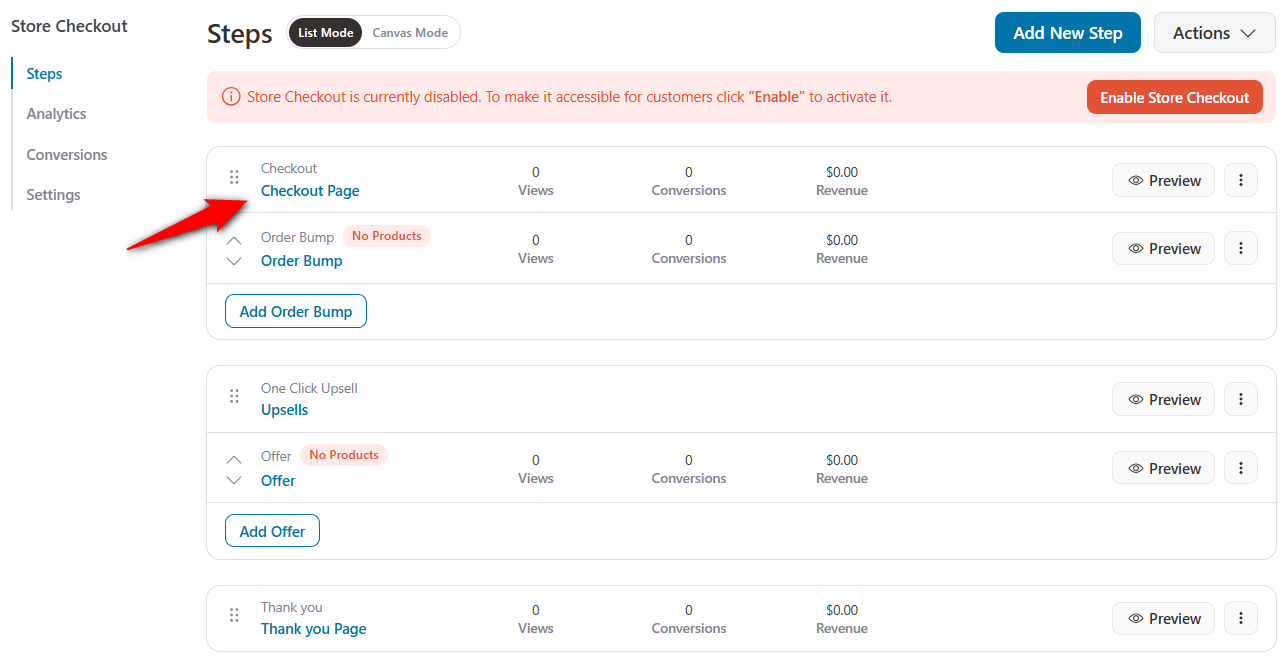
Click on the checkout page step in your funnel.
On the Design tab, click on the ‘Edit Elementor Template’ button to start customizing your checkout page.
Here, we'll be adding the WooCommerce trust badges.
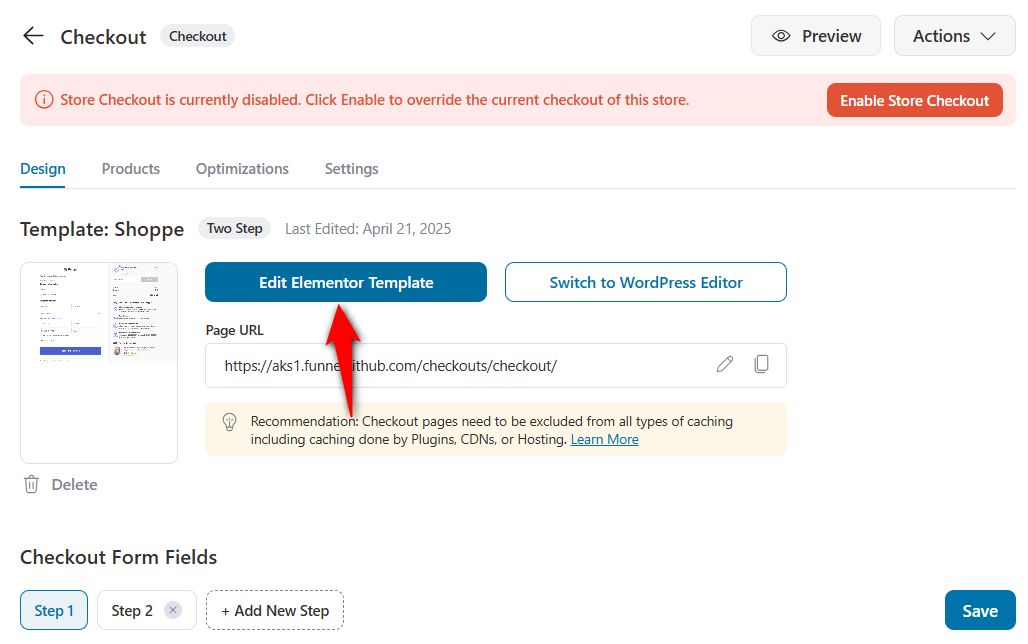
As you can see, the page has loaded in Elementor (because we had chosen Elementor as our preferred page builder).
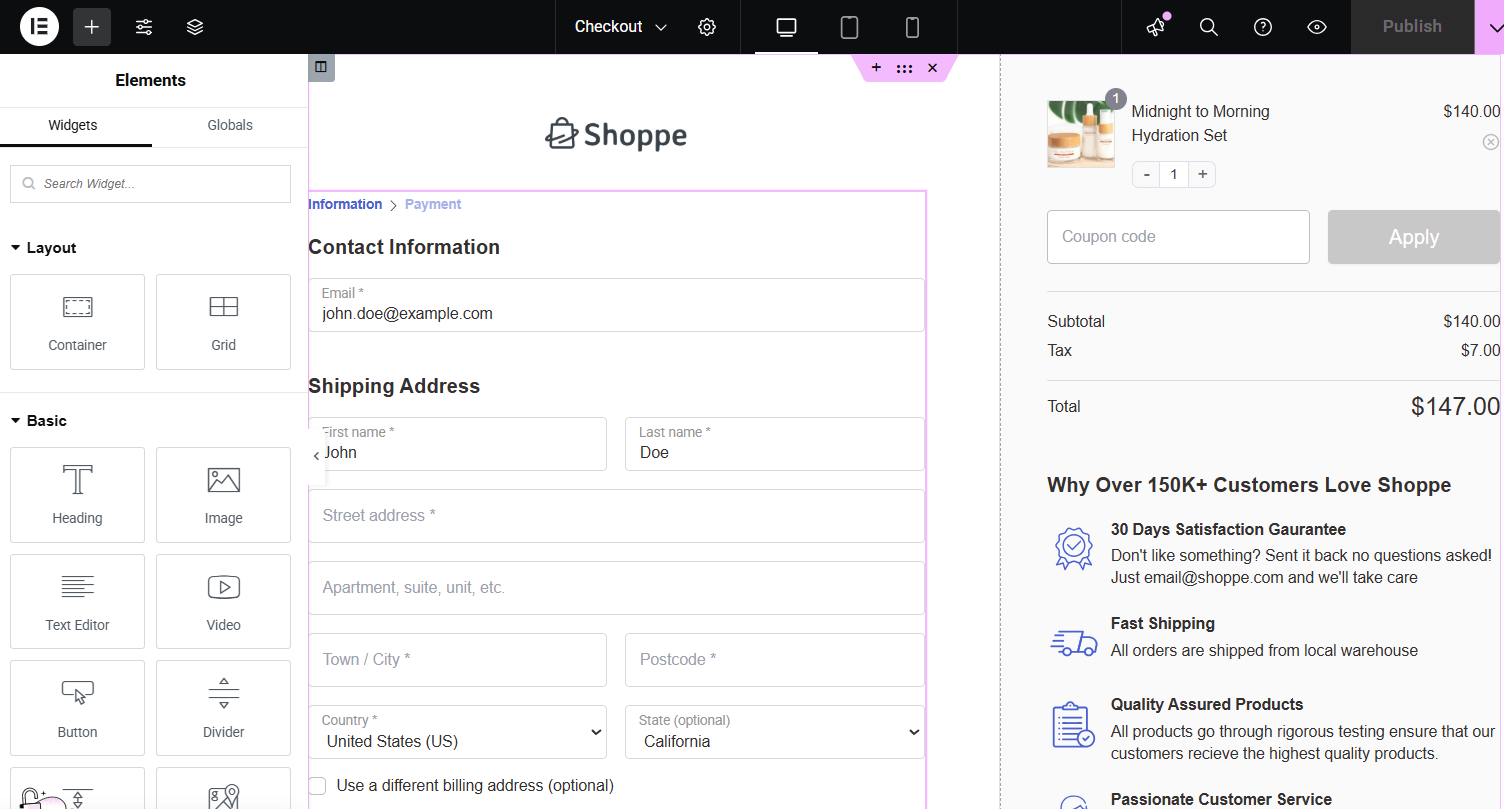
Modify your checkout page with steps, adjust the field widths, update your business logo, customize the mini cart section, and more.
Next, let’s add the trust badges.
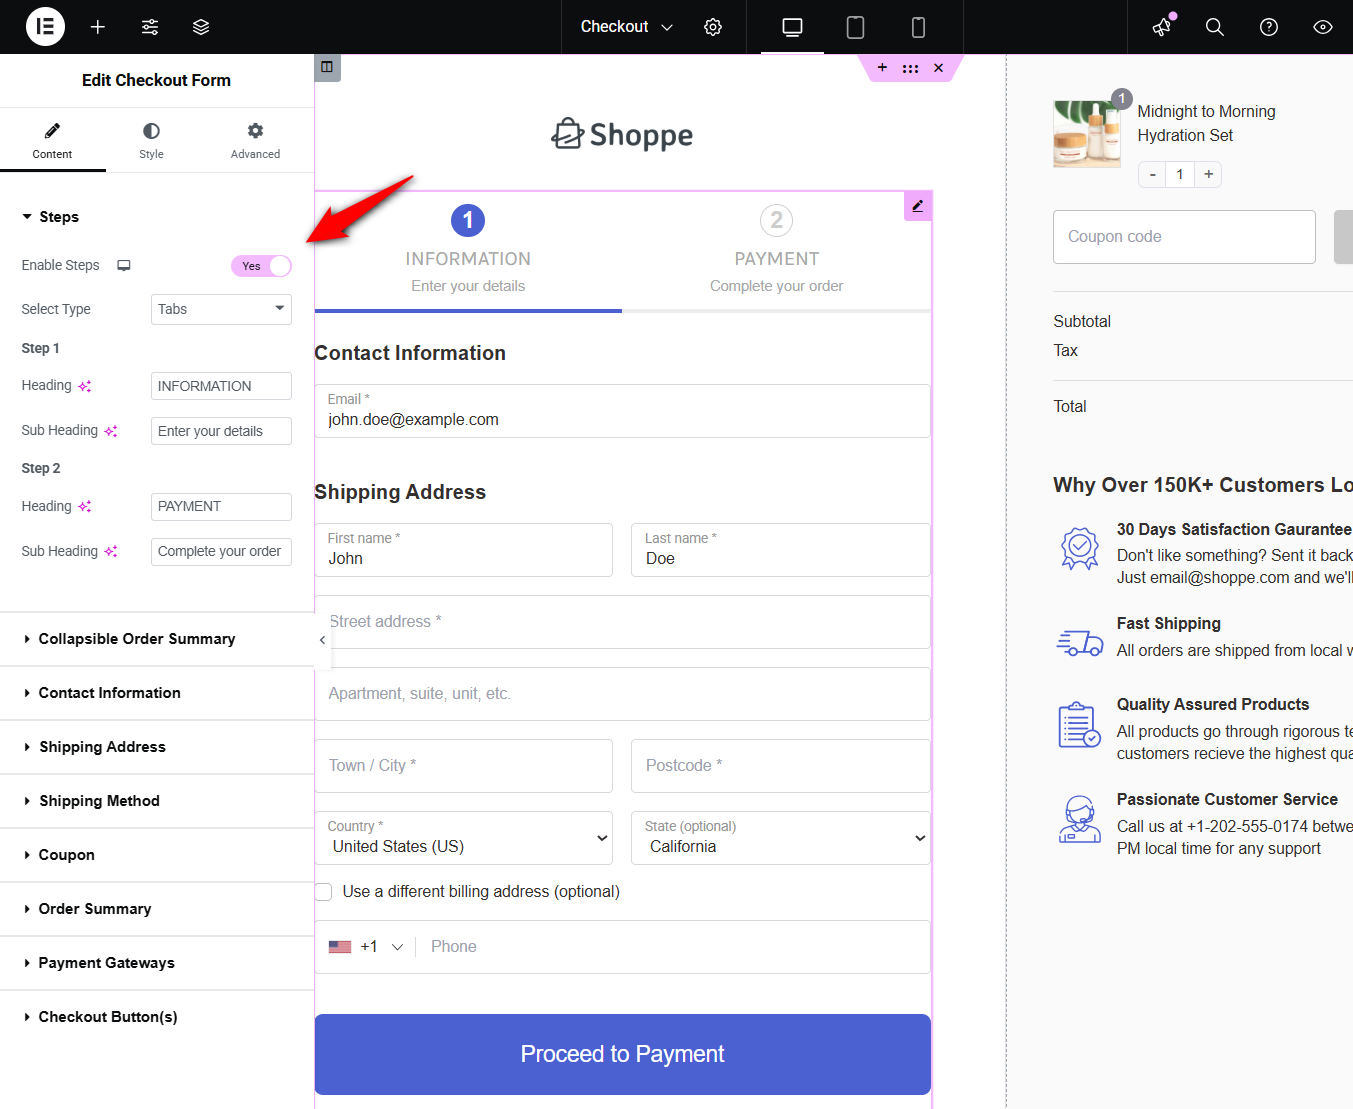
Step 3: Add trust badges to the WooCommerce checkout page
As you can see, the page already has confidence page elements:
- 30-day satisfaction guarantee
- Fast shipping
- Quality assured products
- Passionate customer service
Feel free to modify them as you see fit.
Let’s add some security badges and a genuine customer review.
To add a badge, add an image below the checkout button:
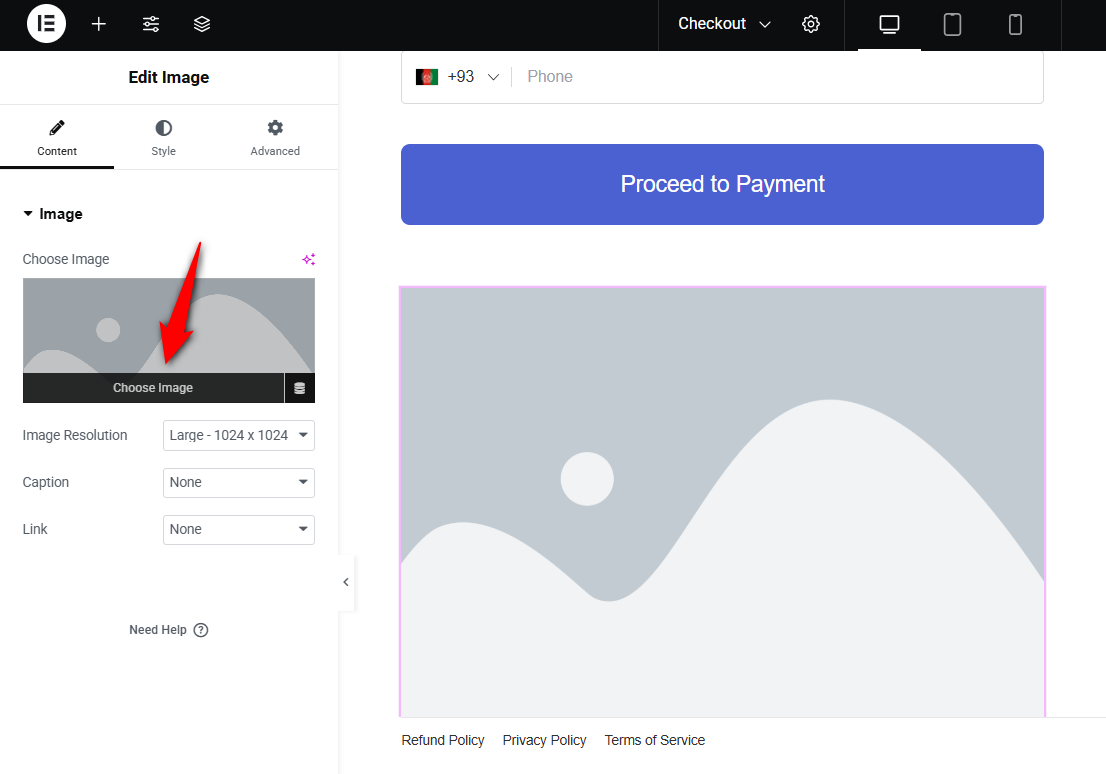
Insert the security badge you want to have here.
Ensure that you set up these badges on your website before adding the image elements. Obtain your trust badges directly from the actual company and use high-resolution images.
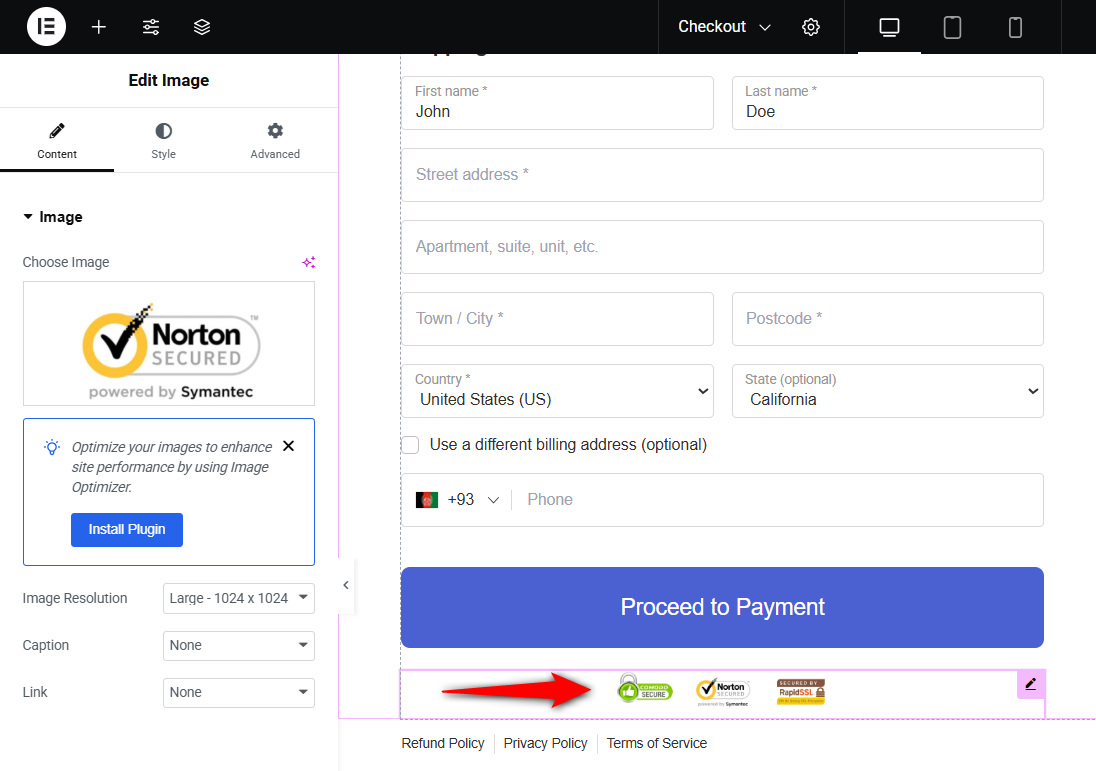
Nicely done! You’ve successfully added the security badge to the checkout page.
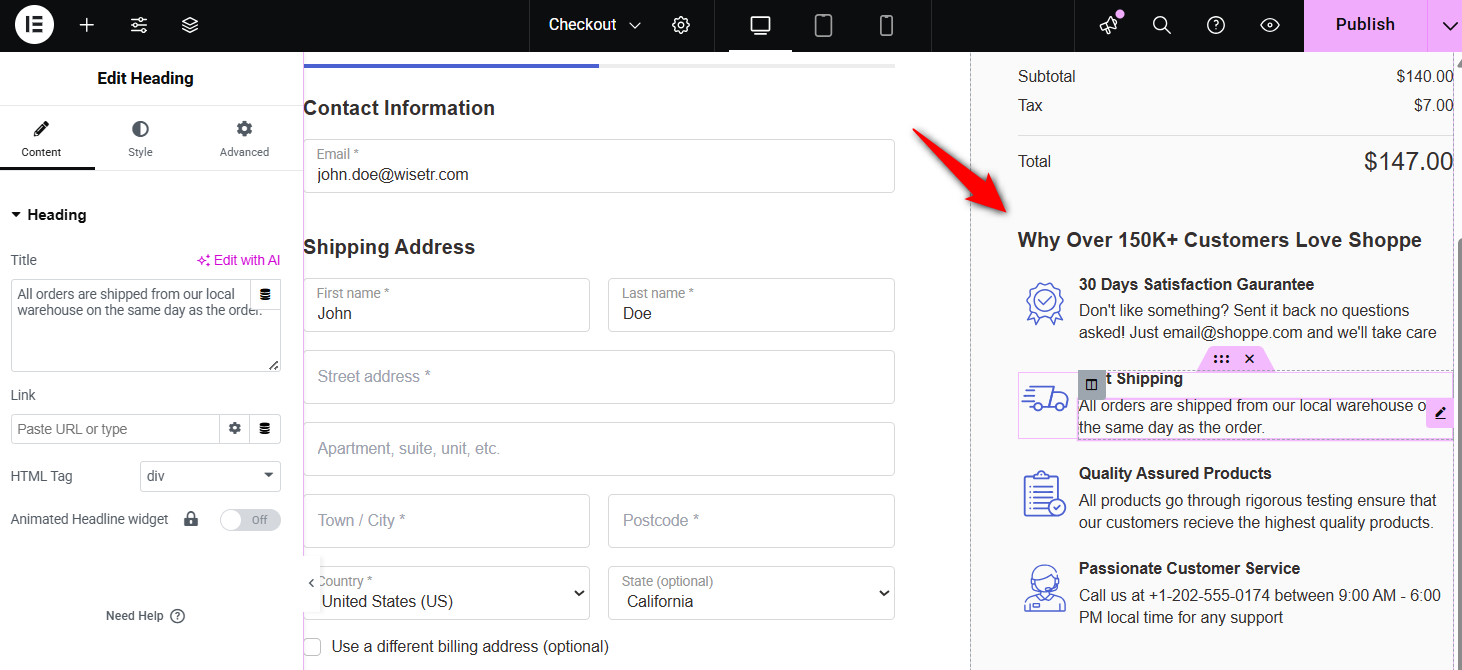
Next, let’s add a customer testimonial section below the confidence section on the right side.
Here, we’ve inserted the heading section to begin our customer testimonial section:
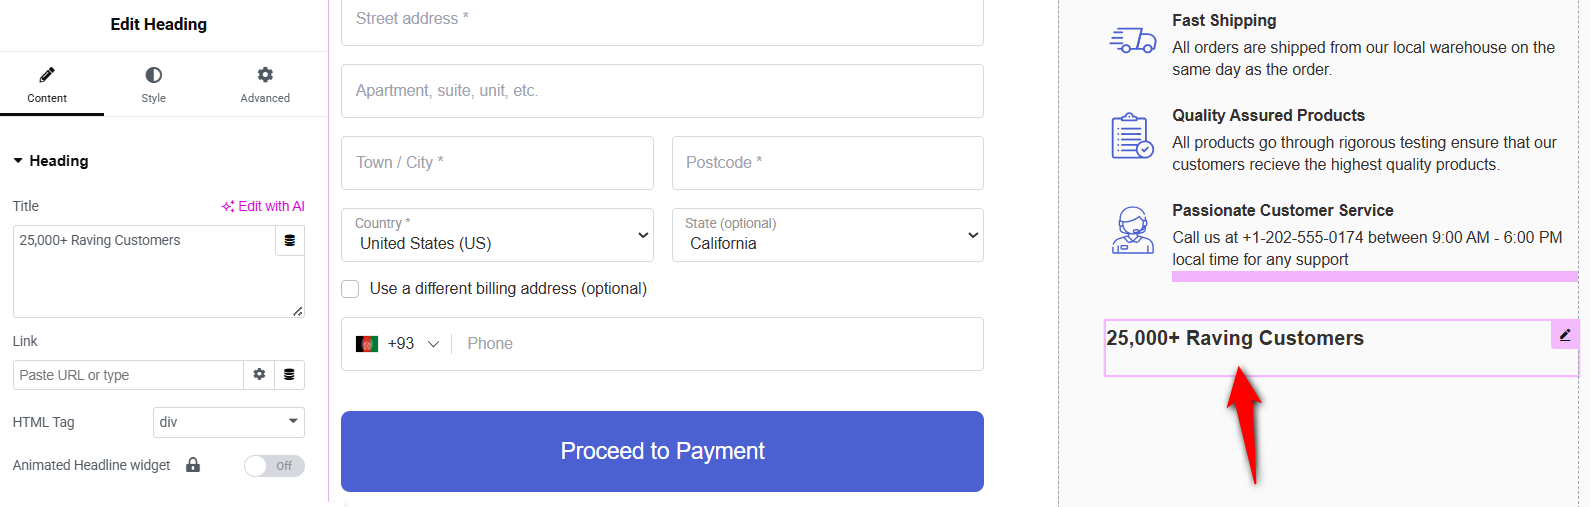
Add the testimonial widget below the heading and customize it as you like.
Here, we’ve edited the testimonial content, image file, resolution, name, title, link, image position, text alignment, and other details.
Hit ‘Publish’ when done. This is how you can add trust badges to the WooCommerce checkout page in just three steps without using any code.
Go back to your store checkout funnel and hit the ‘Enable Store Checkout’ button.
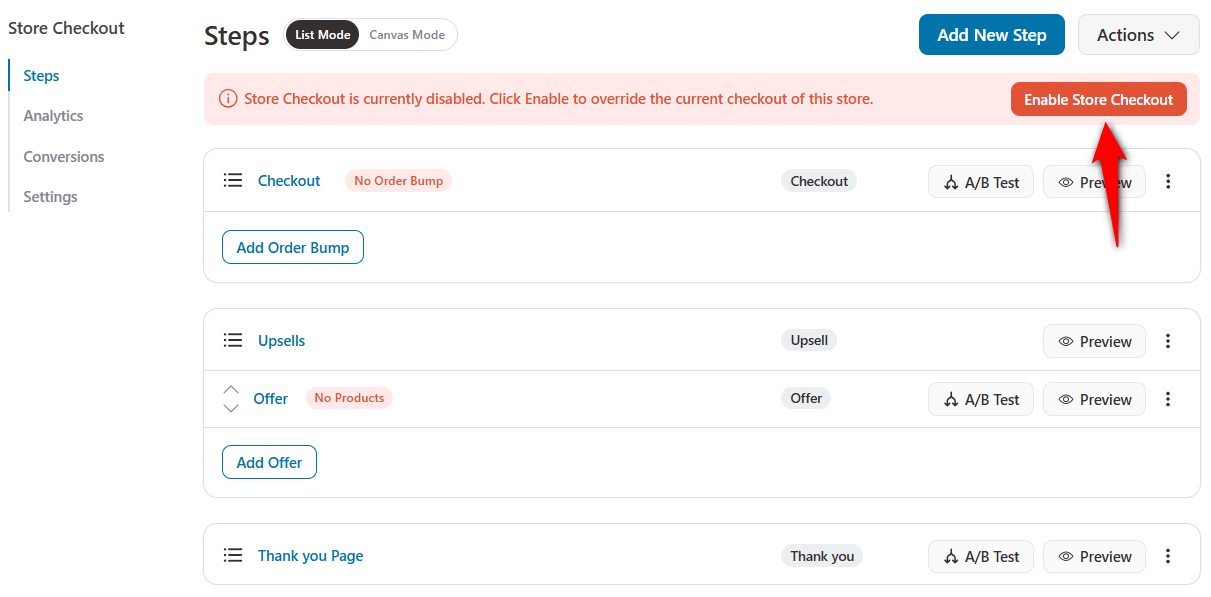
When a shopper adds an item to the cart and heads to the checkout page, they’ll see the trust badges there:
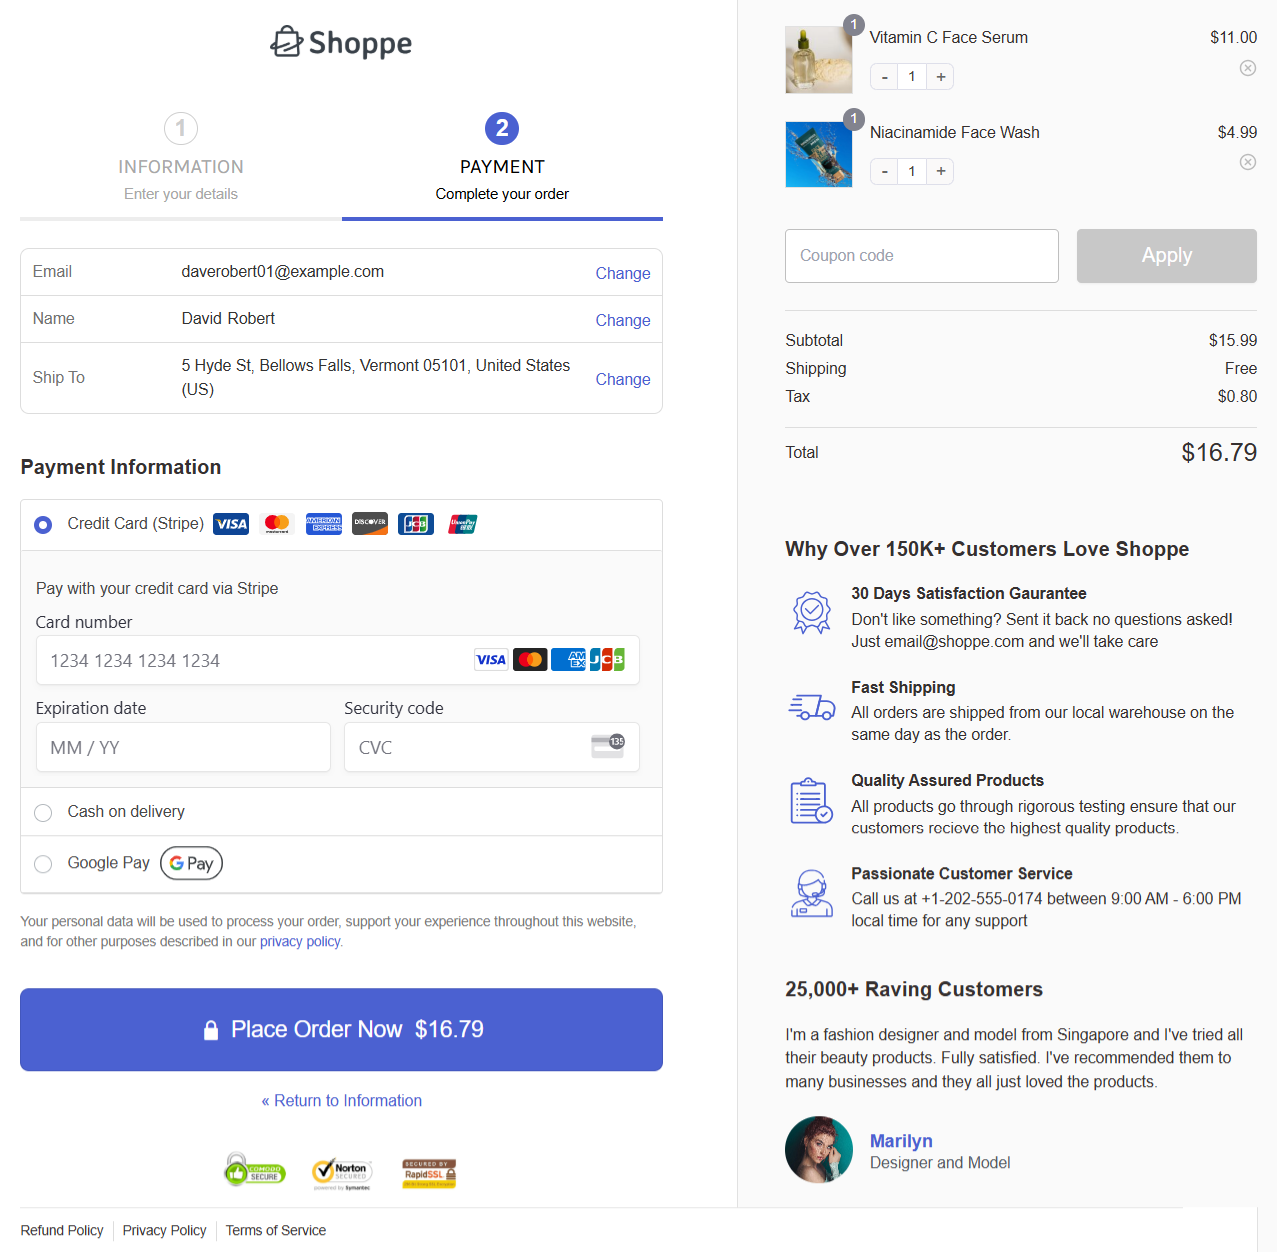
As you can see, the security badges, confidence, and customer testimonials are prominently displayed on the checkout page, making your store appear secure and authentic.
Method 3: WPCode Custom Snippet
This method is best for stores still on the classic shortcode checkout, or anyone who wants exact placement (e.g., directly under Place Order) without touching theme files.
WPCode is a free code snippet plugin that ships with built-in WooCommerce hook locations. It’s the safest way to inject HTML or PHP without editing your theme’s functions.php.
Make sure to install and activate the free WPCode plugin from the WordPress plugin directory.
Step 1: Upload your badge images
Go to the Media Library section in your WordPress dashboard and upload your trust badge images.
Copy each image URL.
Step 2: Add the custom code
Go to Code Snippets ⇨ Add Snippet and paste this HTML, replacing the image URLs with your own:
<div style="text-align:center; margin:20px 0; padding:15px; border-top:1px solid #eee;">
  <p style="font-size:13px; color:#666; margin-bottom:10px;">Your payment is 100% secure and encrypted</p>
  <img src="https://yourdomain.com/wp-content/uploads/visa.svg" alt="Visa accepted" style="height:24px; margin:0 6px;" />
  <img src="https://yourdomain.com/wp-content/uploads/mastercard.svg" alt="Mastercard accepted" style="height:24px; margin:0 6px;" />
  <img src="https://yourdomain.com/wp-content/uploads/paypal.svg" alt="PayPal accepted" style="height:24px; margin:0 6px;" />
  <img src="https://yourdomain.com/wp-content/uploads/ssl-secure.svg" alt="SSL Secure Checkout" style="height:24px; margin:0 6px;" />
</div>
Under Insertion, choose Auto Insert and pick a WooCommerce location from the dropdown:
- Before Checkout Form: Places badges at the top of the checkout page.
- After Checkout Form: Places badges below the Place Order button (highest-converting position in our testing).
- Before/After Order Review: Places badges next to the cart summary.
Toggle 'Active' and click Save Snippet. The badges appear immediately at checkout without editing any theme or flushing the cache.
Method 4: PHP Hooks (For Developers)
If you’re a developer, you can hook directly into WooCommerce’s classic checkout actions. This method works only with the classic shortcode checkout.
If you’re on the block-based checkout, use Method 1 or Method 2 instead, or add a block-checkout integration via the Store API.
Use checkout hooks in WooCommerce using woocommerce_before_checkout_form or woocommerce_after_checkout_form.
Here’s a sample code snippet to add your trust badge below the checkout form:
add_action( 'woocommerce_after_checkout_form', 'fk_add_trust_badges_to_checkout' );

function fk_add_trust_badges_to_checkout() {
    ?>
    <div class="fk-trust-badges" style="text-align:center; margin-top:20px; padding:20px 0; border-top:1px solid #eaeaea;">
        <p style="font-size:13px; color:#555; margin-bottom:12px;">
            Your payment information is 100% protected and encrypted.
        </p>
        <img
            src="<?php echo esc_url( get_stylesheet_directory_uri() . '/images/secure-checkout.svg' ); ?>"
            alt="Secure Checkout"
            style="max-width:160px; height:auto;"
        />
    </div>
    <?php
}
Always add this code via a child theme’s functions.php or a site-specific plugin.
That’s it! You’ve successfully added trust badges to your WooCommerce checkout page.
5 Proven Tips to Effectively Use Trust Badges on Your WooCommerce Checkout Page
Trust badges only work when placed and presented smartly.
Follow these five tips to boost conversions without cluttering your checkout.
1. Place the trust badges in high-action areas
The best position for trust badges on the checkout page is right below the “Place Order” button, where shoppers experience last-minute hesitation.
We also recommend adding badges to your website footer.
If you’re using a custom checkout page using FunnelKit Funnel Builder, you can add different badges below the mini cart section, too.
2. Use recognizable, high-authority badges
Stick to well-known badges such as security badges (Norton Secured, McAfee Secure, etc.).
You can use satisfaction badges and customer testimonials to build shoppers’ trust in your brand.
However, avoid overloading your checkout page with too many or low-quality badges.
3. Optimize for mobile view
With over 60% of mobile traffic directed to e-commerce sites, ensure your trust badges are well-sized and clearly visible on smaller screens.
Use FunnelKit Funnel Builder and your favorite page builder to adjust placement for mobile devices.
4. A/B test the badge placements
However, we recommend that you A/B test your placements to determine which badge position converts best for you.
Performing A/B tests is quick and easy with FunnelKit Funnel Builder, allowing you to test badge placement, design, messaging, and more to track their effectiveness in your WooCommerce store.
5. Optimize page speed
Many users ask whether adding external images, such as badges, can impact page load times.
To solve this, you can use optimized images. We’ve noticed SVGs are lighter and more scalable than PNGs or other image formats. If necessary, implement lazy loading for multiple badges in your WooCommerce store.
Frequently Asked Questions
Some of the most popular and effective trust badge plugins for WooCommerce include:
- FunnelKit Funnel Builder: Offers high-converting checkout templates with built-in trust badges and customization options.
- TrustPulse: Adds real-time activity notifications and social proof alongside trust badges.
- WPC Badge Management for WooCommerce: Provides a library of pre-designed badges for secure payments, satisfaction guarantees, and more.
These plugins vary in features, so choose one that aligns with your branding, ease of use, and pricing value.
No, trust badges will not slow down your checkout if implemented correctly. Lightweight, optimized images (ideally in WebP or compressed PNG format) have minimal impact on loading speed.
Always test your checkout page speed using tools like Google PageSpeed Insights or GTmetrix after adding trust badges.
If your trust badges aren't showing up correctly, here are a few things to look for:
- Image URL: Make sure the image link is correct and publicly accessible.
- CSS conflicts: Your theme or other plugins might override display styles, disable plugins that conflict, or use custom CSS.
- Caching issues: Exclude the checkout page URLs from caching (especially if using a caching plugin).
- Plugin conflicts: Temporarily disable other plugins to identify conflicts.
- Responsive view: Verify that the badges are visible on mobile and tablet views, as they may be hidden due to media queries.
Trust badges can boost your conversion rates up to 42%, according to the Baymard Institute. They’re effective for all types of stores, whether you sell physical products, digital goods, subscriptions, or more.
Here’s why trust badges matter at checkout:
- Reduce purchase anxiety: Security badges help alleviate concerns about payment safety and return policies, making customers more confident in completing their orders.
- Reinforce data security: SSL and antivirus logos signal that your site protects personal and payment information.
- Show recognized payment methods: Logos like Visa, PayPal, and Apple Pay let shoppers know their preferred payment options are available and secure.
- Highlight risk-free guarantees: Badges such as “30-Day Money-Back Guarantee” or “Easy Returns” offer reassurance and reduce hesitation.
- Build credibility: Badges like “Trusted by 50,000+ Customers” or “Rated 4.9/5” provide instant social proof, even at checkout.
Even small symbols like these can make a big difference in helping customers feel confident about completing their purchase.
Ready to Instill Confidence in Your Buyers with Trust Badges?
Trust badges help create a secure, credible shopping experience right when it matters most: at checkout.
With FunnelKit Funnel Builder, adding trust signals is simple.
Just drag and drop badges below the "Place Order" button, near payment icons, or anywhere else that helps reduce hesitation.
You can even fine-tune placement specifically for mobile devices.
Don’t let uncertainty cost you sales. Build trust, reinforce credibility, and lead your shoppers confidently to conversion.
Start transforming your checkout today with FunnelKit Funnel Builder and give your customers the peace of mind they need to buy.
Editorial Team
May 13, 2026The default WooCommerce checkout is a one-size-fits-all solution and is not optimized for your unique business needs. But what if you want to add a custom field to your WooCommerce...

Editorial Team
April 30, 2026WooCommerce checkout validation is essential for ensuring a smooth order process and efficient order management. It reduces errors, improves customer satisfaction, and boosts conversion rates, ensuring a seamless experience for...
Editorial Team
April 27, 2026Imagine walking into a coffee shop, ordering a coffee latte, and the barista says… nothing. No offer for a pastry, no suggestion for an extra shot of espresso. Just silence....


