
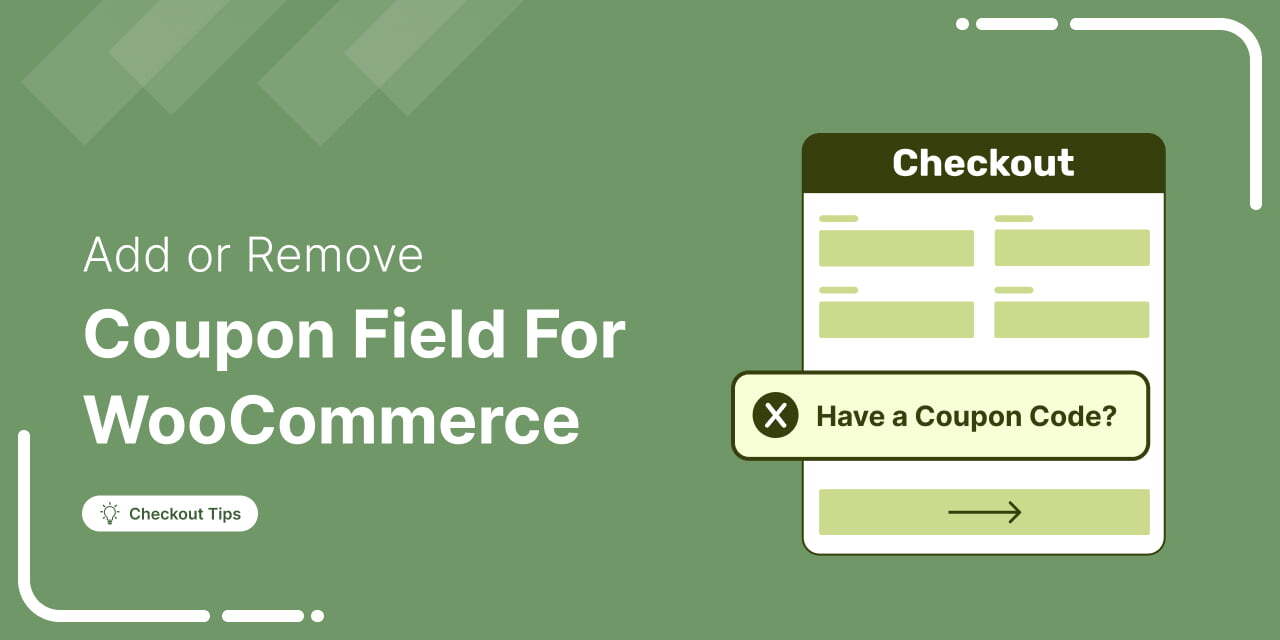
Using a checkout coupon can be a smarter way to boost sales than offering direct product discounts.
Coupons give you full control over your discount strategy, letting you run targeted promotions that attract buyers while protecting your profit margins.
A well-placed WooCommerce checkout coupon motivates customers to complete their purchase, enhances the checkout experience, reduces cart abandonment, and encourages repeat sales.
In this guide, I’ll show you how to optimize the WooCommerce checkout coupon to drive more conversions.
Quick Answers: WooCommerce Checkout Coupon:
Before we dive into the step-by-step guide, here’s a quick overview of the main actions you can take with WooCommerce checkout coupons
- How to Add a Coupon Field: Go to WooCommerce → Settings → General → Enable Coupons.
- How to Customize and Move the Coupon Field: Use a checkout plugin to customize and move the coupon field to your desired location.
- How to Hide the Coupon Field: Disable in WooCommerce settings or remove from custom checkout pages.
- How to Create a Checkout Coupon URL: Use a checkout coupon URL generator.
What Is the WooCommerce Coupon Field and Why Add It?
A WooCommerce coupon field lets customers apply discount codes on the cart and checkout pages to receive percentage discounts, fixed amounts off, or free shipping.
Here are the reasons why you should add the coupon field and offer discounts to customers:
- Improve customer experience: Seeing instant savings at checkout creates a positive shopping experience and builds loyalty.
- Run targeted promotions: Offer discounts to specific groups like first-time buyers, returning customers, or cart abandoners. You can control usage limits and expiry dates for better campaign management.
- Attract new customers: Many shoppers are more likely to try a new store when a discount is available, making coupons a strong acquisition tool.
- Increase overall sales: Discounts encourage both new and existing customers to complete purchases and buy more frequently.
- Boost average order value: Setting minimum spend requirements motivates customers to add more items to qualify for the discount.
- Clear excess stock: Promote specific products or categories to move slow-selling inventory faster.
Table of Contents
- 1 How to Add a Coupon Field to WooCommerce Checkout (Default Option)
- 2 How to Customize & Move the WooCommerce Checkout Coupon Field for Free
- 3 How to Hide/Remove Coupon Field From WooCommerce Checkout Page
- 4 How to Auto-Apply a Coupon At WooCommerce Checkout
- 5 How to Create a WooCommerce Checkout Coupon URL
- 6 Frequently Asked Questions About WooCommerce Checkout Coupon
- 7 Ready to Boost Checkouts with Smart Coupon Placement in WooCommerce?
How to Add a Coupon Field to WooCommerce Checkout (Default Option)
To add a checkout coupon to the WooCommerce checkout, follow these steps:
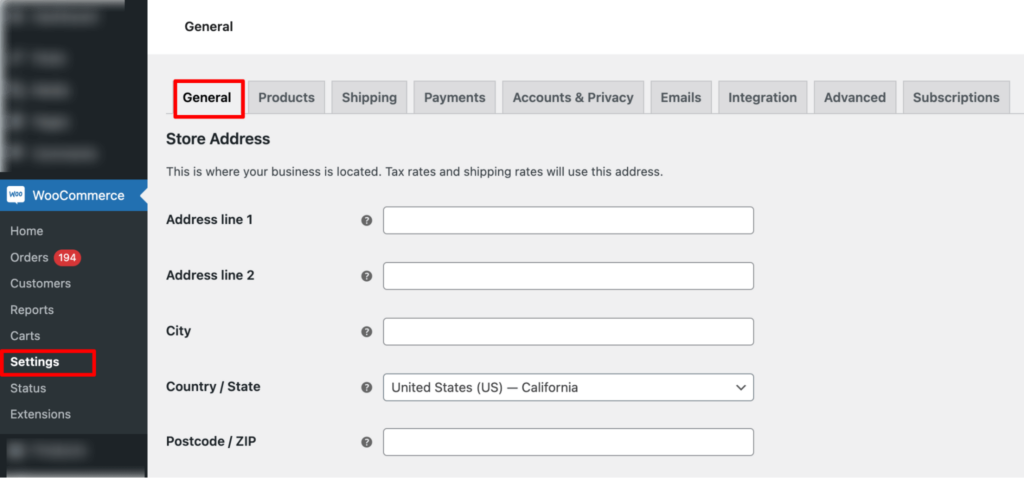
Step 1: Navigate to WooCommerce settings
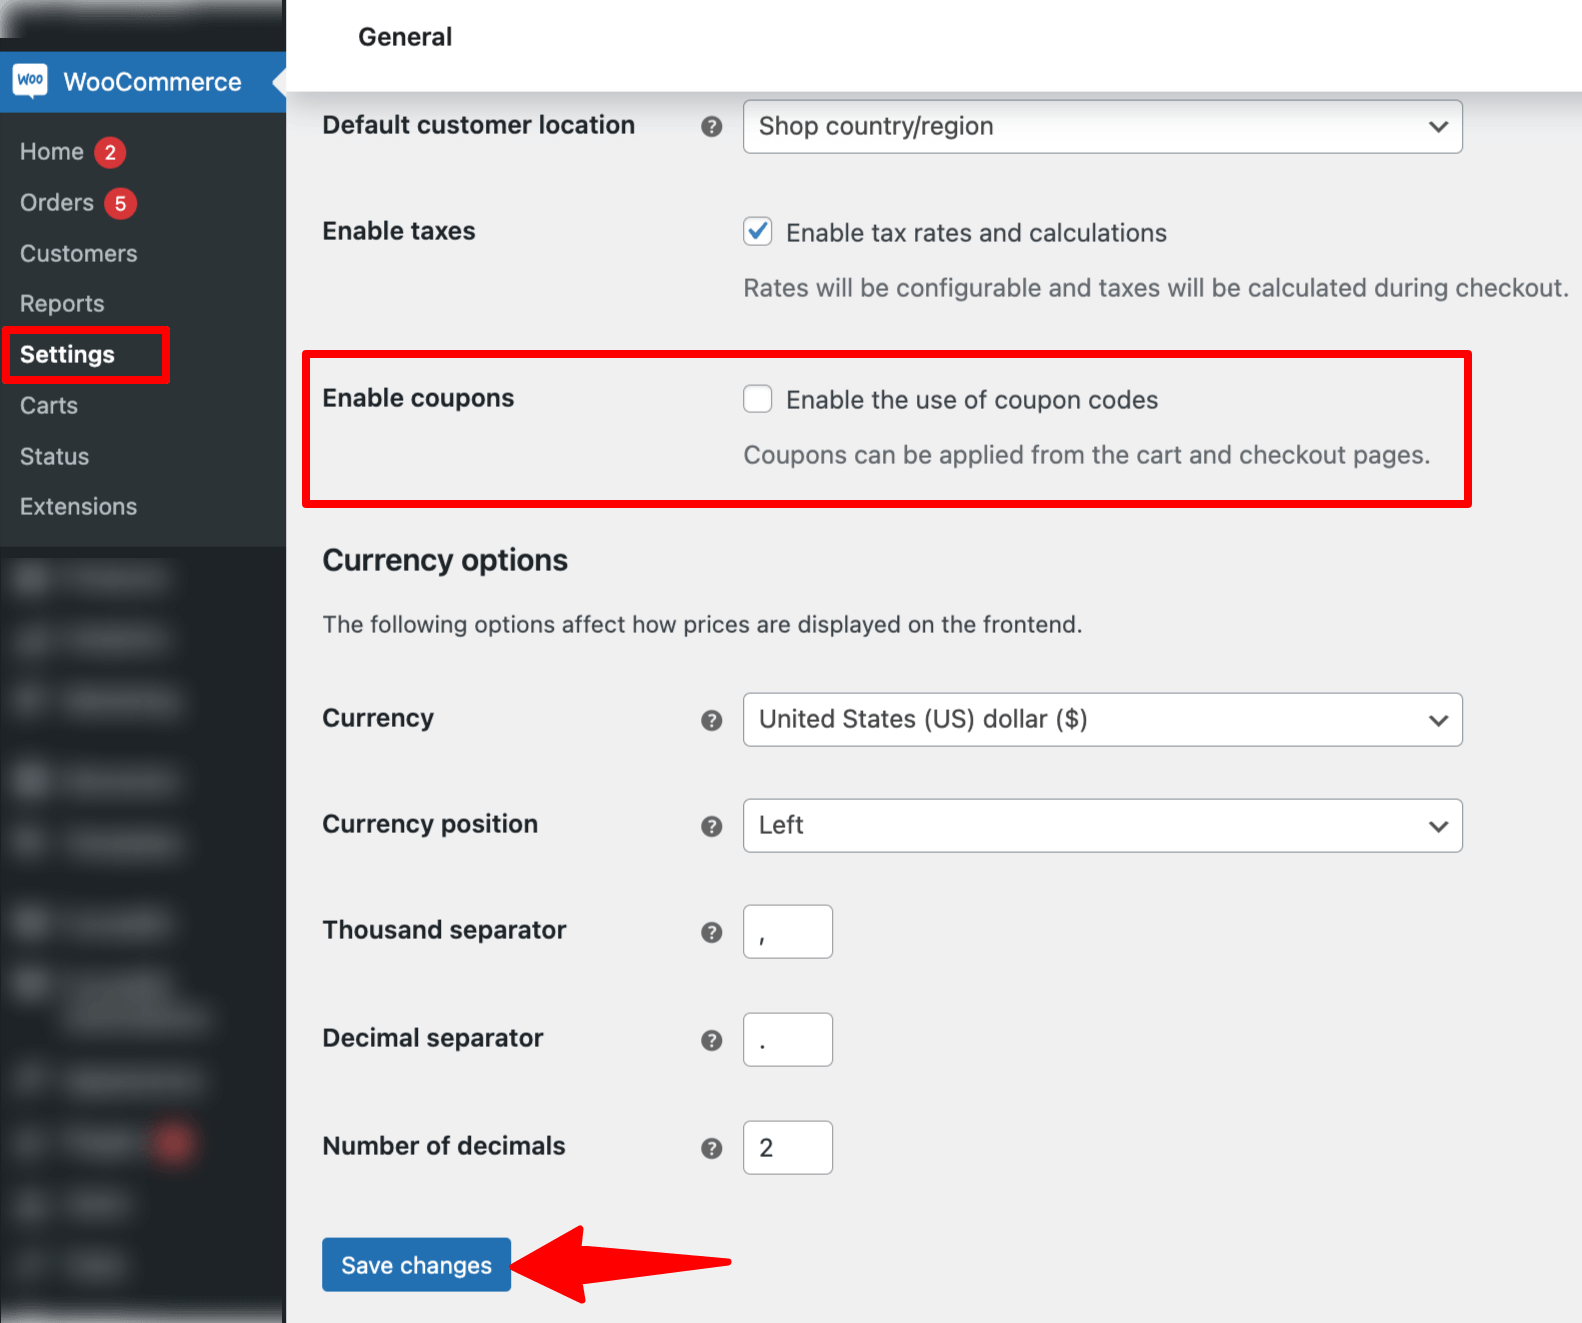
From the WordPress dashboard, navigate to WooCommerce ⇒ Settings and make sure you are on the General settings tab.
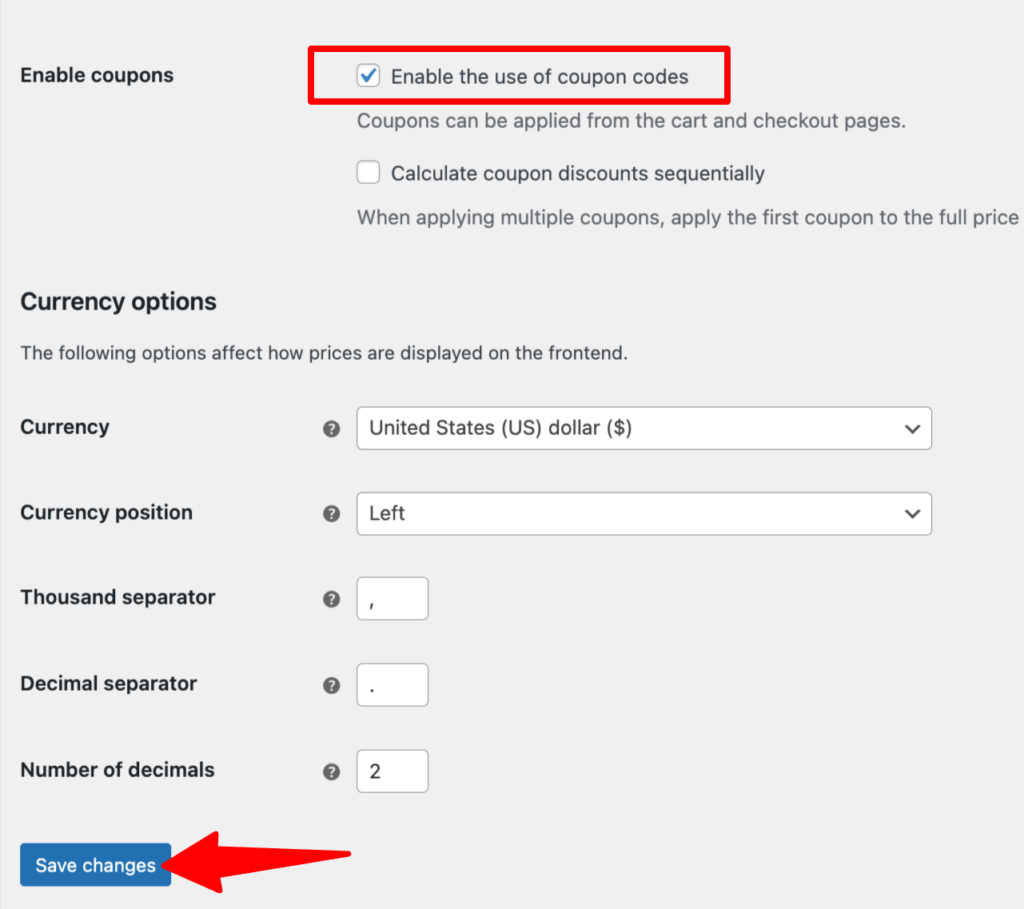
Step 2: Enable the use of coupon codes on the checkout
Now, scroll down and check the option “Enable the use of coupon codes.”
Click on “Save Changes” to update the settings.
Step 3: Test the checkout page with the coupon field
Now, try placing an order, and on the checkout page, you should see a coupon field at the top.
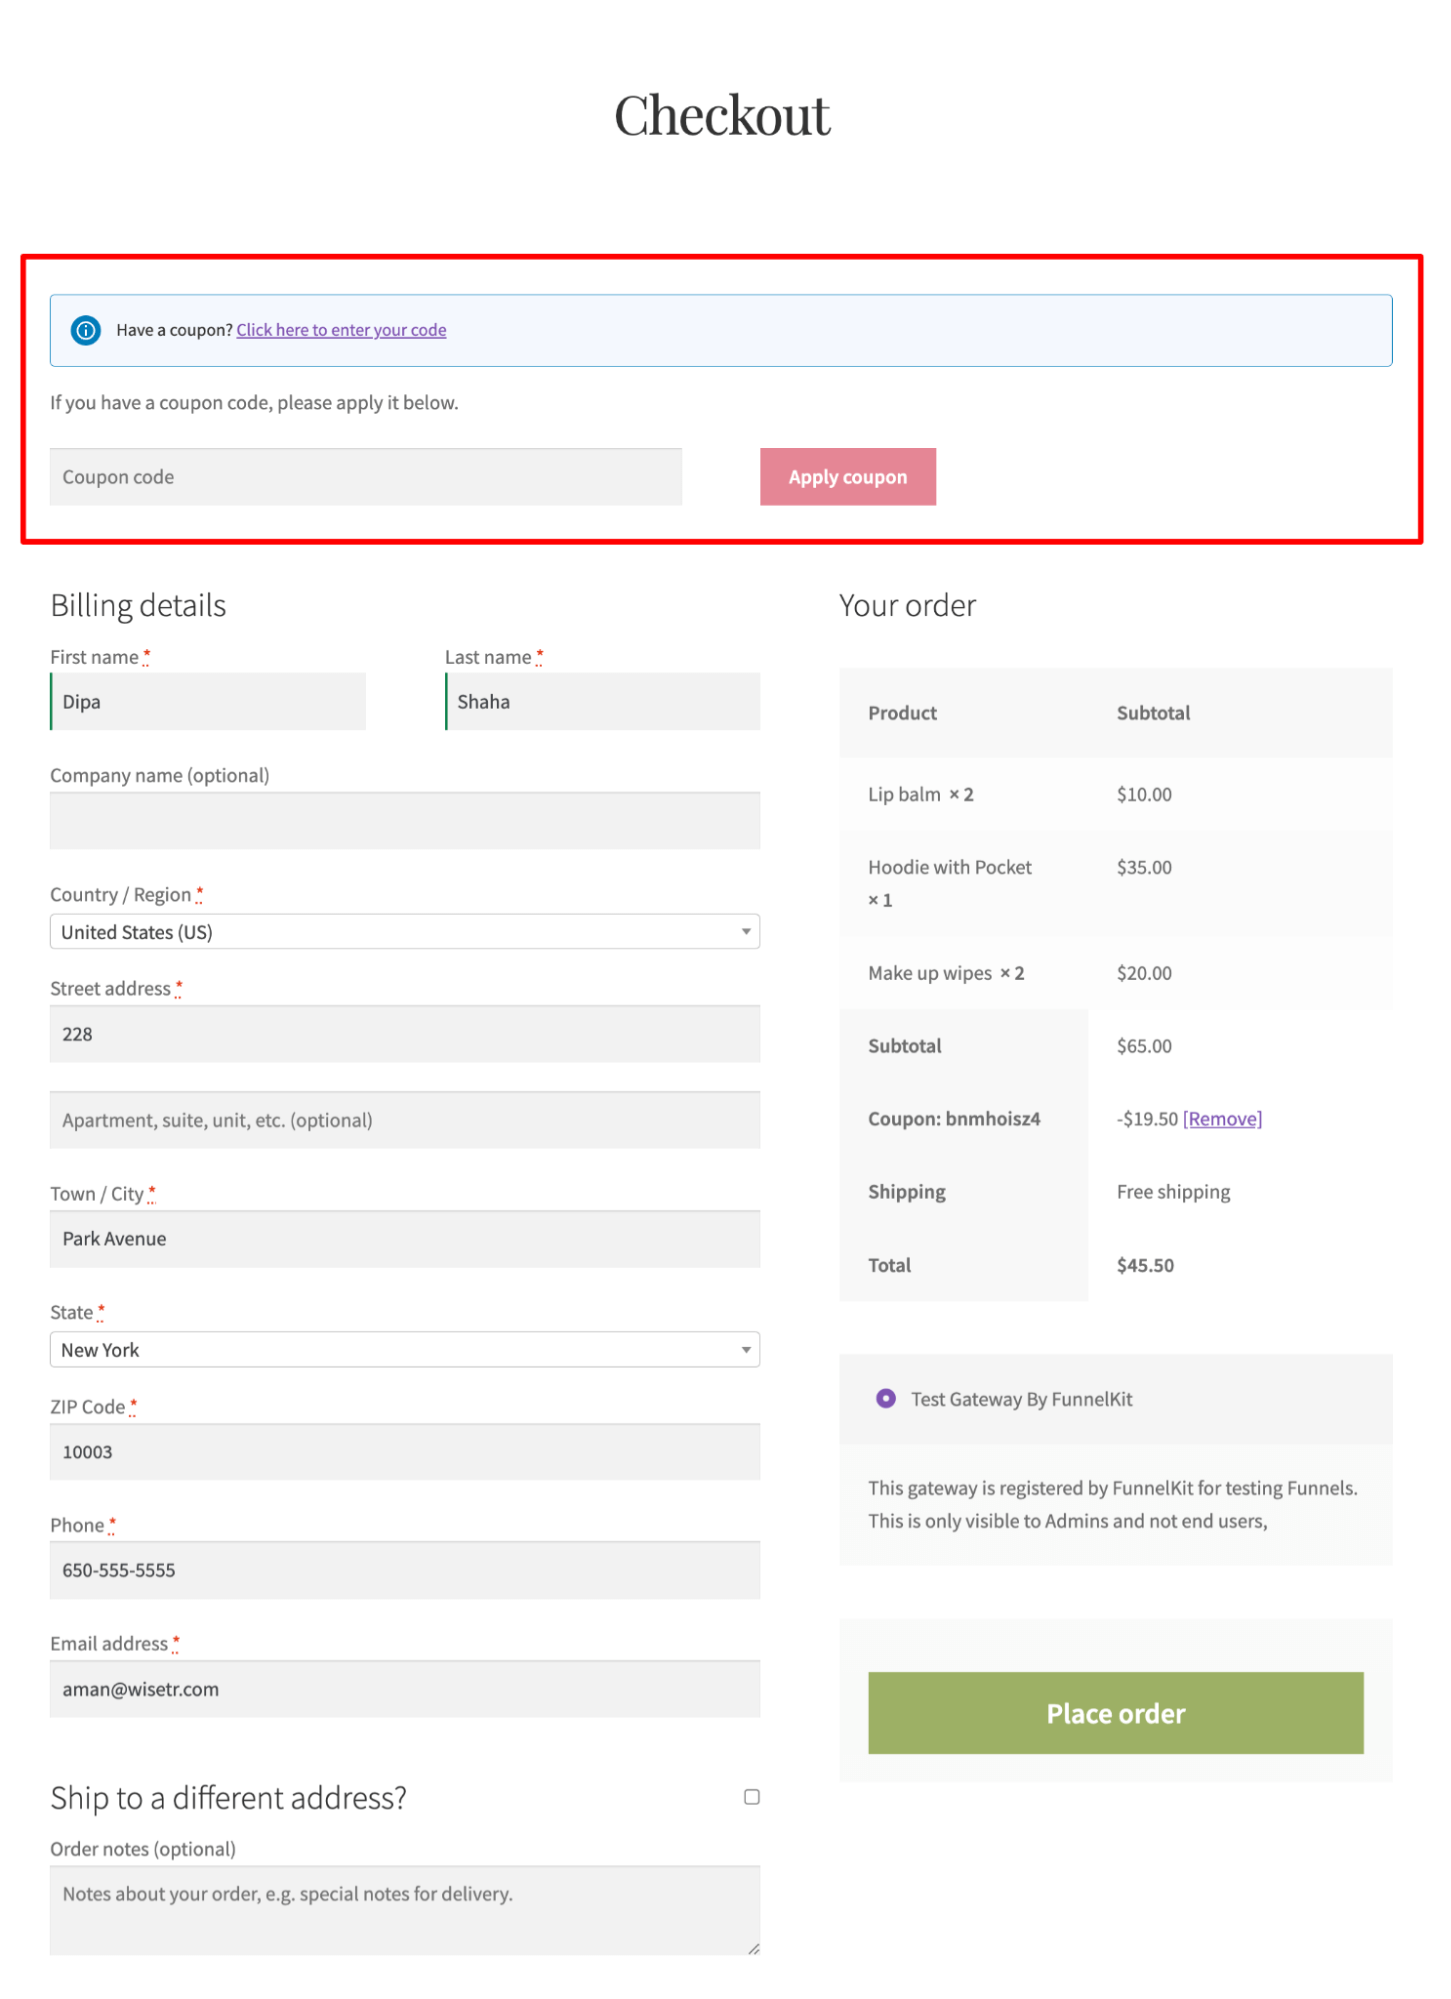
Here is how to add a coupon field to your checkout page with the default option.
While the default WooCommerce coupon field works, you can make it more effective by customizing its appearance and placement.
Move to the next section to learn how to customize and reposition the coupon field at checkout.
How to Customize & Move the WooCommerce Checkout Coupon Field for Free
In this section, I’ll show you how to replace the default WooCommerce checkout page with a more attractive and optimized layout.
You’ll also learn how to control the placement of the coupon field to make it more convenient for customers.
For this process, I will use FunnelKit Funnel Builder. The free version is sufficient to get this done.
Step 1: Set up your store checkout
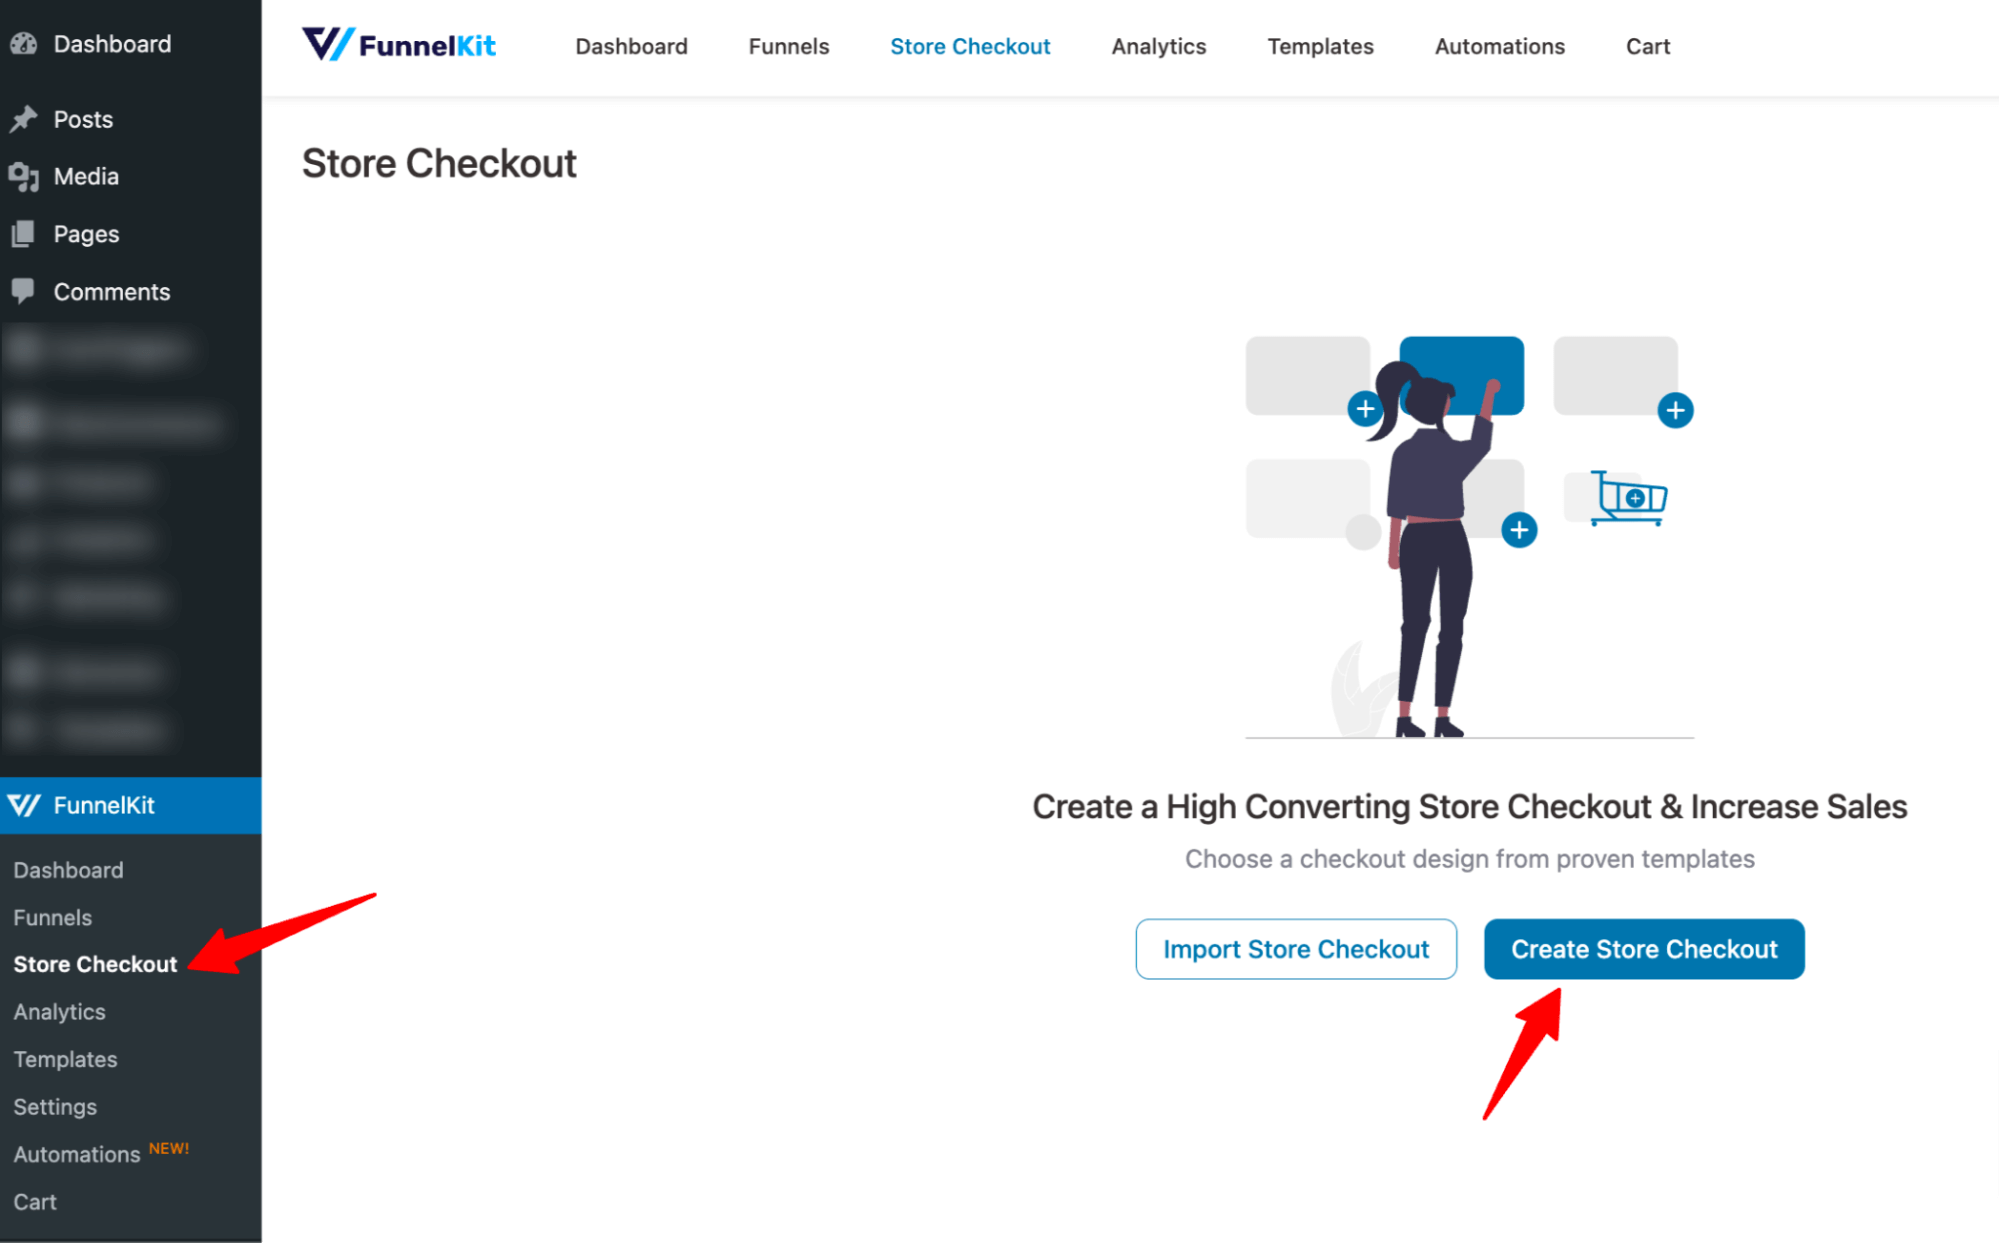
First, create a custom checkout for your WooCommerce store. For that, navigate to FunnelKit ⇒ Store Checkout.
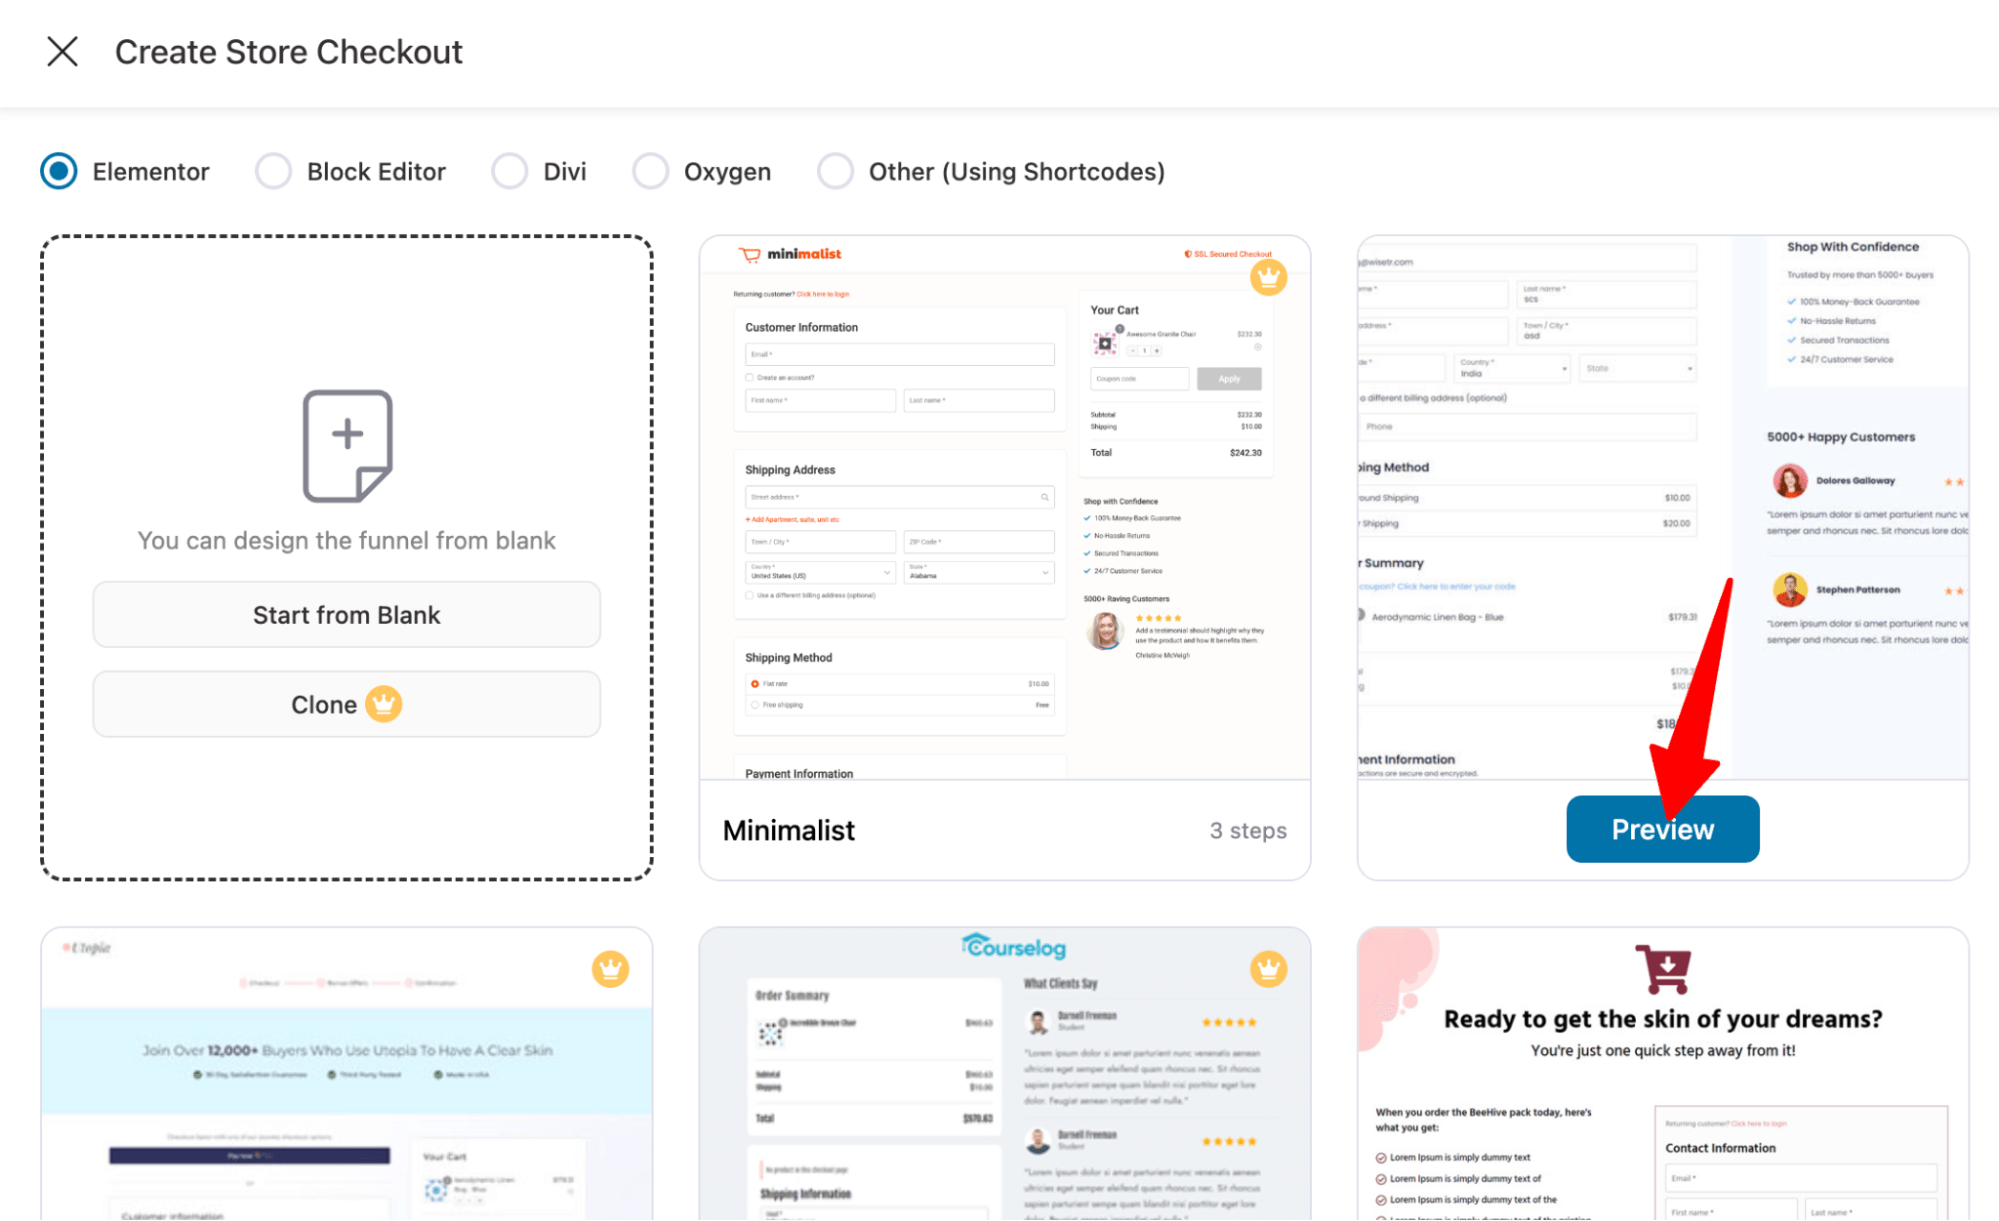
Now, choose your preferred page builder and the template you like. I am choosing Hific.
After that, choose a page builder to filter the sales templates. To check any template, hover on it and click on the preview button.
With the free version of FunnelKit Funnel Builder, you can only create a single-page checkout.
However, if you opt for the pro version, you can create a multi-page checkout that’s more conversion-optimized.
Now, to import, click on the “Import this Template” button. After that, provide a store checkout name.

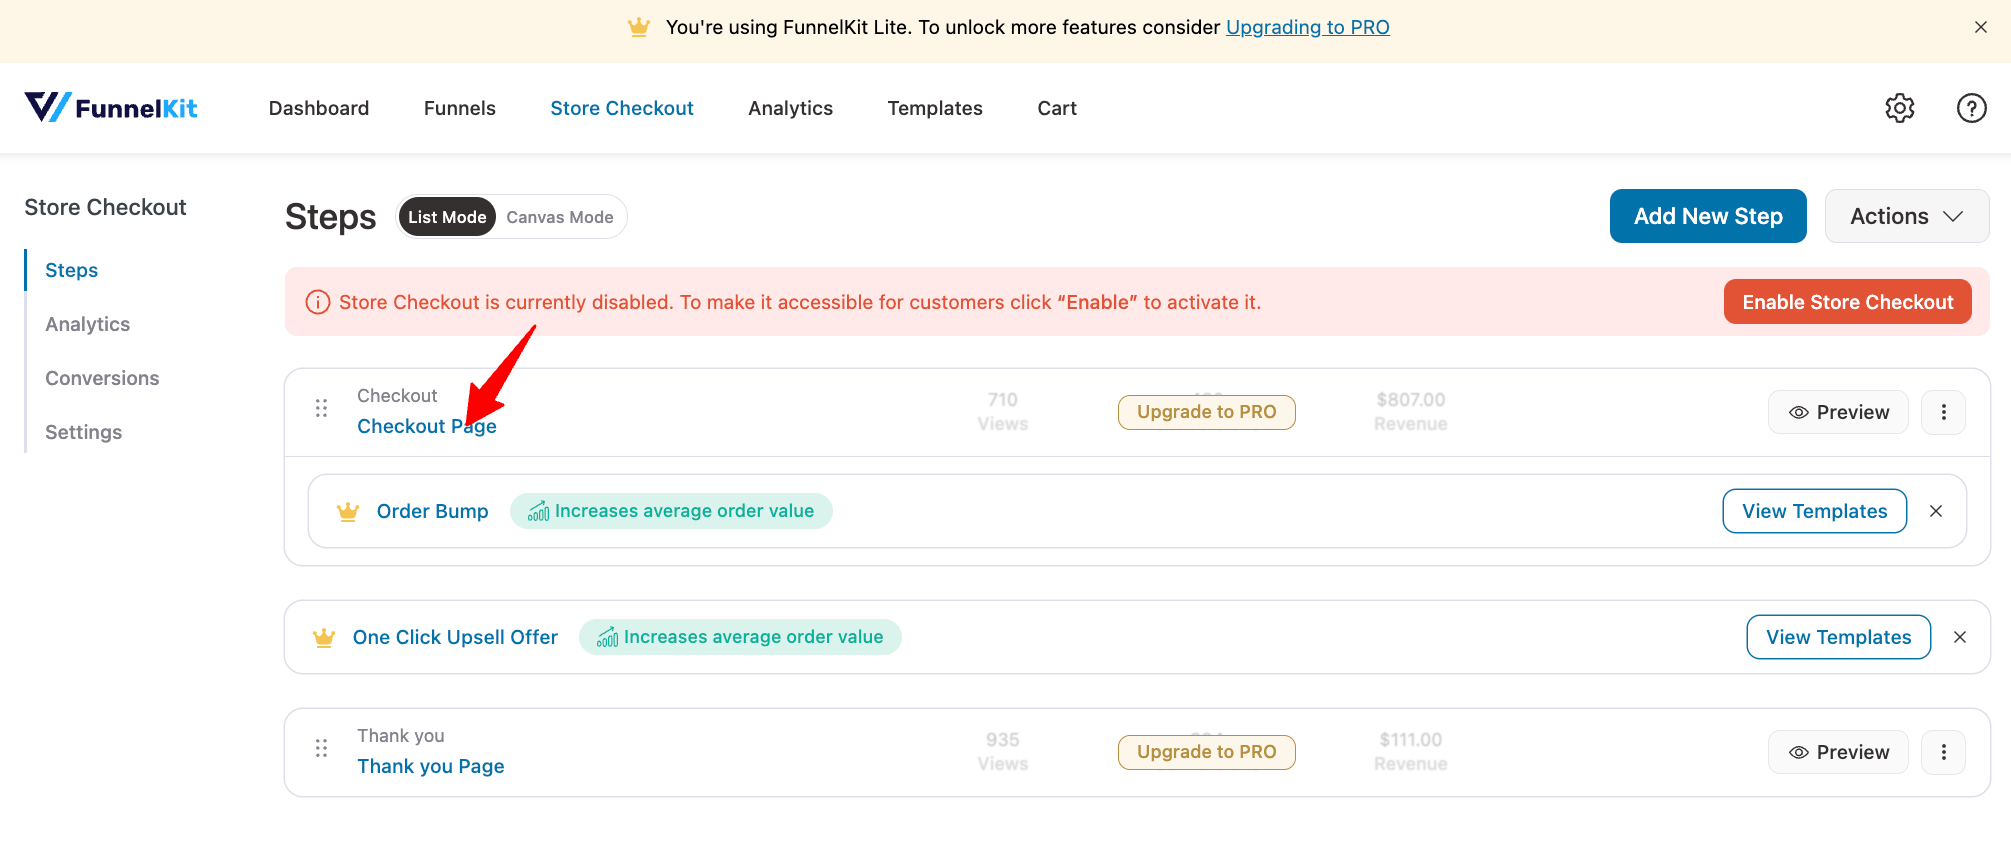
This will import two templates: checkout and thank you page.
Step 2: Customize the coupon field content and style on the checkout page
Next, you need to edit the checkout page. To do so, click on the checkout page option.
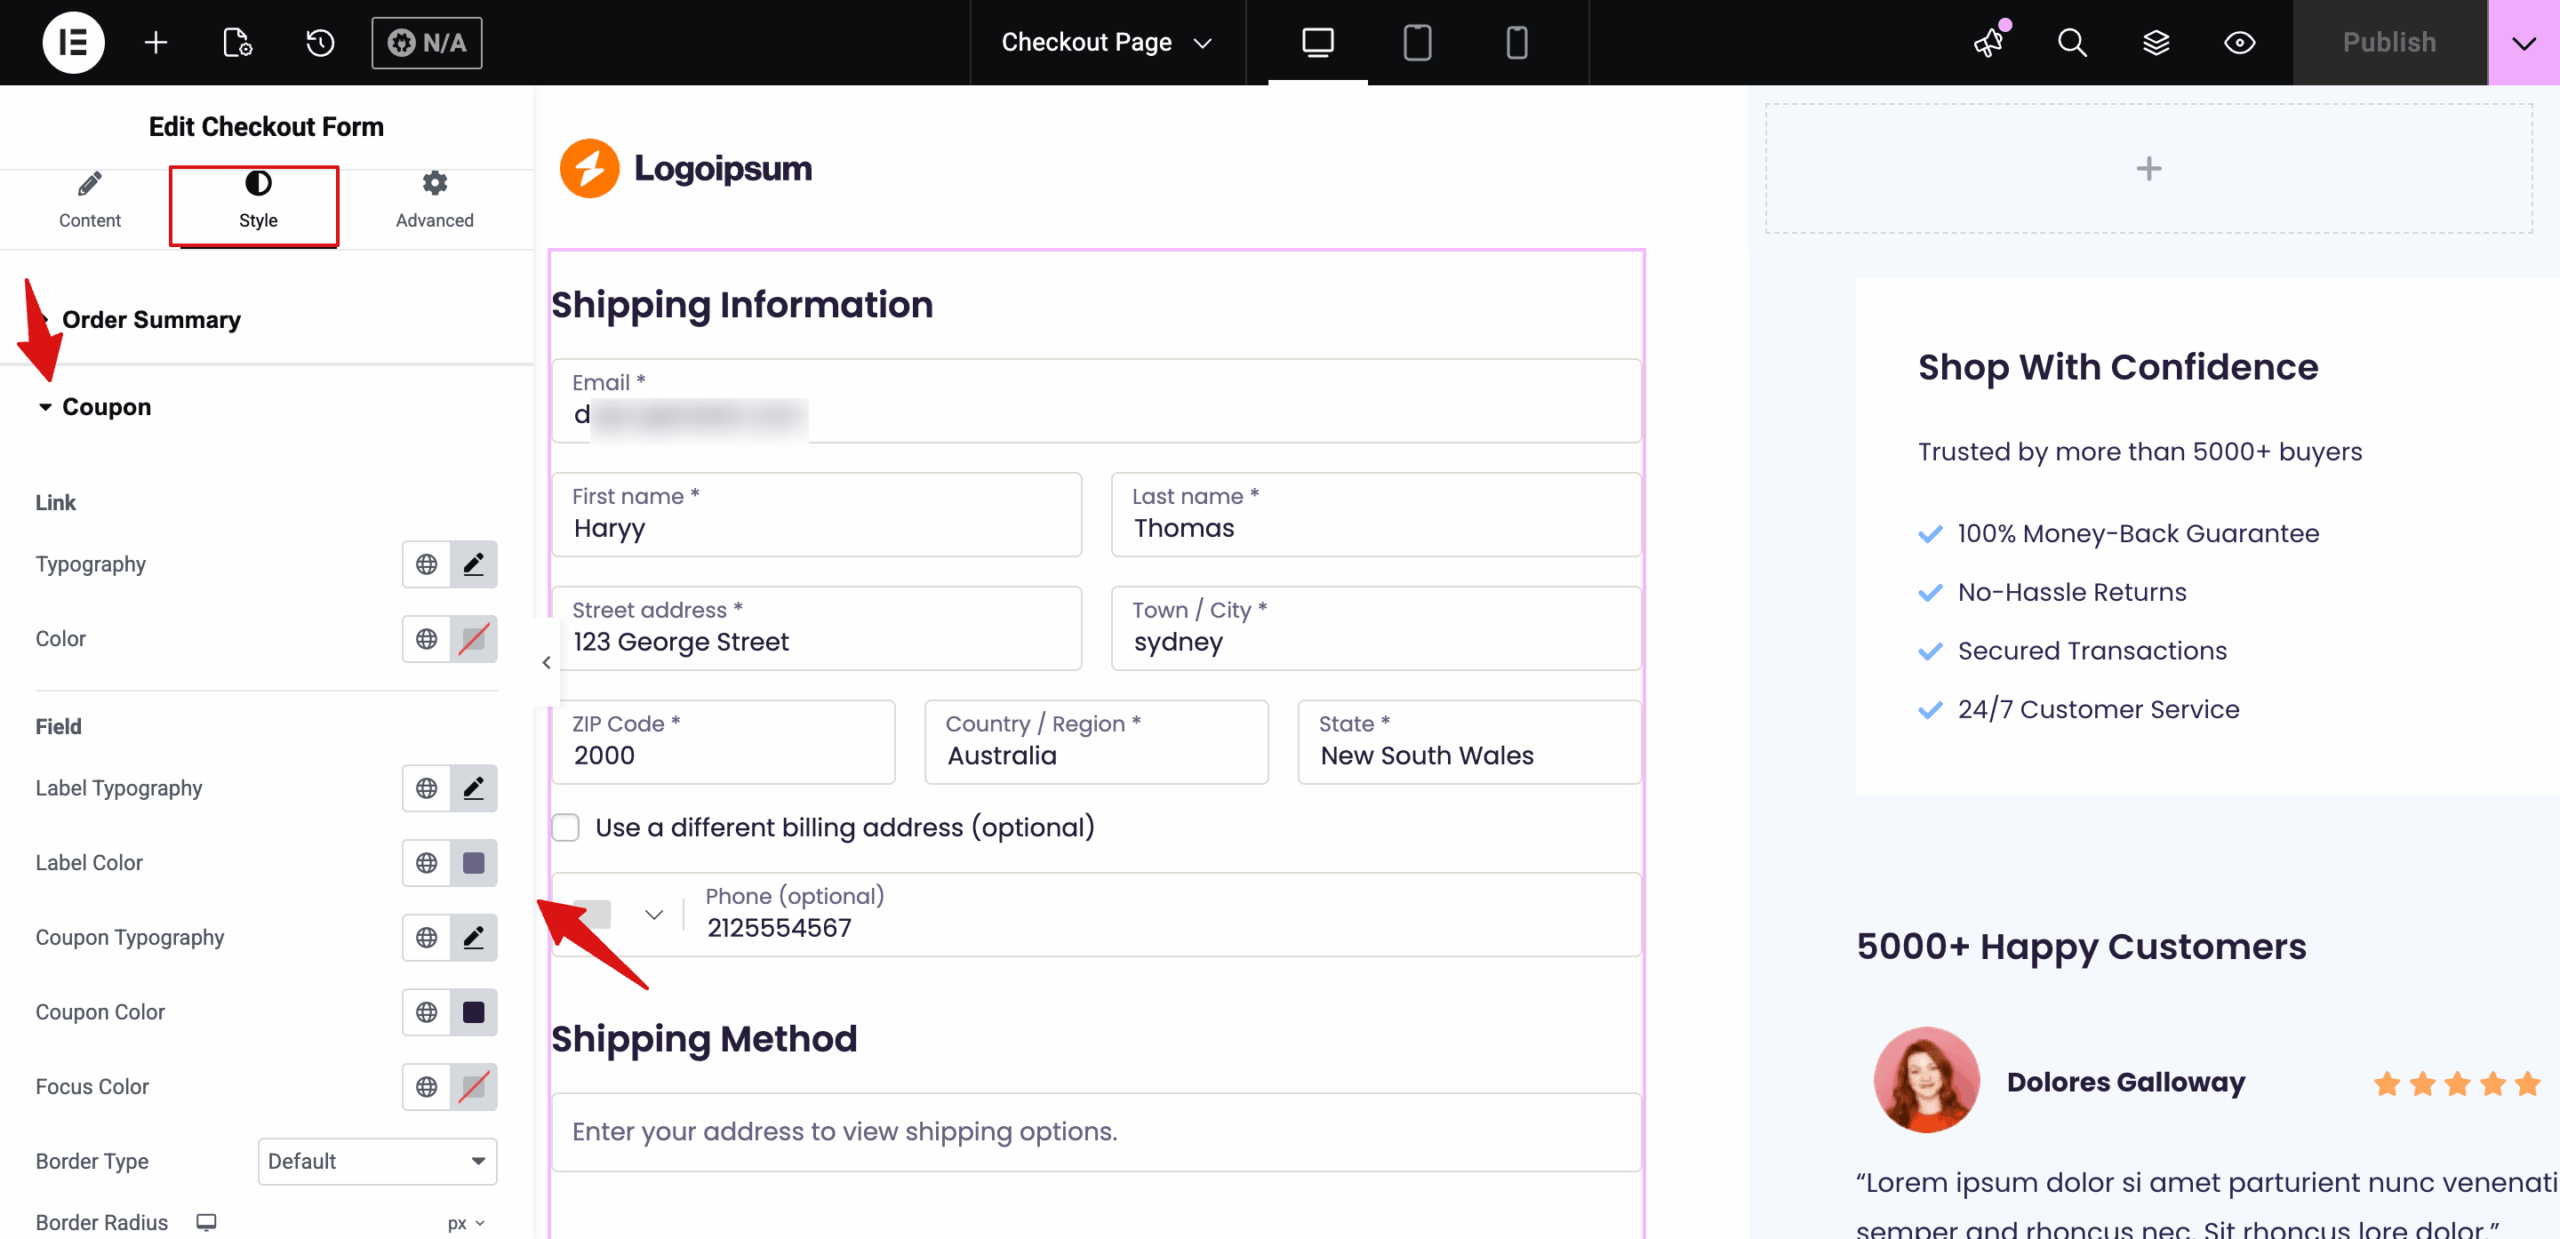
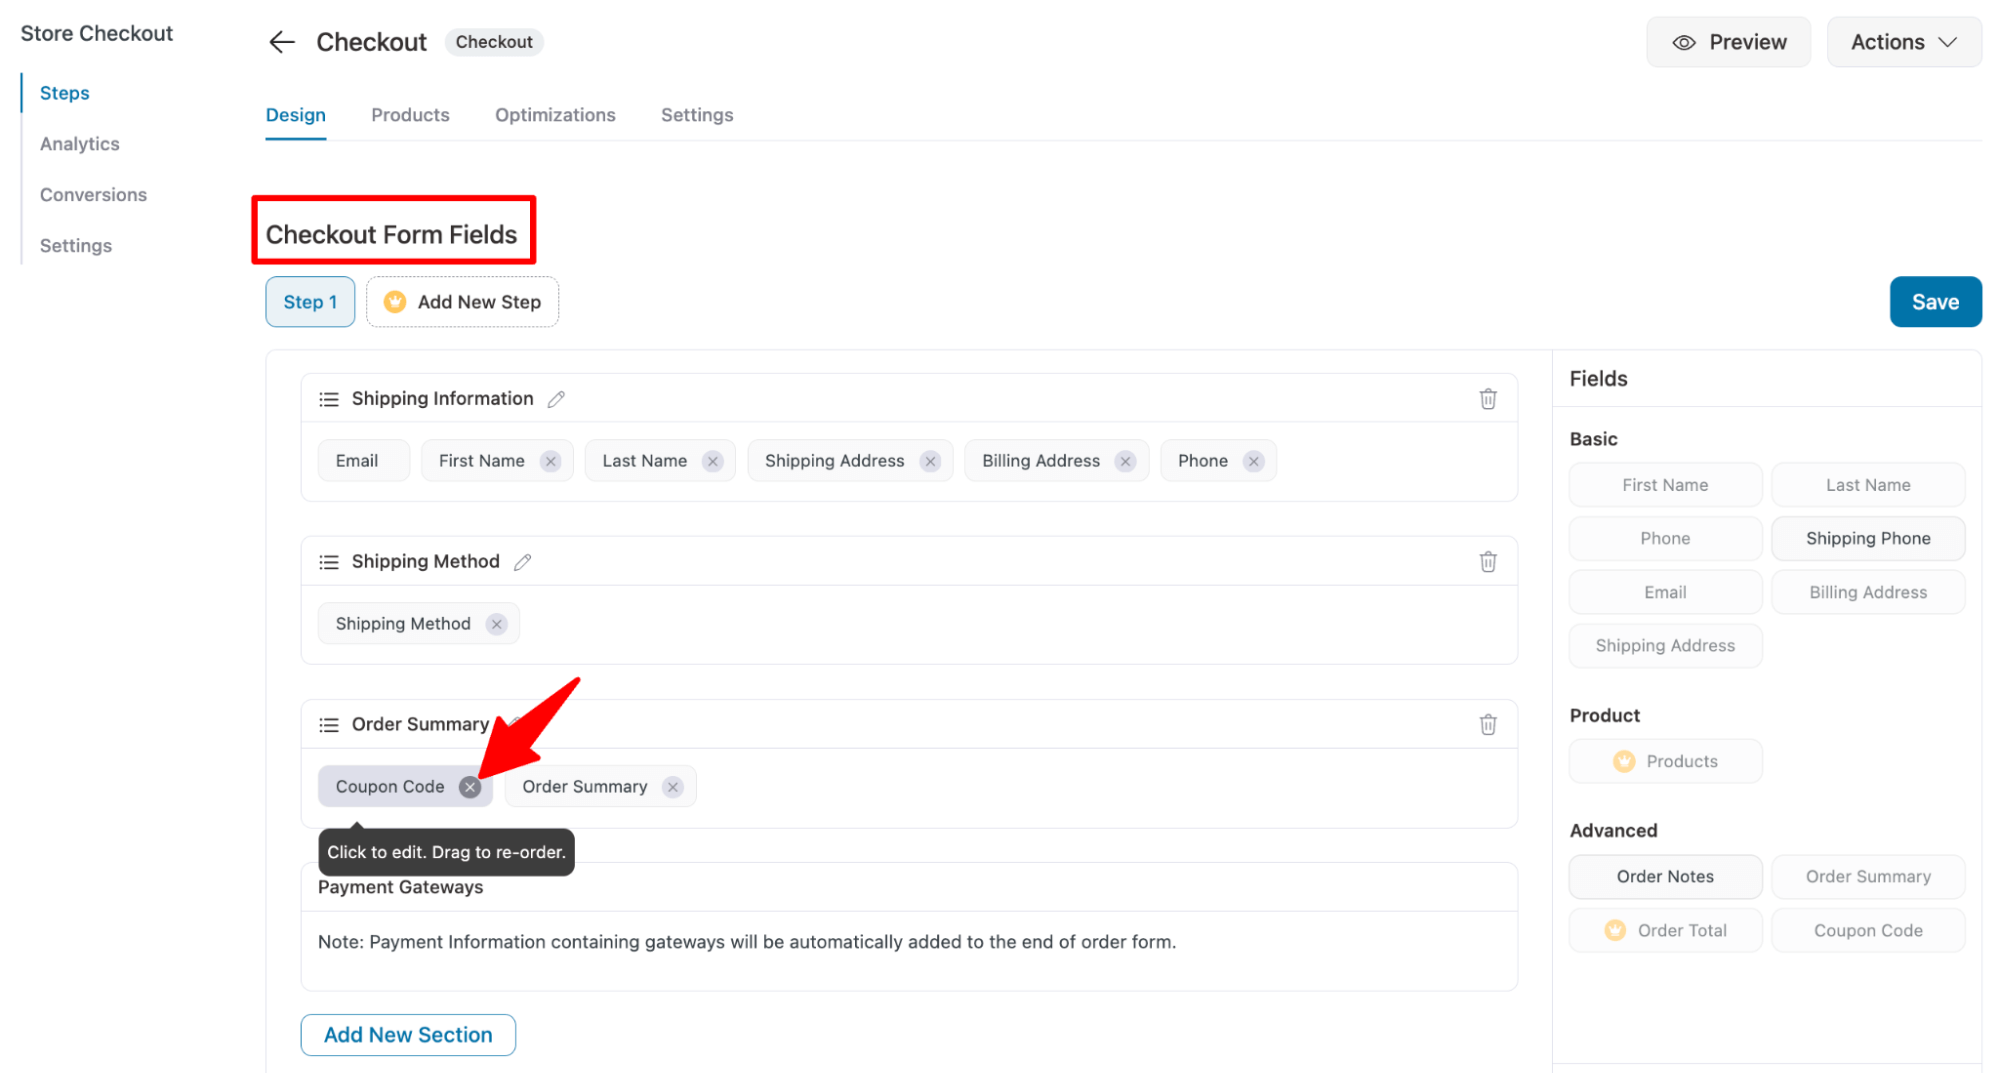
You will land on the Design tab. Now, scroll down to the "Checkout Form Fields" section. Here, you should see the Coupon code placed right before the order summary section.
This is a great placement because users can see how the coupon code affects the order details directly below the coupon field. (In the next section, you can find out how to move/reposition the coupon field.
To make the field a clickable link, toggle on the "Make coupon field a clickable link" option.
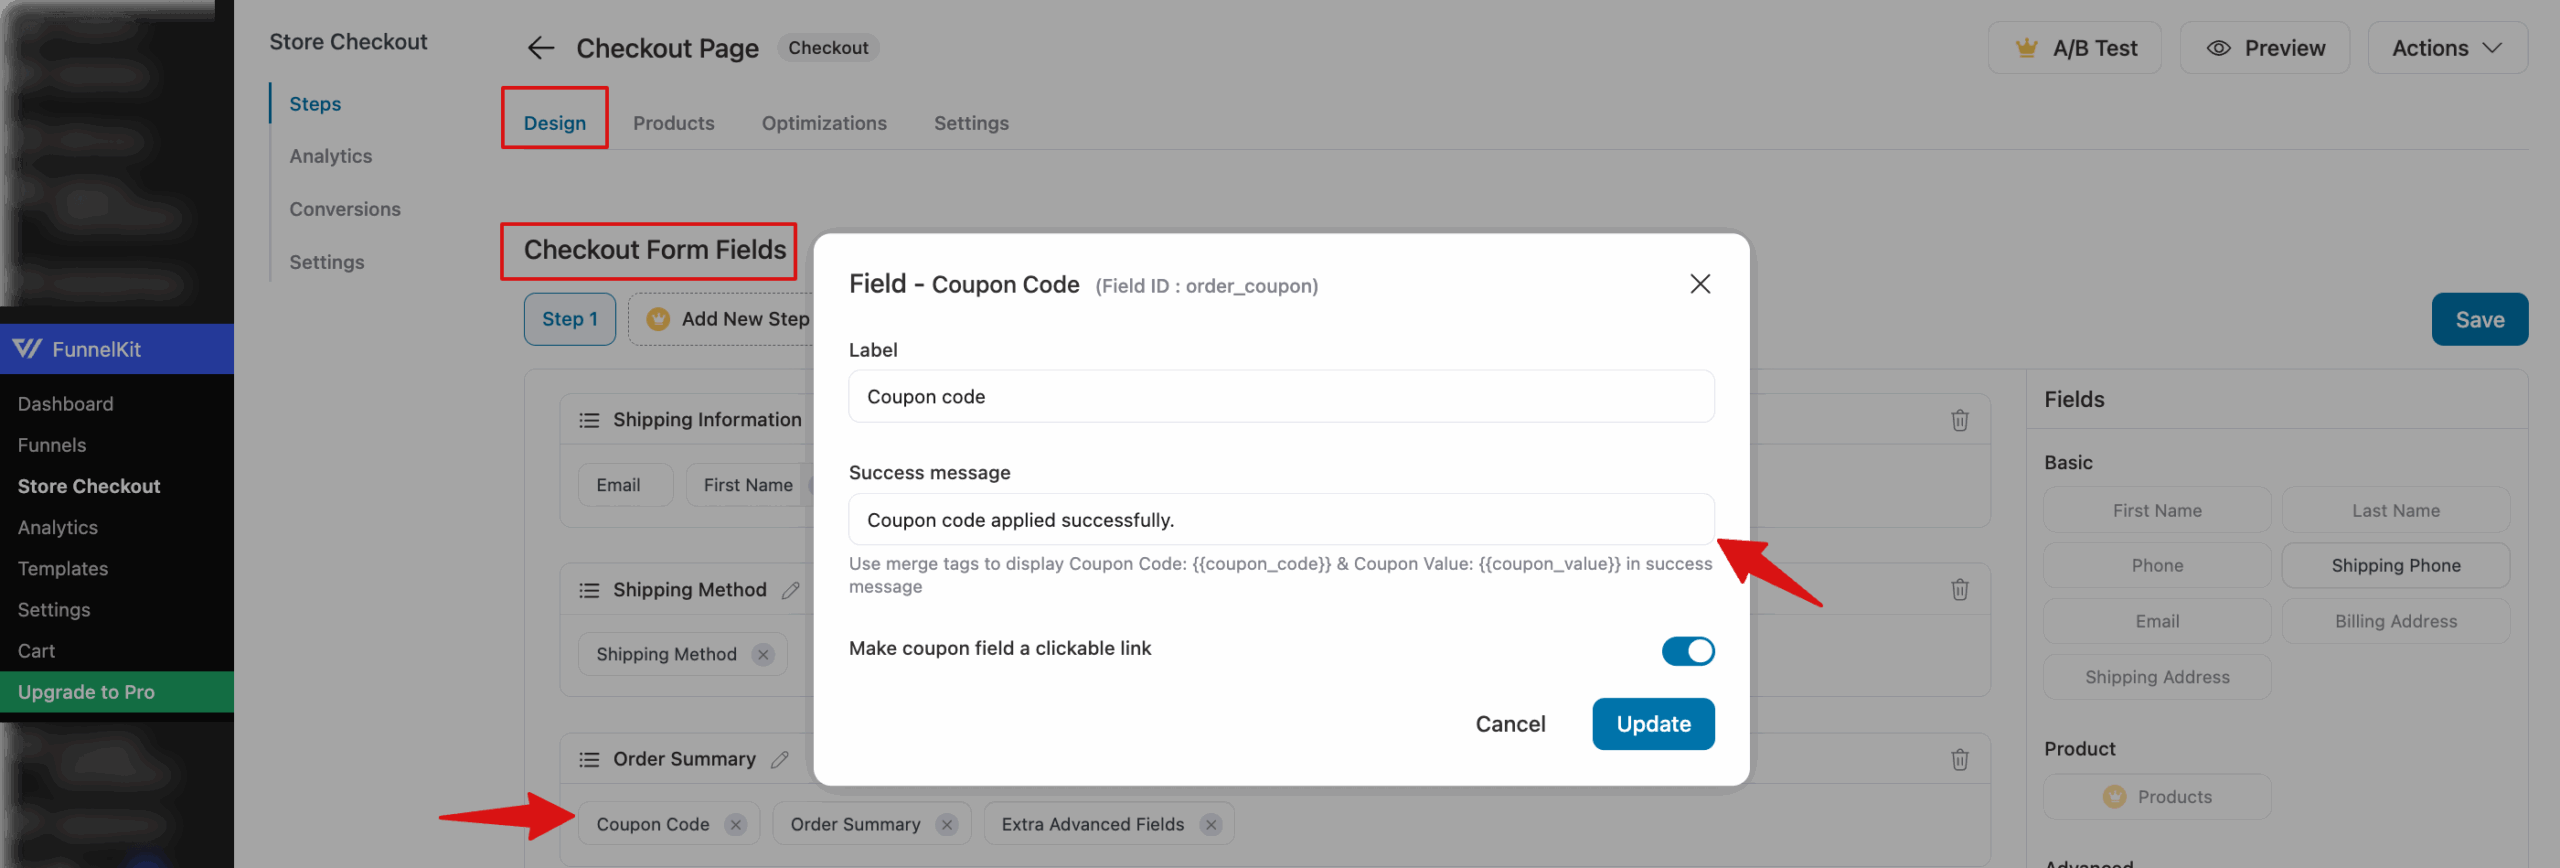
Make sure to click on ‘Update’ to save the changes.
Now, to customize the style, scroll up and hit the "Edit Template" option.
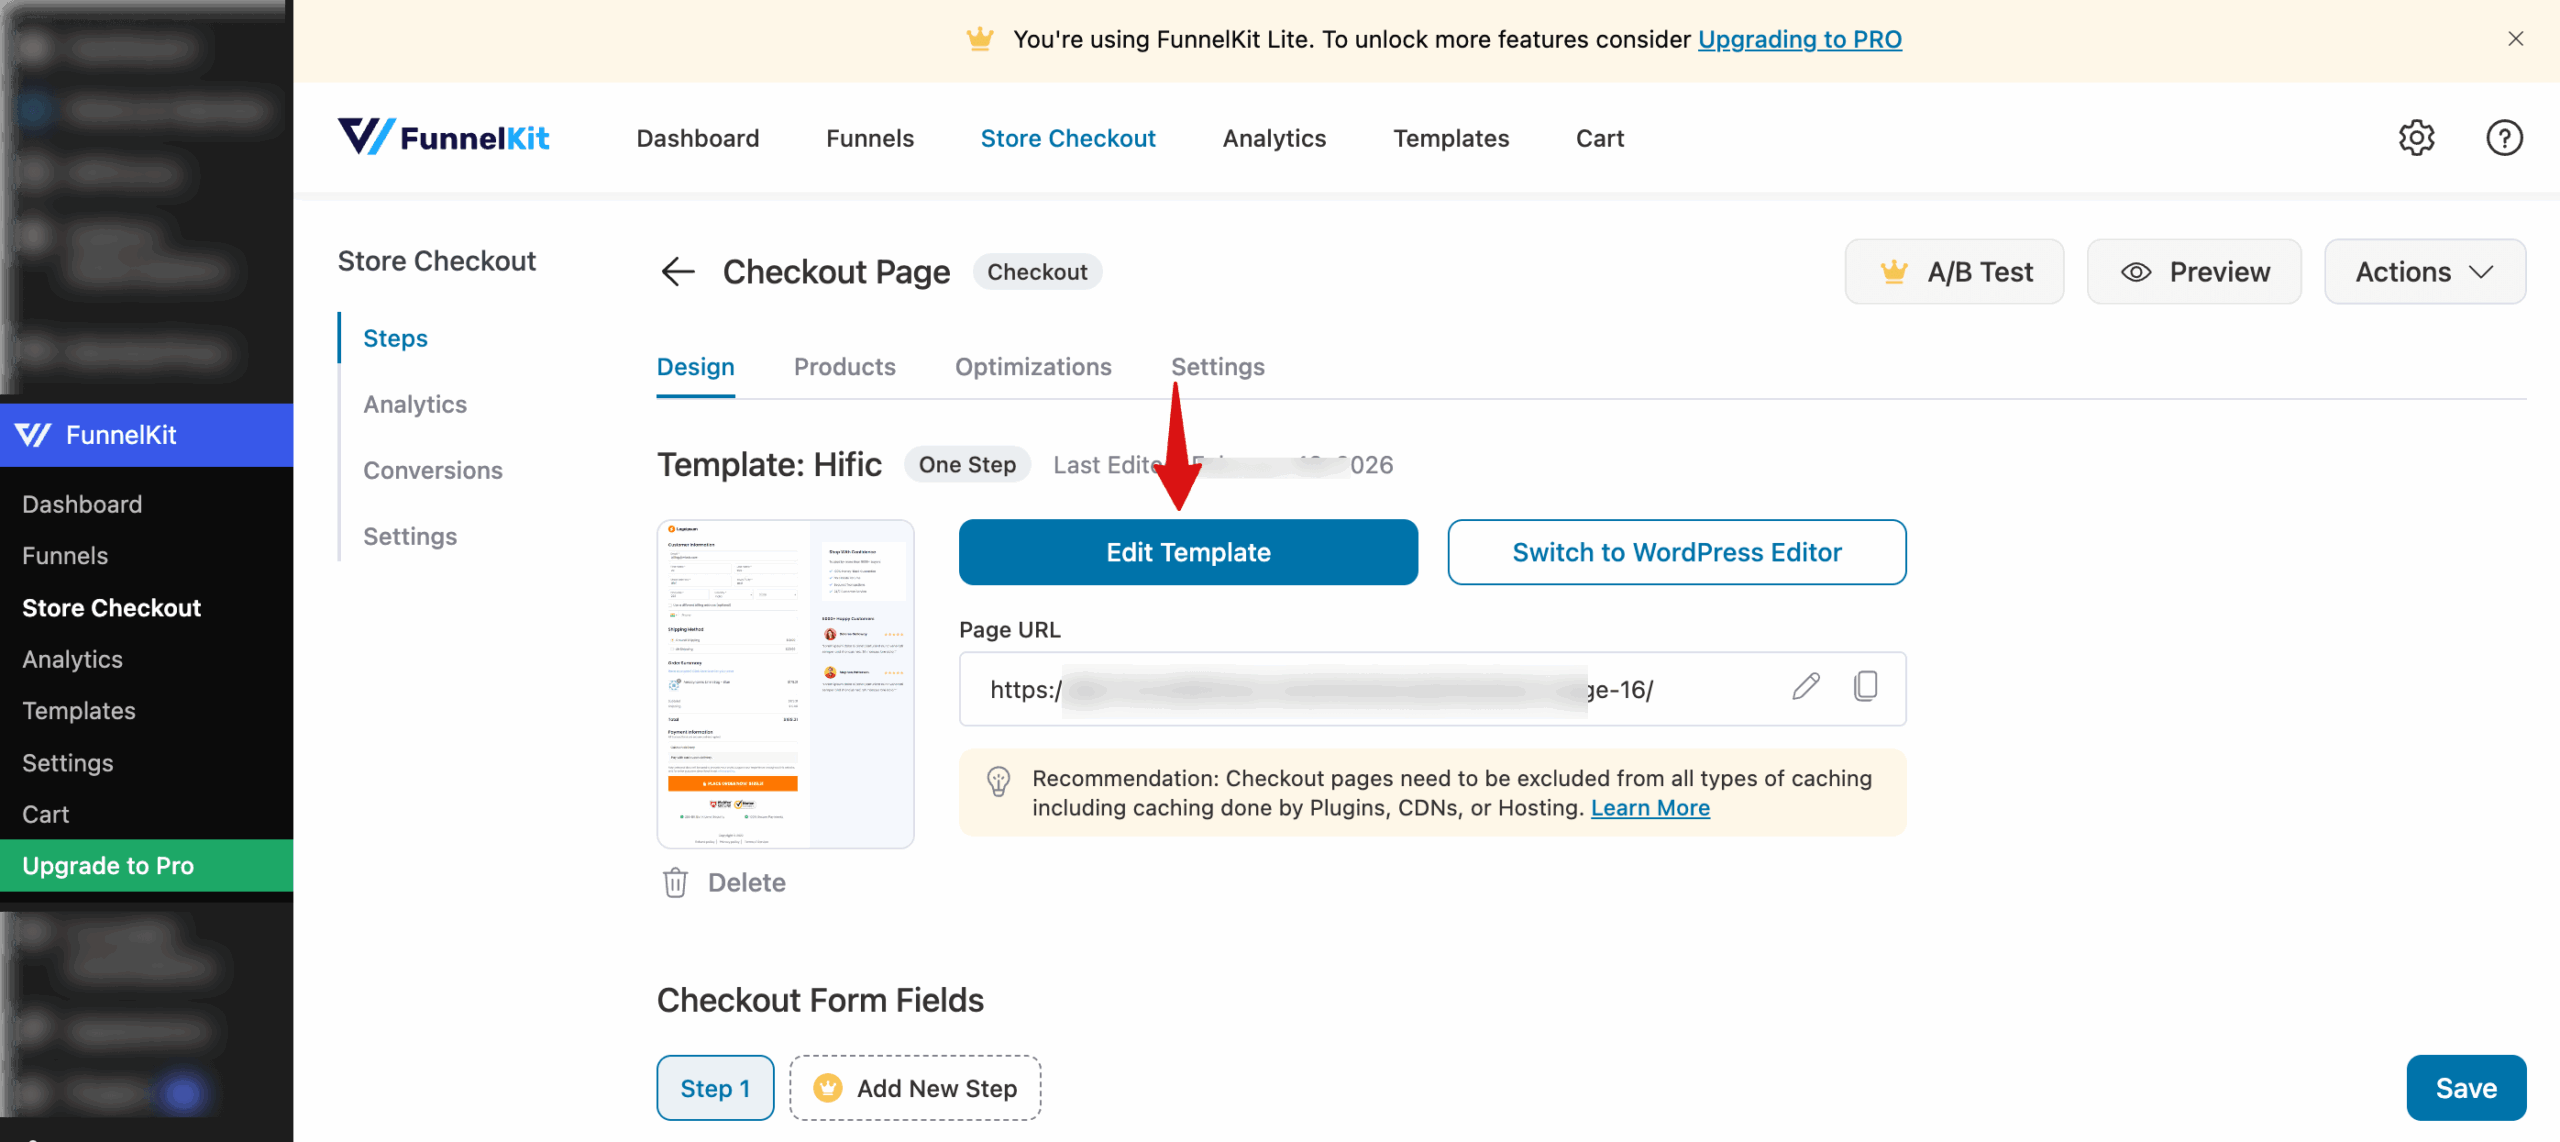
You can fully match the coupon field to your store branding by customizing links, fields, and buttons.
To change the appearance, go to the Style tab, expand the Coupon field to customize the following:
- Link: You can change the Typography and Color of any links in the coupon field.
- Field: You can customize Label Typography, Label Color, Coupon Typography, Coupon Color, Focus Color, Border Type (Default), and Border Radius (Top, Right, Bottom, Left).
- Button: For both Normal and Hover states, you can set the Background, Label color, and Button Typography.
Adjust these settings to match your store’s branding and design.
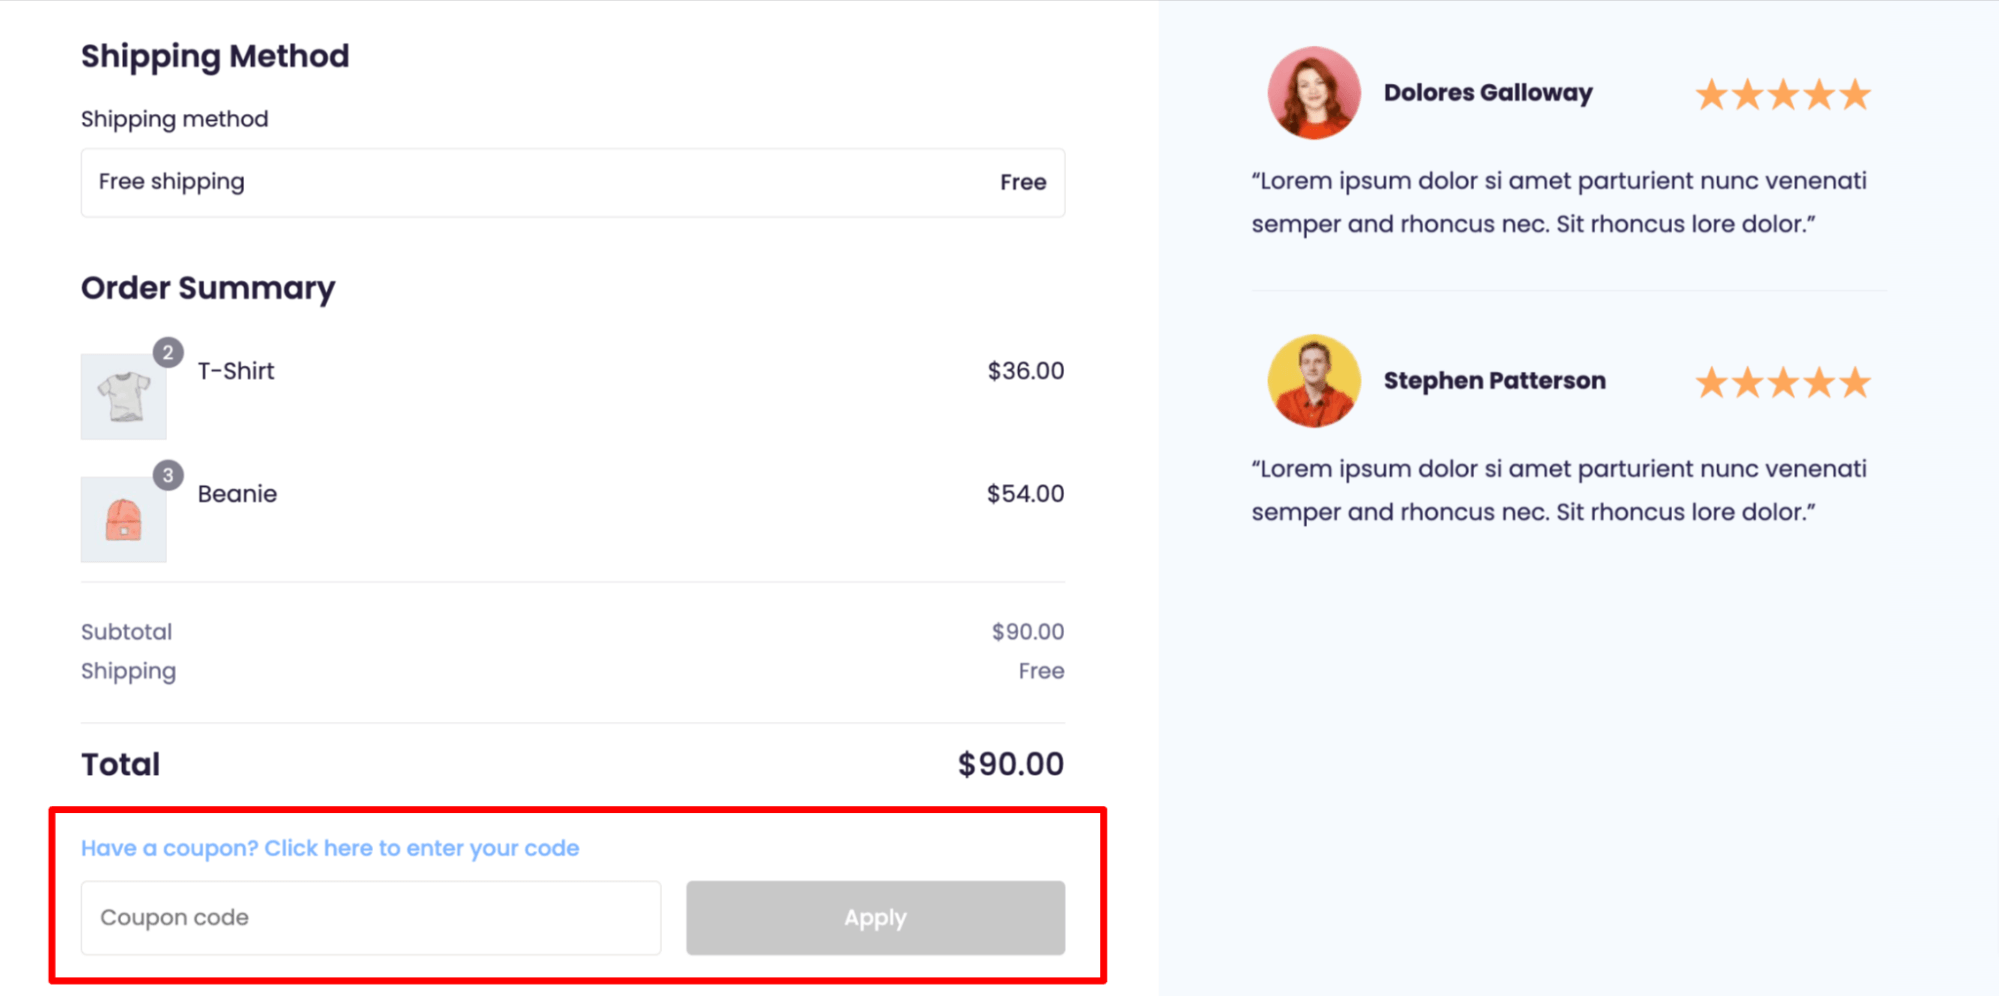
Here is what the clickable coupon field looks like:
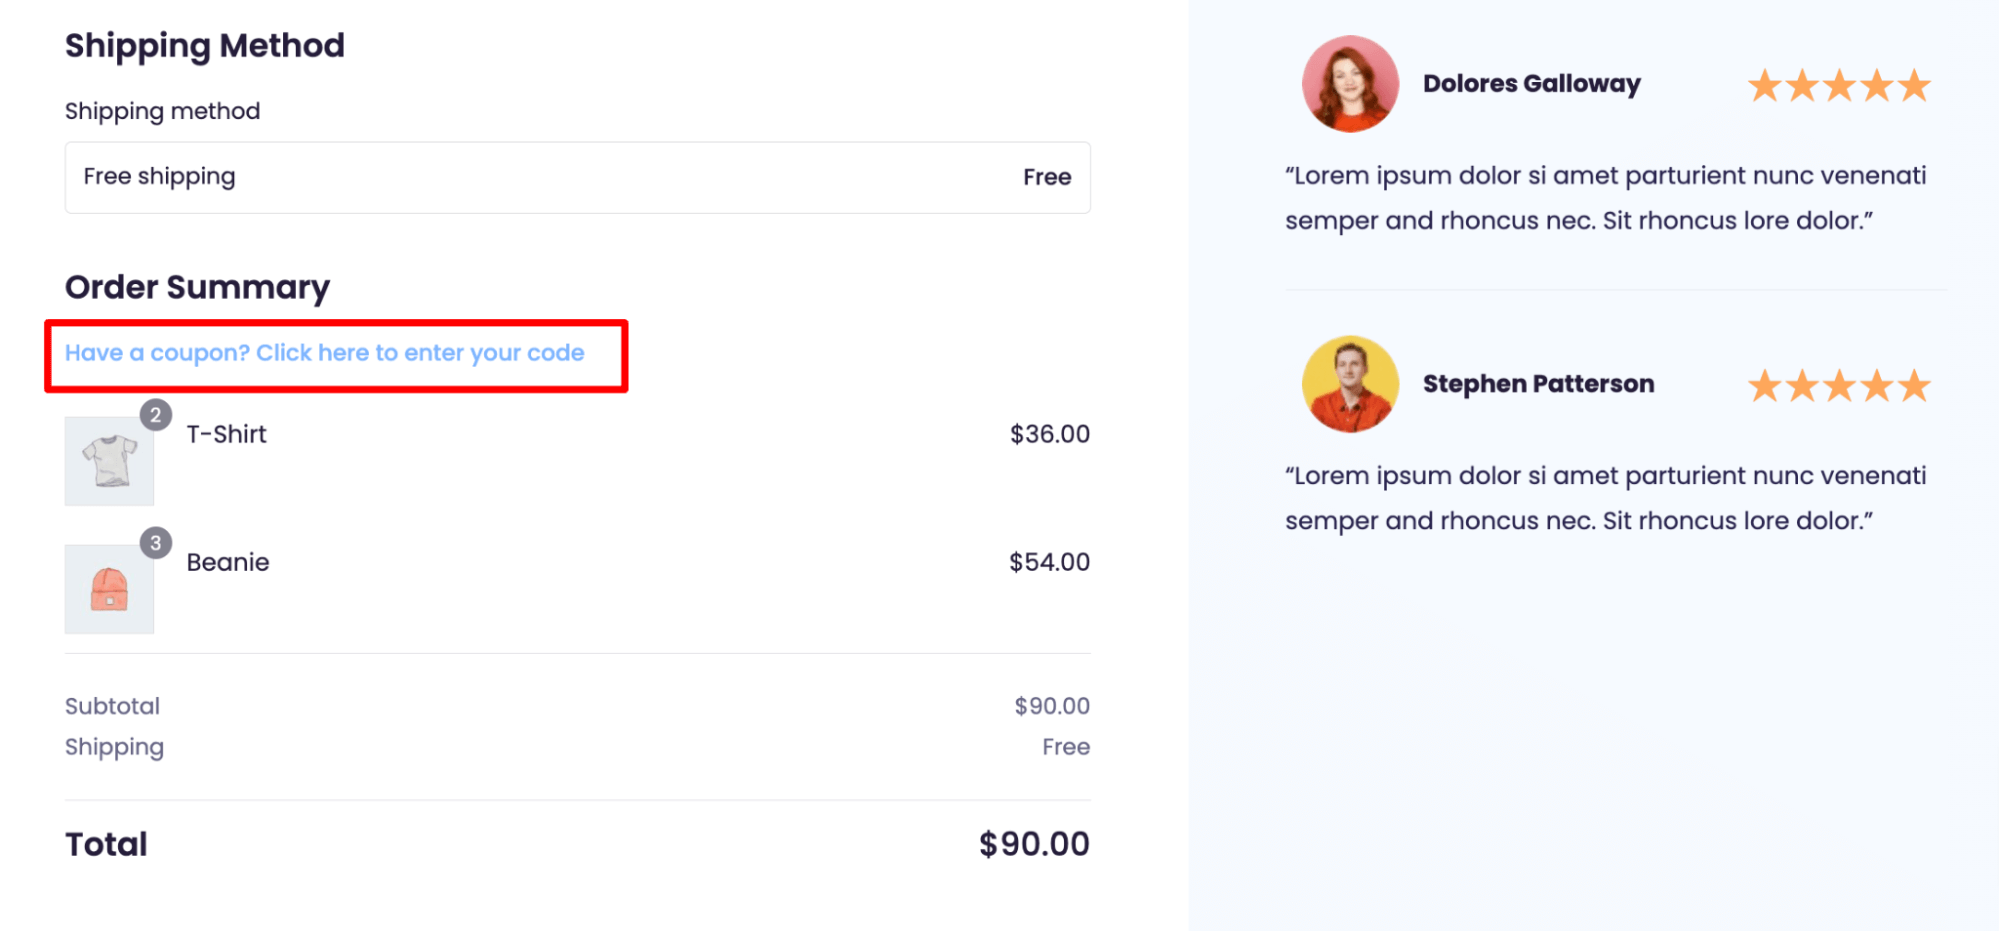
Step 3: Reposition the coupon field on a checkout page
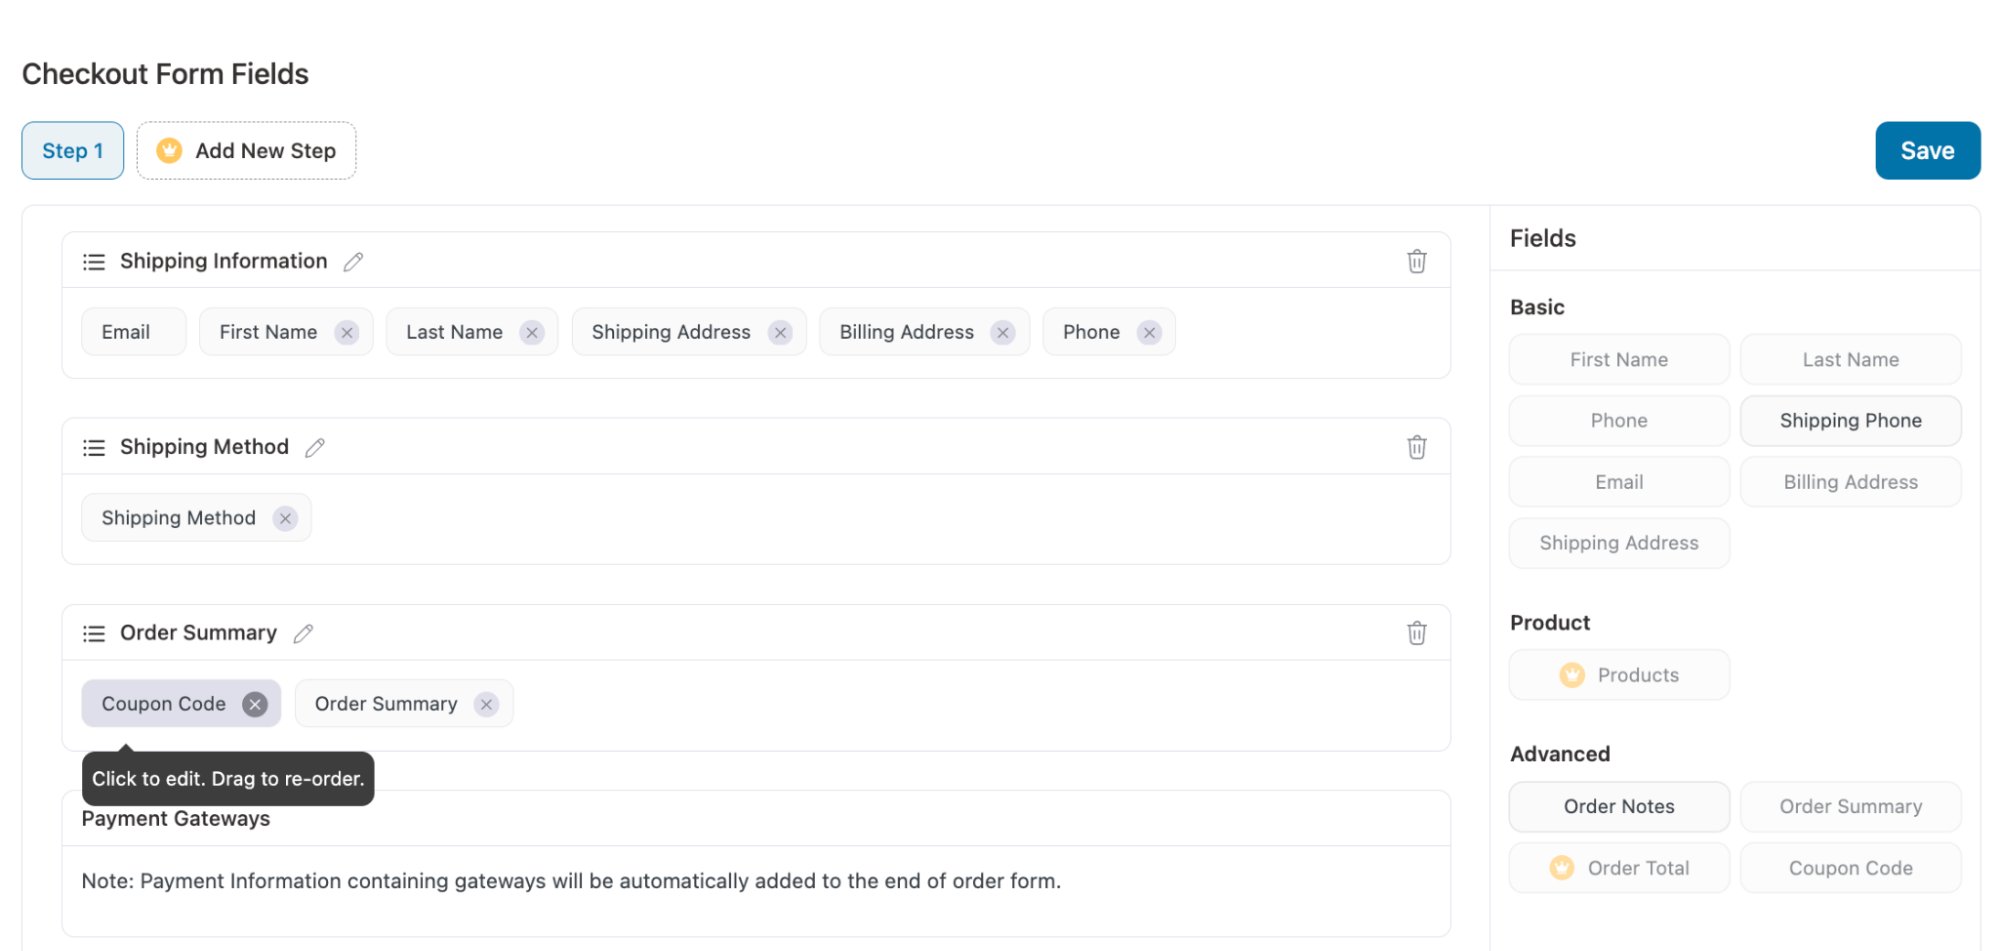
To change the order of the coupon form field, come back to the "Checkout Form Fields" section, simply drag and drop it to the desired location.
For instance, move the coupon code field to after the order summary.
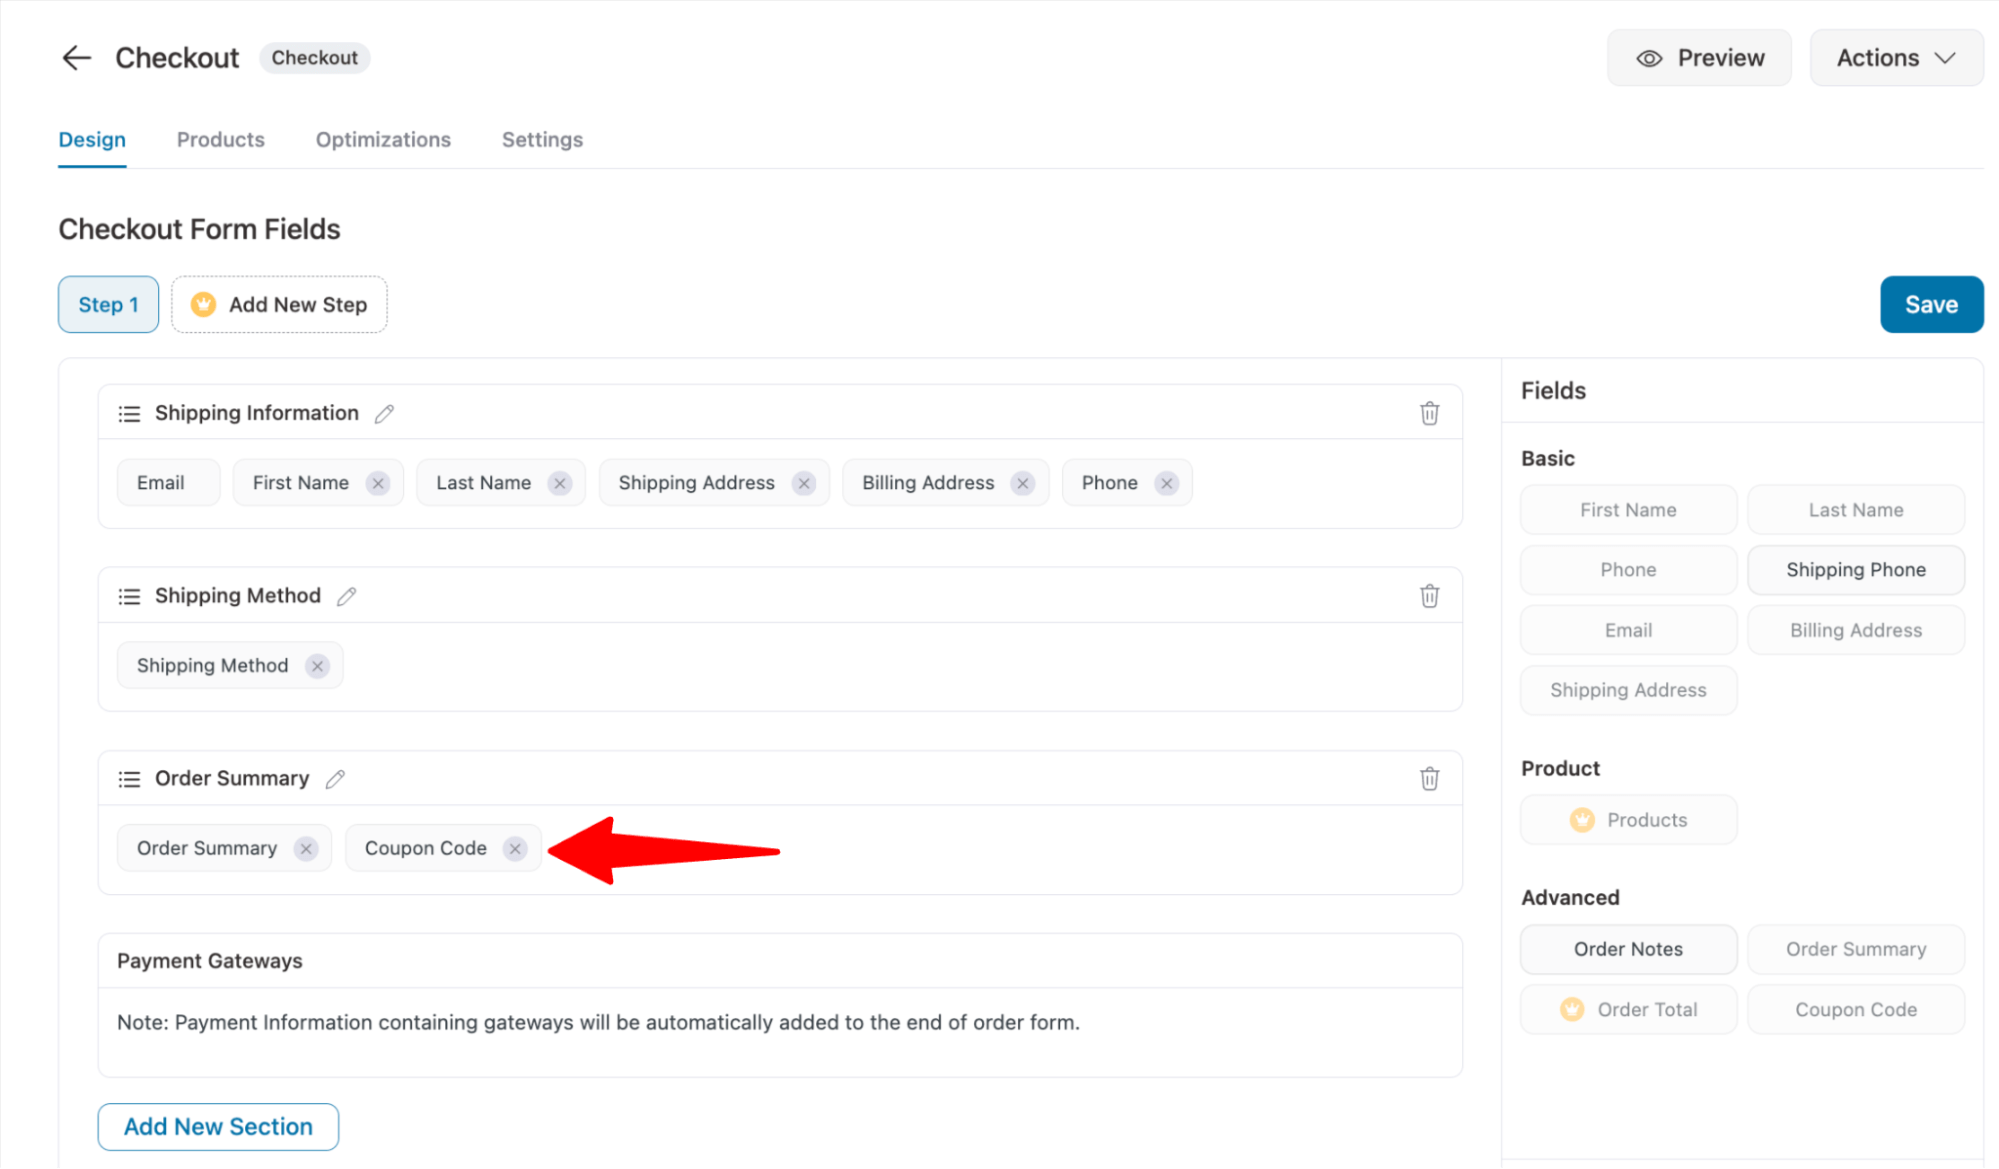
Make sure to click on ‘Save’ to update the changes.
Here is the preview of the coupon field in a new location:
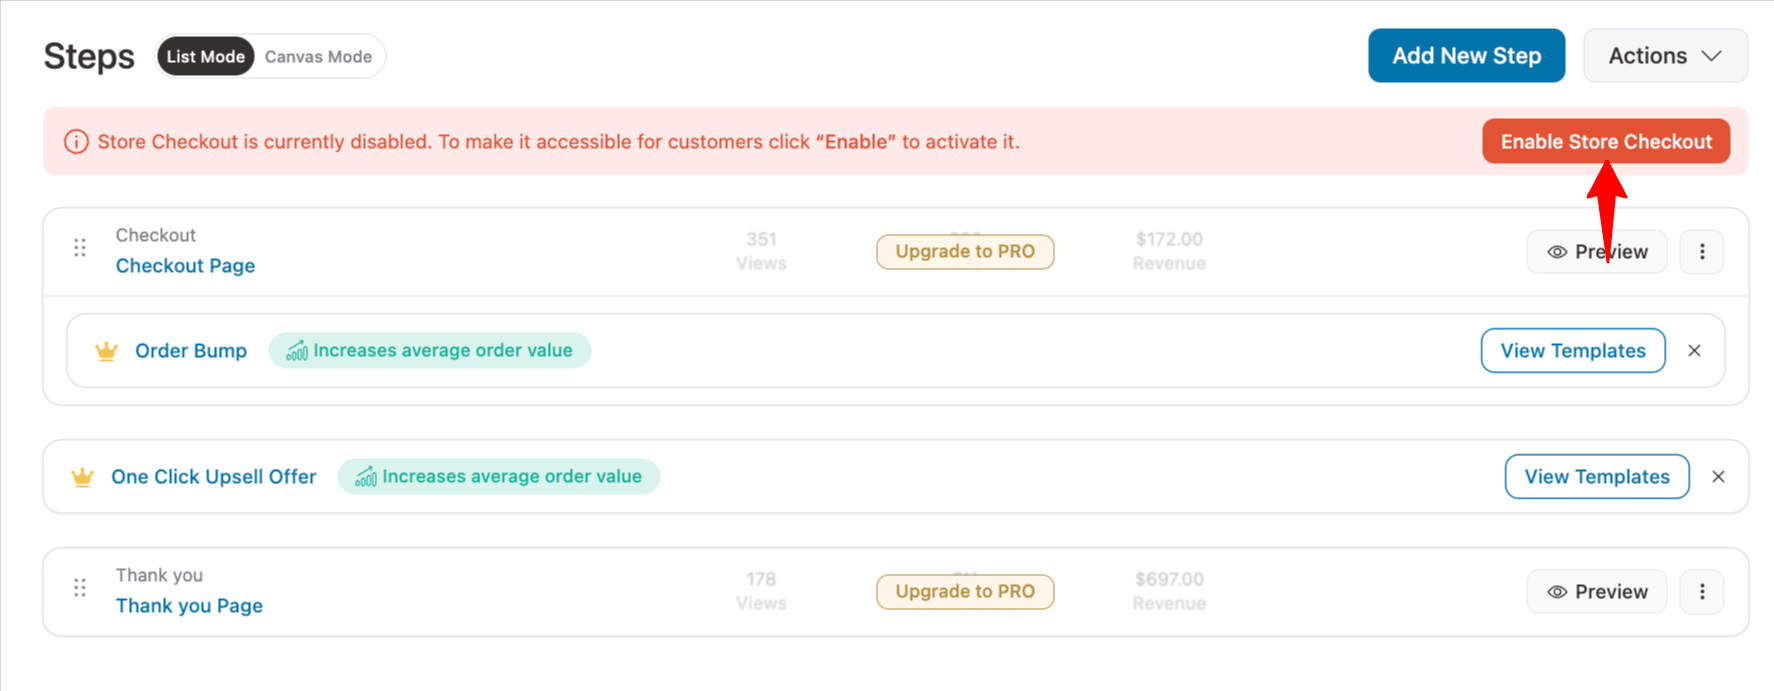
Step 4: Enable the store checkout
Lastly, click on the "Enable Store Checkout" button to activate the store checkout.
This is how you can add a checkout coupon field to the WooCommerce checkout and place it wherever you want.
How to Hide/Remove Coupon Field From WooCommerce Checkout Page
Here, I will share two ways to remove or hide the coupon field from the WooCommerce checkout page:
Method 1: Using WooCommerce default settings
To use this method, navigate to WooCommerce ⇒ Settings ⇒ General and uncheck the option “Enable the use of coupon codes.” Make sure to click on Save Changes to update.
Method 2: Using a custom checkout with FunnelKit Funnel Builder
If you are using FunnelKit Funnel Builder to create your checkout page and add a coupon field, then removing the coupon field is way easier than you think.
To remove the coupon field from your WooCommerce checkout page, edit the checkout page, scroll down to the Checkout Form Fields section, hover over the Coupon field, and click on the ‘X’ icon.
Make sure to click on Save to update the changes.
These were two ways of removing the WooCommerce checkout coupon. Depending on the method you use to add one, follow the relevant process to remove it.
How to Auto-Apply a Coupon At WooCommerce Checkout
To configure an auto-applied coupon at checkout, make sure to install and activate FunnelKit Funnel Builder Pro.
Now, move to the Optimizations tab and click on the “Auto Apply Coupons” section to expand it. Choose “yes” and add the coupon code you want to auto-apply at checkout. Since the coupon is auto-applied, you can disable the field if you want.
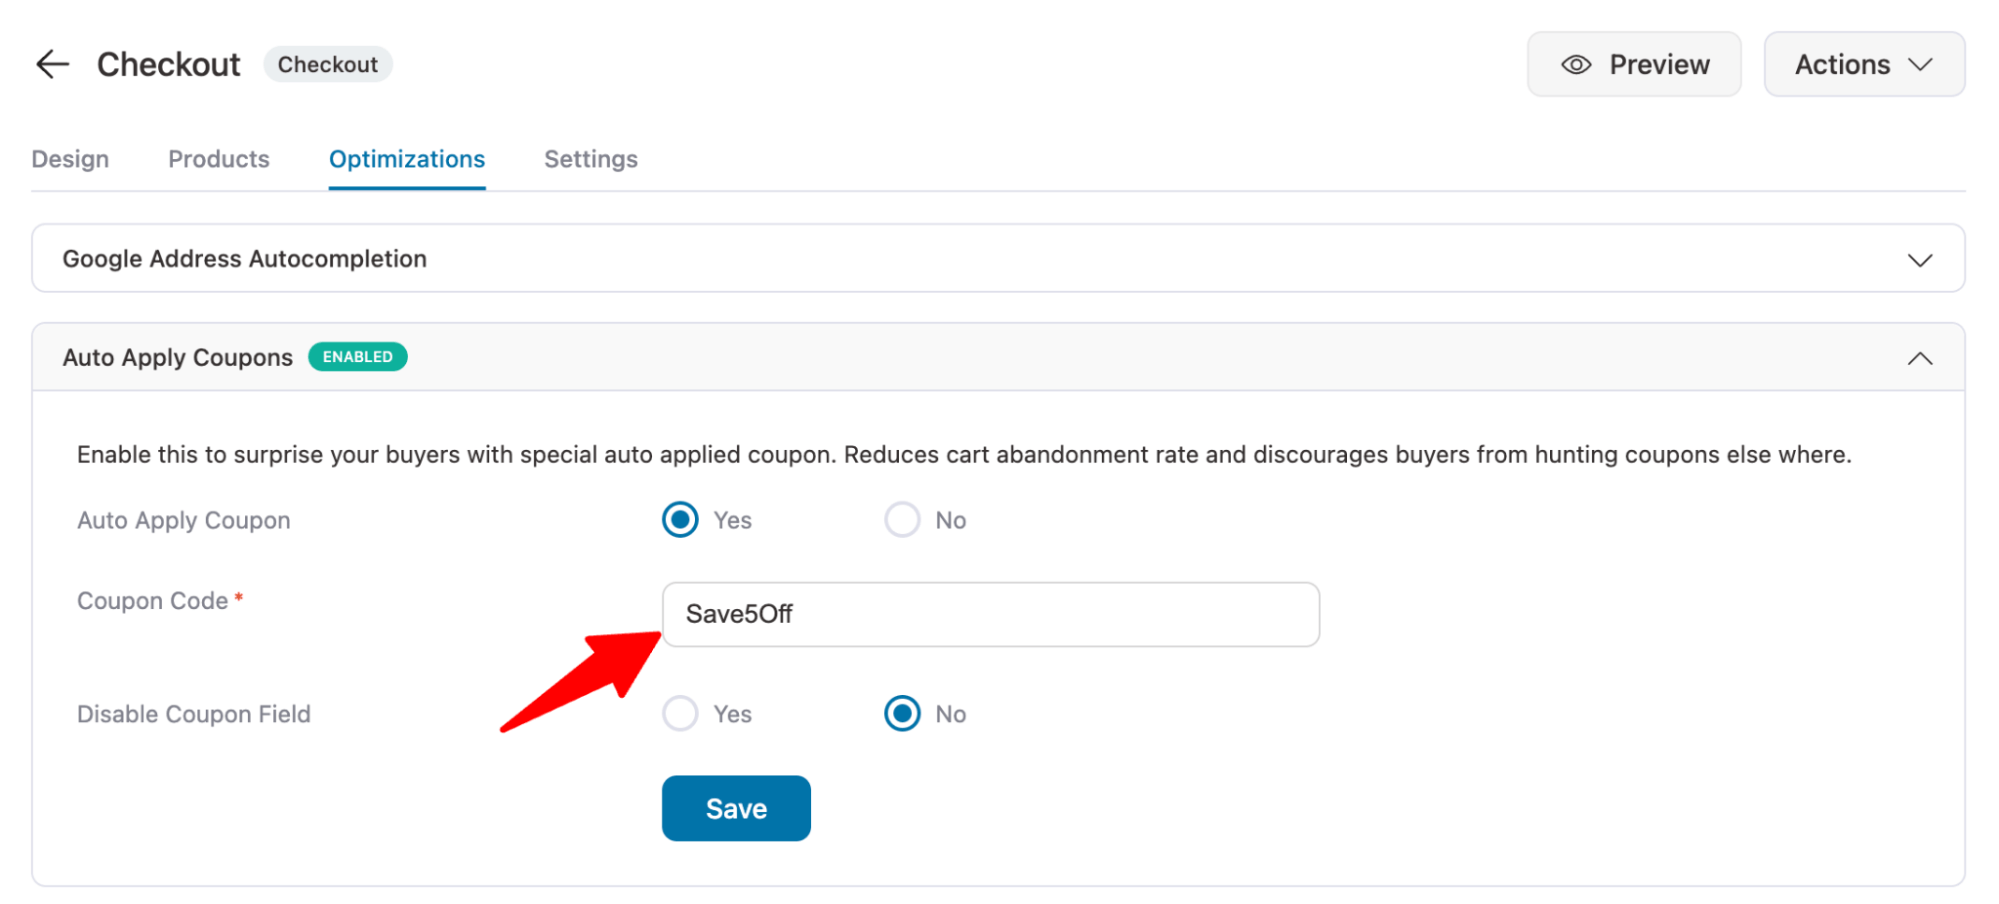
After that, click on “Save” to update the settings. This is how you can auto apply coupon at WooCommerce checkout.
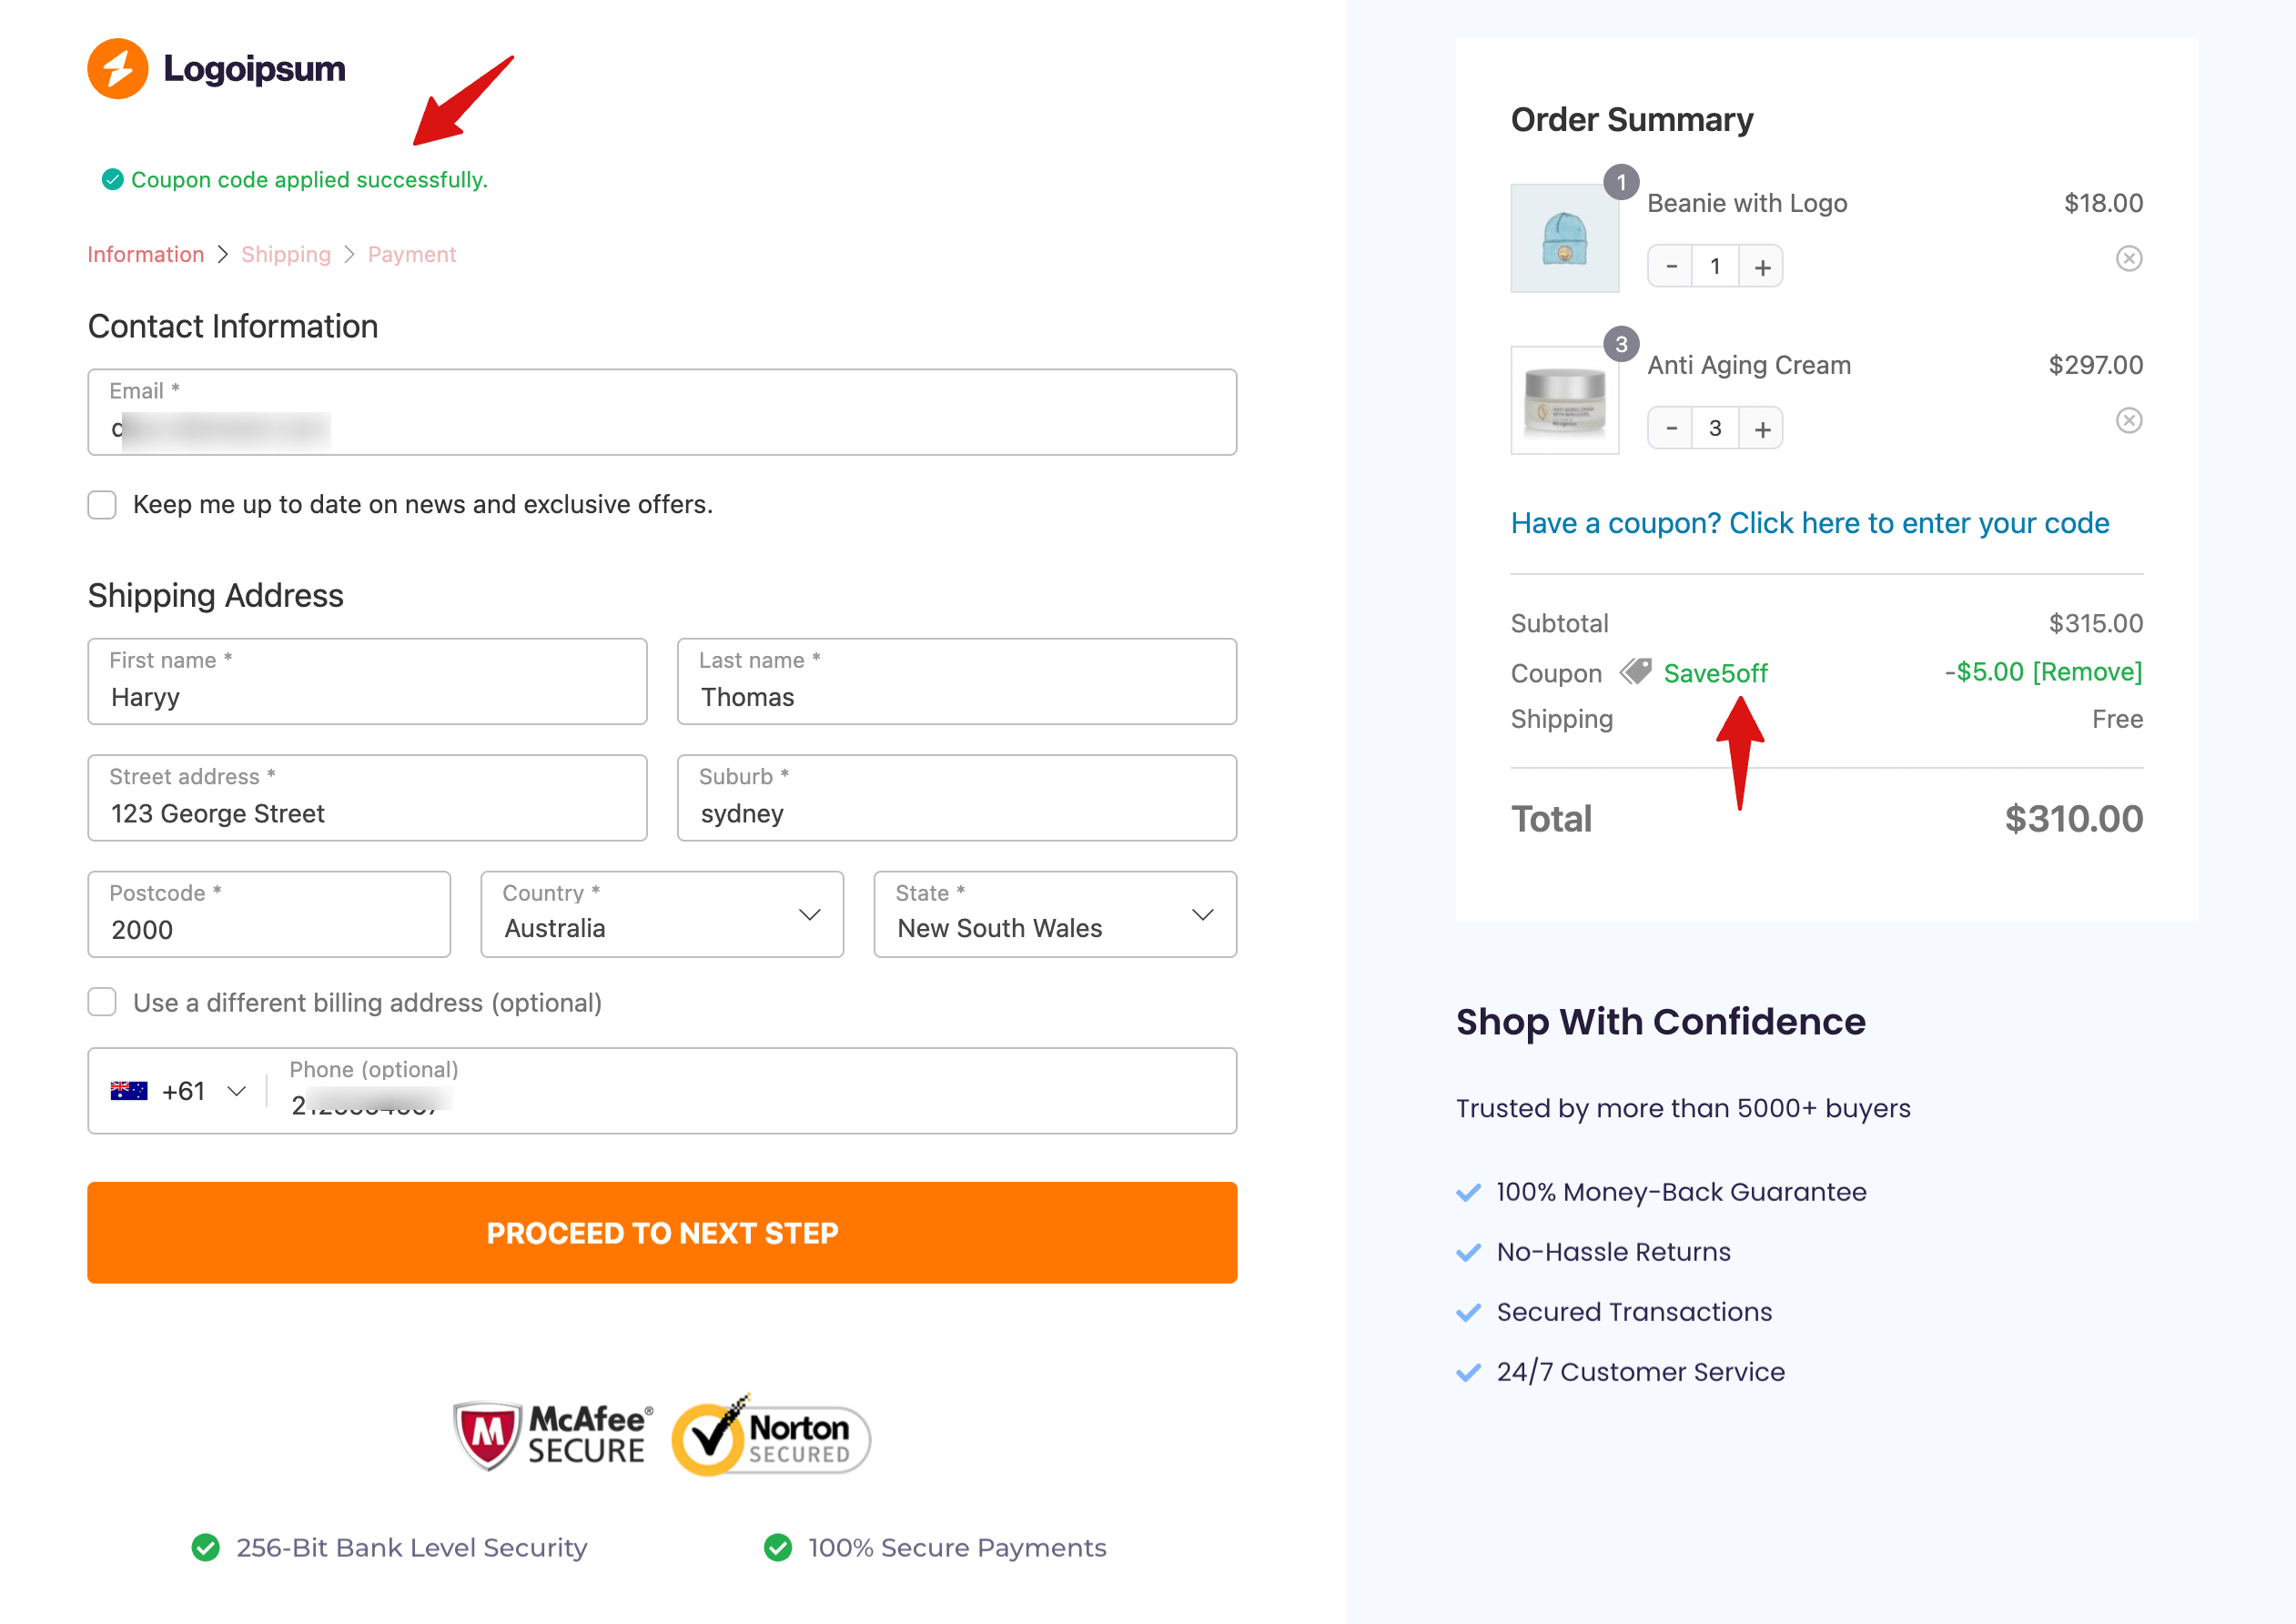
To test, place an order that meets all coupon conditions (e.g., minimum requirements), and the coupon will be applied automatically.
How to Create a WooCommerce Checkout Coupon URL
A WooCommerce checkout coupon URL directs users to checkout with the selected products and an automatically applied coupon. It’s ideal for exclusive discount offers.
With the FunnelKit Funnel Builder Pro, creating such URLs is simple.
After that, edit the checkout and move to the Optimization tab. Here, scroll down to the “Generate URL to populate checkout” section and expand the section. Then, set the following values:
- Product: Add the Product IDs separated by commas that will be added to the cart when users hit the URL.
- Quantity: Provide the product quantities, separated by commas. Make sure to follow the same sequence you used in the product IDs.
- Coupons: Add the coupon you want to apply to the cart when customers use this URL.
After providing the URL, you will find the WooCommerce Checkout Coupon URL in the field “Coupon URL”.
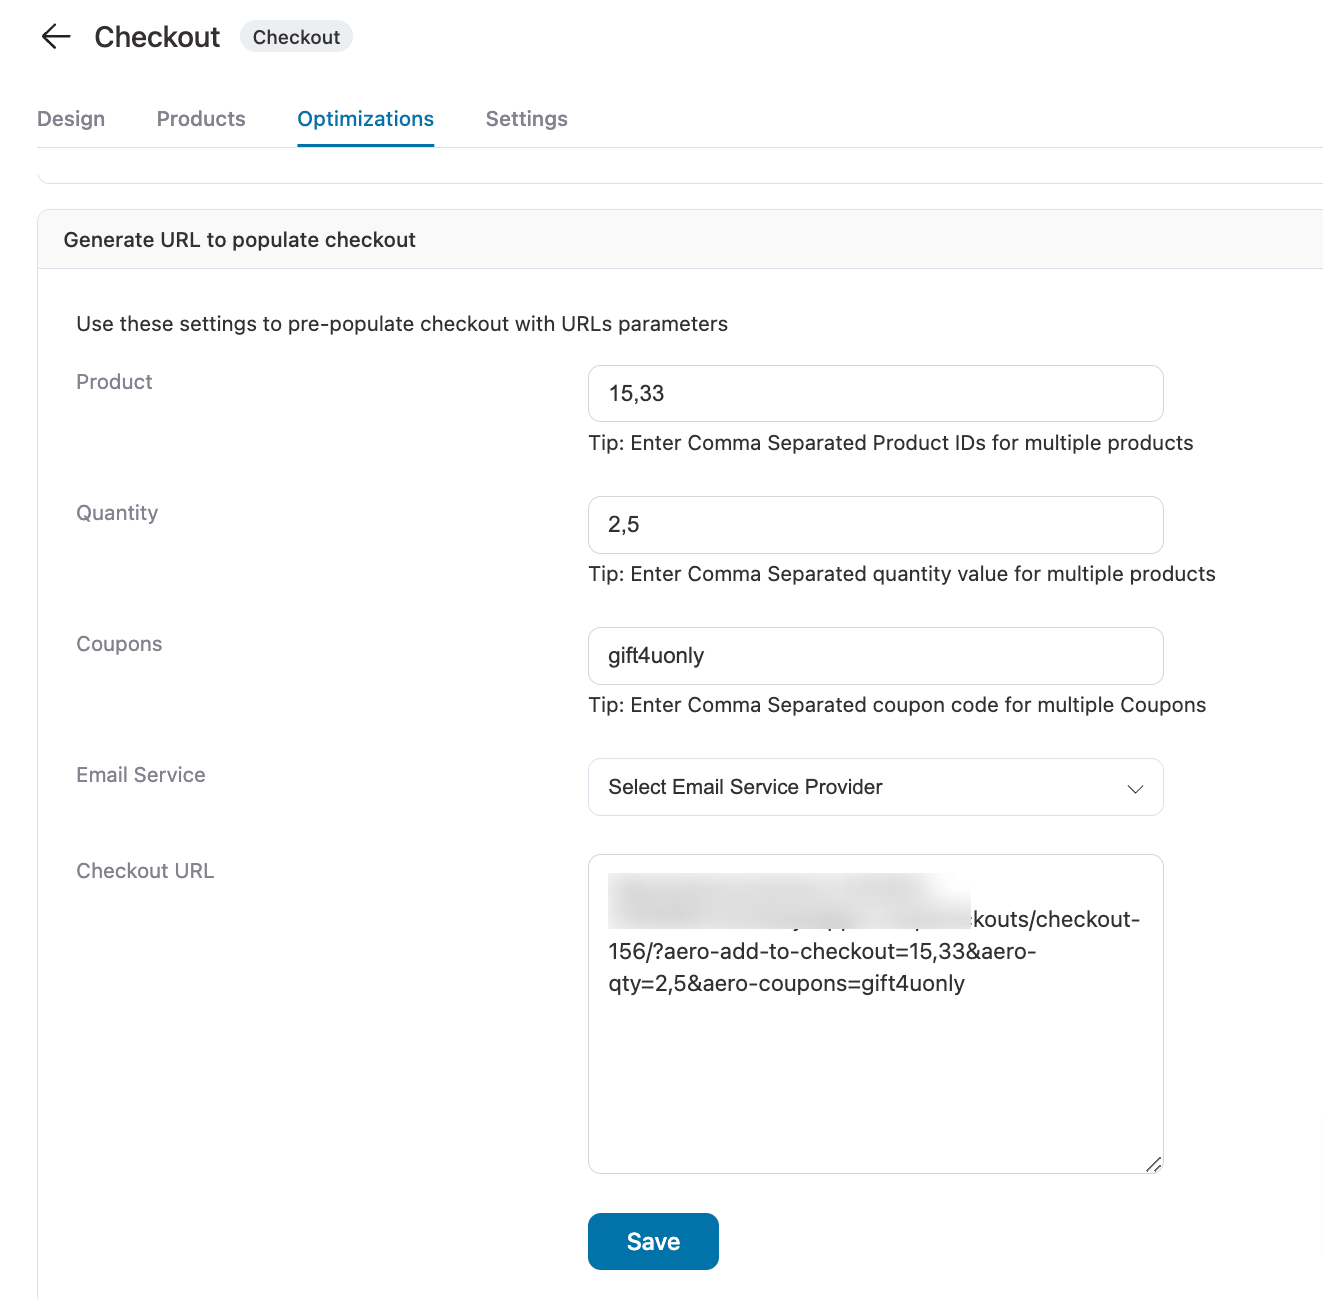
Make sure to hit Save.
Now, you can share this WooCommerce Checkout Coupon URL with the target audience via social or broadcast SMS and email campaigns.
Here is a preview of the WooCommerce checkout coupon URL:
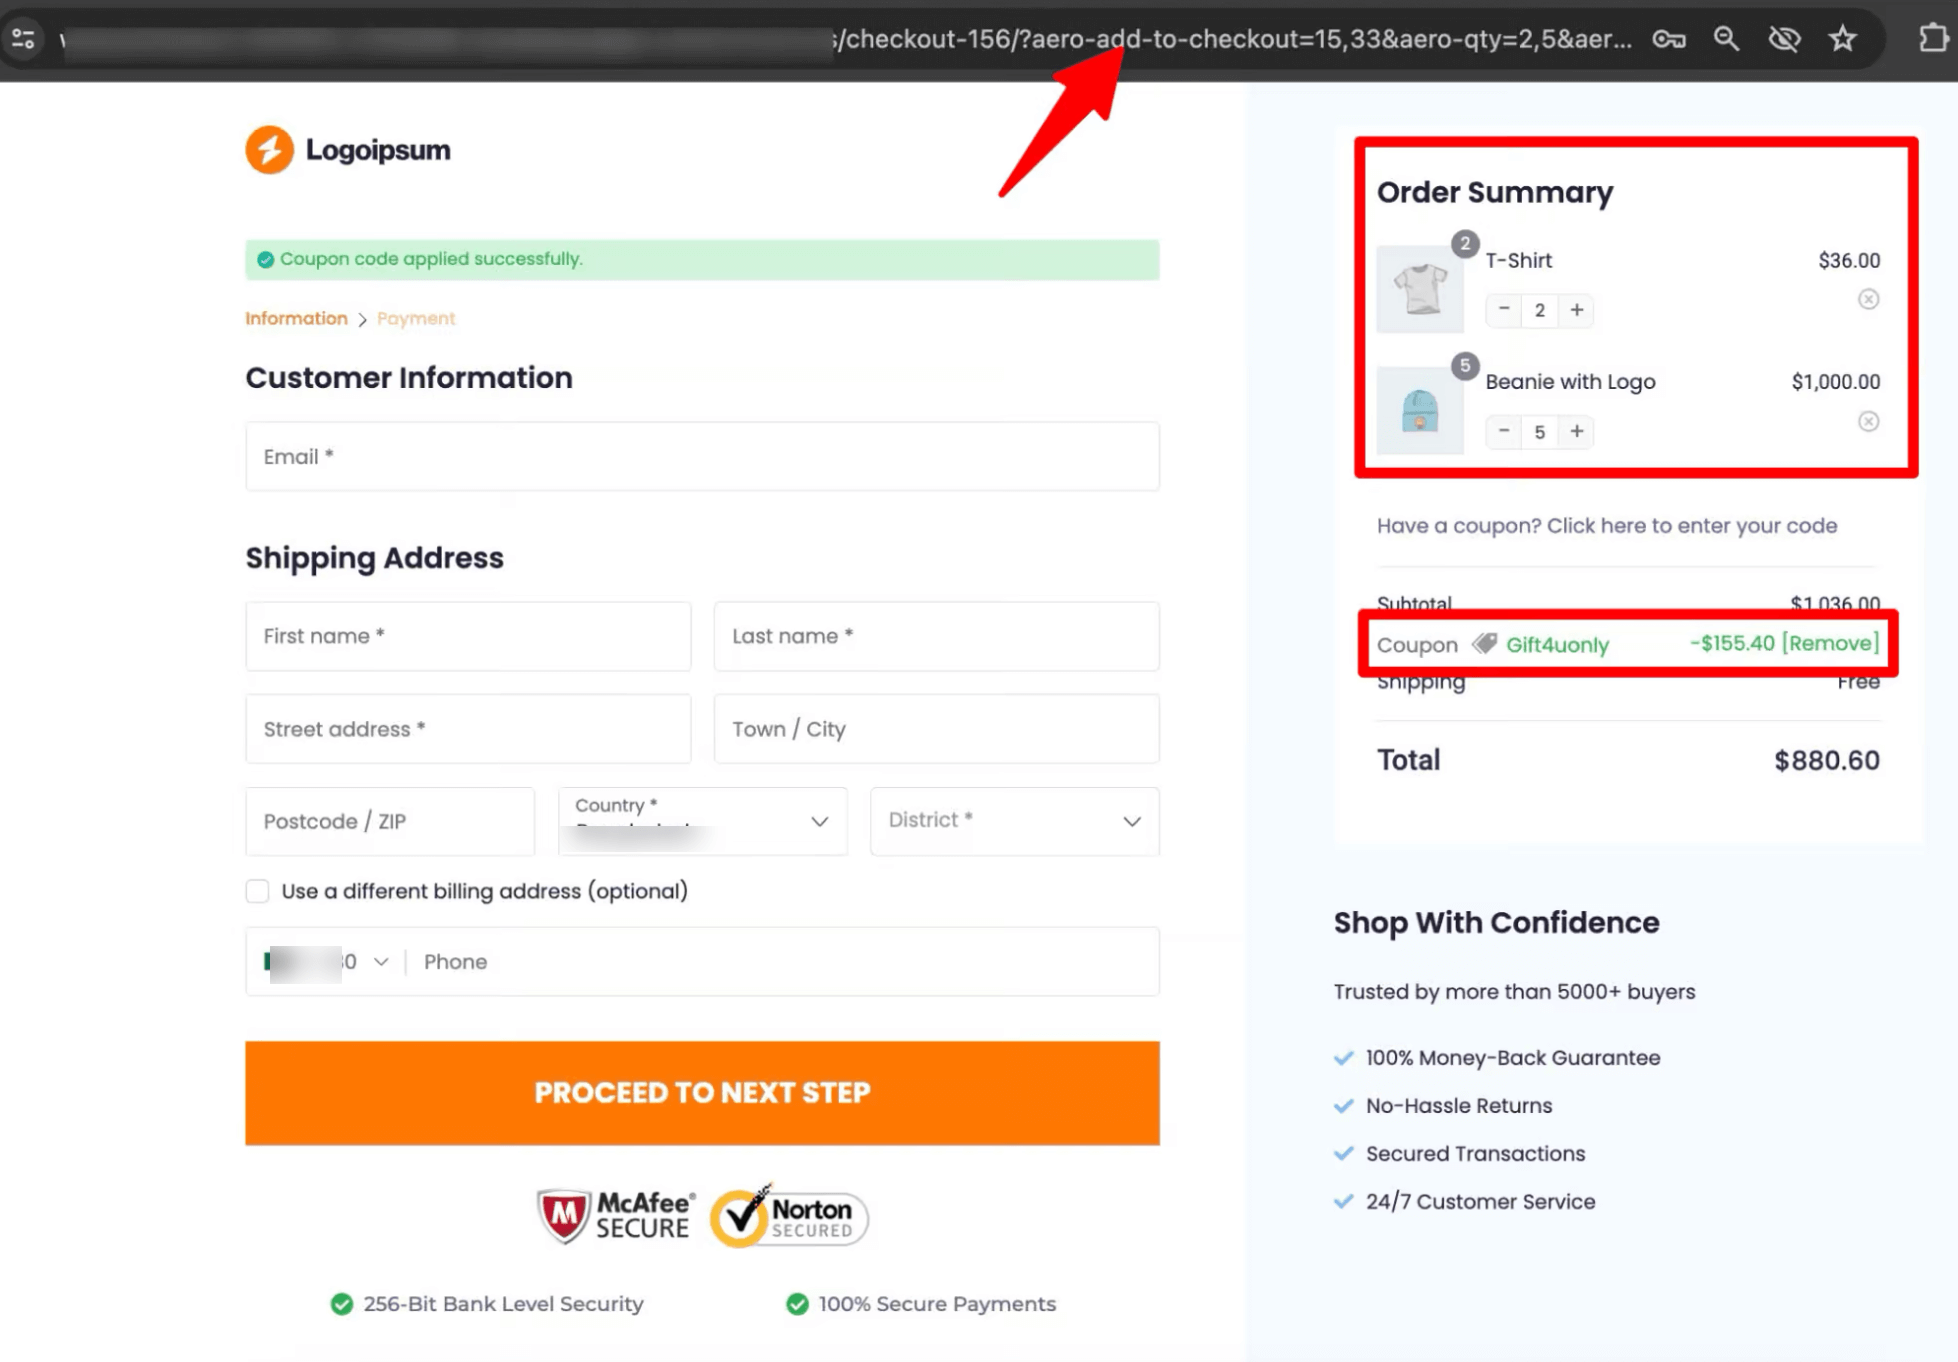
The multi-step checkout above uses FunnelKit Funnel Builder’s premium Hific template. It features a sleek mini cart with the coupon field conveniently placed just below for easy use.
Frequently Asked Questions About WooCommerce Checkout Coupon
Here are some common issues, questions, and tools for managing WooCommerce coupons.
By default, WooCommerce does not let you restrict coupons for guest users. To set limits based on user type, you can use a plugin like Advanced Coupons, which allows restrictions by user roles, including guests and registered customers.
By default, WooCommerce doesn’t let you bulk create coupons. You can only edit existing ones in WooCommerce → Coupons using the bulk actions dropdown.
To bulk-create coupons, you’ll need a plugin such as Advanced Coupons Pro or Bulk Edit Coupons for WooCommerce. These plugins let you generate multiple unique codes, manage discounts, set usage limits, and define expiry dates all at once.
If your WooCommerce coupon isn’t working, common reasons include:
- The coupon has expired or reached its usage limit.
- The coupon is not enabled in WooCommerce settings.
- Restrictions on shipping methods, user roles, or product categories are preventing it.
- Conflicts with other plugins or discounts.
To fix it, check the coupon’s settings, verify restrictions, ensure it’s active, and temporarily disable other plugins to identify conflicts.
Top WooCommerce coupon plugins include:
- FunnelKit Cart – Let's customers apply tiered, auto-applied coupons directly in a modern side cart, boosting order value.
- Advanced Coupons – Supports BOGO deals and loyalty programs, making promotions more engaging.
- Coupon Generator for WooCommerce – Quickly creates large numbers of coupons, saving time for busy stores.
- Bulk Edit Coupons for WooCommerce – Makes managing and updating multiple coupons fast and easy.
- FunnelKit Funnel Builder – Automatically applies coupons at checkout for a smoother buying experience.
- FunnelKit Automations – Sends dynamic, personalized coupons to customers, increasing repeat purchases.
- Tiered Pricing for WooCommerce – Offers wholesale or quantity-based discounts, encouraging larger orders.
- AffiliateWP – Let's affiliates generate coupon codes, boosting referral-driven sales.
- Flexible PDF Coupons – Creates and shares coupons in PDF format for offline or email marketing.
- Coupons Pro for WooCommerce – Enables sharing coupons directly on product pages, improving visibility and usage.
Each plugin is popular because it addresses a different part of the coupon strategy, from boosting AOV and loyalty to streamlining management and increasing conversions.
You can share a WooCommerce coupon with customers via email, SMS, WhatsApp, or other messaging platforms.
Cart pages can slow people down and make checkout longer, which may lead to abandoned carts. Offering coupons on the checkout page makes it easier to complete the order. You can also use a side mini cart so customers can see their cart and apply coupons anytime without extra steps.
Ready to Boost Checkouts with Smart Coupon Placement in WooCommerce?
Offering discounts gives users the push they need to complete a purchase. If you plan to use a discount coupon, the checkout page is the best place to apply it.
By strategically placing and customizing coupons, every checkout can become an opportunity to drive sales and improve customer satisfaction.
With the right tools, you can control how and when coupons are applied, running promotions that attract buyers while protecting your profit margins.
FunnelKit Funnel Builder allows you to manage, customize, and automate your WooCommerce checkout coupons with a single plugin.
You can add and reposition fields, create auto-applied coupons, and generate coupon URLs, making the checkout experience smoother and more motivating.
Every checkout becomes an opportunity to drive sales, improve satisfaction, and grow your store.
More WooCommerce Guides to Explore:
- How To Create Coupons in WooCommerce
- How to Create and Share WooCommerce Birthday Coupons
- WooCommerce Discounts: The Complete Guide
- How to Increase Repeat Sales With WooCommerce Dynamic Coupons
- How to Use WooCommerce Free Gift Coupon
- Best WooCommerce Coupon Plugins
- How to Set Up WooCommerce BOGO Offers

Editorial Team
July 7, 2026Are shoppers adding products to their cart and leaving before they buy? According to Baymard Institute research on checkout usability, 18% of shoppers who abandon their cart do so because...
Editorial Team
July 3, 2026Sometimes, the difference between a visitor leaving and placing an order comes down to something surprisingly small, like a better headline, a cleaner checkout, or a more compelling offer. That's...
Editorial Team
July 1, 2026Are you leaving money on the table by not fully leveraging your customers’ shopping behavior? Many store owners don’t realize that every time a customer adds a product to the...


