

Are your customers wasting time scrolling through a long list of countries to pick one?
If you only sell in one country, why even ask them to choose? It’s an unnecessary step in the checkout process.
Extra clicks like this can confuse shoppers and lead them to abandon their carts.
Removing unnecessary countries from the list or eliminating the country field (if you only sell to one country) can streamline the checkout process for your customers. This will result in fewer abandoned carts and increased conversions.
In this post, we will guide you on how to exclude countries from the checkout list or remove the country field entirely, making the checkout process simpler and faster for your customers.
Table of Contents
- 1 Why Exclude or Remove Countries From the WooCommerce Checkout Page?
- 2 How to Remove the Country from the Country Dropdown List in WooCommerce?
- 3 How to Preselect and Disable the Country Field in WooCommerce Checkout?
- 4 How to Remove/Hide Country Field From Checkout in WooCommerce?
- 5 Bonus: Enable Address Field Validation To Get Accurate Addresses and Avoid Failed Deliveries
- 6 FAQs About Removing the Country Field From WooCommerce Checkout
- 7 Remove Country From Checkout And Improve Checkout Experience!
Why Exclude or Remove Countries From the WooCommerce Checkout Page?
By default, when someone tries to check out, they need to provide an address, and when choosing a country, customers must select from a lengthy list of countries.
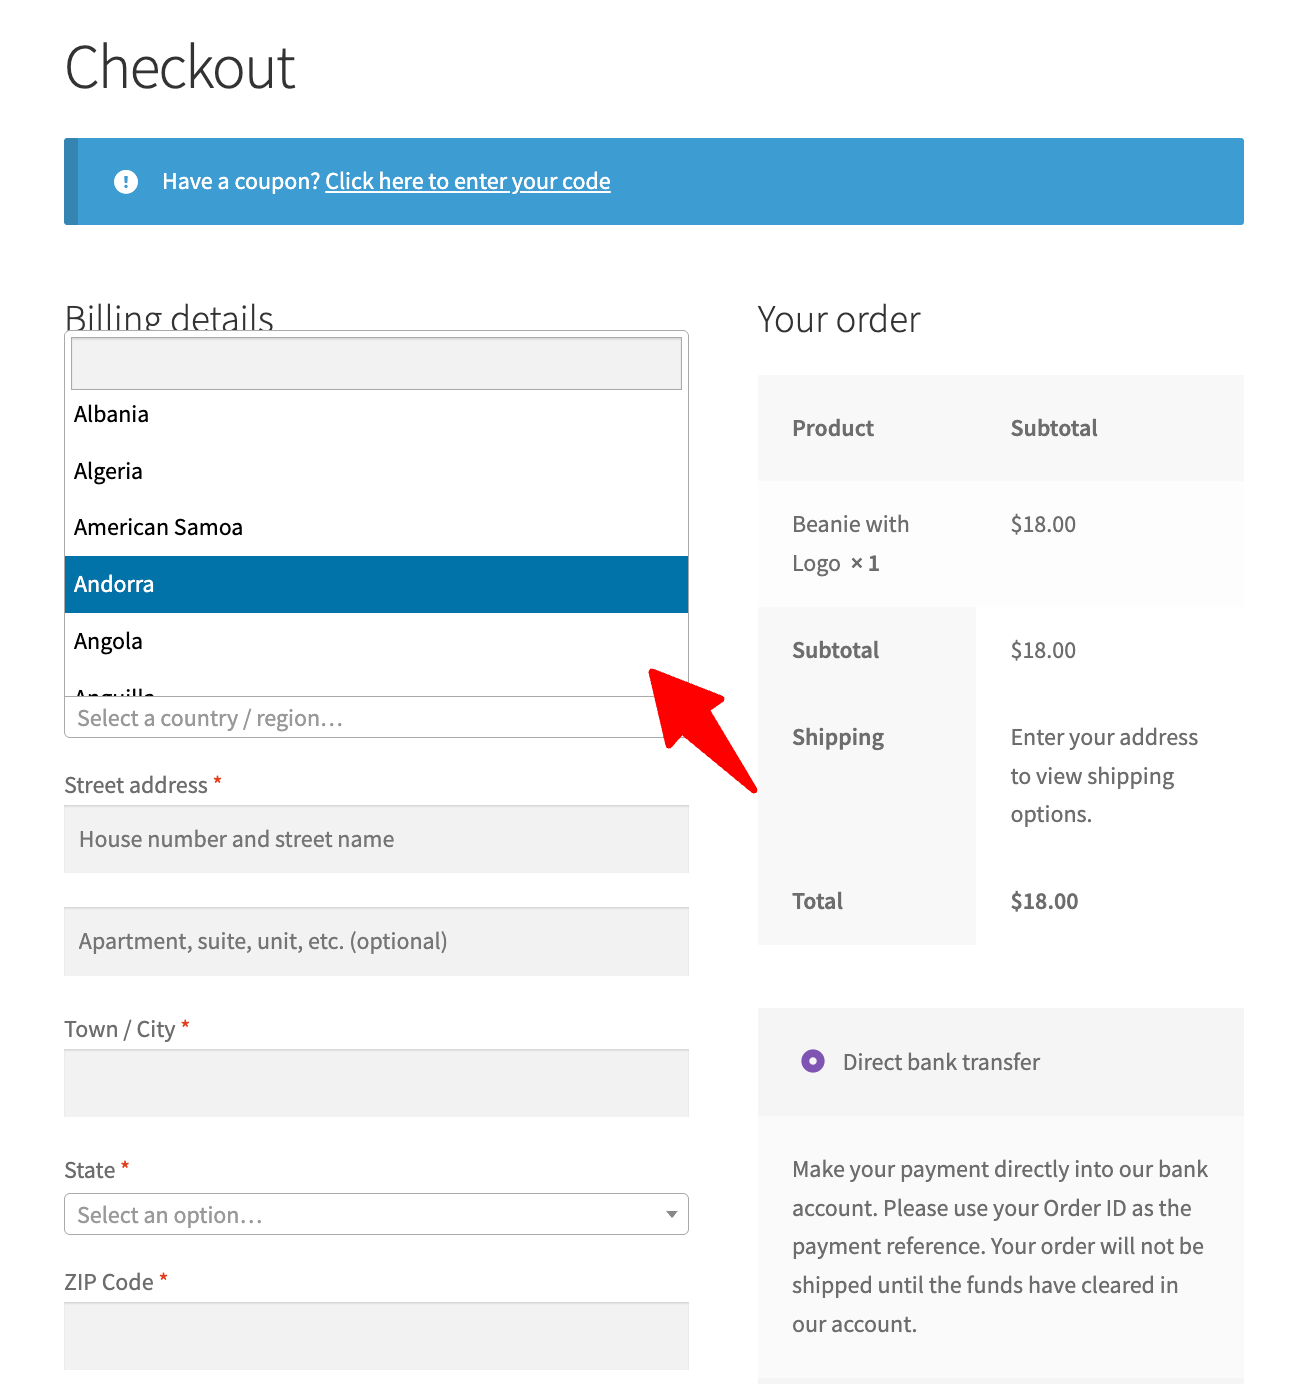
This makes the checkout process more complicated than it needs to be. It can confuse customers, waste their time, and leave them frustrated. This often leads to cart abandonment and lost sales.
To solve this issue, you can do two things:
- Remove the country from the dropdown list
- Remove the country field completely from checkout
Here are more details on when to choose each option and how it helps.
When and Why Remove Countries from the Country Dropdown?
If your store only serves specific regions or countries, displaying an entire list can confuse customers and slow down the checkout process. By removing irrelevant countries from the dropdown, you eliminate unnecessary choices, making it easier for customers to select their country.
For example, if you only ship to the United States and Canada, including countries like Japan or Germany, only adds friction, potentially leading to cart abandonment. A simplified checkout results in faster conversions and a better customer experience.
When and Why Remove the Country Field from Checkout?
If your store only sells to one country, asking customers to select it adds friction. Removing the option to select the country at the checkout process reduces confusion and helps prevent unnecessary cart abandonment.
When you set a single country, you can set it as the default, so users don’t have to select any country.
Now let’s check how you can remove the country from checkout.
How to Remove the Country from the Country Dropdown List in WooCommerce?
Step 1: Navigate to WooCommerce general options
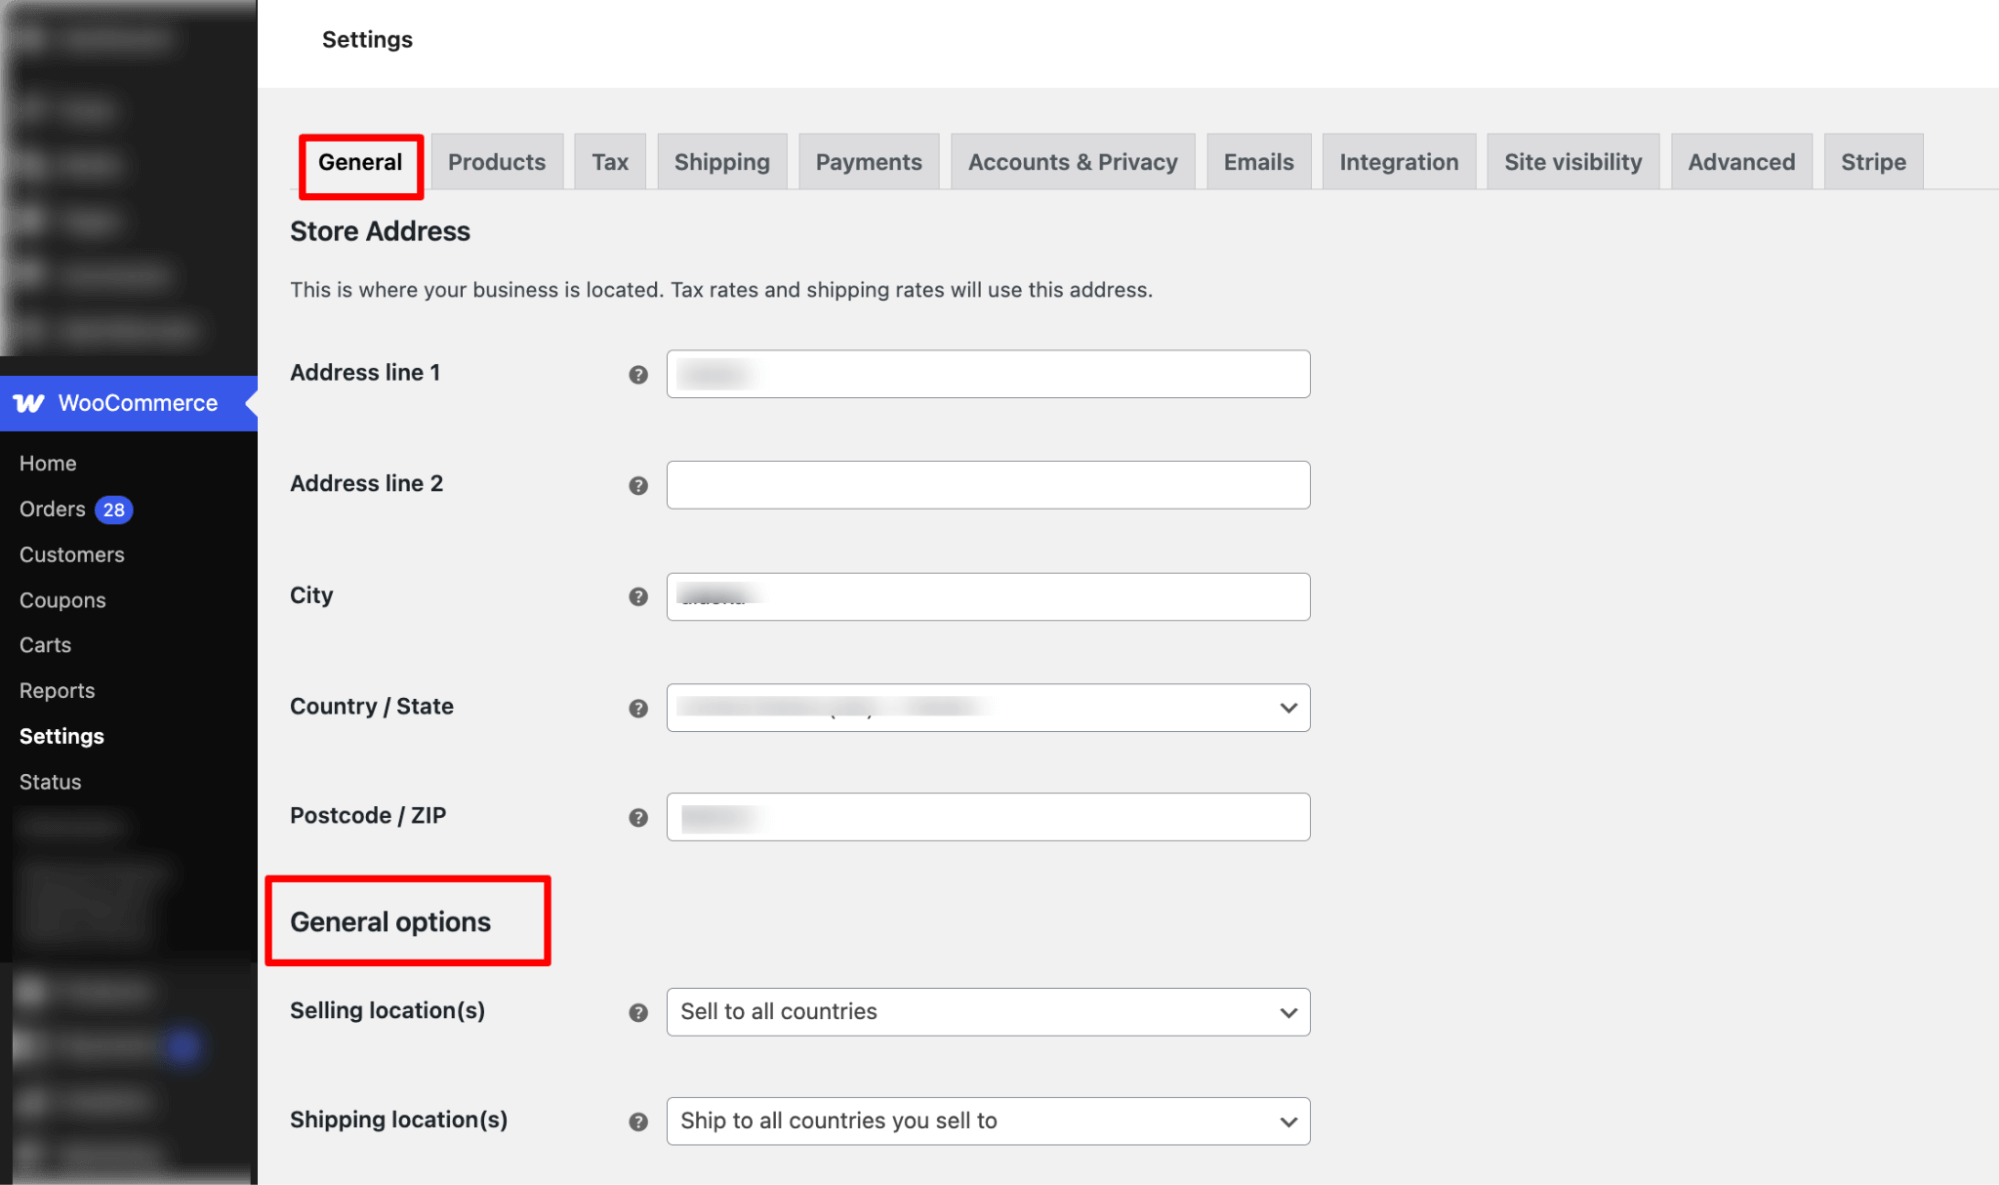
For this, you need to navigate to WooCommerce ⇒ Settings ⇒ General and then scroll down to the General options section.
Step 2: Set the selling location to limited countries
Now you need to set the selling location to specific countries, and then set those countries. This way, on the dropdown, only the countries you sell to will show up.
To do this, configure these settings:
- Selling location(s): Select the option “Sell to specific countries”.
- Sell to specific countries: Search and add the countries you sell to.
- Shipping location(s): Select this option as “Ship to countries you sell to”.
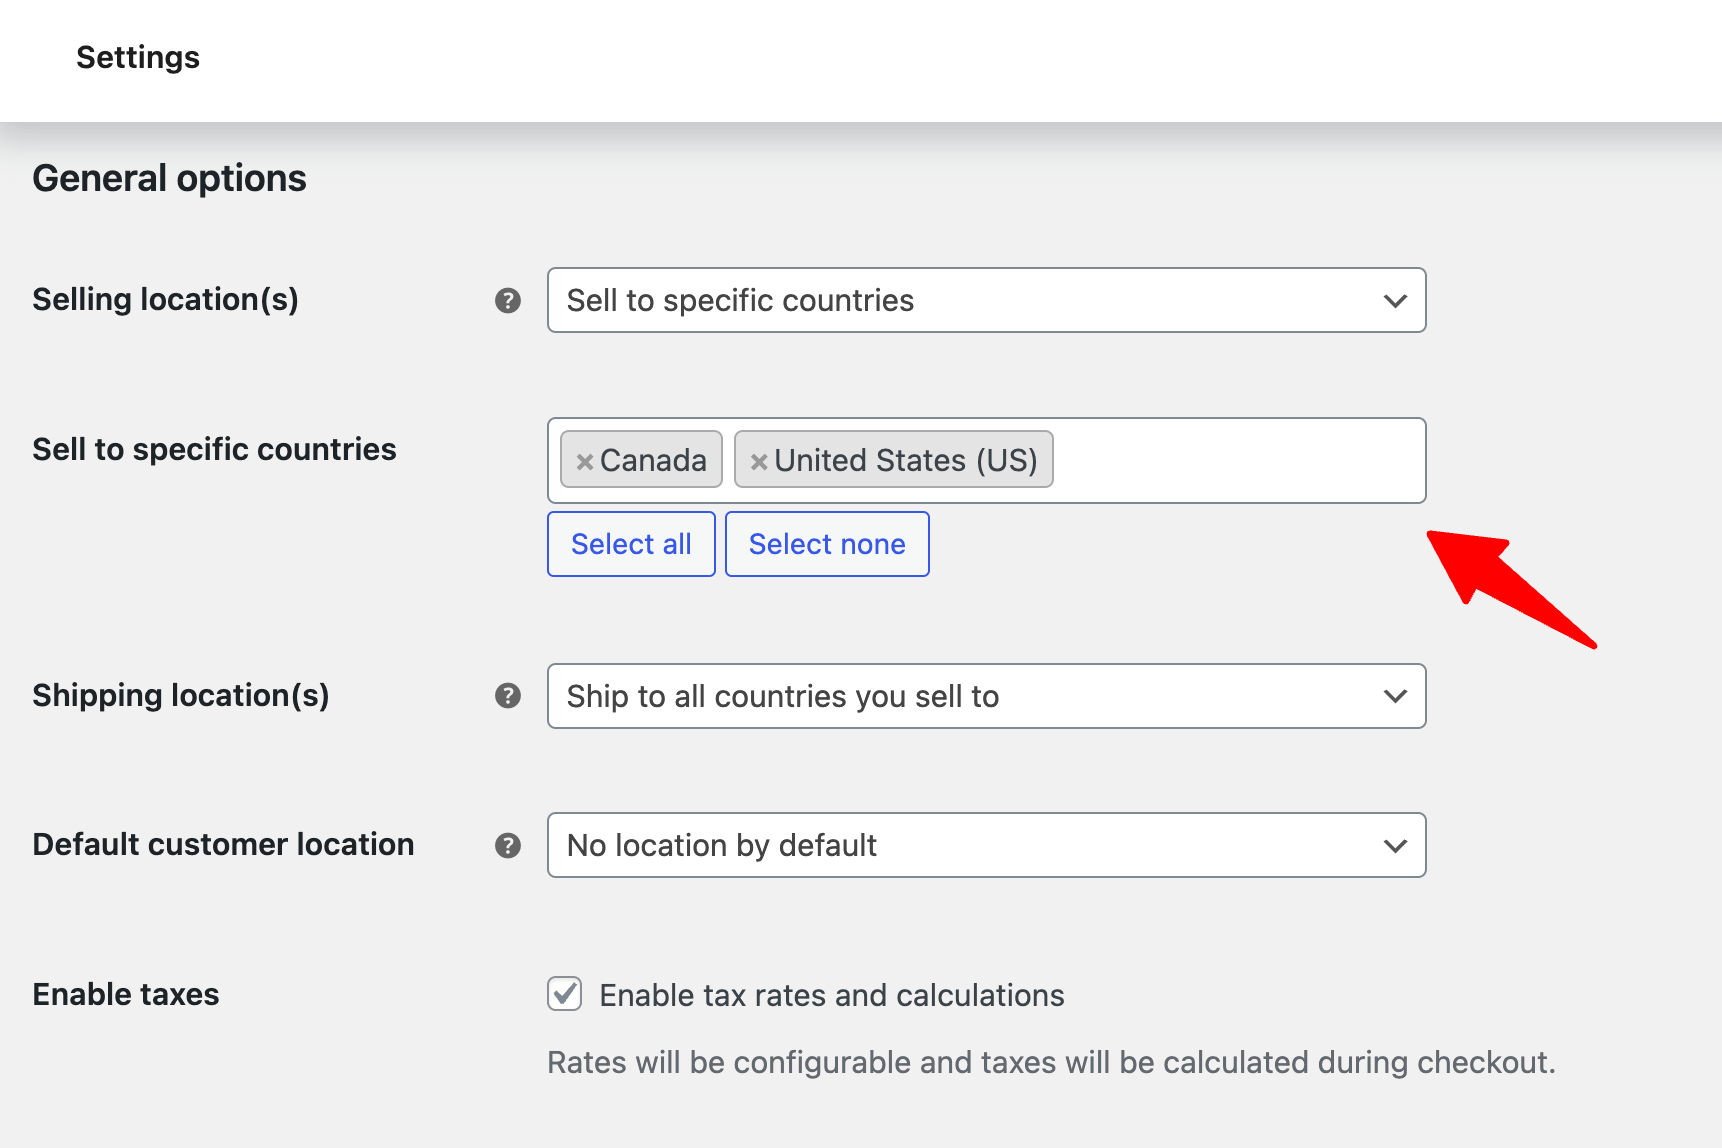
Make sure to scroll down and hit save changes.
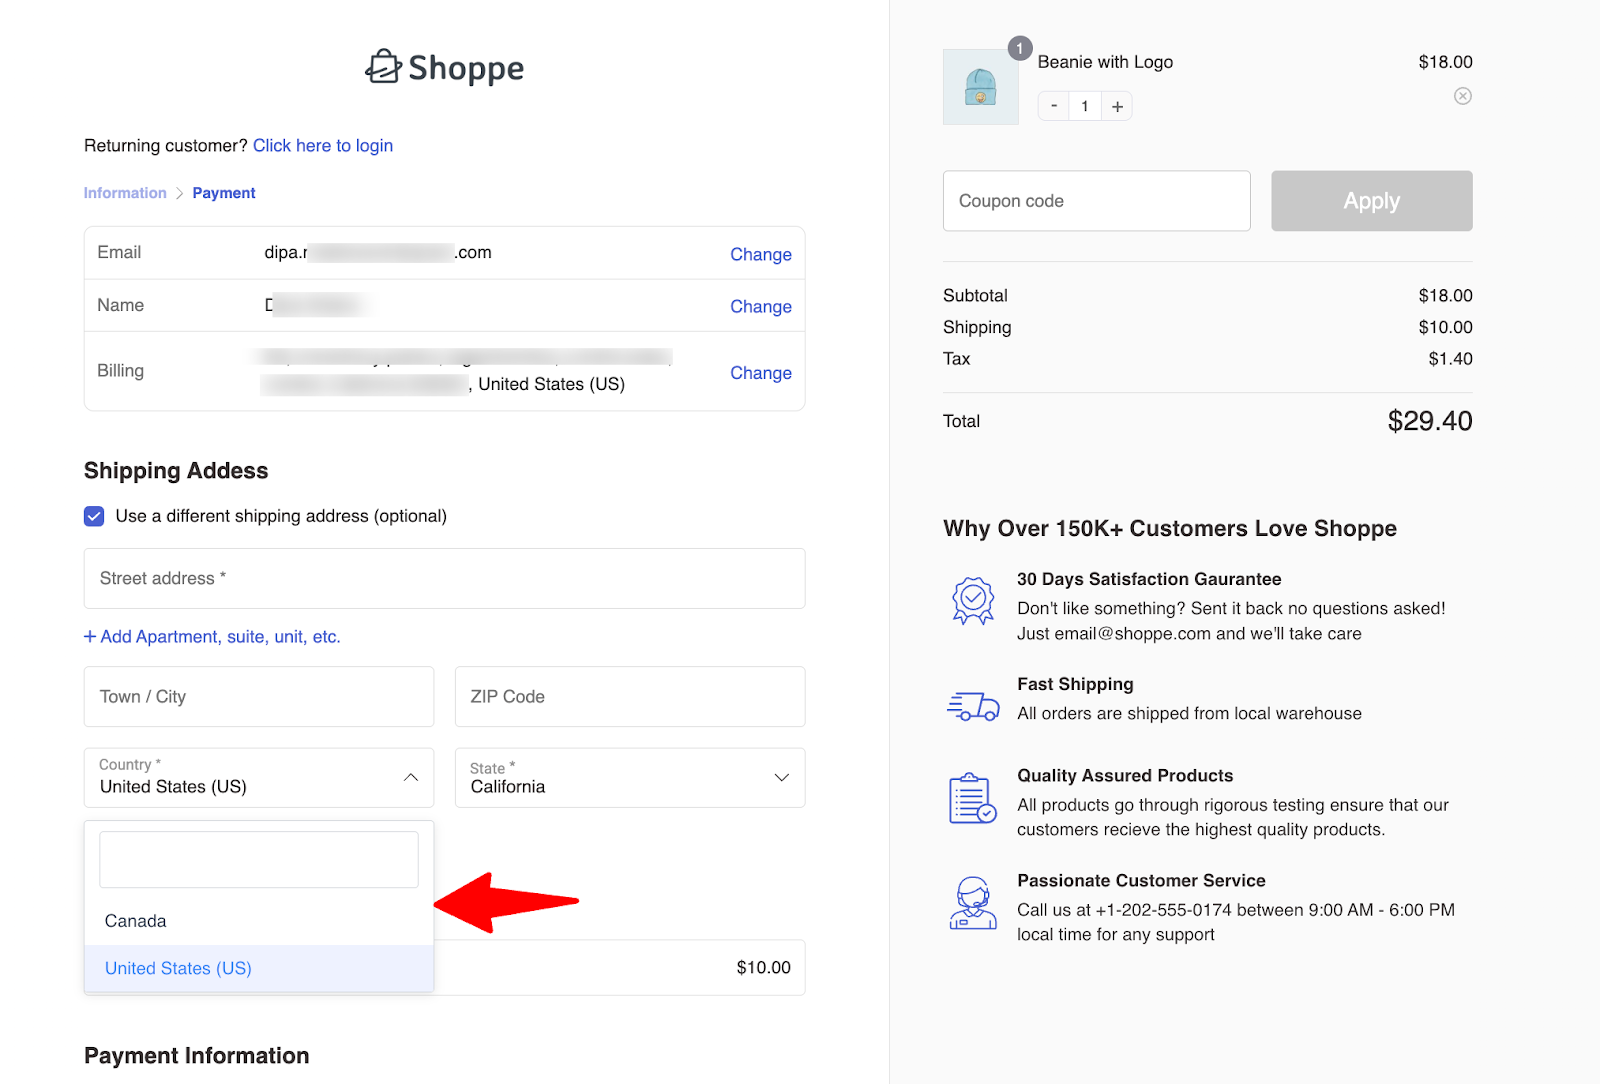
Step 3: Test the country list at checkout
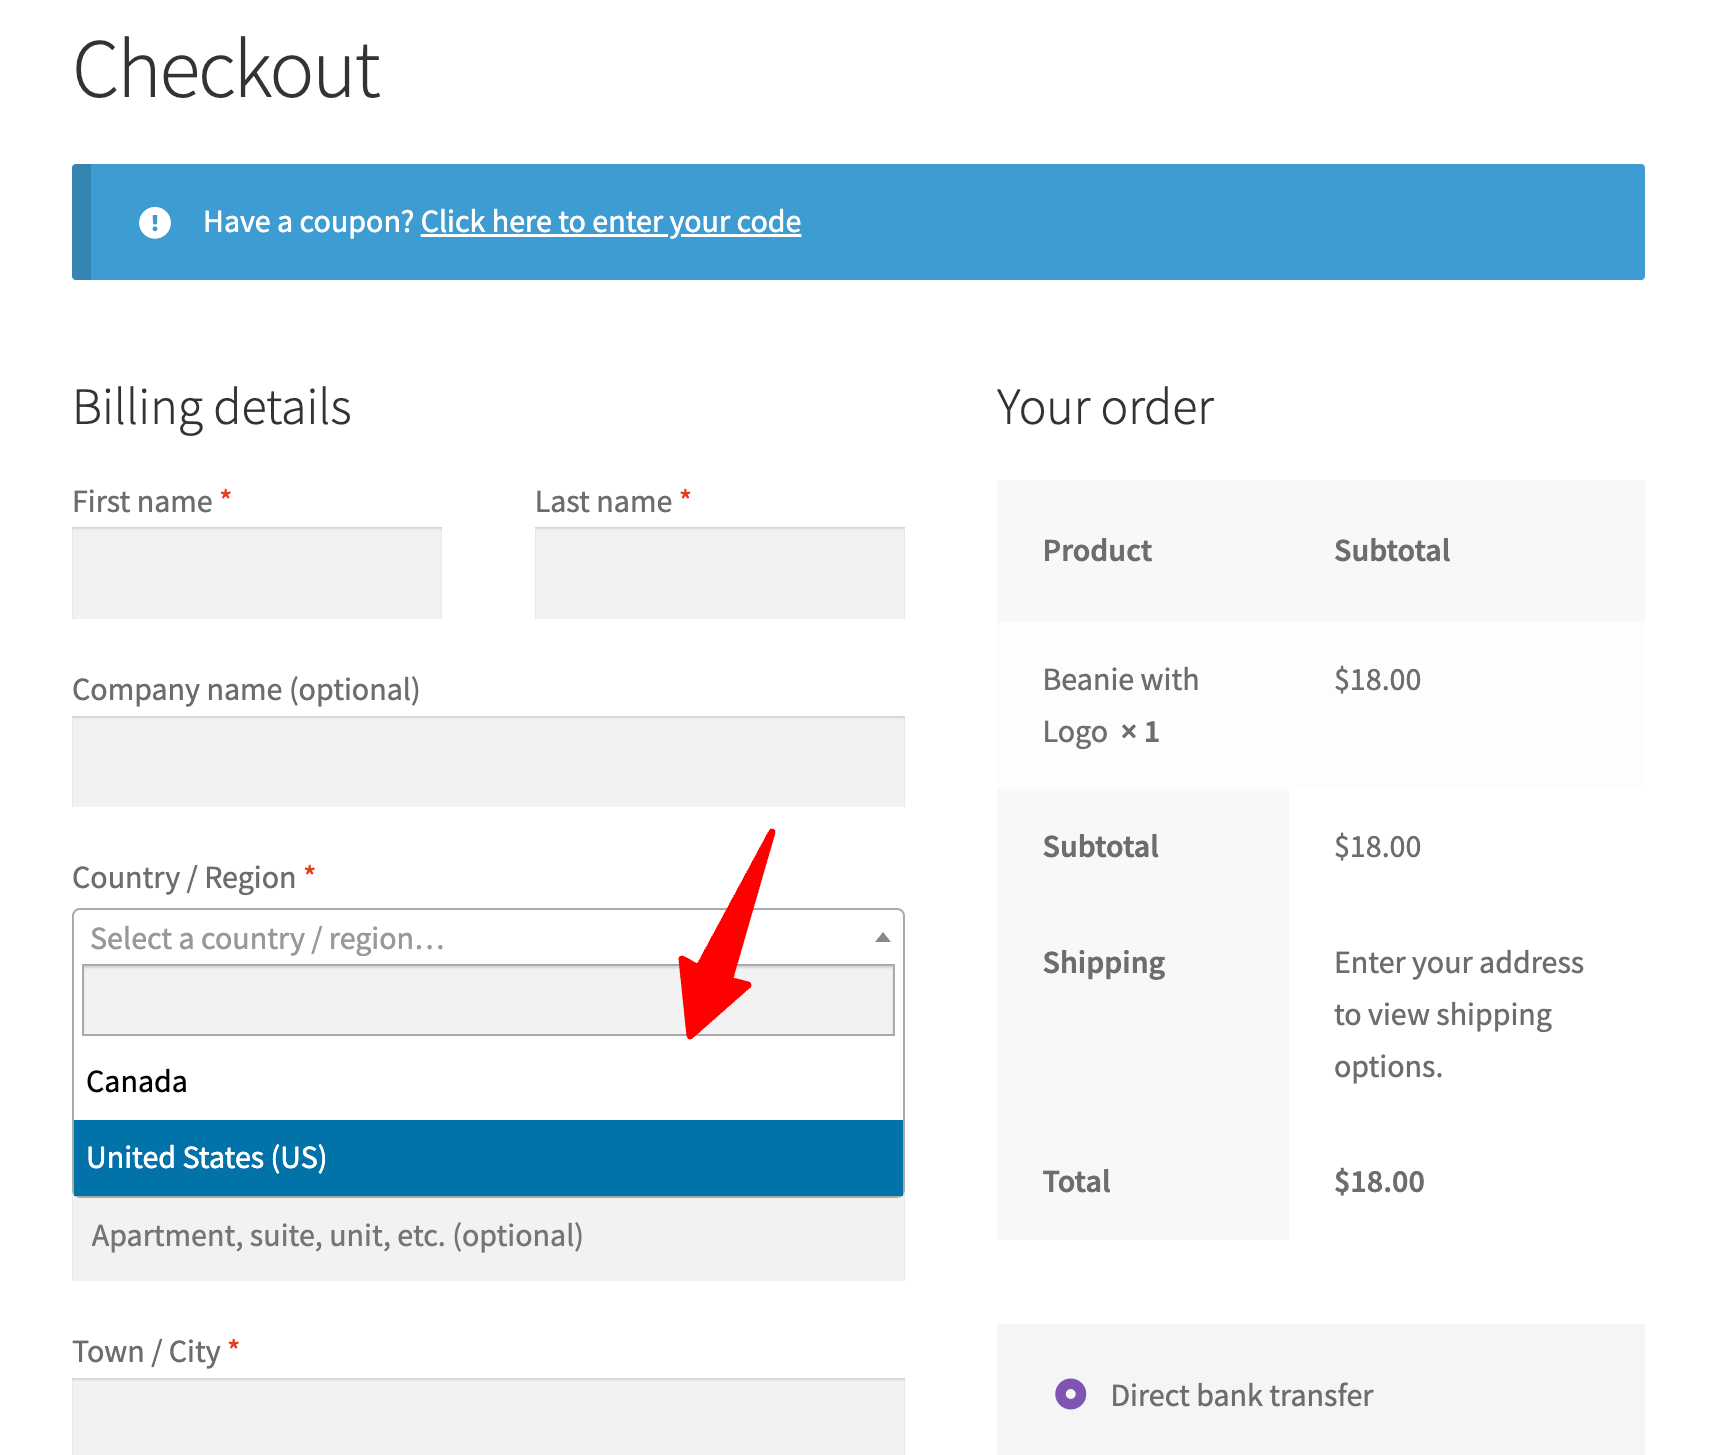
Now, if you try to place a test order, in the country section, you will find only the countries you added to your sell to specific countries list. Others will be excluded.
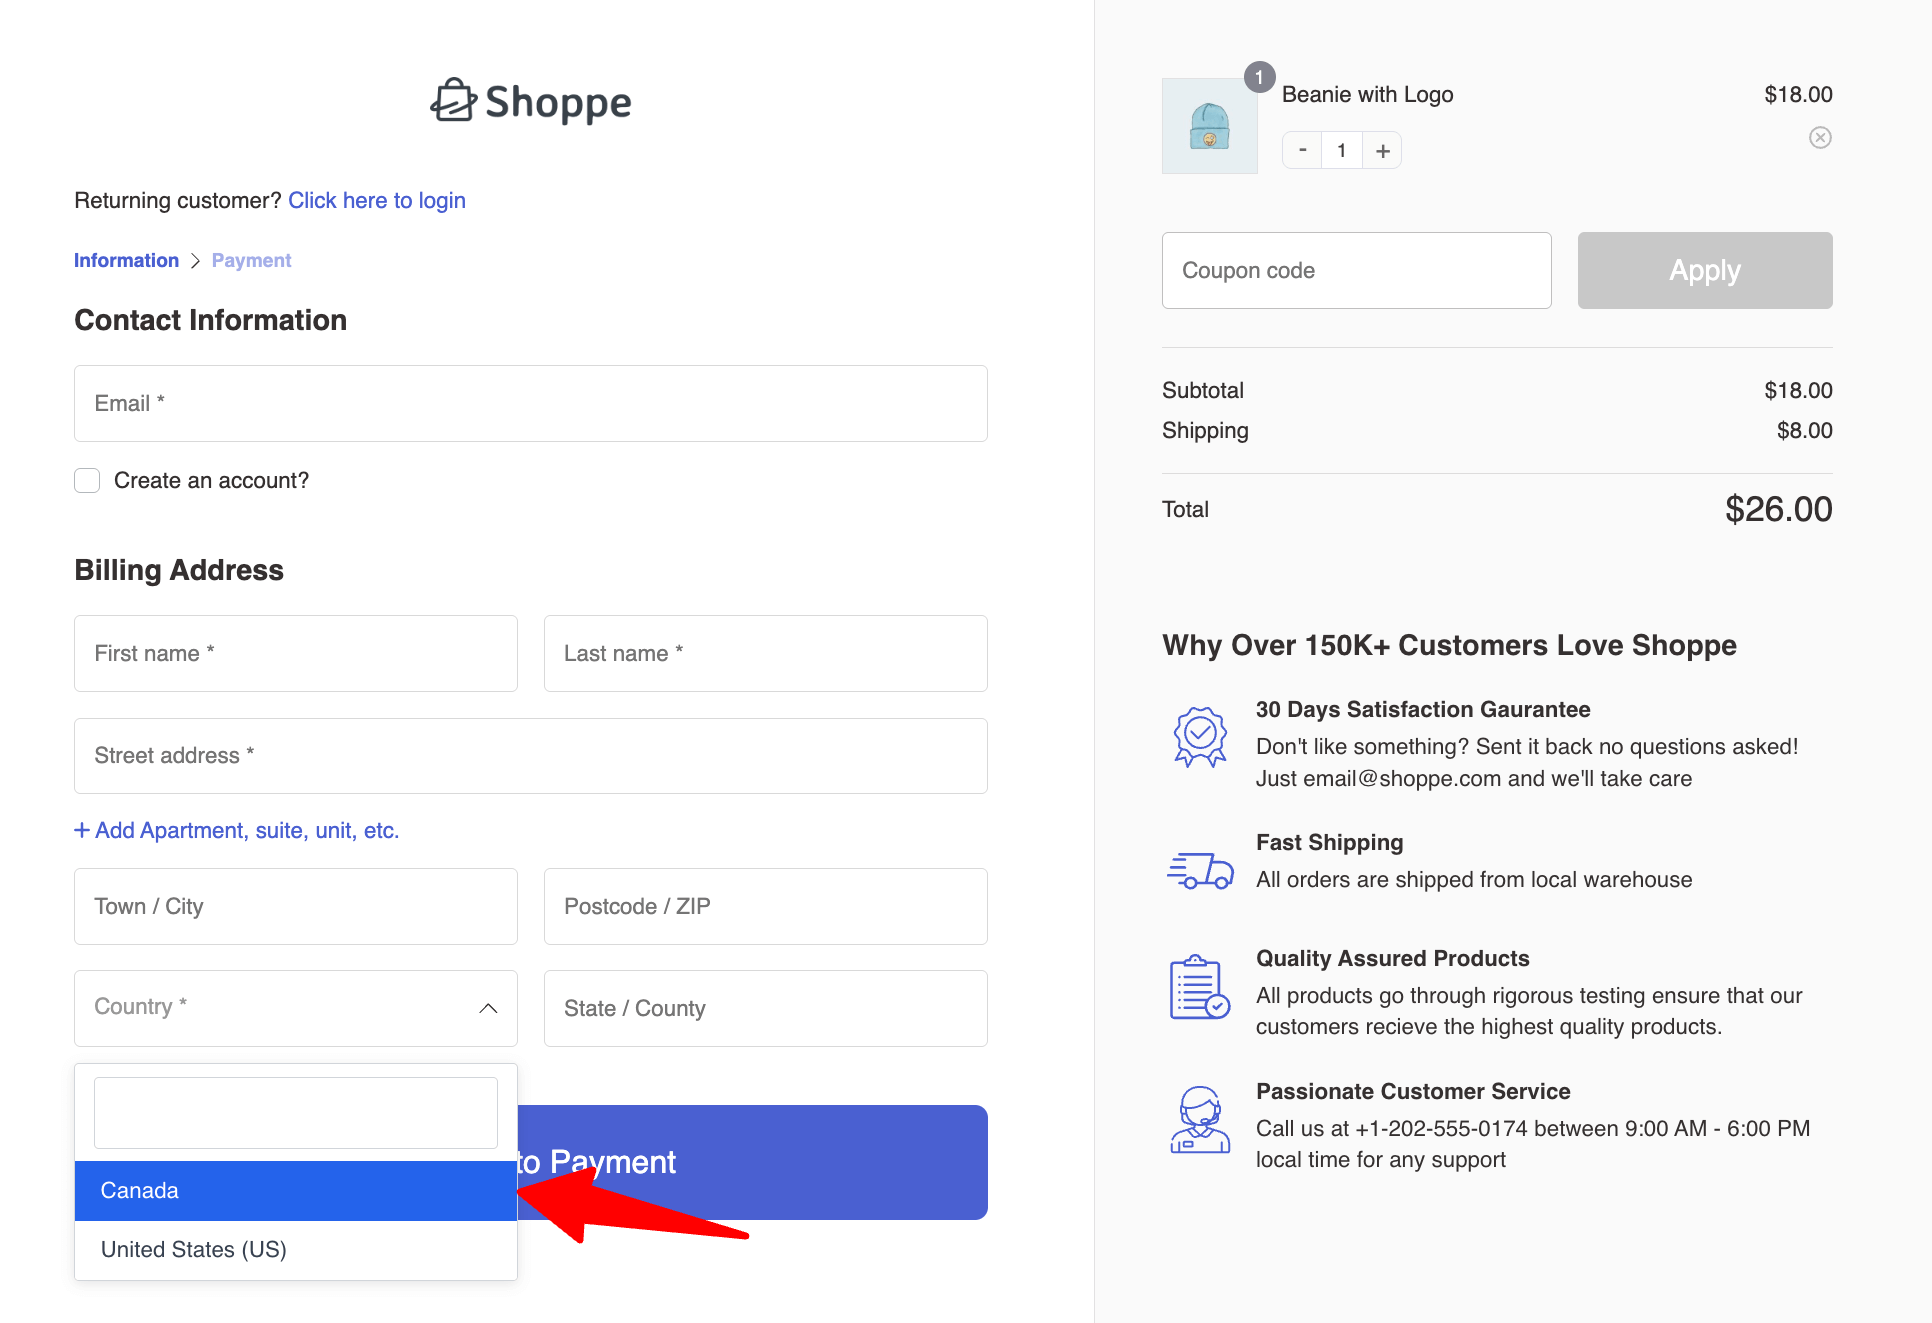
If you offer a different shipping address option, this setting will apply there as well.
How to Preselect and Disable the Country Field in WooCommerce Checkout?
If you want the country to be populated by a specific country and don’t want customers to edit this, you can do that as well.
This option works great when you sell to only one country.
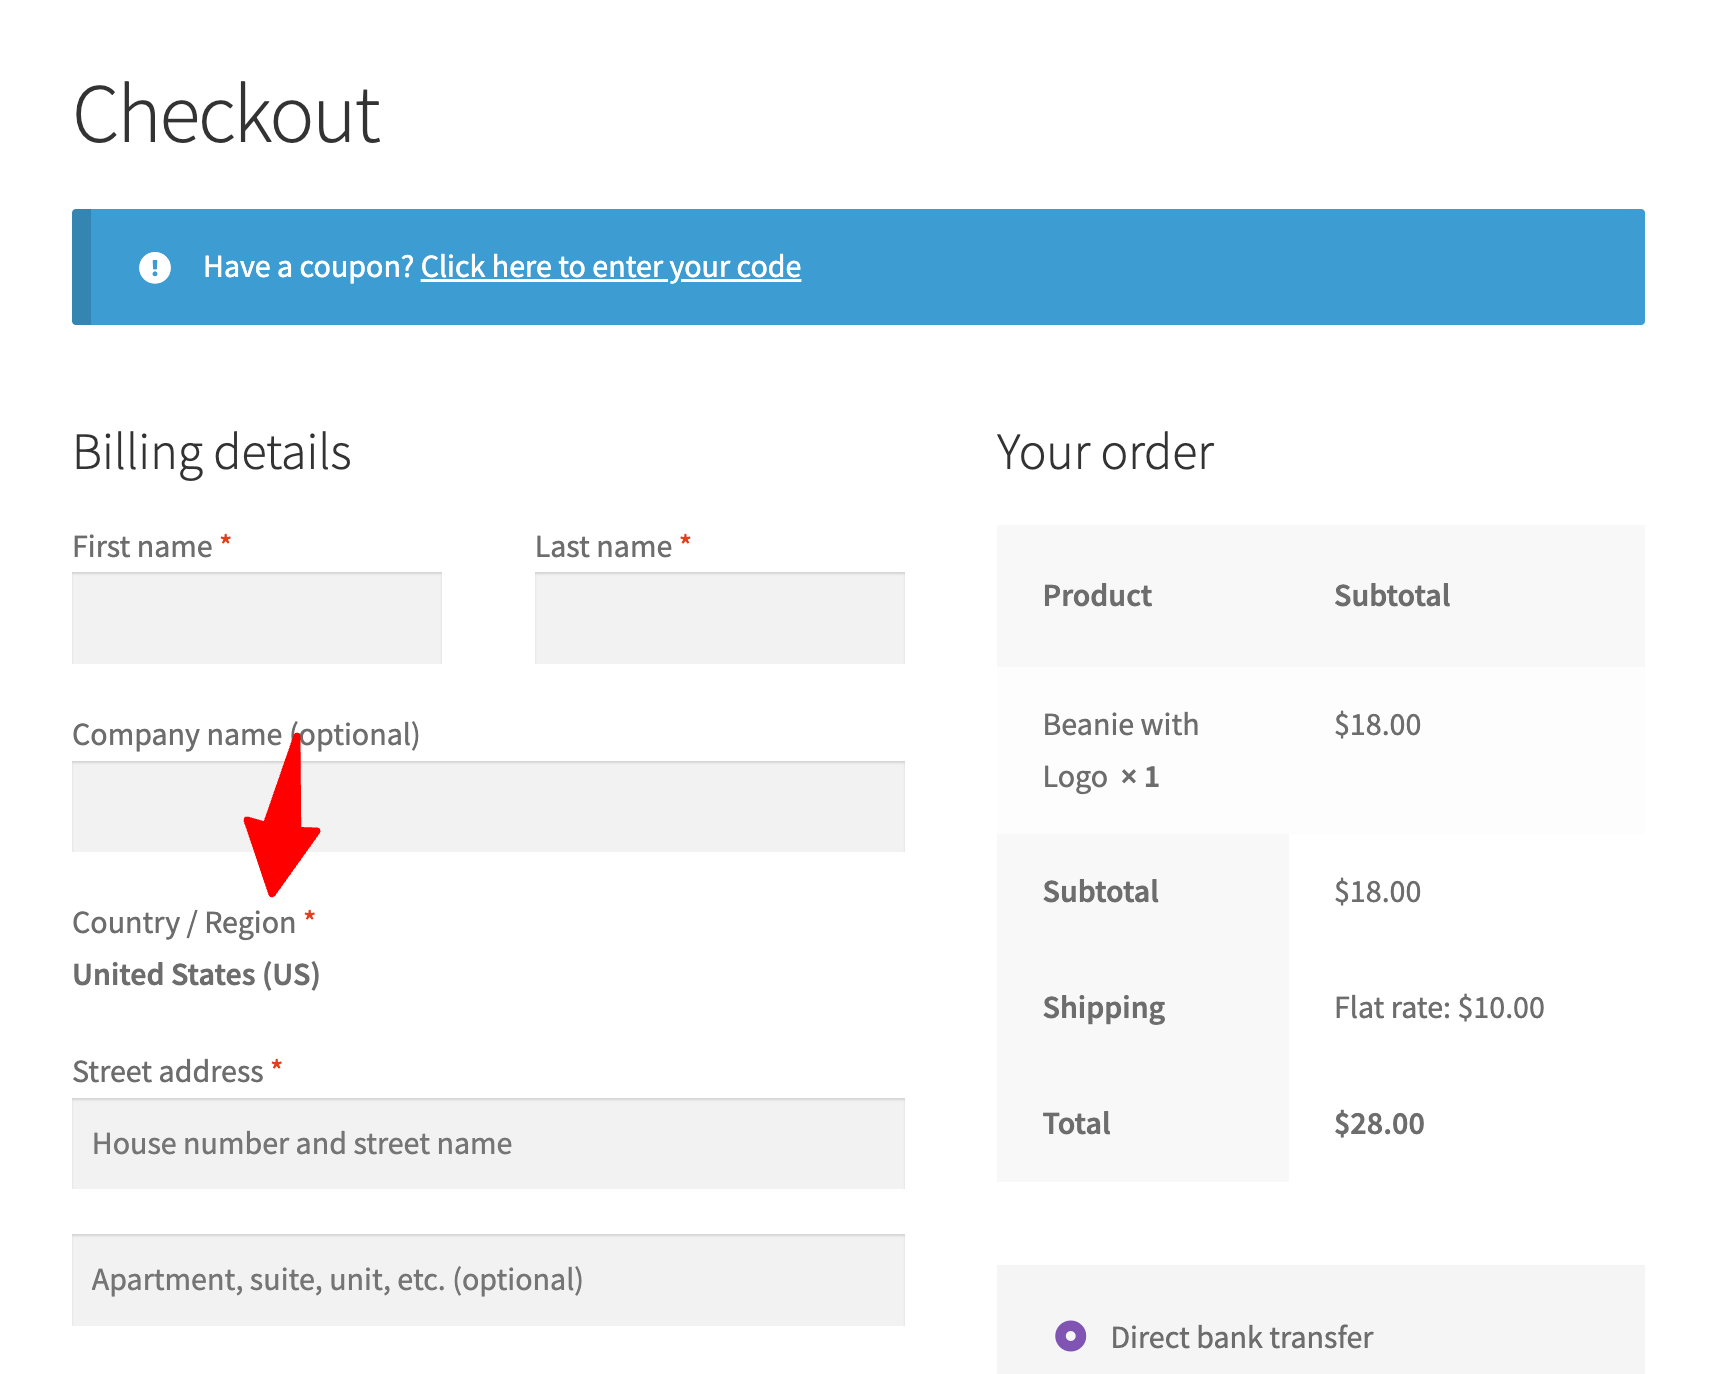
For this, under general options, for the “Sell to specific countries” select that country and save the changes.
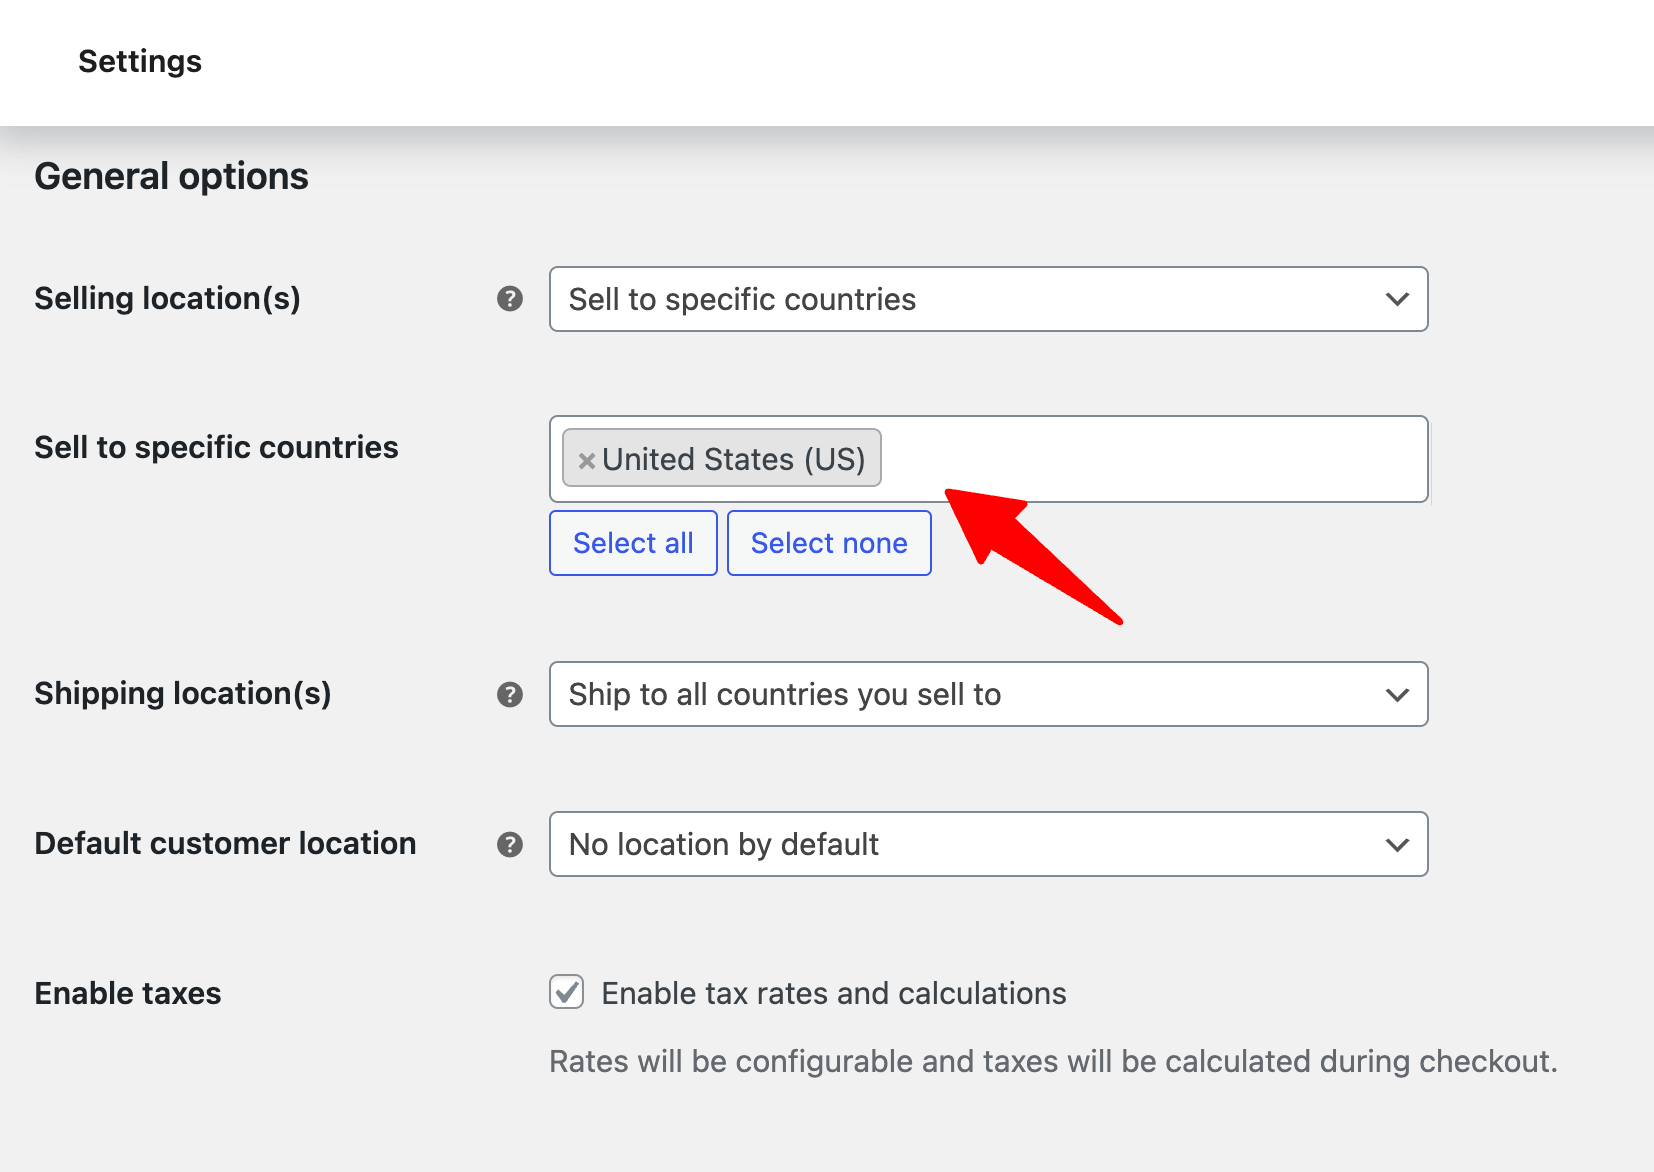
Now the checkout page will have the set country selected, and users won’t be able to edit or change that.

How to Remove/Hide Country Field From Checkout in WooCommerce?
Now, if you want to remove/hide the country field altogether from the checkout page, you can do that as well.
Unfortunately, WooCommerce doen’t provide any such option to do this.
To hide the country field at checkout, you can use FunnelKit Funnel Builder.
Along with hiding, you can also replace the default checkout with a custom conversion-optimized one.
Simply import the prebuilt template and customize it to your preference. No coding required.
After importing, you can design your checkout page using any of the popular page builders, such as Elementor, Divi, Gutenberg, Oxygen, etc.
Along with checkout, you can also replace your thank-you page with a custom one to ensure a smooth experience for your customers.
So, make sure you have installed and activated the free version of FunnelKit Funnel Builder.
Next, follow these instructions:
Step 1: Create a store checkout
First, you need to build a custom store checkout to replace the default WooCommerce checkout page.
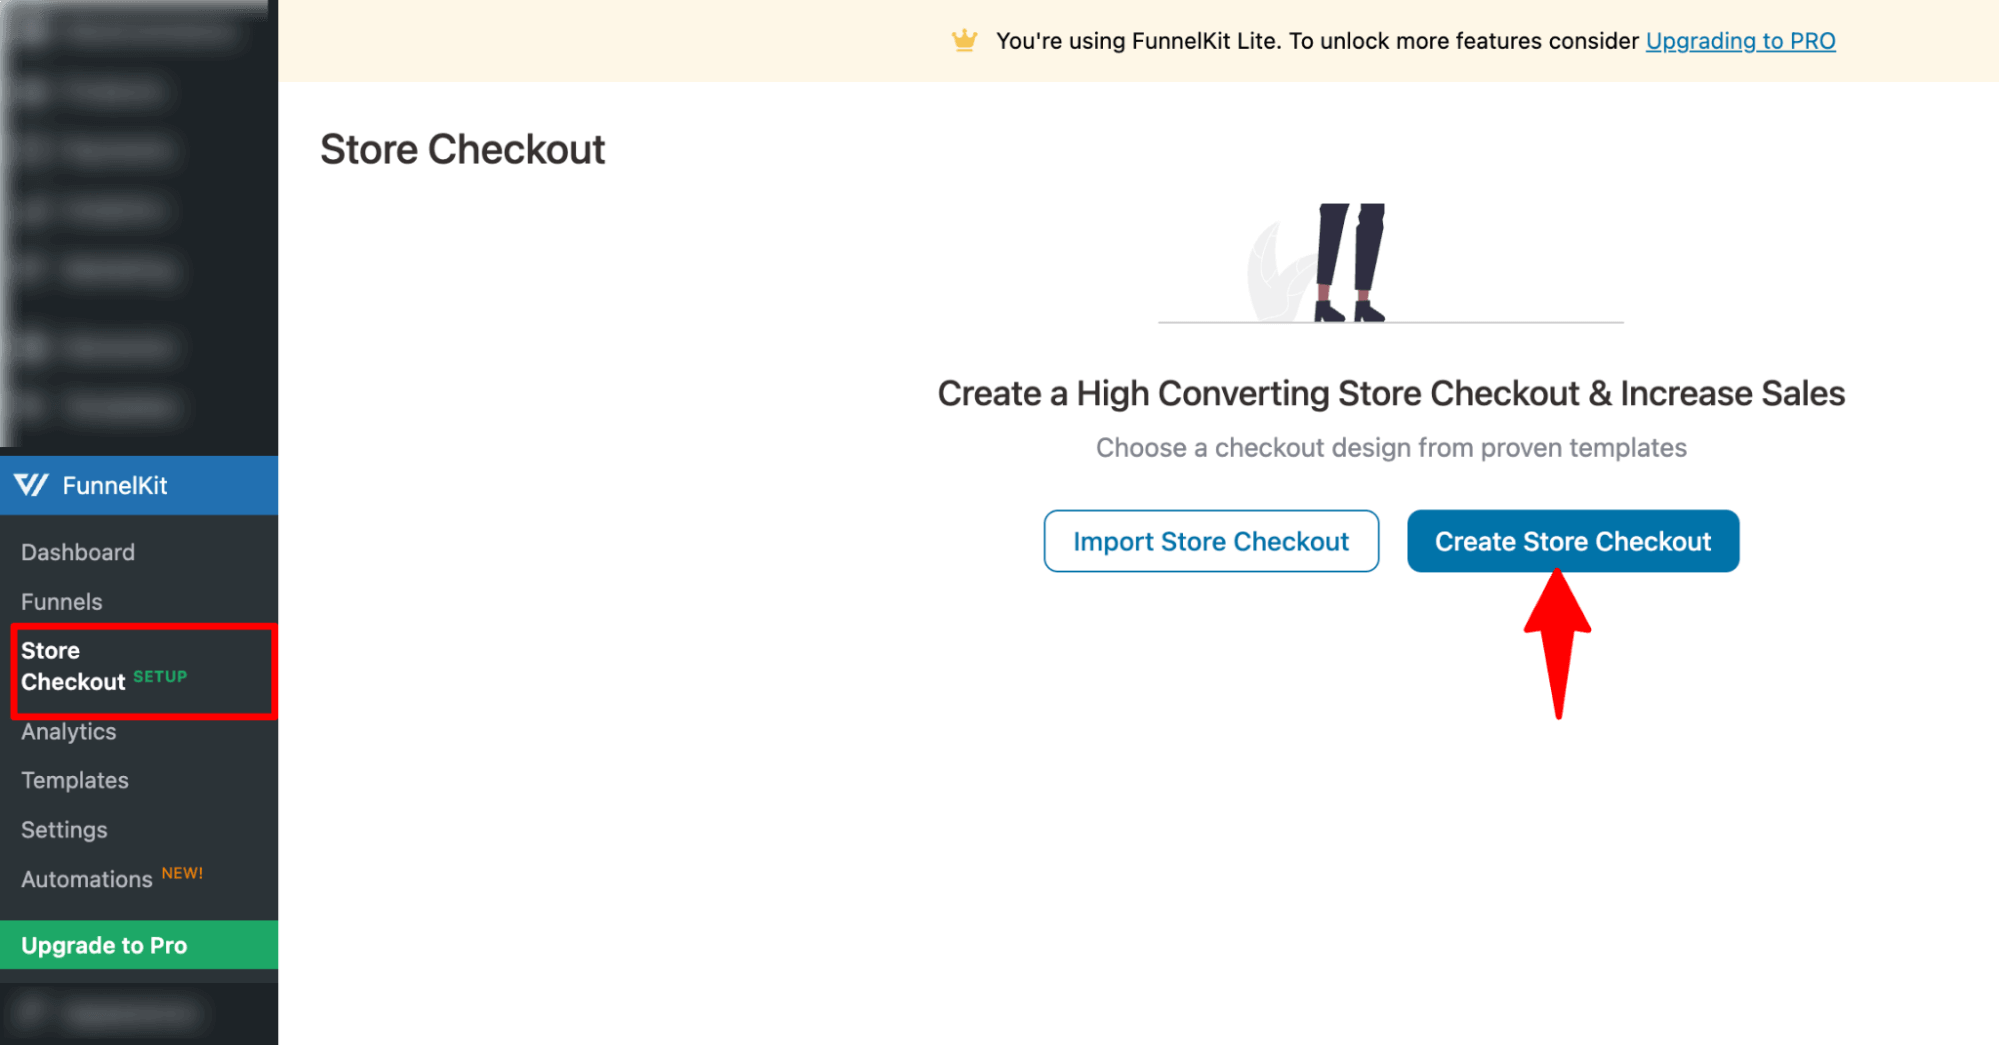
To do this, go to FunnelKit ⇒ Store Checkout and select the ‘Create Store Checkout’ button.
Next, choose your preferred page builder and select a template from FunnelKit’s library of pre-built checkout designs.
First, select your favourite page builder. Next, to preview a template, simply hover over it and click Preview. In this example, we’re using the Elementor page builder with the Optic template.
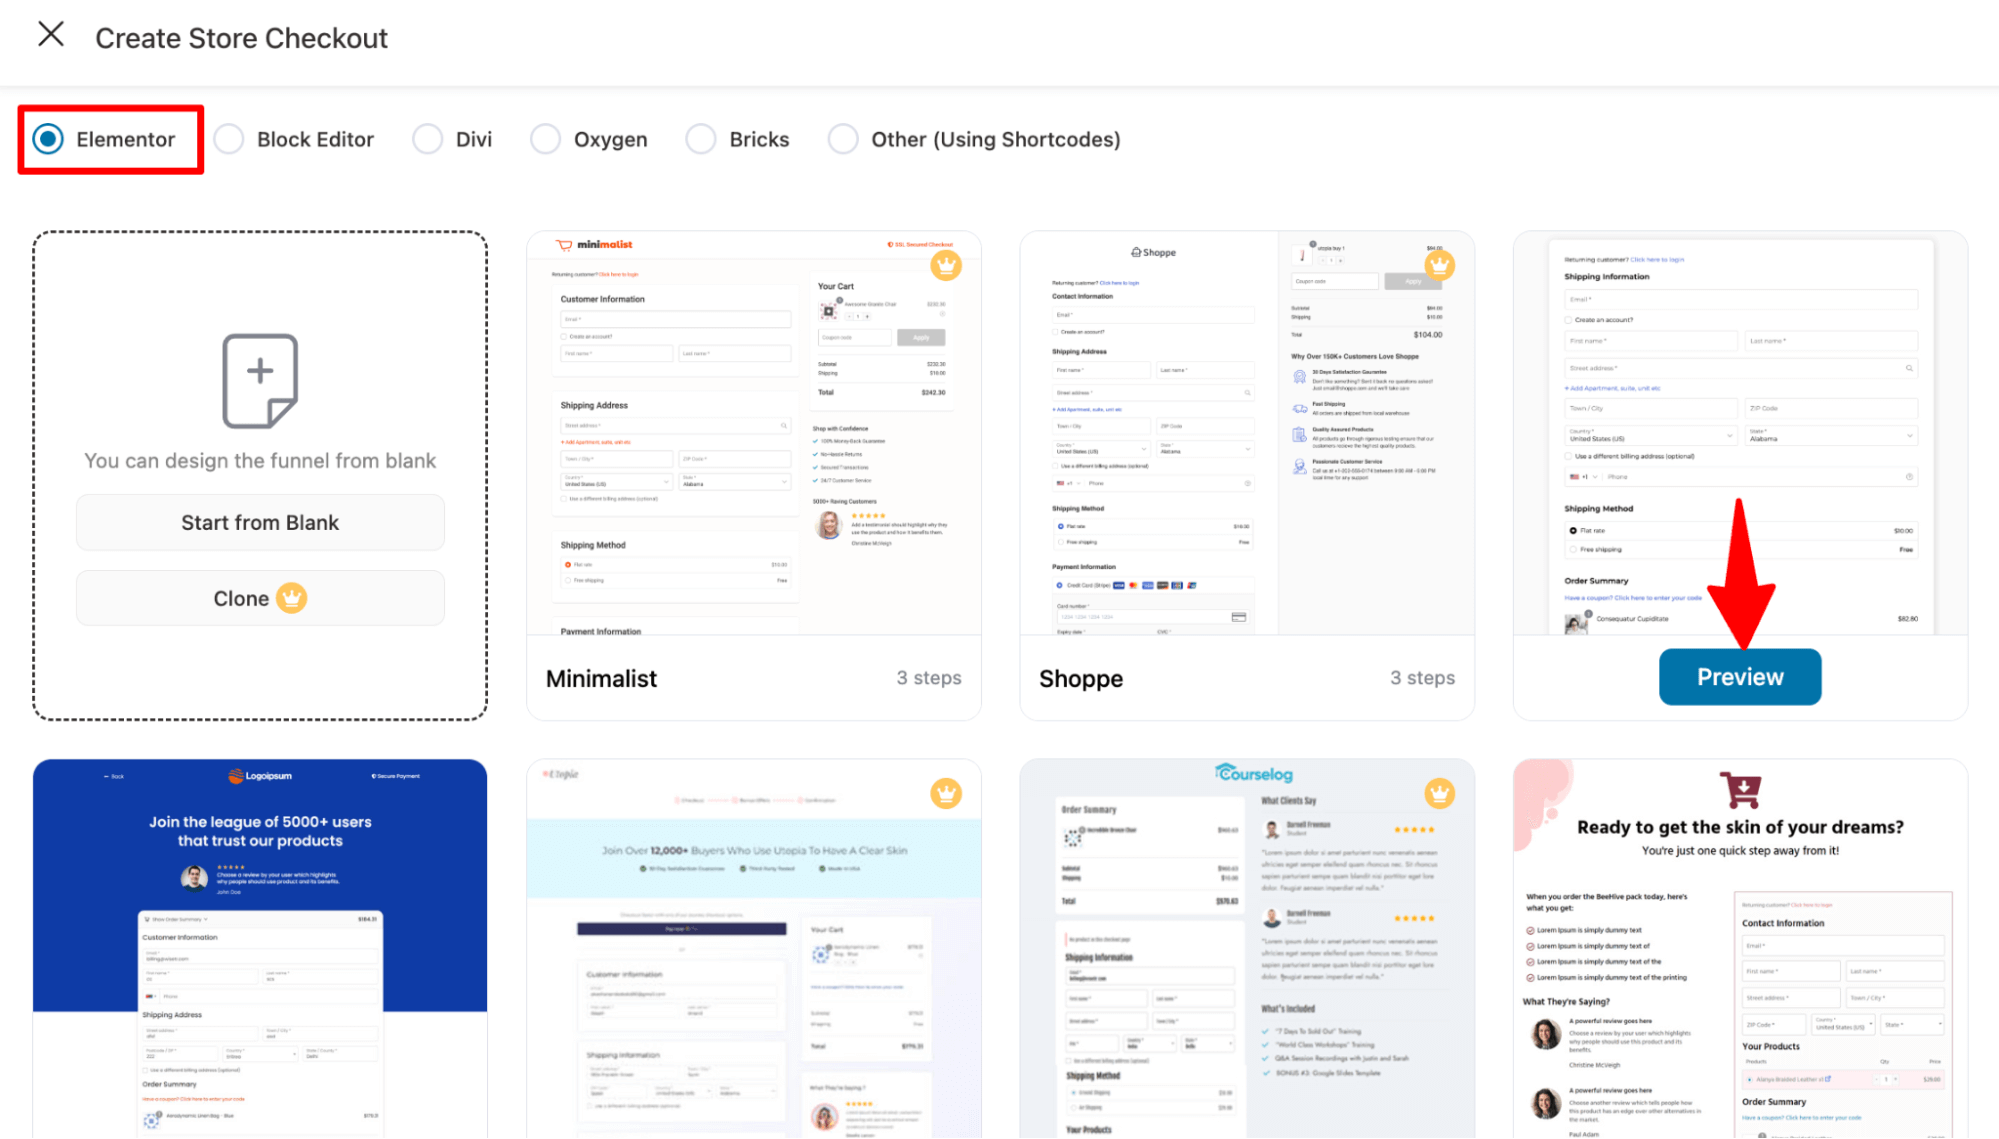
We are going with a single-page checkout.
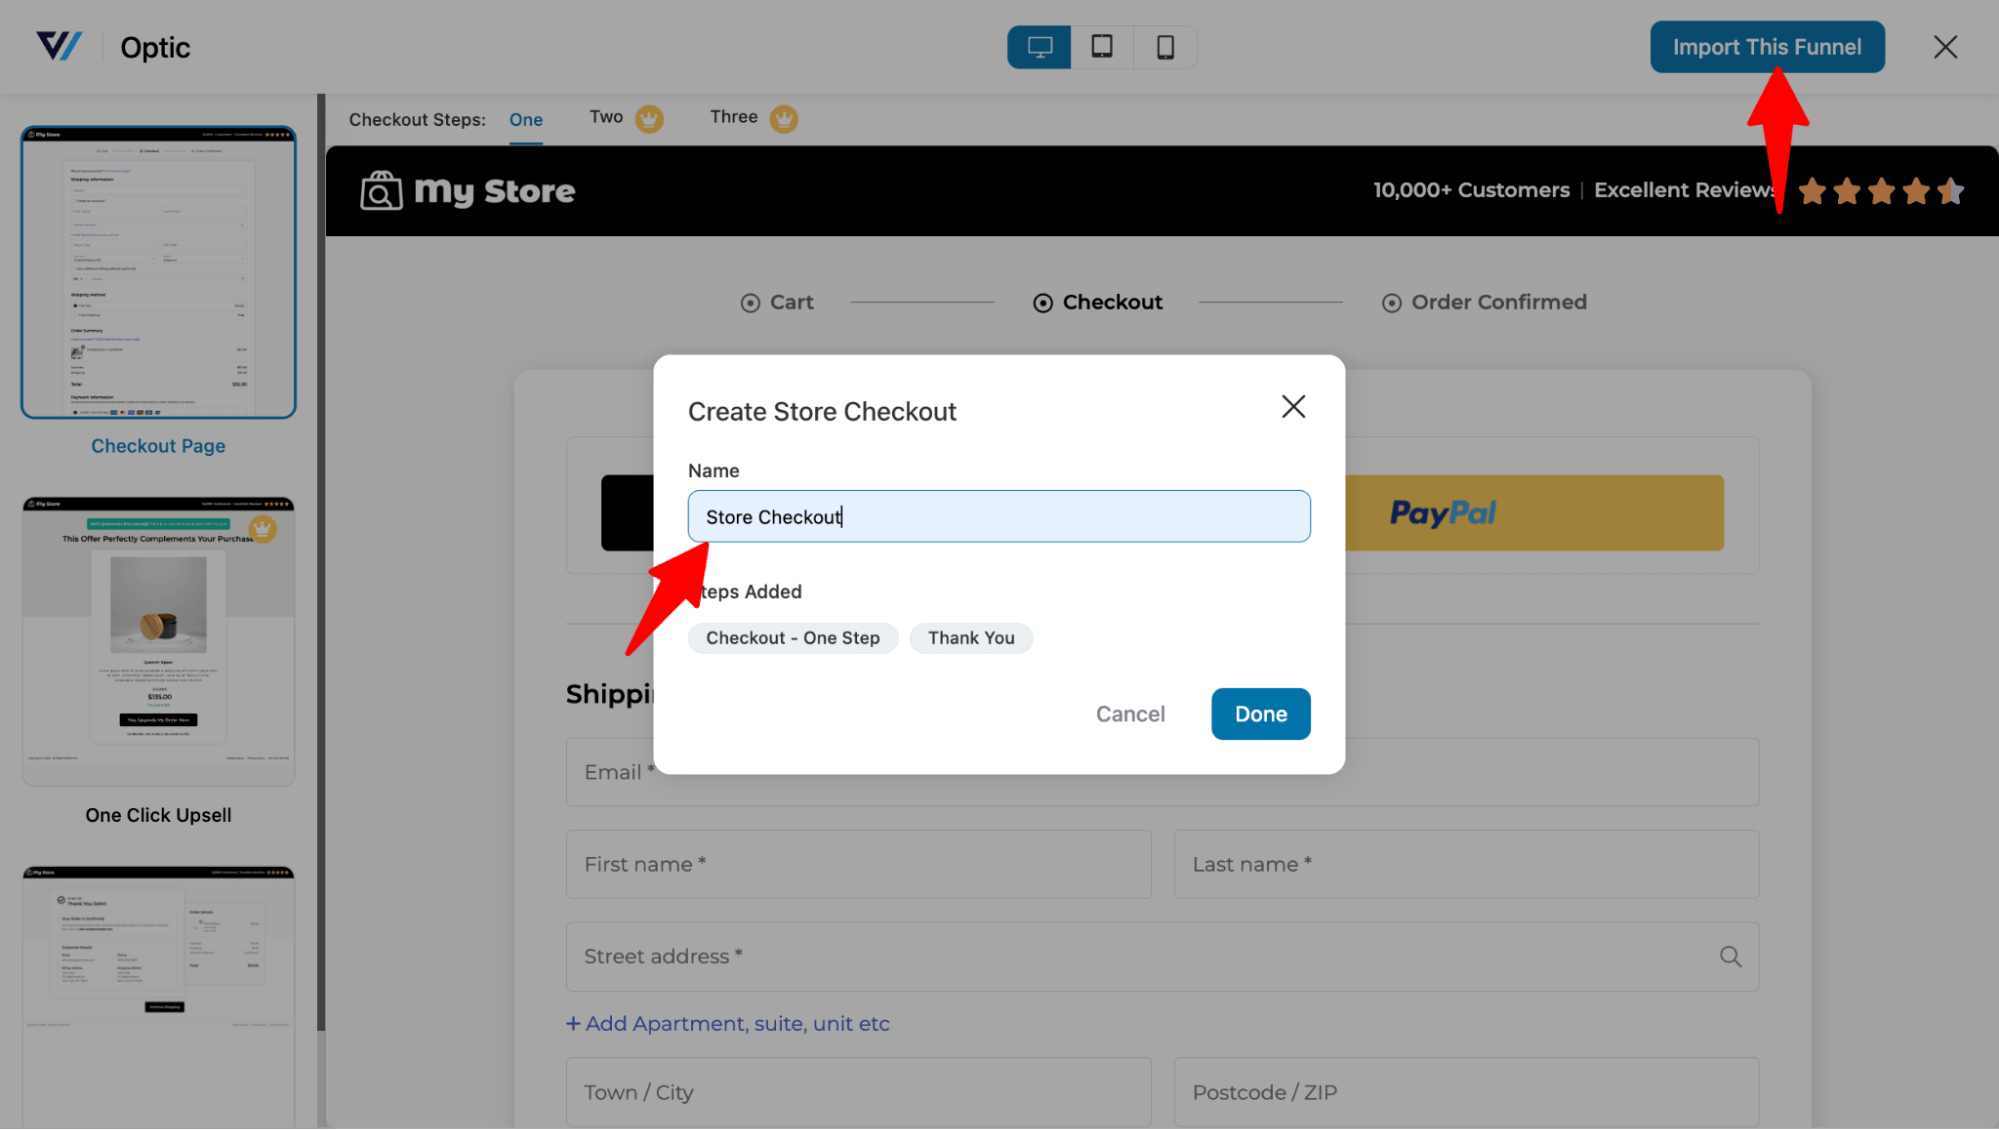
After that, click on “Import This Funnel,” provide a name, and hit the Add button to import your store checkout funnel.
Step 2: Customize the checkout page
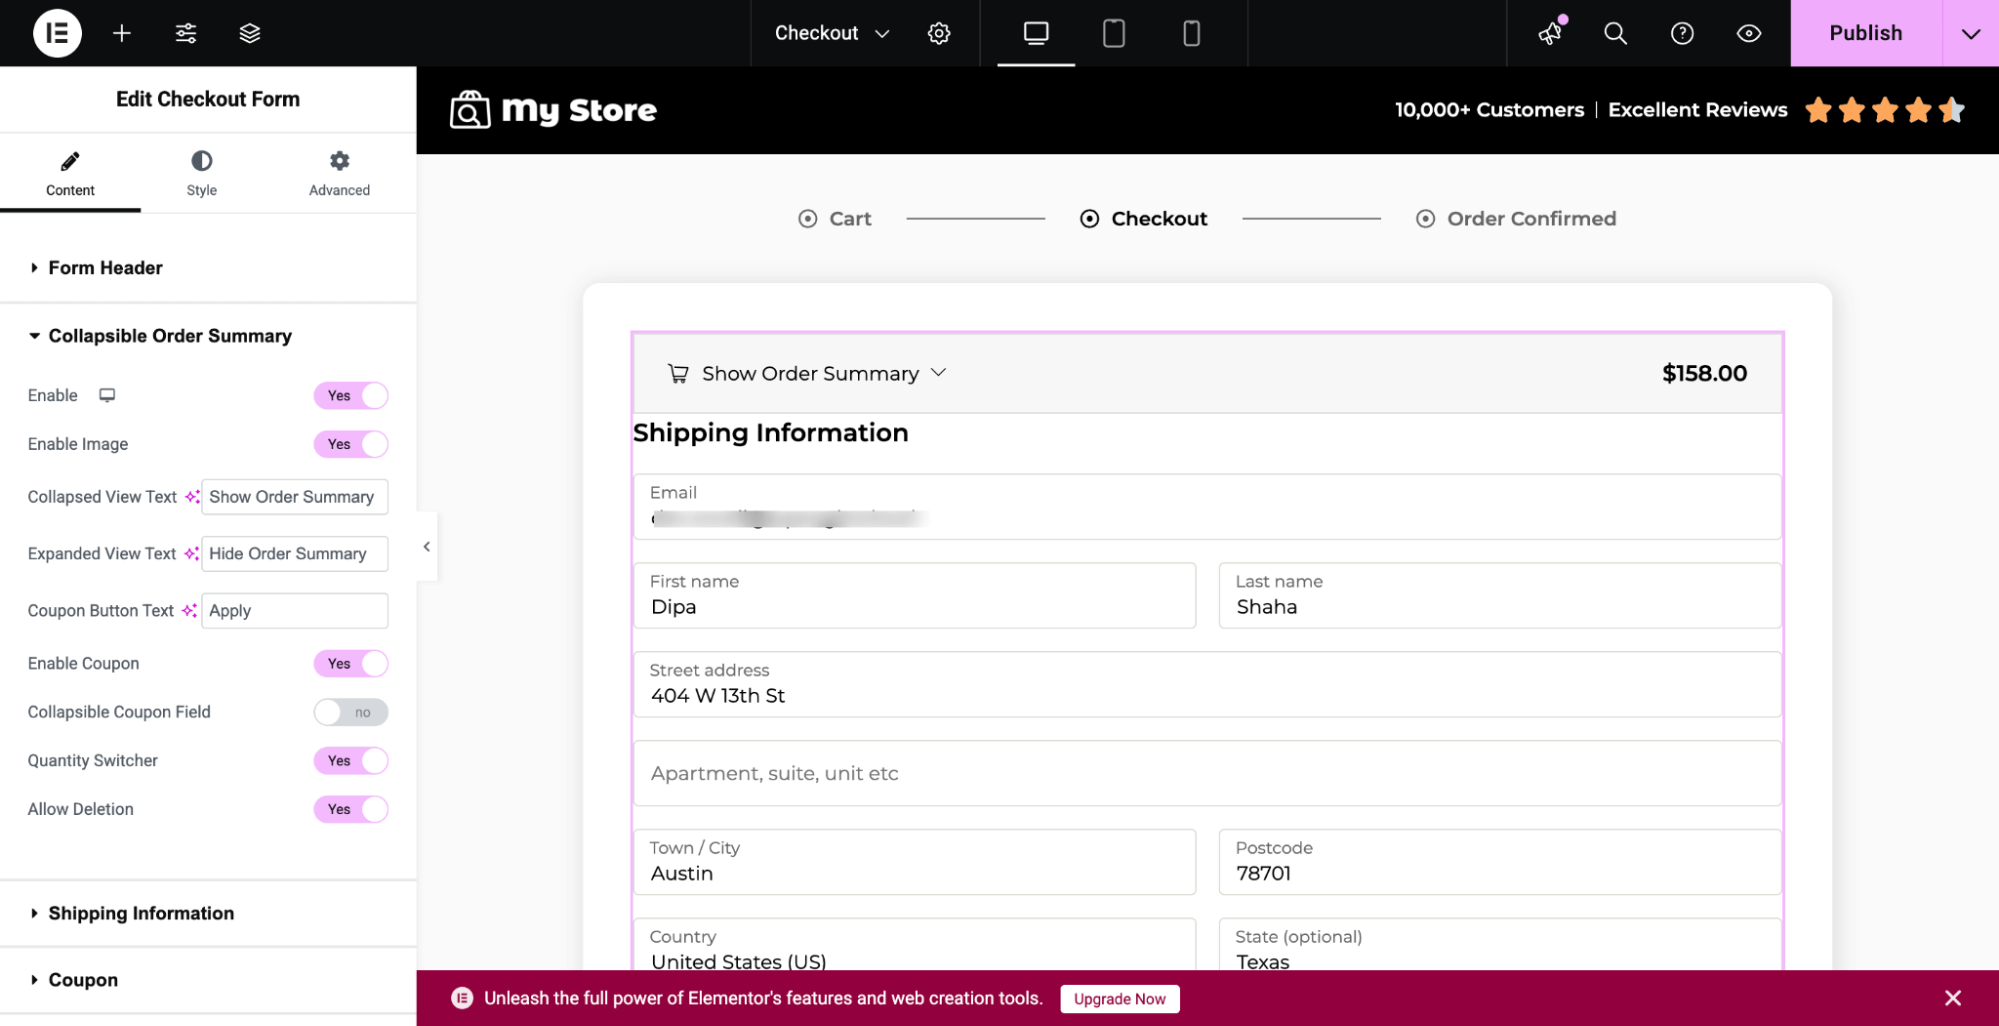
Next, navigate to the checkout page and click the "Edit Template" option to start customizing it.
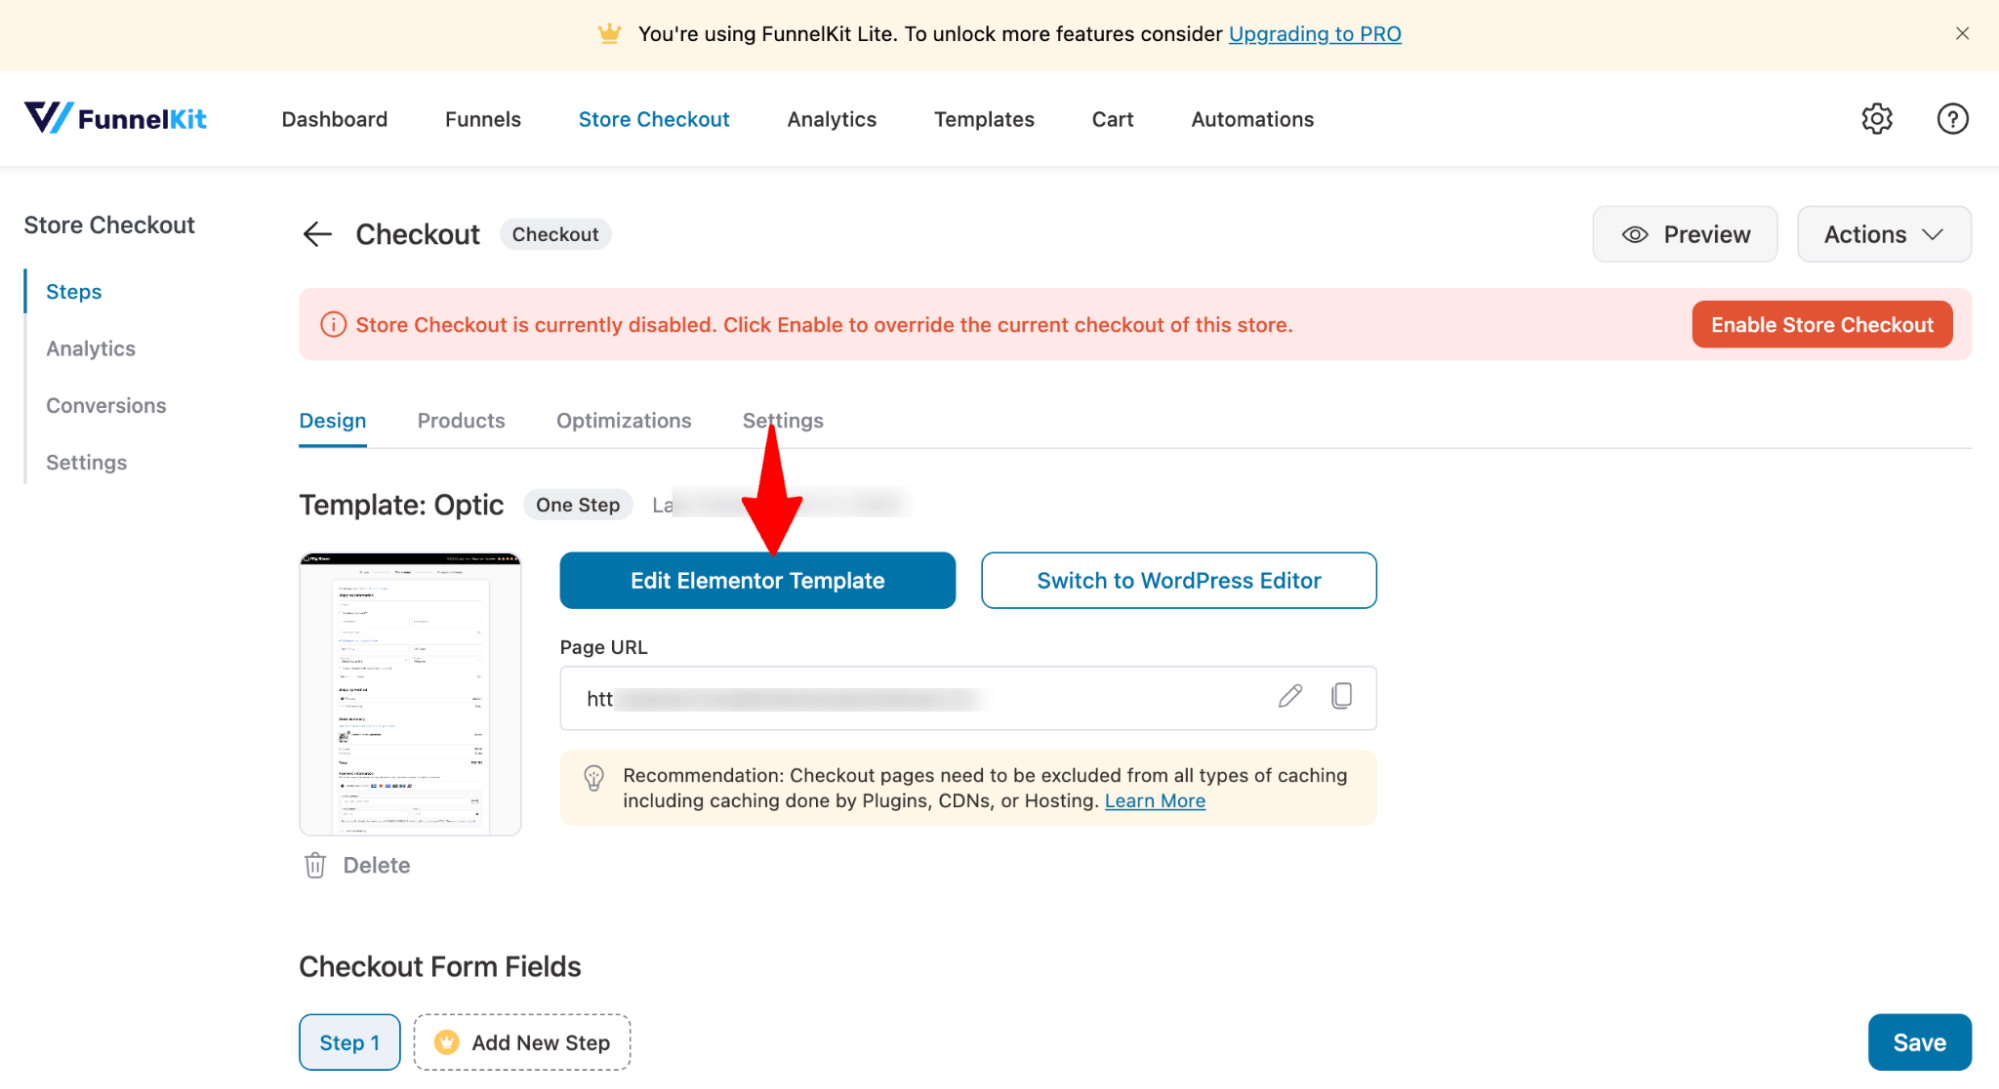
Here, you can customize the content and style of each section. Add a collapsible order summary, which is extremely handy for mobile users and more.
Step 3: Hide or remove the country field on the checkout page
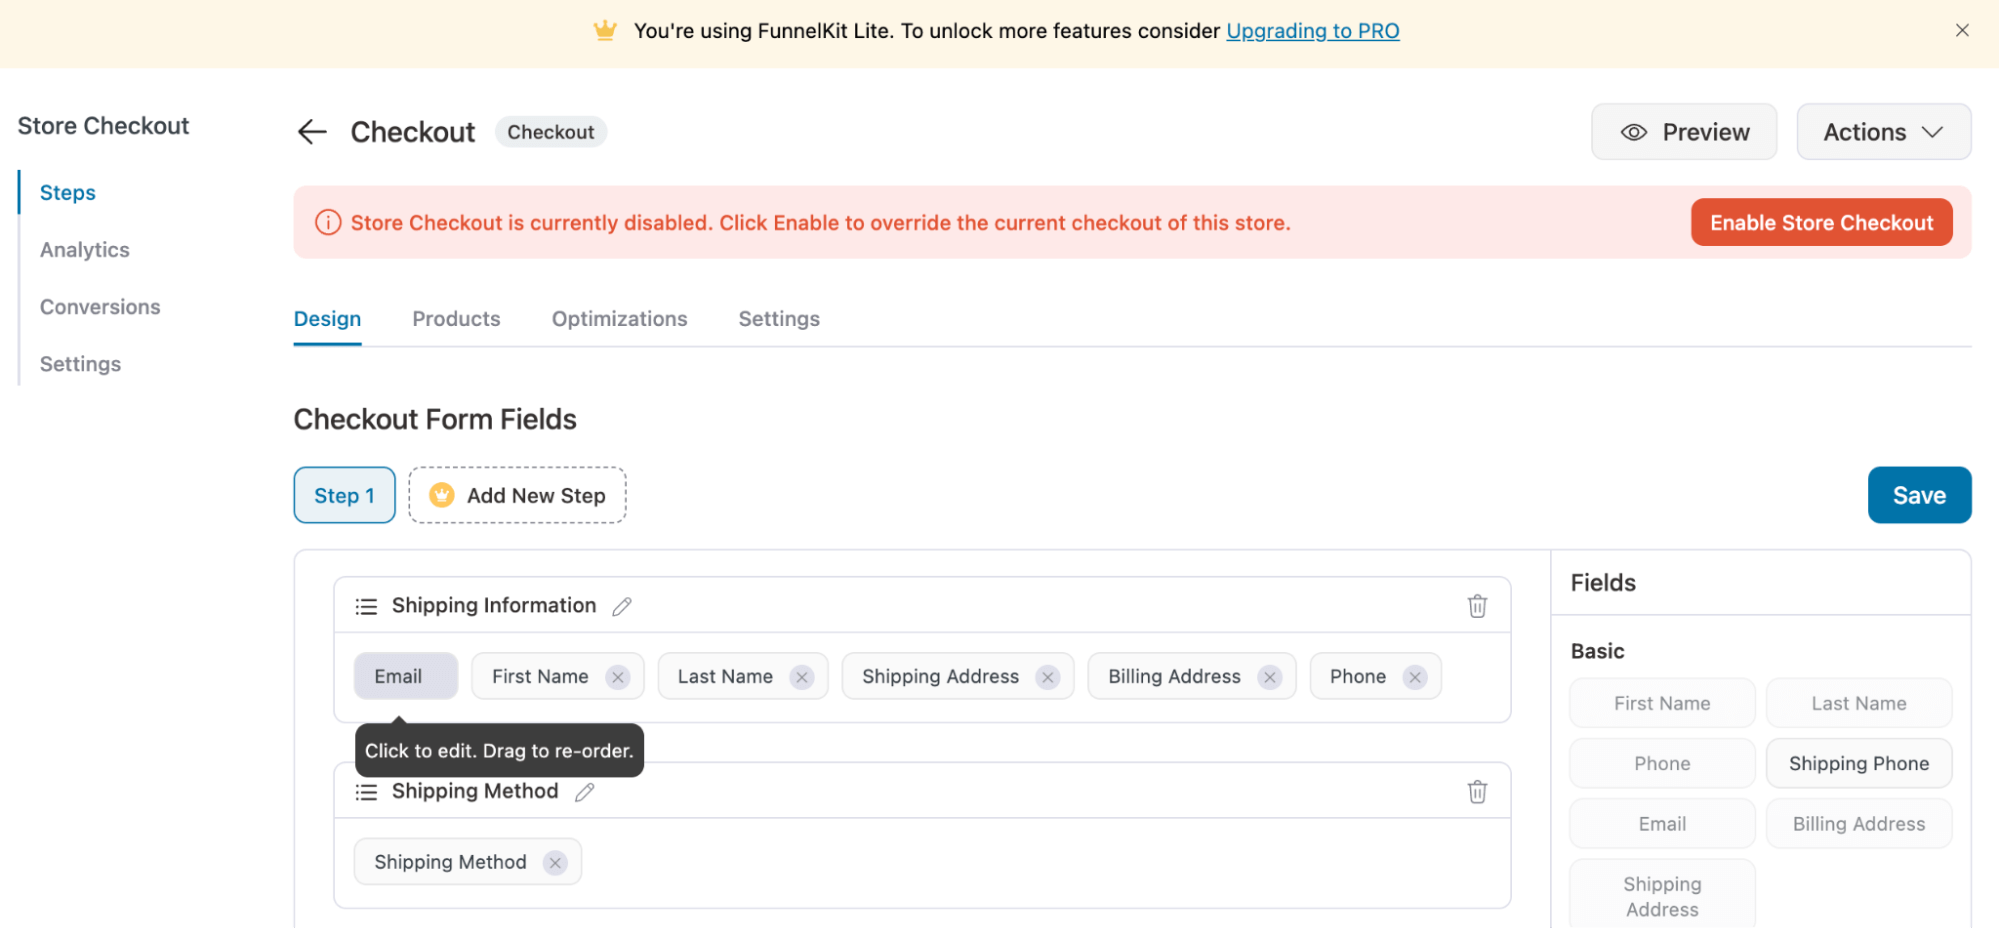
Now, to hide/remove the country field from WooCommerce checkout, scroll down to the “Checkout Form Fields” section.
You can easily drag and drop any field to reorder it. For instance, you can place the email at the top. This way, you can nudge existing customers to an easy login when they type their email.
This way, they won’t have to fill in all the information manually, and can complete the checkout process fast.
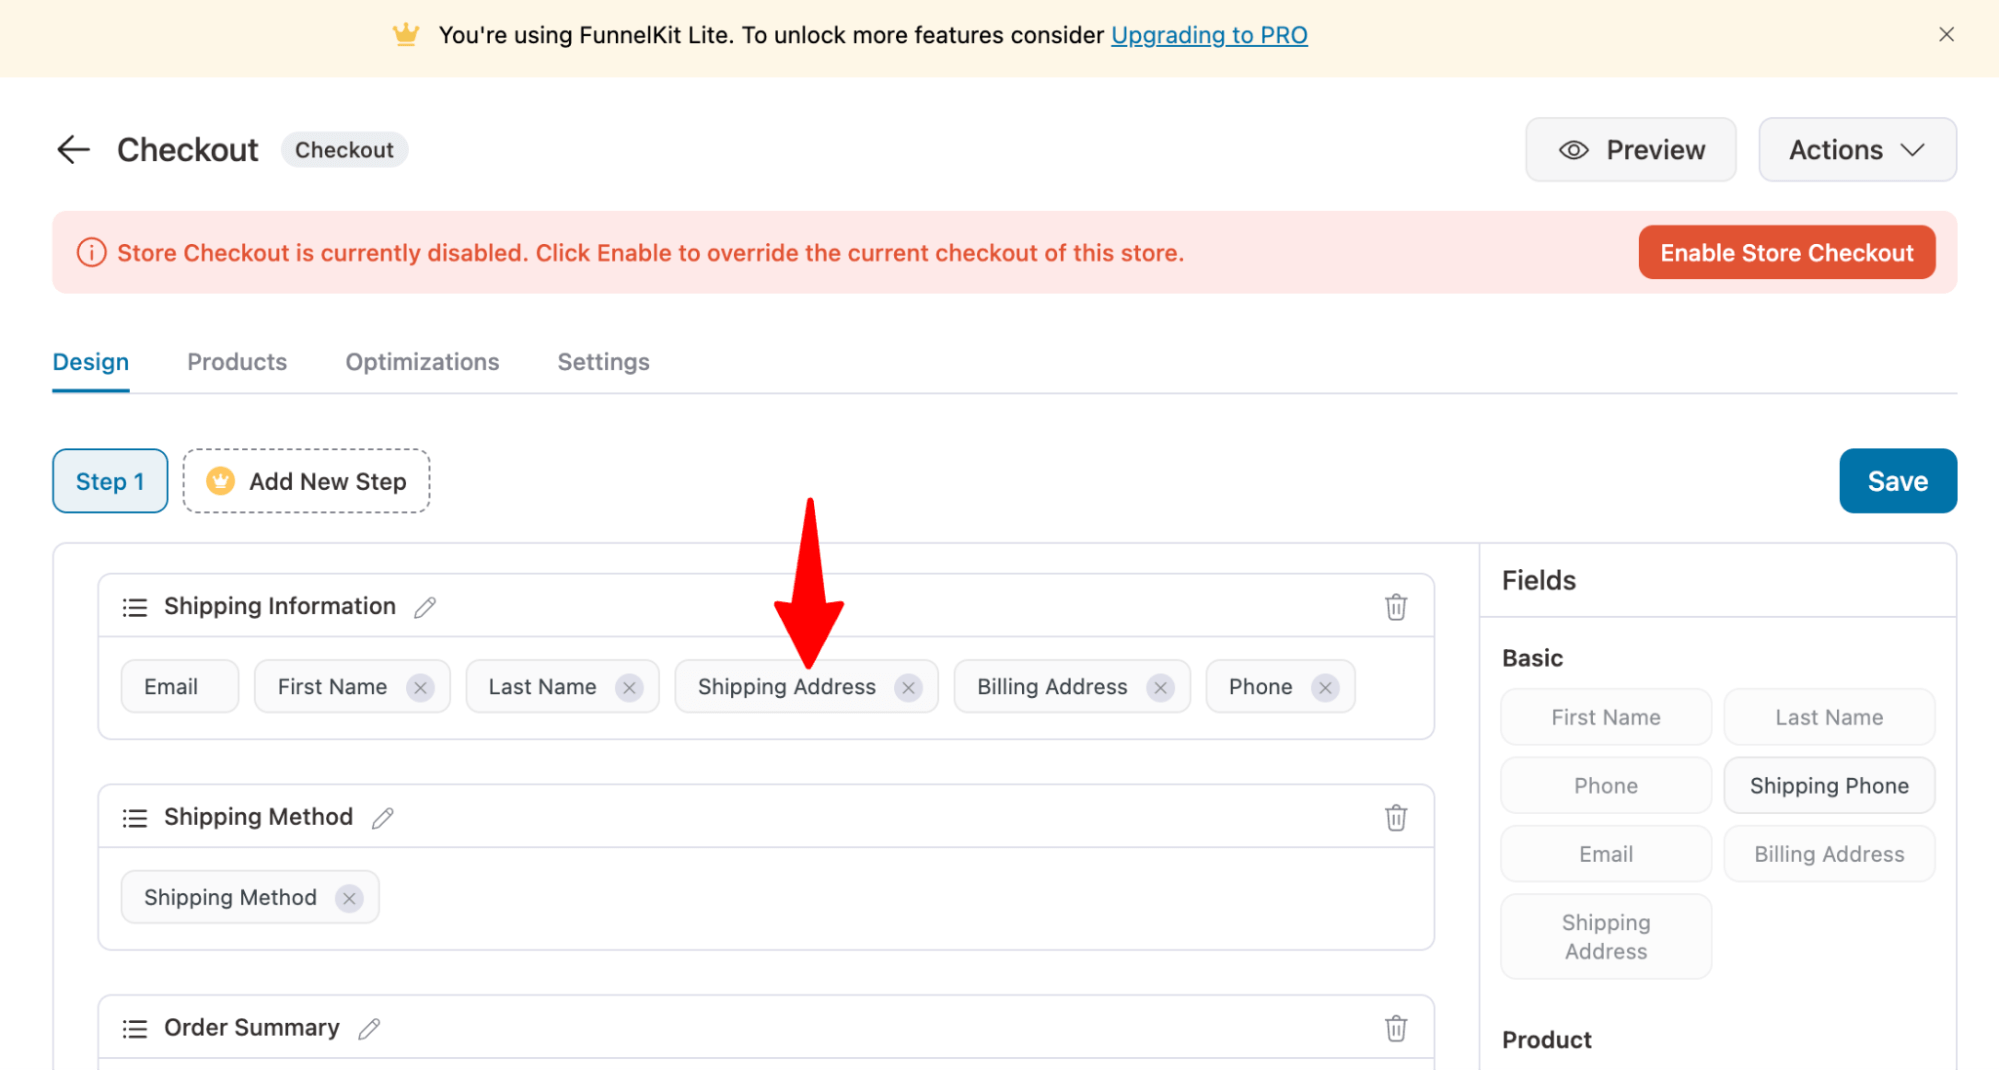
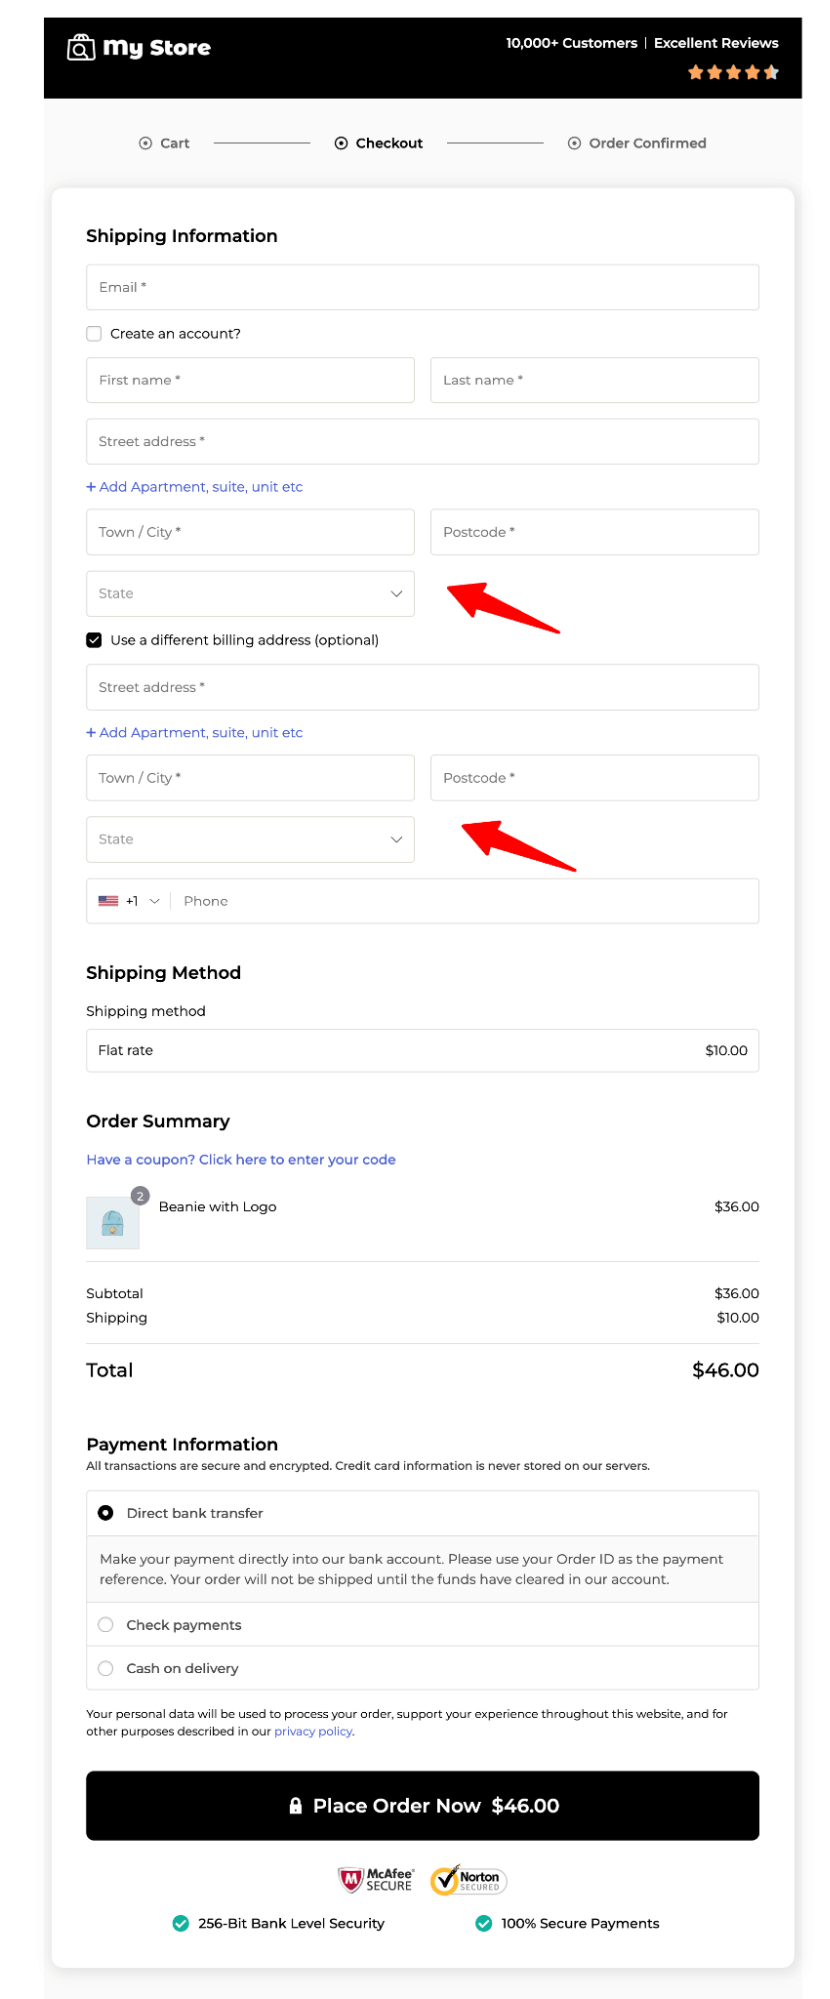
To remove a country field from either shipping/billing address, hit that field. Here, we are going with the Shipping Address first.
Next, click the eye icon to hide it from the checkout page.
Also, make this field optional; otherwise, it will show an error message asking the customer to fill in the required country.
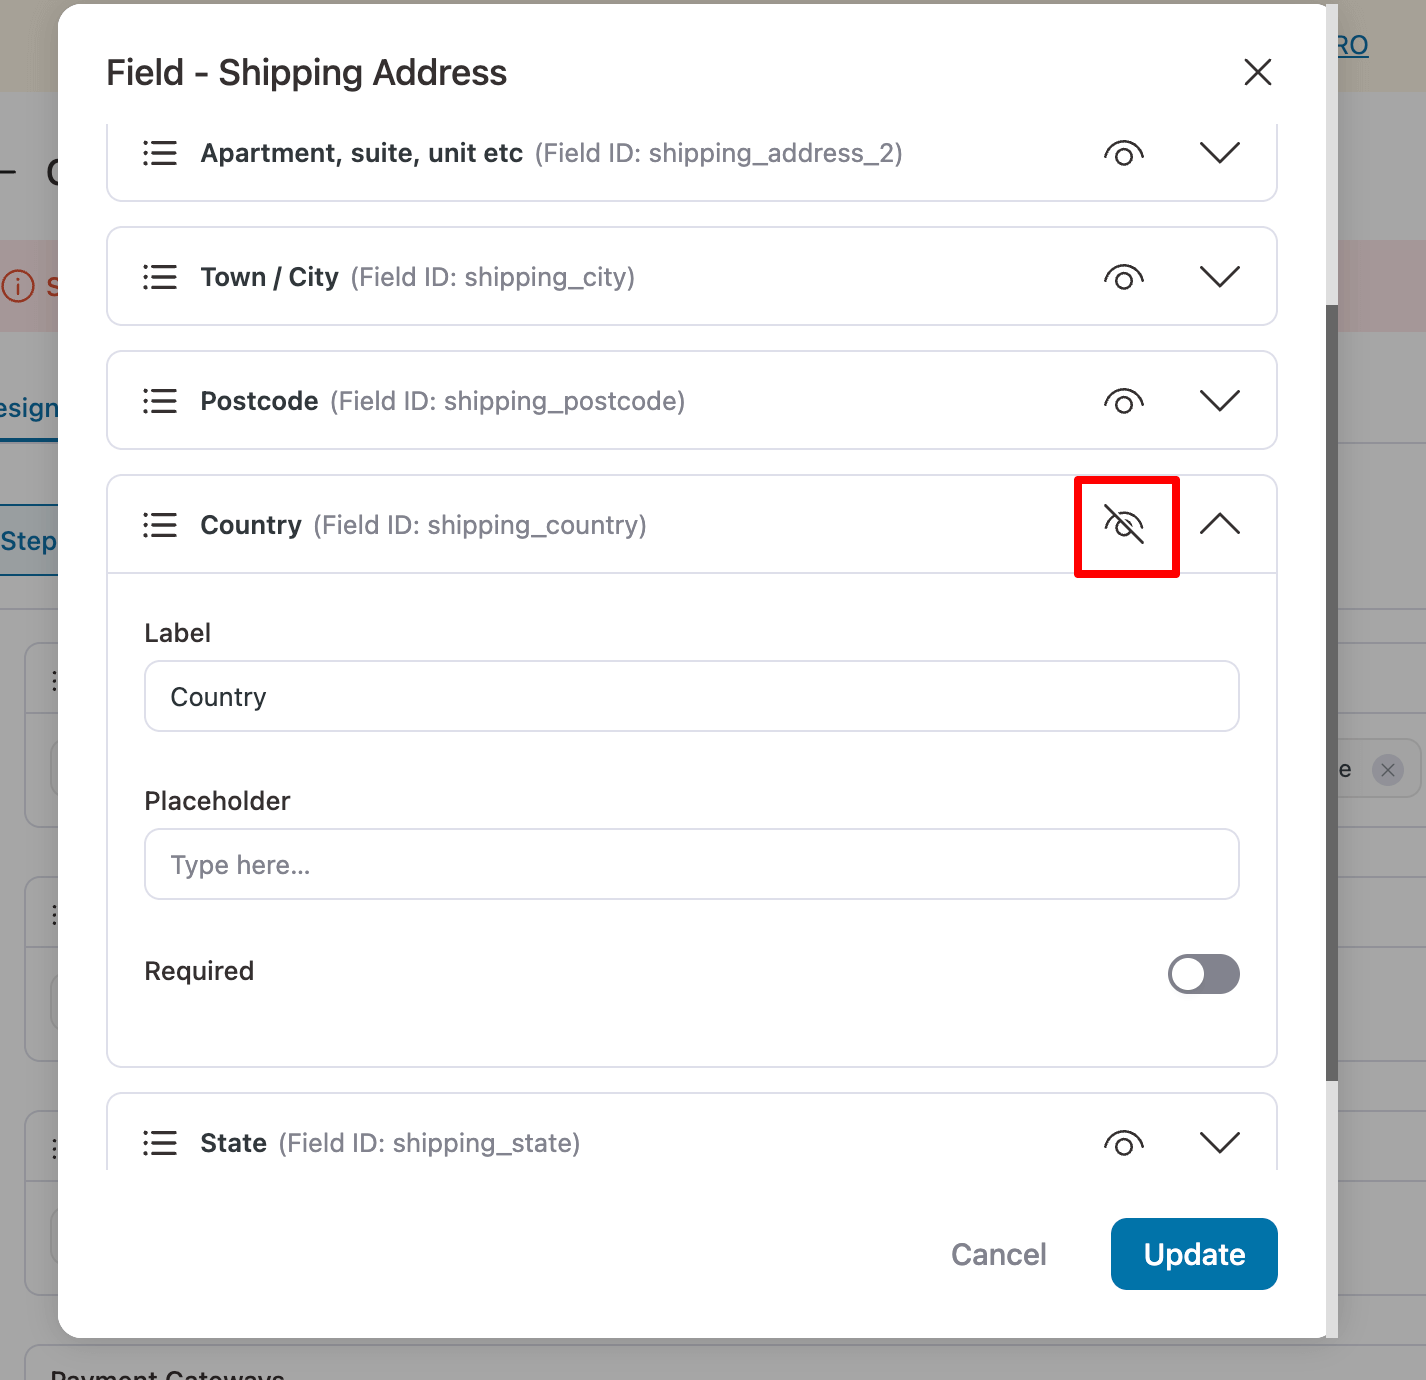
Please ensure that you update after making the changes.
Repeat the same process for the billing address sections.
Step 4: Enable the store checkout
The last step is to enable the store checkout.
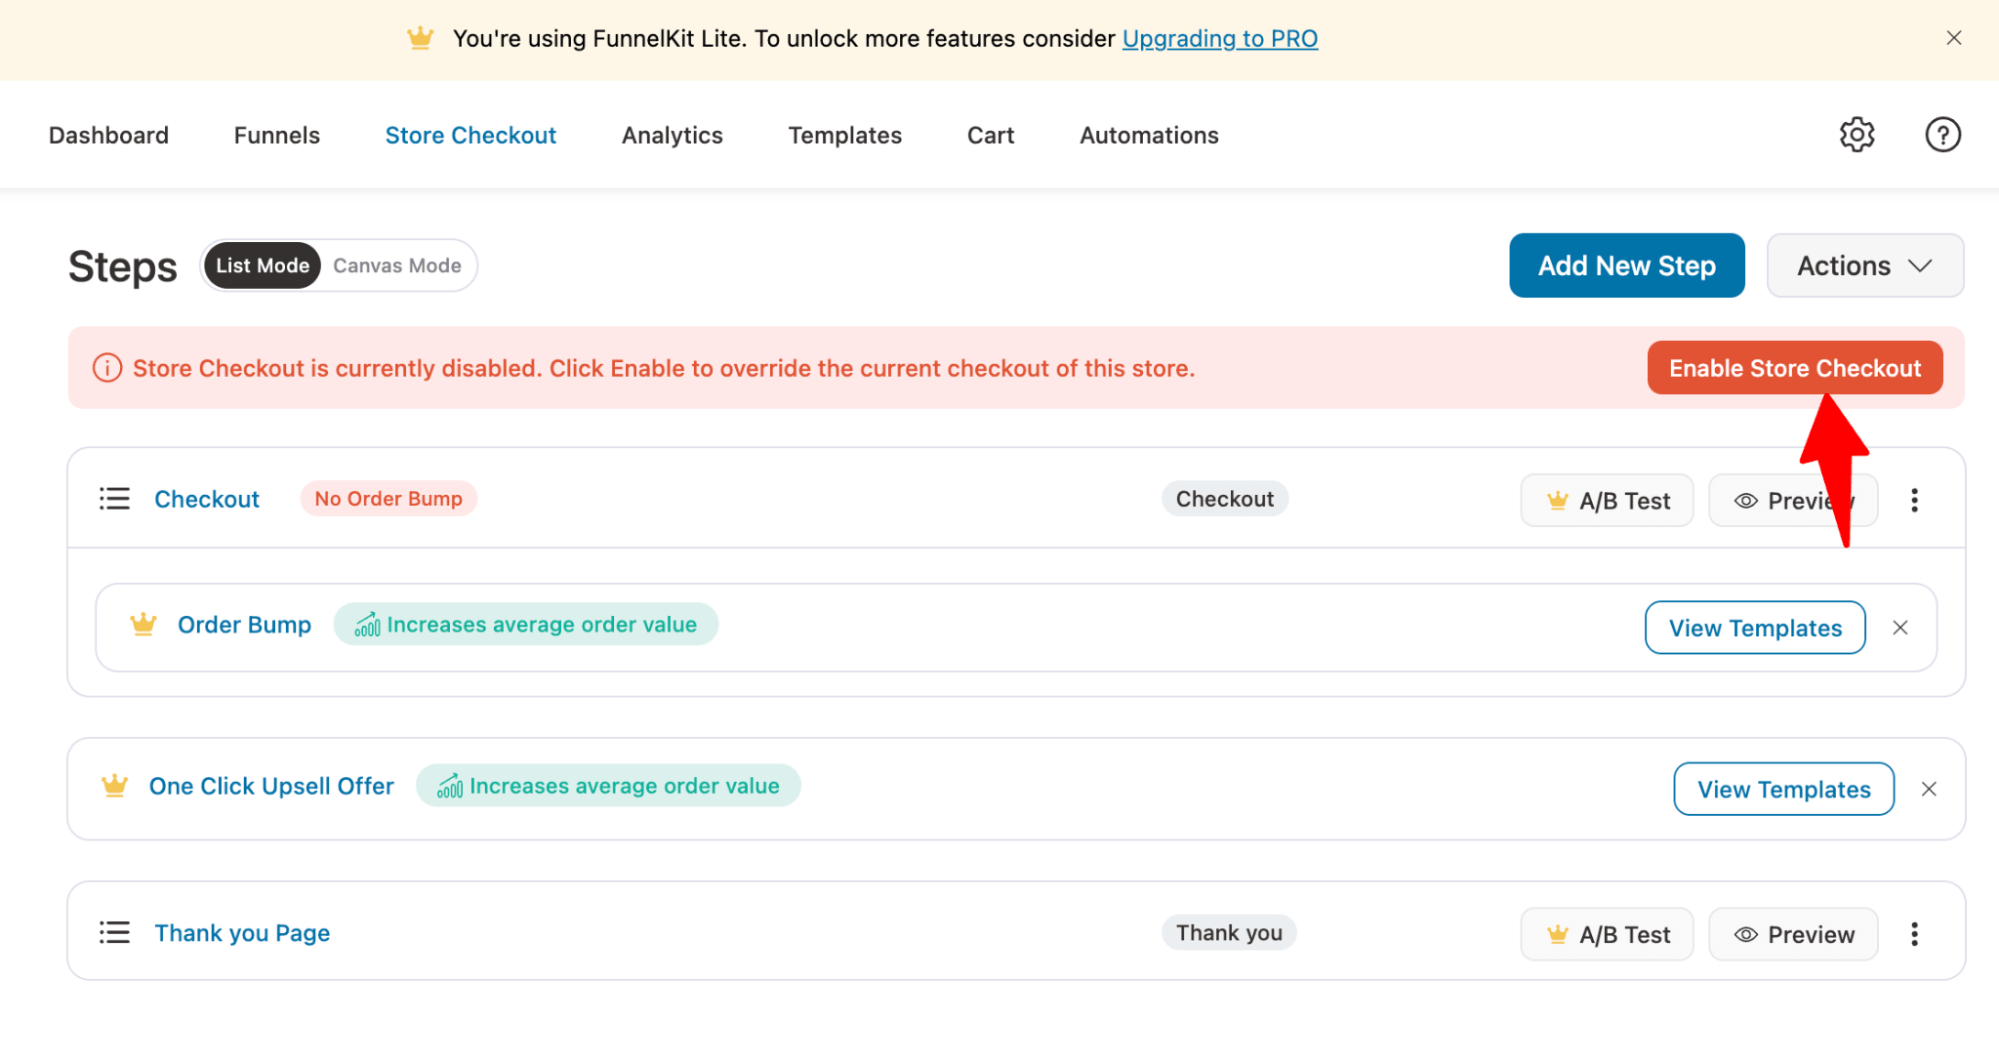
Now, try to place a test order, and you will not see the country field.
Bonus: Enable Address Field Validation To Get Accurate Addresses and Avoid Failed Deliveries
If you sell to only a single country, then you don’t need the customer to fill the country field, but you do need the complete and accurate address.
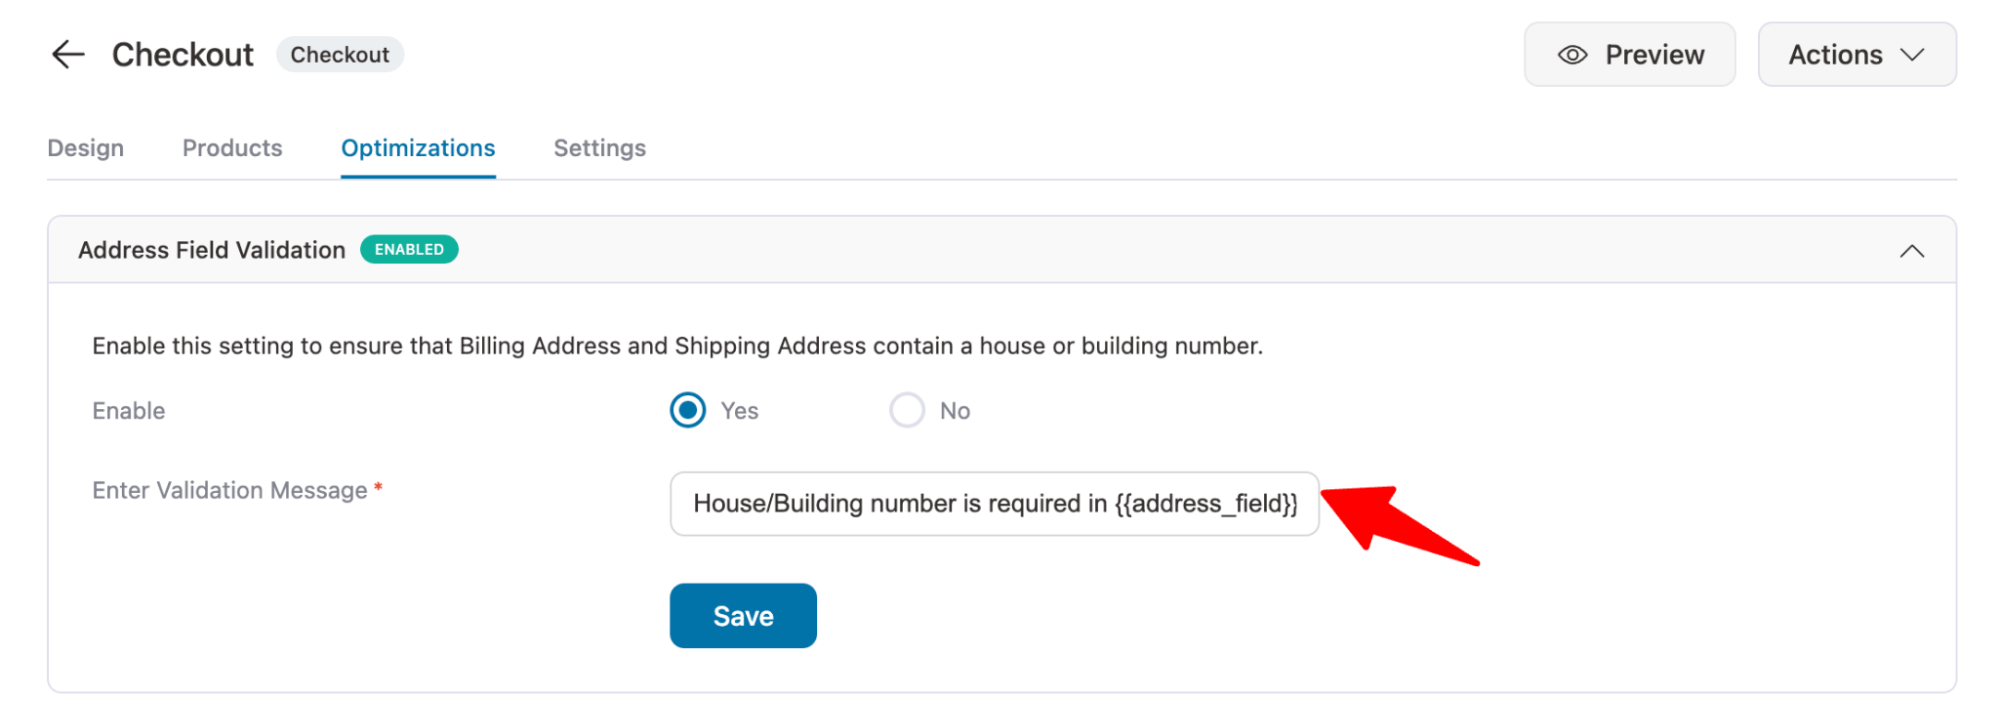
To avoid failed deliveries or incomplete orders, you can enable a setting that requires a house or building number in both the Billing and Shipping Address fields.
This small step ensures customers provide complete and accurate address details, reducing delivery issues and improving fulfillment accuracy.
Just navigate to the Optimizations tab under checkout. Next, enable the Address Field Validation, set the validation error message, and hit Save.
FAQs About Removing the Country Field From WooCommerce Checkout
- Can I remove the country field from WooCommerce programmatically?
Yes, you can remove a country field from WooCommerce using PHP. Here is the code you can use.
Note: This code is compatible with the default WordPress theme.
// Remove country field from the checkout page
function remove_woocommerce_checkout_country_field($fields) {
    // Remove the country field from the billing address
    unset($fields['billing']['billing_country']);

    // Remove the country field from the shipping address (if applicable)
    unset($fields['shipping']['shipping_country']);

    return $fields;
}

add_filter('woocommerce_checkout_fields', 'remove_woocommerce_checkout_country_field');
- Is there a plugin to hide the country field without coding?
Yes, with a plugin like FunnelKit Funnel Builder, you can easily hide the country field without any coding.
- Is there a plugin to hide the country field for billing only or shipping only?
Yes, with FunnelKit Funnel Builder, you can hide the country field separately for the billing or shipping section or both.
Remove Country From Checkout And Improve Checkout Experience!
If you only sell to specific regions or operate in a single country, there's no need to display a long list of countries or ask customers to fill in unnecessary fields.
Depending on your store's setup, you can remove certain countries from the dropdown or hide the country field entirely from the checkout page.
To offer a seamless and high-converting checkout experience, use FunnelKit Funnel Builder. It lets you create beautifully designed checkout pages that are optimized for conversions, fully customizable, and easy to manage.
Simplify the buying process and give your customers the checkout they deserve with FunnelKit Funnel Builder.

Editorial Team
July 7, 2026Are shoppers adding products to their cart and leaving before they buy? According to Baymard Institute research on checkout usability, 18% of shoppers who abandon their cart do so because...
Editorial Team
July 3, 2026Sometimes, the difference between a visitor leaving and placing an order comes down to something surprisingly small, like a better headline, a cleaner checkout, or a more compelling offer. That's...
Editorial Team
July 1, 2026Are you leaving money on the table by not fully leveraging your customers’ shopping behavior? Many store owners don’t realize that every time a customer adds a product to the...


