

There are many LearnDash tutorials out there that show you how to set up LearnDash and create courses. But that’s not why you’re here.
In our LearnDash tutorial here, we will go beyond the basics!
We tell you how to create a course on LearnDash, but that's not where we stop.
You'll discover a ninja technique on creating a Free Course and offering it to attract qualified leads for your business.
You’ll learn how to create an opt-in page to generate leads and make these leads auto-login into the LMS to view their free course.
It’s the slickest auto-login process that you can’t find in other tools out there, which creates a seamless and device-agnostic experience for the end-user.
So without any more delay, let’s discover how.
First, watch this LearnDash tutorial video to help you get a gist of the post, and then get on reading!
Table of Contents
Power of the Word 'FREE'
One of the most effective tactics in the history of product marketing is Sampling. Sampling means that you’re offering a smaller, free version of your product to the public to test out.
It doesn't necessarily need to be a version of the same product you're selling, but it can be a product designed especially to be offered for free as the lead magnet.
Around 81% of consumers state that they are more likely to buy a new product after trying a free sample.
The other major reason for companies offering free samples is - The Principle of Reciprocity.
Reciprocity is one of the six principles of Robert Cialdini and can be used to influence people to perform a particular behavior.
We humans have a strange need to balance the scale. If someone does something for us, we are inclined to do something for them in return. The same concept applies in business.
Offering a free course allows you to let the students experience your teaching style without paying anything upfront. Then, if and when they like what they experience, they will be more inclined to invest in your program and buy the paid courses.
So the word ‘FREE’ has a powerful emotional pull attached to it, which is very hard for any consumer in the market to ignore.
Free Course Example - A Breakdown
Now that we will design and sell our free course to the masses, we need to ensure that our free product is so optimized that the lead becomes compelled to buy our paid products.
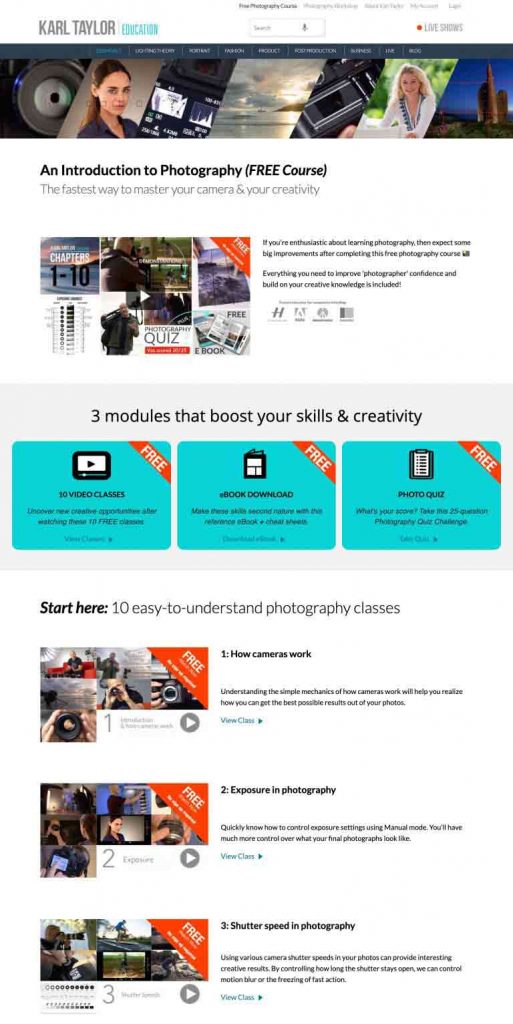
Let’s look at this example of a website offering a free course on photography.
A few things are done right here, but a few can be improved upon for better conversions in the future.
Things Done Right
Few things that this website did right:
- The course covers all the photography basics for free
For any product to sell, it should appeal to the audience. This course does just that. It offers the basics of photography that would get anyone considering photography, to become interested in the course.
- Establishes creator’s authority on the subject
The way the whole course material is divided, makes one trust the knowledge of the course creator. It makes you believe that you’d actually learn what is claimed on the site.
Areas to Improve
The areas that could be improved on for better lead generation:
- The course is available for anyone to access
Having an open course means that anyone and everyone can access the material and you won’t have any record of it. Neither will you be able to generate leads nor nurture them into becoming paying customers.
- No systematic LMS
This website just lists down the videos one after the other. Rather they should have divided content into lessons that the users can check off once completed to assess their progress.
Having a proper lesson plan in place makes navigation easier for the users and progress tracking easier for you.
- No Conversion Plan in place
In this example, users can just come in and view the videos without having to fill any form or signing up. Unfortunately, since the creator doesn't have the contact information of the leads - they can't approach them with an offer.
Instead, the users should at the very least be asked to fill a form to access the content.
What You Need to Implement This LearnDash Tutorial
Now that you've understood the power of "FREE" and how it can help you generate more leads, let's get to implementing the technique and create amazing courses for maximum conversion.
The ingredients required to build these beautiful free course funnels are:
- LearnDash Plugin - LearnDash is WordPress' most trusted LMS plugin.
- Funnel Builder Pro - It allows you to design beautiful funnels that help you increase the sales of your courses.
- A Page Builder - Use builders such as Elementor, Divi, Oxygen, Gutenberg or any other builder of your choice
- FunnelKit Automations - The ultimate automation follow up engine.
And of course, an idea for the free course you want to offer.
The point that you might stress about the most is the idea. Though it is a crucial ingredient of this epic dish, you don't need to worry too much about it.
A quick win is what we are aiming for. So create a mini-course that doesn't overwhelm the users and one they can consume easily in a couple of hours or so.
Create a Course in LearnDash
We will be designing a free course in LearnDash, that would later generate qualified leads for your business. Let’s follow along:
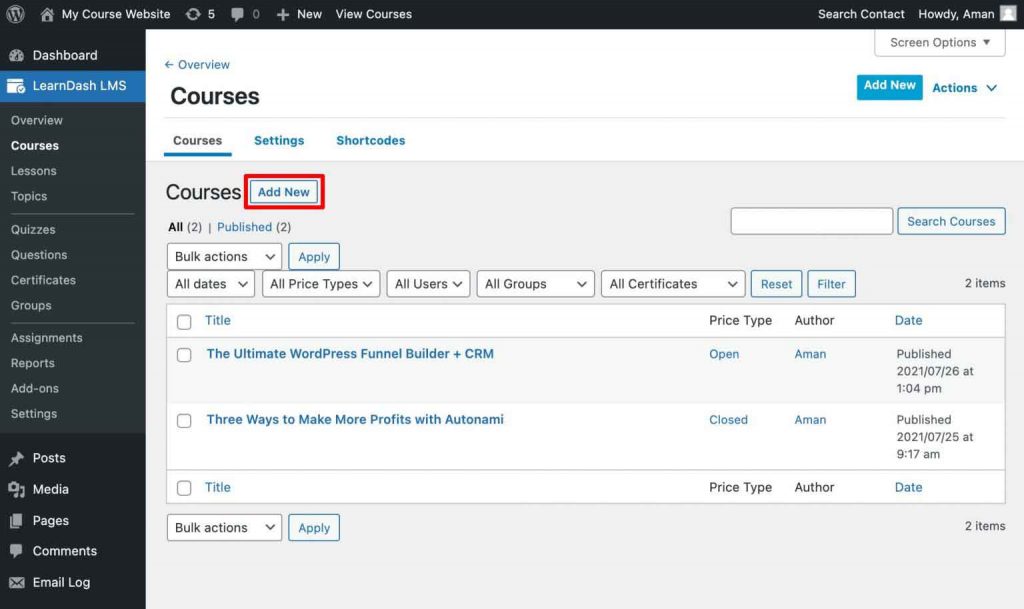
Step 1: Add a New Course
To add a course in LearnDash, go to LearnDash > Courses from the WordPress Menu.
If you are starting new, you’d be asked to Add your first course; otherwise, you can just click on the Add New button to create a new course.
Next, enter the course title and any course content you wish to add on the next screen.
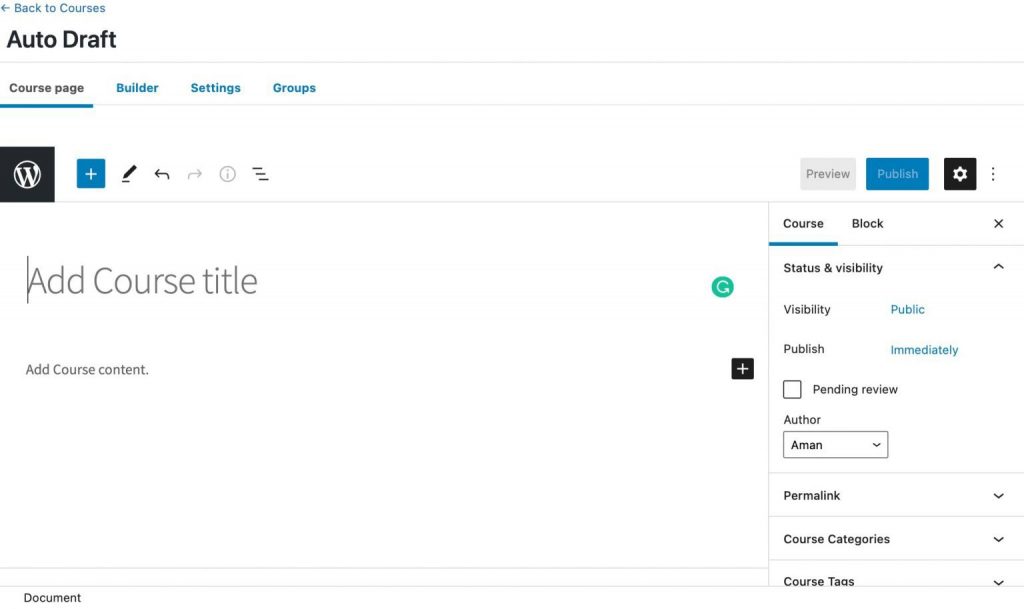
Save his draft before moving ahead.
Step 2: Add Course Lessons
Next, go into their newly installed Builder tab to create the course.
Here, add a new section heading and name it.
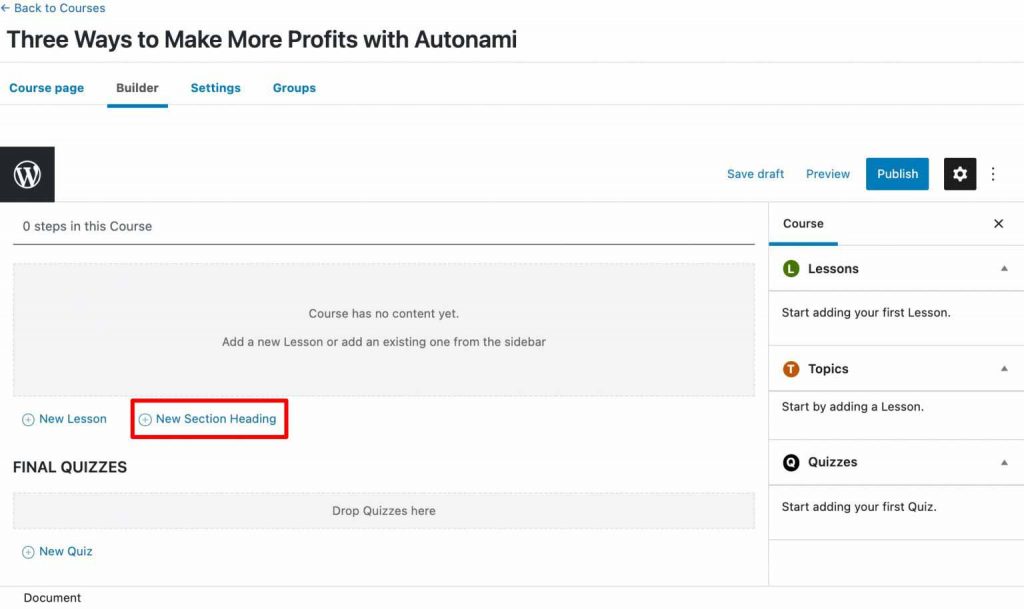
We named the section 'Introduction'. Following that, add a new lesson too.
To add content to the added lesson, click on Edit next to the lesson name.
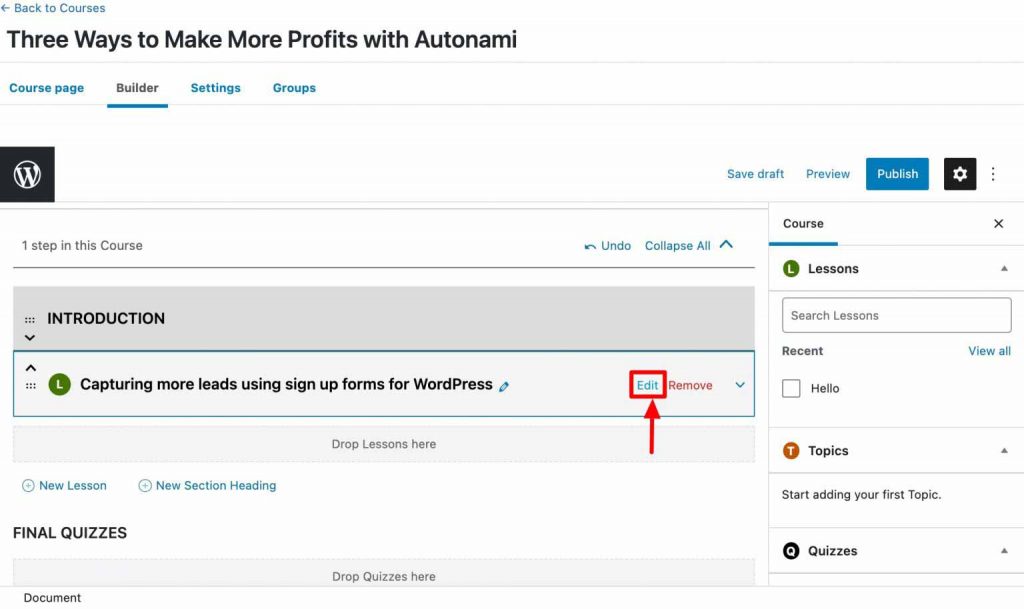
Then, add the text, images, and videos that describe the lesson, using the Guttenberg blocks available to you, and hit Update.
Now, head back and add more lessons in this section in a similar manner.
Try to make your lesson names catchy and desirable to appeal more to the audience.
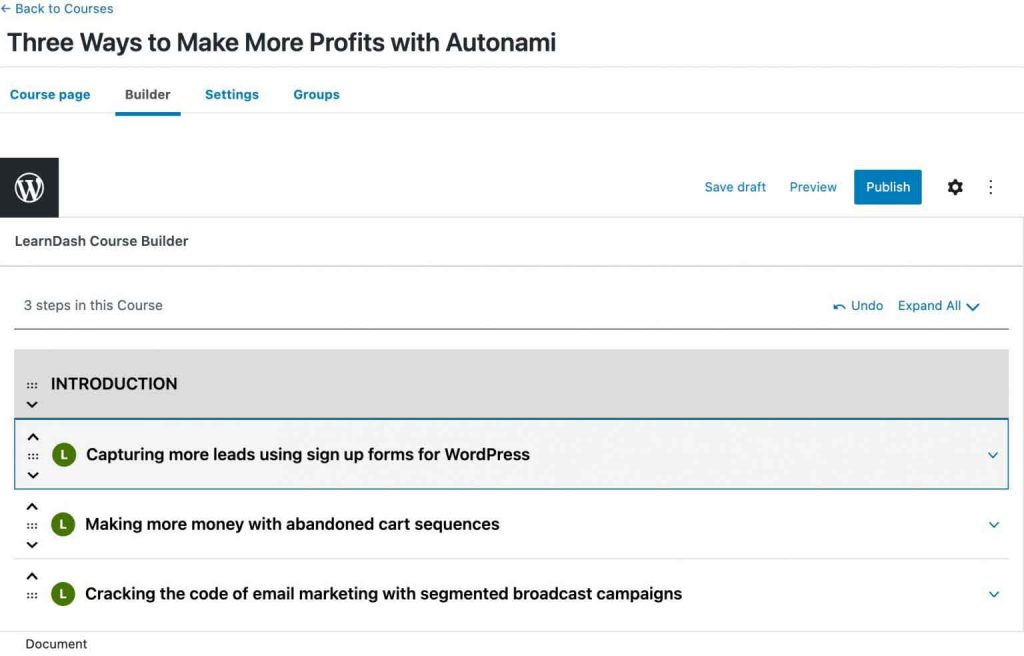
When you’re happy with the way the course looks, publish it to make it visible.
Note: You can make the course and lessons as advanced as you want with topics, quizzes, and more added to the mix. But for the purpose of this LearnDash tutorial, we have kept it simple with a 3-lesson course.
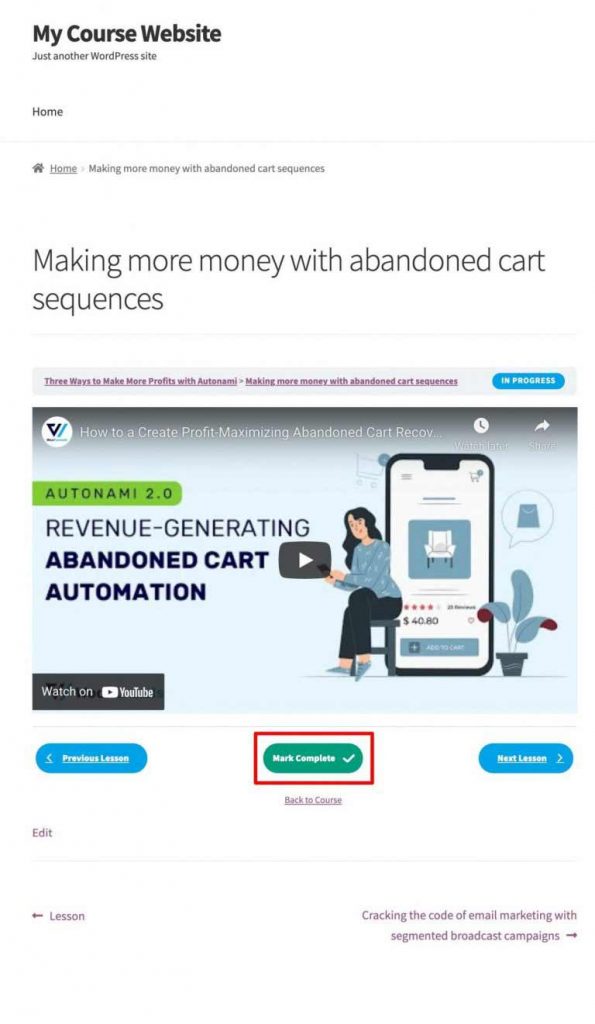
Step 3: View the Course
After publishing the course, click on View Course to see how it will be shown on your website.
It’ll show the course title and lessons to you in clear formats. Also, at the top of the dashboard, you’ll be able to spot a progress bar that highlights the lesson progress you’ve made.
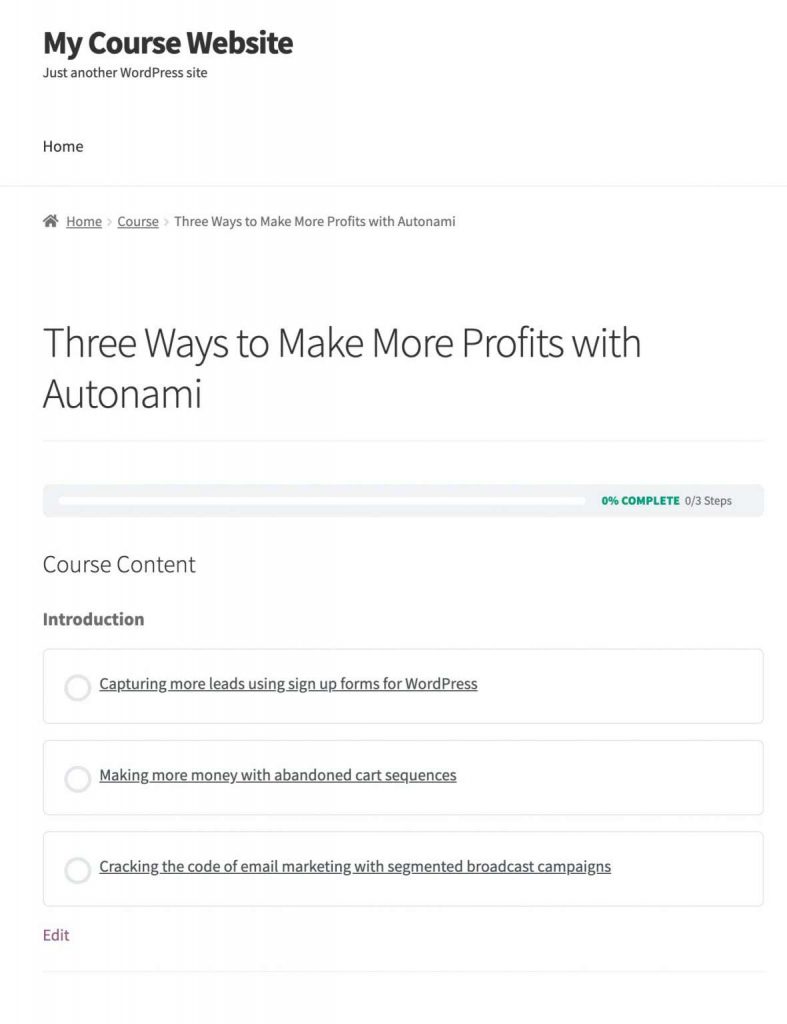
Click on each of the lesson titles to access the material, and when finished, click on Mark Completed and move onto the next lesson.
Design an Opt-in Funnel for the Course
To pitch your free course and generate qualified leads simultaneously, you’d have to gate your content.
An opt-in funnel is a smart and easy way to attract users with similar interests and capture their details using the opt-in form embedded on the page.
Let’s see how to create one in WordPress using FunnelKit (formerly WooFunnels), Funnel Builder.
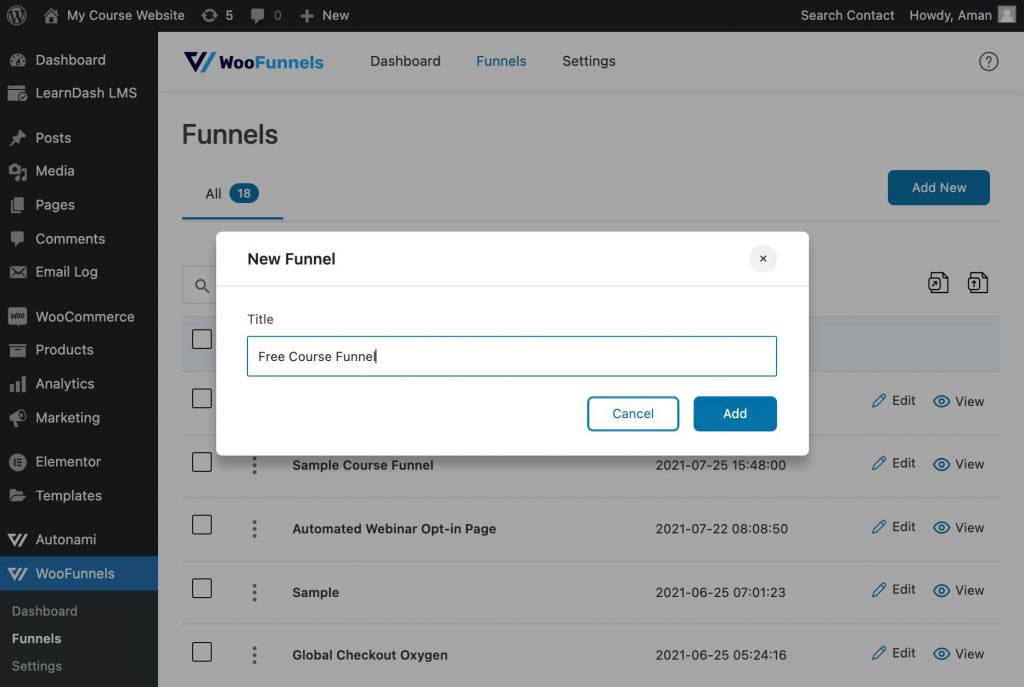
Step 1: Add a New Funnel
First, go to FunnelKit (formerly WooFunnels) > Funnels from the WordPress menu. Then, click on Add New and name the funnel.
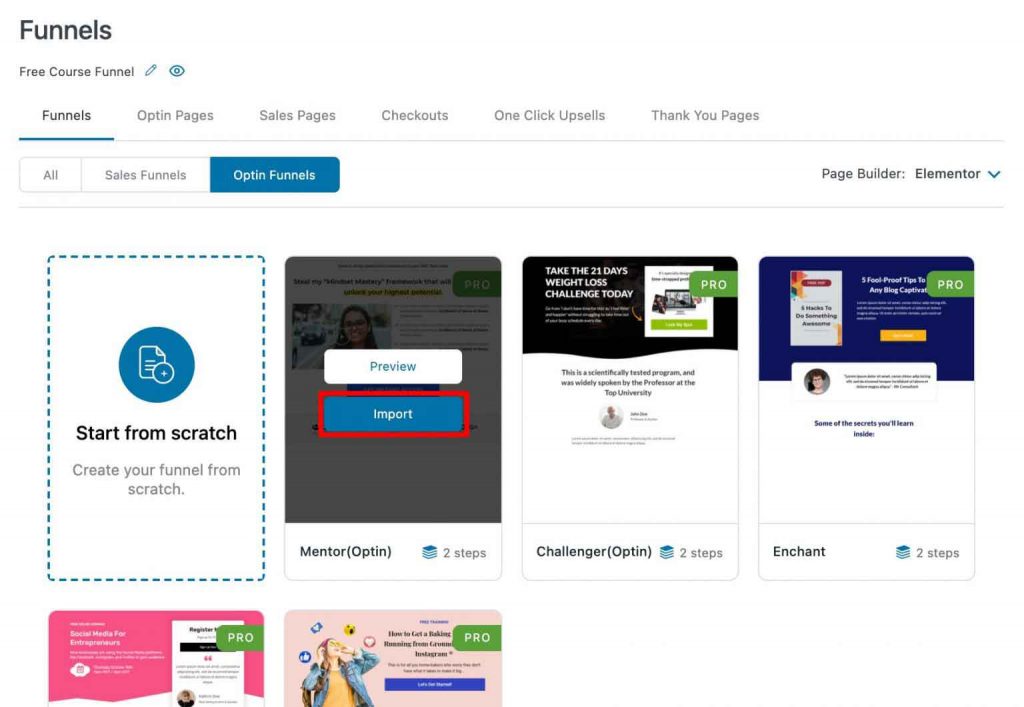
Step 2: Import a Template
When you add a funnel, FunnelKit (formerly WooFunnels) offers you a range of beautifully designed funnel templates to choose from.
You have the option of importing a whole pre-designed funnel template or adding one page at a time. There is even a blank funnel template available if you wish to design the funnel pages from scratch.
As we are creating an opt-in funnel, go to Optin Funnels and choose the page builder you wish to use. Then, select the template you like and hit Import.
For this example, we will use the Mentor Optin Funnel template in Elementor.
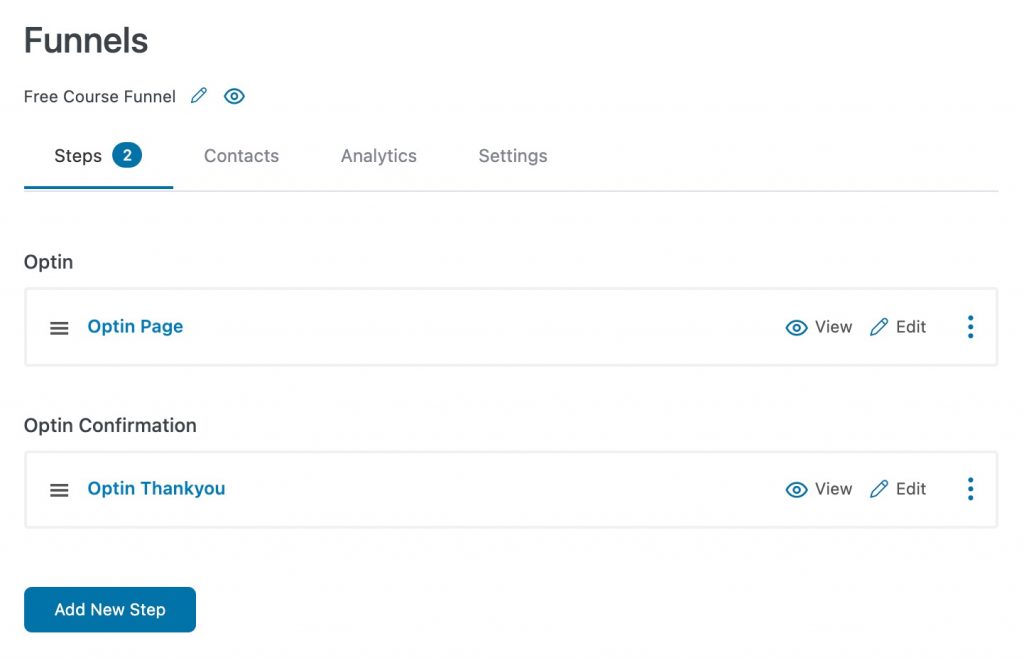
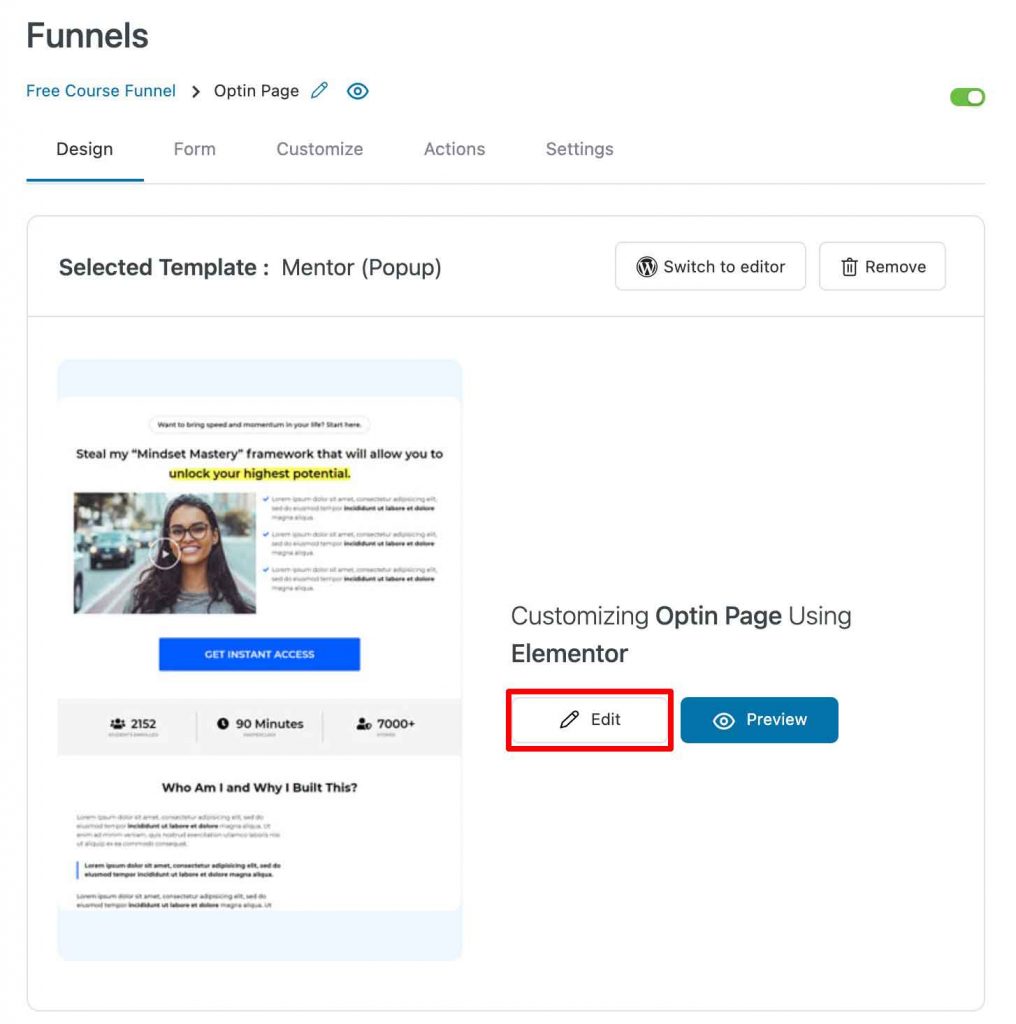
Step 3: Edit the Opt-in Page Template
On the main funnel page, where you can see all the steps of the funnel listed one below the other, click on Edit next to the opt-in page name.
Then, under the design tab, again hit on Edit to open the template in Elementor.
Now, customize the opt-in page and form as you want using the Elementor widgets.
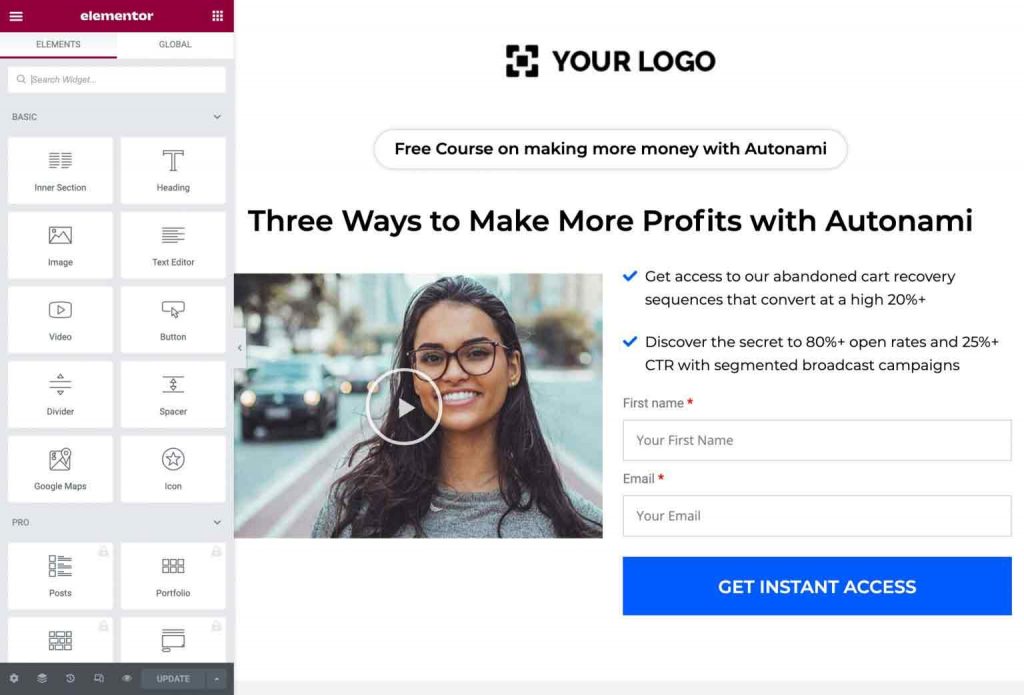
Once done, click on Update to save the changes.
You can even customize the form fields to capture the information you want.
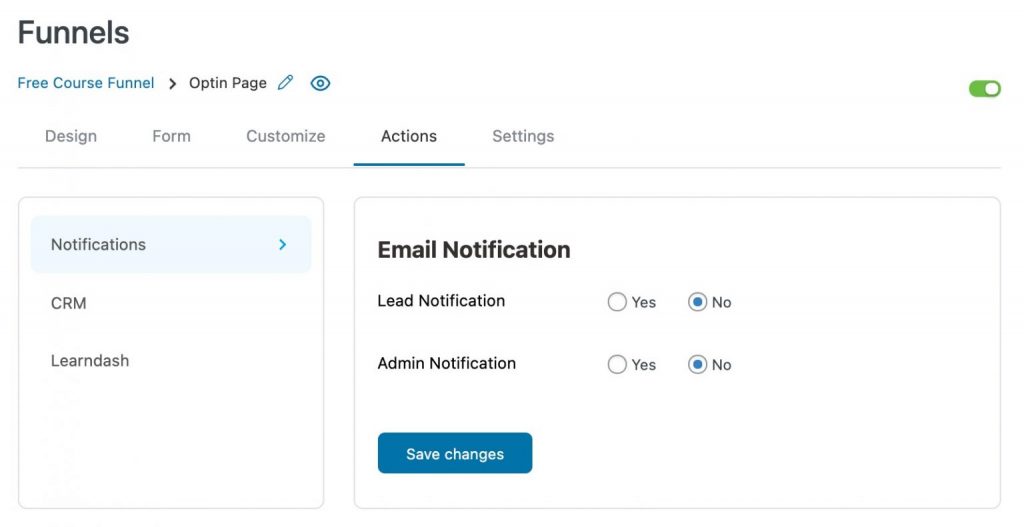
Enable Lead Notifications
One of the most important reasons for choosing FunnelKit (formerly WooFunnels) as your funnel builder is the ability to send email notifications to anyone who signs up to your opt-in form without the need to link to a CRM.
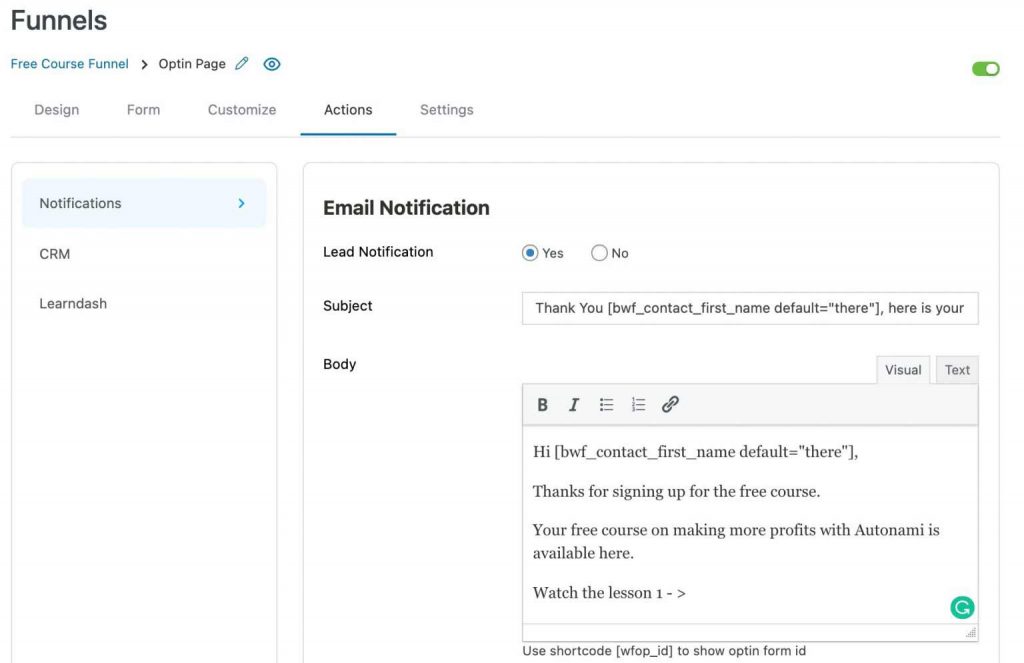
Go to Action and enable Lead Notifications to notify the leads who enter the funnel of their engagement.
Next, you’ll see the option to create your first contact email. Write a warm copy to welcome the users and guide them on accessing their free course.
Enable Auto-Login
Creating an account and logging in can be a hassle. But what if we told you that you can eliminate this step from your user's to-do list.
By linking a custom shortcode in your email copy, you can enable your users to auto-login and redirect them directly to the enrolled course - with just one click!
Pretty cool, right?
FunnelKit (formerly WooFunnels) is the only funnel builder that integrates so wonderfully with LearnDash to offer you this amazing feature.
To insert the shortcode to the email body, copy the code from the list of suggested shortcodes at the bottom of the email builder, and paste it as a hyperlink to an actionable text.
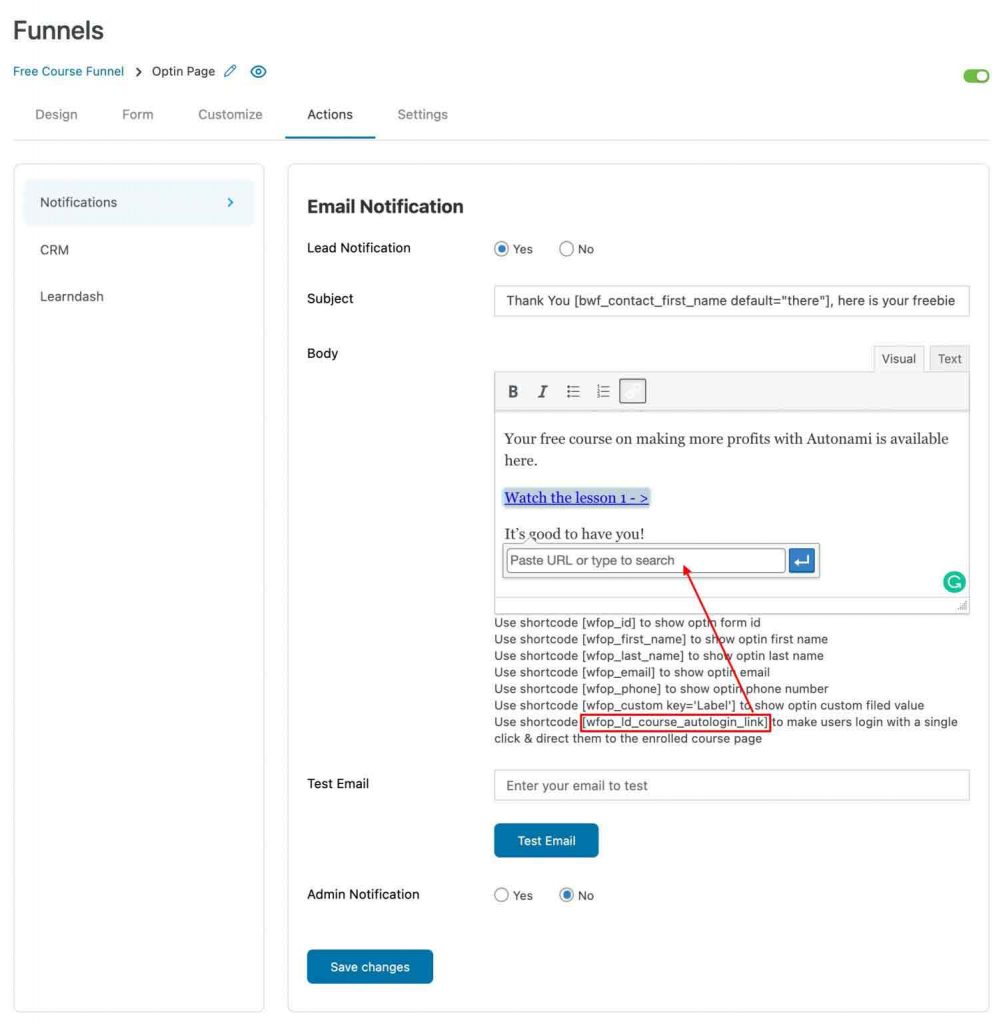
Save changes once you’re happy with the email.
Also, you can enable Admin Notification to receive an email every time a lead enters the funnel and fills the form.
Next, go to LearnDash and link your created course to the opt-in page.
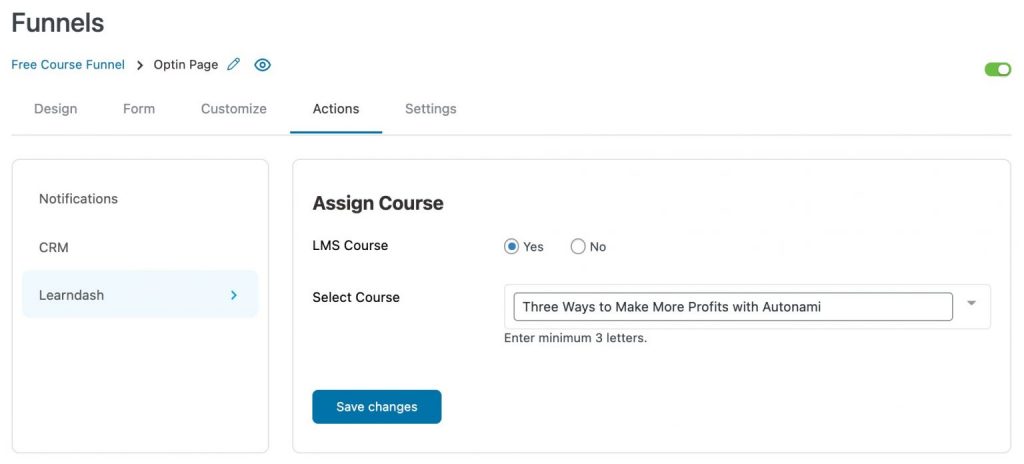
Remember to save changes before exiting the page.
Please Note: If you send yourself a test email from the Notifications tab, you wouldn’t be able to view the course. So, it is advised to follow the whole process to test the funnel.
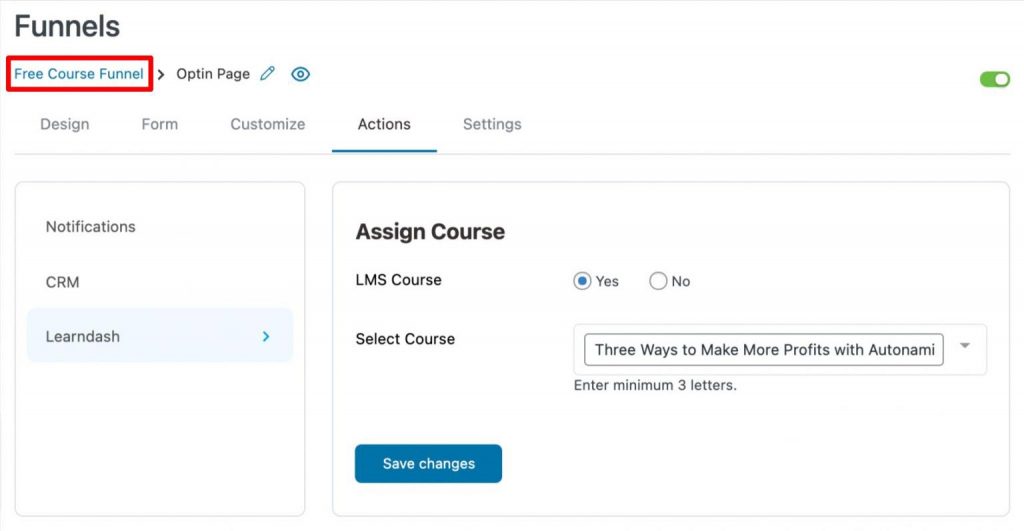
After you’re done designing the opt-in page, click on the funnel name from the breadcrumbs at the top to go back to the funnel steps.
Thank you pages are just as important as the main sales page. So, just like you did with the Opt-in page, click on Edit to customize the Opt-in confirmation in Elementor.

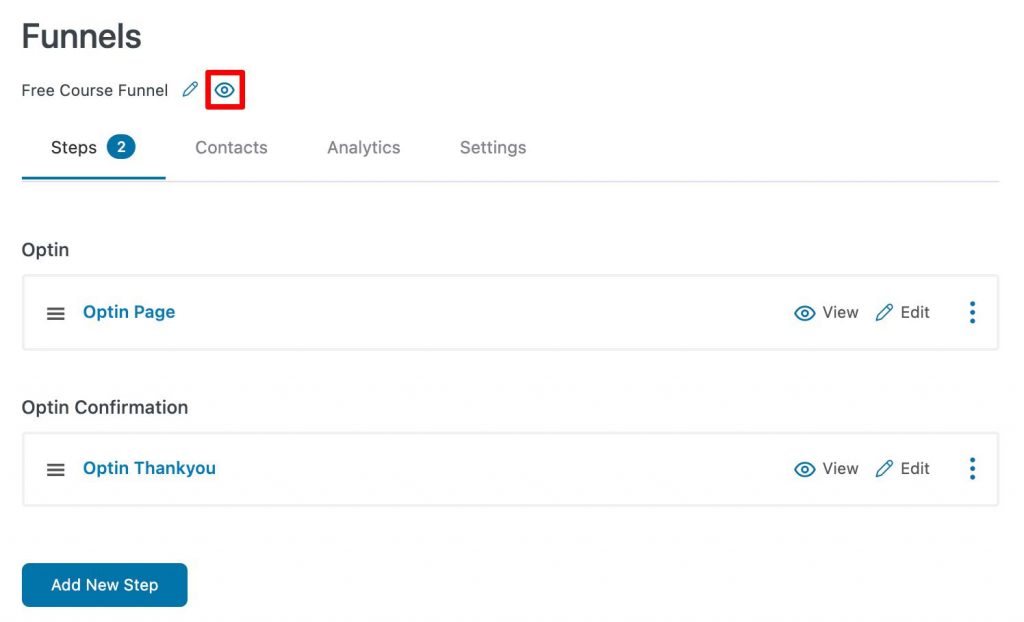
Test the Funnel
To test out the funnel you’ve just designed, click on the eye icon on the funnel steps page, next to the funnel name.
LearnDash Free Course Funnel Conversion Plan
To ensure that your Free Course funnel remains evergreen, design a few LearnDash automated emails in FunnelKit Automations that would ensure that you're always in contact with the leads that enroll in your free course.
In particular, design 2 automations - one sent after a user enrolls in the course, and the other for when they complete the course.
Design your automation by going into FunnelKit Automations > Automation from the WordPress menu.
For this post, we will just show you the two automation examples that you can also create for your store. But if you wish to learn how to set up your first automation in FunnelKit Automations, read our document on the same.
When a Lead Enrolls in the Free Course
When a lead first signs up on the opt-in page and enrolls in your free course, send them an official first handshake with a warm welcome email.
This email will highlight all that will be covered in the course, any information they should be aware of, and more.
With FunnelKit Automations, you can even decide when to send this email - immediately or after a delay. We recommend you send it within the first 2 hours after enrollment.
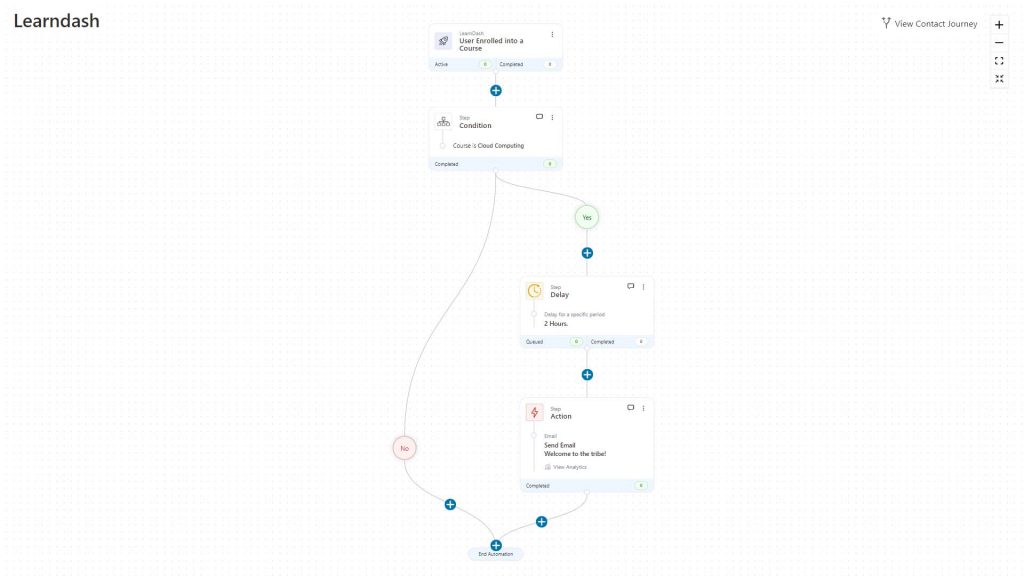
This first email will make them feel noticed and encouraged about the signed-up course.
When a Lead Completes the Free Course
The whole purpose of this automation is to convince the leads to buy a paid course after completing their free course.
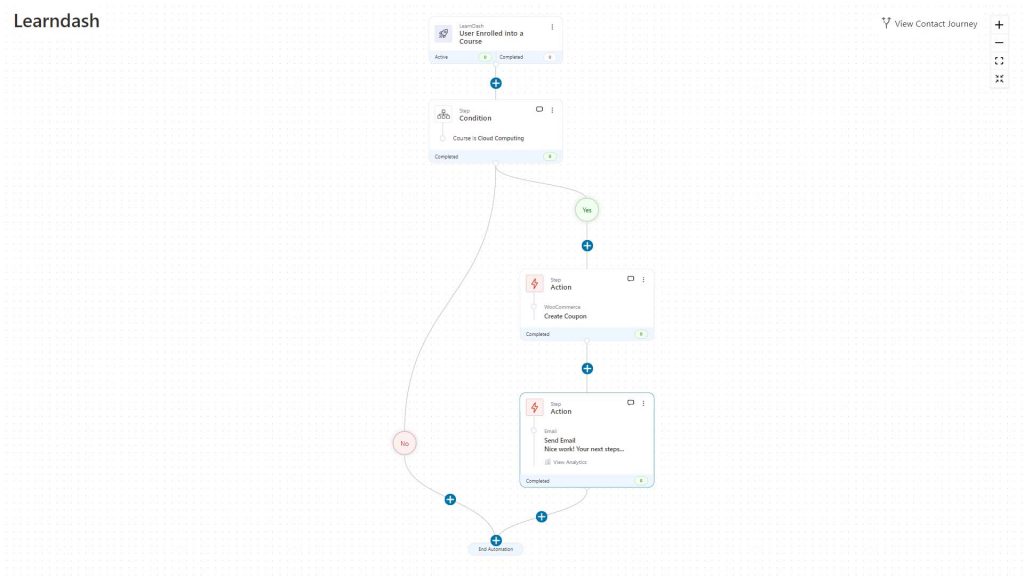
To nudge these users into purchasing a course, first create a coupon after a lead completes their free course.
Make this coupon code time-bound and add it to a convincing and rich email copy, using merge tags.
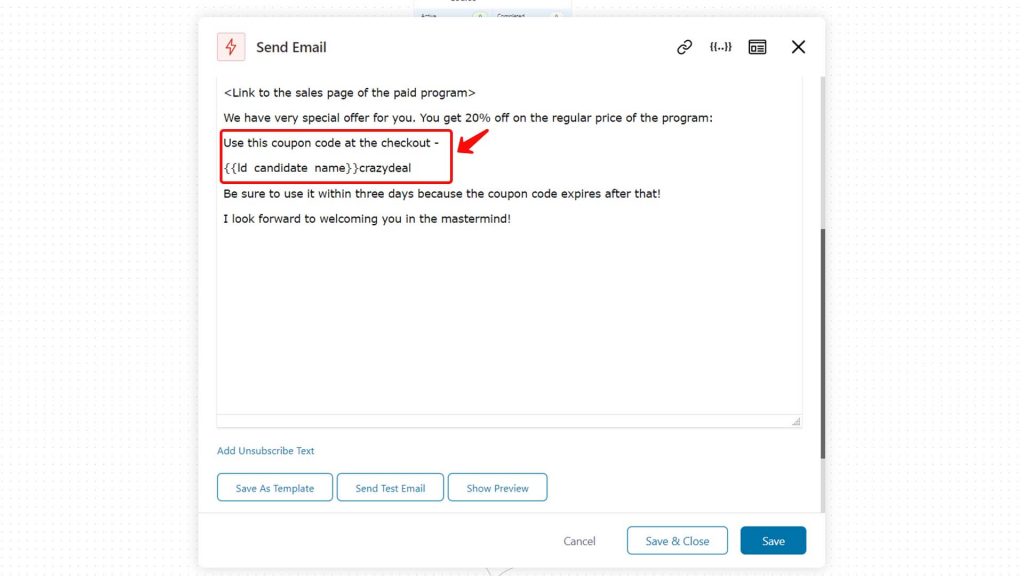
You can even schedule this automation to run at a specific time or date, in case of a launch; but it is just best to keep this automation active and running to make the most of the leads generated through the free course.
Implement This LearnDash Tutorial Today!
Now that you've seen how you can make the most of the free courses designed in LearnDash, create one for your business and generate qualified leads.
The opt-in funnels in FunnelKit (formerly WooFunnels) also allow you to scan the contacts that entered the funnel and also analyze funnel performance - all within the same interface.
So don't wait around any longer. Instead, create courses in LearnDash and offer them to your audience using the funnels built in FunnelKit (formerly WooFunnels).
Editorial Team
July 7, 2026Are you looking for WooCommerce checkout optimization hacks to streamline your users' shopping experience? 7 out of 10 shoppers who reach a WooCommerce checkout leave without paying; according to Baymard...
Editorial Team
July 6, 2026A WooCommerce order form lets customers select multiple products, set quantities, and choose variations from a single page instead of visiting individual product pages. There are two ways to add...
Editorial Team
July 6, 2026The Bricks WooCommerce builder is built directly into the Bricks theme. Activate the free WooCommerce plugin, and Bricks unlocks more than 30 store-specific elements plus visual templates for every part...


