
Importing contacts into FunnelKit Automations is just a matter of few clicks. You can import contacts from various sources such as a CSV file, WordPress and WooCommerce into this WordPress marketing automation plugin.
Since FunnelKit Automations communicates very well with your WooCommerce store, it allows you to import all your completed orders.
Once imported, you can view rich contact profiles and in-depth analytics, which no other CRM let's you do.
In today’s post, we will show you how to import contacts from various sources. You’ll also learn how to export and download these contacts for number crunching.
Table of Contents
- 1 Managing Contacts in FunnelKit Automations
- 2 How to Import Contacts in FunnelKit Automations
- 3 Import Contacts from CSV
- 4 Importing Contacts from WordPress
- 5 Importing Contacts from WooCommerce
- 6 Viewing the Imported Contacts
- 7 How to Export Contacts from FunnelKit Automations
- 8 Download the Exported List
- 9 You're All Set to Import & Export Contacts
Managing Contacts in FunnelKit Automations
According to HBR, one of the most challenging tasks to manage for any business is - syncing the contacts.
Often with WooCommerce stores, you need to have a separate CRM plugin to manage your contacts. You have to keep switching from one interface to another to study your contacts and run the business.
But with FunnelKit Automations, that's not the case anymore.
You can access your contacts and manage them - all from within WordPress itself.
Also, you get access to an in-depth contact profile. You can study their AOV, revenue generated, the last email open/click rates, and so much more.
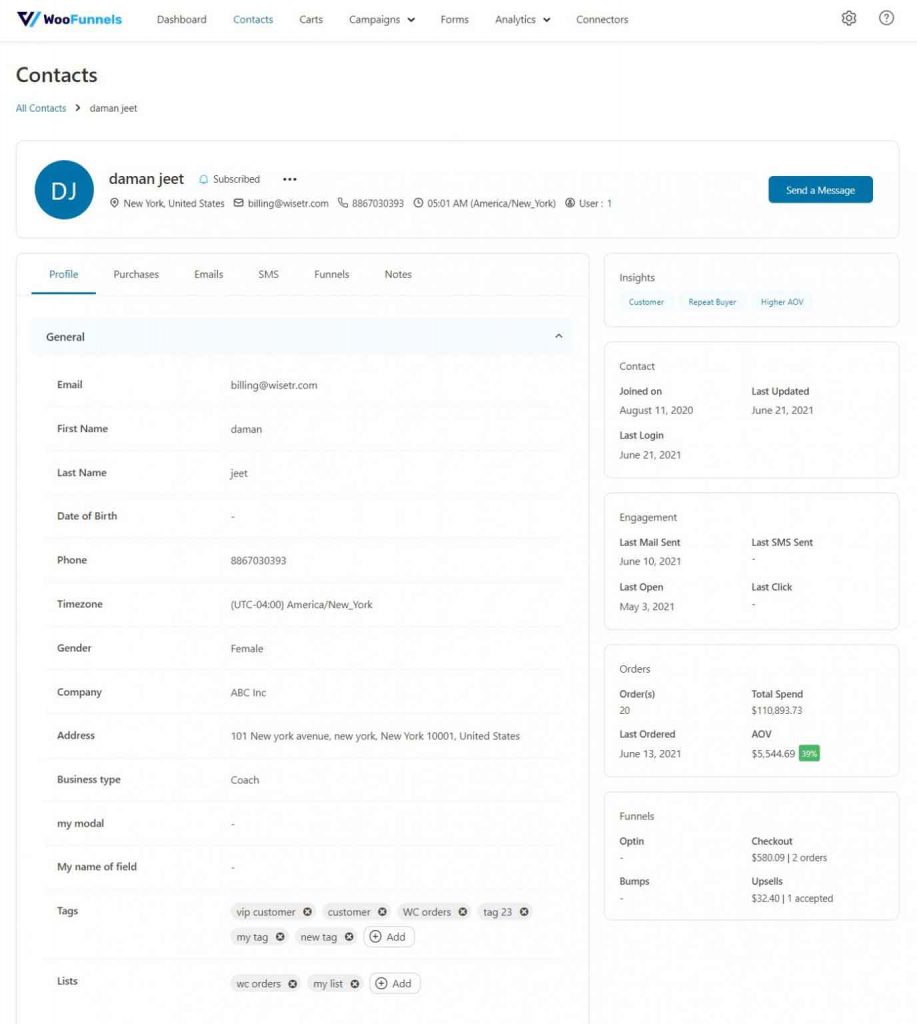
You can have unlimited contacts in your account without the need to upgrade to a higher plan as your list of contacts keeps increasing.
How to Import Contacts in FunnelKit Automations
At the time of writing this post, FunnelKit Automations allows you to import contacts from three sources:
- CSV Files
- WordPress
- WooCommerce
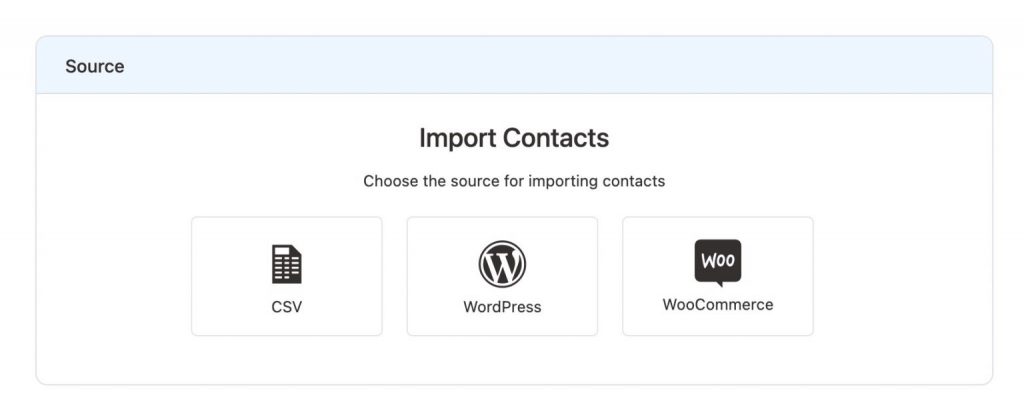
Let’s discuss each of these modes in detail.
Import Contacts from CSV
If you have a CSV file stored on your device, you can always import the contacts saved in that file to FunnelKit Automations.
Just follow these steps:
Step 1: Click on Import
Go to FunnelKit Automations > Contacts to view the list of all your contacts in one place.
If you’ve just started on FunnelKit Automations, you may not have any contacts saved here, but that is why we are going to import them.
Click on the import icon on the top right corner of the screen.
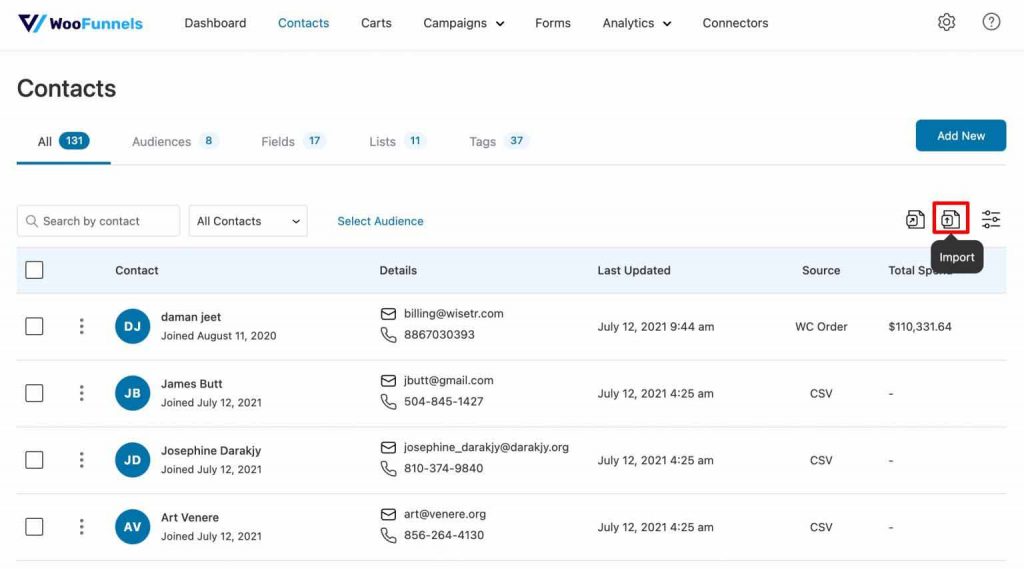
Step 2: Select a Source
From the three source options shown on the page, choose CSV.
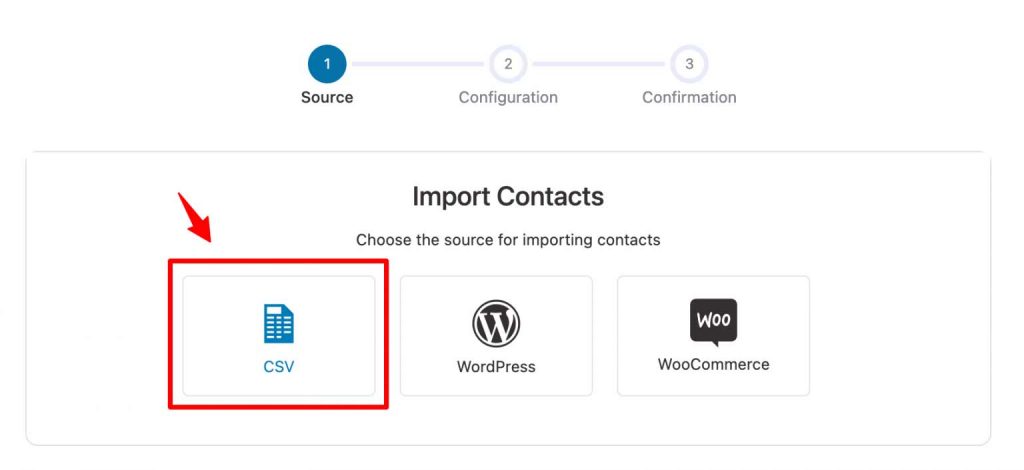
Before you upload the CSV file, make sure of the following:
- Email is a mandatory field to import
- The country code should be in the form of a two-digit ISO Code
- Tags should be separated by commas
Step 3: Upload the CSV File
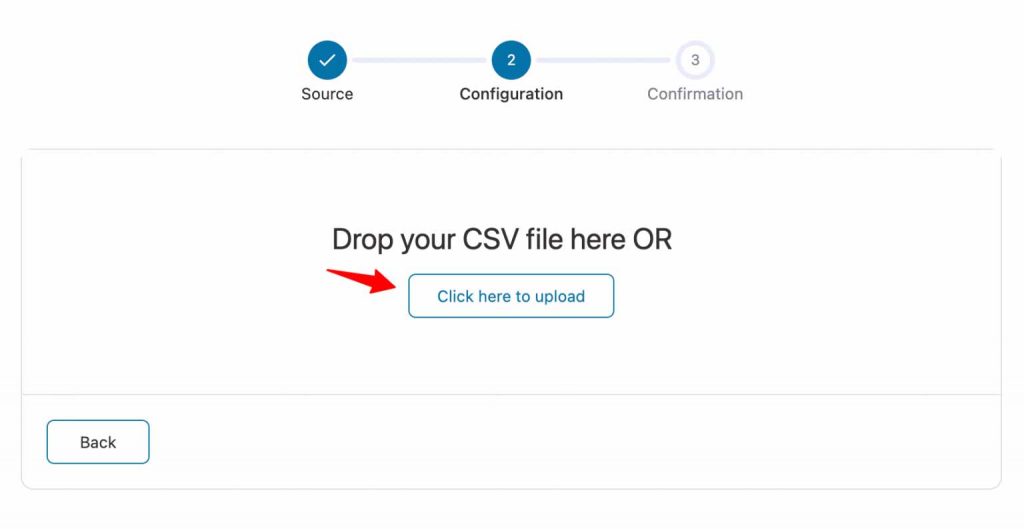
On the next screen, you’ll be asked to upload the desired CSV file.
You can even drag and drop it in the designated area.
Step 4: Map the Fields
Mapping is a highly crucial step of importing contacts. You want all the fields to be mapped correctly in FunnelKit Automations to have no error in data capturing and storage.
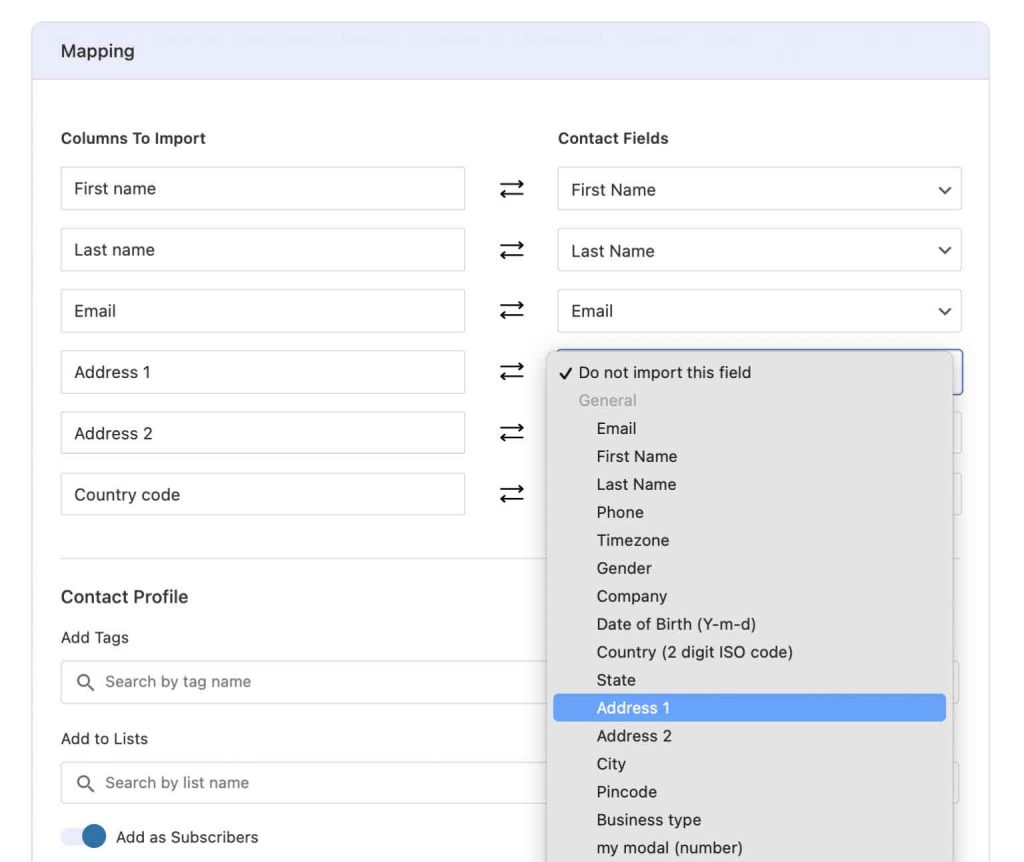
In case you don’t find the exact field to map in FunnelKit Automations, you can always create new custom fields to map the contacts without any error.
Step 5: Adding Tags and Subscribing to Lists
Once you’re done tagging, you can add tags to the contacts being imported, like - “CSV Import”, or add the contacts to a list.
You can even update your existing contacts with new information if that is the case and mark them as subscribers.
Finally, FunnelKit Automations even lets you run automations related to the tags and lists mentioned in the steps above.
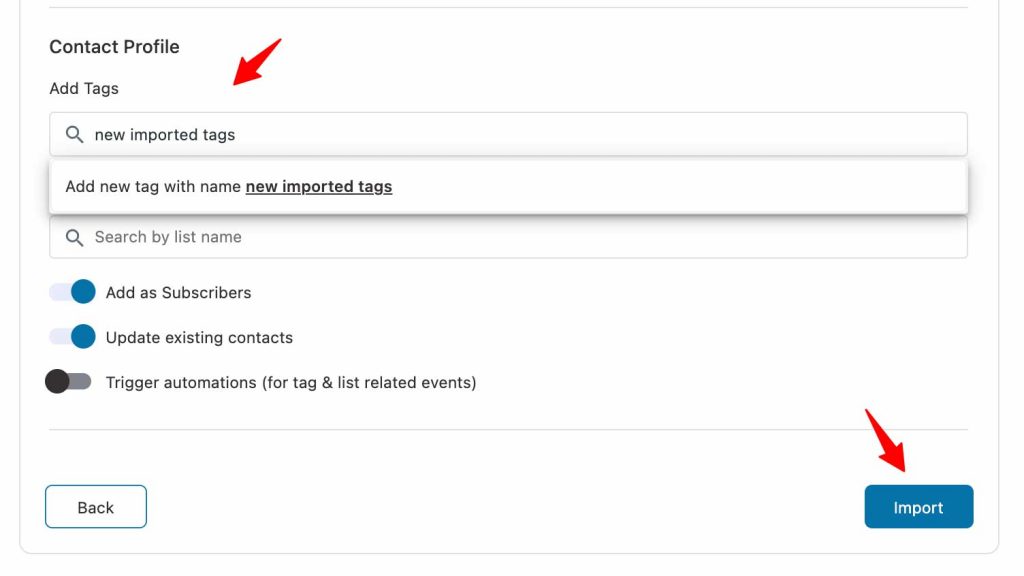
Just select the settings you want and click on Import.
On the final confirmation page, you’ll be able to note the number of contacts imported, skipped, and failed.
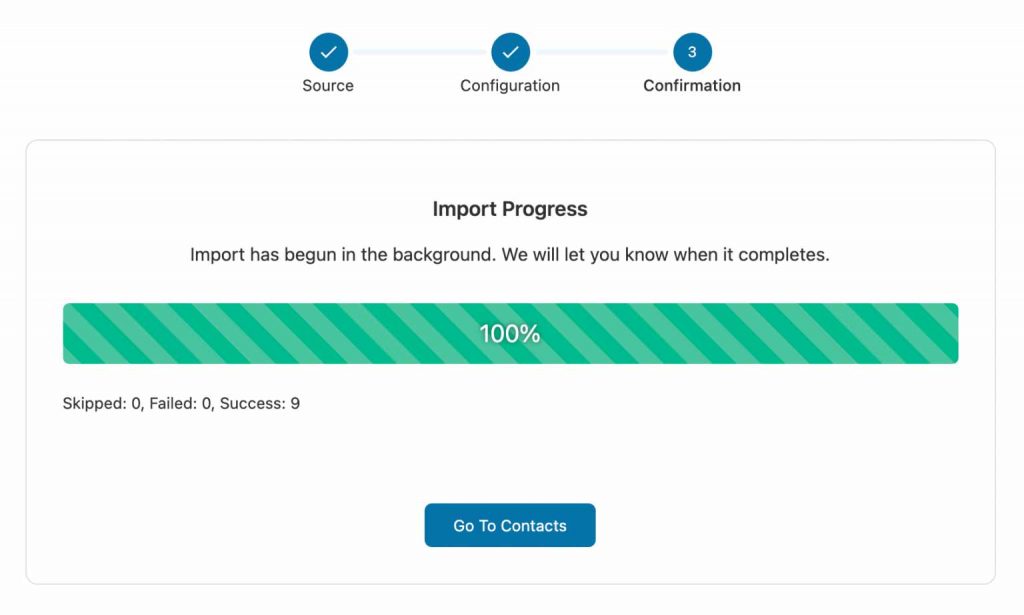
To view the added contacts, click on the Go to Contacts button.
Importing Contacts from WordPress
Similar to CSV Files, you can import contacts from WordPress. Let’s give it a look.
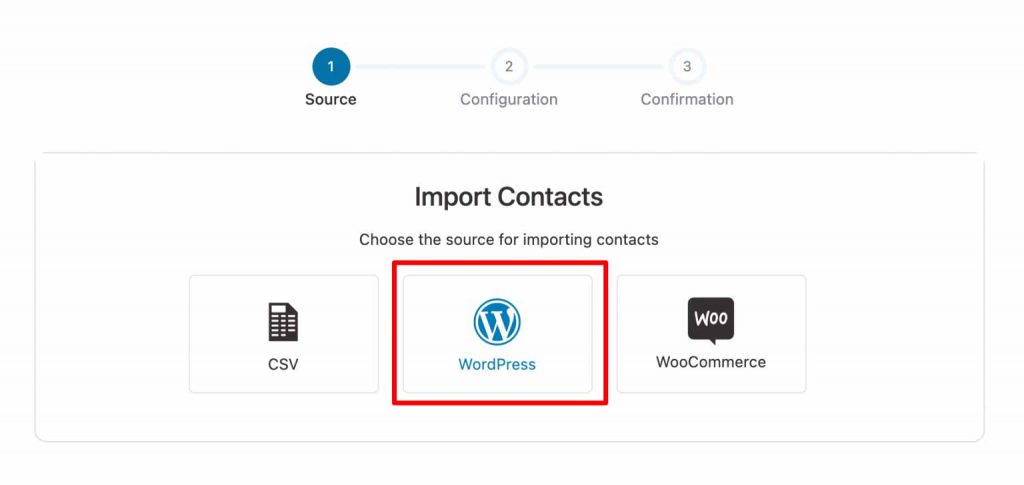
Step 1: Select Source
Instead of CSV, this time, we will choose WordPress.
Step 2: Configure the Settings
Here you can select which user roles you wish to import and which ones you want to skip.
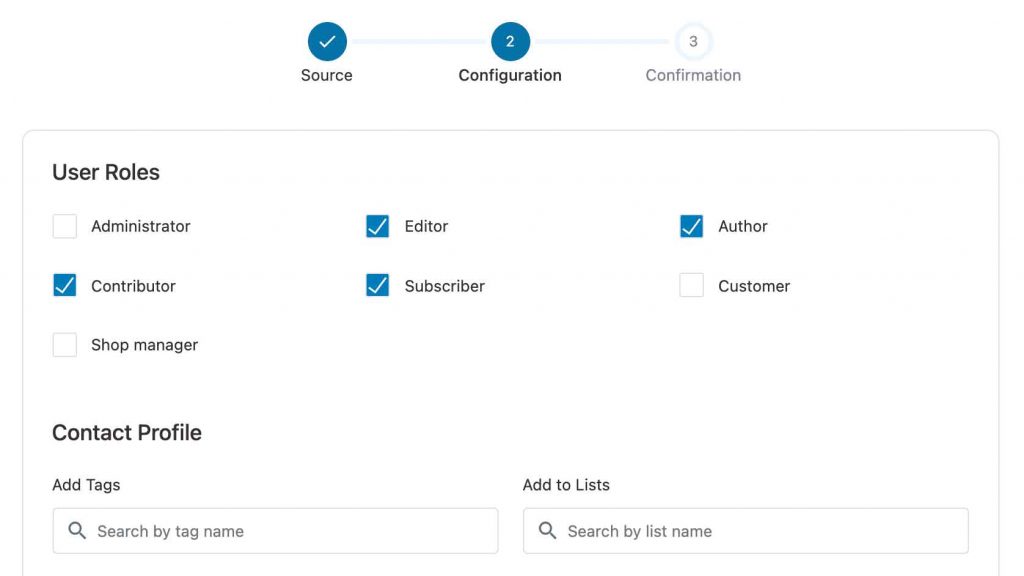
Note: Whichever role you pick, all contacts marked to that role will be imported to FunnelKit Automations.
Step 3: Adding Tags and Subscribing to Lists
Just like with CSV files, configure the rest of the settings, like adding tags or marking the users as subscribers upon import.
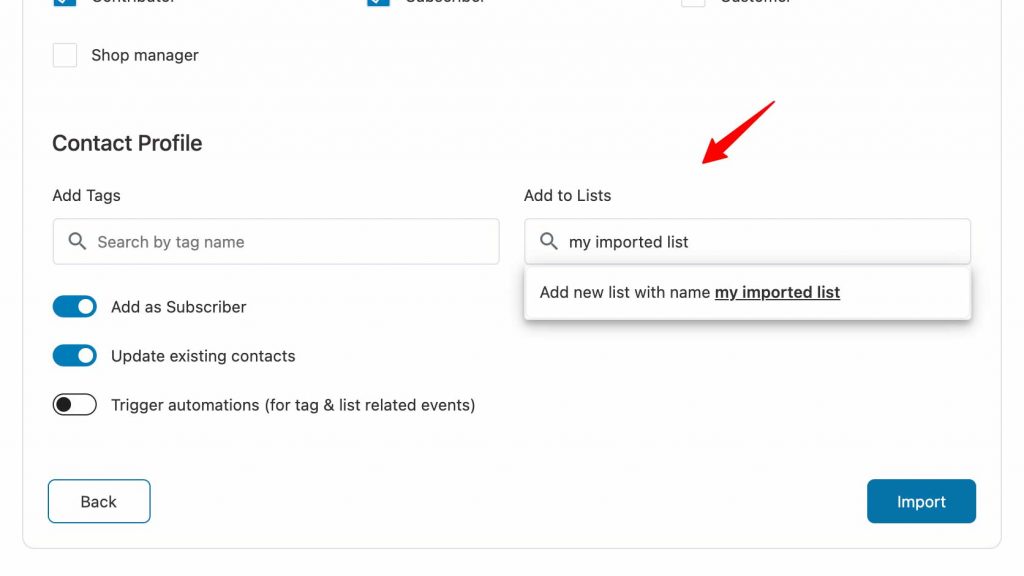
Once you’re done, click on the Import button to begin importing contacts.
Importing Contacts from WooCommerce
Not just CSV or WordPress, you can even import your WooCommerce customers to FunnelKit Automations.
Note: FunnelKit Automations only imports the contact details of paid customers.
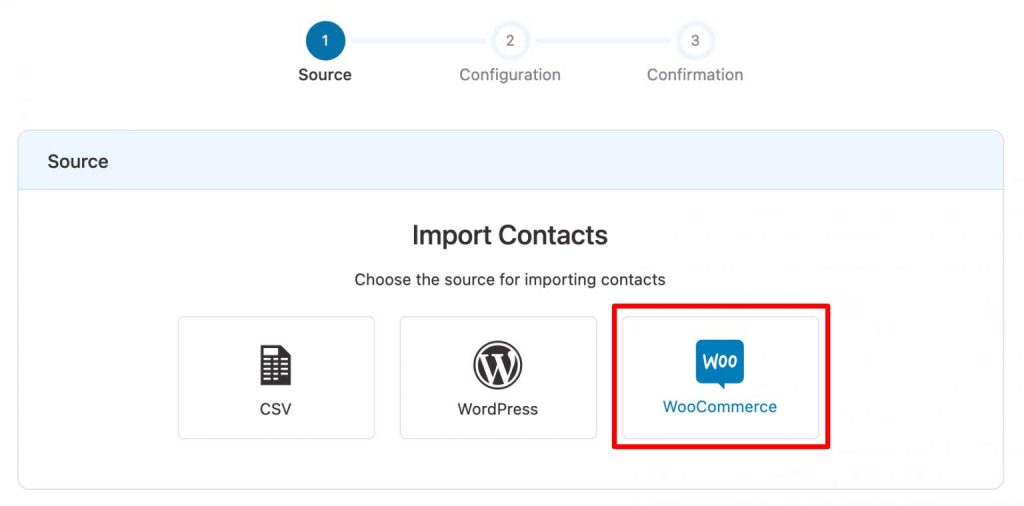
Step 1: Select Source
Select WooCommerce from the sources available.
Step 2: Configure the Settings
At the top, you’ll be notified of how many contacts are available for import.
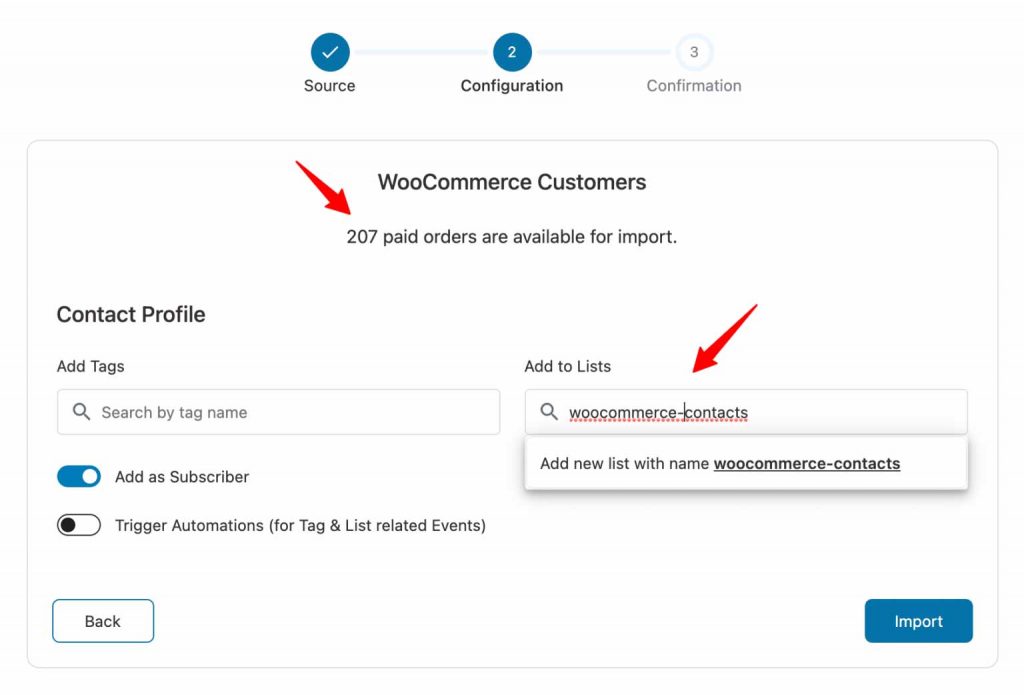
So, manage the tags, lists, and other settings before hitting Import.
Step 3: Confirmation
The final step is the confirmation step. You'll be shown the number of contacts imported, skipped, and failed.
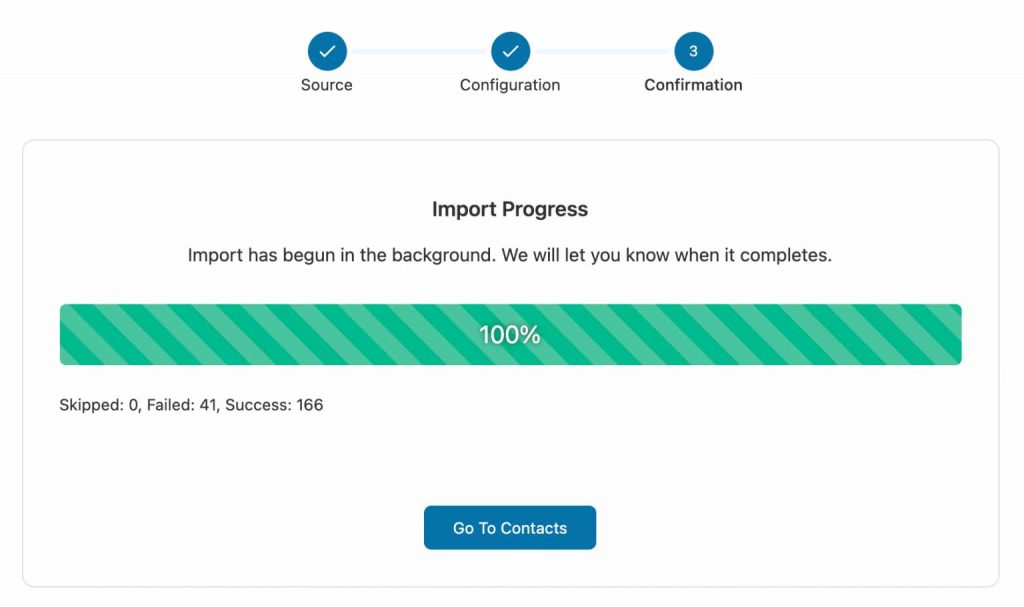
And that’s it! That’s how you can import contacts in FunnelKit Automations and use them to send out automation and broadcast campaigns.
These campaigns, in turn, will make your contacts more aware of your brand and urge them to buy from you, boosting your revenues.
Viewing the Imported Contacts
All of the imported contacts can be viewed in the Contacts section of FunnelKit Automations. You'll be able to see the contacts against other details relating to it, like - source, last updated, total spends, etc.
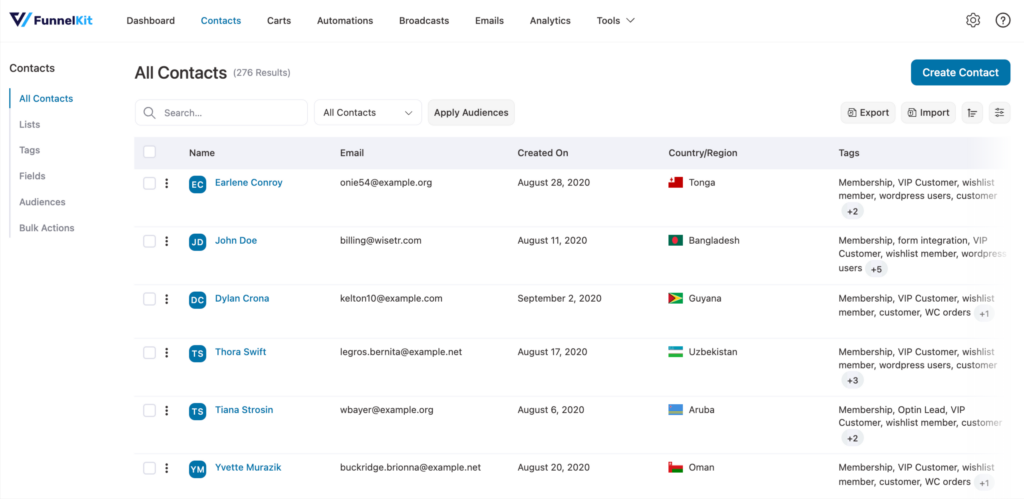
One of the most powerful aspects of FunnelKit Automations is its ability to segment contacts in dynamic ways other than just using tags and lists.
Filter contacts on various parameters like - tags, lists, WooCommerce purchase, Contacts Details, Custom Fields, Geography, and Engagement.
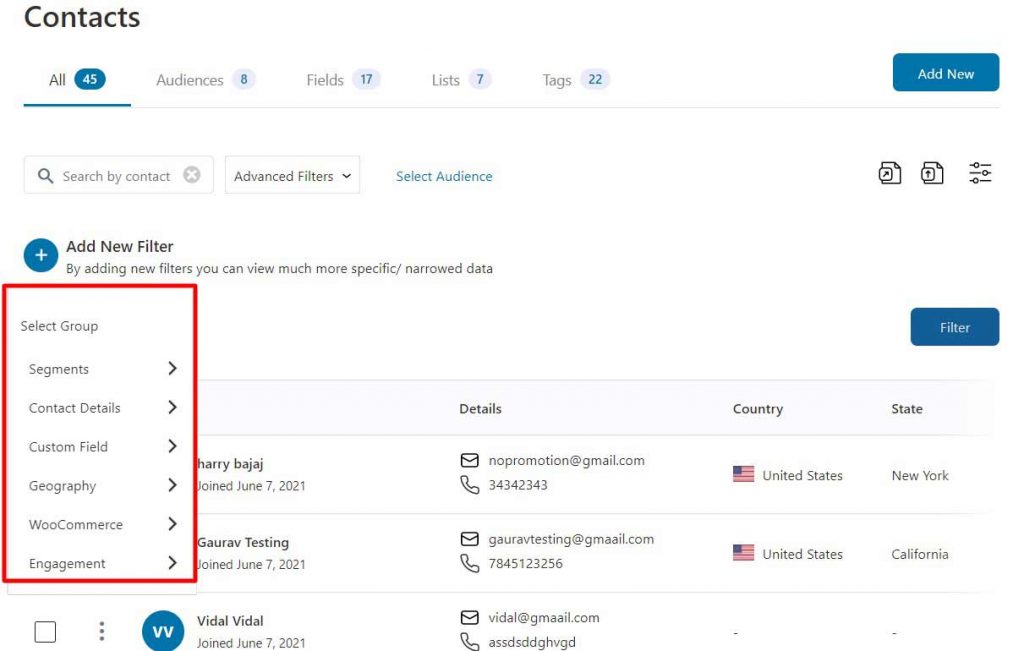
Just select the criteria you want, define the details and apply them to your contact list to filter and show only the relevant contacts.
You can even apply more than one filter at a time. For example, if we wish to segment contacts who have purchased Sunglasses and live in Canada, we can do that:
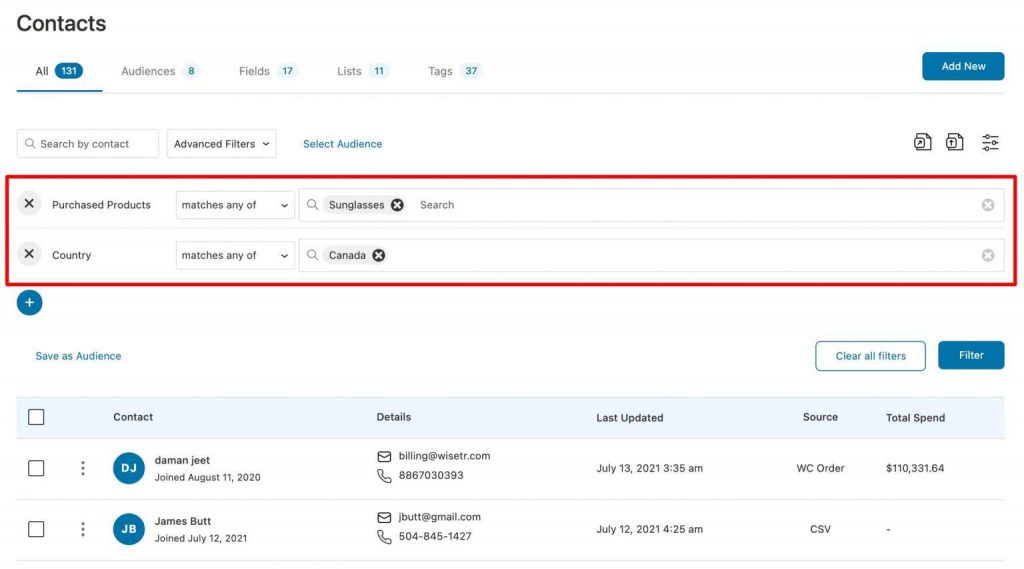
And that’s it! Just click on Filter, and you’ll have a list of contacts that live in Canada and have purchased sunglasses from you.
How to Export Contacts from FunnelKit Automations
If you ever need to export contacts and mind the data, you can do so. Export the contacts from FunnelKit Automations and download them locally in a CSV file.
It is a very simple and intuitive process that we’re sure you’d find helpful.
Watch this video to see how you can export contacts from FunnelKit Automations:
To export contacts from FunnelKit Automations, first, you need to go into Contacts and click on the Export icon.
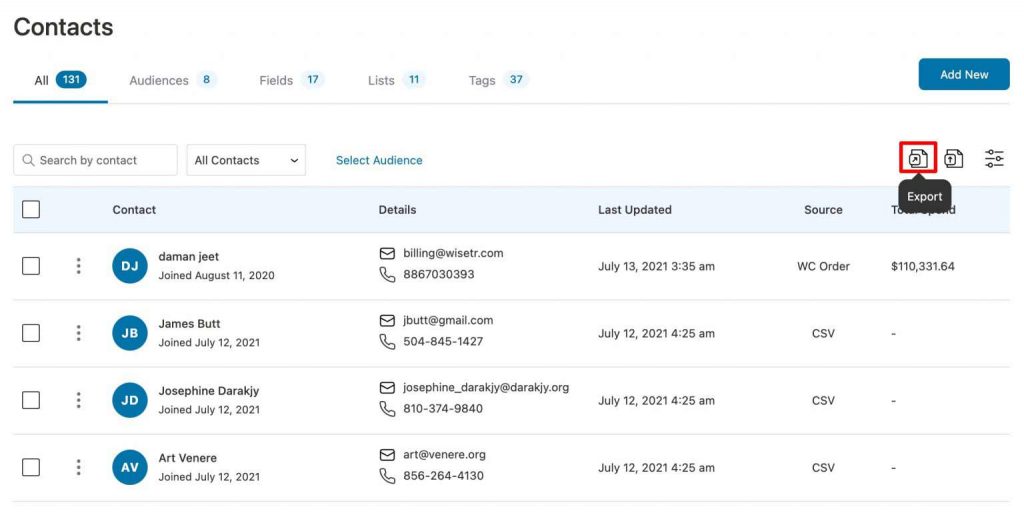
Then click on Add New on the next page.
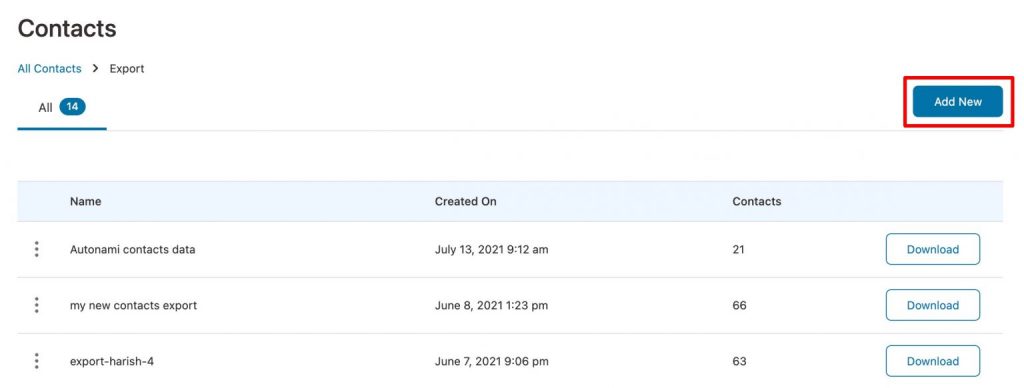
Step 1: Select Fields to Export with Contacts
Now name your new export and define the fields you wish to export.
Click on the checkboxes on the fields you want to keep and export and uncheck the ones you don’t want.
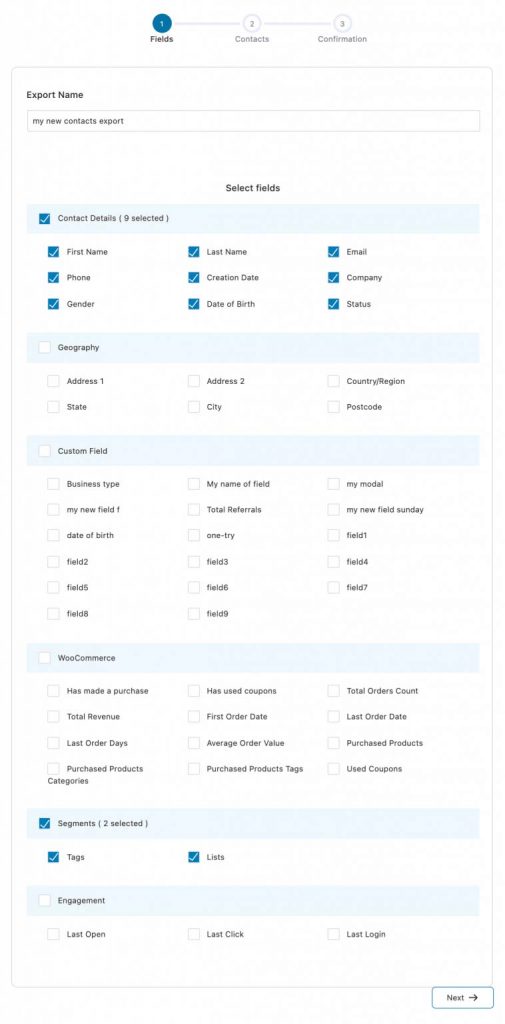
Checking the heads of the fields like Contact Details, Geography, WooCommerce, etc., would automatically select all the sub-heads under them. If you do not wish to import any specific field from there, you’d have to uncheck them manually.
When you’re done selecting the fields you want to be exported, click on Next to move to the next step.
Step 2: Filter Contacts or Import All
FunnelKit Automations not only allows you to export your entire contact list but also group a specific few contacts that meet specified conditions to export.
You can segment your contacts in two ways before exporting:
- Add a Filter
- Select an Audience
You can either add a new filter and group contacts based on tags, lists, purchase history, and more.
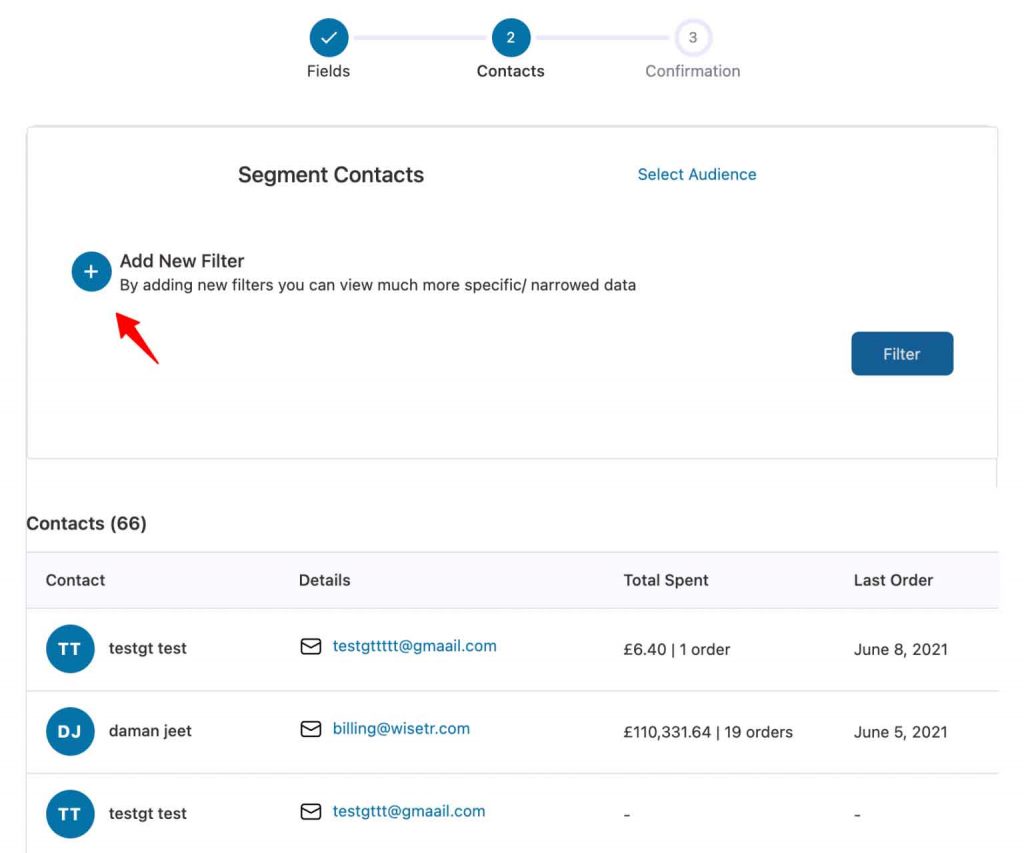
Or you can select a pre-saved audience that has the segmenting conditions already saved. Just click on Select Audience and click on the one you wish to use.
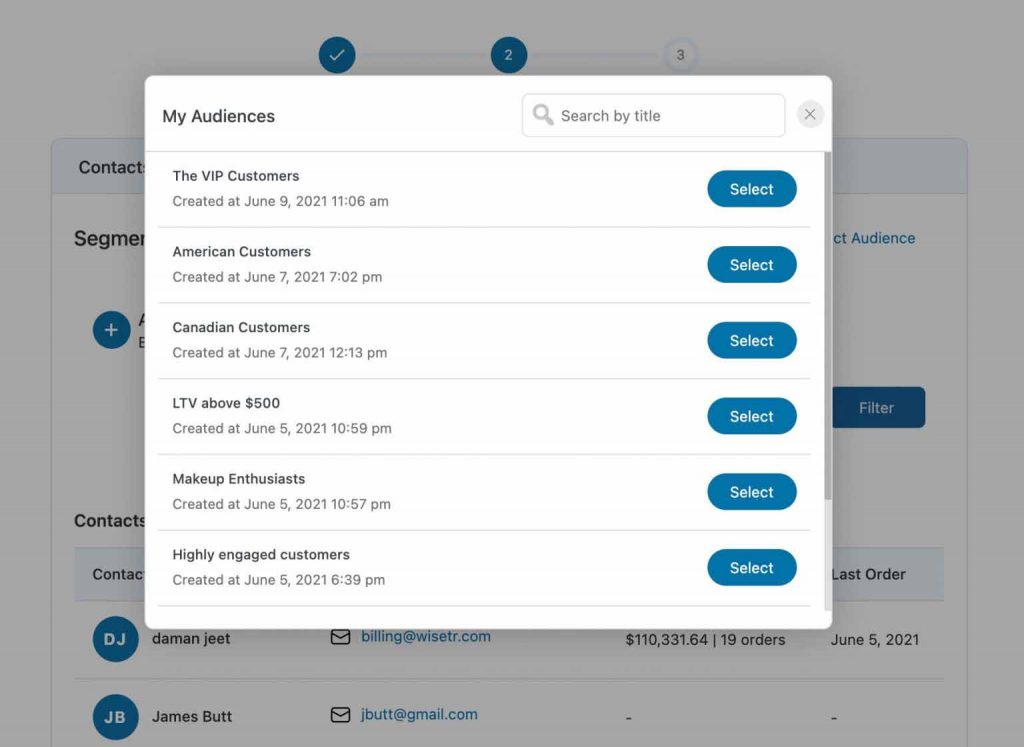
Then click Next.
Step 3: Confirm the Action
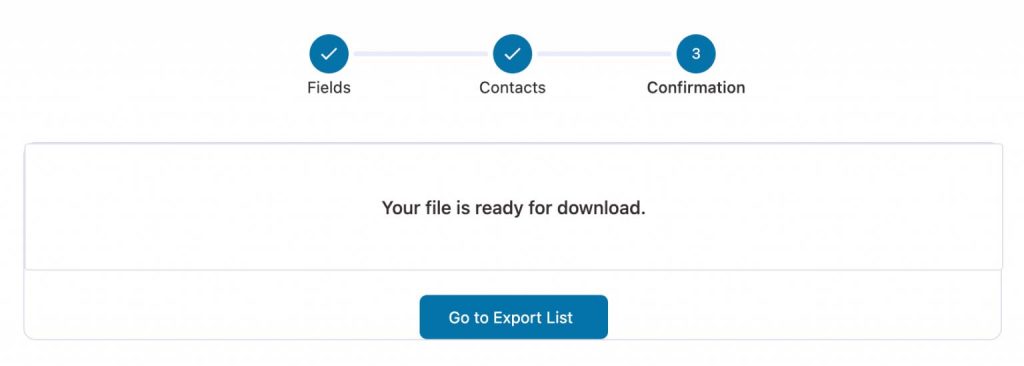
You’ll see the export confirmation in the final step and the button to Go to Export List. Click on it.
Download the Exported List
Once you click on the Go to Export List button, you’ll be taken back to the page that lists out all the exports.
Click on Download next to the contact export list that you’d just created in the first step.

All the contacts exported from FunnelKit Automations will then be downloaded on your device in CSV format.
And this is how you export contacts from FunnelKit Automations.
You're All Set to Import & Export Contacts
Now that you know that FunnelKit Automations has no contact limits and it is easy-peasy-lemon-squeezy to import and export contacts in and out of FunnelKit Automations, you have nothing to worry about.
With your contact list at your fingertips, reach out to targeted audiences with new product launch announcements, cart follow-ups, and more with absolute ease.
Don’t just go by our words. Try FunnelKit Automations for yourself, judge the difference, and make the switch like so many other WordPress users.

Editorial Team
February 17, 2026A WooCommerce auto apply coupon adds a discount to your customer's cart without them needing to type or paste a coupon code. Instead of relying on manual entry, the coupon...
Editorial Team
February 12, 2026First impressions matter, and in eCommerce, your welcome email is your first chance to shine. A WooCommerce welcome email is an automated message sent to new customers right after they...
Editorial Team
February 6, 2026With increasing competition and rising ad budgets, acquiring new customers is difficult. Forbes reports that the conversion rate for new customers is just 5%-20%. On the other hand, repeat customers...


