
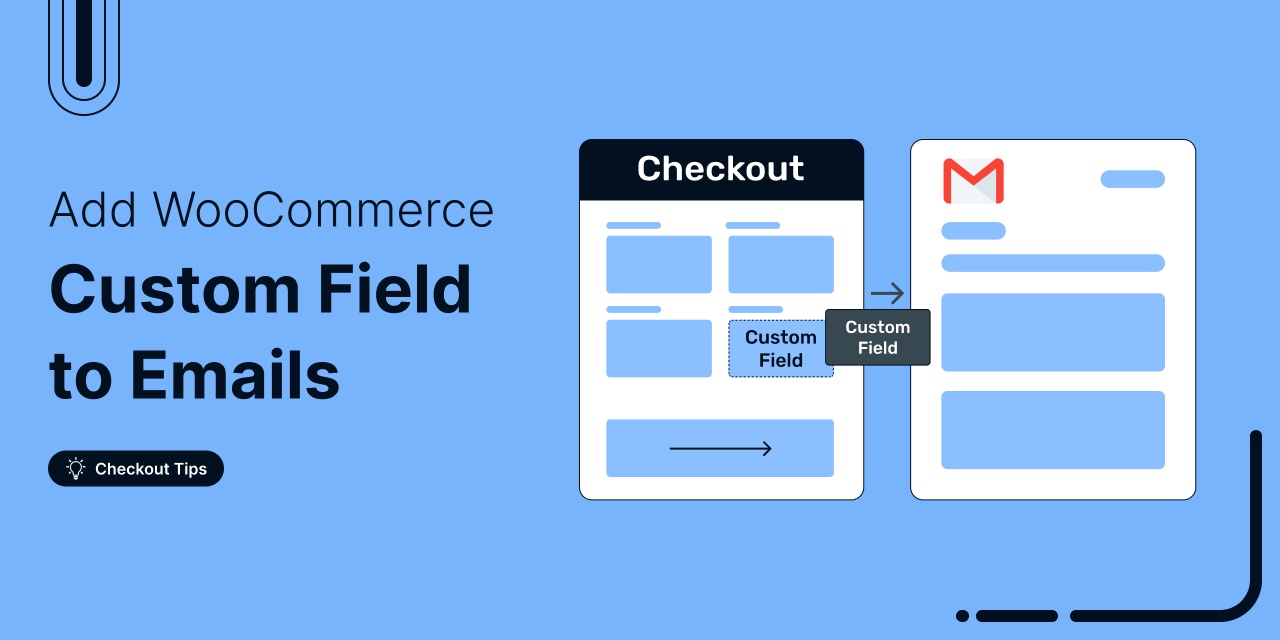
Customers missing key info in their order emails? That’s a problem.
The reason is simple. WooCommerce’s default emails only include basic order details like the order number, items, and totals. They leave out key custom fields such as delivery notes, VAT IDs, and other checkout data.
In this post, you’ll learn how to:
- Capture custom fields during checkout
- Include that data in WooCommerce email templates
- Display customer order notes in emails
- Insert third-party custom fields using hooks
And more, to make sure your customers get all the information they expect, right in their inbox
Table of Contents
- 1 First, Collect Data Using Custom Fields to Add to WooCommerce Emails
- 2 How to Add Custom Fields to WooCommerce Emails?
- 3 How to Add Customer Order Notes to WooCommerce Email Notifications?
- 4 How to Add Third-Party Custom Field Data to WooCommerce Email?
- 5 How to Add a Custom Field to WooCommerce Email Using Hooks
- 6 More Questions About Adding Custom Fields to WooCommerce Emails
- 7 What types of custom fields can I add to WooCommerce order emails?
- 8 Is there a security concern when adding custom fields?
- 9 How can I test my custom fields in order emails before going live?
- 10 Add Custom Fields to WooCommerce Emails for Effective Communication!
First, Collect Data Using Custom Fields to Add to WooCommerce Emails
Before you can add custom data to WooCommerce emails, you need to collect that data at checkout using a custom field. WooCommerce emails can’t display custom information unless it’s first captured during the order process and saved in your store.
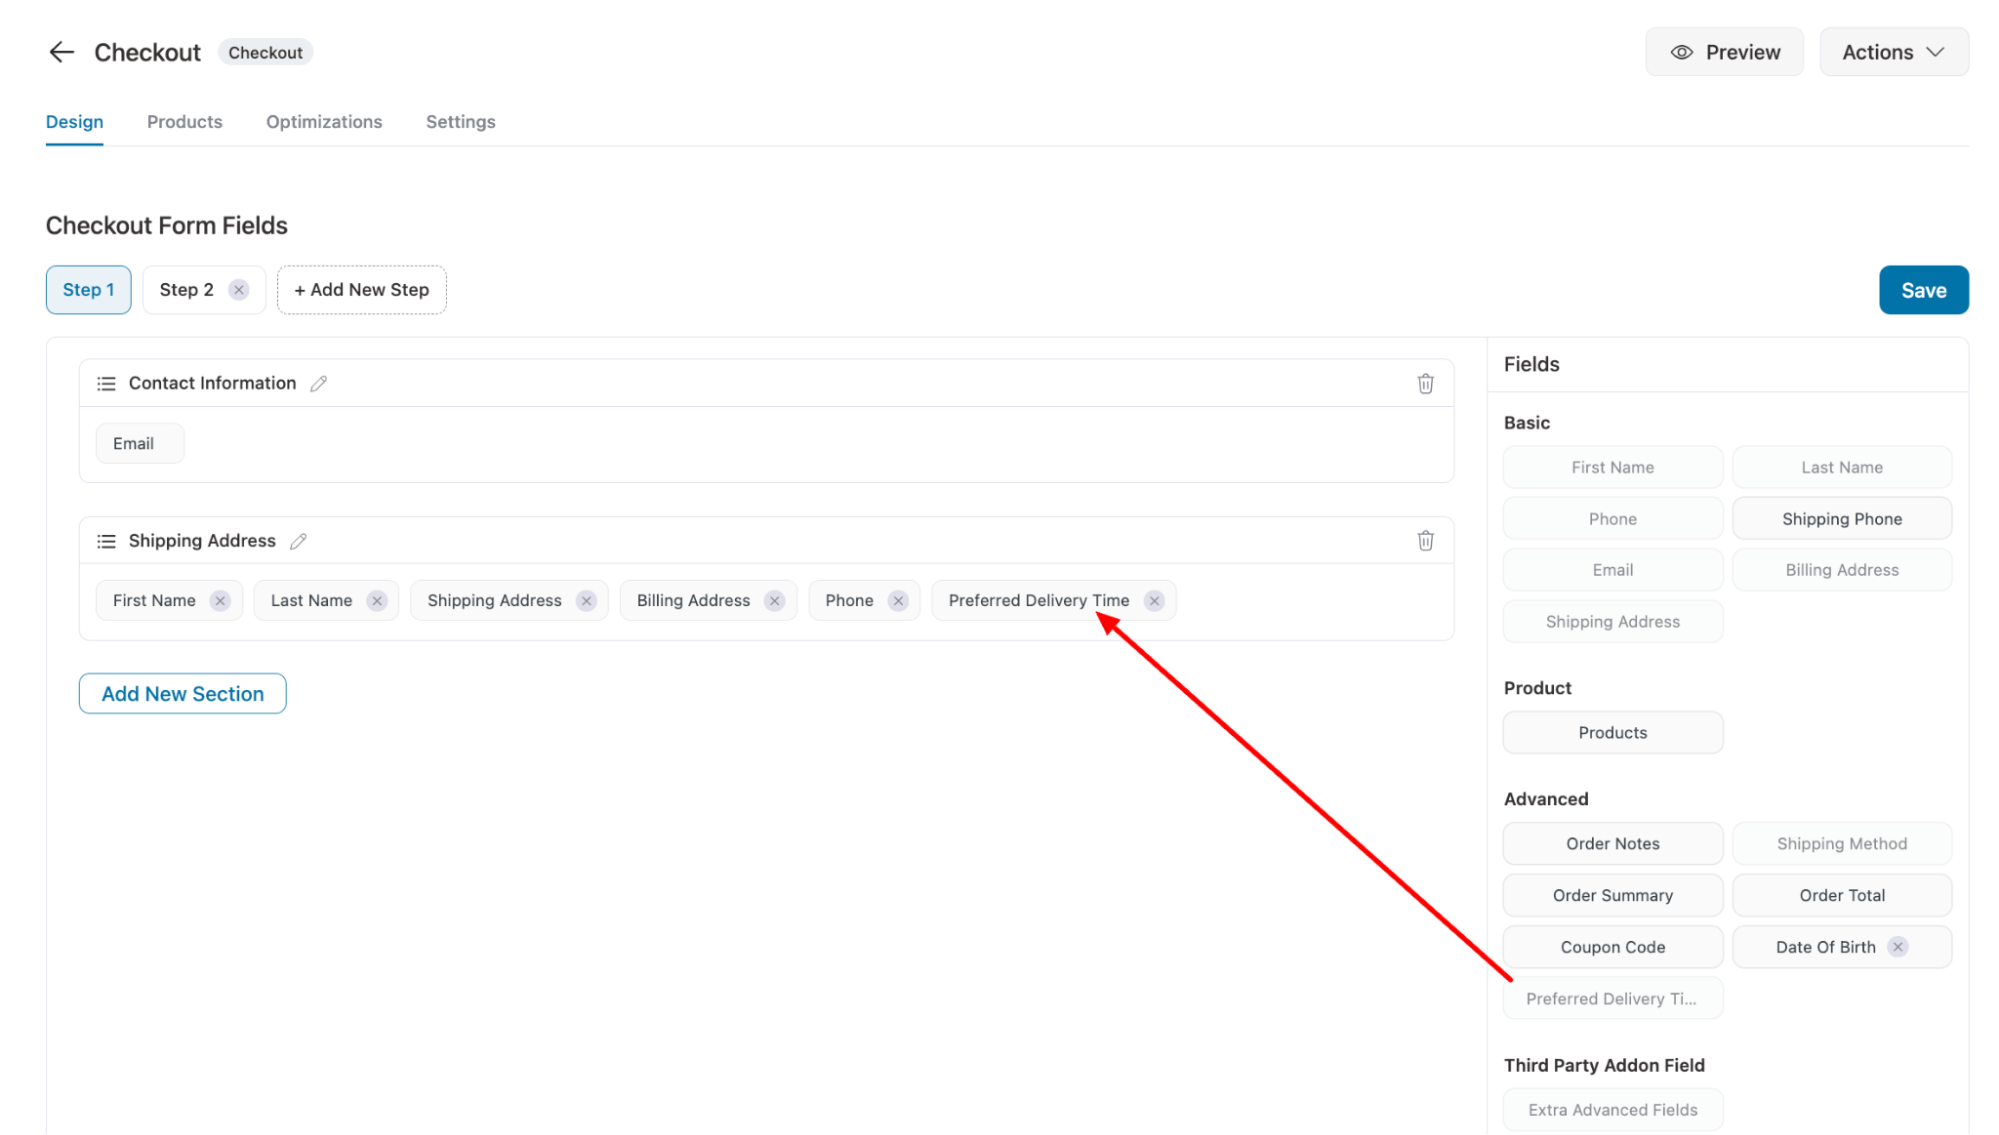
In this section, we’ll walk you through how to add a custom field to the checkout page to collect extra info, then how to include that data in your WooCommerce emails.
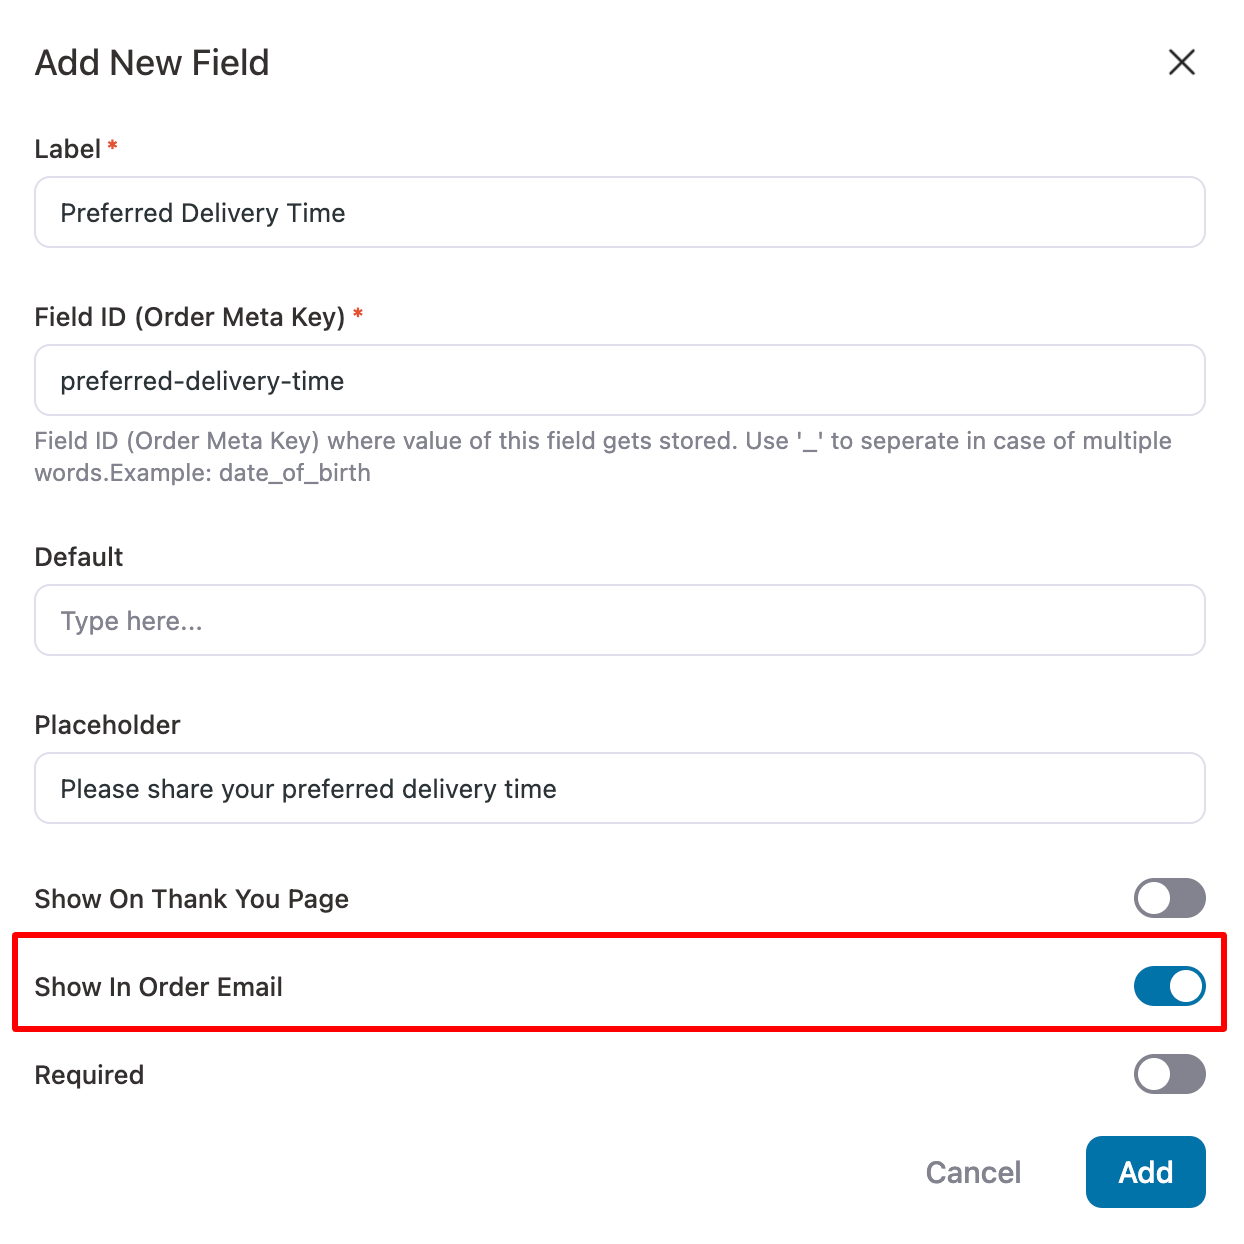
Then customize the checkout page and create any custom field you want. Based on your needs, you can create different types of WooCommerce custom fields, such as single-line text, Checkbox, Radio, Dropdown, etc.
Choose the type of field you want and enter the required details like label, field ID(Order Meta Key) etc.
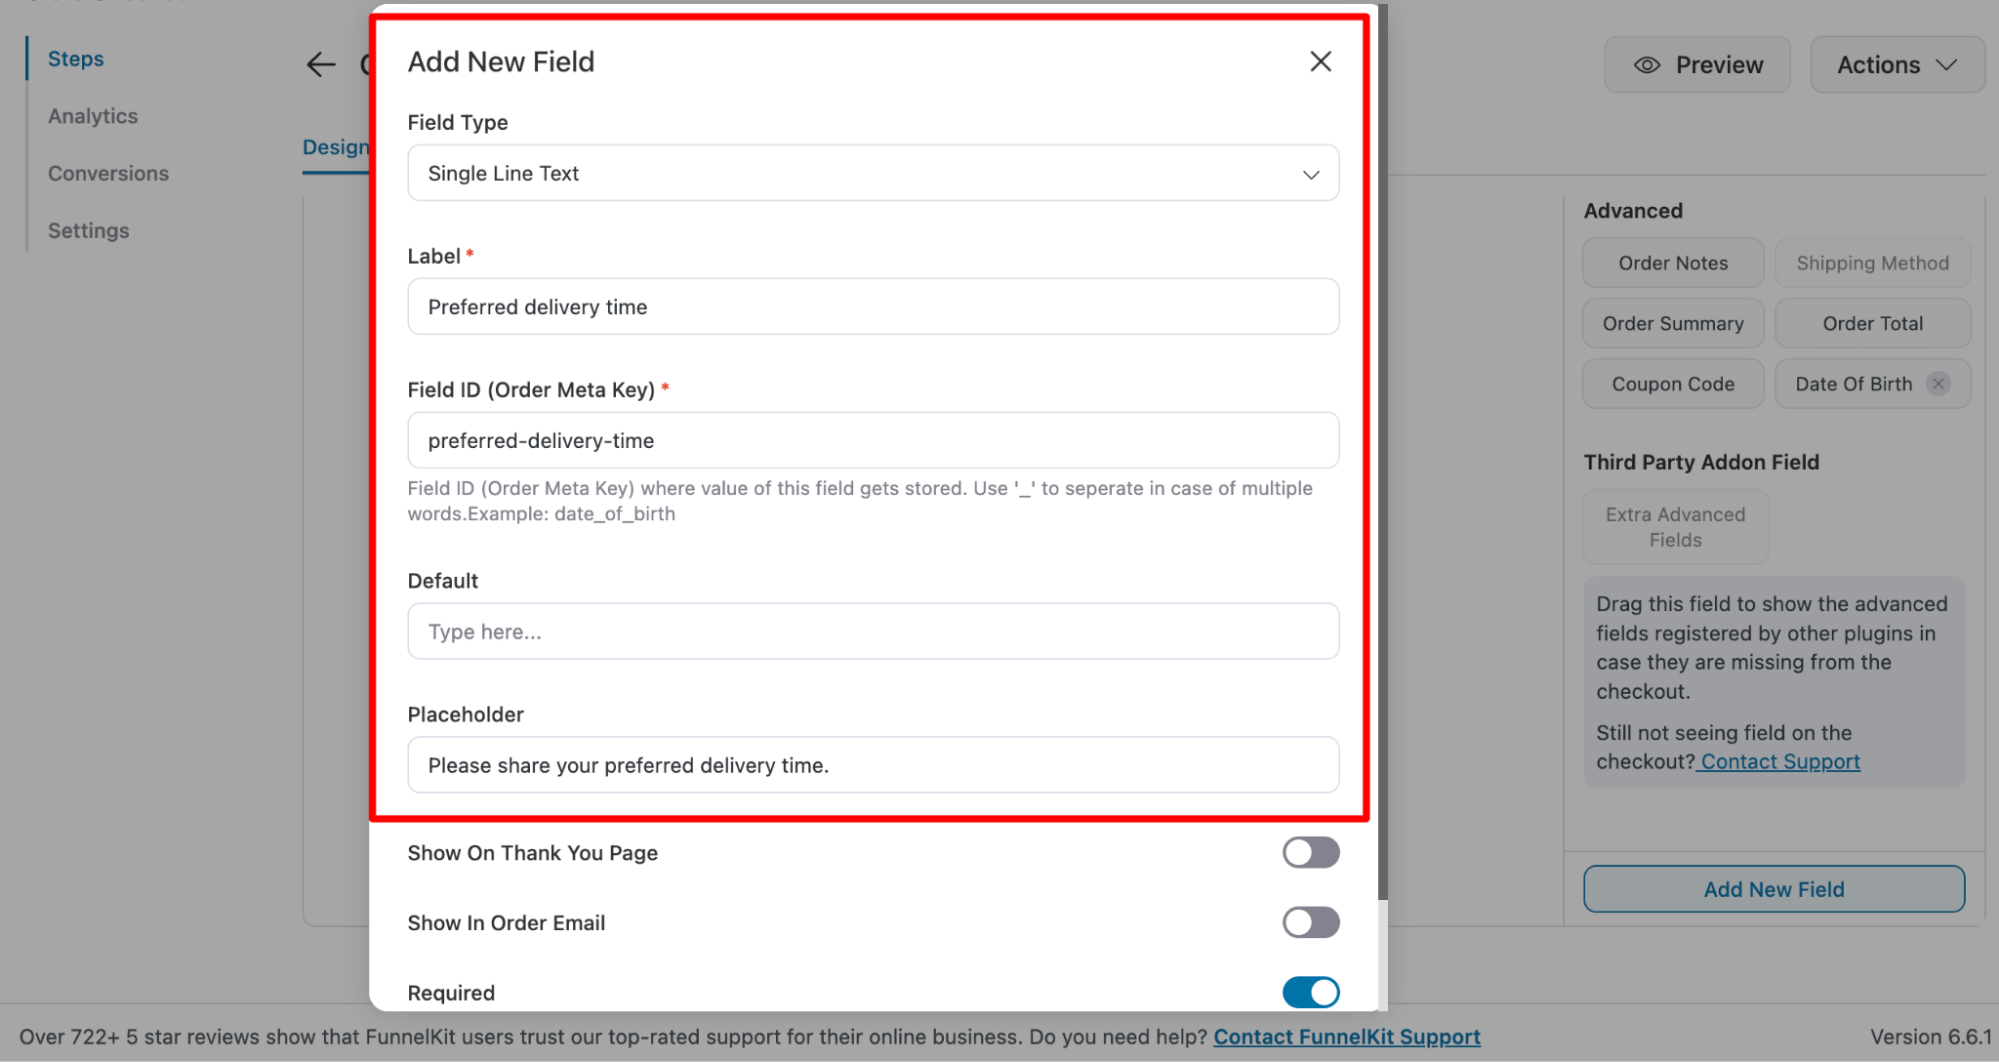
Toggle on “Show In Order Email” to include your custom field in WooCommerce order emails.
After creating the emails, drag and drop the checkout page. And must make sure the new checkout page is activated.
FunnelKit Funnel Builders is compatible with many other plugins as well; you can easily collect VAT numbers, extra fields for Brazilian shoppers, etc.
Now that you know how to collect custom information, let’s check how you can add it to WooCommerce order emails.
How to Add Custom Fields to WooCommerce Emails?
Once you collect the custom information, you can add it to all the WooCommerce transactional emails.
However, if you want a code-free solution, you will need a separate plugin, and we recommend using FunnelKit Automations.
With this email customizer tool, you can easily add custom fields to all the order-related emails. Additionally, you can replace all the default order emails with custom ones and redesign them using an intuitive visual builder.
Here, we will outline the process for adding custom fields to order-processing emails. You can follow the same process to add custom fields to any WooCommerce order emails.
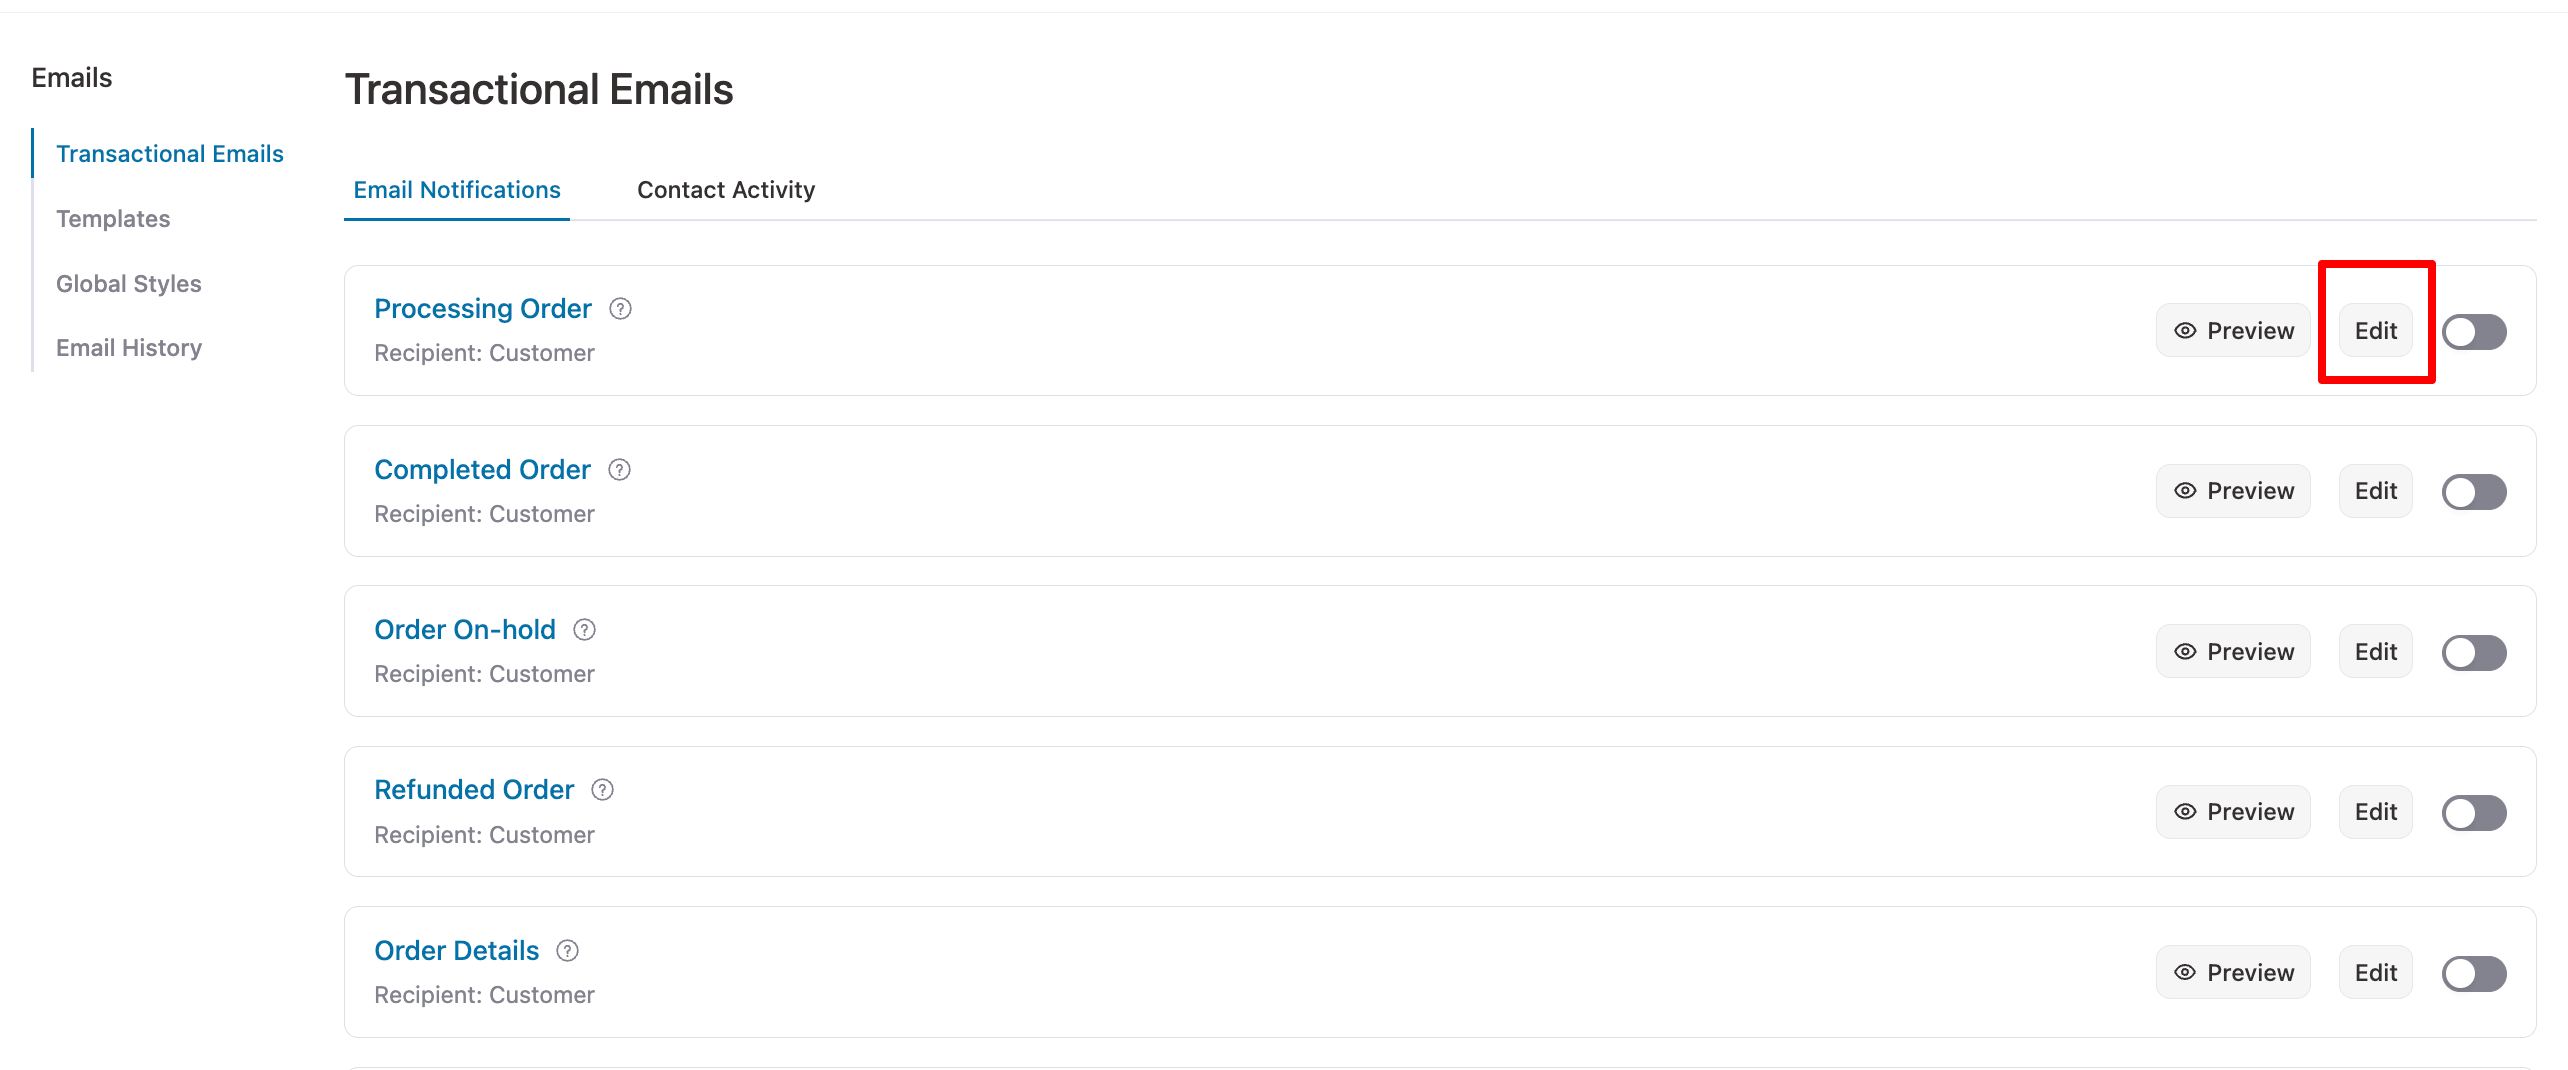
Step 1: Navigate to WooCommerce emails
Navigate to FunnelKit Automations ⇒ Emails and click on the ‘Transactional Emails’ section.
You’ll see 12 transactional emails you can customize, including: new order, completed order, refunded order, cancelled order, failed order, reset password, and more.
Click the Edit option for the email you want to add the custom field to. Here we are going with the Processing email.
You gett a pre-built email template that's completely customizable.
Step 2: Add the custom field
You can follow the process we showed above to collect custom data at checkout. However, to add the information in the email, you need to use an order data merge tag.
For this first copy, the field ID of the custom field.
Now, go to the email customization options and open the merge tag.
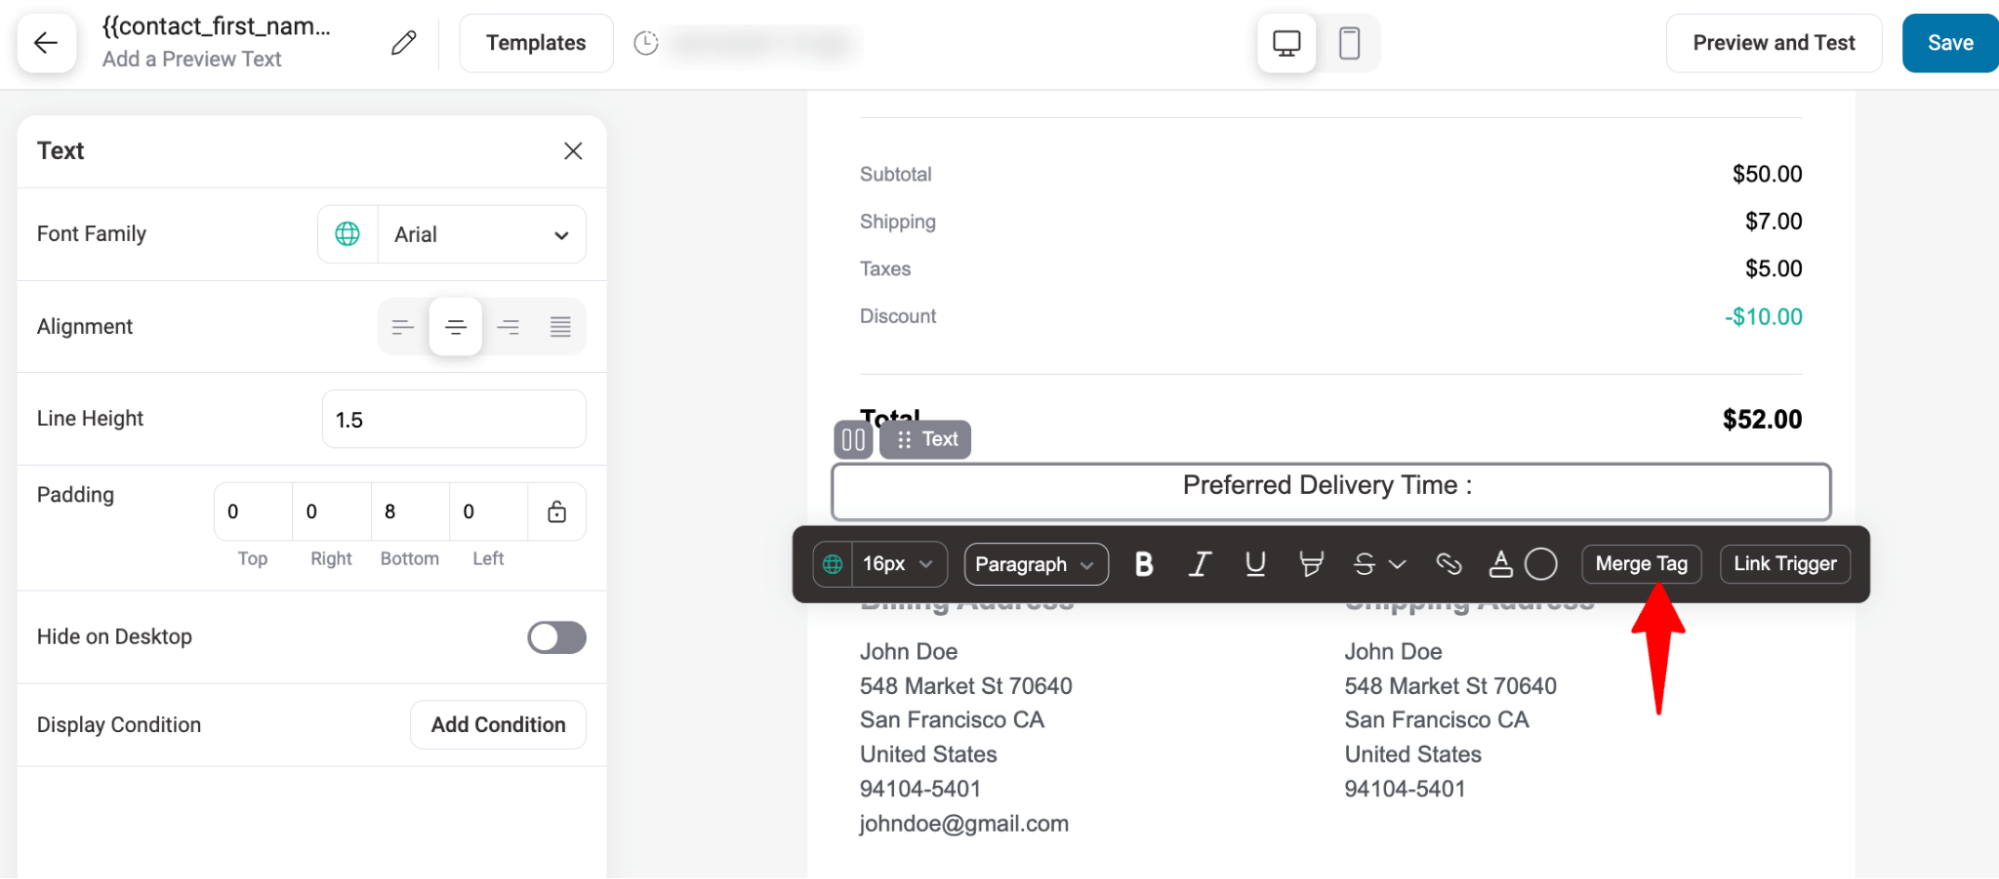
Here, search for the Order Data merge tag and hit the settings icon.
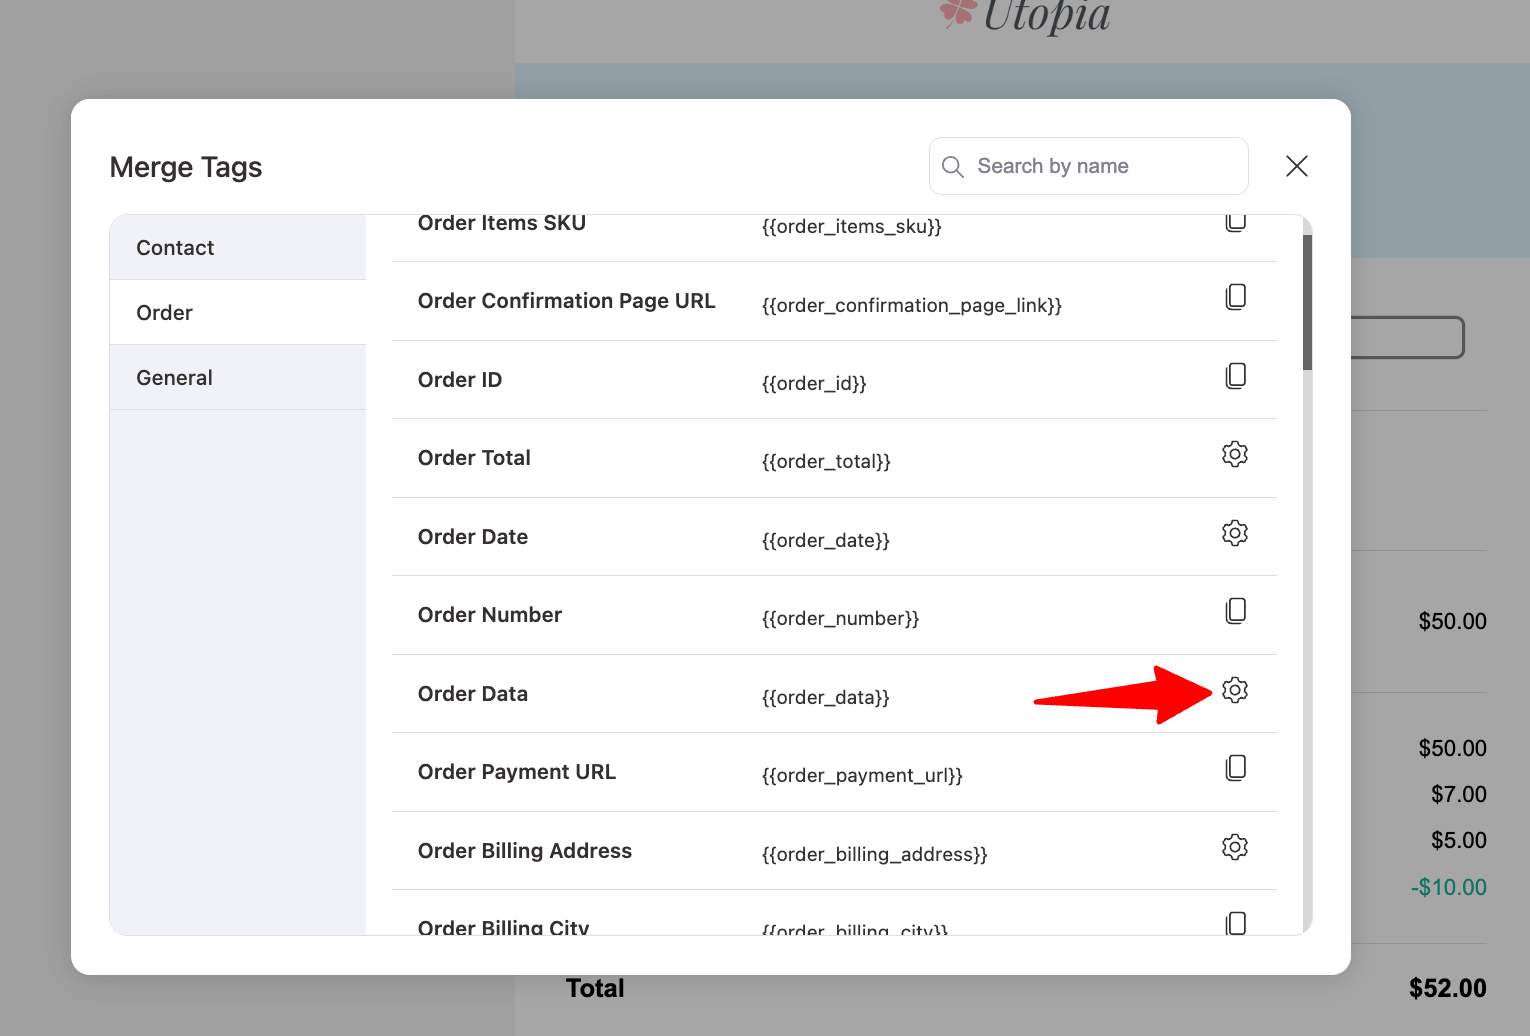
Here, paste the copied Field ID in the Meta Key field, choose the Meta Field Type, and hit “Copy” to copy the value.
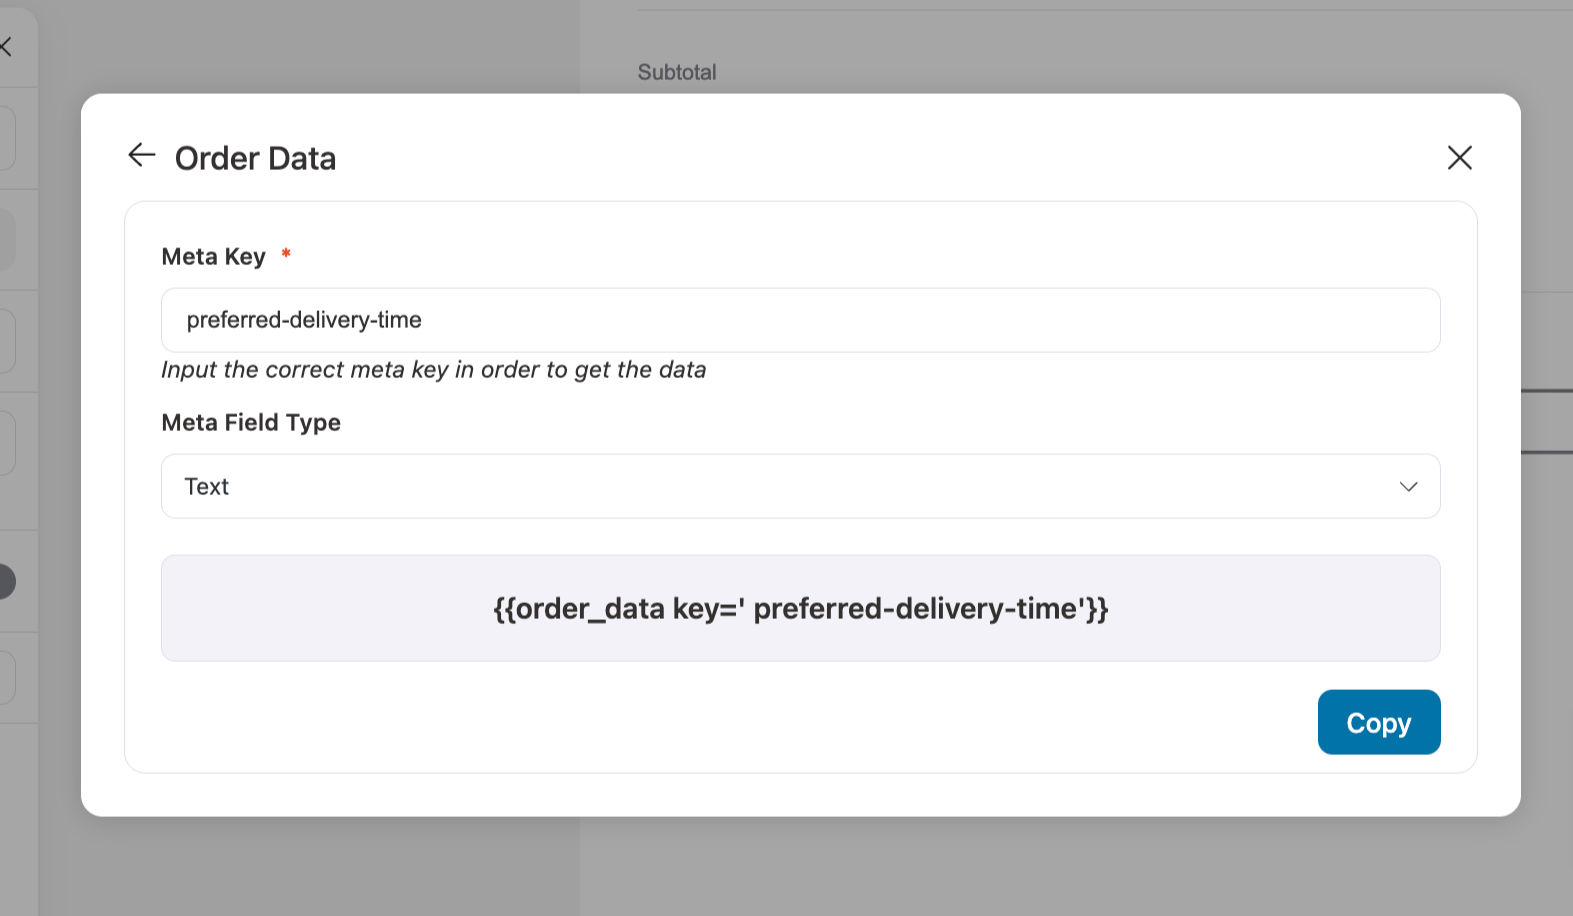
Now, paste the value in your email body.
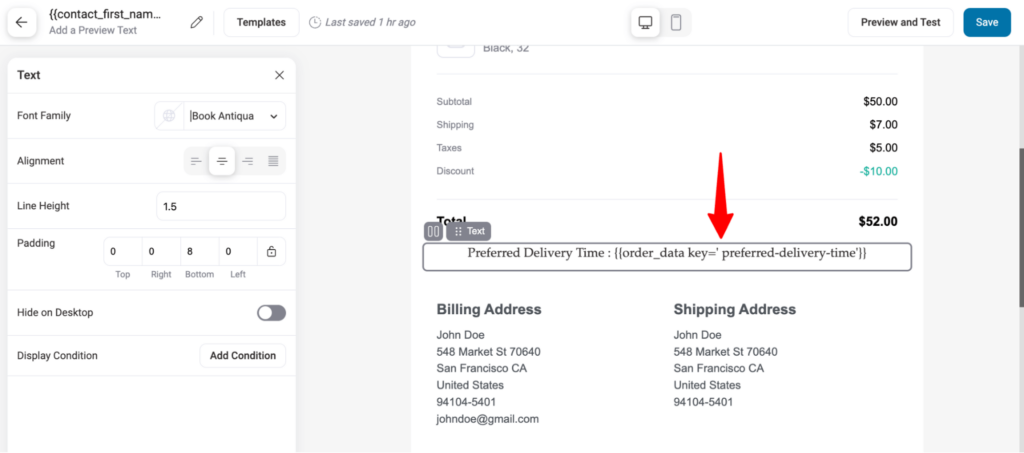
This will add the custom data to your WooCommerce emails.
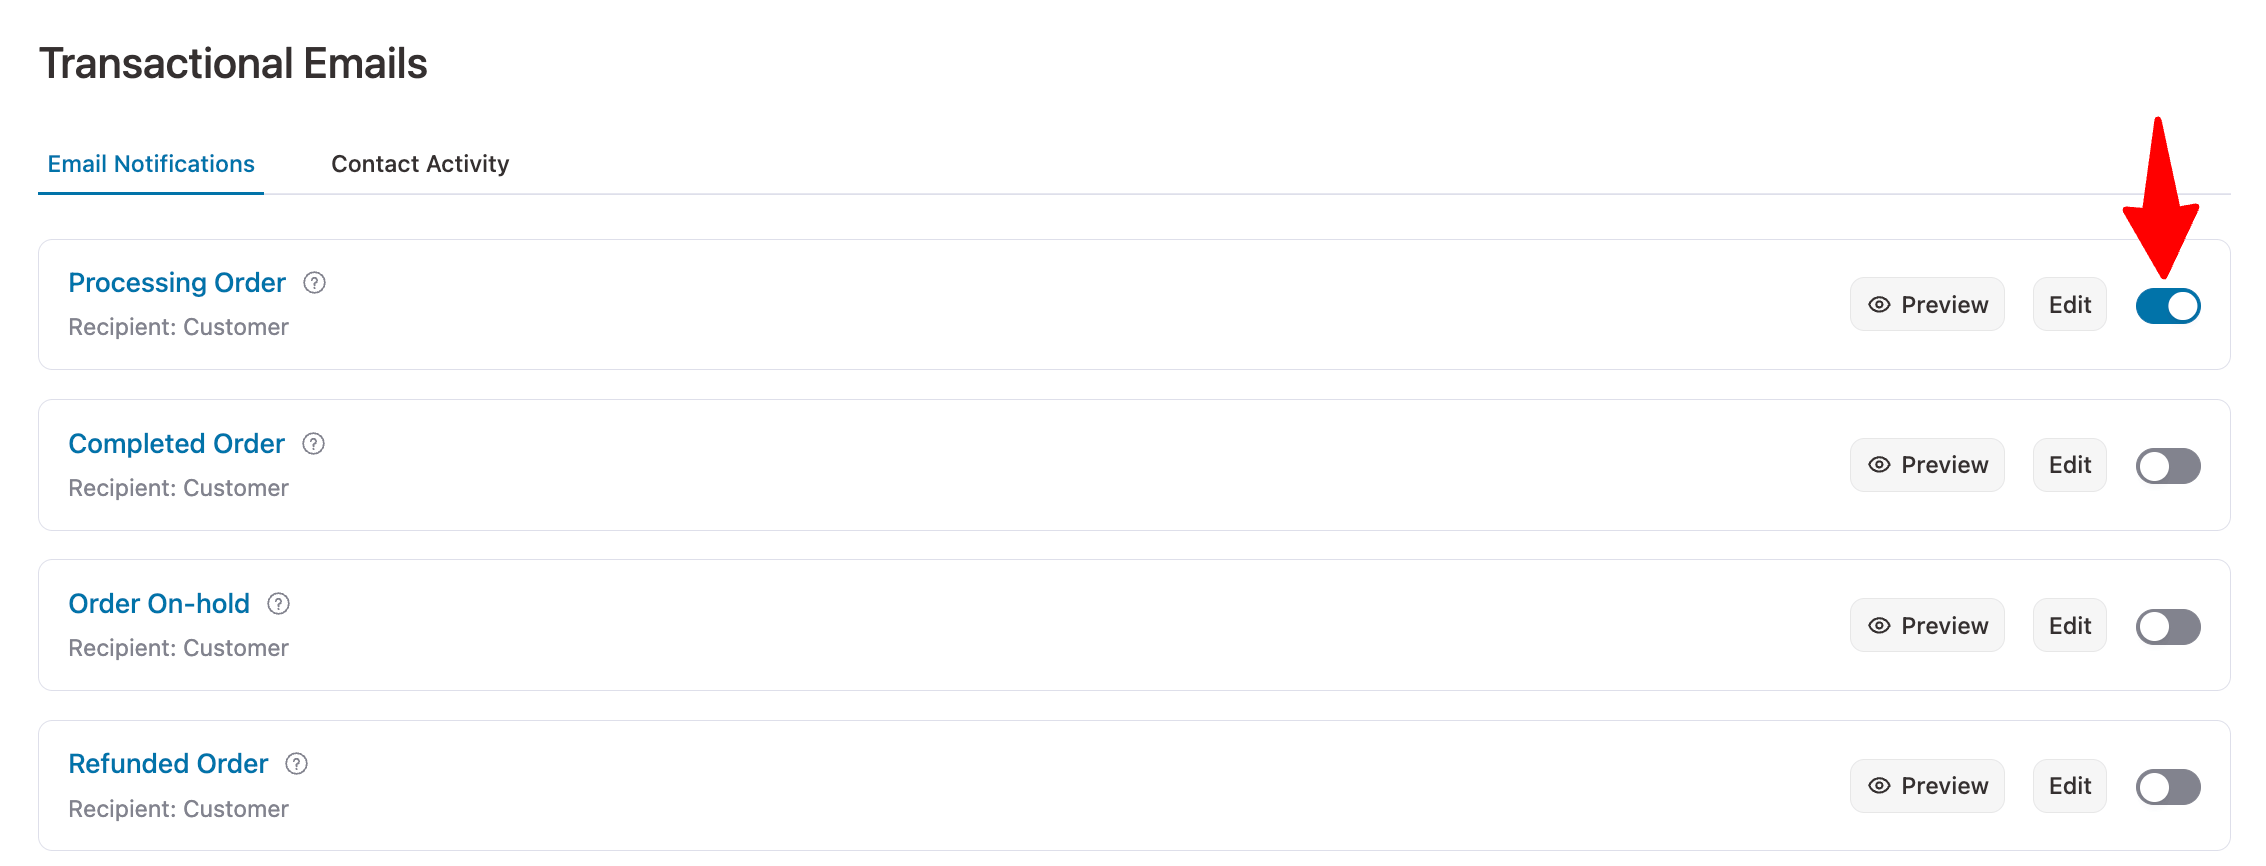
Step 3: Activate the WooCommerce email
Lastly, make sure you activate the email; this will replace the default email and send customers the custom email with the custom field you added.
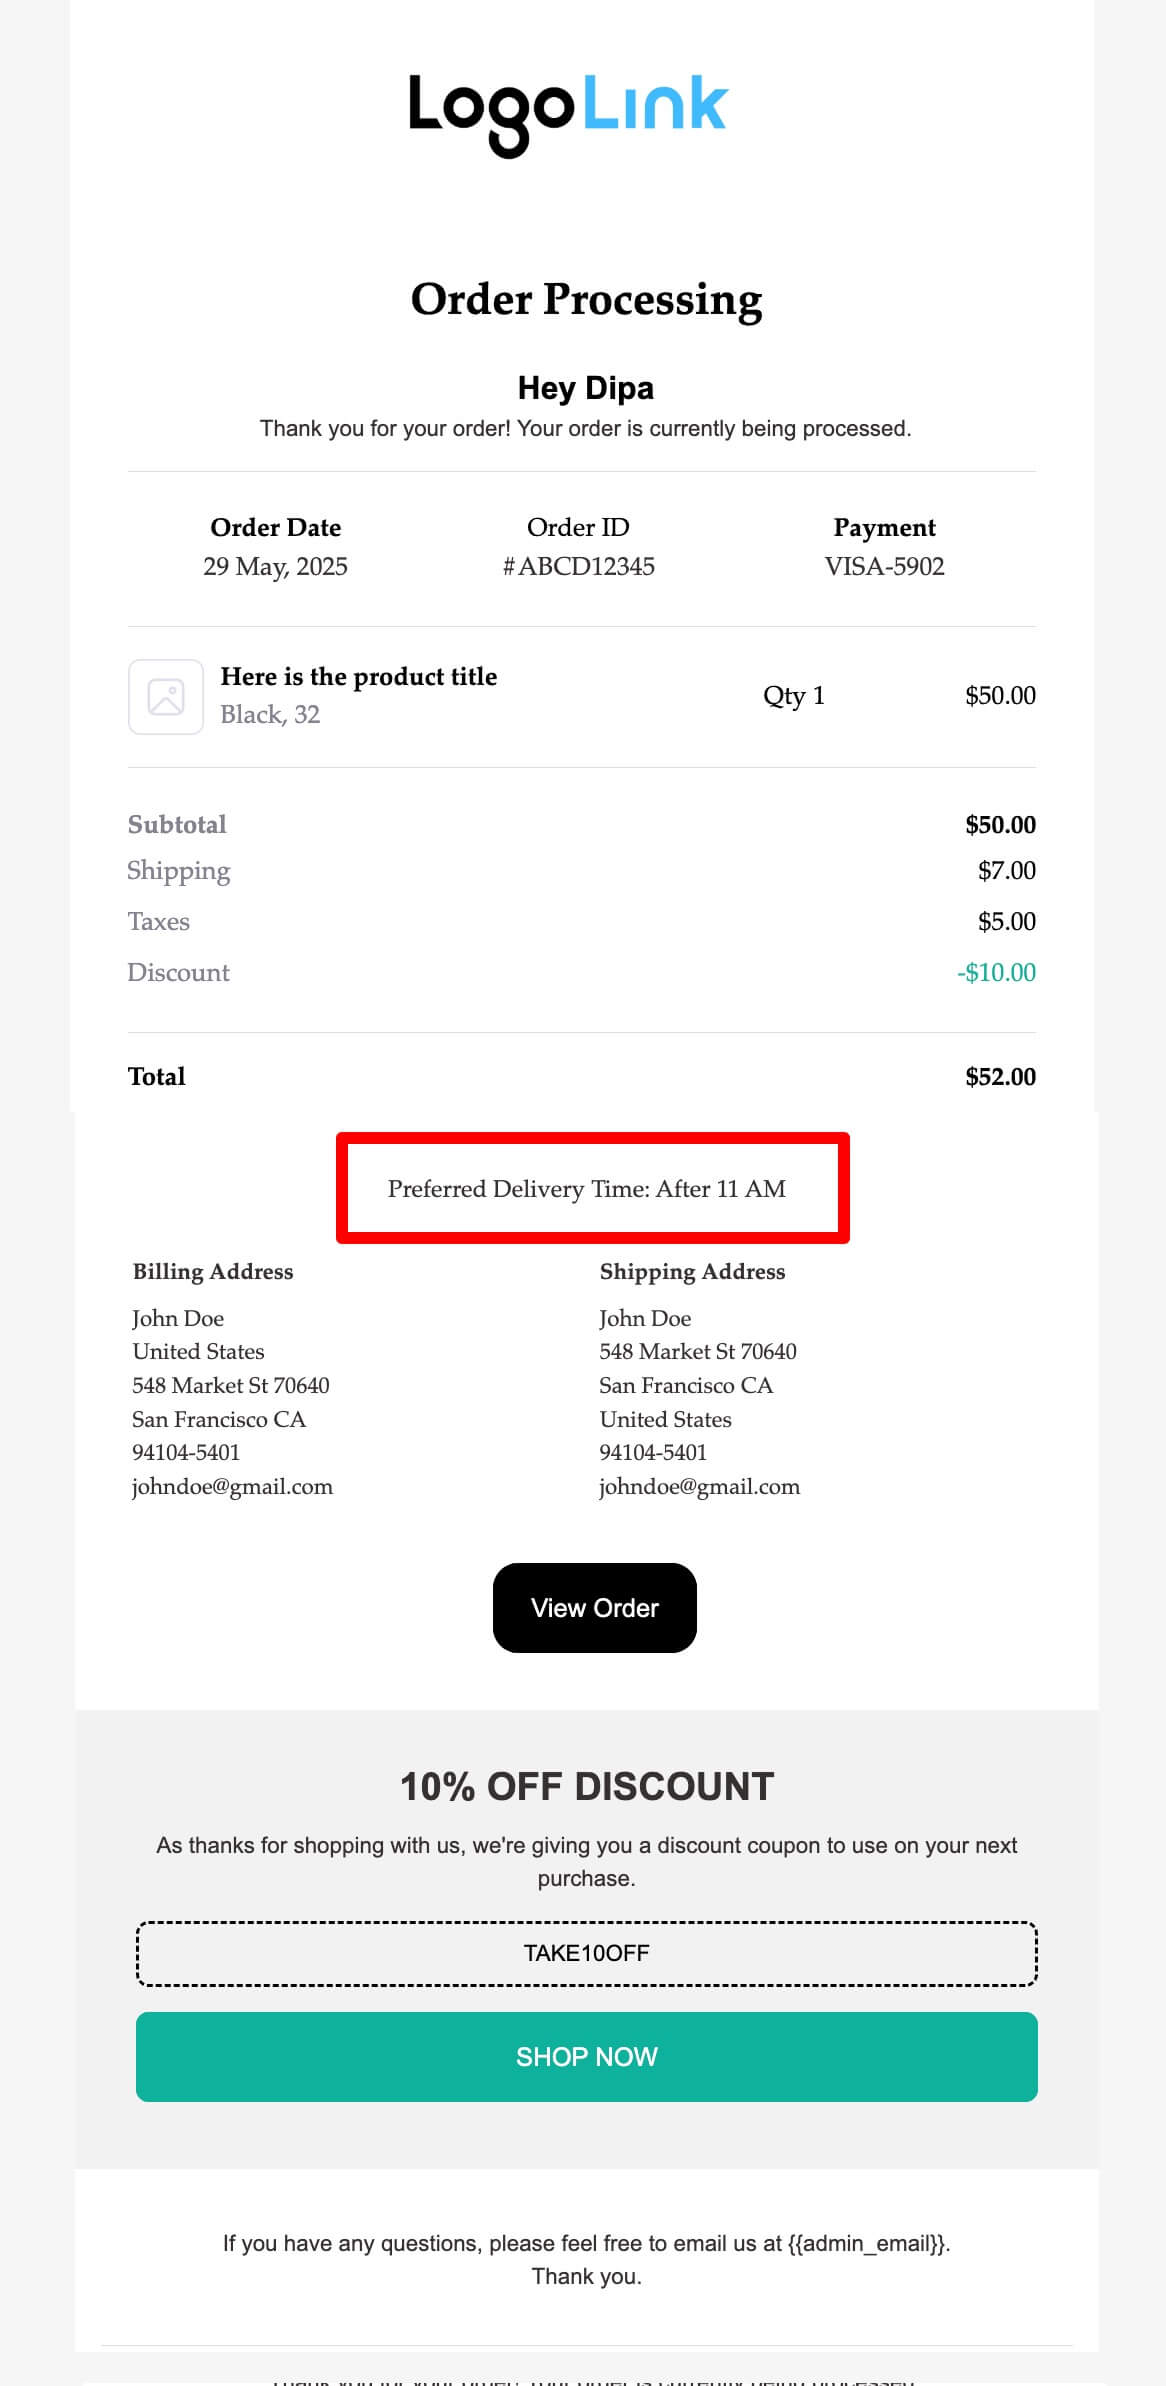
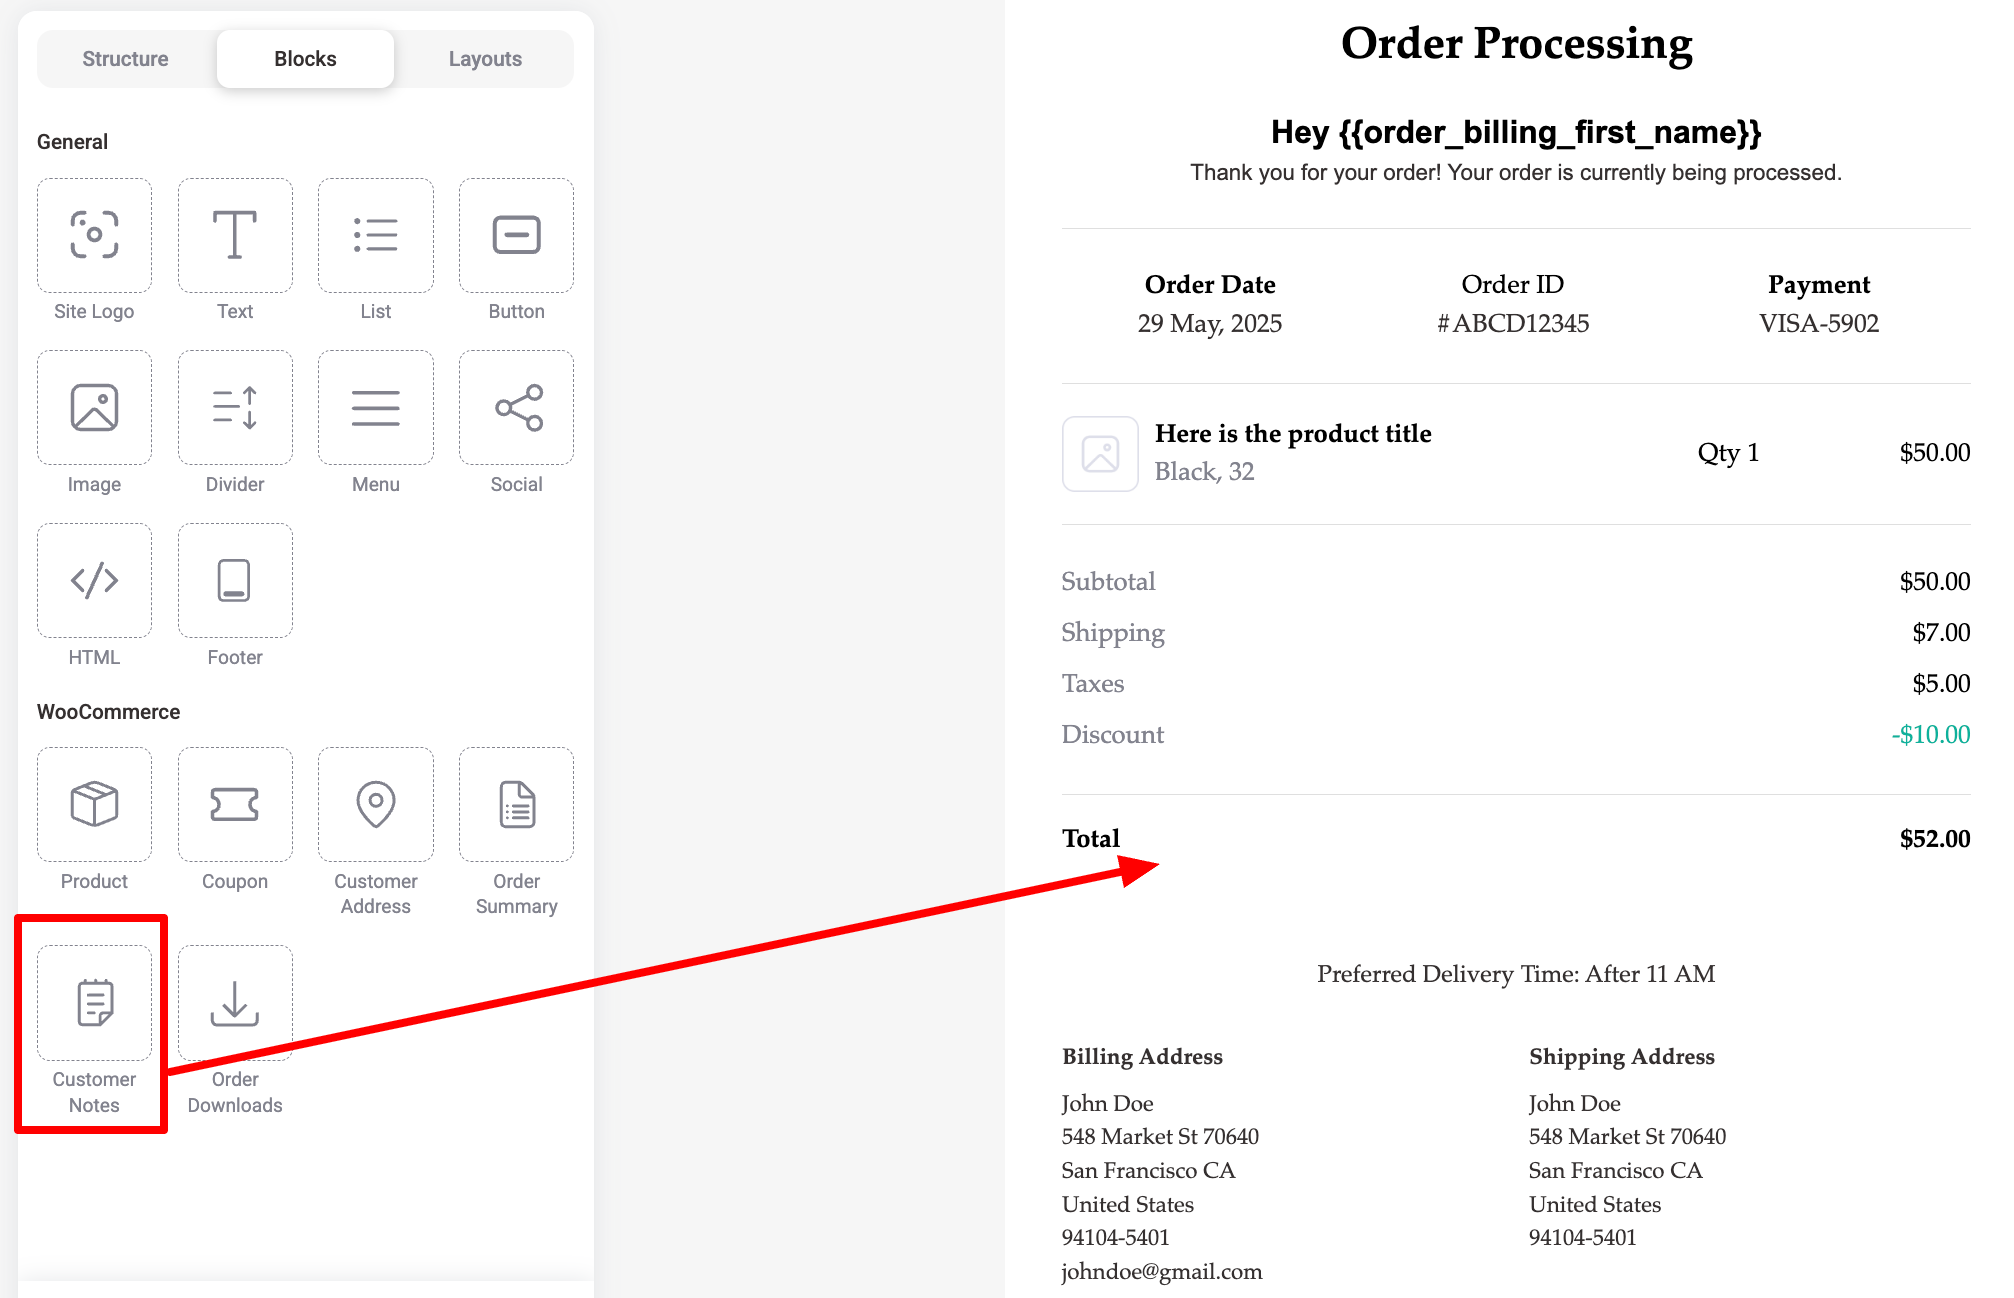
Here is a preview of the order email with a custom field.
How to Add Customer Order Notes to WooCommerce Email Notifications?
To add a customer note to any of the WooCommerce emails, just drag and drop the Customer Notes email.
After adding, you can adjust the alignment, font family, line height, padding etc
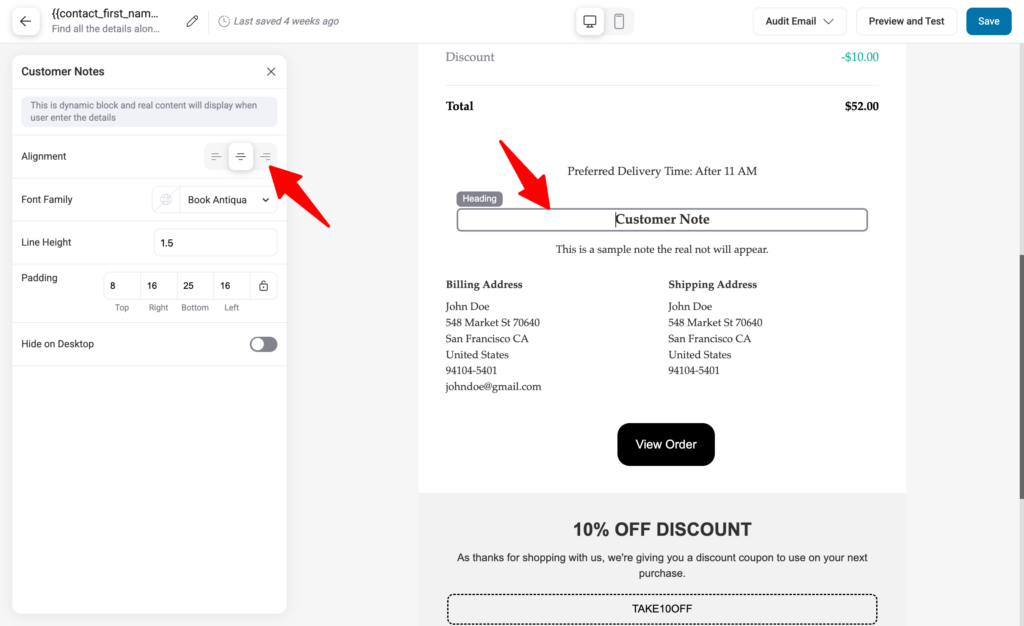
Make sure to save the changes, and the customer note will appear in the order email.
How to Add Third-Party Custom Field Data to WooCommerce Email?
If you use third-party plugins with WooCommerce, they can add important metadata to orders.
Often, this data is relevant to your customers, making it essential to include it in WooCommerce emails.
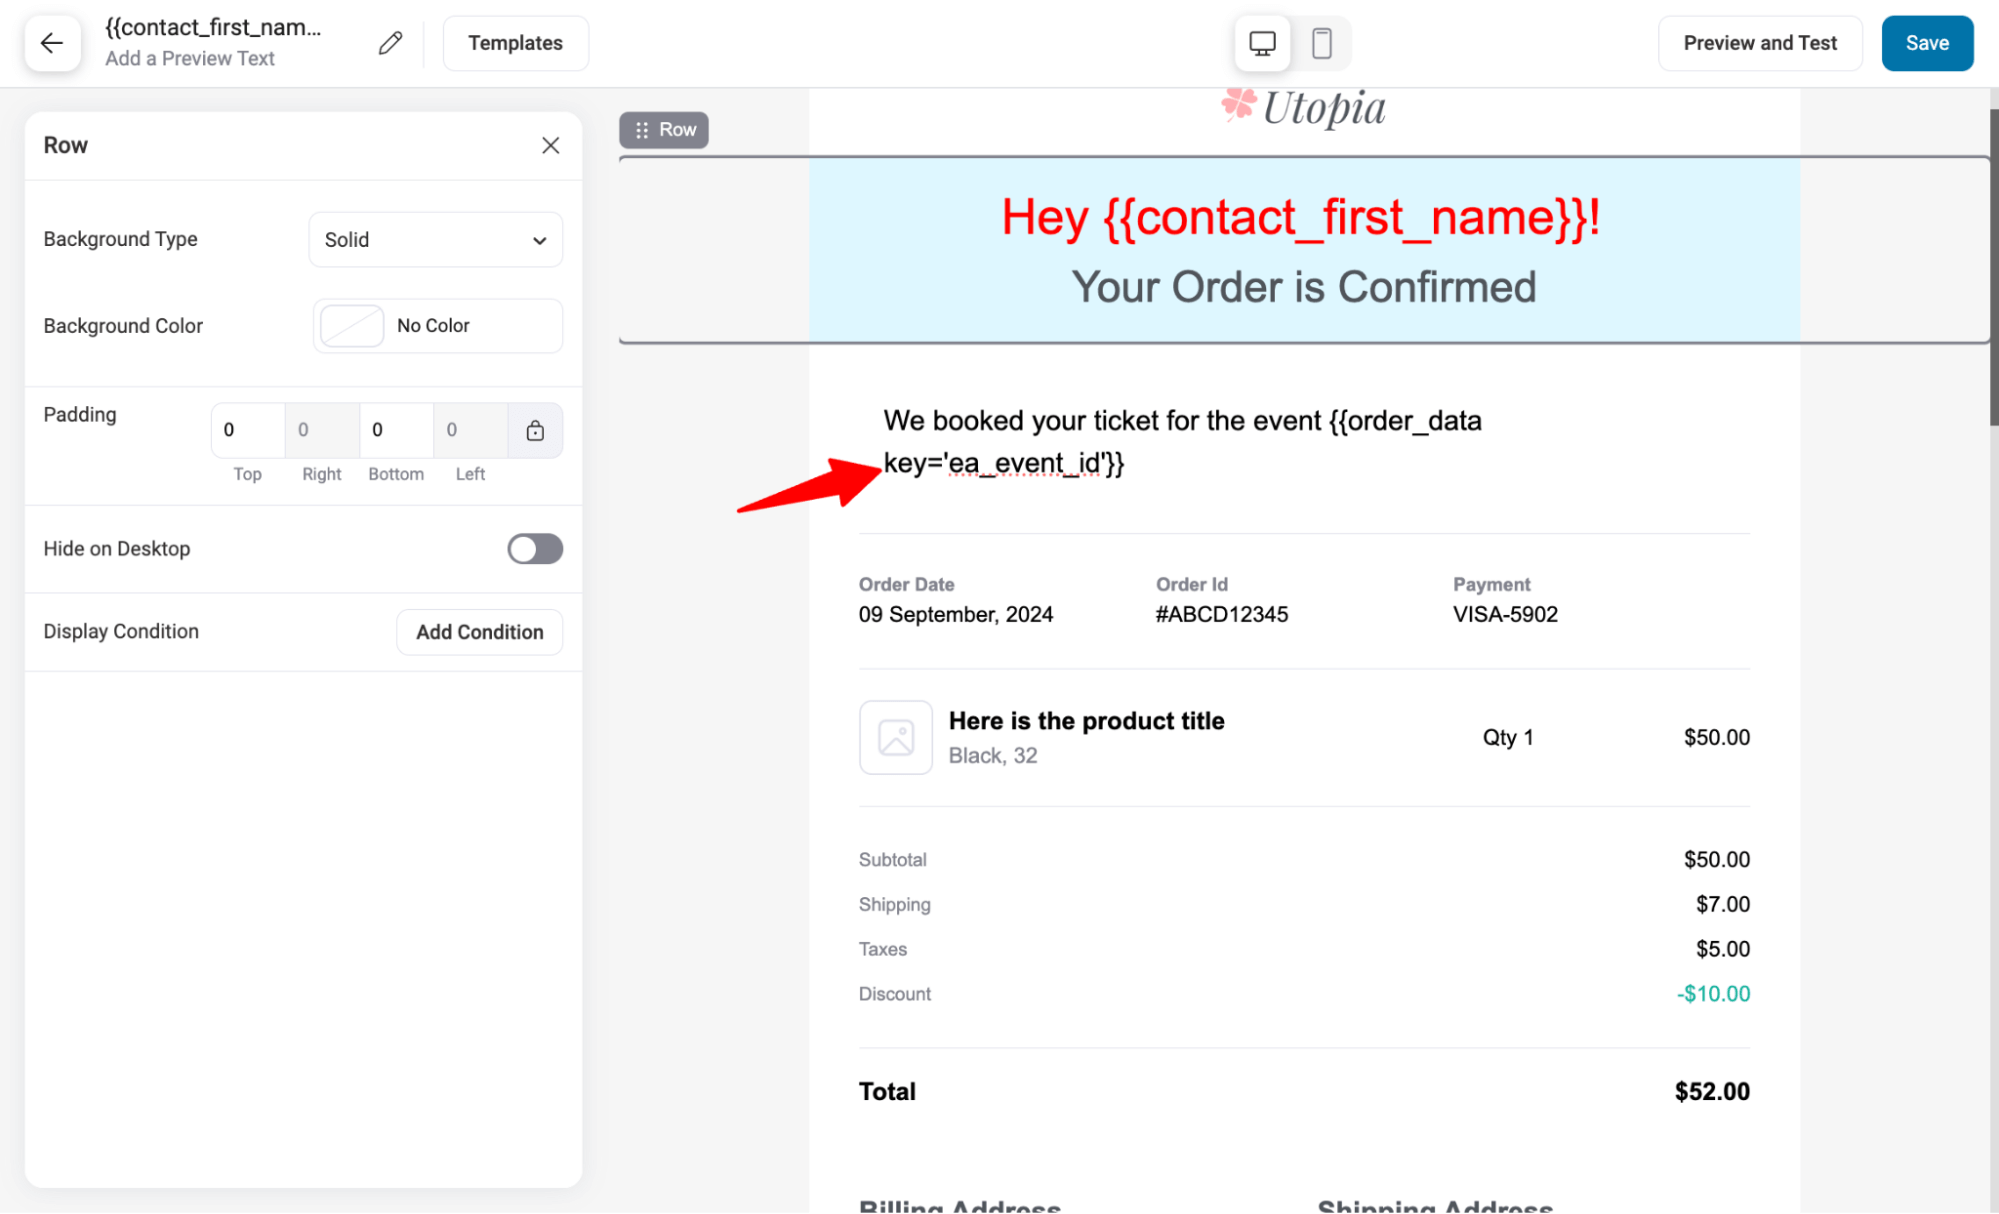
Suppose you're hosting an online event or workshop through your WooCommerce store using an event management plugin.
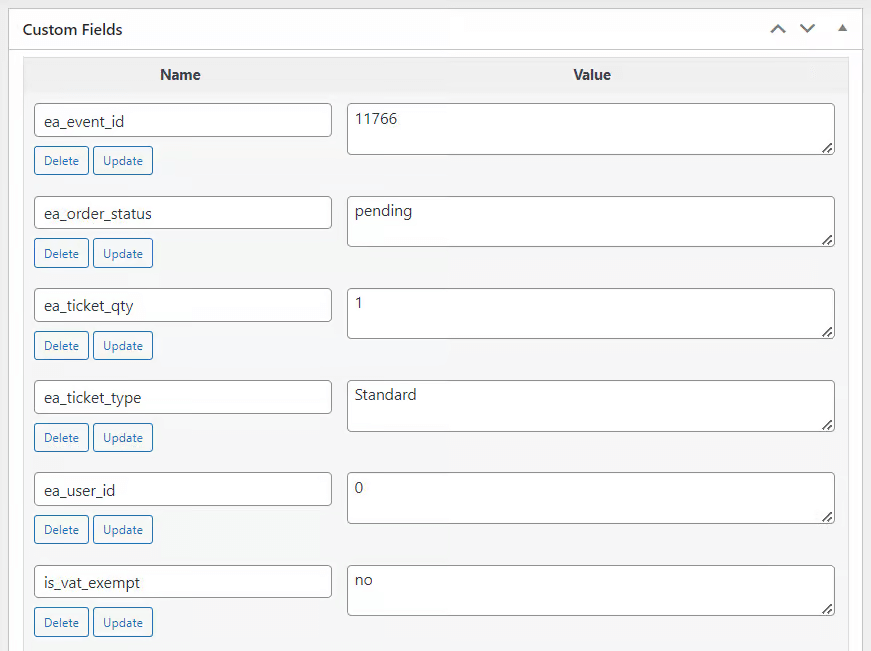
You'll come across various custom fields for the event, such as event ID, event order status, ticket quantity, ticket type, and more.
Including these custom fields in your WooCommerce emails ensures your customers receive all necessary details.
You can include such third-party metadata using merge tags. For that click on the Merge tag.
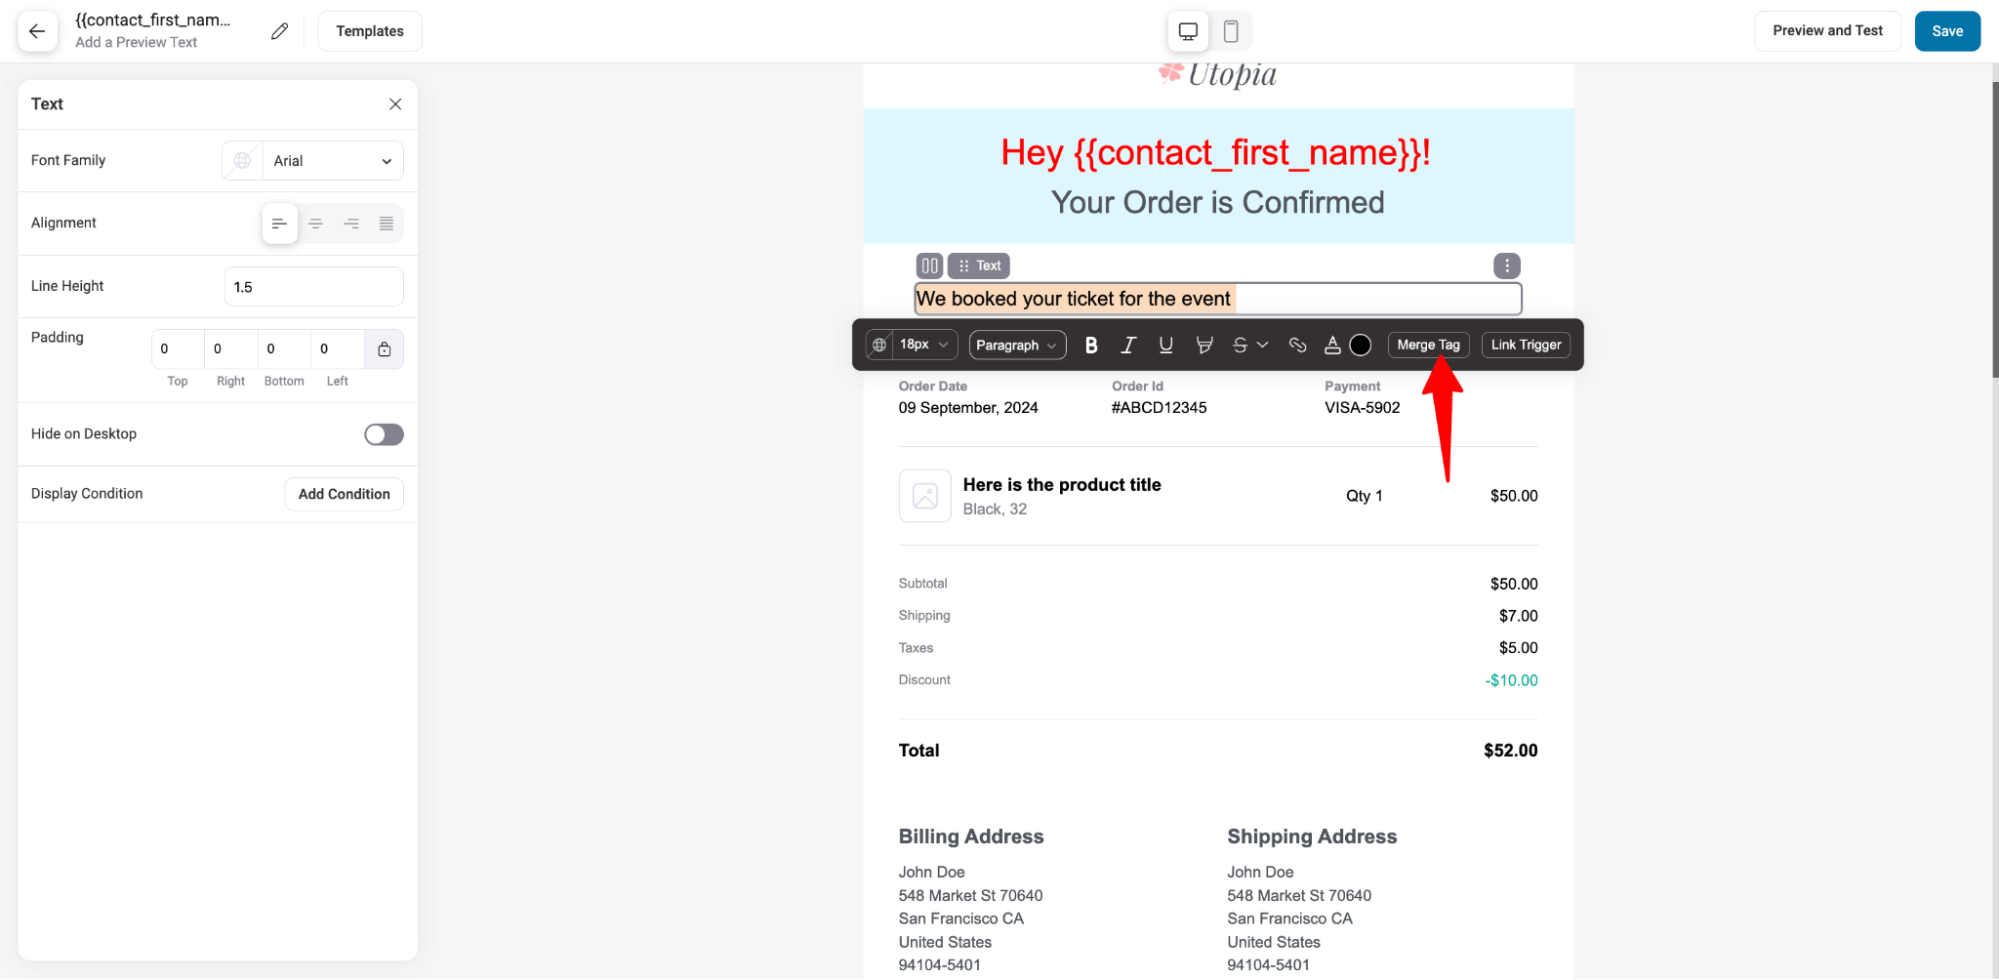
Then, from the merge tag list, go to the settings for order data.
Then, select the metadata. For example, the meta name of the Event ID is ‘ea_event_id’. Once you select, copy this merge tag.
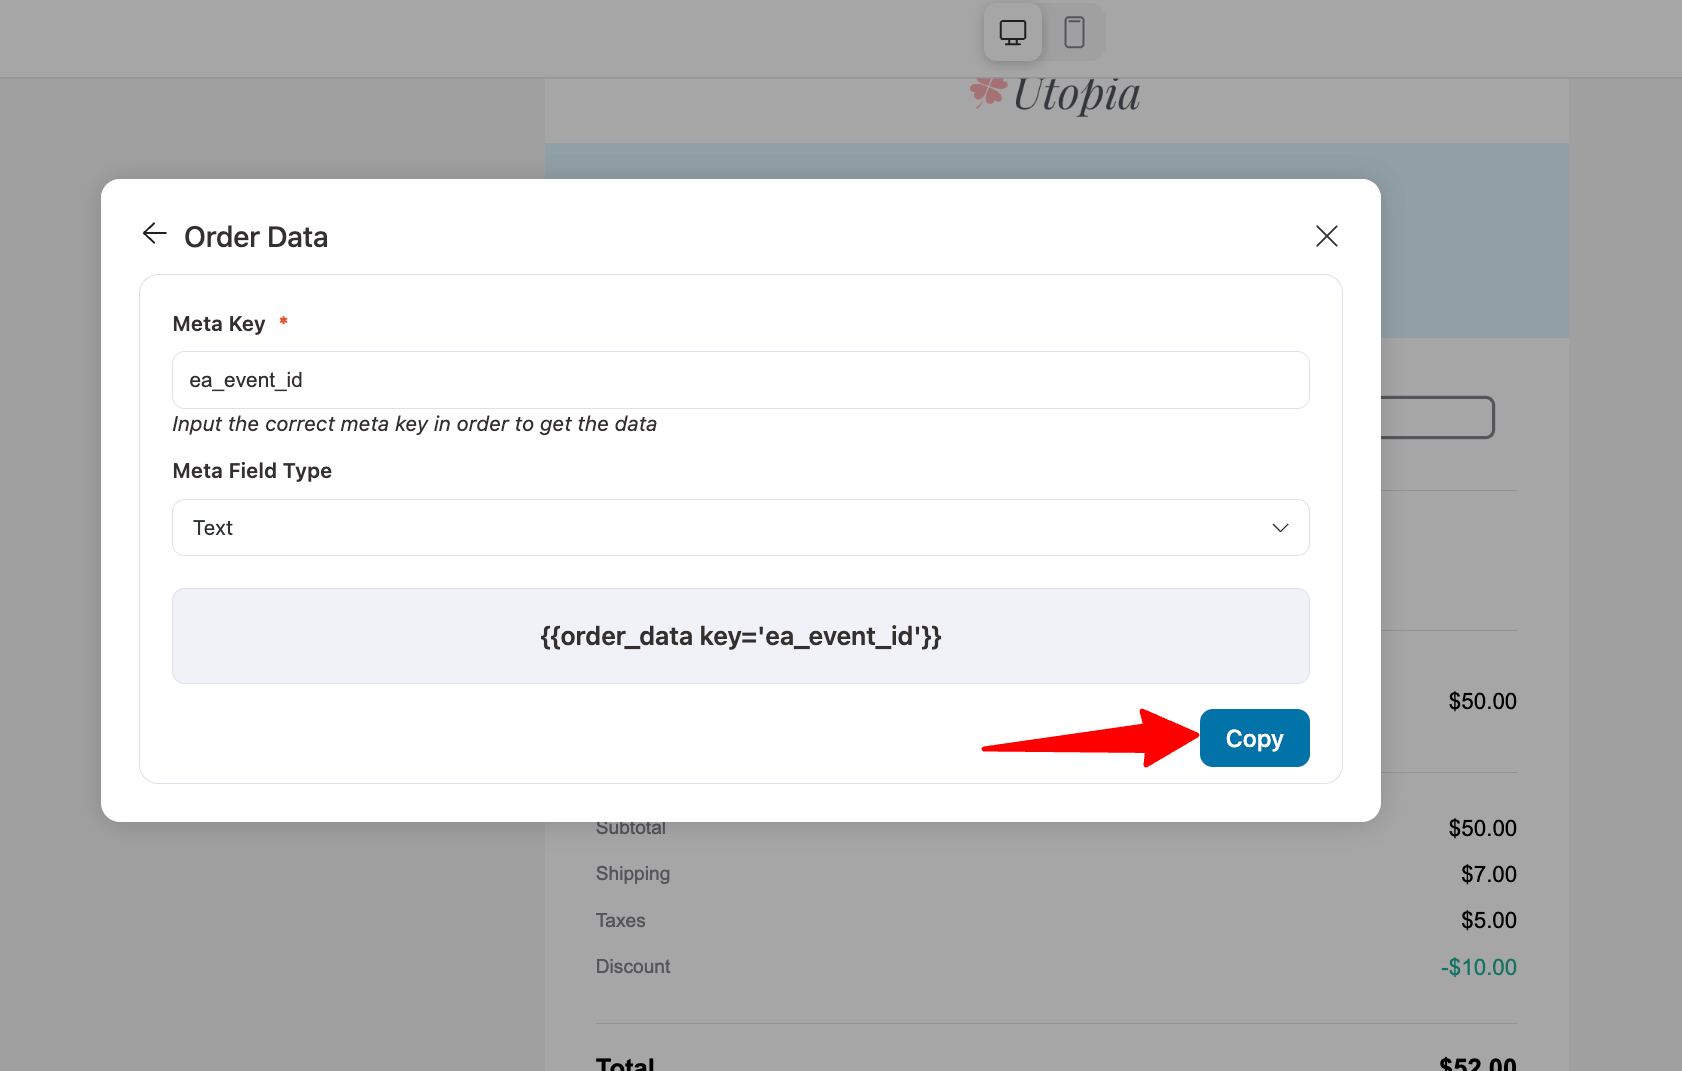
Now, you paste it into your email to add third-party metadata.
That’s it. You can follow this process to add any third-party custom data to add to your WooCommerce emails.
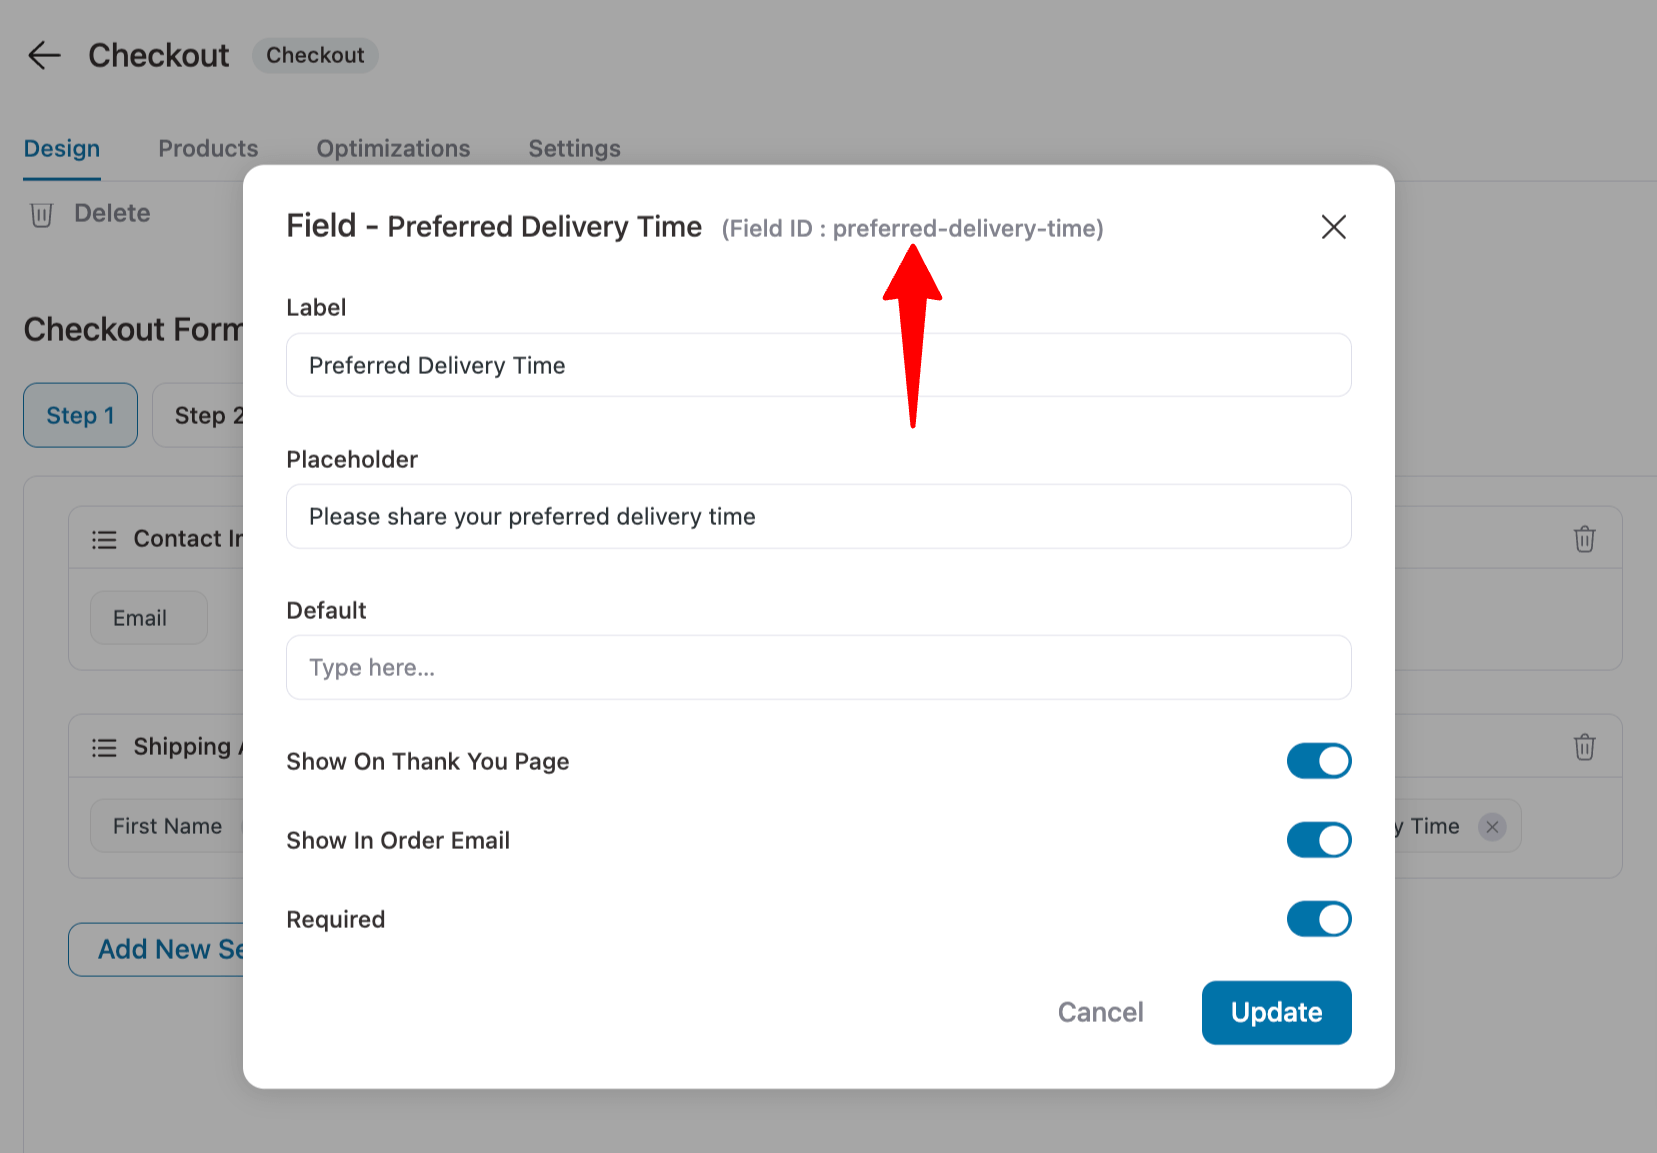
How to Add a Custom Field to WooCommerce Email Using Hooks
If you don't want to use a plugin to add custom fields to WooCommerce, you can use the built-in filter hook: woocommerce_email_order_meta_fields.
This requires a small custom code snippet that uses the hook to add your custom field, such as Preferred Delivery Time, to order emails with a label of your choice.
/**
 * Add a custom field to WooCommerce order emails
 */
add_filter( 'woocommerce_email_order_meta_fields', 'custom_woocommerce_email_order_meta_fields', 10, 3 );

function custom_woocommerce_email_order_meta_fields( $fields, $sent_to_admin, $order ) {
    $fields['preferred_delivery_time'] = array(
        'label' => __( 'Preferred Delivery Time' ),
        'value' => get_post_meta( $order->get_id(), 'preferred_delivery_time', true ),
    );
    return $fields;
}
That’s it. You can use the same process of using a webhook to show a different custom field in the email, replace 'preferred_delivery_time' in both the label and get_post_meta() parts of the code with your field key and label.
More Questions About Adding Custom Fields to WooCommerce Emails
Here are the frequently asked questions about how to add custom fields to emails in WooCommerce:
What types of custom fields can I add to WooCommerce order emails?
To add extra information in your WooCommerce order emails, you first need to capture custom data during checkout using custom fields. Here are some field types you can use:
- Single-line Text Field: For simple details like customer notes or order instructions.
- Checkbox: For yes/no options like "Is this a gift?"
- Radio Buttons: For single-option selections like preferred delivery times.
- Dropdown: For lists of options such as product size or color.
- Date Picker: For date-related information like preferred delivery dates.
Is there a security concern when adding custom fields?
When collecting and displaying sensitive data (like VAT numbers or delivery addresses), ensure the custom fields comply with privacy laws (e.g., GDPR). Avoid displaying sensitive information unless necessary and ensure proper encryption is in place.
How can I test my custom fields in order emails before going live?
Testing custom fields in order emails is crucial to ensure they are captured and displayed correctly. Use sandbox orders to simulate real customer purchases and verify that the data appears as expected in the emails.
Add Custom Fields to WooCommerce Emails for Effective Communication!
Custom fields in WooCommerce provide crucial data about customer orders. To ensure clear and effective communication with your customers, it’s essential to include all important details.
Whether it's adding custom instructions, integrating third-party metadata, or sharing your exchange policy, custom fields play a vital role.
With FunnelKit Automations, adding custom data to your emails is incredibly easy. Plus, you get access to an amazing email builder to create stunning, personalized emails.
More than 20,000 WooCommerce store owners are already using this tool to improve customer communication.
So, get FunnelKit Automations today and start adding custom fields to WooCommerce emails for more effective communication!

Editorial Team
July 6, 2026Discover how to collect birthdates and share personalized birthday coupons automatically in WooCommerce. Want loyal customers who keep coming back? WooCommerce birthday coupons let you offer personalized discounts or gifts,...
Editorial Team
June 29, 2026Discover why sending the same email to everyone can hurt engagement and how WooCommerce conditional emails help you deliver personalized messages for better results. Not every customer should get the...
Editorial Team
June 25, 2026There are two things most people get wrong about the WooCommerce order confirmation email. First, they don't realize it's the Processing order email they need to switch on and not...


