
Do you want to create funnel pages using the incredible power of Divi modules that convert like crazy?
While creating sales funnel pages with Divi templates is the easy way, sometimes you want to use your creativity and build pages that scream your brand's personality.
And you can do that by creating full-fledged sales funnels from scratch.
The Divi page builder by Elegant Themes gives you a range of modules for creating your pages and blog posts.
But none for building different components of a sales funnel, such as opt-in pages, checkouts, one-click upsells, and more for your online store.
In our last post, we will look at how you can create sales funnel pages in WooCommerce from scratch using versatile Divi modules.
Let's dive right in.
Table of Contents
- 1 What are Divi Modules?
- 2 Meet the FunnelKit’s Divi Modules Built for Creating Sales Funnels
- 3 Divi Modules For Opt-In Pages By FunnelKit
- 4 Divi Modules for Checkout Pages By FunnelKit
- 5 One-Click Upsell Page Divi Modules
- 6 Thank You Page Divi Modules
- 7 How to Build Use Divi Modules By FunnelKit to Build Sales Pages From Scratch
- 8 Start Using Divi Modules by FunnelKit Today!
What are Divi Modules?
Divi modules are content building blocks that help you create a webpage without coding just by dragging and dropping.
Divi Modules library offers 40+ modules. These modules provide users with a flexible and efficient way to design visually appealing and interactive web pages.
Take a look at the Divi modules library:
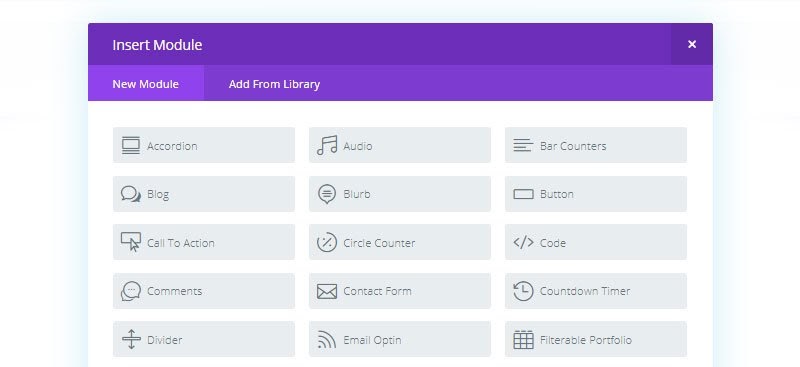
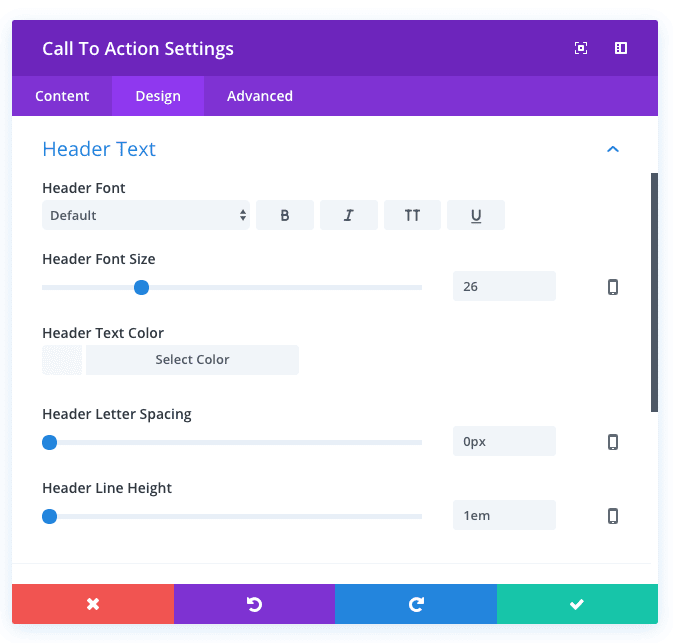
You can add these modules to your page with a single click. Each Divi module comes with individual settings that can be fully customized. You can set the colors, add a border, margin, padding, change content typography, and more.
The modules can be customized further with CSS using the "Advanced" settings.
Furthermore, you can save your settings and use the custom Divi modules on any page, saving you a lot of time and effort.
Meet the FunnelKit’s Divi Modules Built for Creating Sales Funnels
A sales funnel defines a journey your potential customers go through, a guided path from getting aware of the product to buying it.
You can get your users to sign up for a free offer using an opt-in page. Then you nurture and direct them to a sales page to buy your product. Here are the five major steps in a sales funnel:
With our Funnel Builder’s deep integration with Divi, you can now create appealing components within your sales funnels. And that, too, without writing any complicated codes on your WordPress website.
In the following sections, we will have a look at the Divi modules Funnelkit offers to create different sales funnels.
Divi Modules For Opt-In Pages By FunnelKit
FunnelKit has two Divi modules ready to be used for creating or customizing the opt-in page.
- Optin Form
- Optin Form Popup

Optin Form Divi module
With the Optin form divi modules, you can add an option form to your web page. The form has two fields: name and email.
You can customize the width of the form fields. Moreover, you can customize the submit button’s title, subtitle, and submitting text.
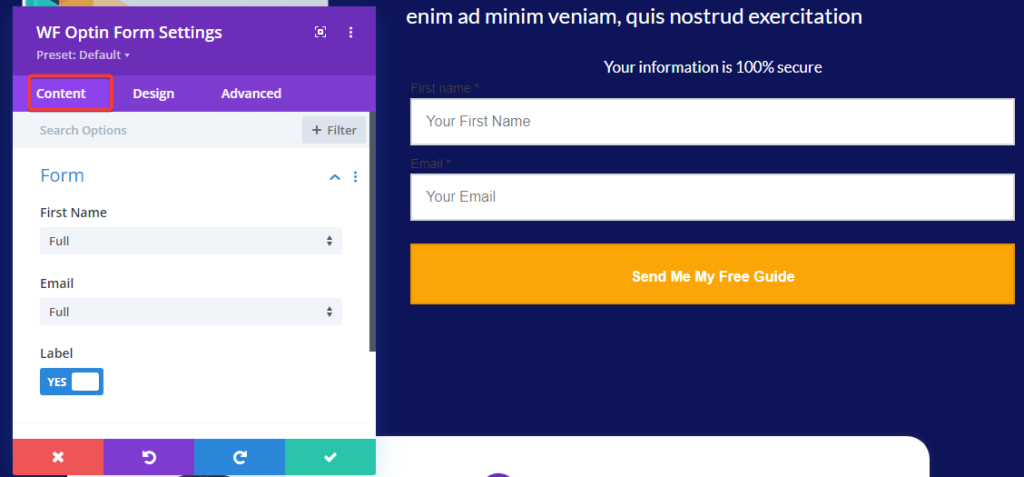
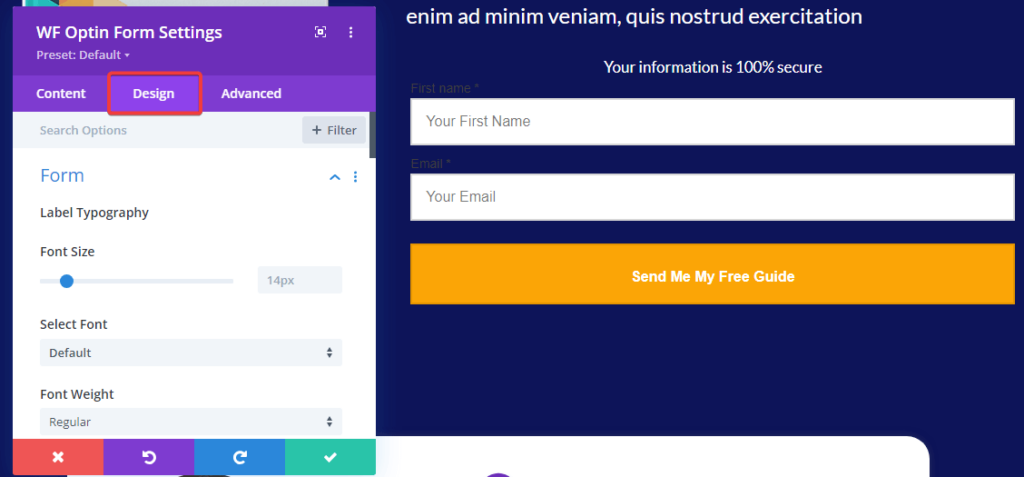
On the design tab, you can customize the form label typography, input typography, input color, button width, button color, etc.
Opt-in Form Popup Divi Module
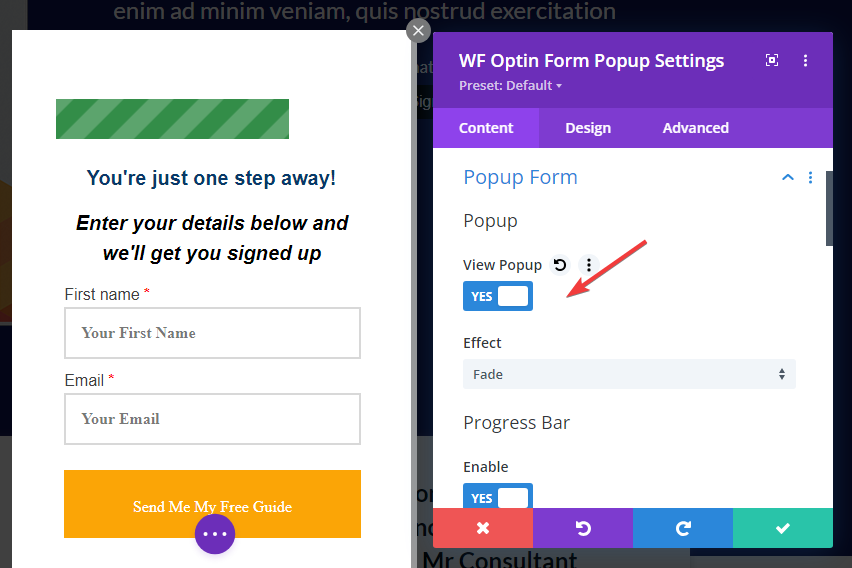
With this Divi module, you can add a pop-up to your opt-in page. The popup will appear with a form field and one CTA after someone clicks on the trigger button.
For the FunnelKit’s Optin form popup, you can configure the content settings for the “Call to Action Button” and “Popup Form.”
You can change the title, subtitle, button, and text alignment, etc. Moreover, icons to be added on the button along with a popup effect, progress bar, heading/subheadings, form labels, submit button text, etc.
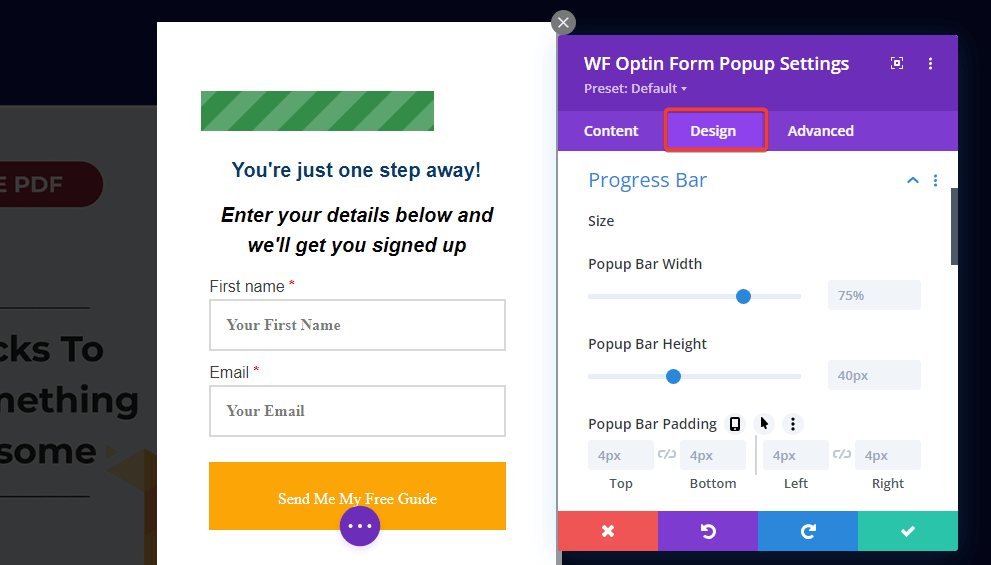
Furthermore, you can configure the progress bar, headings, and design settings for the close button, form, and submit button from here.
This was all about the opt-in divi modules that FunnelKit provides.
Divi Modules for Checkout Pages By FunnelKit
FunnelKit offers two Divi modules for WooCommerce checkout pages:
- Checkout form module
- Mini cart module
Checkout form module
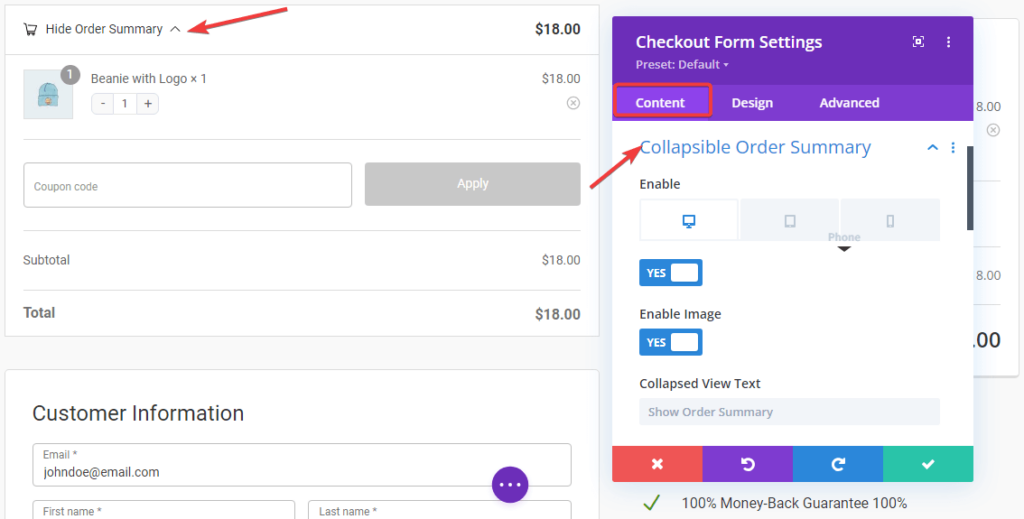
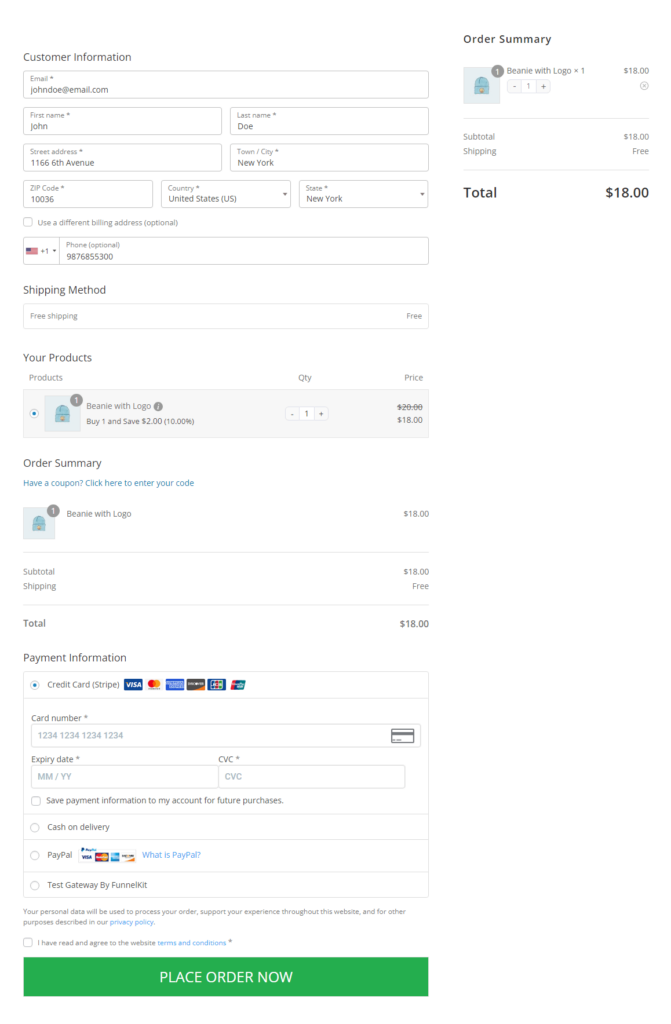
The checkout form module allows you to add a form to WooCommerce checkout page. It lets you collect all the necessary information for placing an order, such as customer information, shipping address, shipping method, payment information, etc.
You can add a collapsible order summary version on the top so users don’t have to go back to see their order details.
You can change the form width for all the sections, such as customer information, shipping address, etc.
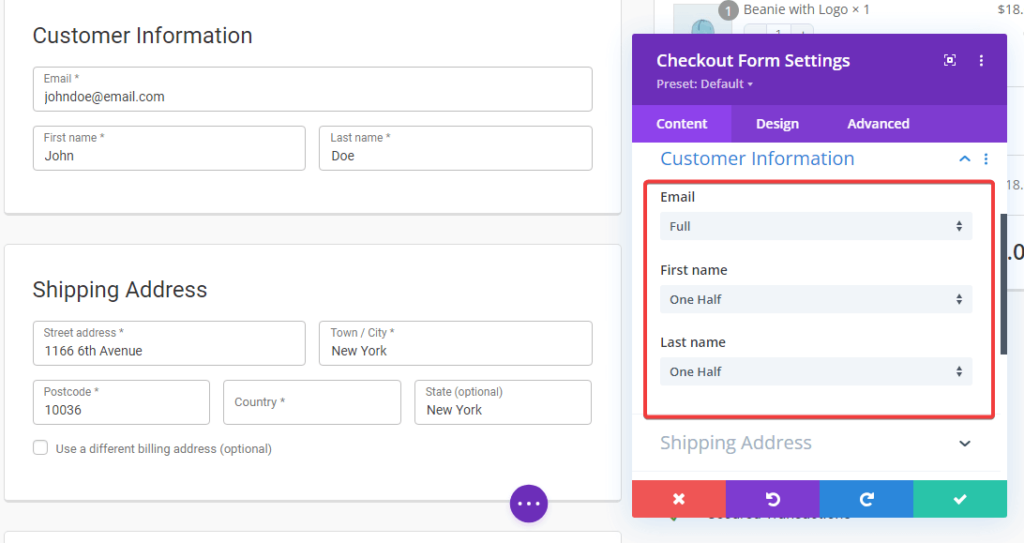
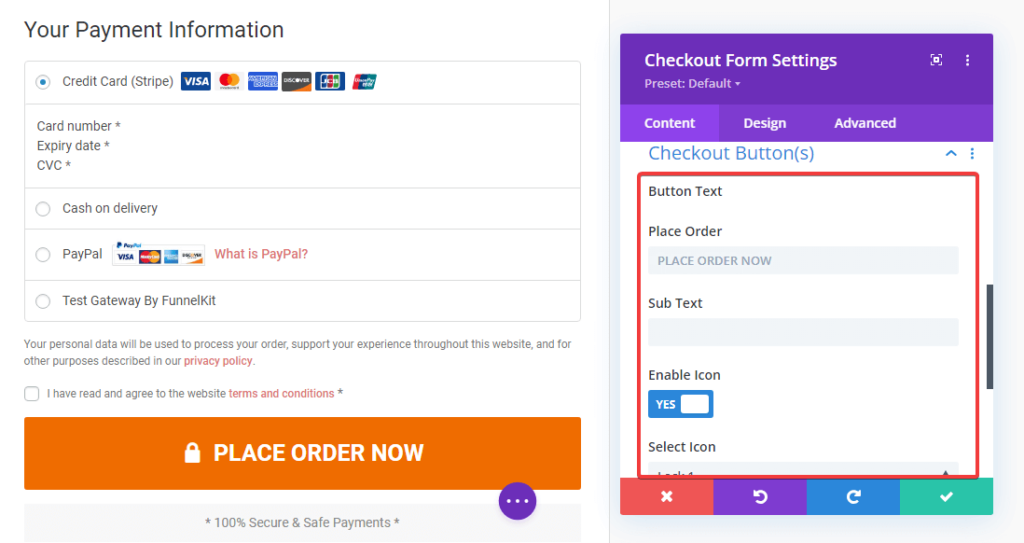
For the checkout place order button, you can customize the button text, subtext, add an icon, add order total, etc.
You can edit, remove or rearrange any checkout form field if you want. If you want, you can also add a custom form field. To learn more, read our blog “WooCommerce Checkout Field Editor: How To Customize Your Checkout Form Without Code”
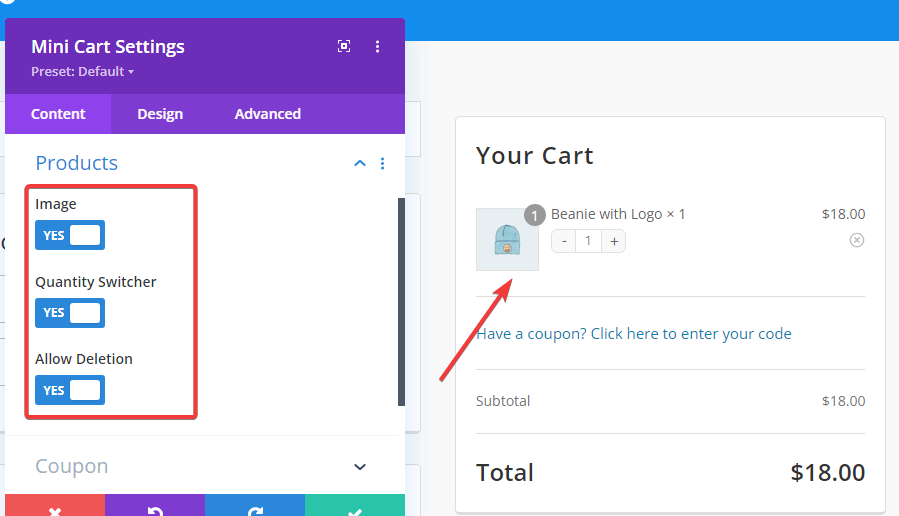
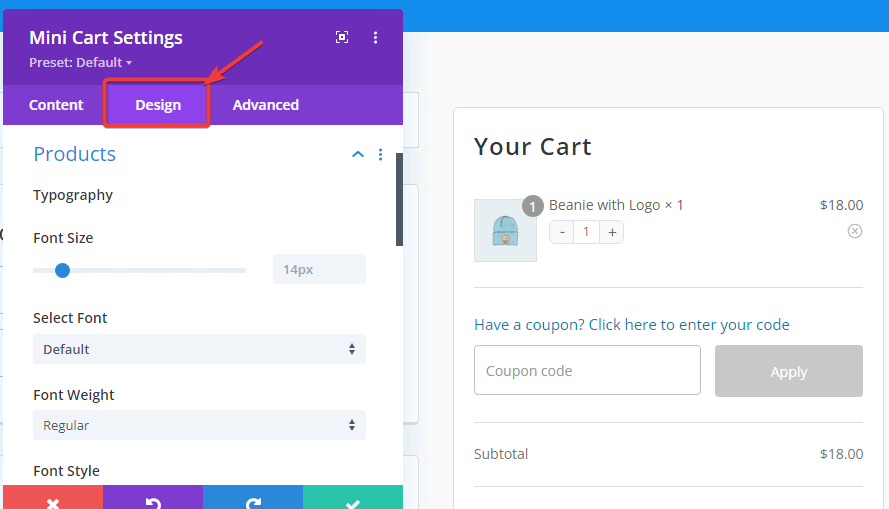
Divi Mini Cart Module
The mini cart module gives users the option to make quick changes to their cart items on the checkout page itself. This WooCommerce mini cart allows you to suppress the additional movement of going back and forth to the WooCommerce cart/checkout page.
FunnelKit lets you easily customize all the Divi modules, including the Mini cart, based on the Content, Design, and Advanced settings.
You can modify the heading title by changing its text, enabling/disabling the product image, using the quantity switcher, and allowing the item deletion option in the Product menu.
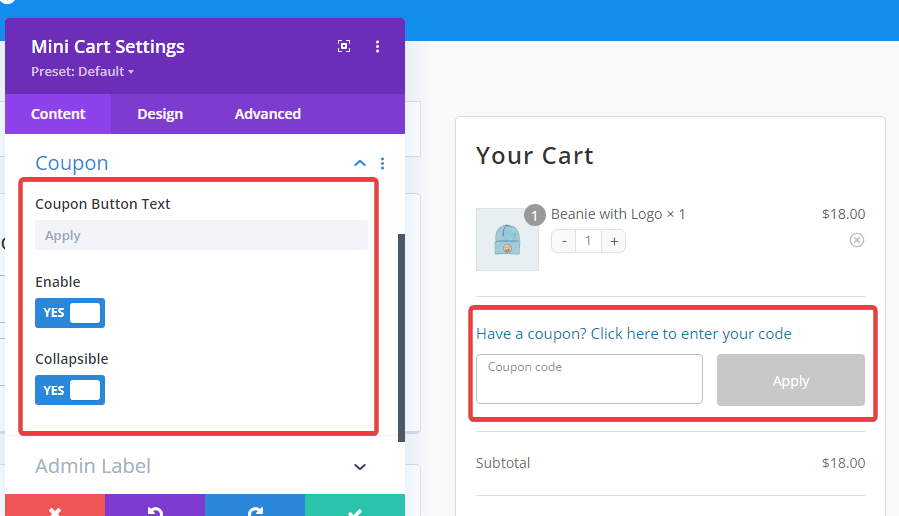
Furthermore, you can also enable/disable the coupon options or make them appear in a collapsible format.
If you move to the Design tab, you’ll be able to style the appearance of your Divi mini cart modules.
One-Click Upsell Page Divi Modules
Using the Funnel Builder, you can create compelling one-click upsell offers to increase the average order value (AOV) of your cart.
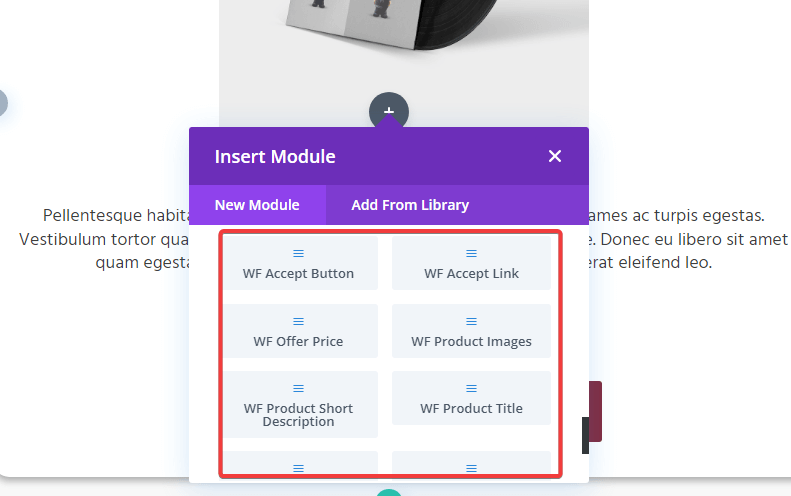
To create the upsell page from scratch, FunnelKit offers many divi modules, such as
- Accept Button: This button allows users to accept the one-click upsell offer.
- Accept Link: Users can accept the upsell offer by clicking on the accept link.
- Product Price: You can display the product price using this divi module
- Product Images: Using this divi module, you can display the product images.
- Product Short Description: You can add a product short description to your upsell page using this module.
- Product Title: This module will display the product title.
- Quantity Selector: Using this module, you can select product quantity.
- Reject Button: This will offer users a button to reject the upsell offer.
- Reject Link: This will offer users a link to reject the upsell offer.
- Variation Selector: Users can use this module to select variations of a product.
Thank You Page Divi Modules
Using the Funnel Builder, you can create a custom, user-friendly WooCommerce thank you page.
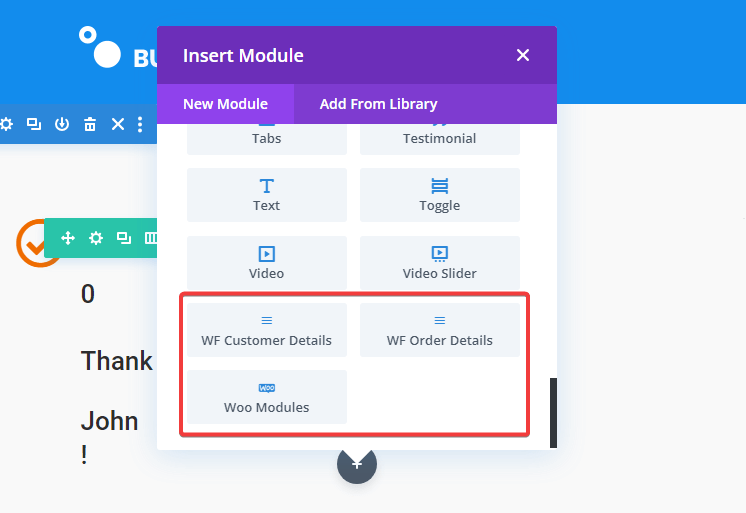
To create the thank you page, FunnelKit offers 2 divi modules:
- Customer Details
- Order Details
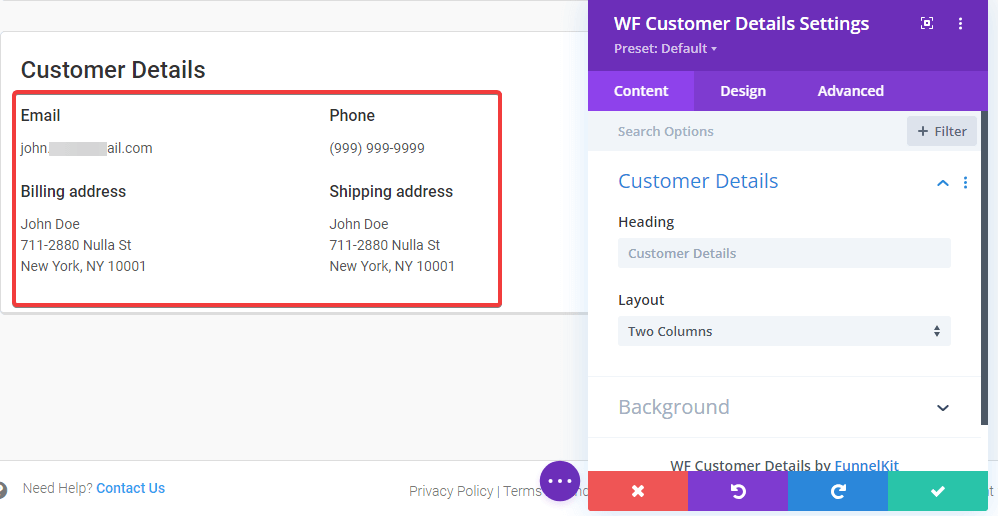
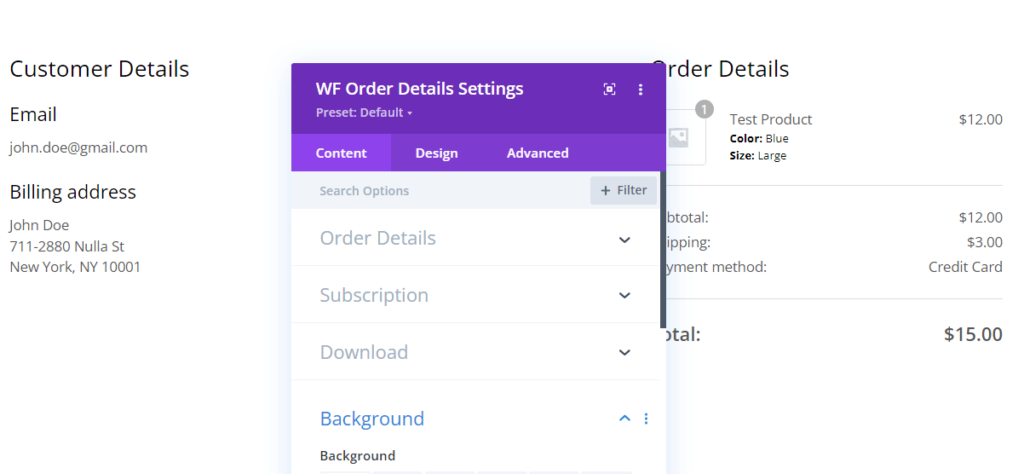
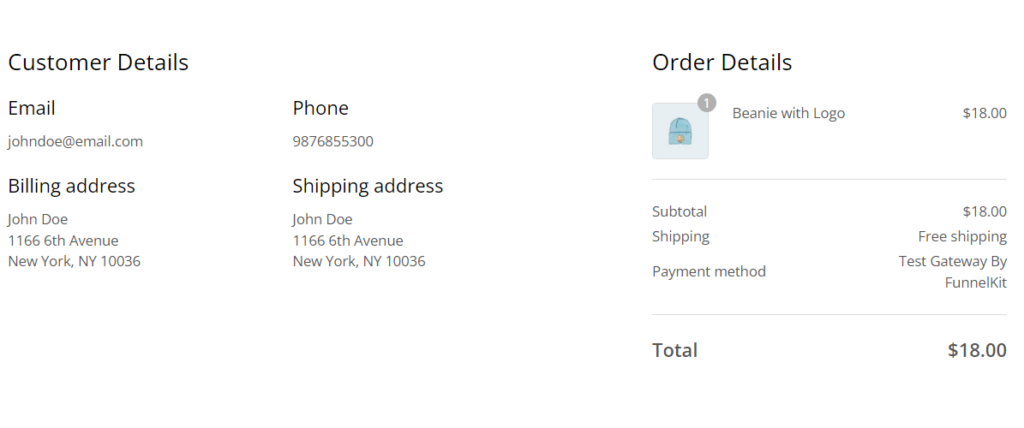
Customer Details
This will display the customer details such as email, phone number, billing address, and shipping address. You can easily customize the layout, heading, background color, typography, etc.
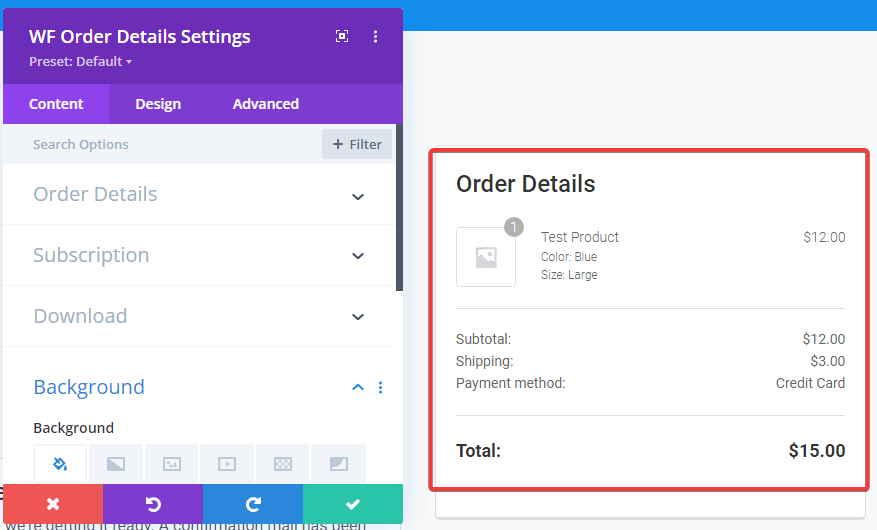
Order Details
This divi module will add order details such as product details, subtotal, shipping fee, payment method, and order total. You can customize many settings if you wish to.
Now you know about all the Divi modules FunnelKit provides that you can use to build sales funnel pages from scratch.
Let’s check how you can build a sales funnel page from scratch using the Divi modules FunnelKit offers.
How to Build Use Divi Modules By FunnelKit to Build Sales Pages From Scratch
Make sure you already have Divi installed on your WordPress site.
To set up your sales funnel, install and activate both FunnelKit Funnel Builder Free and Pro versions.
After activating the plugin, follow these steps to create a sales funnel from scratch using Divi modules.
Step 1: Add a sales funnel
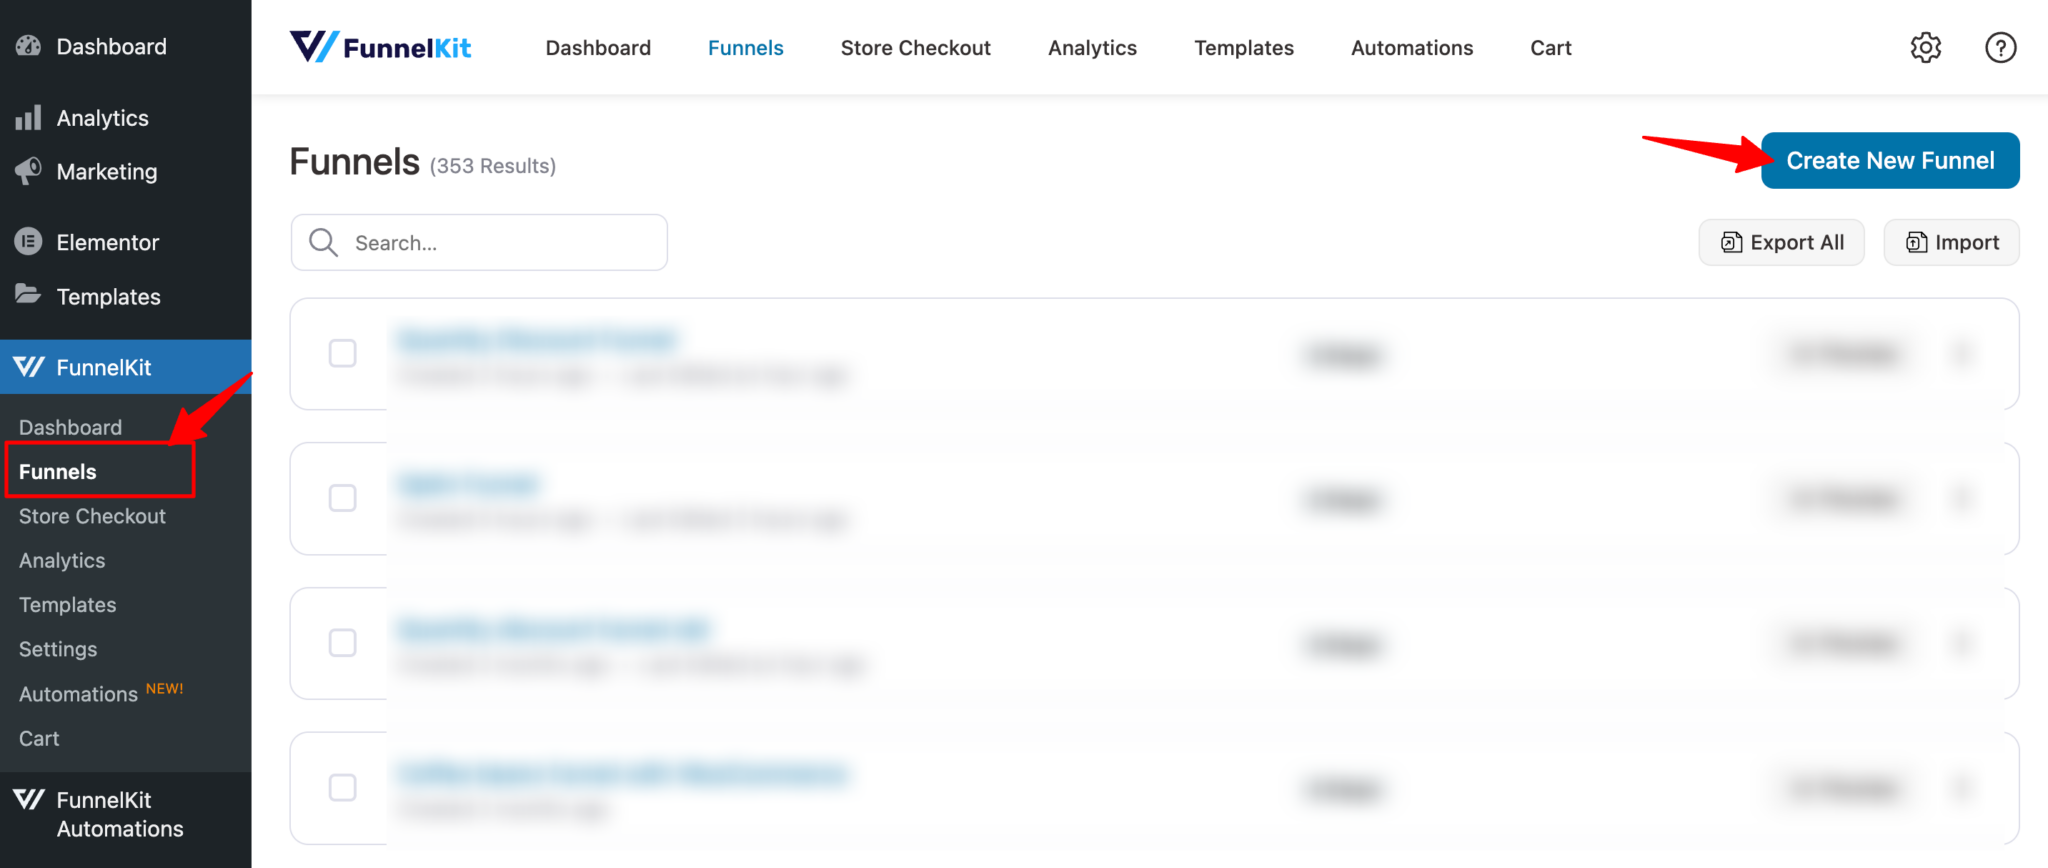
Navigate to FunnelKit ⇒ Funnels from the WordPress admin panel and click the ‘Create New Funnel’ button.
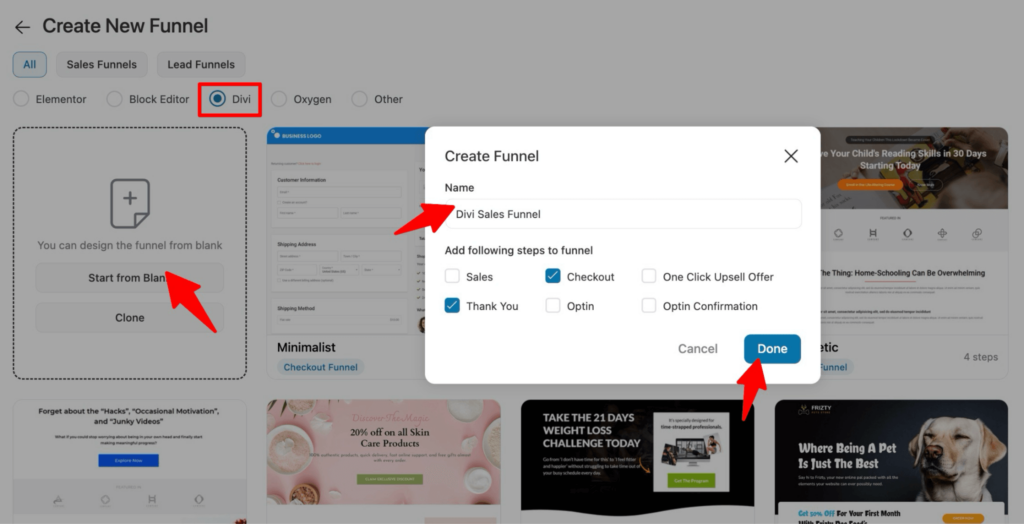
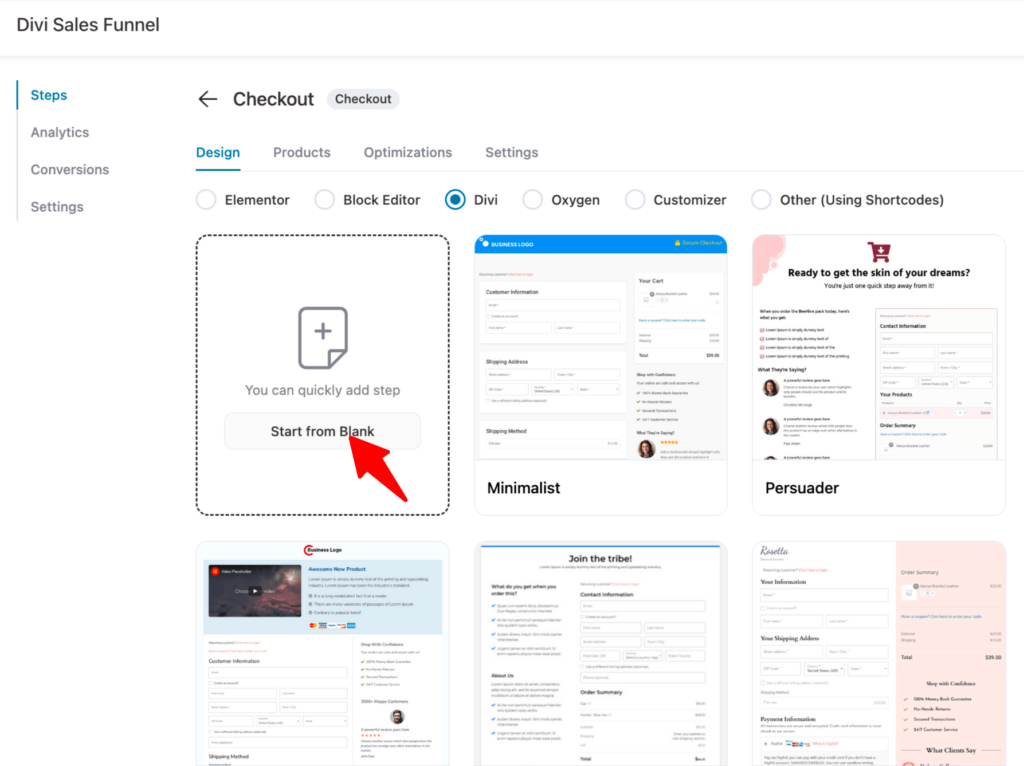
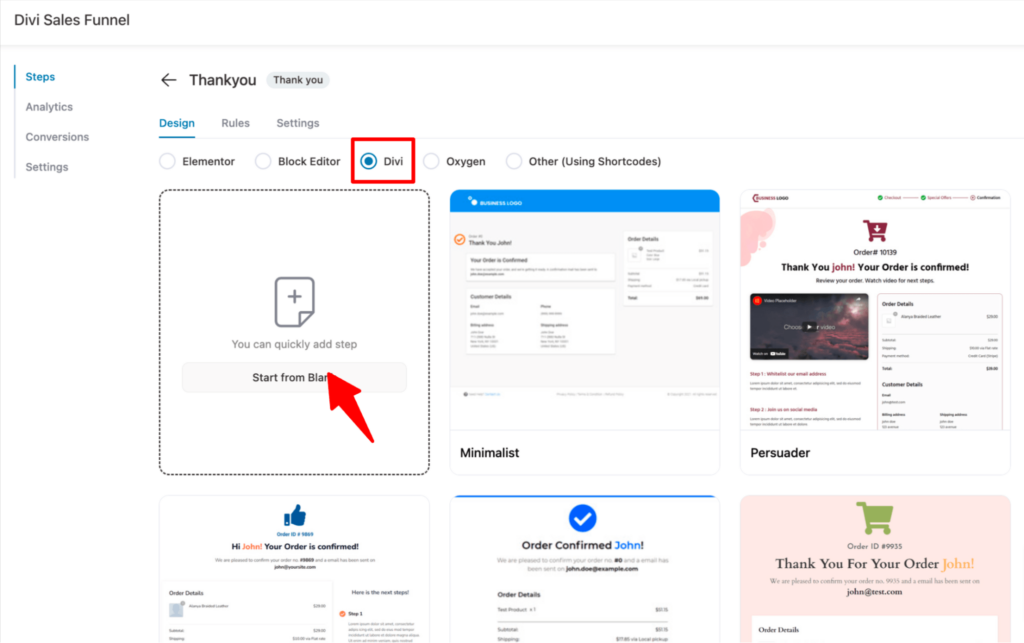
Now choose the funnel you want to build and the page builder as Divi. And since we are going to build one from scratch, click on “Start from Blank.”

Click on "Start from blank", provide a name, choose the steps you want in your funnel, and click on Done. We are creating a funnel with two steps: checkout and thank you.
Note: Here we will show you how you can build a checkout page and thank you page from scratch using Divi Modules. You can follow the same steps to create the sales funnels with other steps.
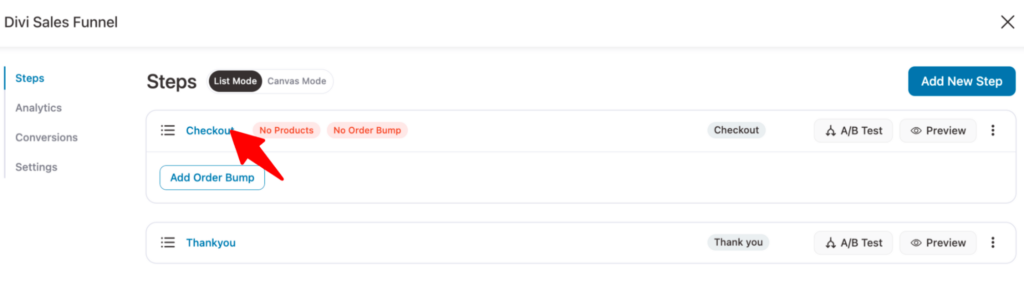
Step 2: Create a checkout page
To add a checkout page to the sales funnel you just created, click on the Checkout step.
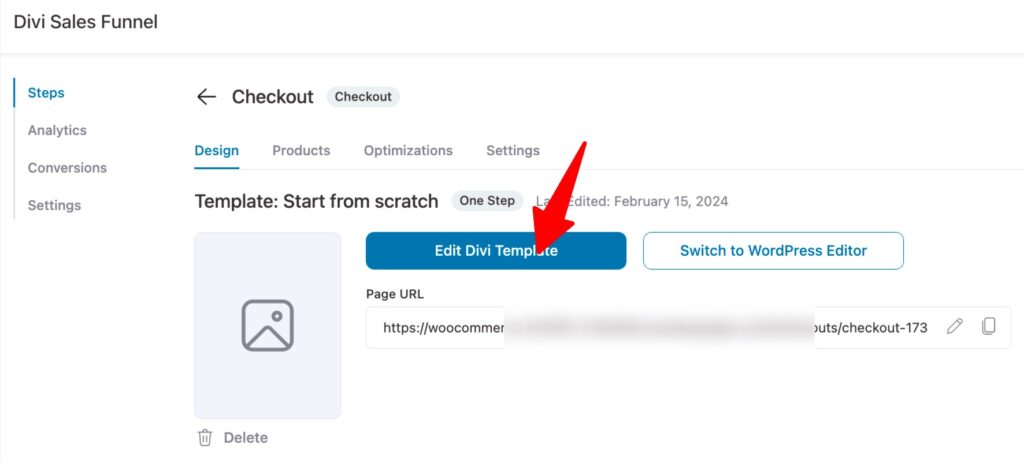
Now choose Divi and click on "Start from Blank" to import the blank funnel.
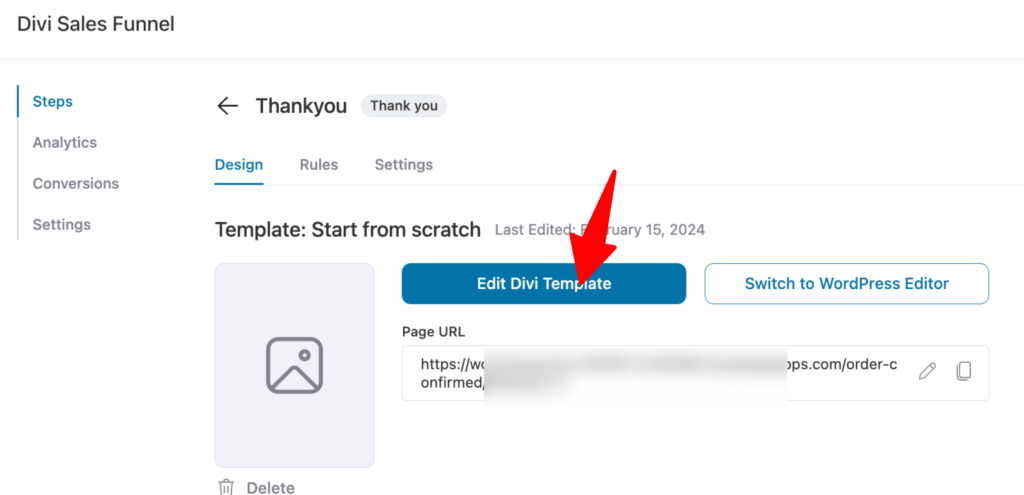
Click on the "Edit Divi Template" to build the checkout page with Divi page builder.
Now choose a layout.
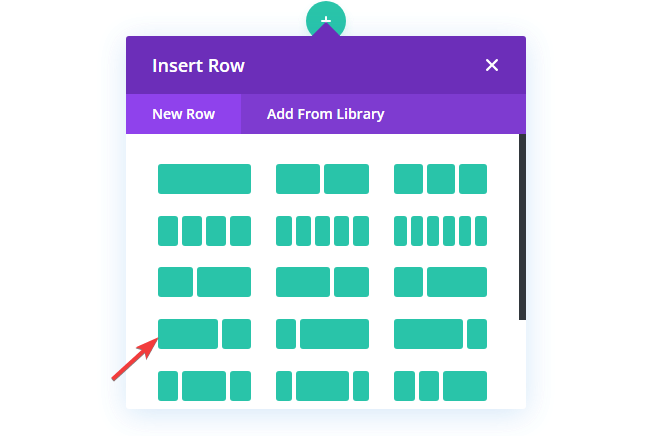
After selecting the layout, search and add FunnelKit’s divi modules for the checkout page. Here is first adding the checkout form divi module.
Similarly, add the Mini cart divi module. And your checkout page is ready. You can customize the modules if you need.
Here is how it will look :
Step 3: Create a thank you page
To add a thank you page, click on the thank you page. After that, choose Divi as your page builder, and click on “Start from Blank.”
After that provide a name and import. Then edit the thank you page with "Edit Divi Template".
After that, choose a layout and add the thank you divi modules.
Here is what the thank you page looks like
Repeat the same process to build all the pages of the sales funnel.
Start Using Divi Modules by FunnelKit Today!
Sales funnels play a significant role in ensuring you achieve a high conversion rate. To ensure your customers convert, you need to provide them with a smooth, user-friendly experience on your Divi website.
With access to a library of Divi templates at your disposal and custom Divi modules, you have everything you need to create beautiful and converting sales funnels. With FunnelKit, the WooCommerce builder for Divi, you can now create beautiful sales funnels from scratch.
Along with creating a sales funnel, you can also A/B test each page of the funnel to find out what resonated with your target audience.


