


This document explains how to enable and configure Google Pay, including its display, appearance, shipping information, and payment behavior.
Note: The Google Pay button is rendered by Stripe (Express Checkout) and works in supported browsers such as Chrome without a Google Merchant ID. No additional setup is required.
The following settings let you control the Google Pay button’s display, appearance, shipping information, and payment behavior.
How To Enable And Configure Google Pay
Step 1: Enable Google Pay
To enable and configure Google Pay, navigate to WooCommerce ⇒ Settings ⇒ Payments and select the Google Pay tab.
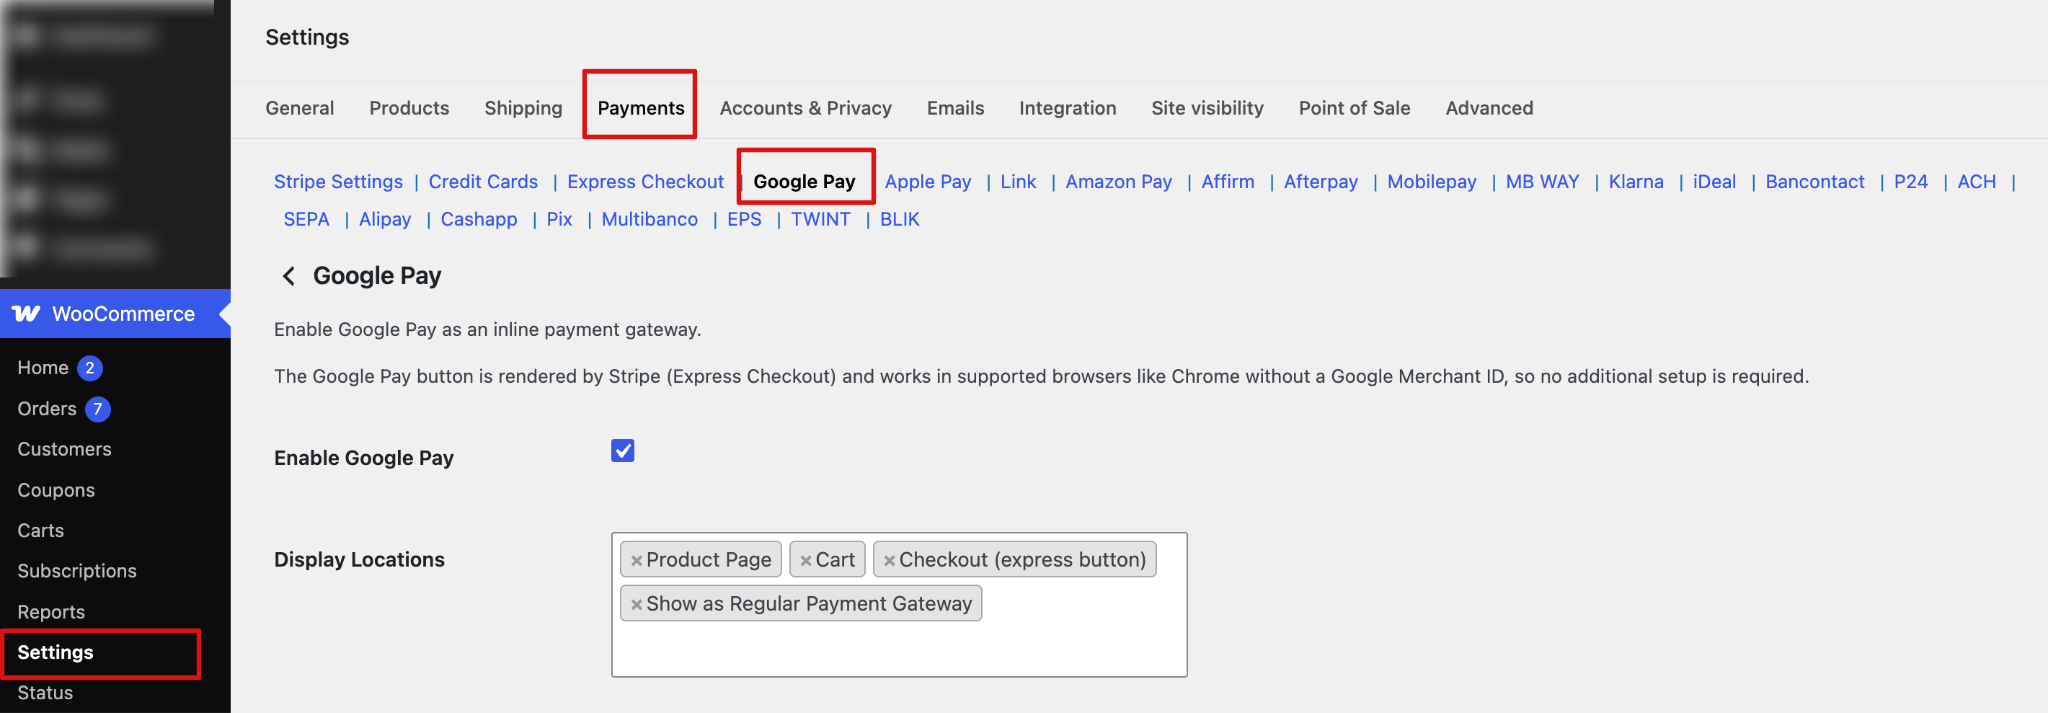
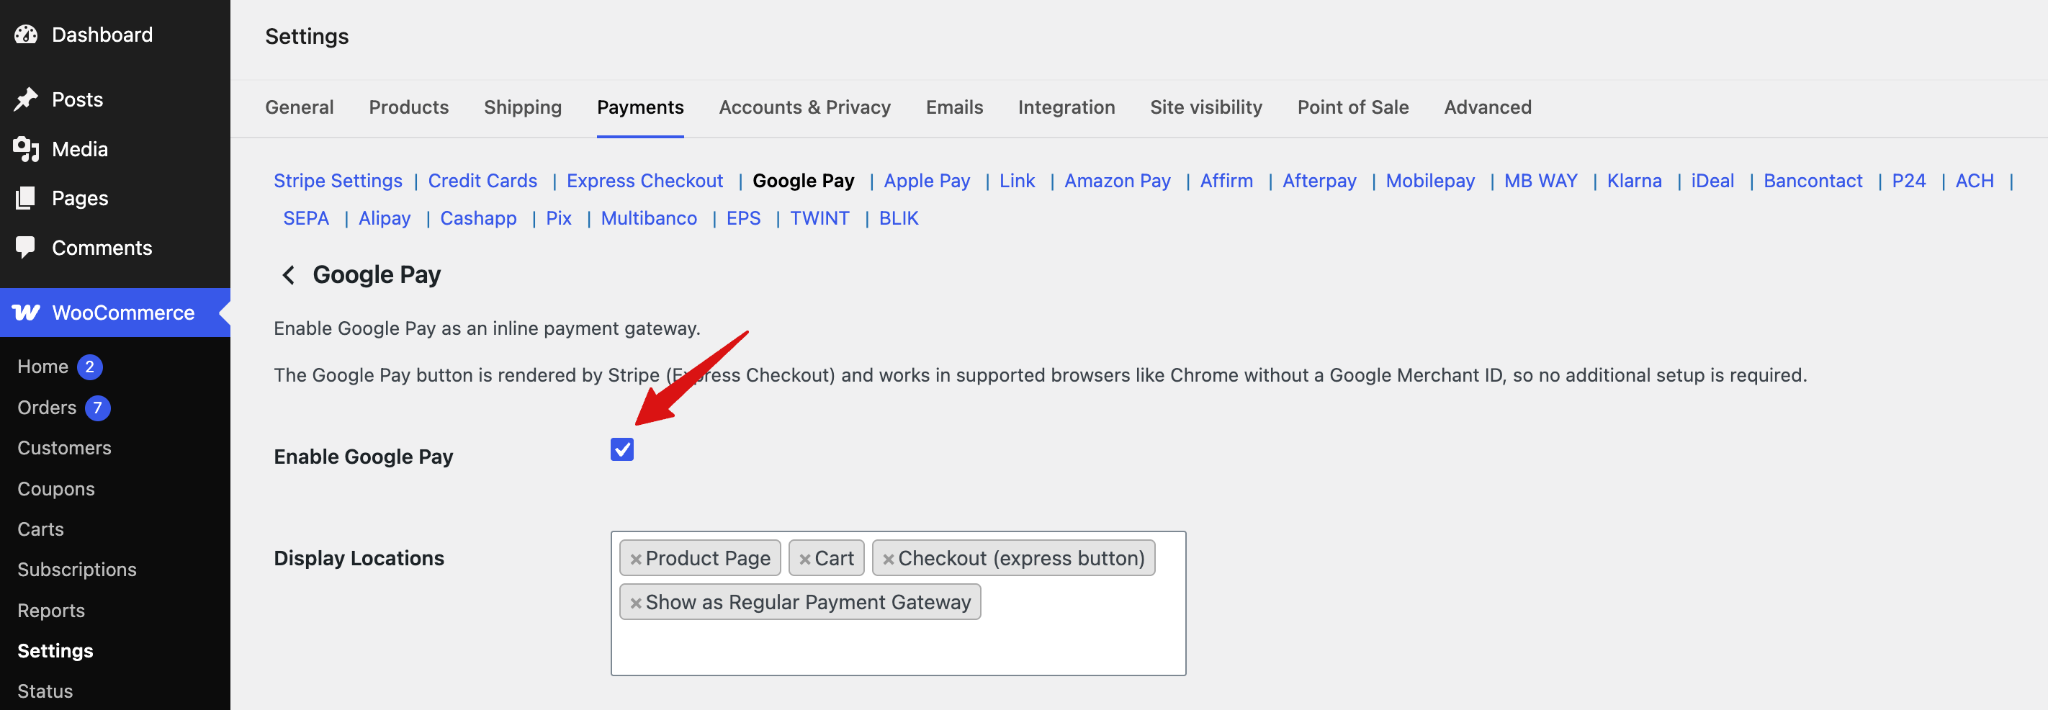
- Enable Google Pay: Check the box to enable Google Pay on your WooCommerce store.
Step 2: Set up display locations and positions
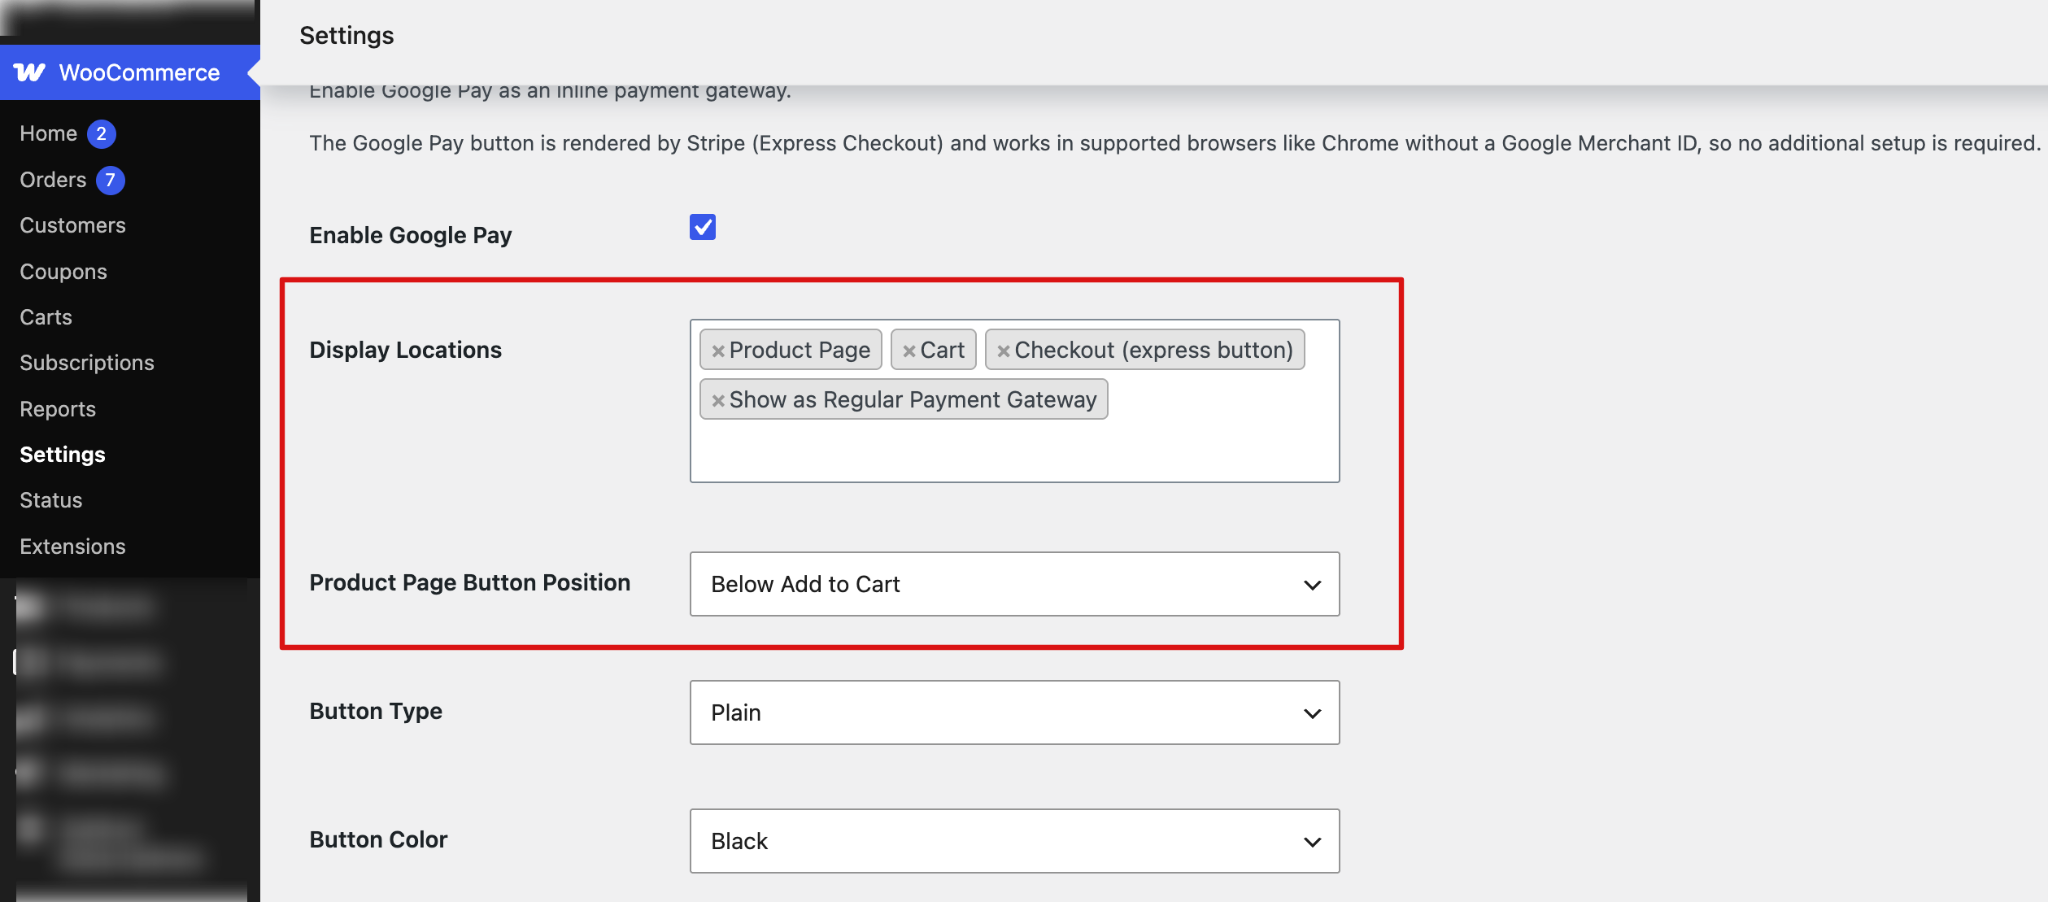
- Display Locations: Choose where to display the Google Pay button: Product Page, Cart, Checkout (Express Button), Show as Regular Payment Gateway
- Product Page Button Position: Choose where the Google Pay button appears on the product page: Above Add to Cart, Below Add to Cart, or Inline Button.
Step 3: Configure button type and style
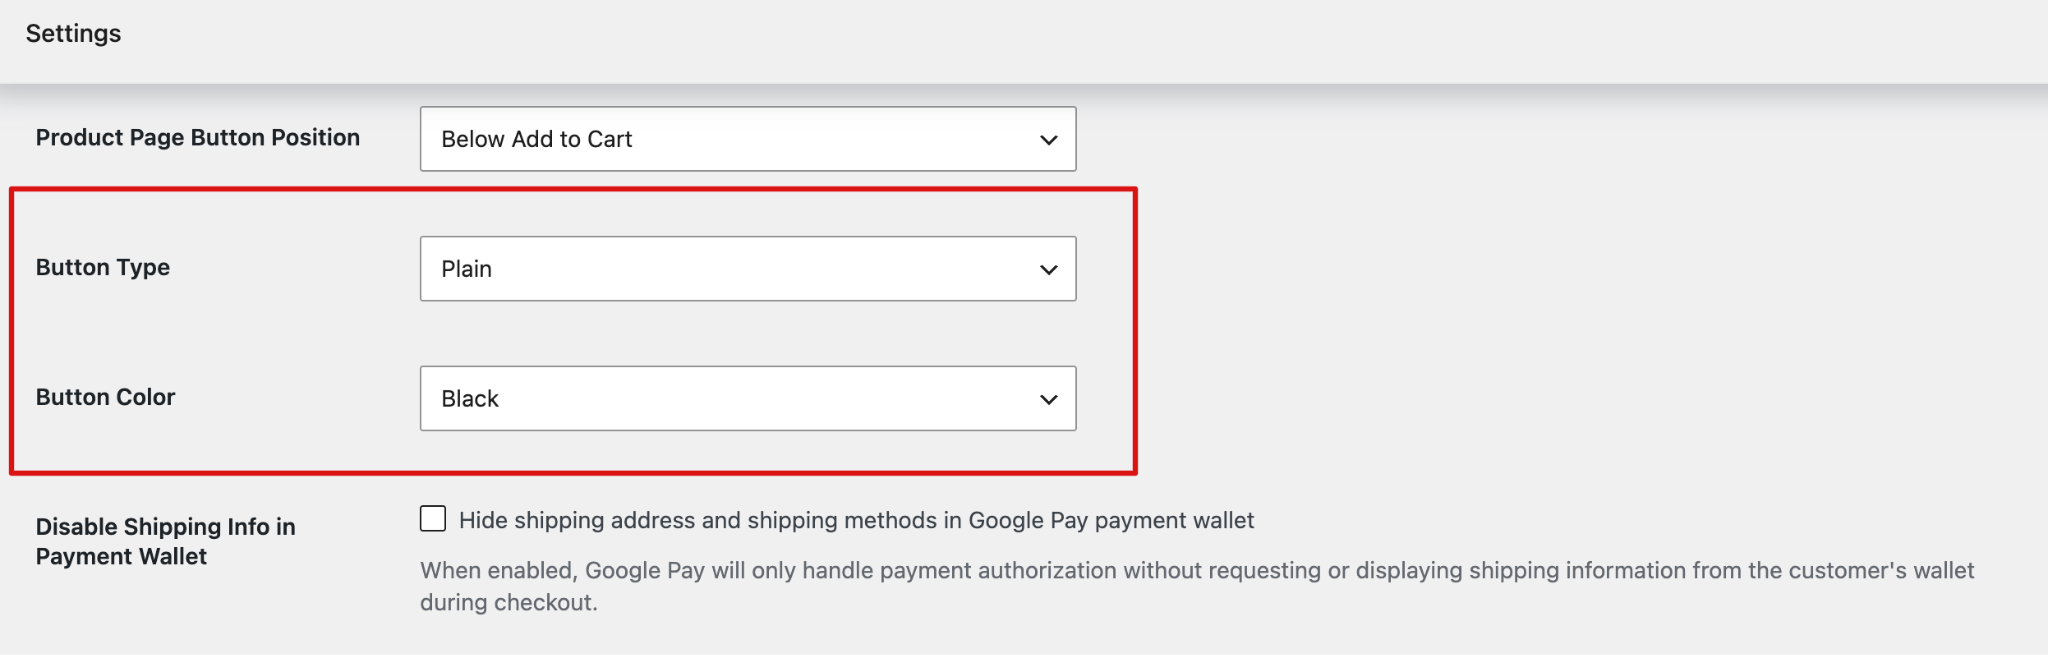
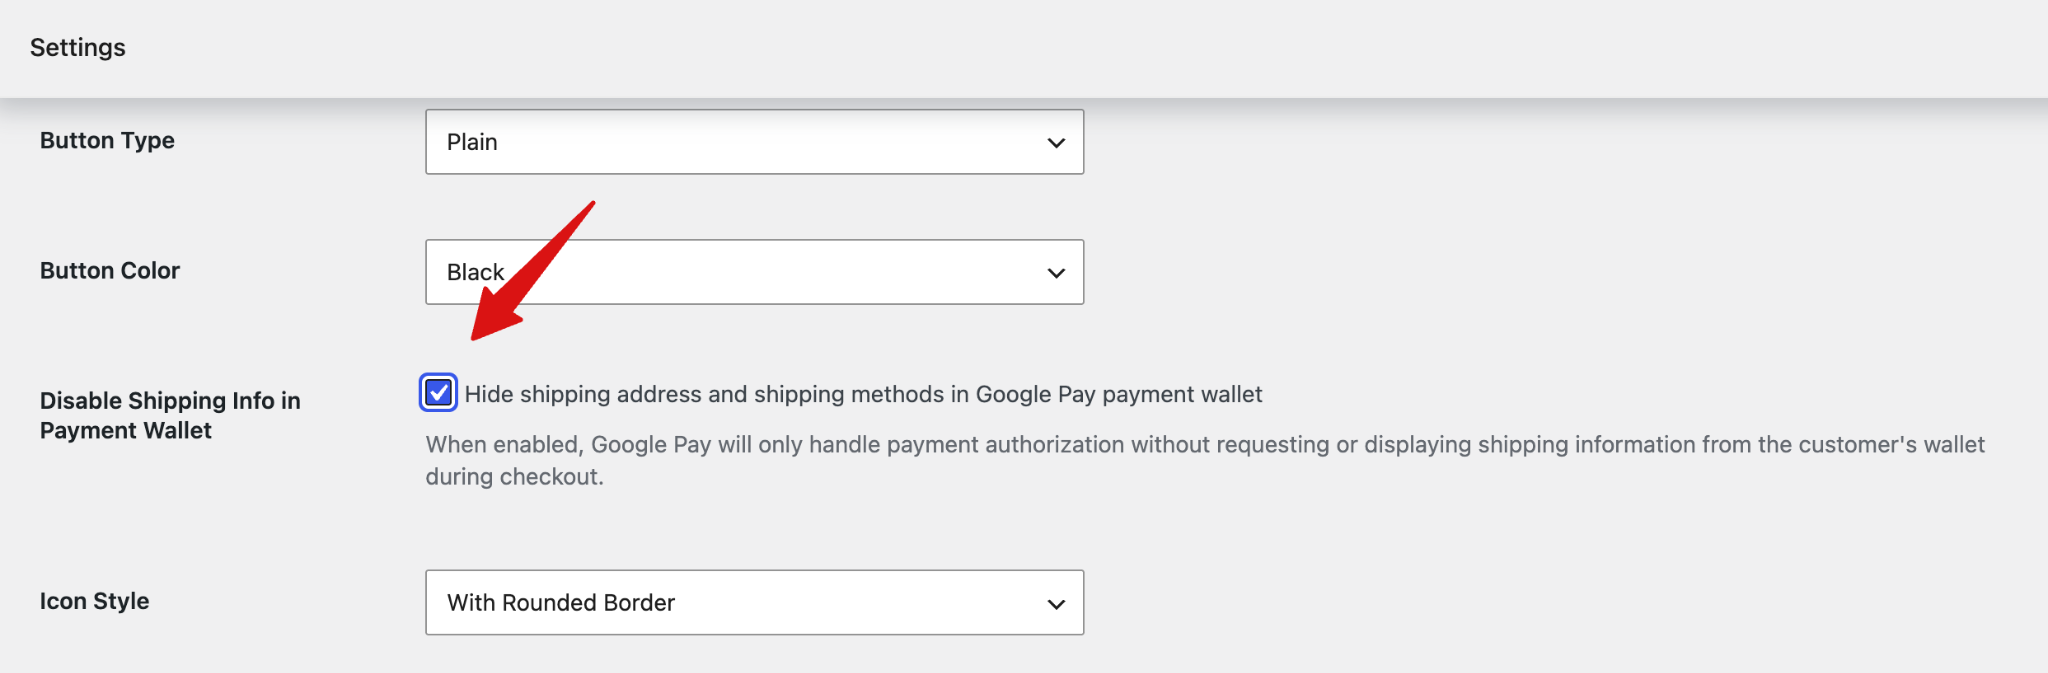
- Button Type: Select the button type. Options are Plain, Buy, Pay, Checkout, Donate, Book, Order, or Subscribe.
- Button Color: Choose the button color. Options are Black and White.
Step 4: Disable Shipping Info in Payment Wallet
- Disable Shipping Info in Payment Wallet: Hide the shipping address and shipping methods in the Google Pay payment wallet. When enabled, customers select their shipping information on the checkout page instead of in the Google Pay wallet.
Note: Enable this option if your store uses shipping, parcel, or local pickup plugins with their own shipping interface. It helps prevent conflicts by keeping shipping address and method selection on the checkout page.
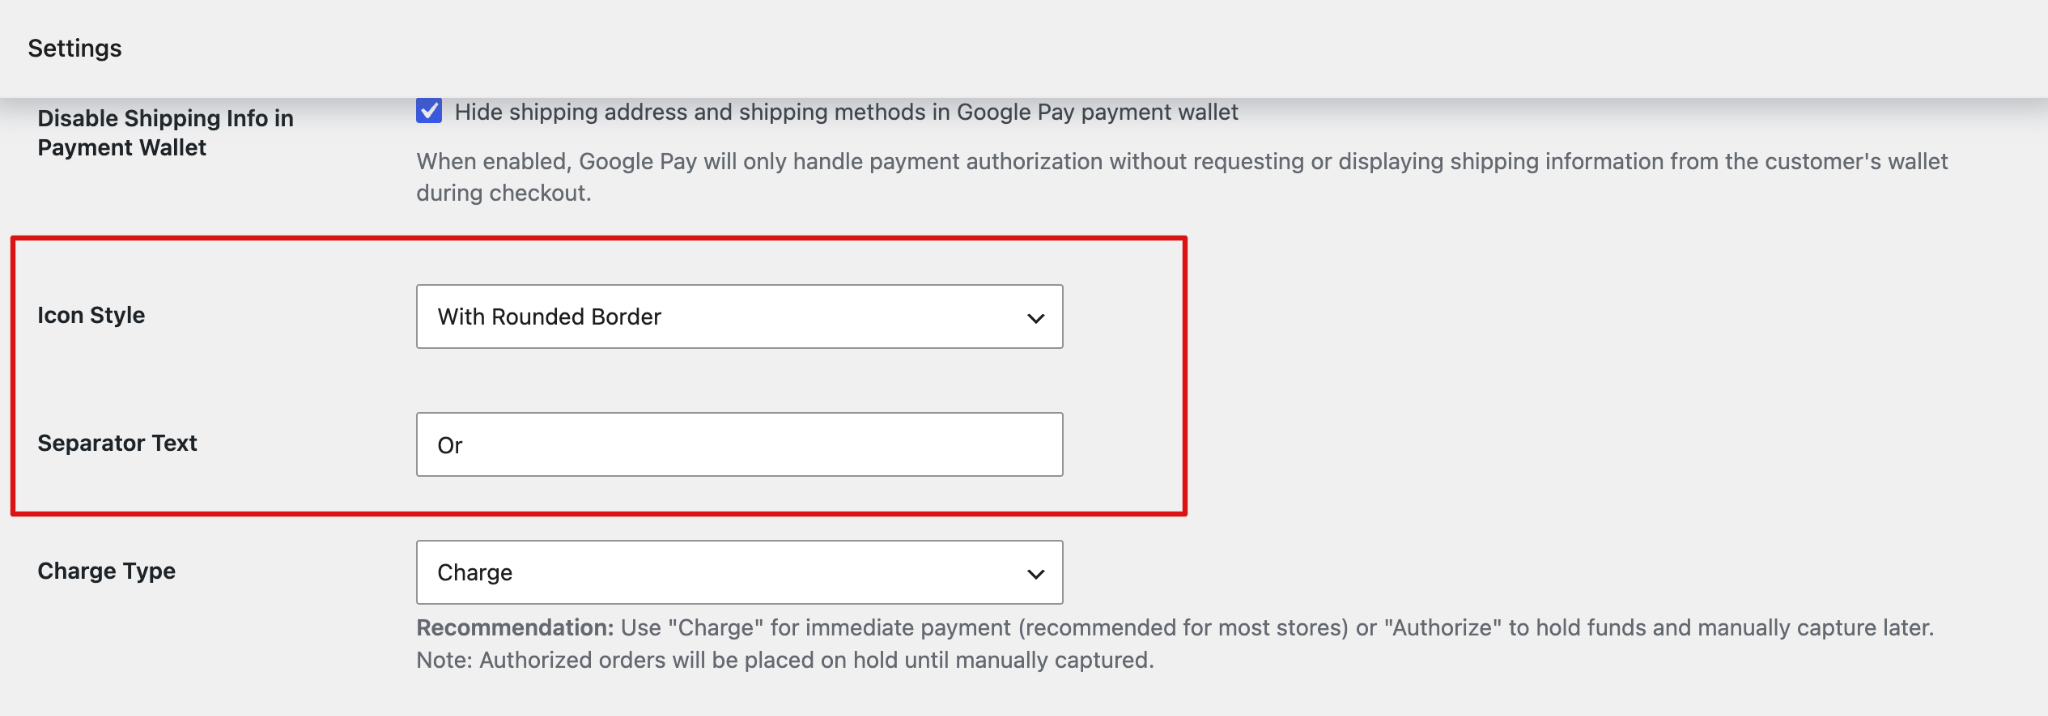
Step 5: Set up icon and separator text
- Icon Style: Choose the icon style from With Rounded Border, With Border, and Standard.
- Separator Text: Enter the text to display as a separator around the Google Pay button.
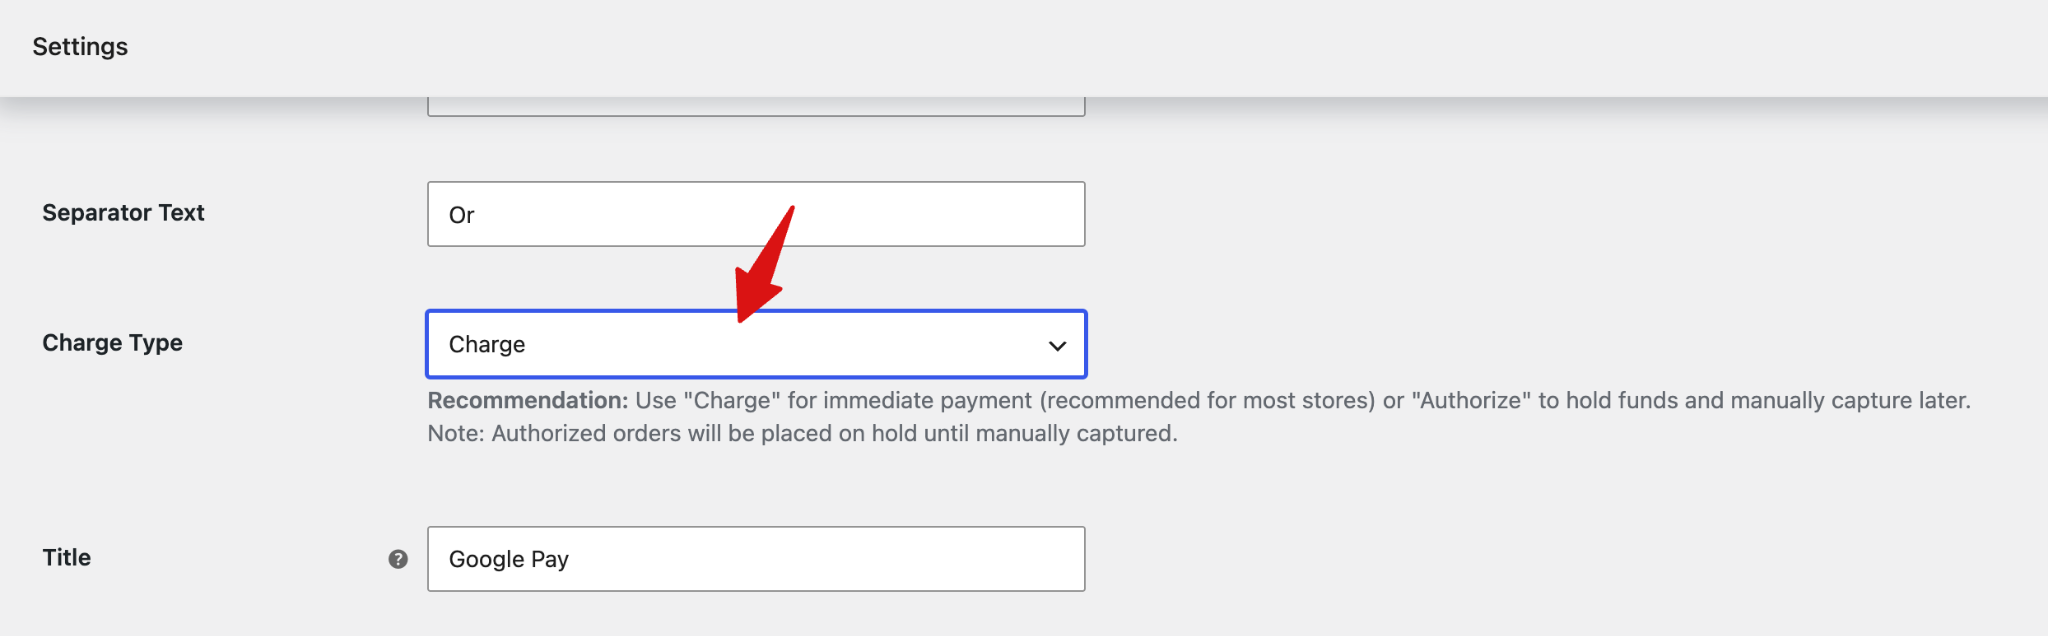
Step 6: Set up charge type
Choose how payments are processed:
- Charge: Captures the payment immediately. This is recommended for most stores.
- Authorize: Places a hold on the customer's funds, which can be captured manually later. Authorized orders remain on hold until the payment is captured.
Step 7: Set up title and description
- Title: Enter the title displayed for Google Pay when it is shown as a regular payment gateway.
- Description: Enter the description displayed for Google Pay when it is shown as a regular payment gateway.
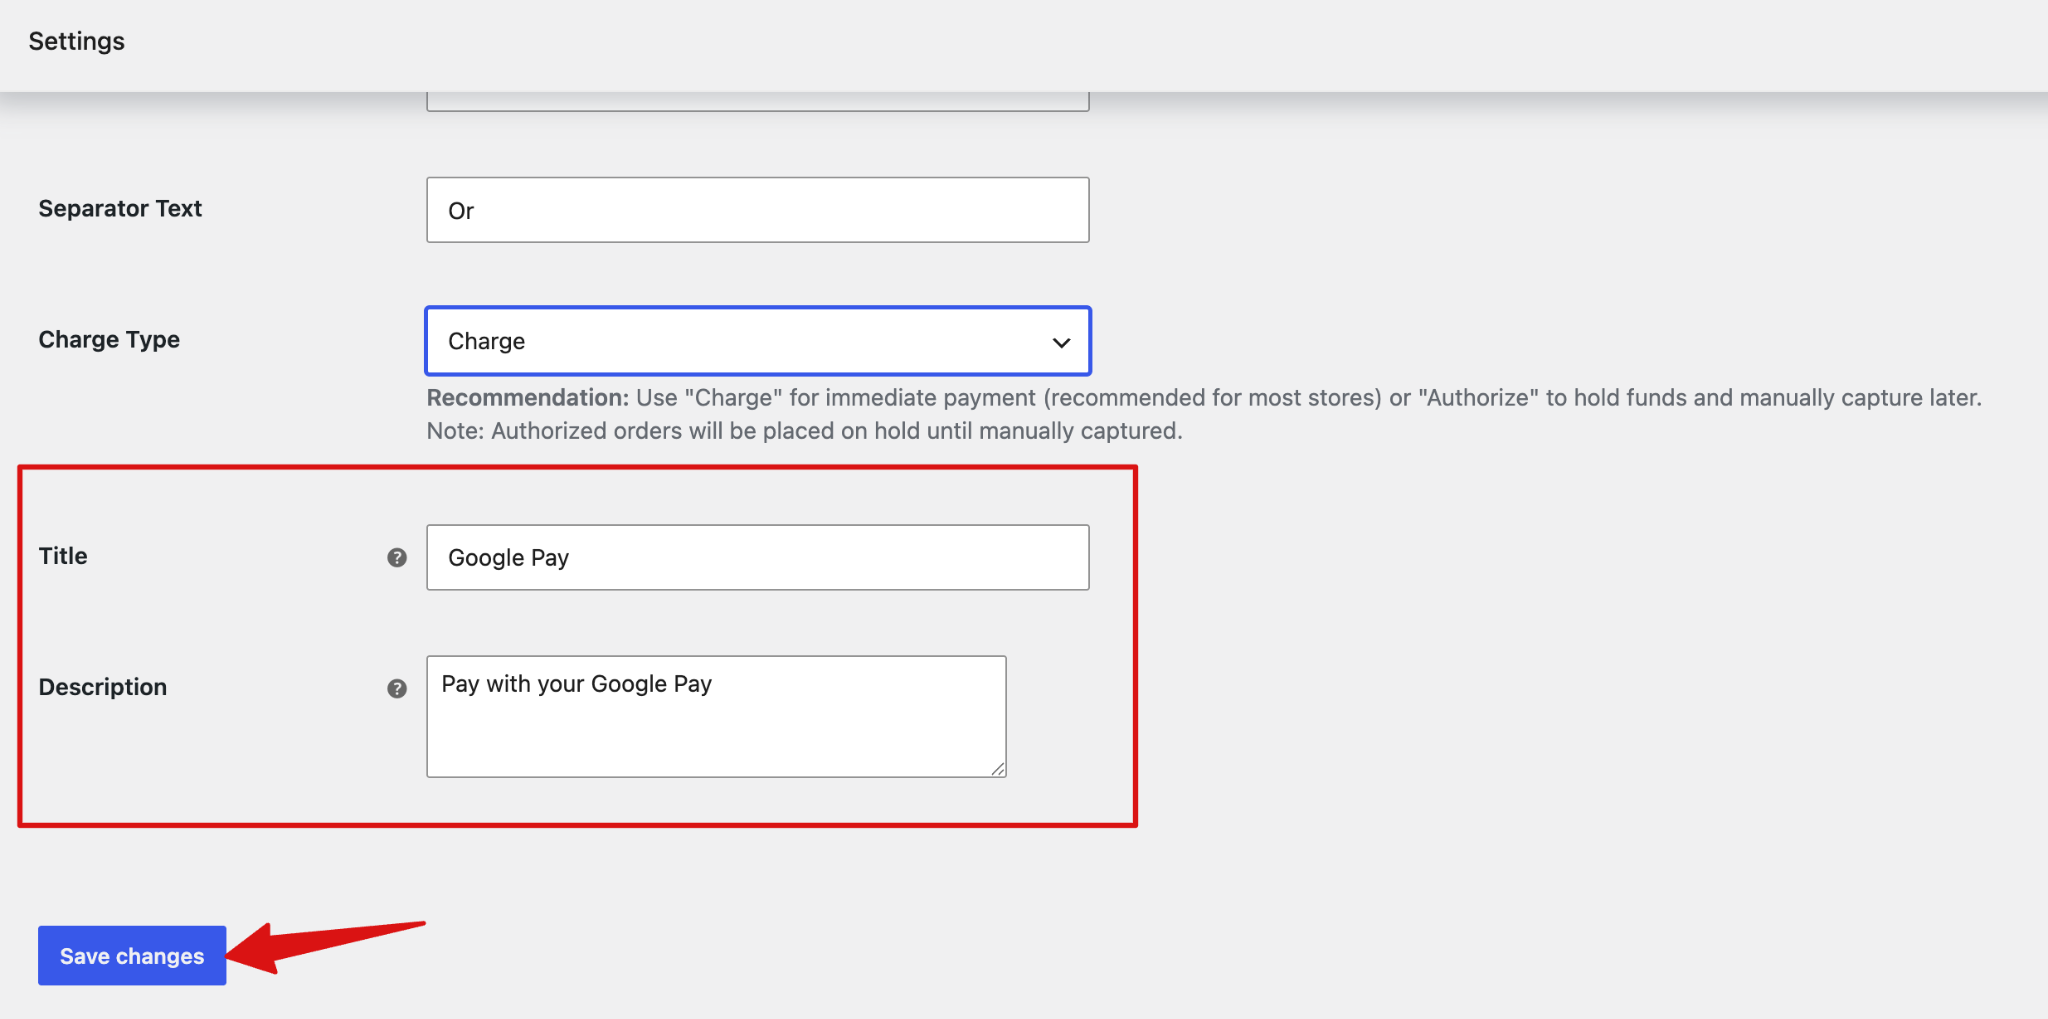
Finally, make sure to hit “Save Changes” to save the settings.
Testing Google Pay
Now, to test the process, go to a product page where you can find the Google Pay option.
Customers can directly buy from the product page using Google Pay.
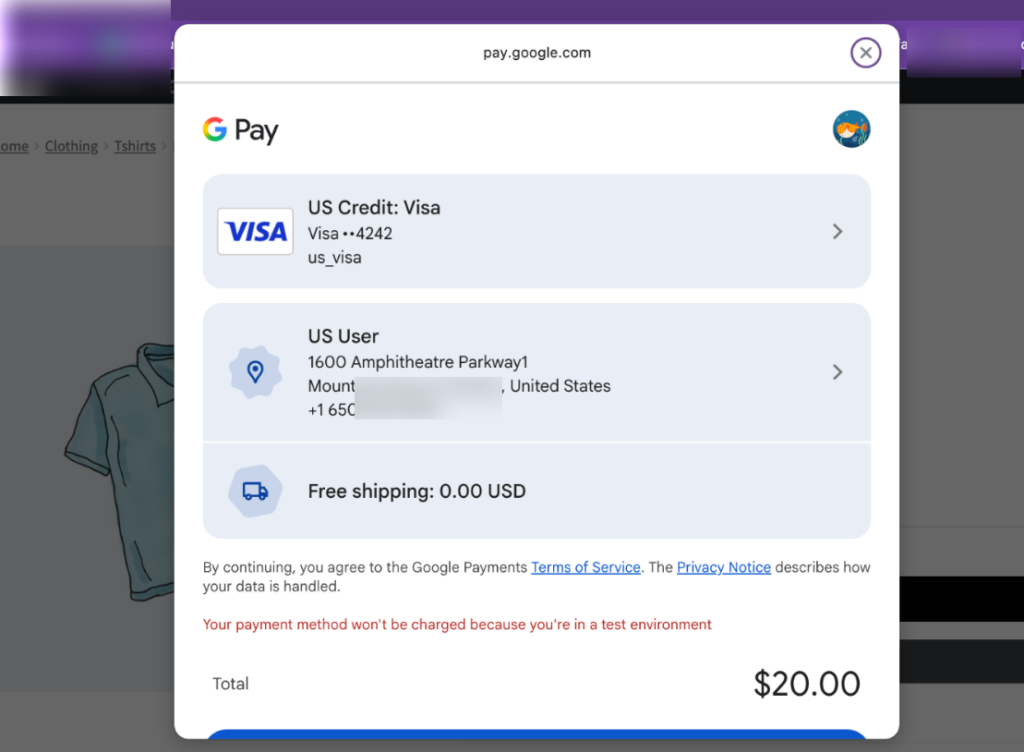
Similarly, you can find the Google Pay option as express checkout and inline payment on the checkout page.
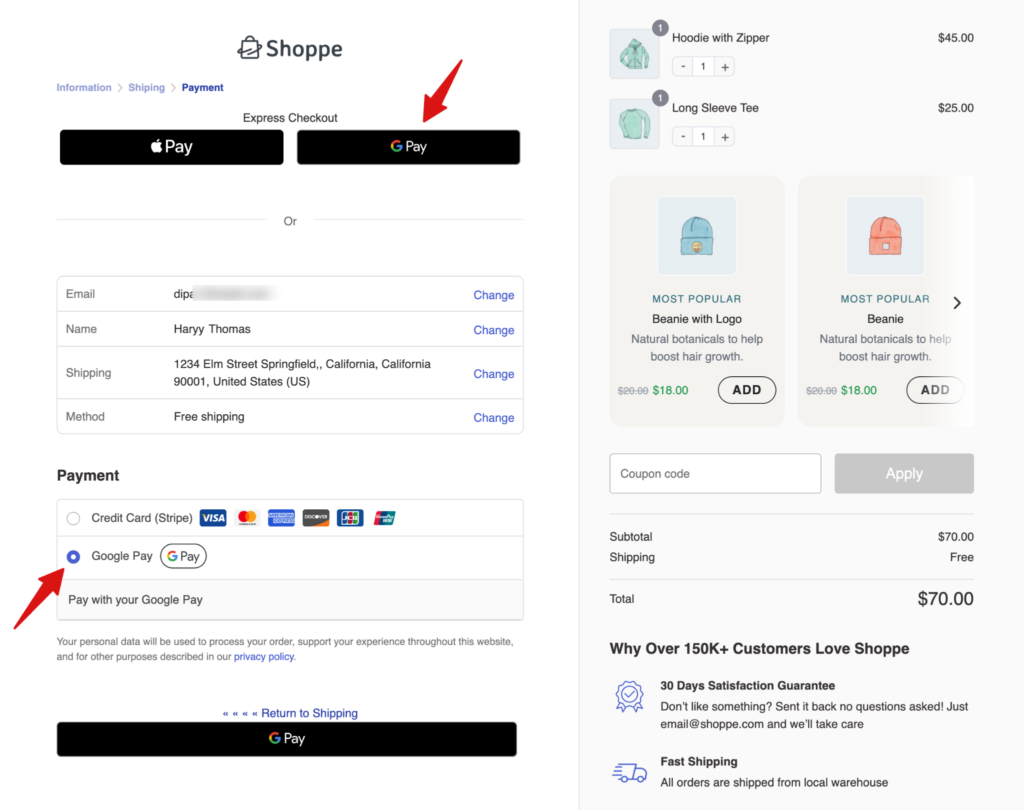
Make sure to test payment methods in test mode and, once done, switch to live mode.


