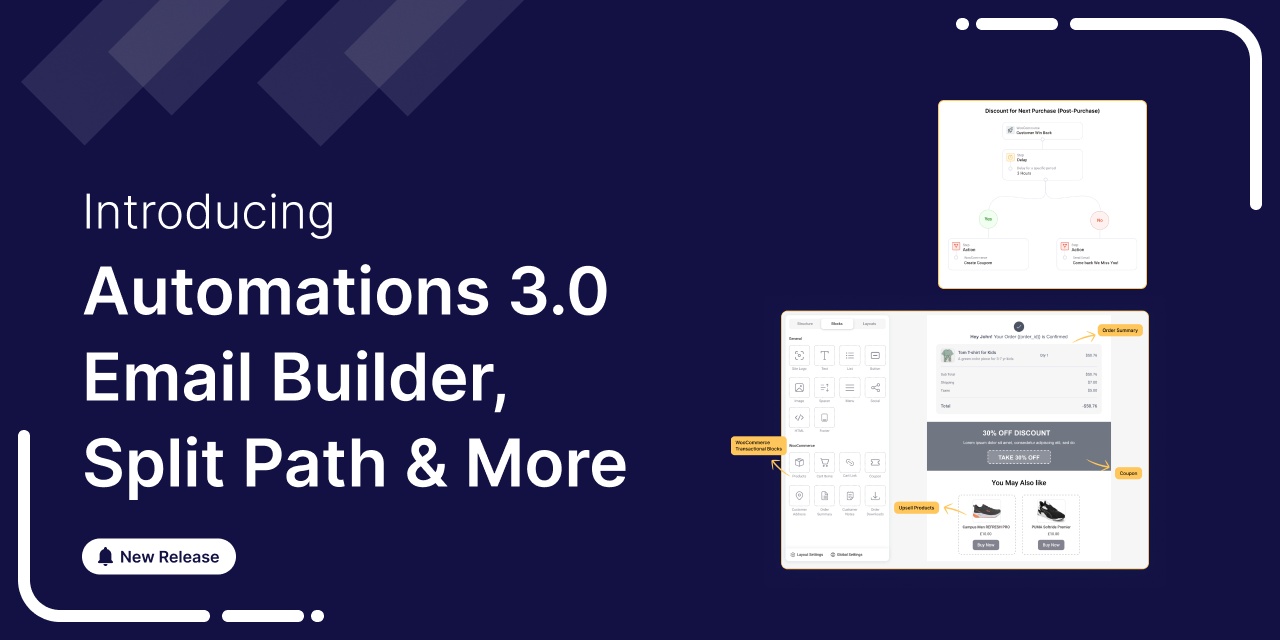
Brace yourselves, FunnelKit Automations enthusiasts! The moment we’ve all been eagerly awaiting is finally here.
We are thrilled to announce the release of the much-anticipated FunnelKit Automations 3.0, which is set to revolutionize your business with seamless and personalized experiences.
After eight months of expansive thinking and aggressive hard work, we’re proud to unveil FunnelKit Automations version 3.0!
This release features an innovative visual email builder that will help you create captivating, revenue-driving email campaigns seamlessly integrated with your WooCommerce store.
Watch this video to see what's in store for you.

Let's begin.
Table of Contents
- 1 Feature 1: Improved UI Experience
- 2 Feature 2: Intuitive Drag-and-Drop Email Builder
- 3 Feature 3: WooCommerce Content Blocks
- 4 Feature 4: Global Styles
- 5 Feature 5: A New Email Builder Template Library
- 6 Feature 6: Pre-Built and Saved Custom Layouts
- 7 Feature 7: Display Conditions
- 8 Feature 8: Split Path Automation
- 9 Feature 9: Add Contacts to Automations
- 10 Feature 10: Global Contact Activities
- 11 Feature 11: Comprehensive Contact Profiles
- 12 Experience the Most Exciting FunnelKit Automations 3.0 Today!
Feature 1: Improved UI Experience
Get ready for a transformation in user experience that surpasses expectations and sets a new standard for intuitive design and functionality.
Say hello to our all-new, improved user interface (UI) design in FunnelKit Automations 3.0.
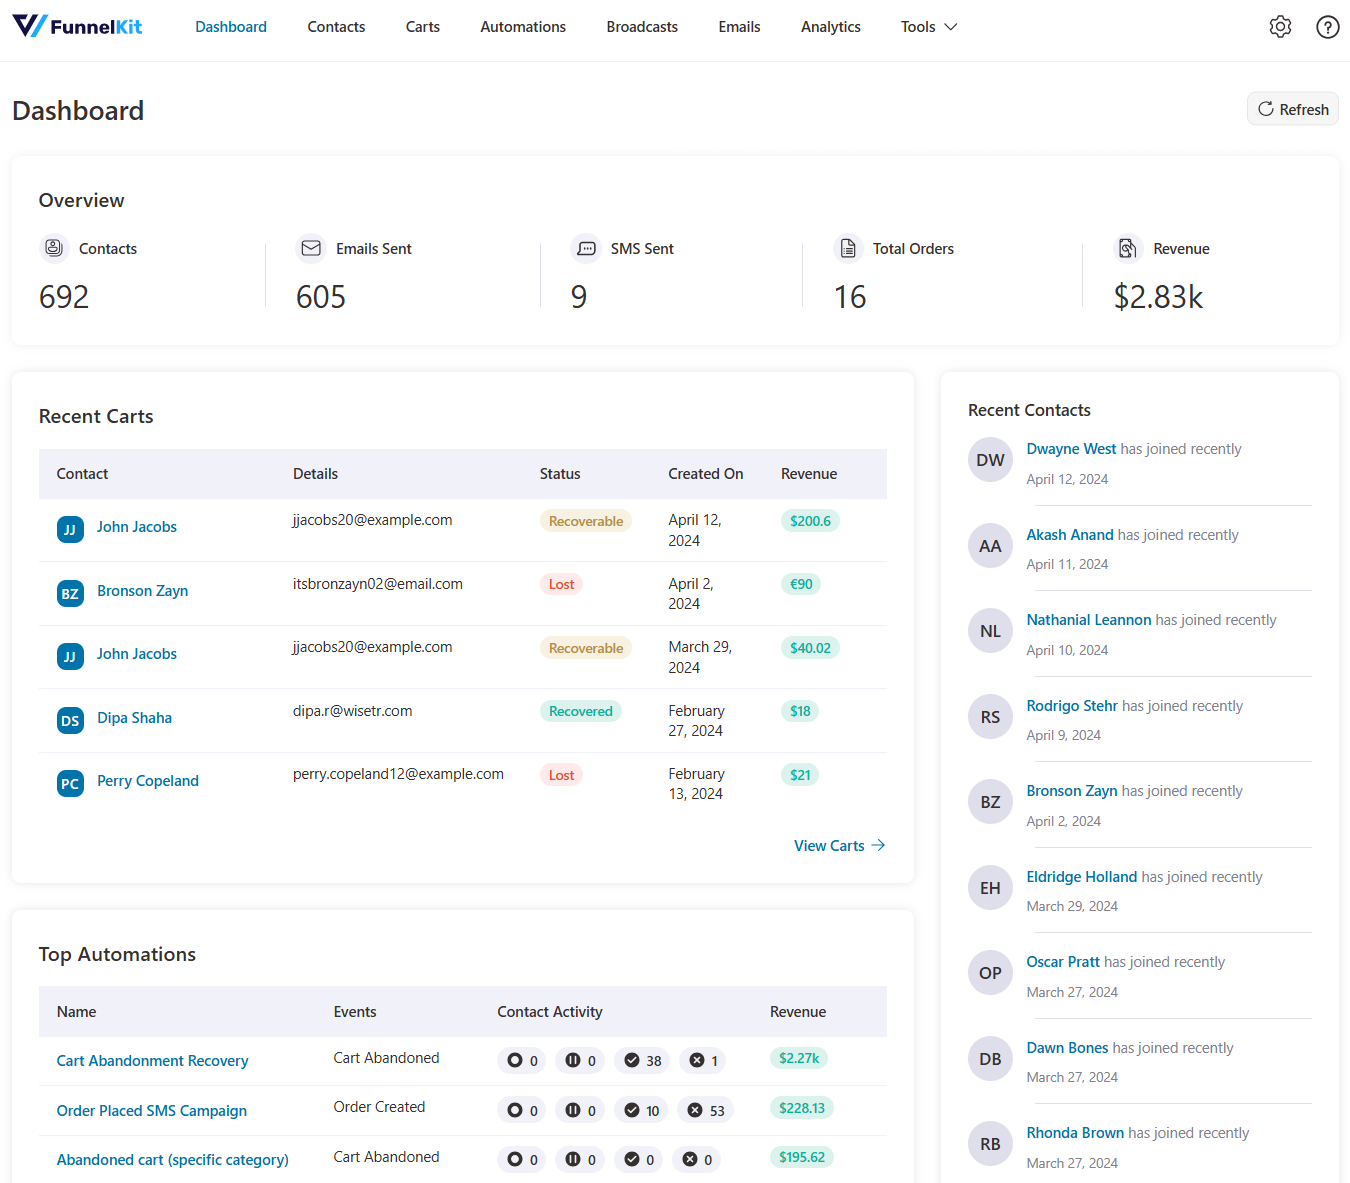
Thanks to the power of React! The sections inside the FunnelKit Automations load much faster now.
Sleek and modern design
We have revamped the UI to have the elements of sleekness and modernity. We’ve ensured that your interaction with FunnelKit Automations is not just a task but a delightful experience.
Faster UI experience
Navigating through FunnelKit Automations has been made smoother. The improved UI introduces intuitive navigation that allows you to effortlessly operate your marketing activities through menus, features, and functionalities.
Enhanced interactivity
We’ve managed to provide you with a world of heightened interactivity. Buttons respond with a satisfying animation, help buttons guide you purposefully, and every interaction enhances your connection with our plugin.
Feature 2: Intuitive Drag-and-Drop Email Builder
FunnelKit Automations introduces an all-new, our very own block editor that helps you design visually appealing and responsive emails for your email marketing campaigns.
This all-in-one solution solves one of the biggest problems that store owners face: creating better emails for WooCommerce.
Our email builder allows you to convert outdated default WooCommerce emails into beautiful personalized emails that your customers will love.
It simplifies the process of creating visually stunning and highly effective email campaigns. With this intuitive tool, WooCommerce merchants can effortlessly craft personalized emails tailored to engage customers and drive sales.
It has a user-friendly interface, responsive emails for all devices, and requires no coding skills.
Here are some key features that help you create professional-looking emails:
- Drag-and-drop content blocks
- Modern customizations
- Responsive design
- Personalization
- Conditional content display
- Pre-built layouts
- Preview and test emails
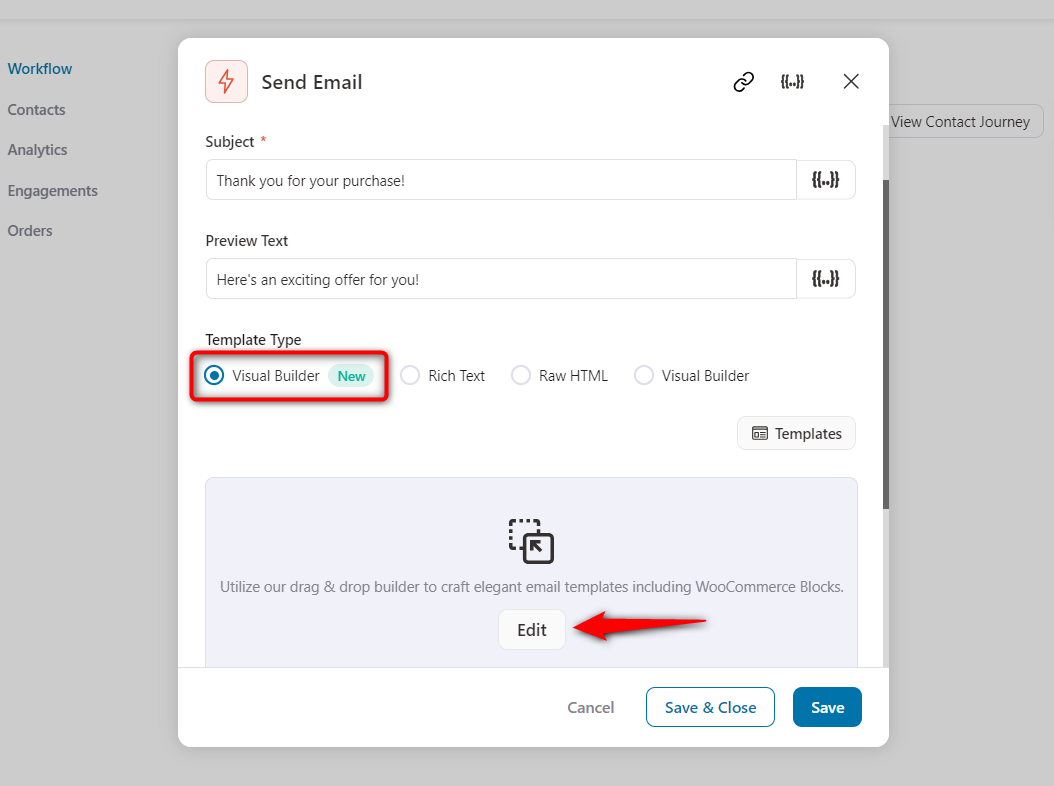
Just select the Visual Builder (New) and hit ‘Edit’ to launch the builder.
You get access to different content blocks that can be customized, just like the page builder tools.
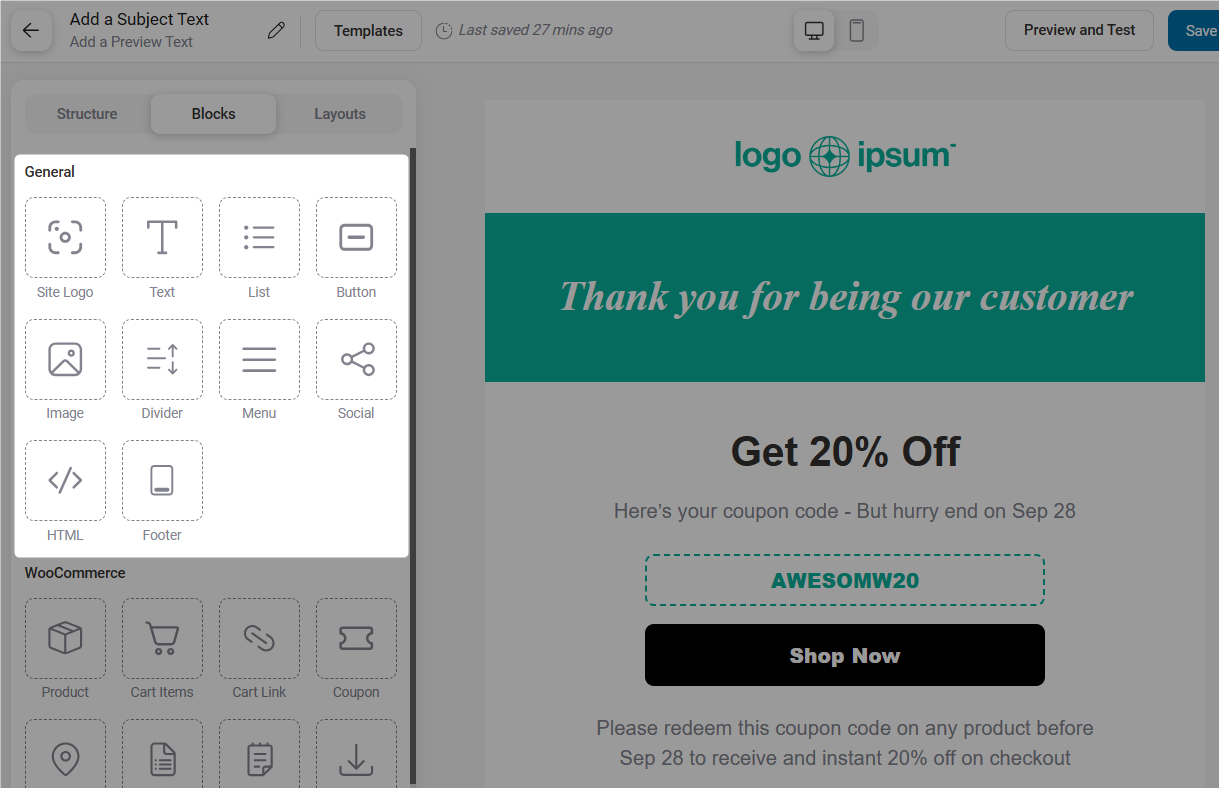
You get general blocks like site logo, text, list, button, image, divider, menu, social, HTML, footer, etc., to style your emails on brand.
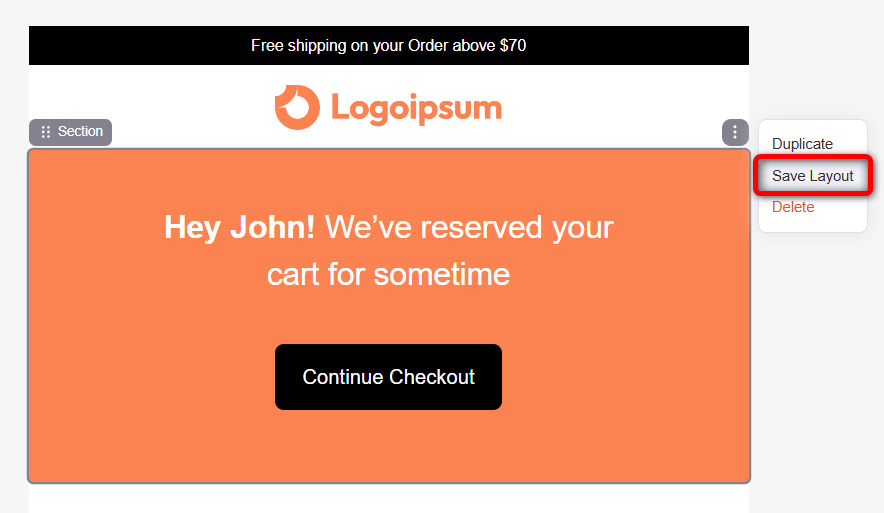
Further, it allows you to save and use layouts in every email.
We’ll explore each of these features one by one later in this post.
Feature 3: WooCommerce Content Blocks
Say no to boring default WooCommerce emails! FunnelKit Automations 3.0 allows you to create visually-appealing emails from WooCommerce content blocks.
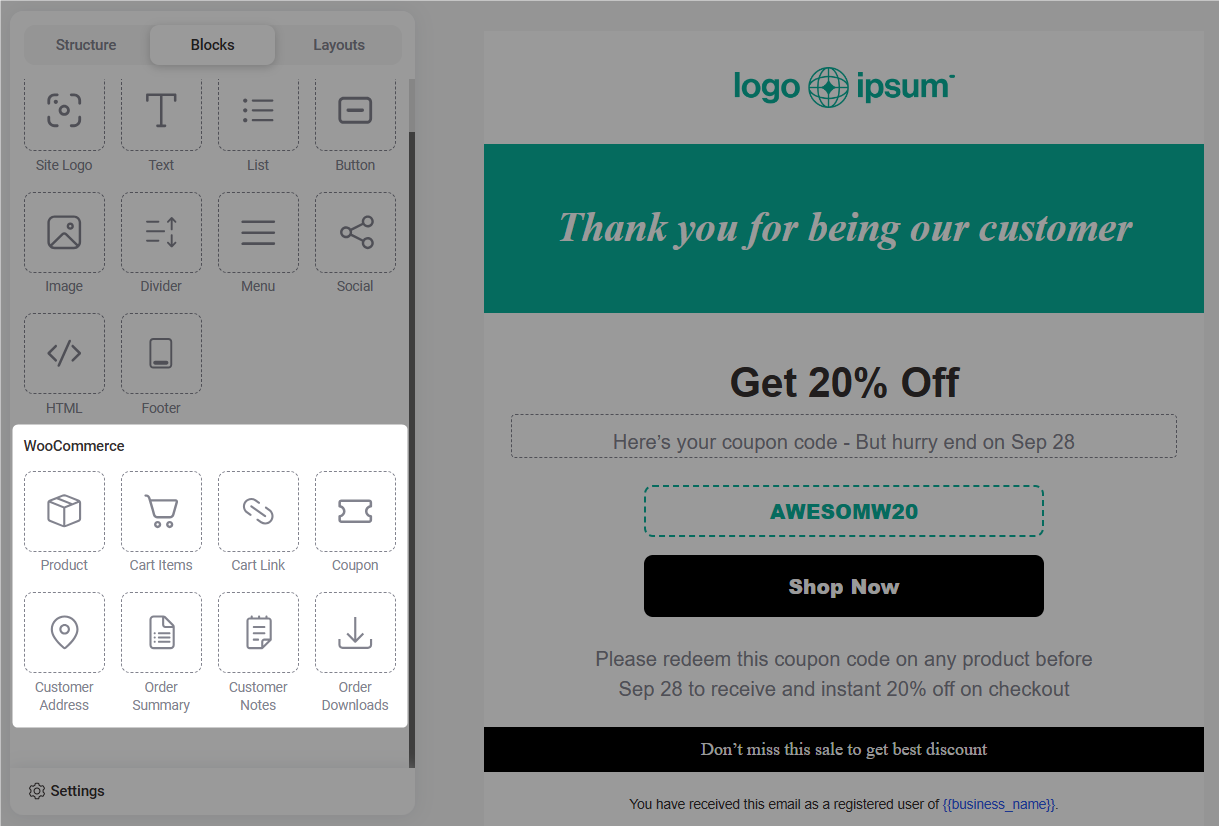
Let’s explore these blocks inside the visual email builder.
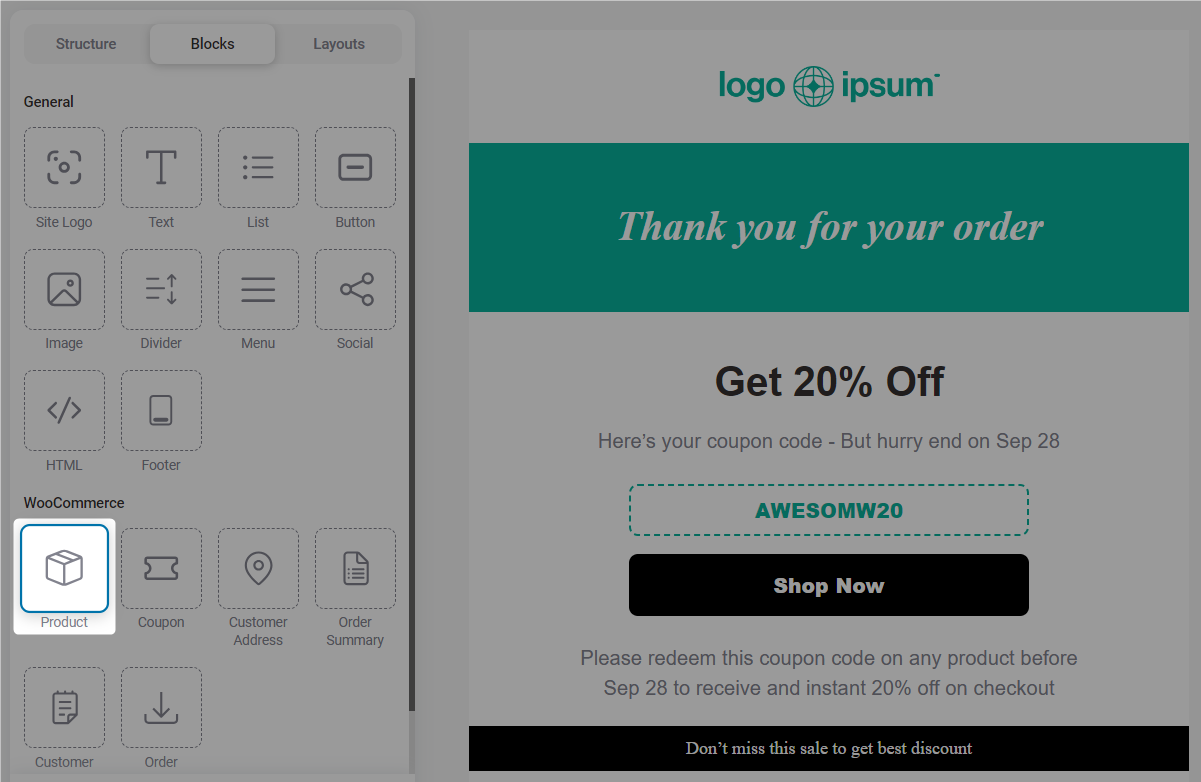
- Product block
Drag and drop the product block into the workspace.
Add your product recommendations by clicking on the ‘Add Product’ button.
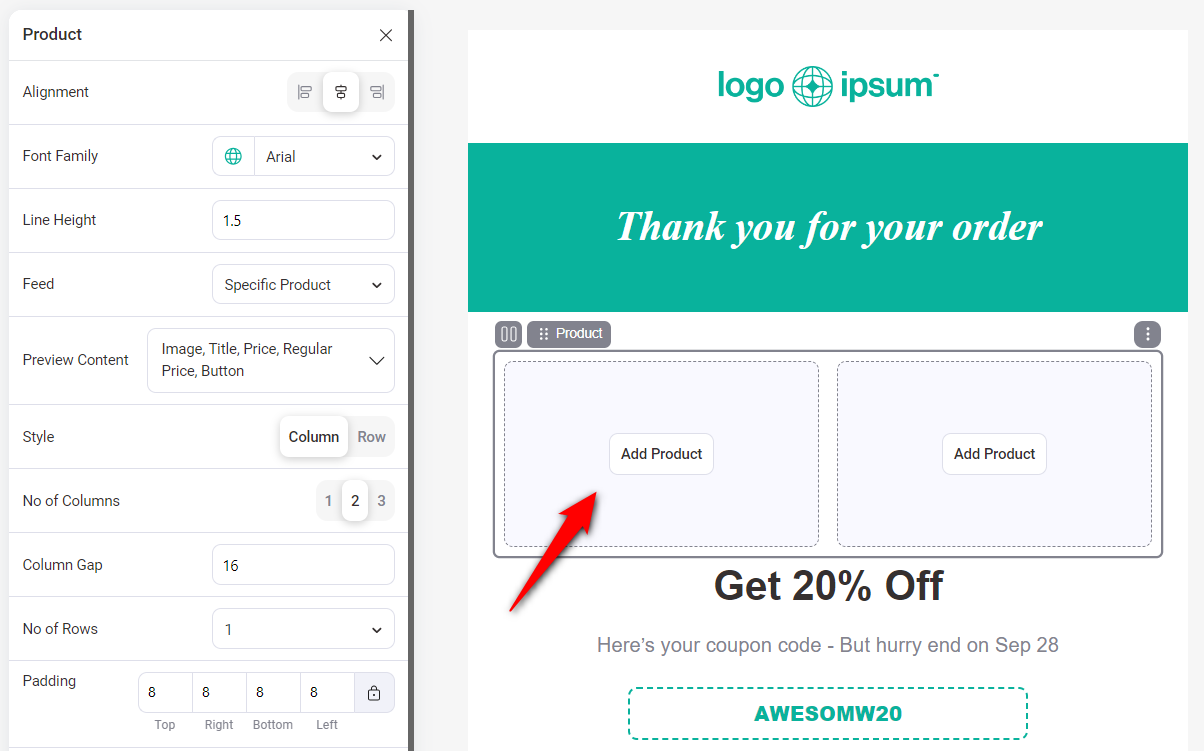
You can either choose from a list of latest products or search for a product to add.
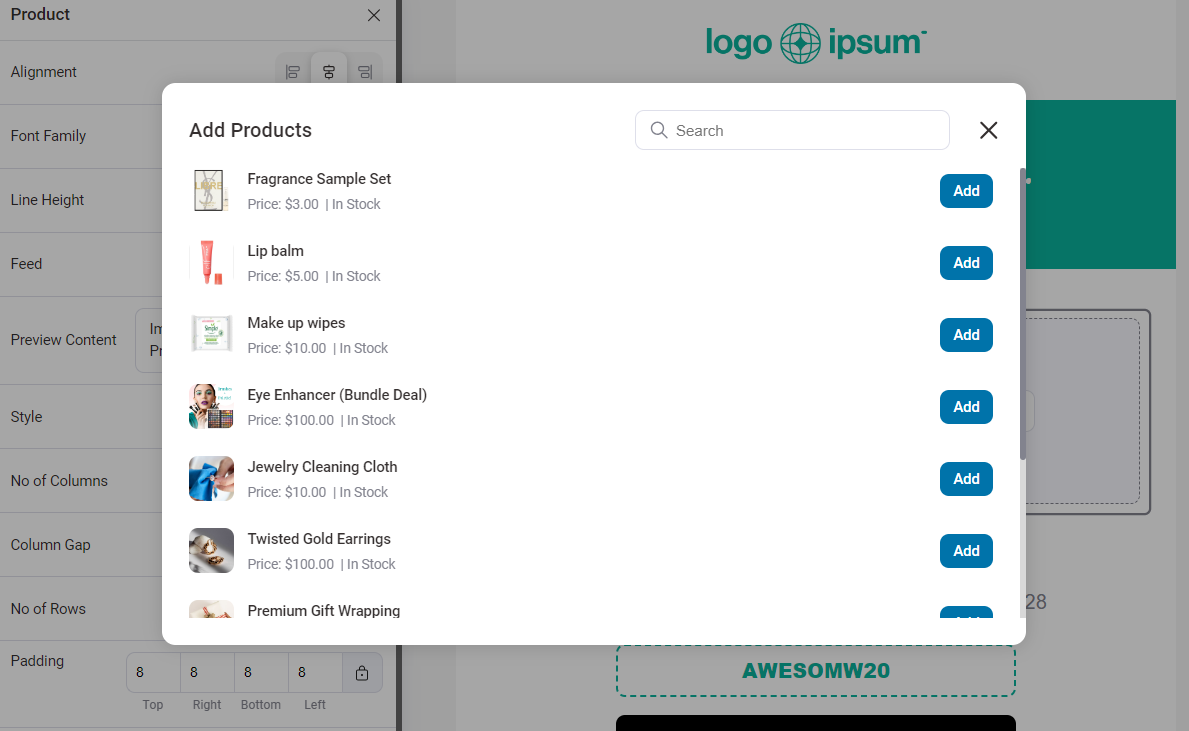
Customize the style of your product block, including the options for the product title, buy now button, price, and more.
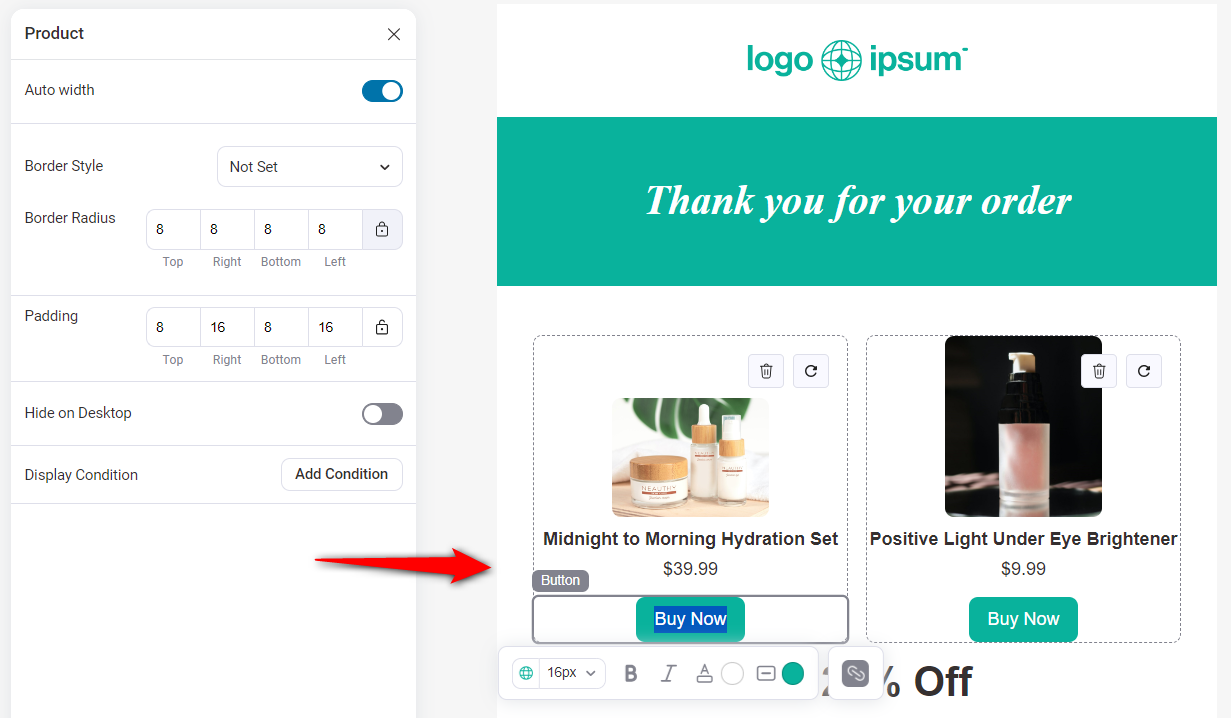
Click on ‘Save’ when done.
- Order Summary block
Drag and drop the order summary block to your workspace.
This block allows you to create beautiful order confirmation emails.
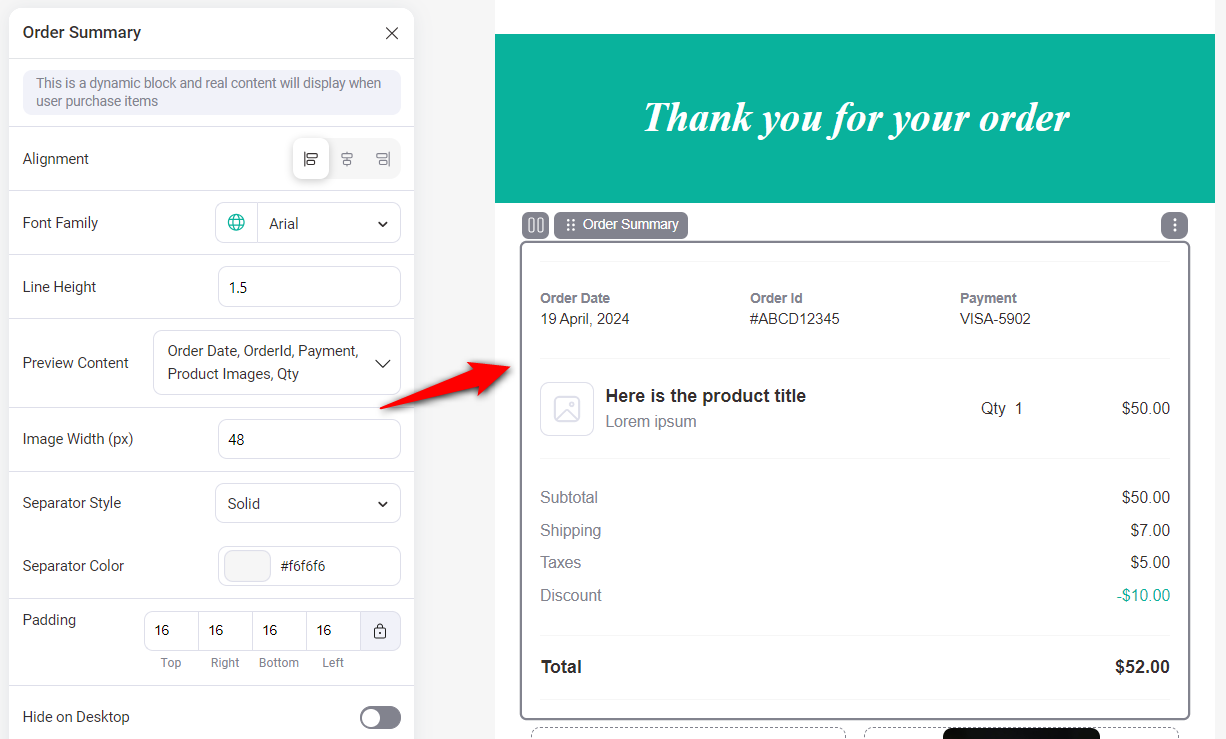
Customize the style of your order summary the way you want.
You can configure the alignment and font, enable/disable the order date, product images, quantity, image width, separator, and more.
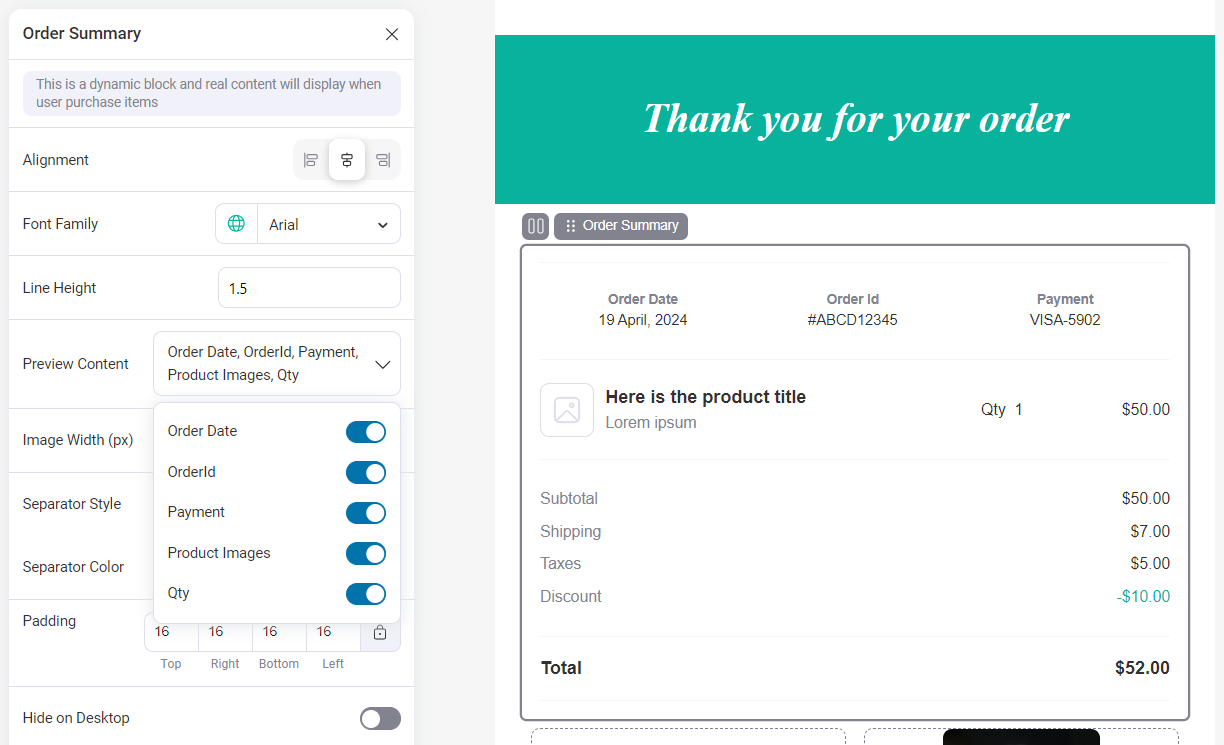
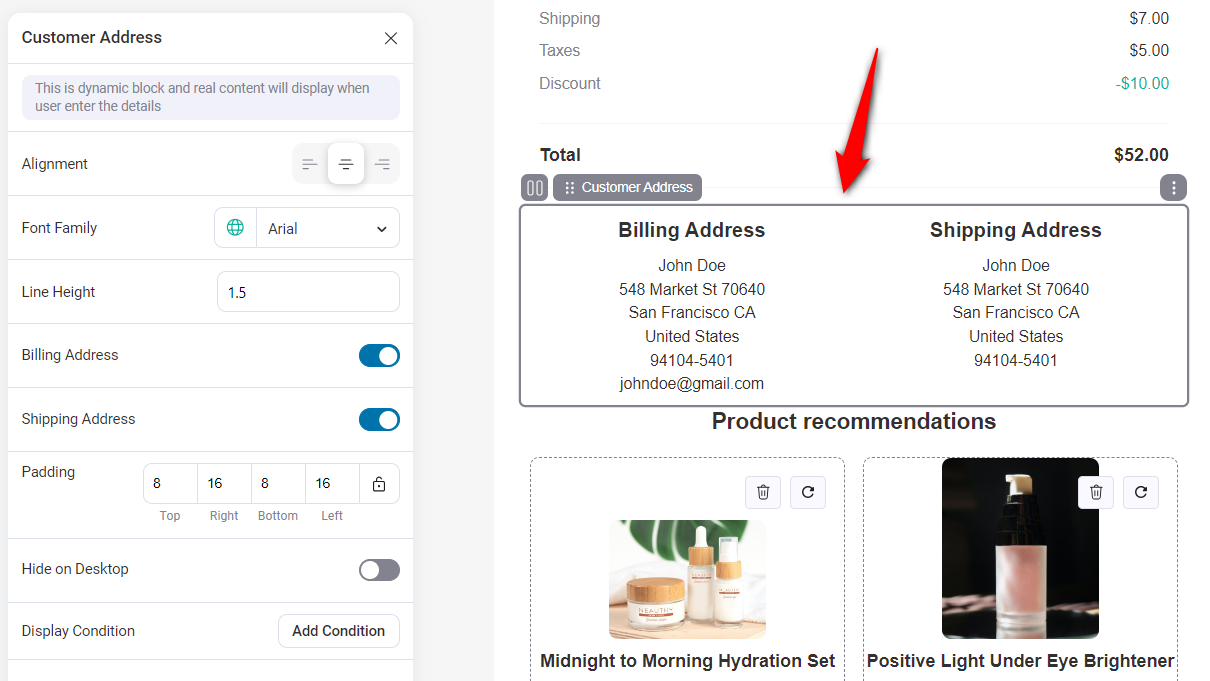
- Customer Address block
The Customer Address content block displays the billing and shipping addresses of the customer who has placed the order. It’s also useful for creating order confirmation emails.
- Coupon block
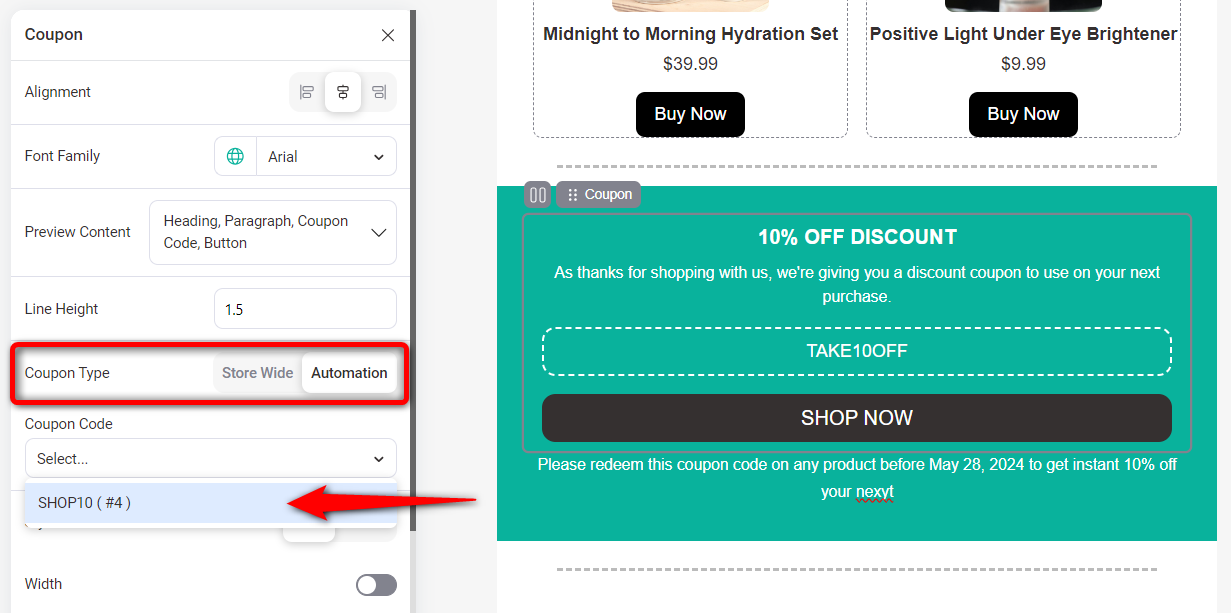
The coupon block lets you incentivize customers with discount coupons. You can display static WooCommerce coupons or create personalized, dynamic coupons with FunnelKit Automations and offer them here.
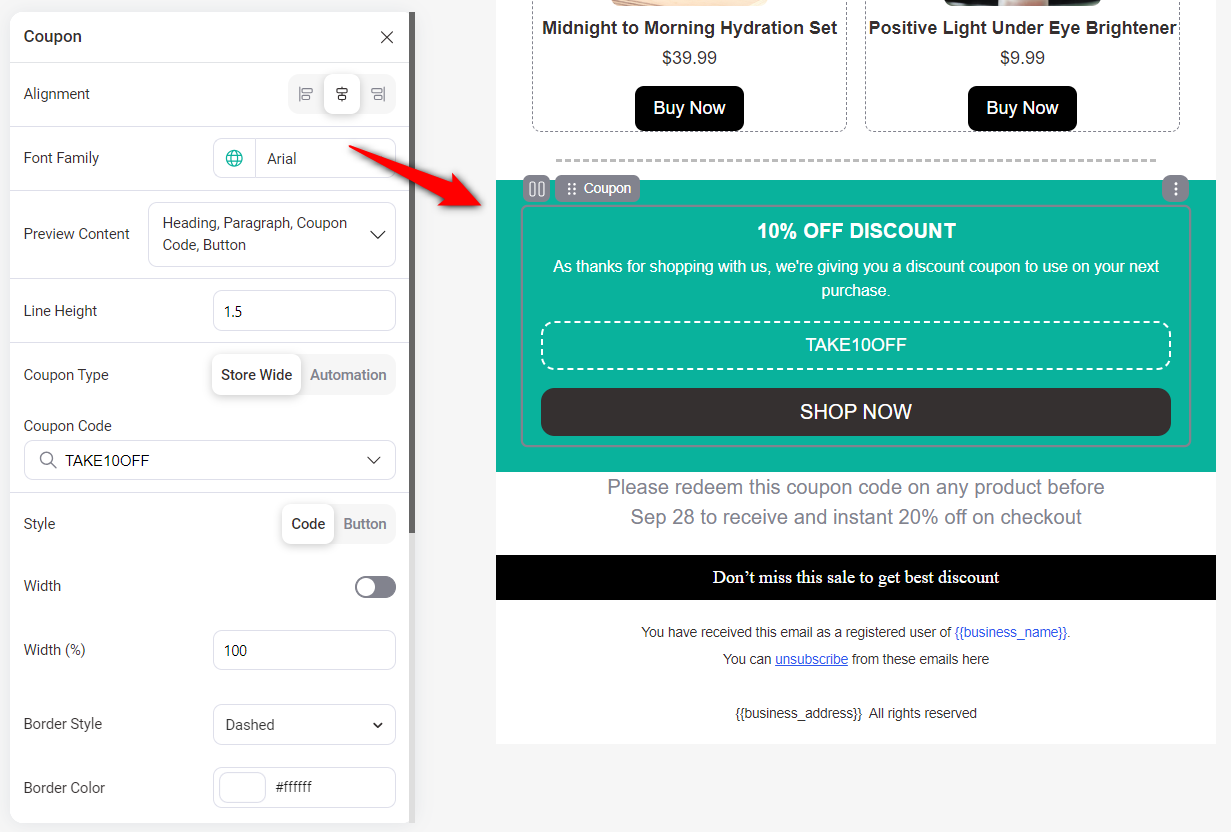
Make sure to customize this content block as per your requirements.
This coupon block allows you to fetch coupons from WooCommerce or dynamic coupons from your automations.
Apart from all these, there are more WooCommerce content blocks to try your hands on.
Customizing your WooCommerce emails is now a breeze - all you have to do is drag and drop the content blocks, customize them, and you’re done!
Feature 4: Global Styles
Global styles affect the design, which applies universally to all sections and elements within an email template.
This foundational setting enhances the overall look and feel of your email campaigns and ensures consistency across different devices.
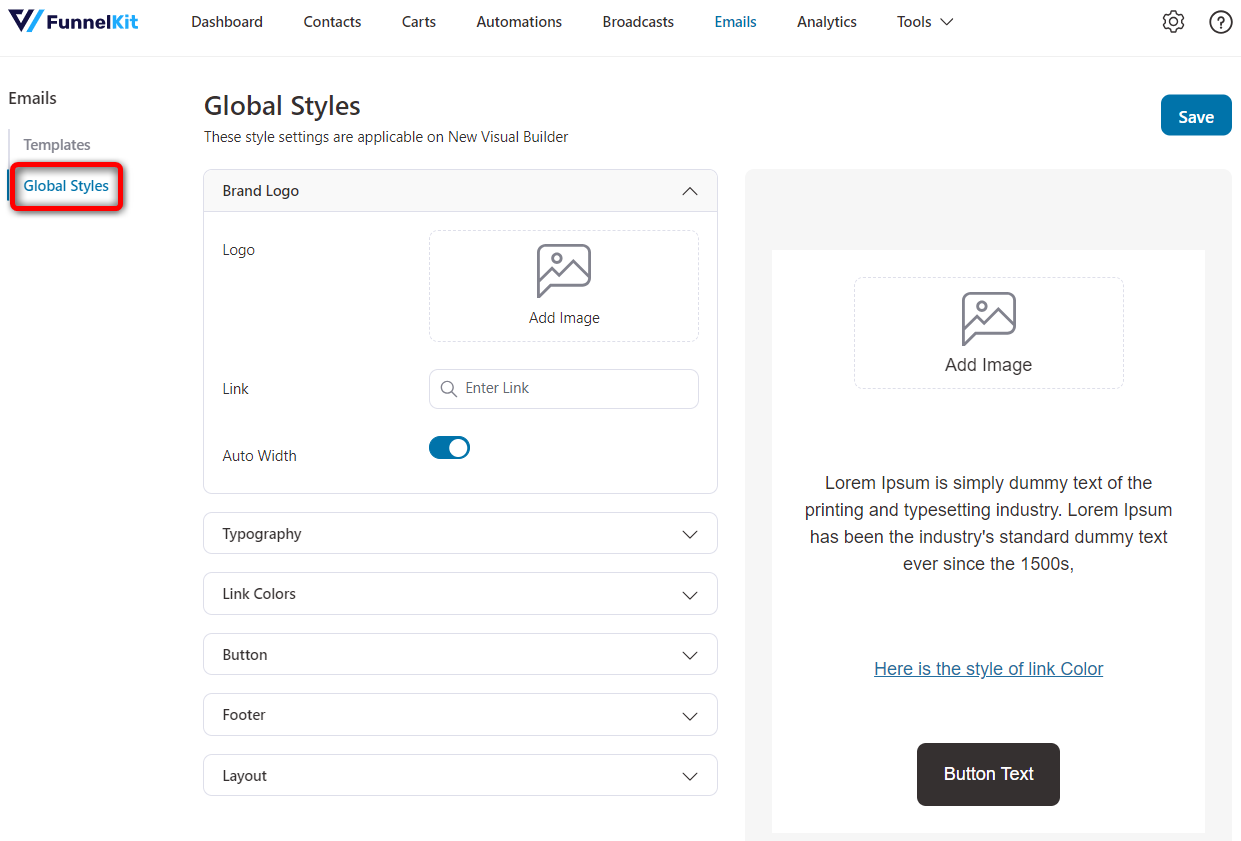
Customize the global style with your designed logo, typography, link colors, button, footer, layout, and more.
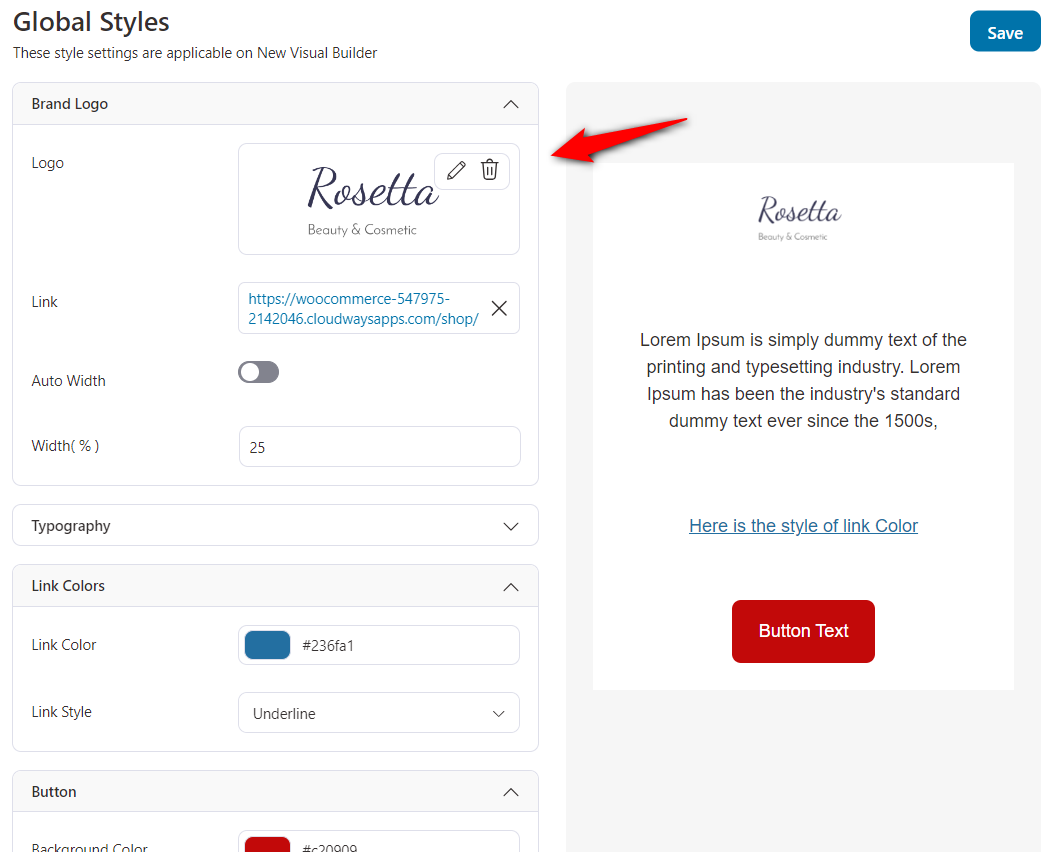
Hit the Save button when done.
Apply the global styles to preview each email and what they’ll look like in your brand colors.
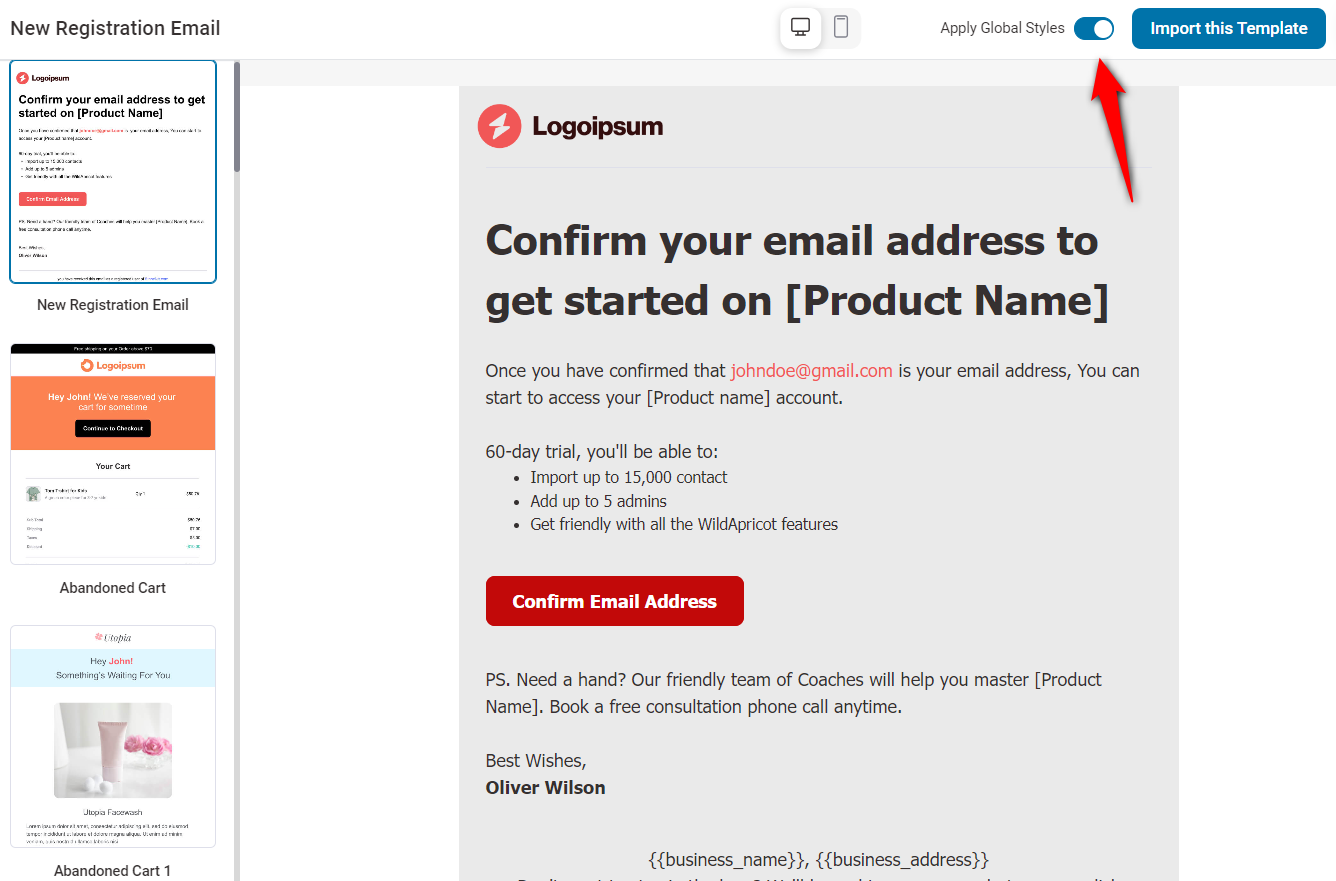
Once you’re satisfied with the design, you can import the template with the applied global style and save your time.
If you drag and drop a content block like buttons, the same global style will automatically apply to this button.
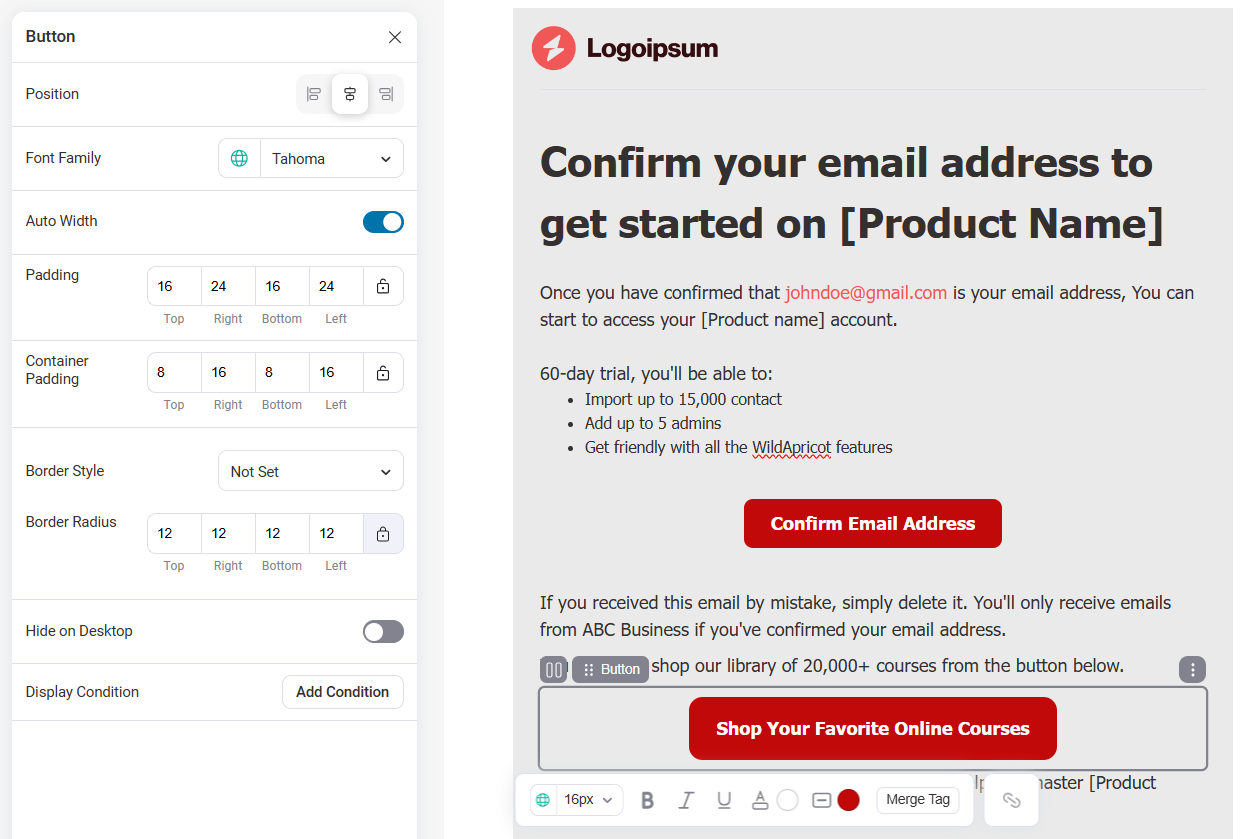
After you’ve set up the global styles, you won’t have to worry about customizing the stylings of content blocks you add to your email.
Feature 5: A New Email Builder Template Library
Just like your sales funnel templates in the Funnel Builder, we’ve brought a library of ever-growing email templates.
You get 23+ pre-designed, visually appealing email templates responsive to different devices. We’ll keep adding new templates to elevate your email marketing game!
Feel free to import these templates to edit them or design a template from scratch.
These are templates for your use cases:
- Welcome or registration emails
- Cart abandonment emails
- Winback emails
- Order confirmation emails
- Flash sale emails
- Post-purchase emails like purchase anniversaries, review requests, etc.
- Email newsletters
- Webinar emails
- Course engagement emails
Hover over the template you want to import and click on the Preview button.
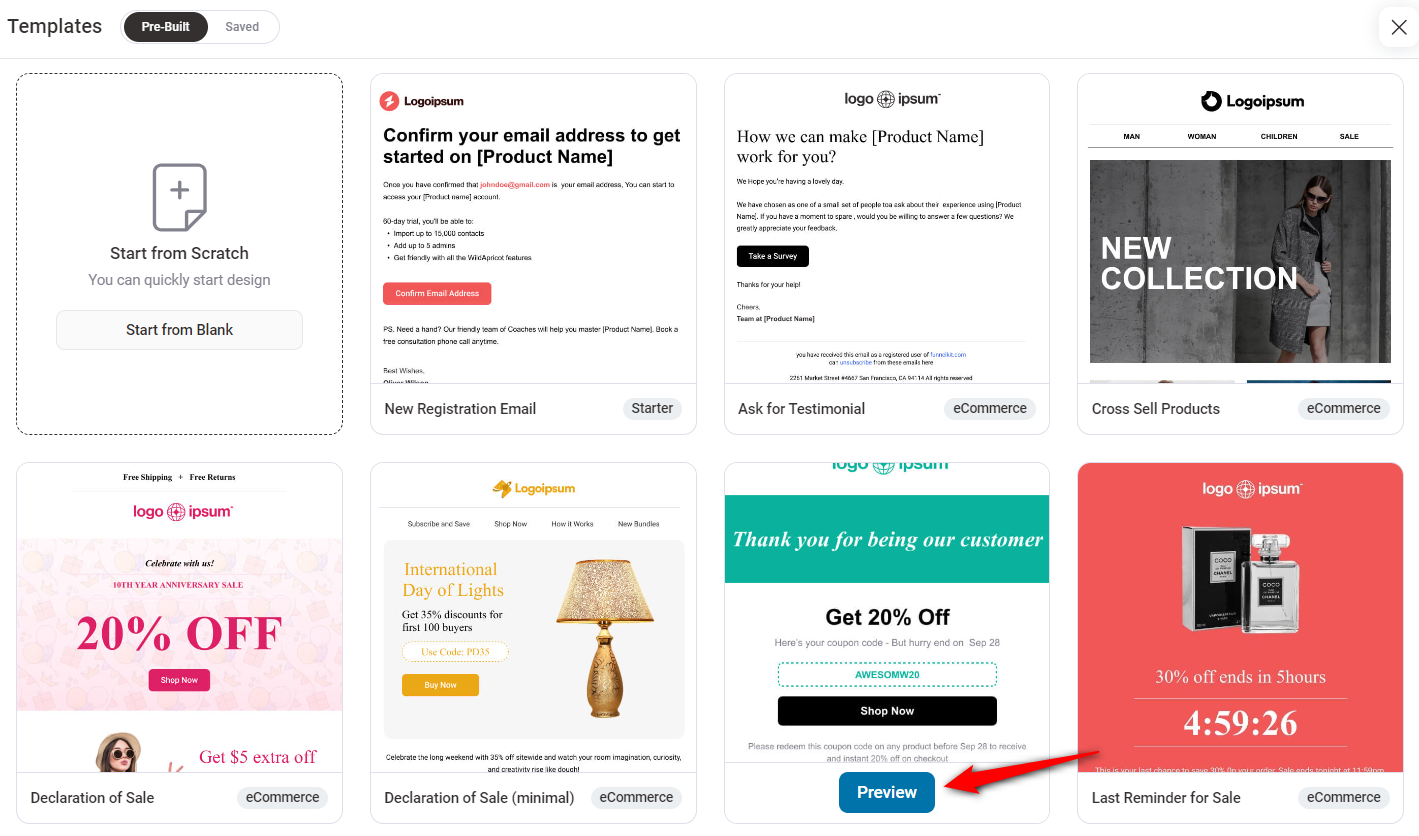
You’ll see a full preview of your selected template. If you like it, hit the ‘Import this Template’ button. Otherwise, you can go back and preview more templates.
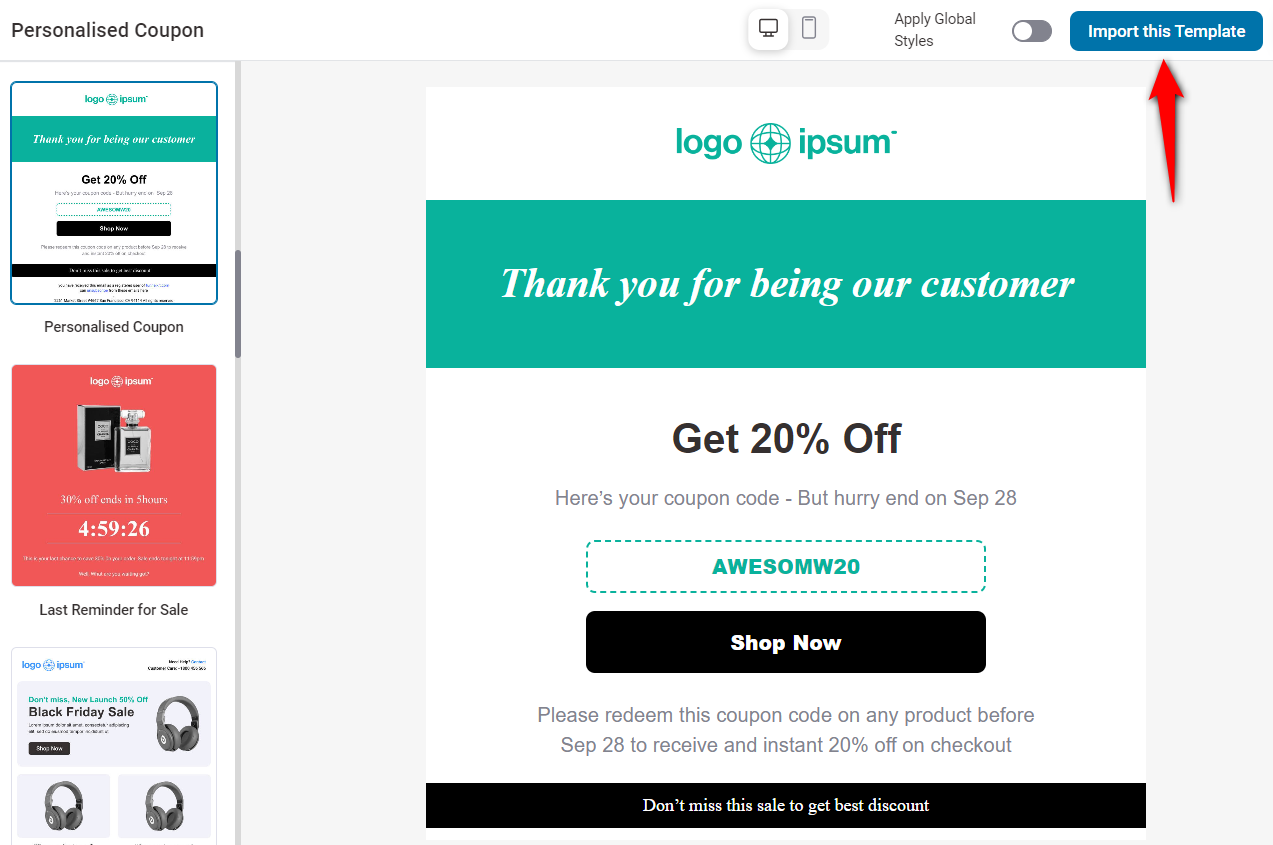
Your email template will be imported. You can easily customize your default WooCommerce emails and create attractive marketing emails.
Just drag and drop the block onto your workspace to create a perfect email for your audience.
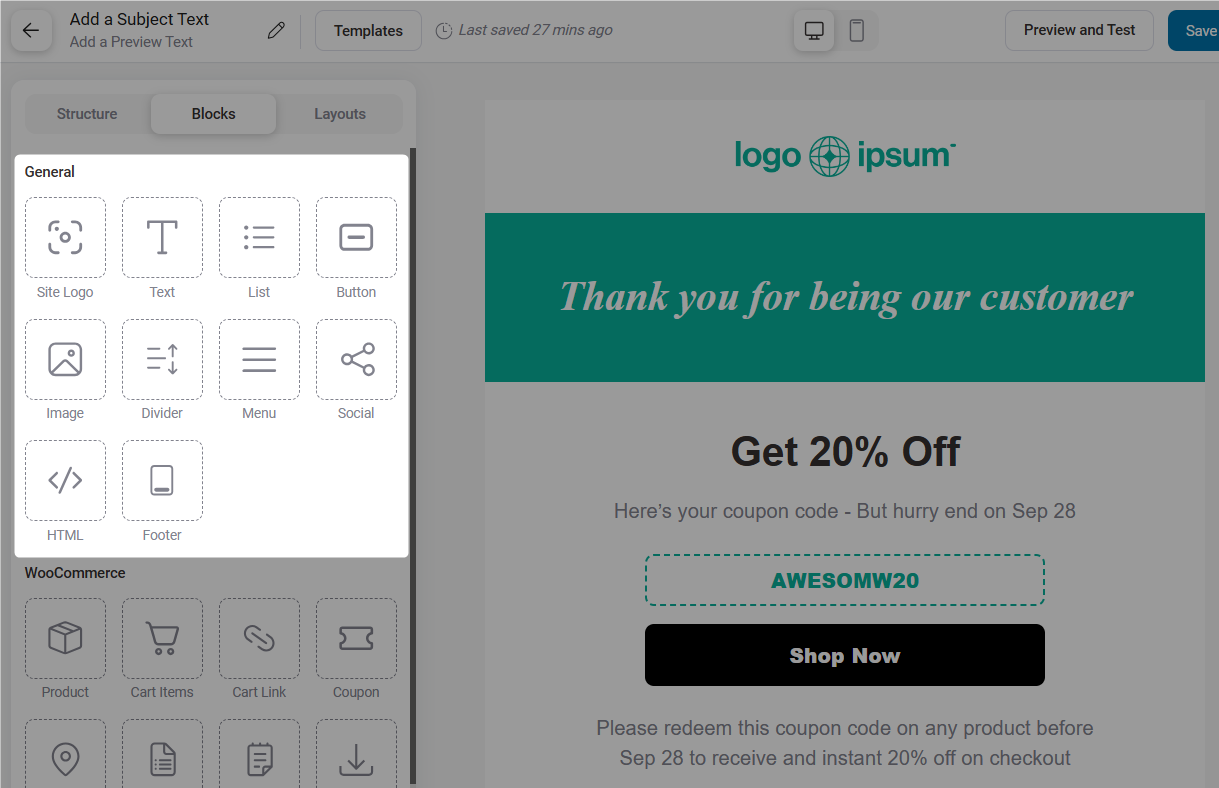
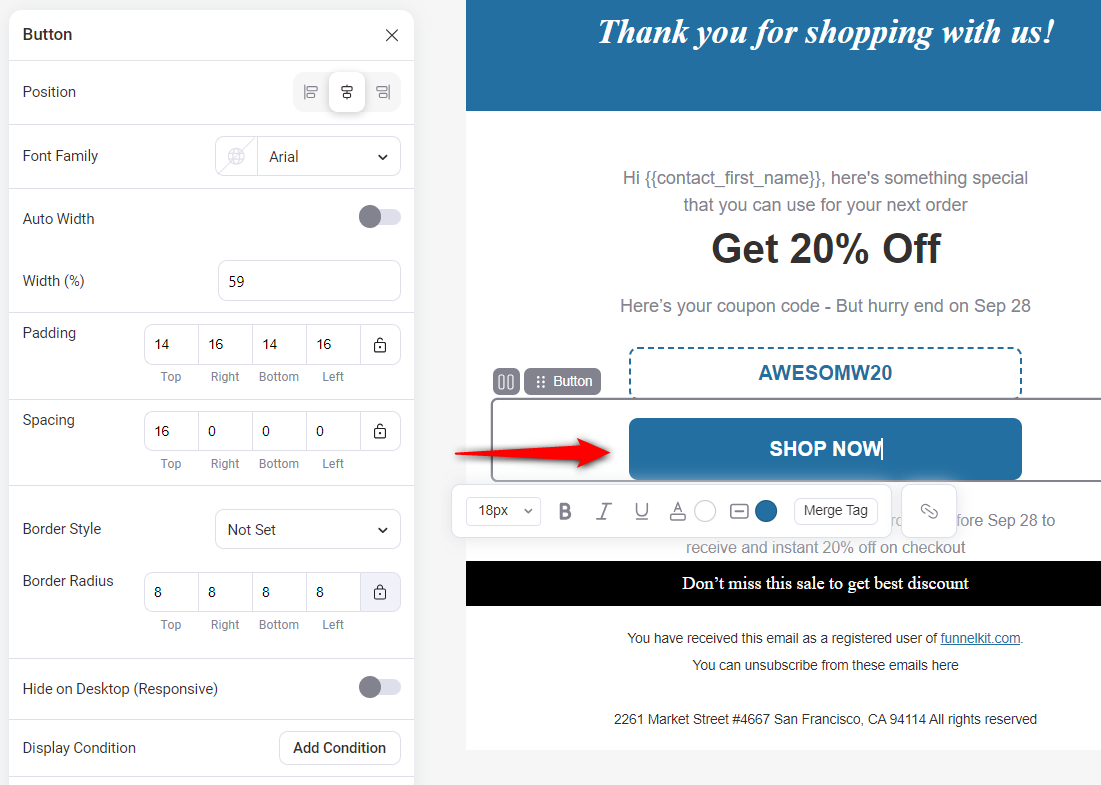
Feel free to customize your emails with branded logos, text, fonts, borders, backgrounds, buttons, etc. You can adjust block configurations within a few clicks and successfully craft a beautiful email.
Add social media icons by dragging and dropping the ‘Social’ block to your email template.
The block's flexibility allows you to add different social media platforms depending on your brand.
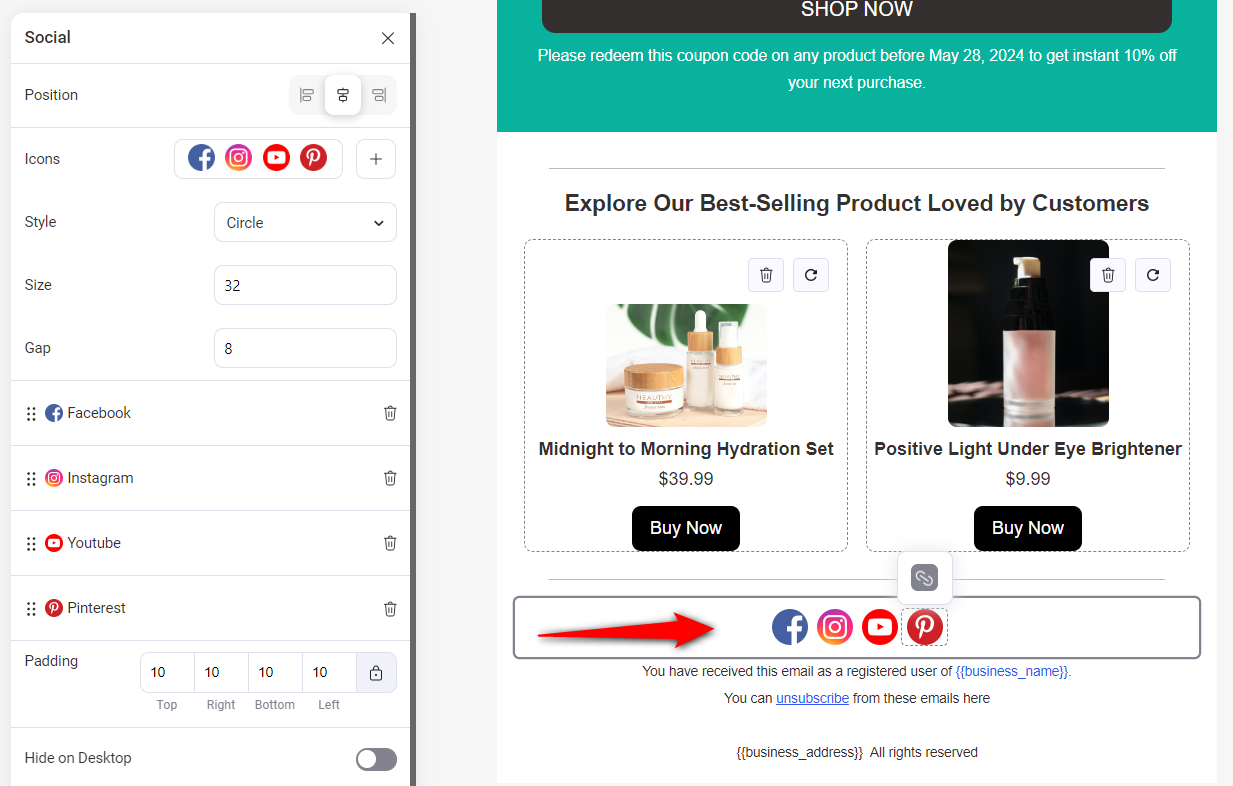
Hyperlink the URL of your social media channels to these icons.
Feature 6: Pre-Built and Saved Custom Layouts
With pre-built layouts, you can quickly create the email you want by dragging and dropping different sections.
You get access to different layouts such as headers, banners, single or multiple product recommendations, testimonials, footers, FAQs, and so much more.
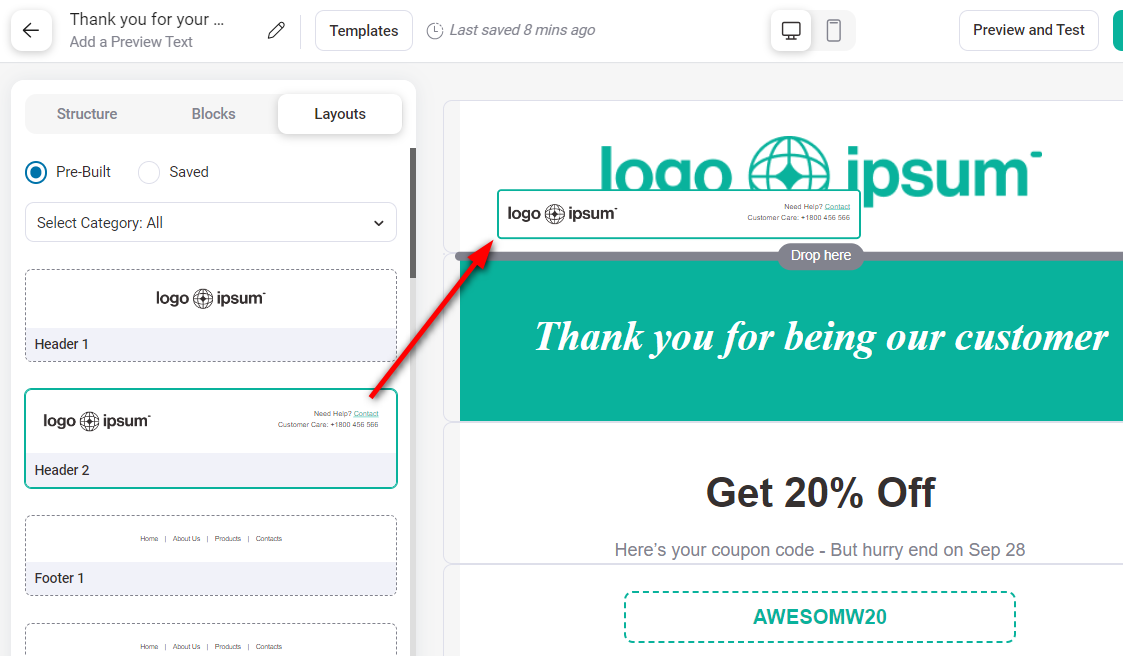
You can find many layouts available in FunnelKit.
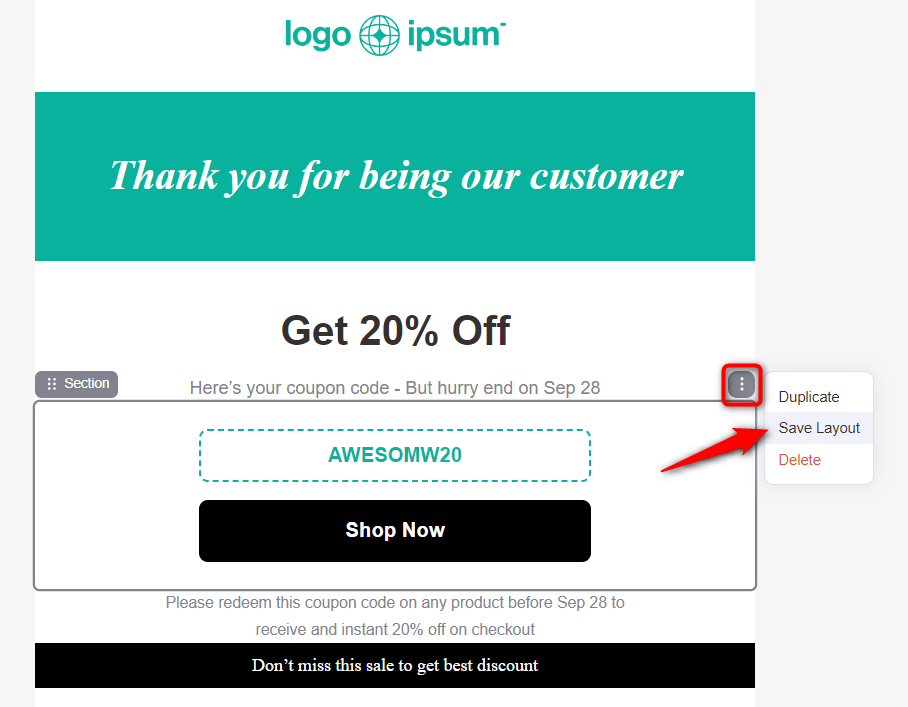
If you love a section you’ve created, you can save it as a layout. Just hit the action button and click on the ‘Save Layout’ button.
You can then access these saved layouts from the Saved Layout section.
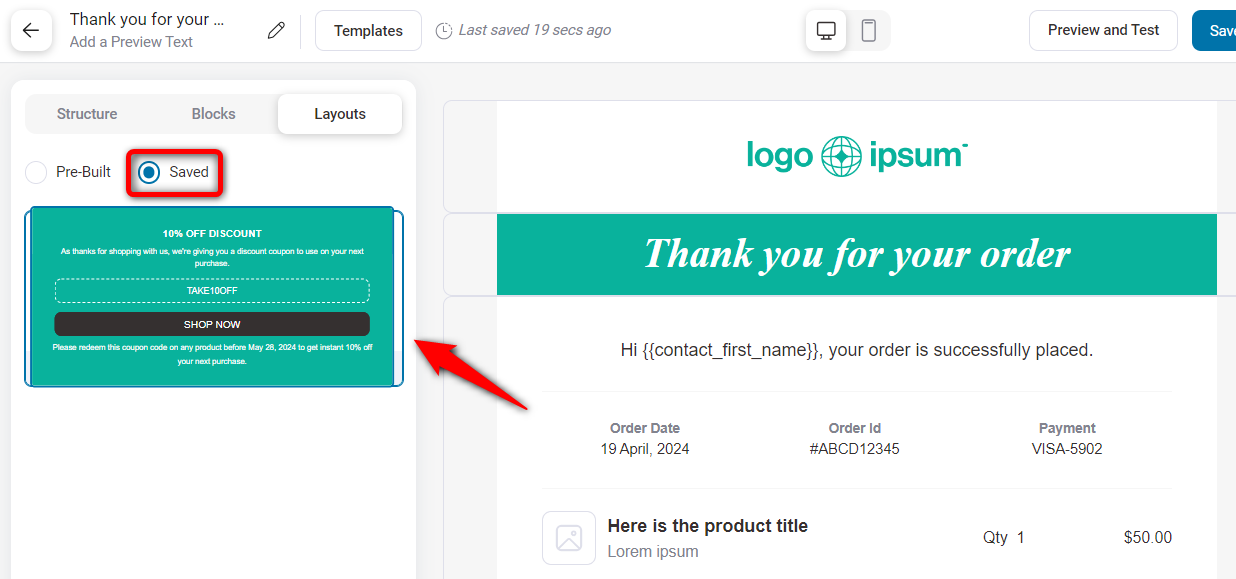
You can use these emails in any email by dragging and dropping them from your saved layouts section.
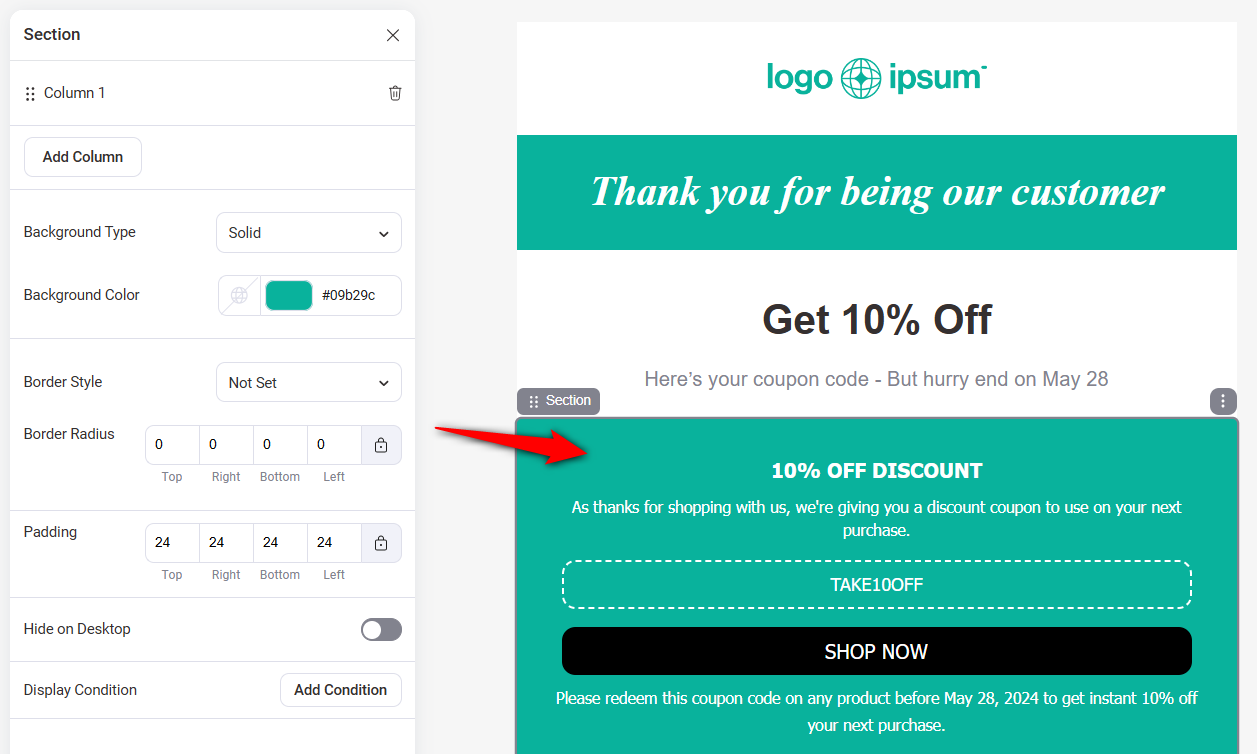
You can even make changes to this layout too.
Another example is to create your footer once and save it as a layout. You’ll be able to inject it into any email from the saved layout section.
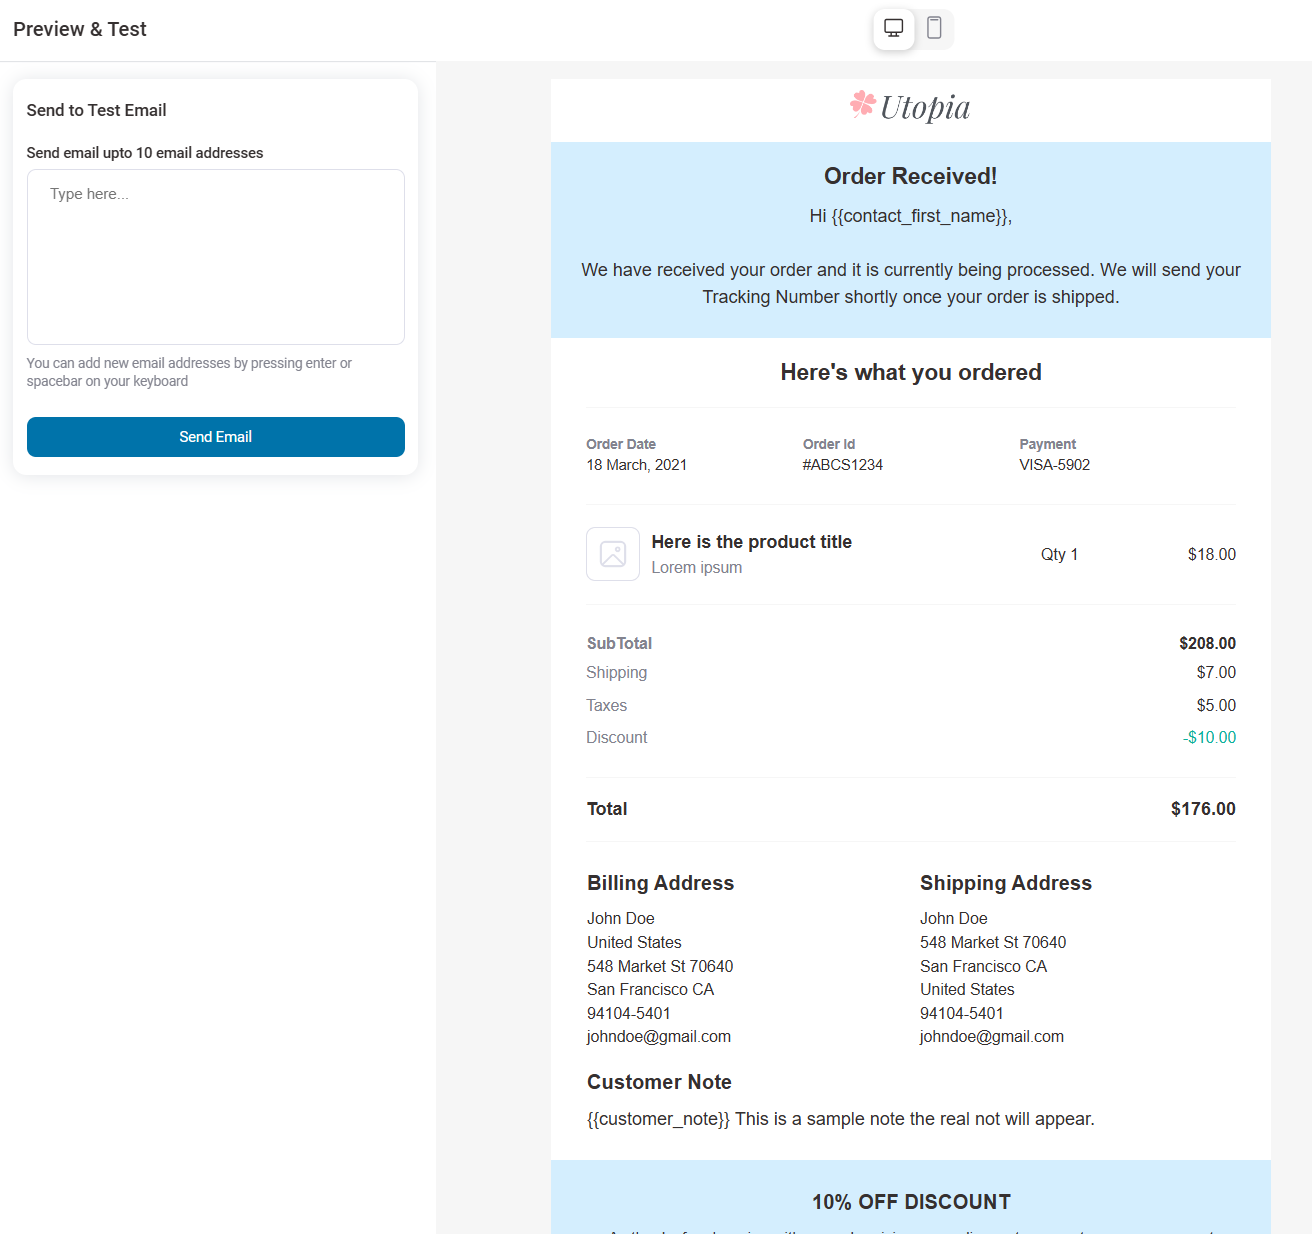
Once everything is done, you can preview and send a test email to see if everything looks good.
Feature 7: Display Conditions
Set up conditions to display your blocks to specific users based on your requirements.
For example, you can set up conditions to display different coupons to different customers.
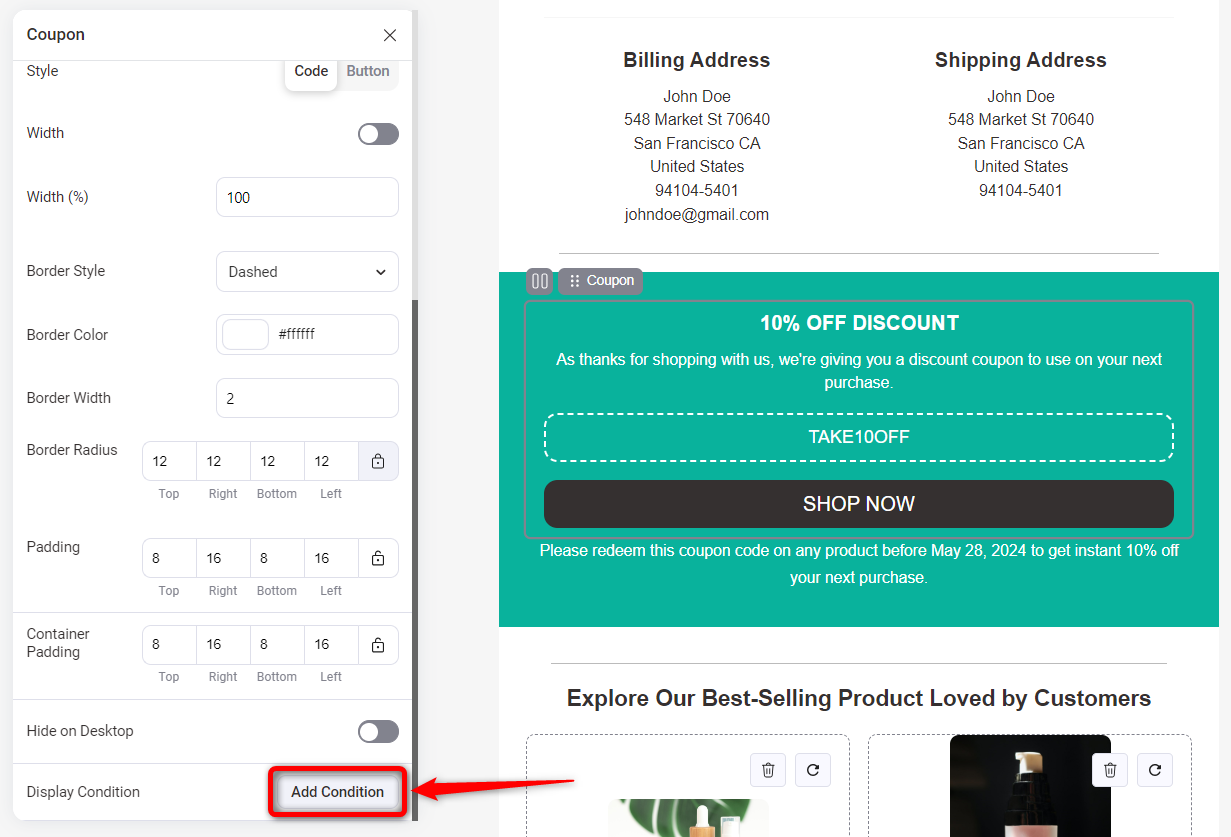
Select the coupon block and click on Add Condition.
Choose from a list of rules here.
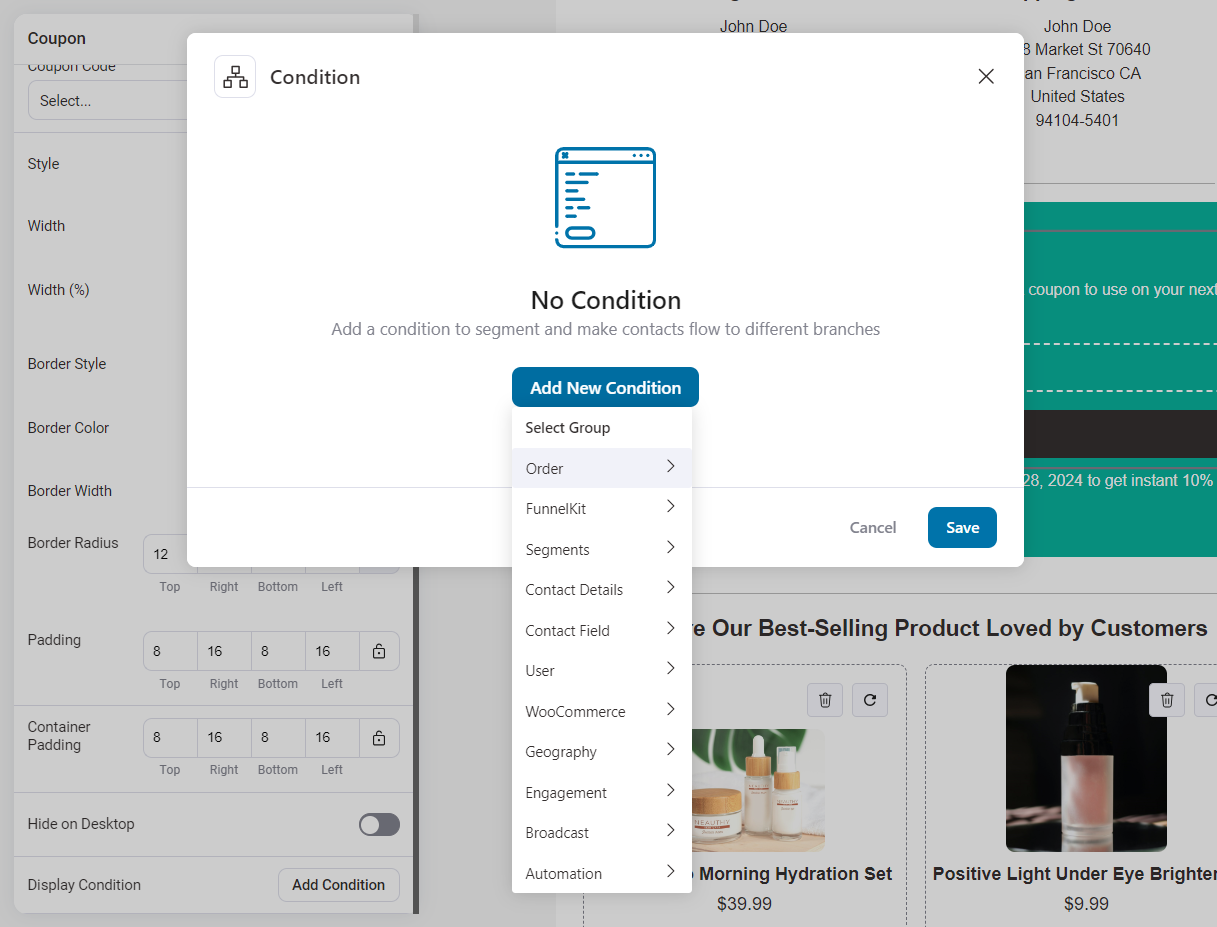
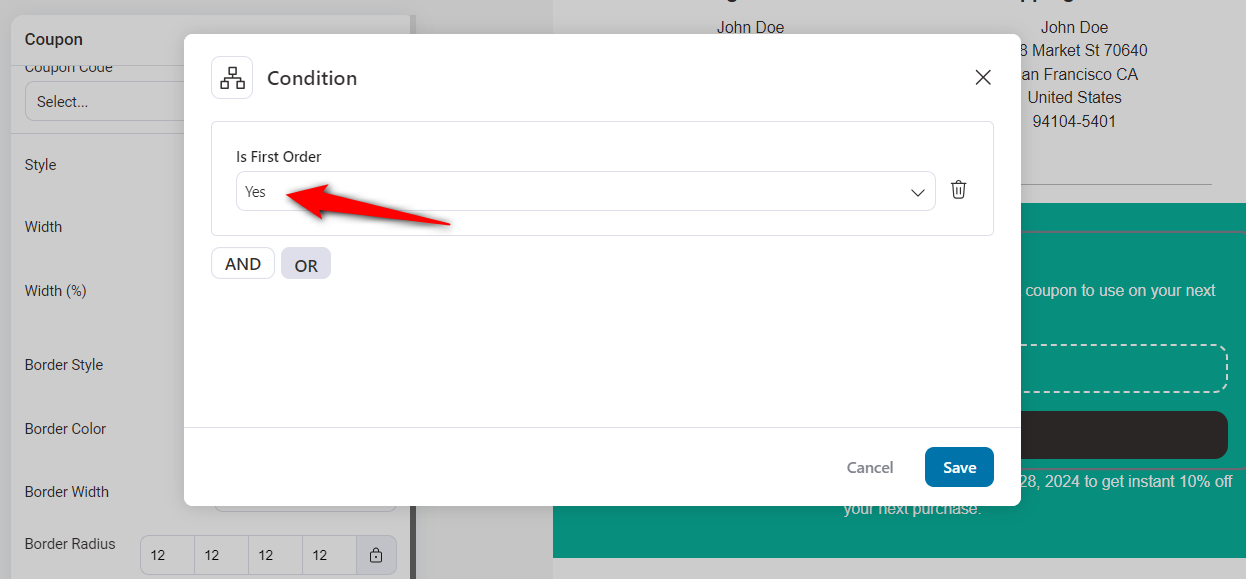
Here, we’ll select the First Order rule under the Order group.
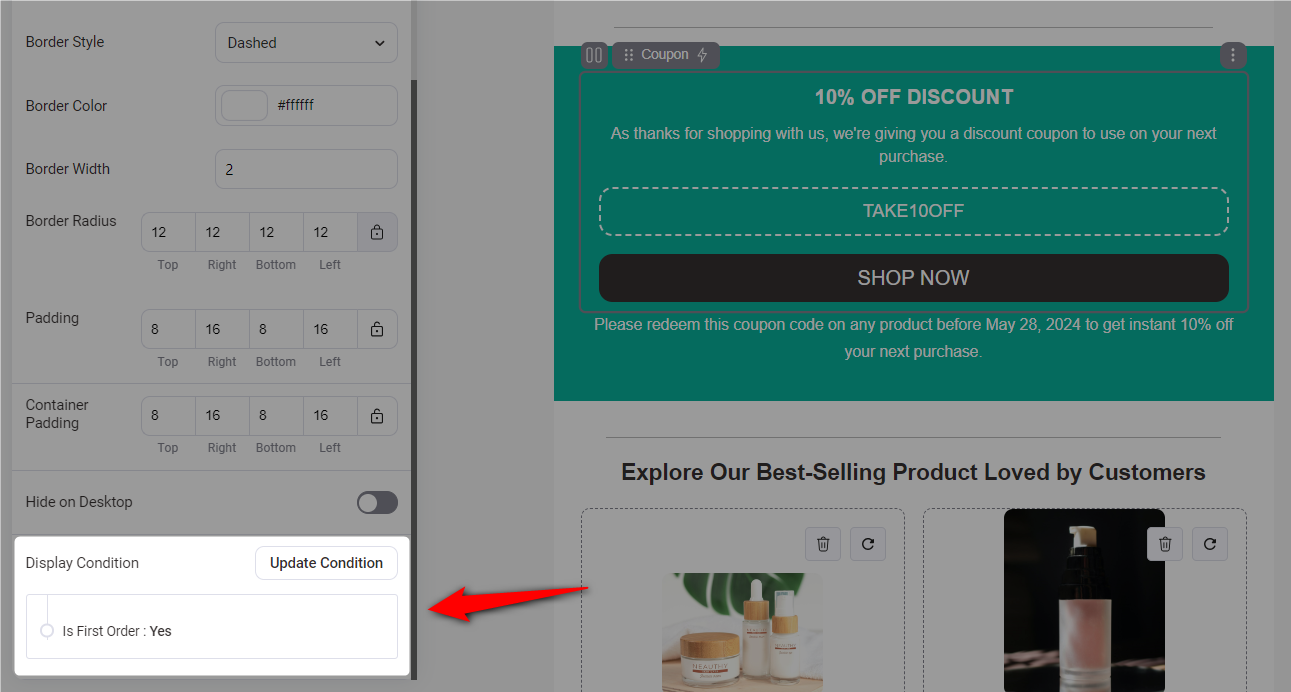
As you can see, this coupon block will be only visible to customers who have made their first purchase.
You can duplicate or add another coupon block and have another condition for different customers.
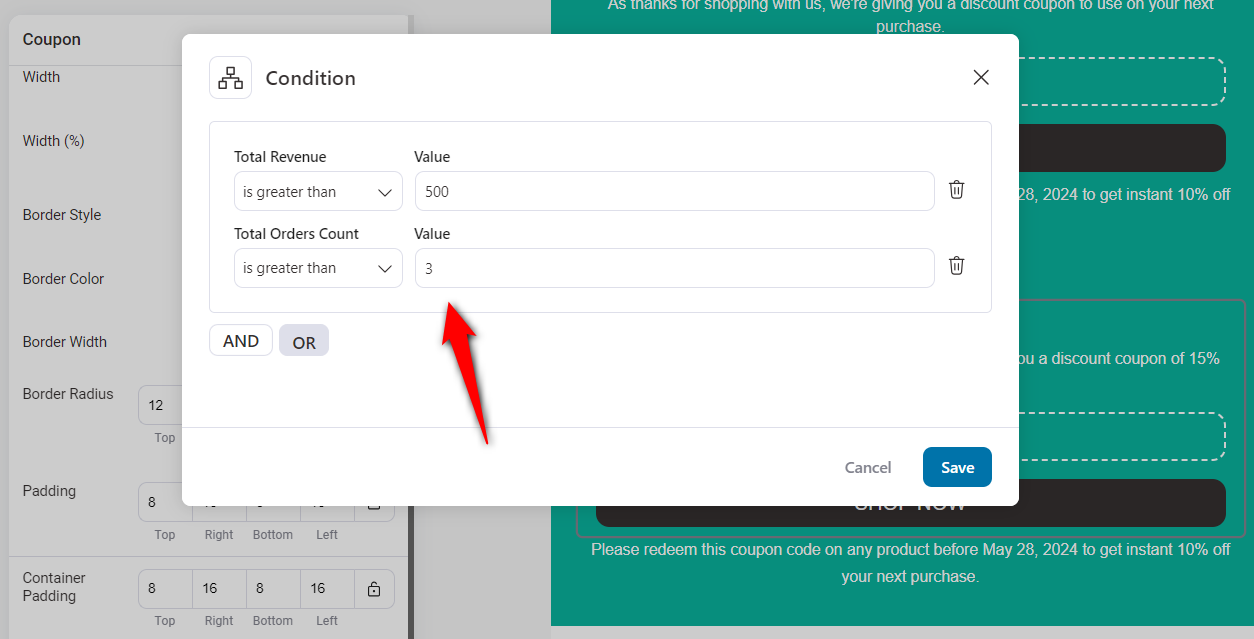
This is how you can send different coupons to different customers by setting up display conditions.
Once everything is done, you can preview and send a test email to see if everything looks good.
Feature 8: Split Path Automation
You can now A/B test and optimize your marketing automations to unlock new levels of success.
Split test your automated flows by A/B testing your email subject lines, discount coupons, delay time periods, email designs, etc. This will help you analyze which variation or path will generate higher profits in your business.
To set this up, click on the Split Path when setting up your automations.
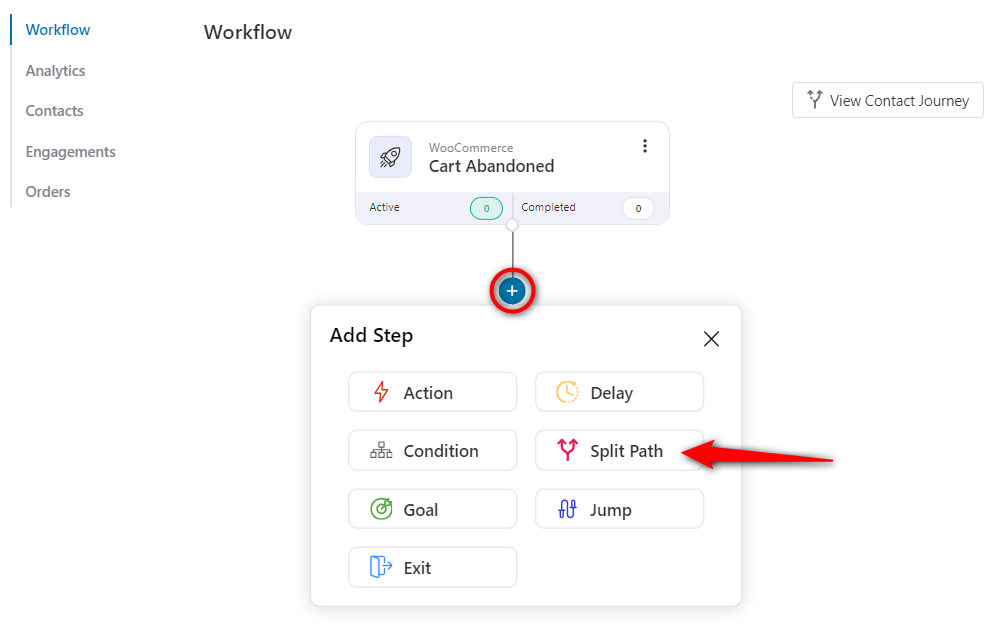
Split the automation path as per your requirements.
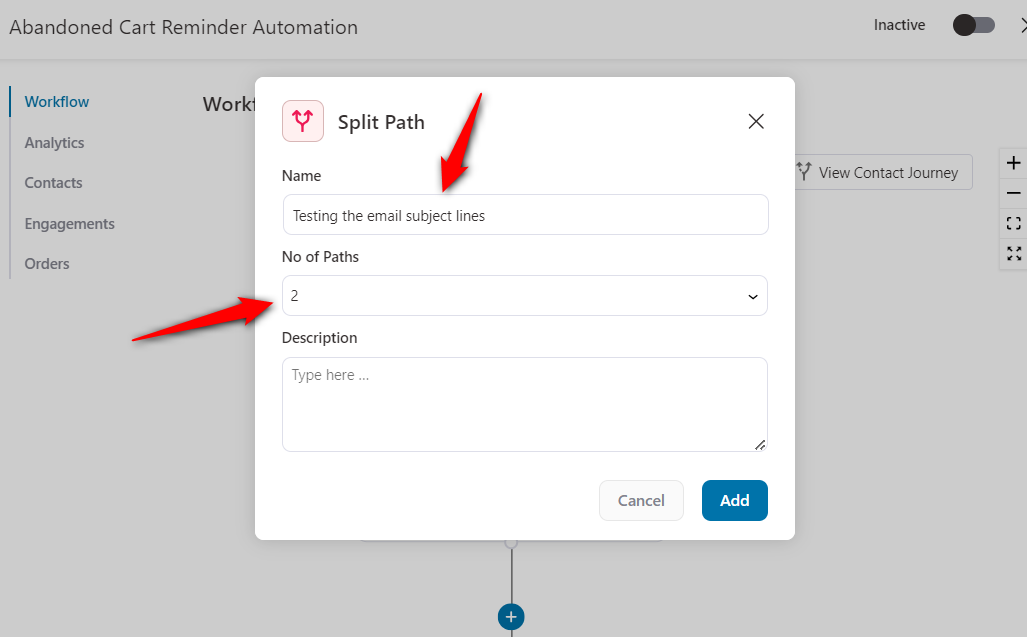
You’ll see the split test path added to your automation. Now, specify each path’s action, conditions, and delays.
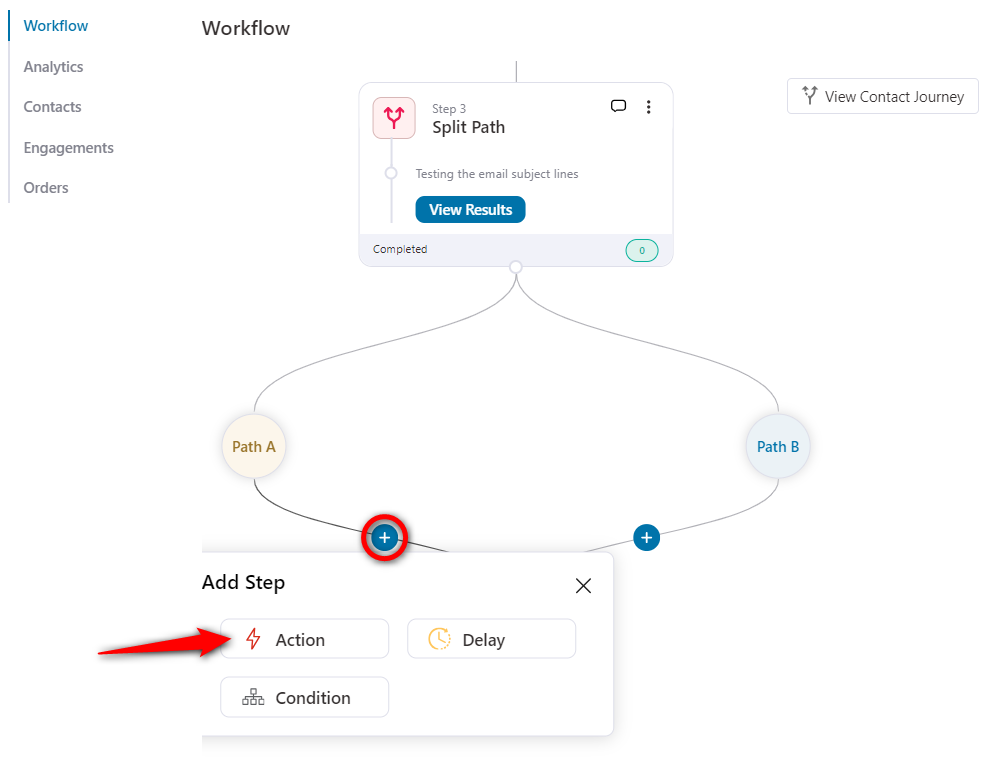
It’s a great tool to have in your hands to make data-backed decisions and optimize marketing campaigns.
You can split test a number of use cases, such as:
- Email subject lines - to determine the opening of your emails by your recipients
- Email designs - to know the design elements that resonate with your audience and drive the desired actions
- Discount coupons - to determine which coupon offers drive better sales and engagement
- Send time or delays - to optimize the timings of your automated campaigns
There are thousands of use cases that you can implement in your business that help you gain the upper hand in making profits.
Feature 9: Add Contacts to Automations
Adding contacts manually to automations has been one of our most requested features. With the release of FunnelKit Automations 3.0, you got it!
You can now manually add a contact to an automation.
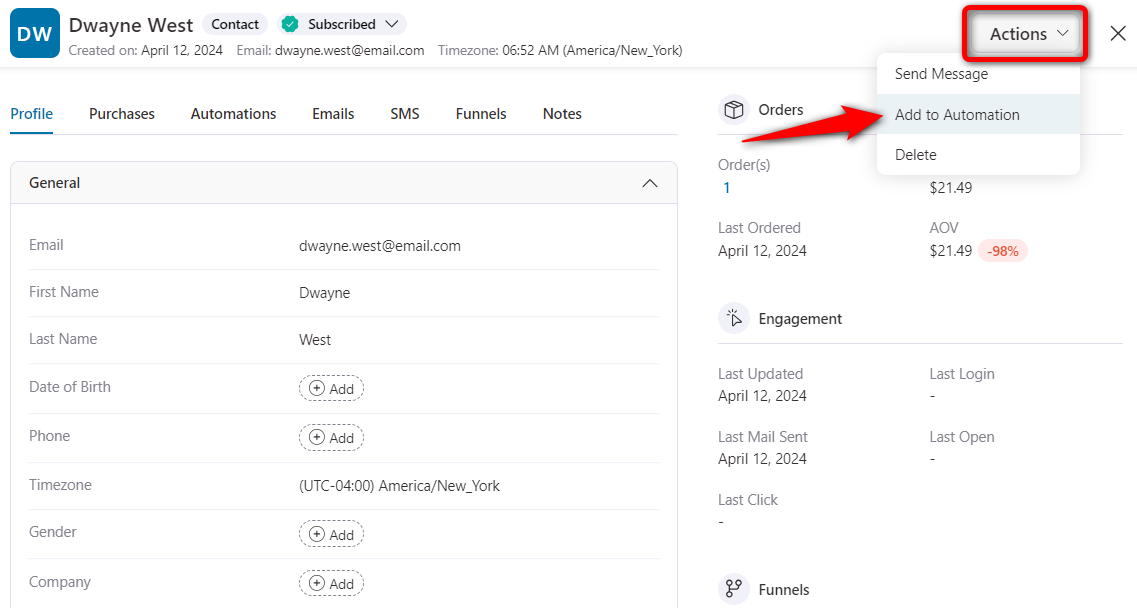
Let’s suppose you recently added a contact and want to add them to an automation. You can do that by going to their contact profile.
Click on the ‘Actions’ and hit the Add to Automation button.
Just select the automation you want this contact to add to.
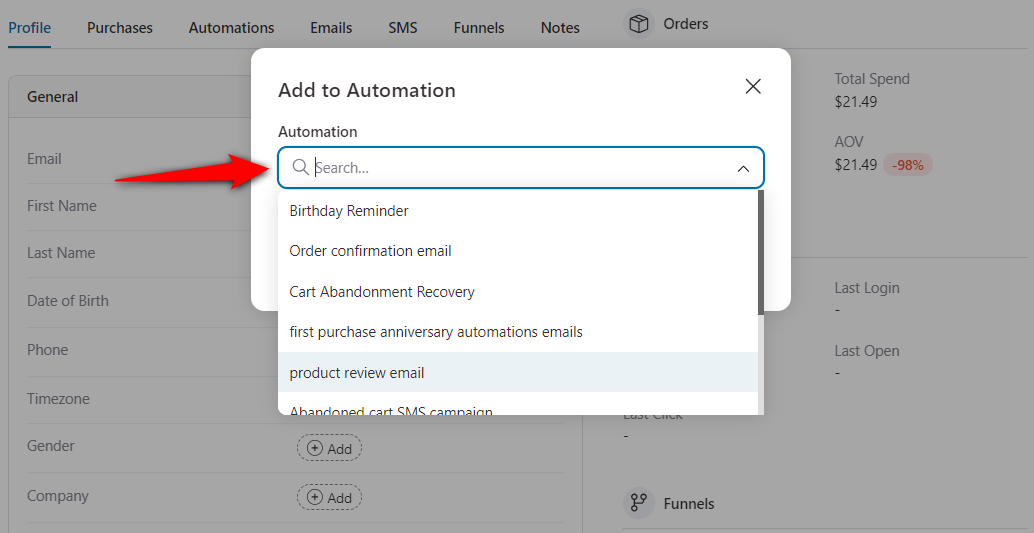
This will add your contact to the specified automation.
Feature 10: Global Contact Activities
FunnelKit Automations 3.0 now offers a detailed global-level Activities section showing your contacts interacting with your business automations.
It includes a real-time log of contact activities with the status, automation name, last as well as the next automation run time.
Go to the Automations section and click on Contact Activities to access this section.
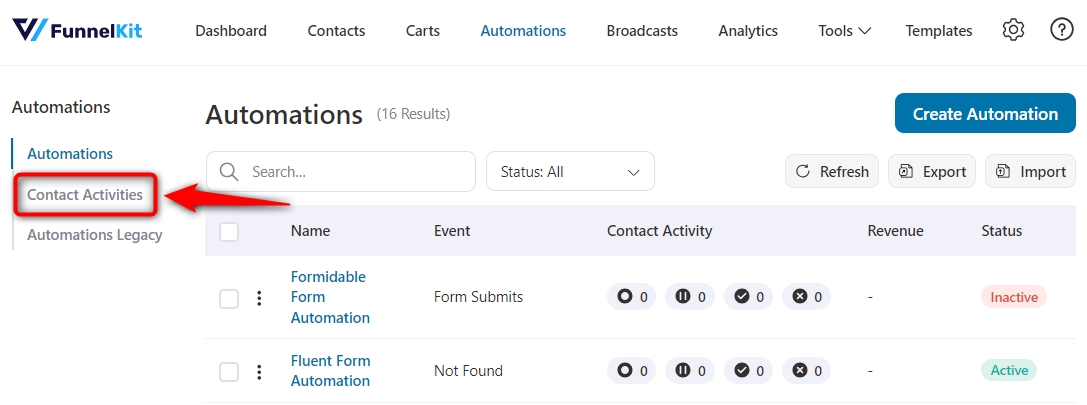
Here, you can see all the contact activities happening within your active automations on your website, including the failed tasks, active contacts, paused tasks, completed tasks, and more.

This feature gives you a comprehensive view of the activities of your contacts in your automations. Plus, you can take actions directly from the global activity screen.

You can retry an action, rerun an automation, re-enter this contact to the automation, end an automation, or delete an activity.
Feature 11: Comprehensive Contact Profiles
FunnelKit Automations 3.0 brings a snappier contact profile section that delivers comprehensive insights and actionable data to grasp.
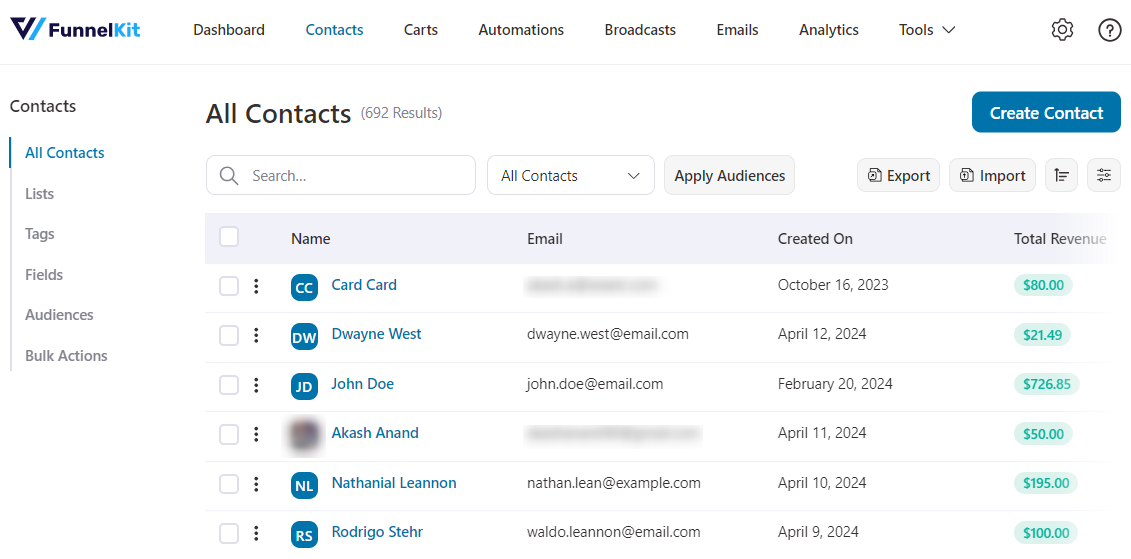
You’ll be able to see the contact’s purchases along with their order details and current WooCommerce order status. From here, you can even go to the WooCommerce orders screen and make any adjustments if you need.
By going through the different sections like automations, you can even go to that automation and make changes.
You also get referrer insights that help you track conversions in your store.
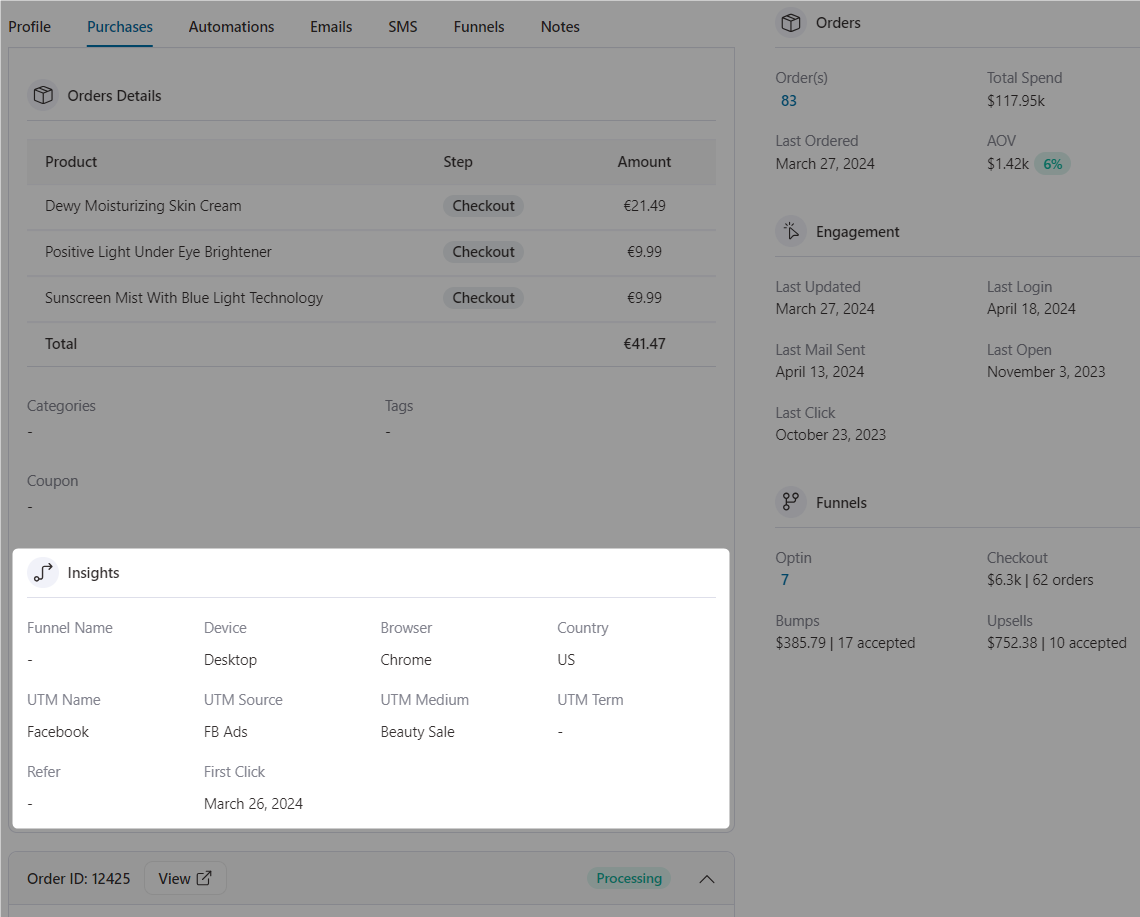
In addition, you can view all the automations this contact was a part of, emails they received from your business, funnels they entered, customer or admin-related notes, etc.
Experience the Most Exciting FunnelKit Automations 3.0 Today!
The release of FunnelKit Automations 3.0 has marked a significant leap in the quest to redefine customer relationships.
With a focus on intuitive design, advanced features like split path automations, an all-new email block builder, pre-designed email templates, etc., you now have a powerful tool at your fingertips to create personalized marketing campaigns that boost your business revenue.
So what are you waiting for?
Update to the latest version of FunnelKit Automations now and get ready to experience massive profits in your business.
If you’re new to FunnelKit Automations, try it out now >>
Editorial Team
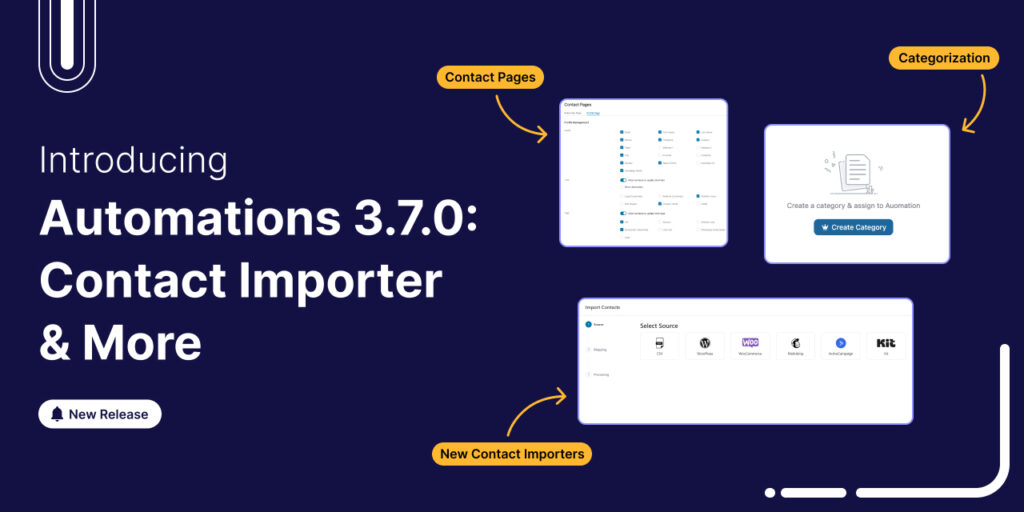
January 22, 2026FunnelKit Automations 3.7.0 is here! 🎉 And it brings meaningful improvements that make building and managing your marketing automation easier than ever. This release is all about giving you more...
Editorial Team
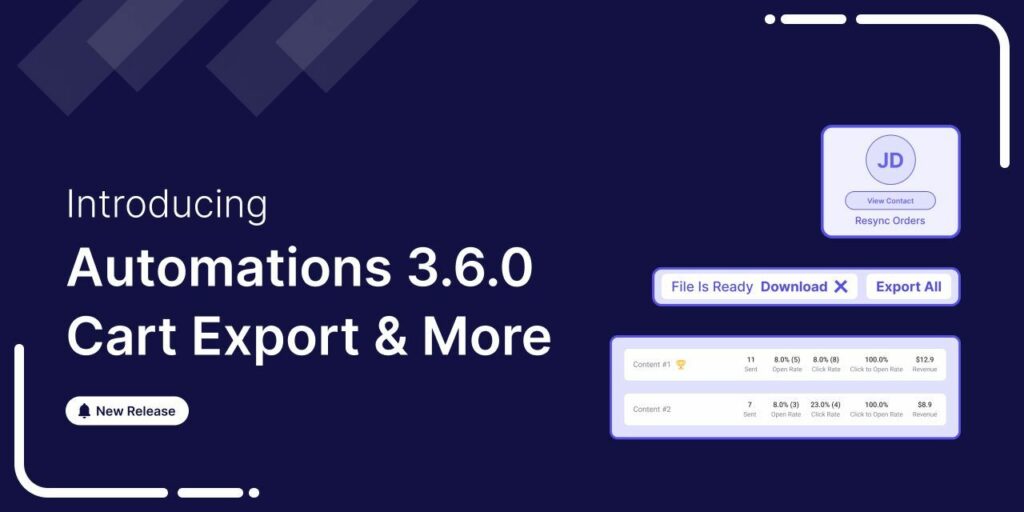
June 9, 2025FunnelKit Automations 3.6 is here, and it’s packed with powerful features to help you grow smarter and faster. With this release, you can: Export abandoned cart data with a click...
Editorial Team
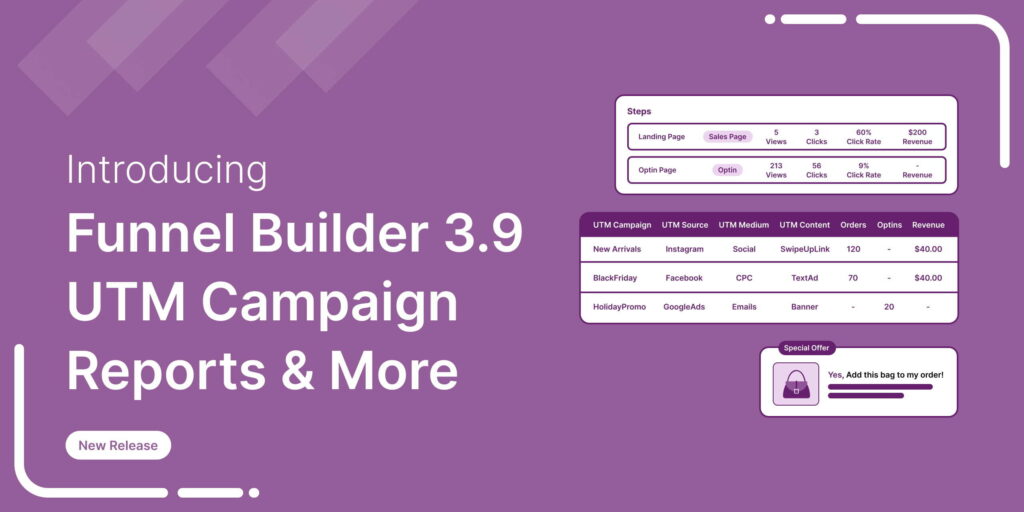
February 4, 2025The wait is over! We’re proud to announce the latest FunnelKit Funnel Builder version 3.9 release. This new release is packed with powerful new features designed to streamline your checkout...


