Would you like to sell a curated set of products together as one package at a single price?
In this guide, we'll walk you through creating a Fixed Bundle, from choosing the items to setting the bundle discount. All you need is Funnel Builder installed and activated.

Before you get started, make sure Funnel Builder is installed and activated on your WordPress site. If you need help, see our guide on installing the plugin and activating your license.
Step 1: Choosing Where the Bundle Appears
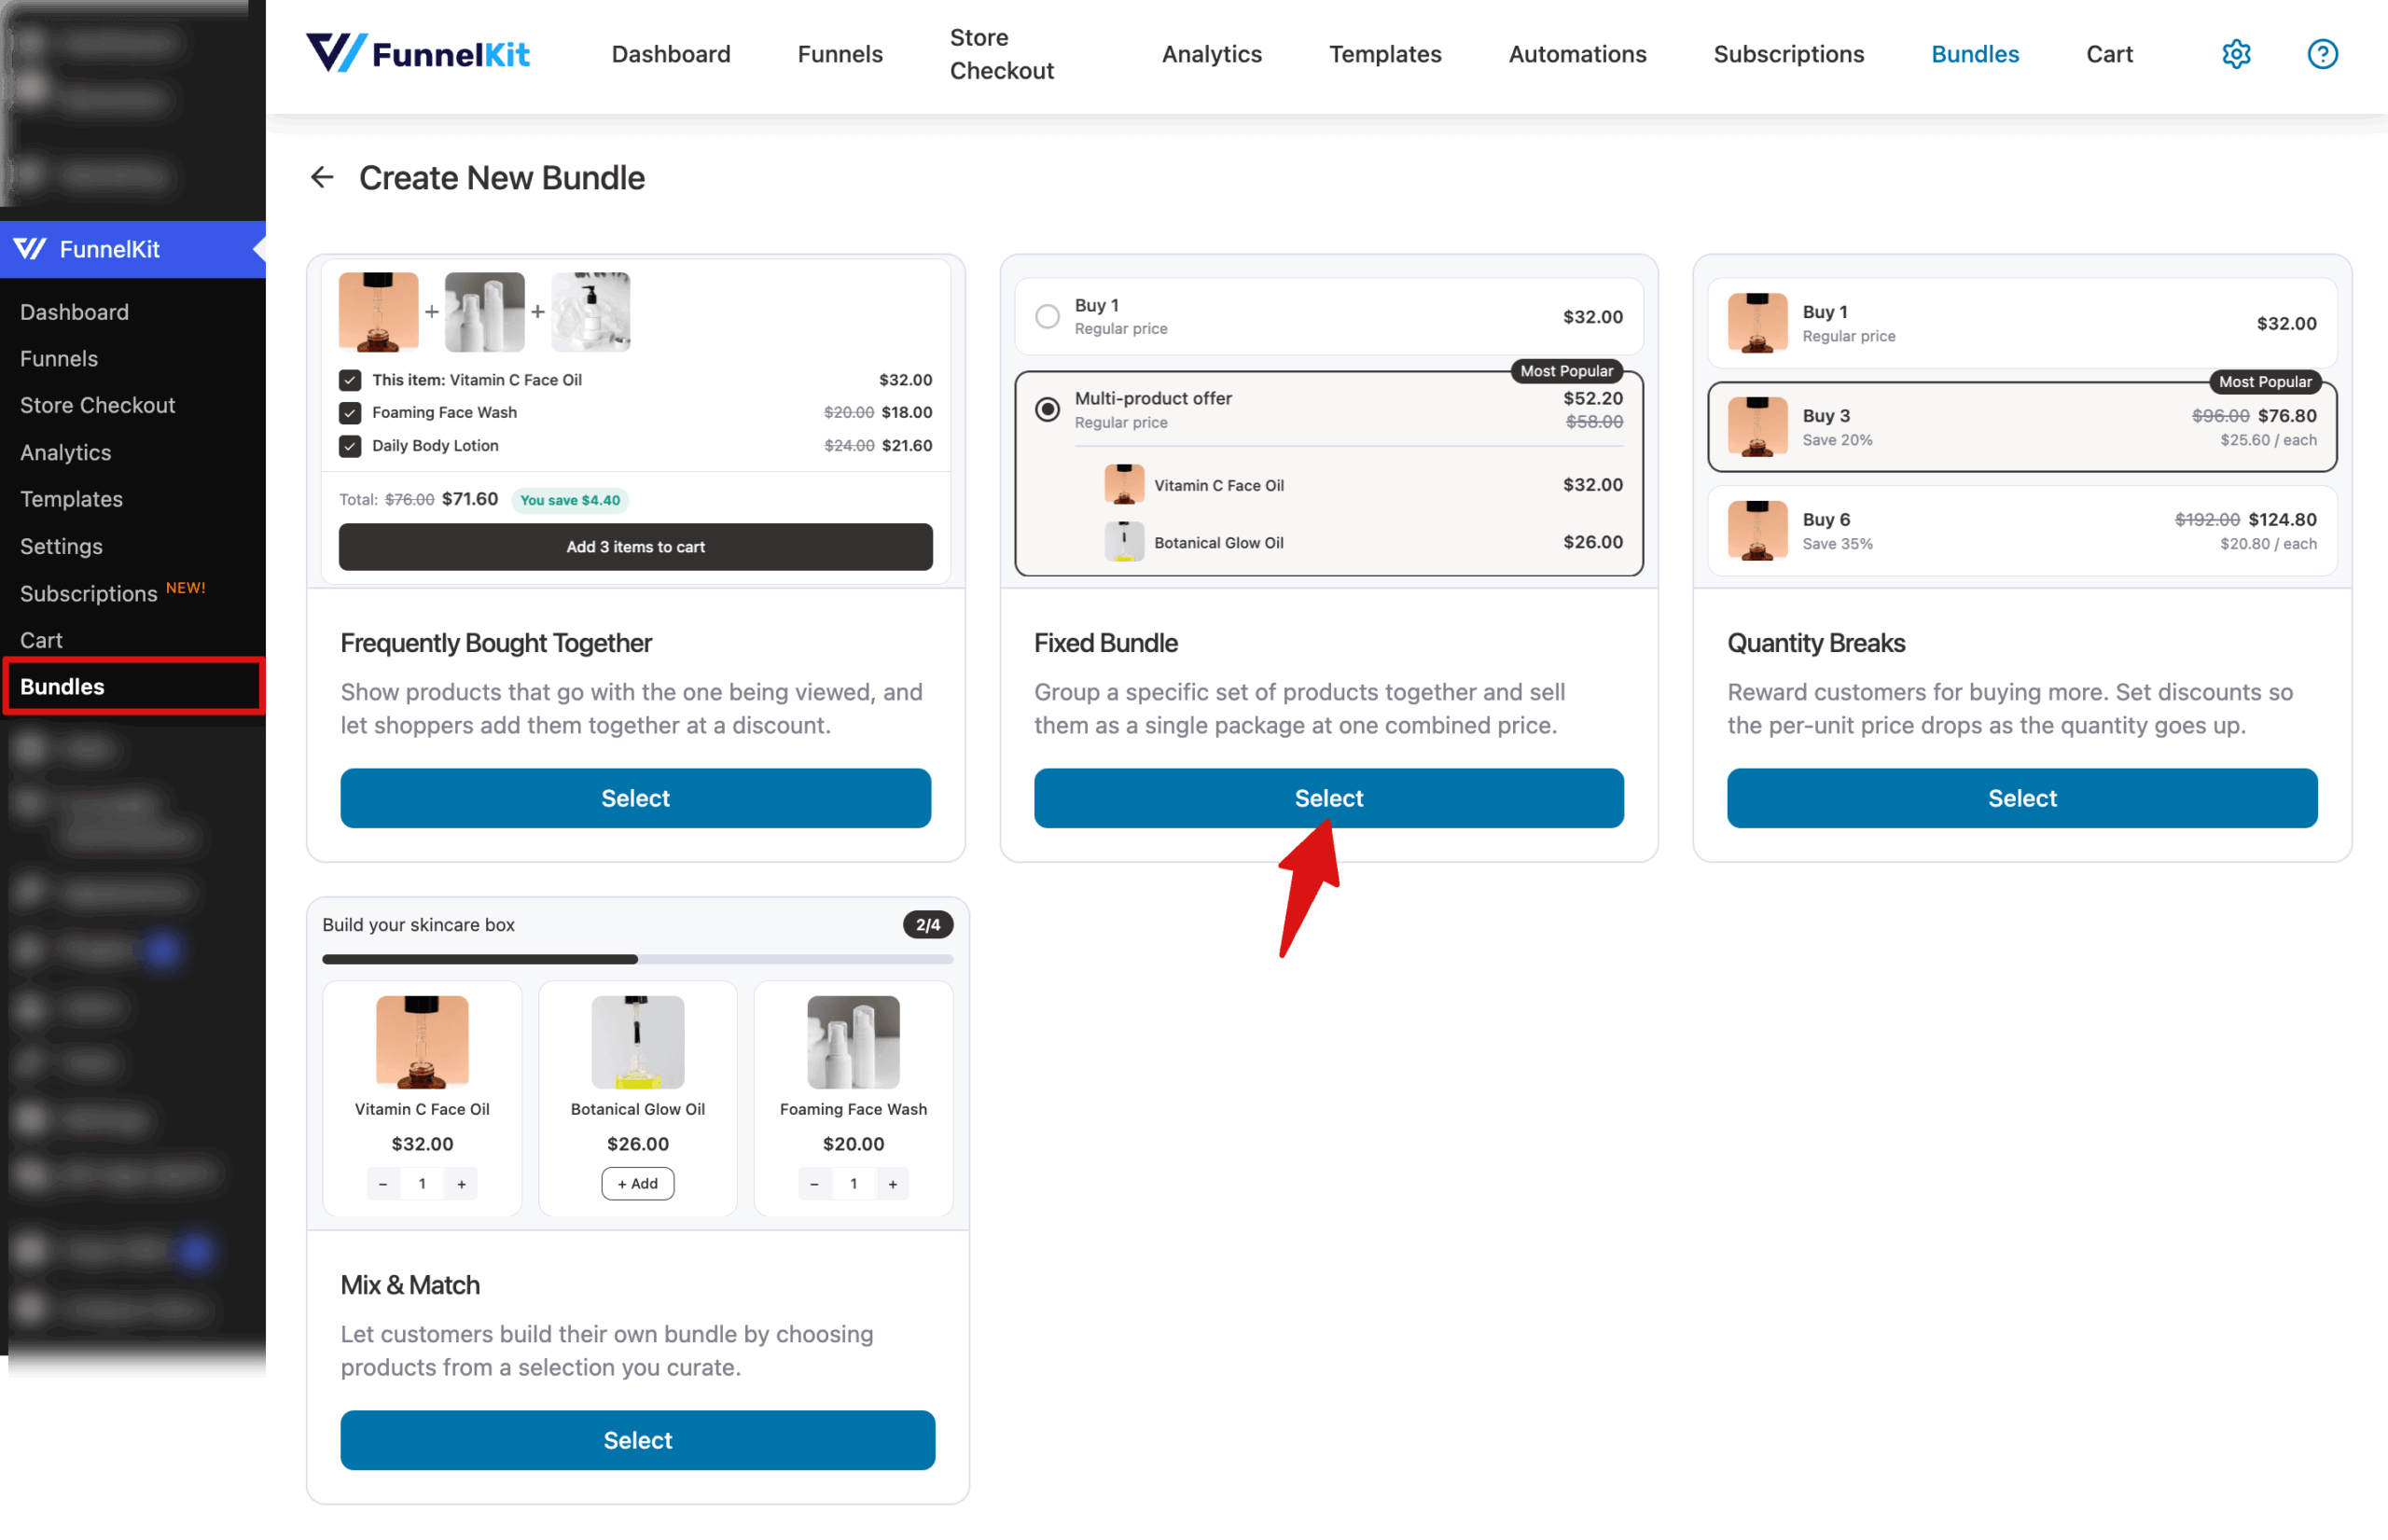
To begin, go to FunnelKit » Bundles, click Create Bundle, and select Fixed Bundle.
Next, choose which product pages should display this bundle.
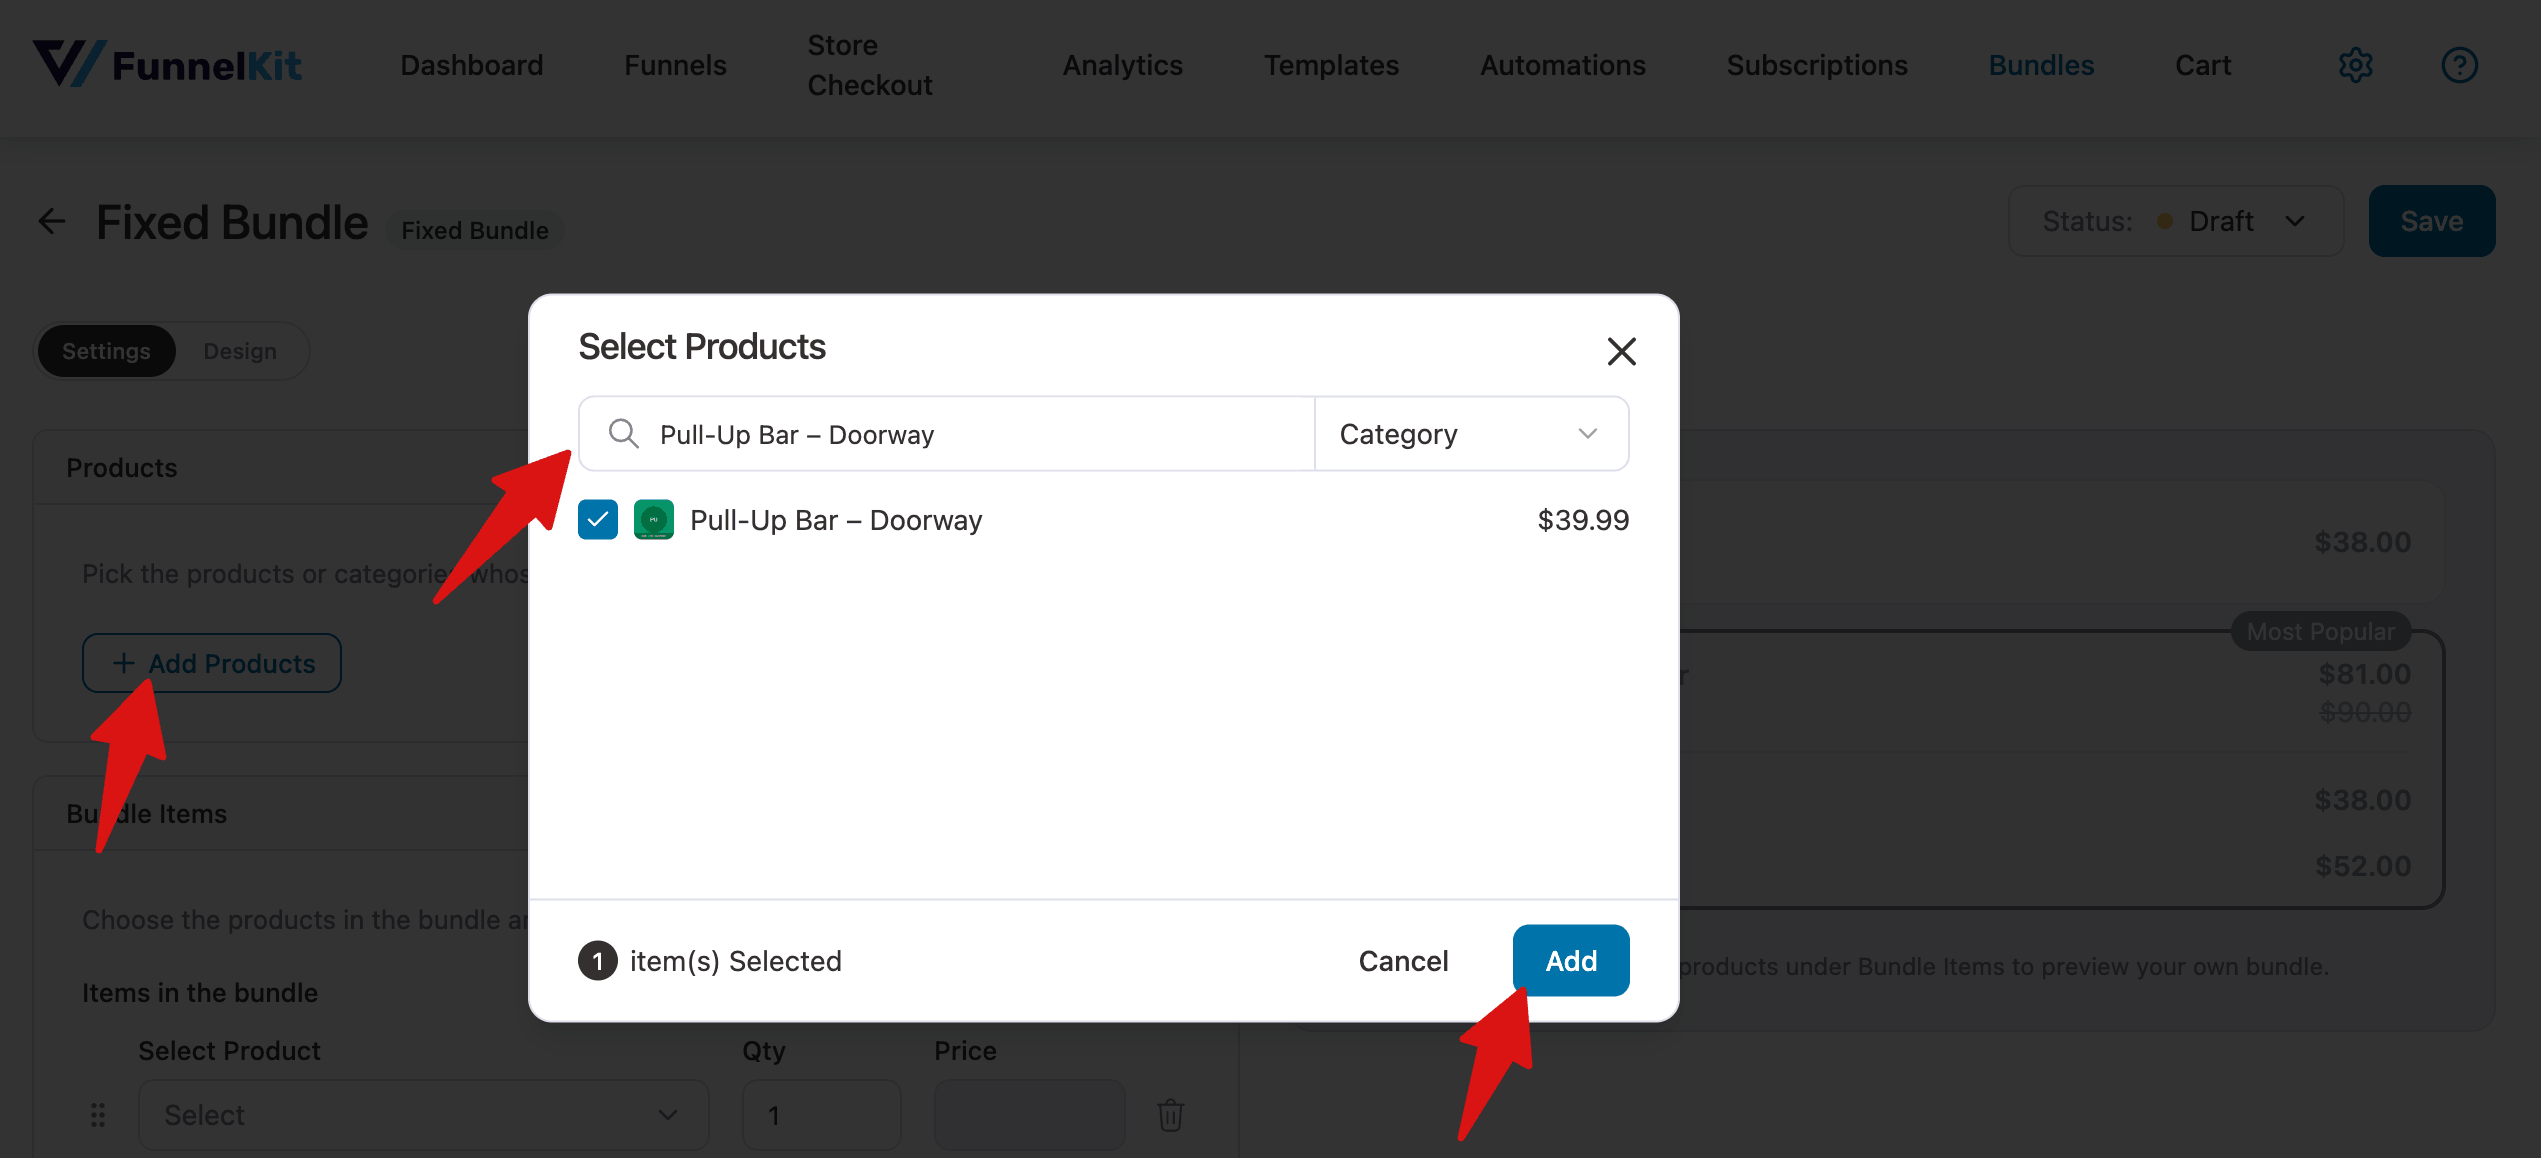
In the Products section, click Add Products and select the pages where the offer should appear. Most stores add every item in the bundle, so shoppers see the deal no matter which product they open first.
Step 2: Adding the Bundle Items
The Bundle Items section sets exactly what's in the package.
To add a product, hit the button "+Add Prouducts, then search and add the product."
Next, for each row, choose a product in Select Product and set its Qty. The Price column shows each item's regular price for reference.
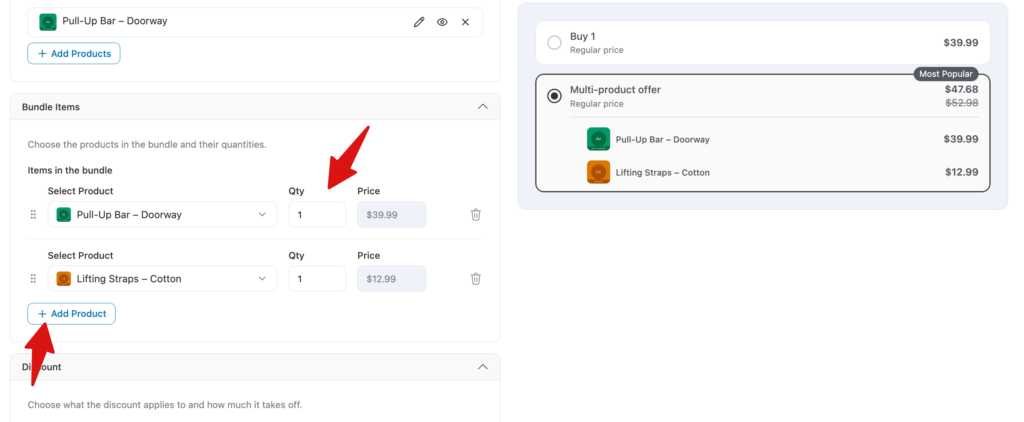
To add another item, click Add Product. You can drag rows by the handle on the left to change their order, or click the trash icon to remove one.
If an item is a variable product, shoppers choose its options, such as size or color, inside the bundle on the product page.
Step 3: Setting the Bundle Discount
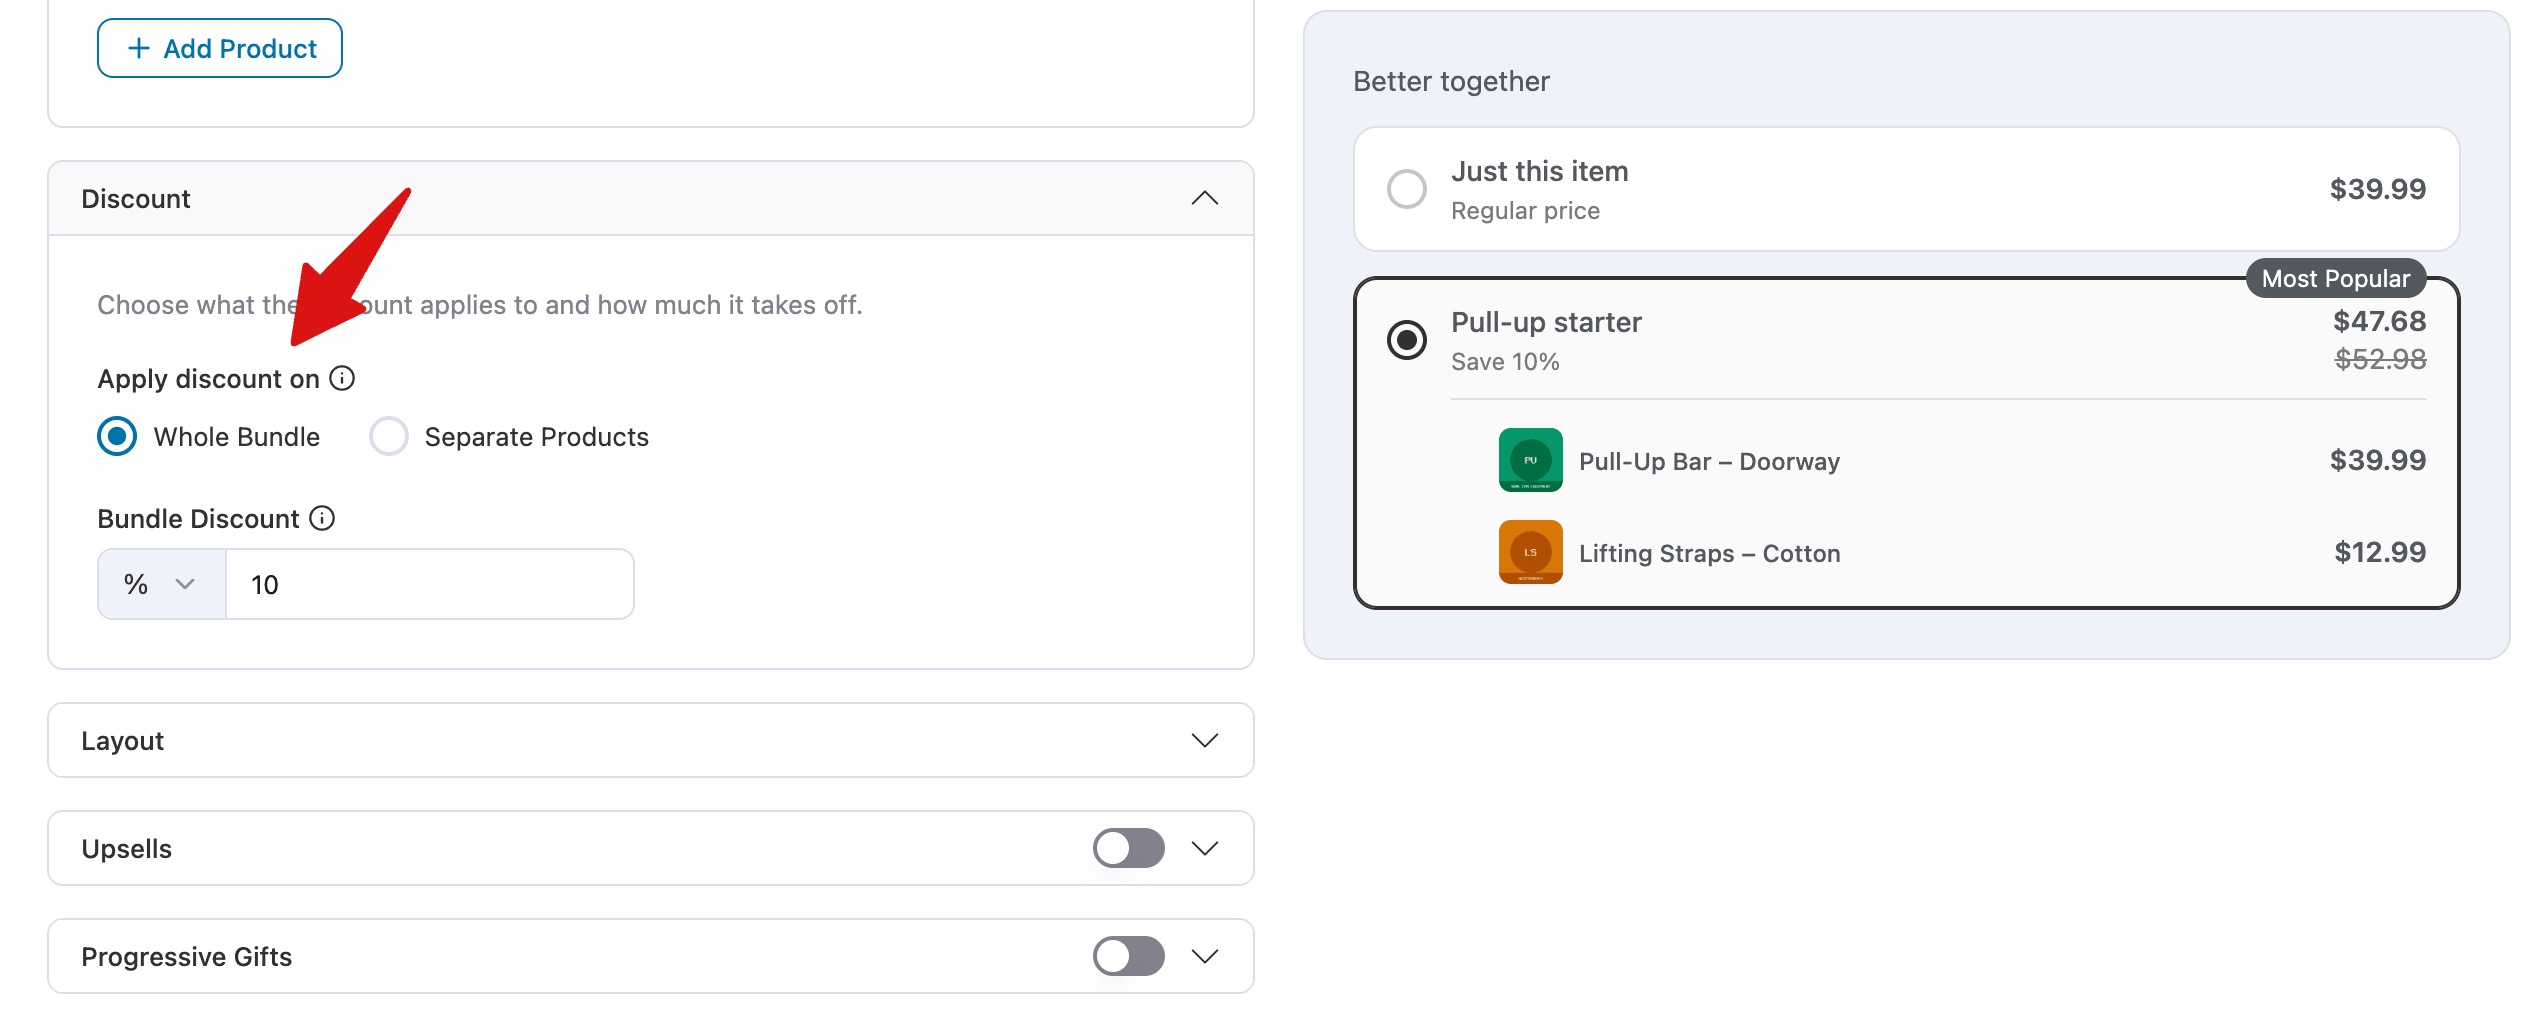
In the Discount section, choose what the discount applies to with Apply discount on:
- Whole Bundle: one discount applies to the bundle total.
- Separate Products: each item gets its own discount, set on its row in Bundle Items.
Then enter the Bundle Discount and use the dropdown next to it to choose a percentage or a fixed amount.
Step 4: Customizing the Layout
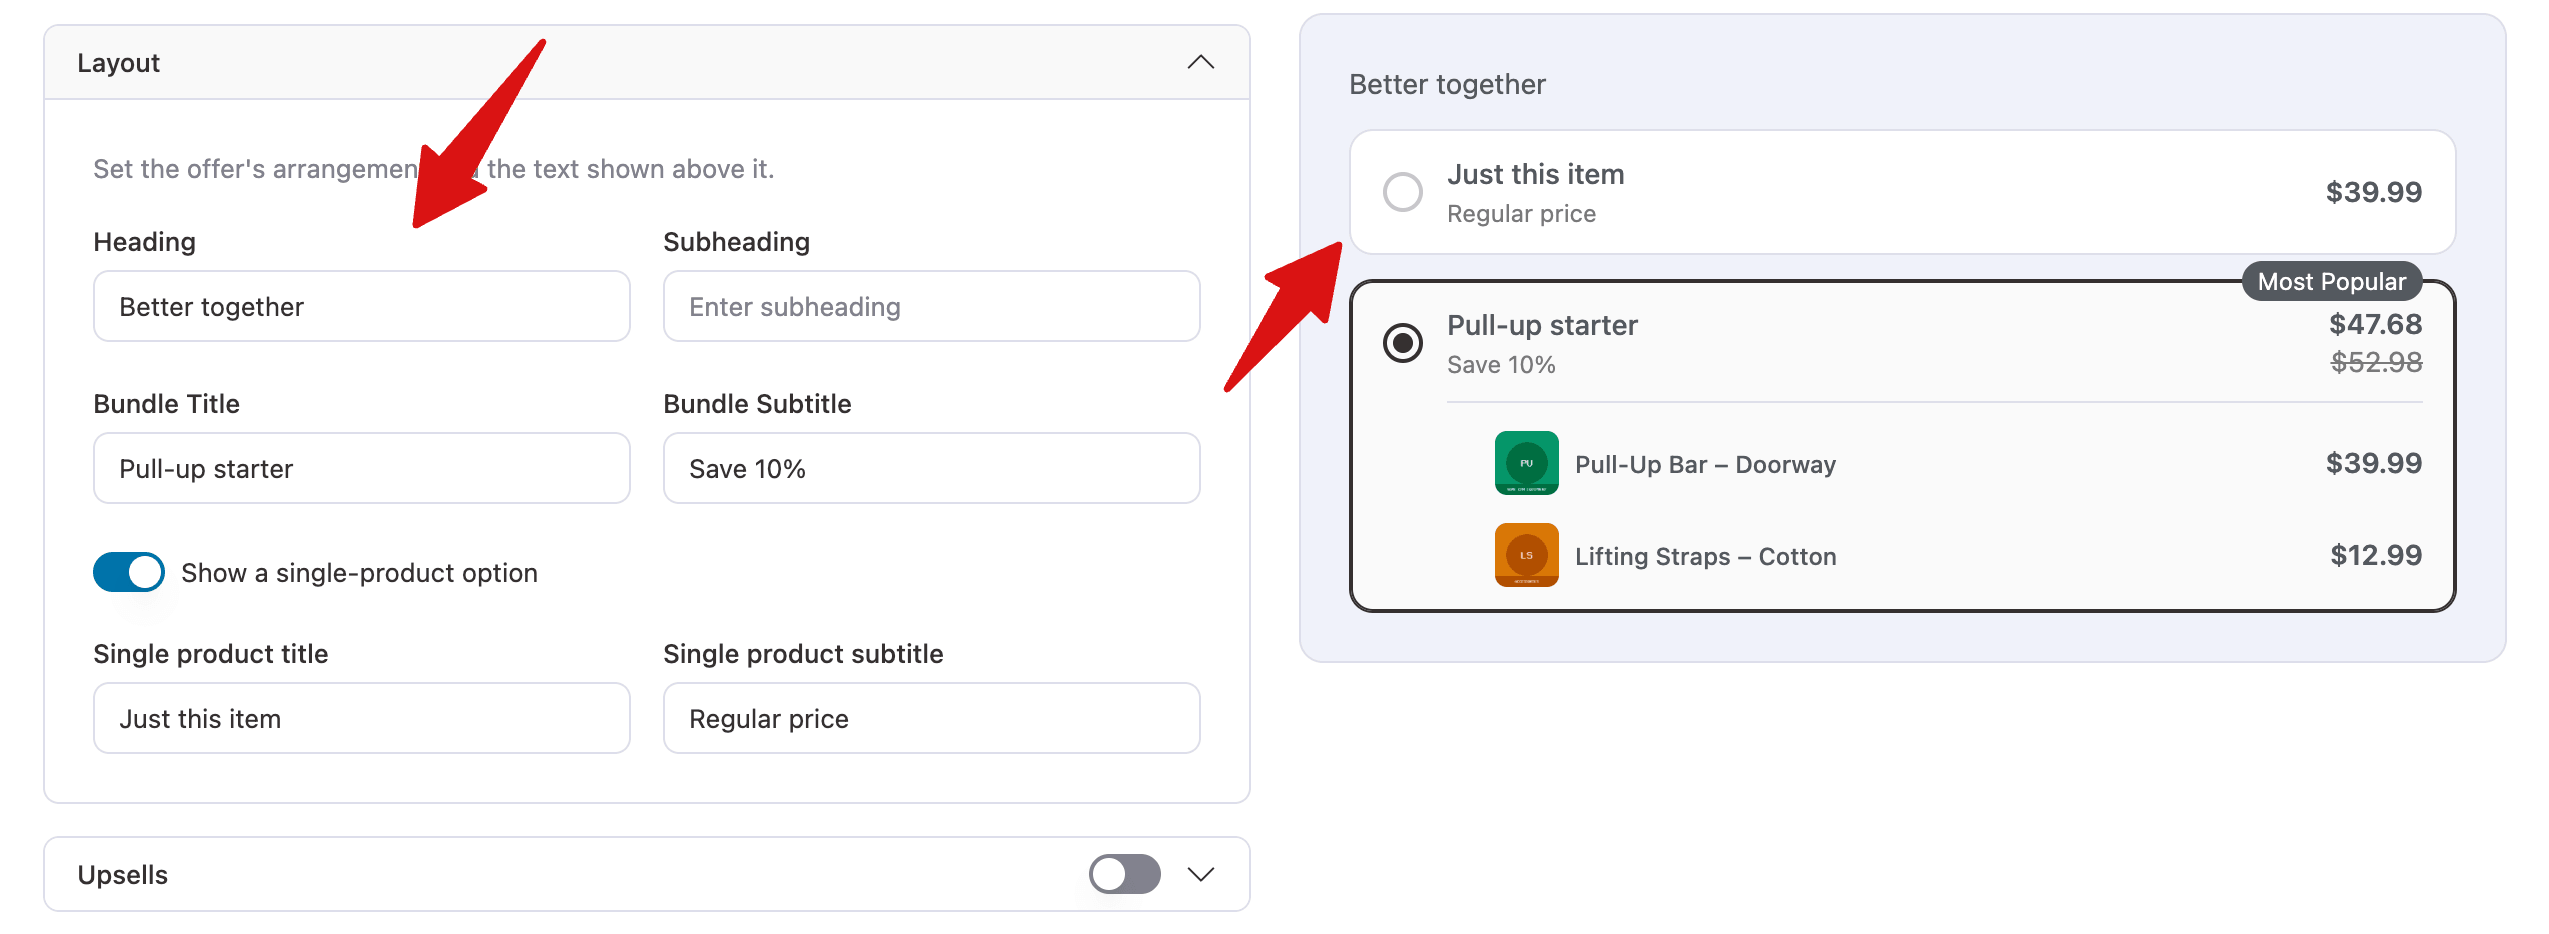
The Layout section controls the text shoppers see:
- Heading and Subheading: text above the offer, such as Complete the routine and save.
- Bundle Title and Bundle Subtitle: the name and short description of the bundle choice.
- Show a single-product option: adds a second choice that lets shoppers buy just the product they're viewing. When it's on, set that choice's Single product title and Single product subtitle, such as Buy 1 and Regular price.
Step 5: Checking the Preview
The preview on the right shows the finished offer, including the combined price, the original price crossed out, and any free gifts.
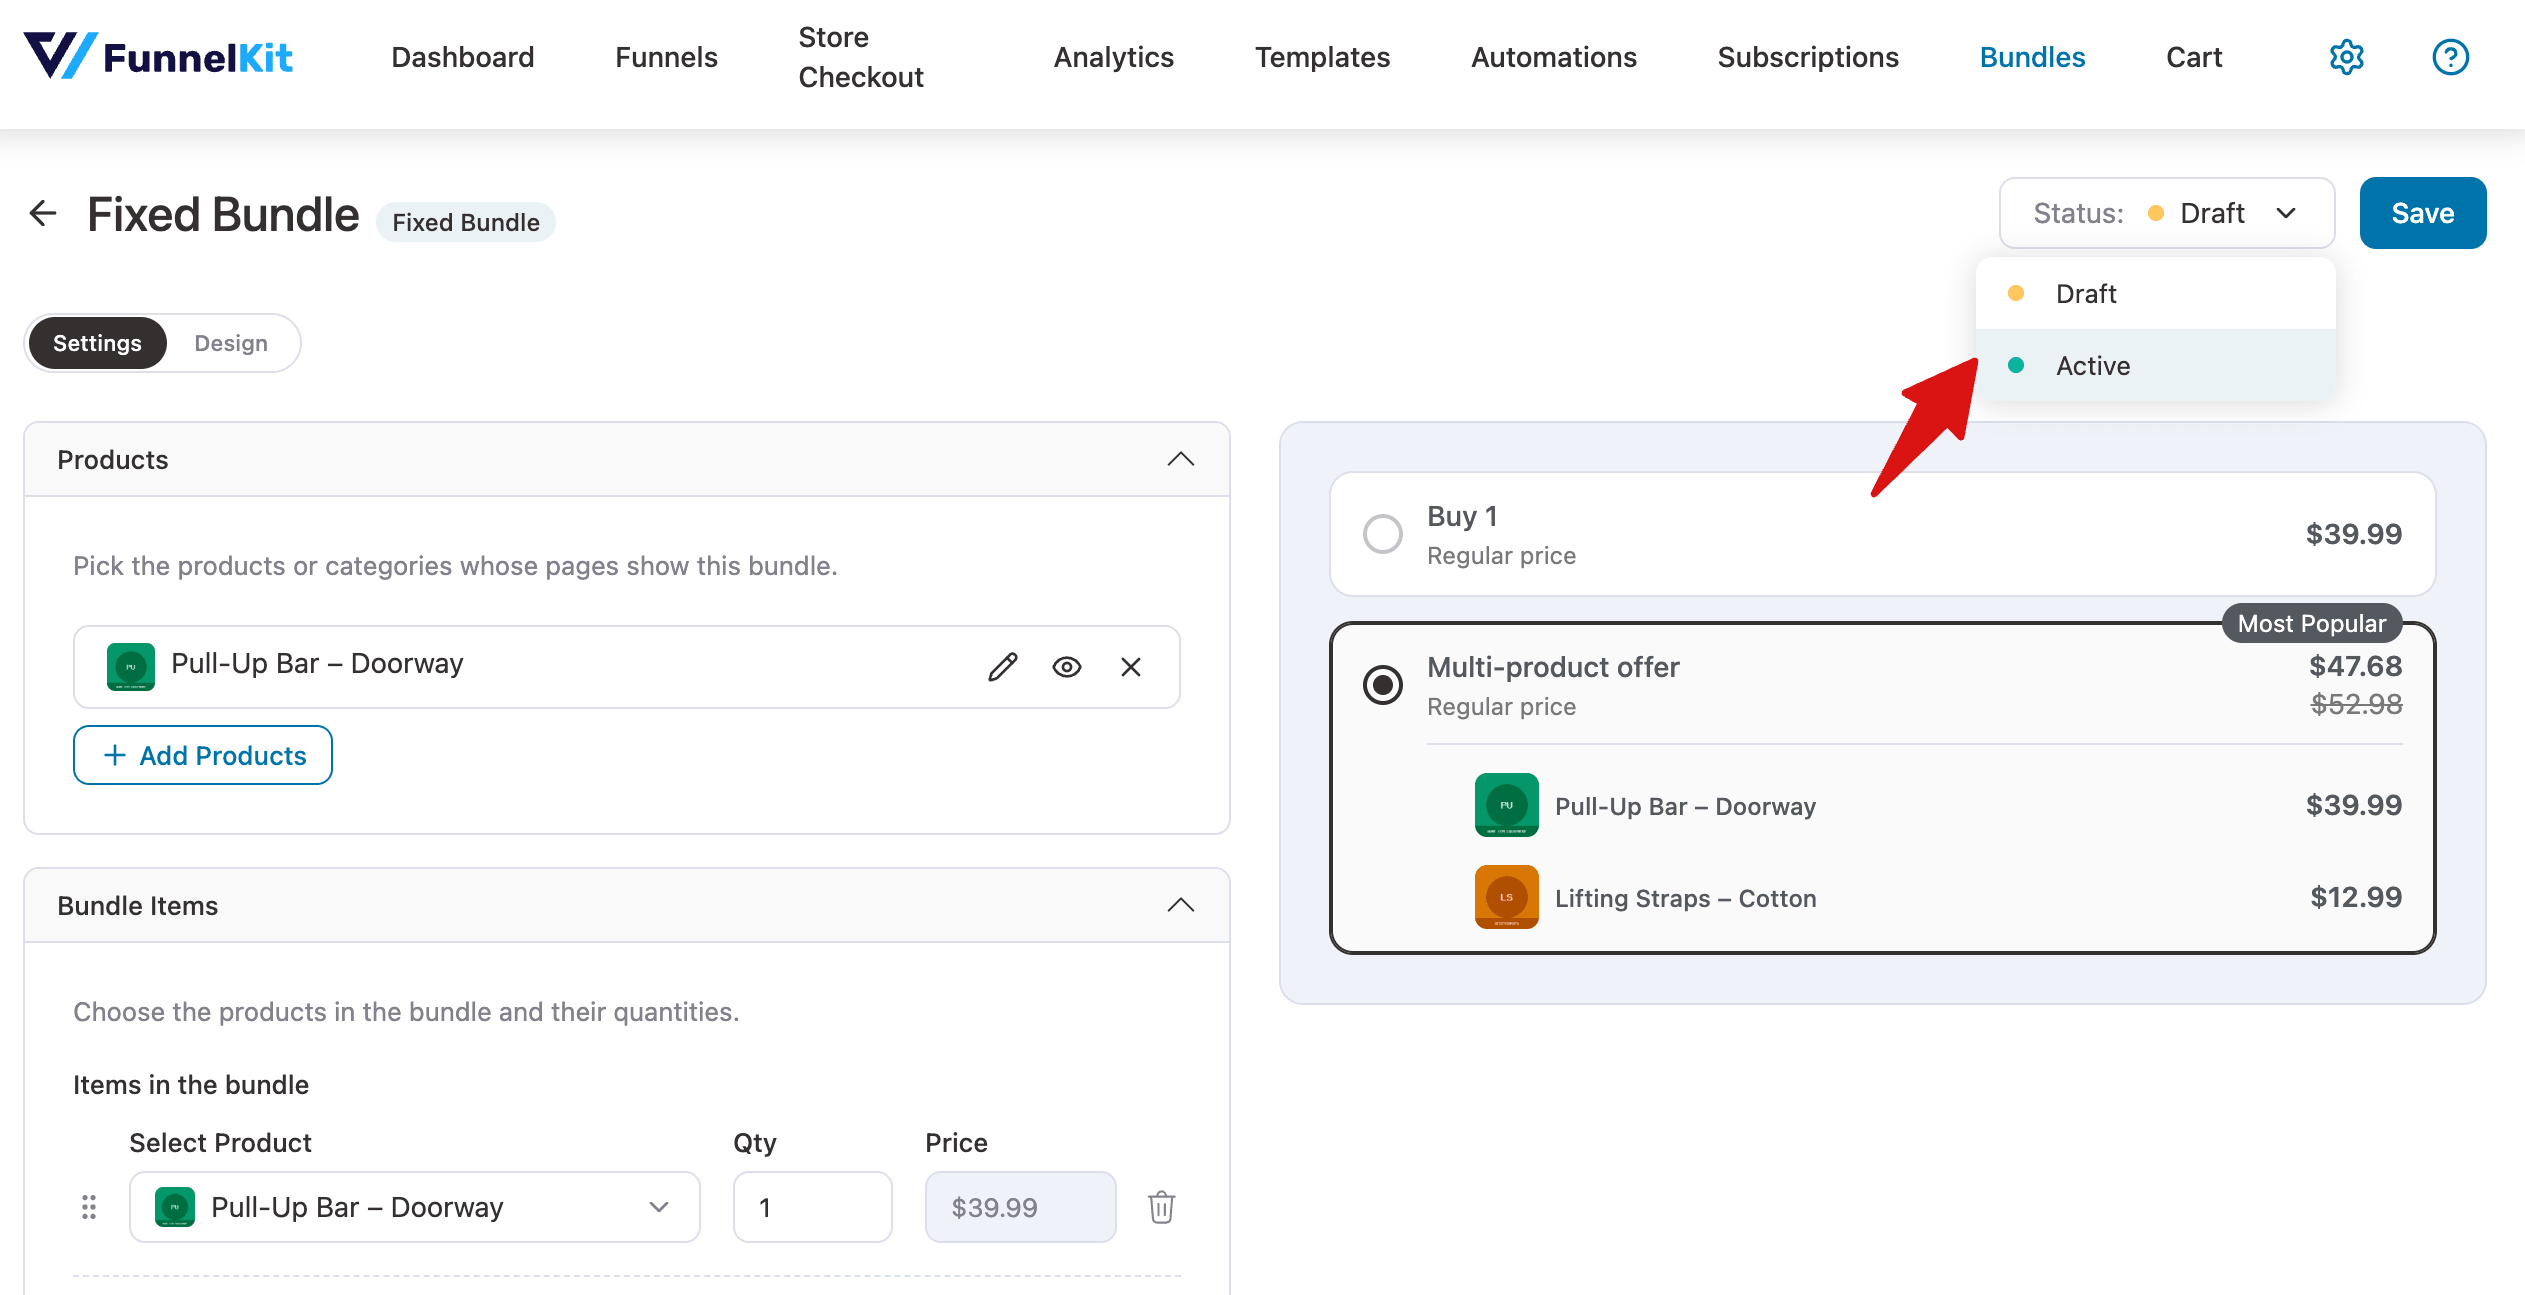
When everything looks right, set the status to Active and click Confirm. Your changes are saved, and the bundle goes live.
That's it! You've created a Fixed Bundle that sells a set of products together at one price.
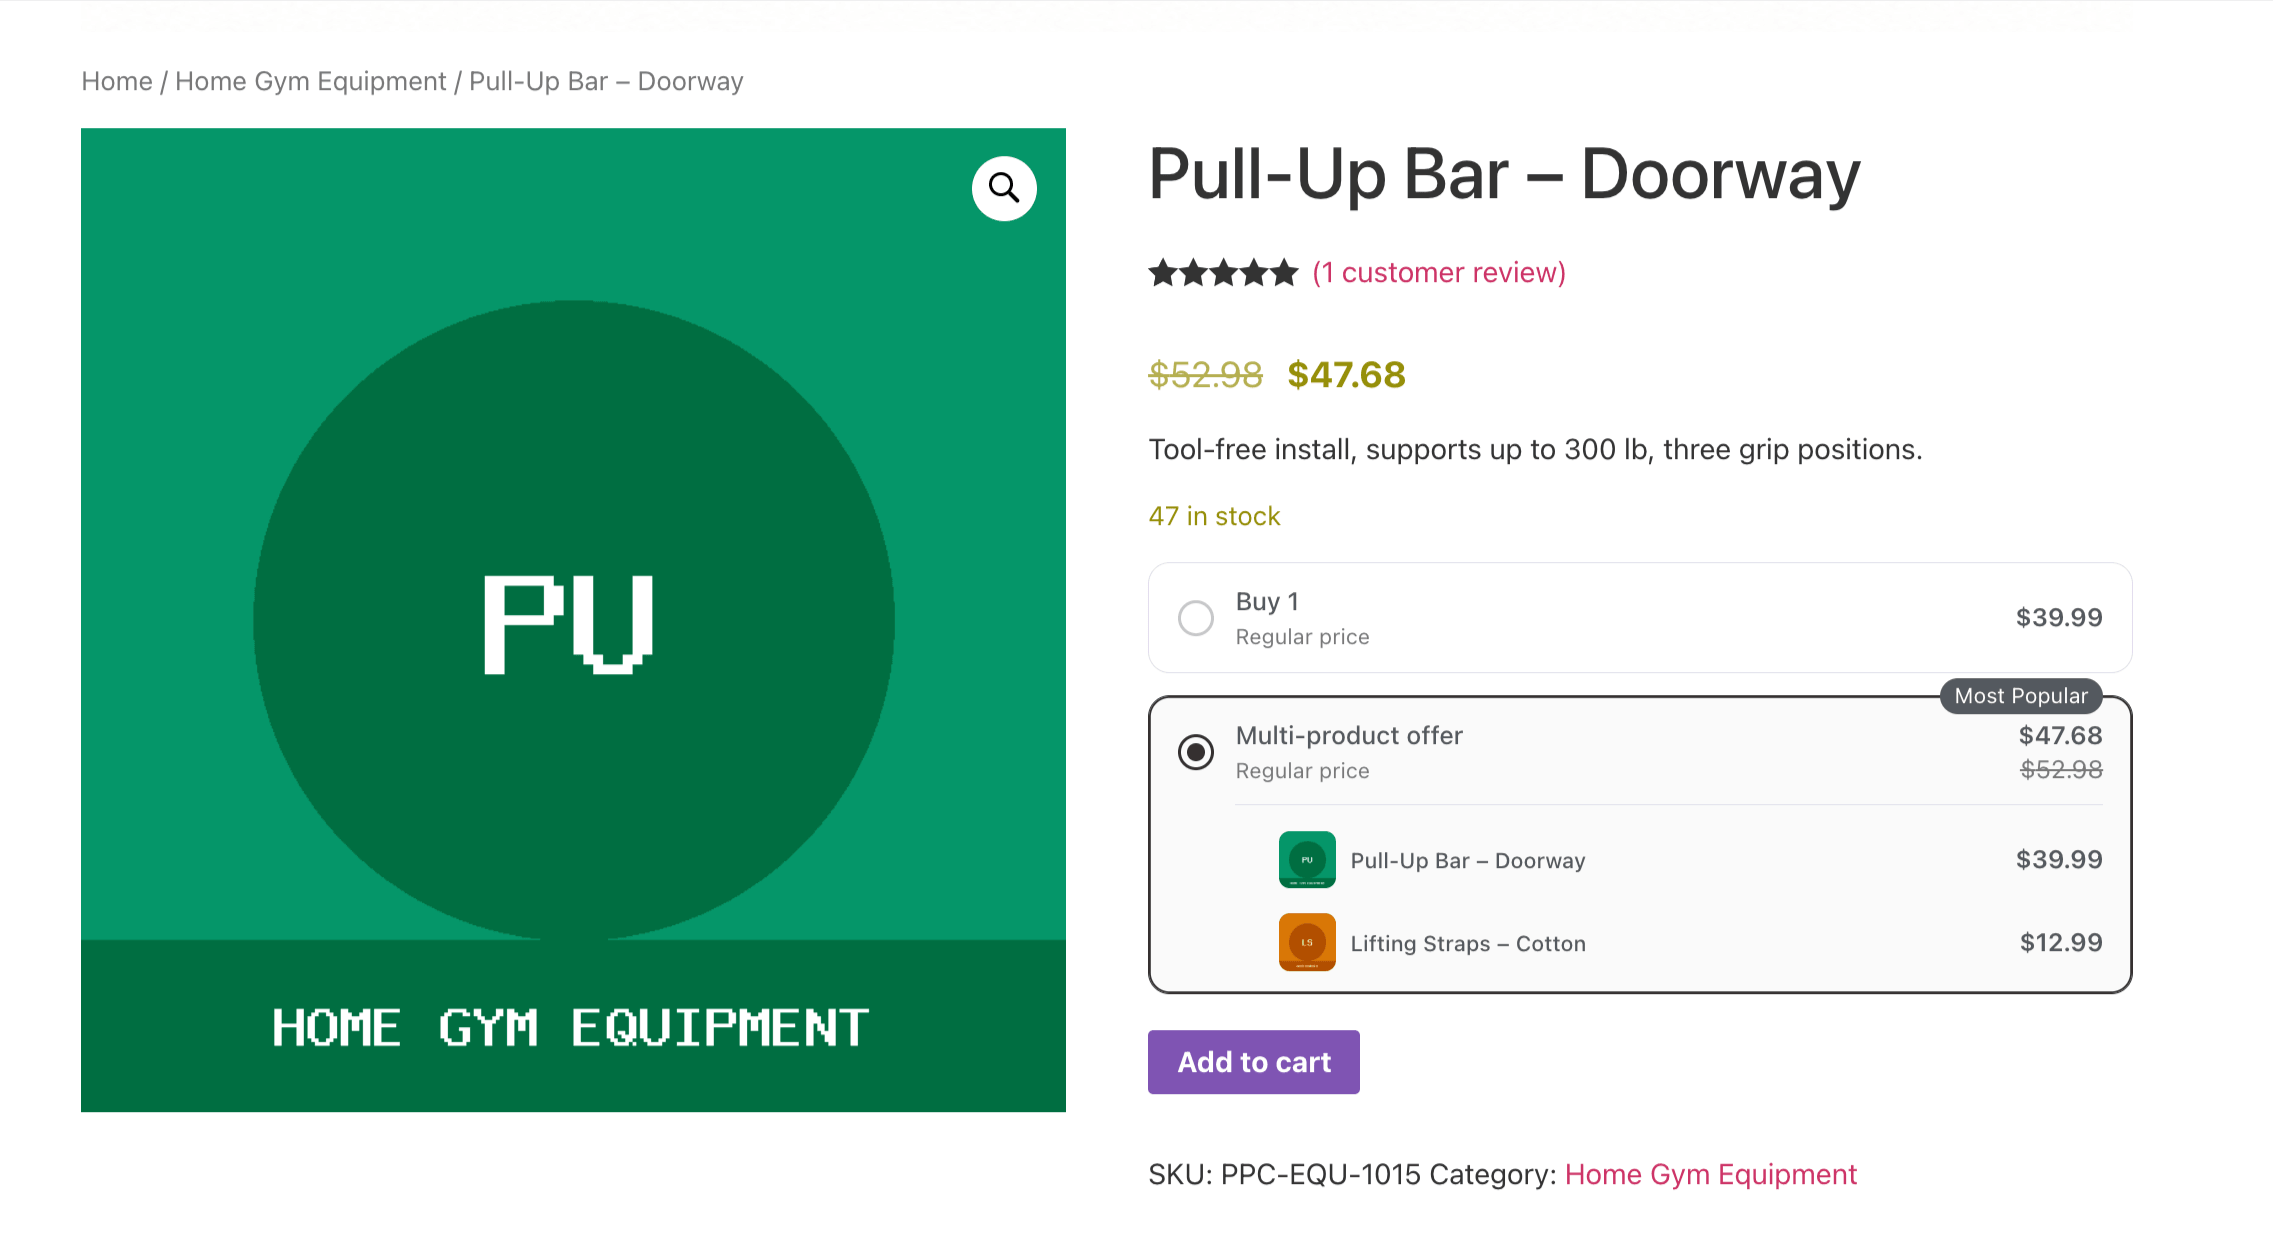
Here is what a fixed bundle looks like on the product page:
Next, you might want to add upsells to your bundle for even bigger orders.
FAQ
What happens when a shopper clicks Add to cart for a Fixed Bundle on a shop page?
On shop and category pages, the Add to Cart button for a product with a Fixed Bundle links to its product page, so shoppers can choose any options before the bundle is added.
How does a Fixed Bundle look in the cart?
Bundle items are grouped together in the cart, checkout, order emails, and Thank You page. See how bundles appear in the cart and orders.