Would you like to reward shoppers who buy more of the same product with a lower price per item? In this guide, we'll walk you through setting up a Quantity Breaks bundle, from choosing products to building your offer tiers. All you need is the Bundles Addon with an active license.

Before you get started, make sure Funnel Builder, Funnel Builder Pro, and the Bundles Addon are installed and activated on your WordPress site. If you need help, see our guide on installing the plugin and activating your license.
Step 1: Create a Quantity Break bundle
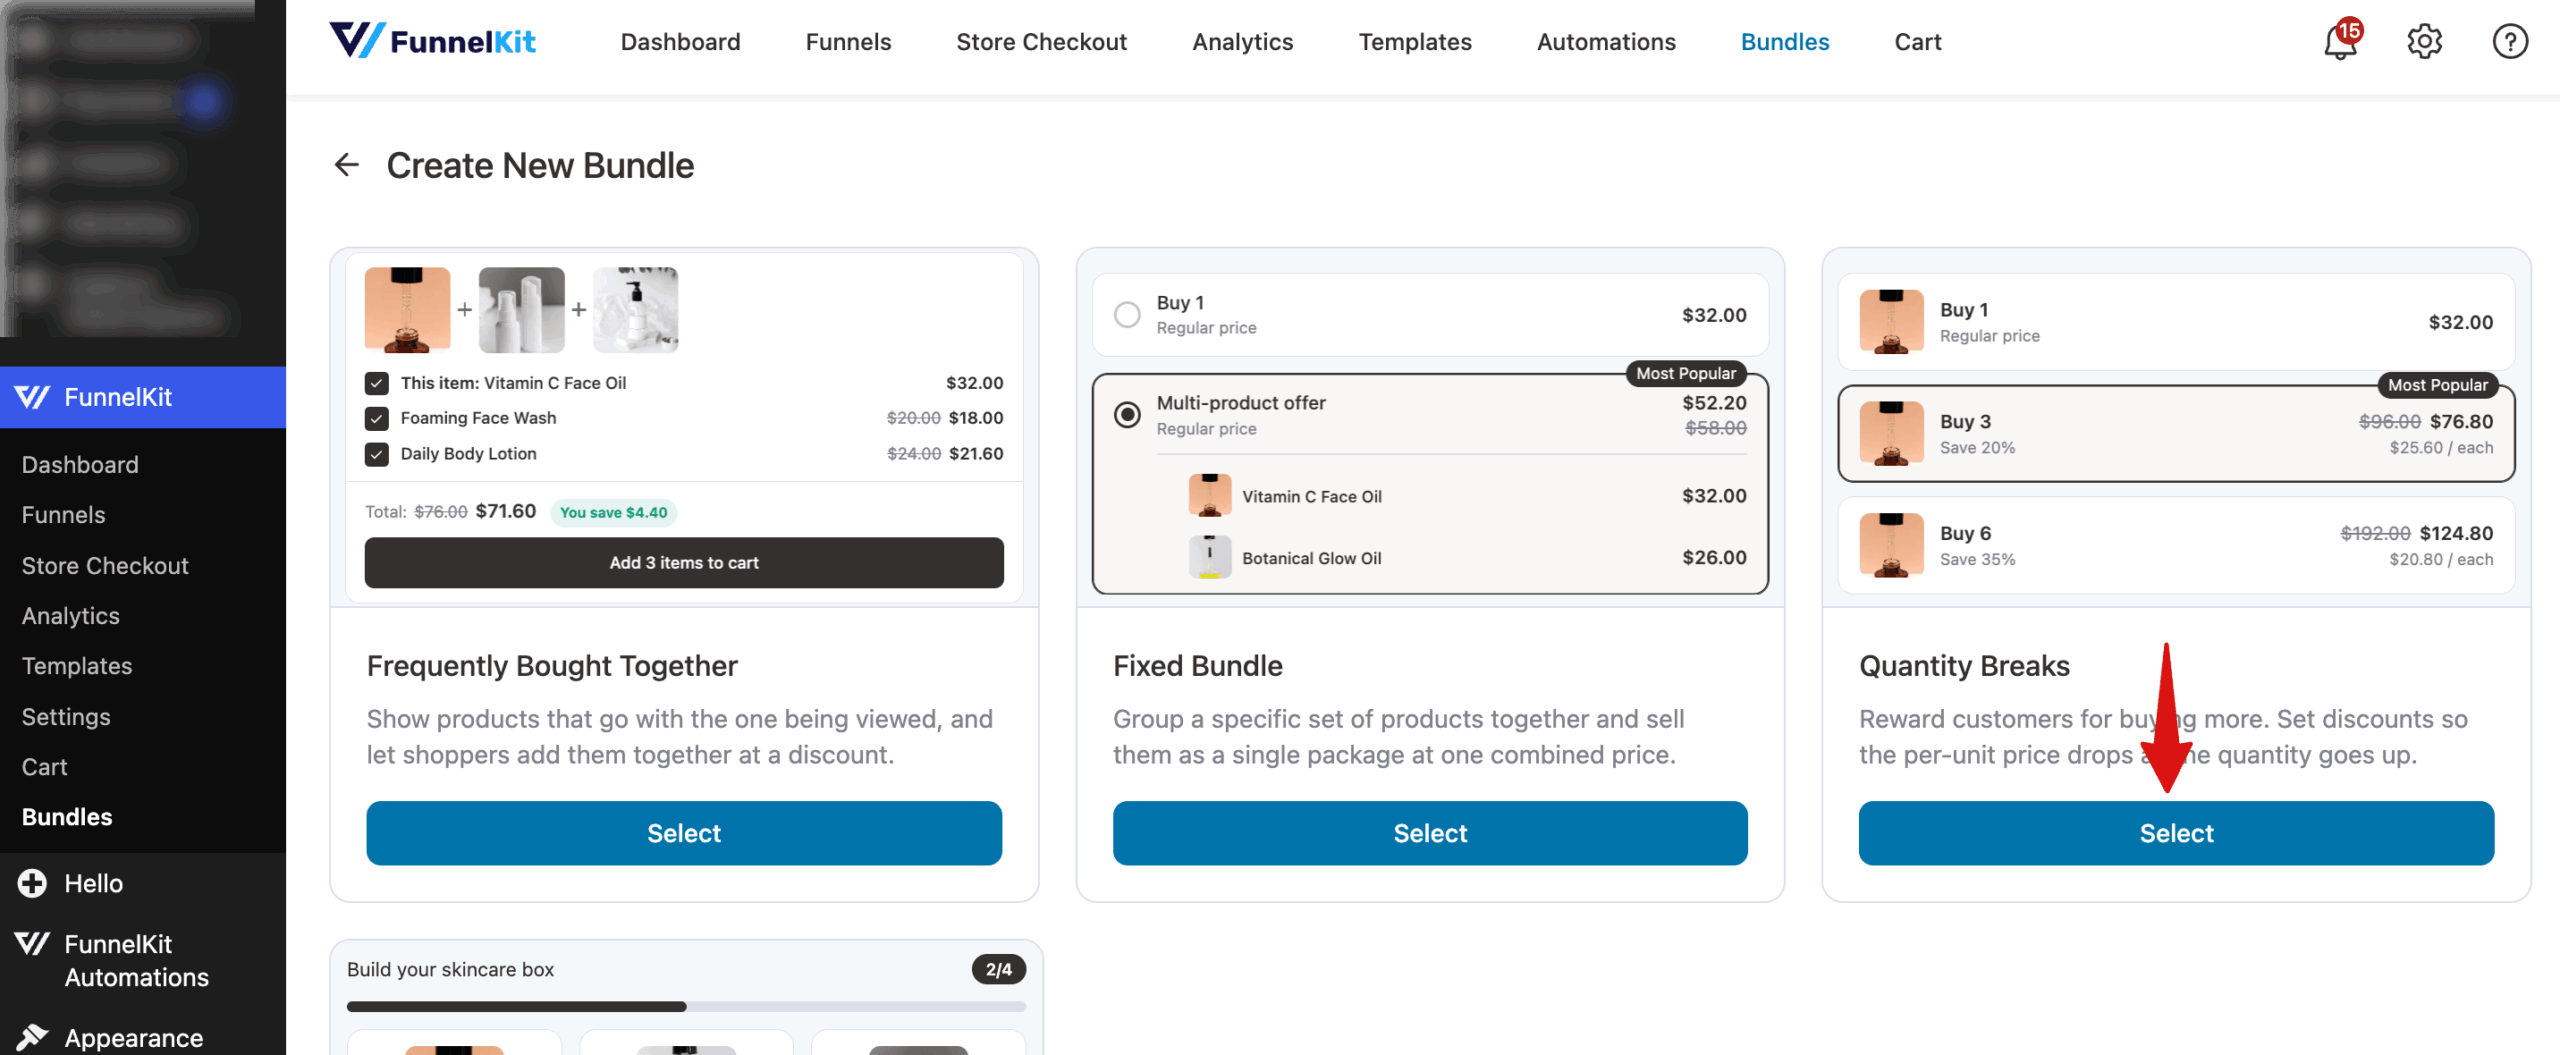
To begin, go to FunnelKit » Bundles, click Create Bundle, and select Quantity Breaks. For a walkthrough of the editor itself, see creating your first bundle.
Step 2: Choosing Where the Bundle Appears
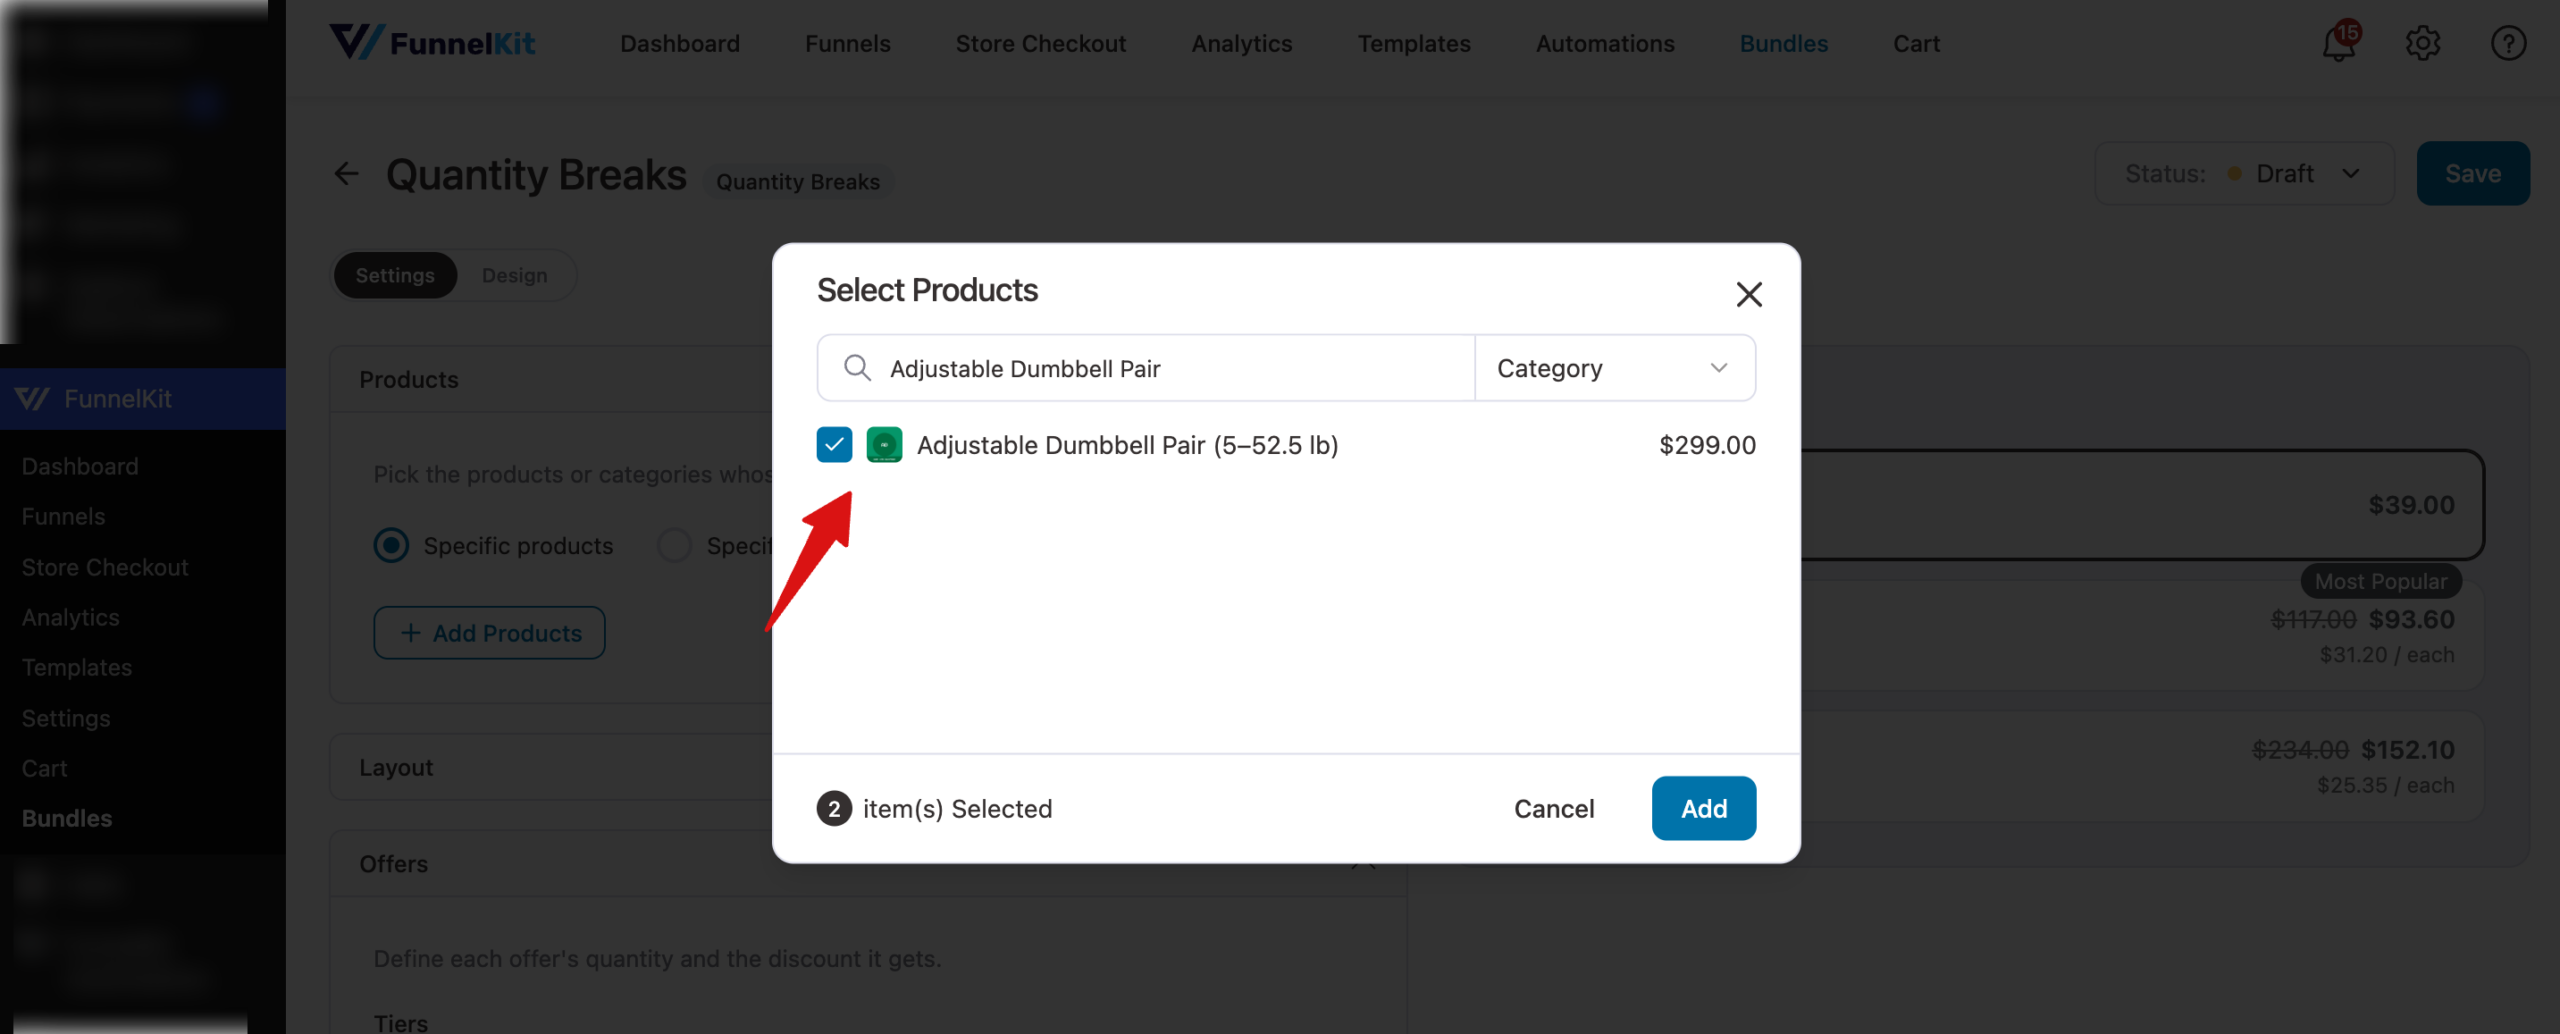
In the Products section, choose which product pages show the bundle. Select Specific products to pick individual products, or Specific categories to show the bundle on every product in the categories you choose. Then click Add Products to search for and add products.
Step 3: Choosing a Layout
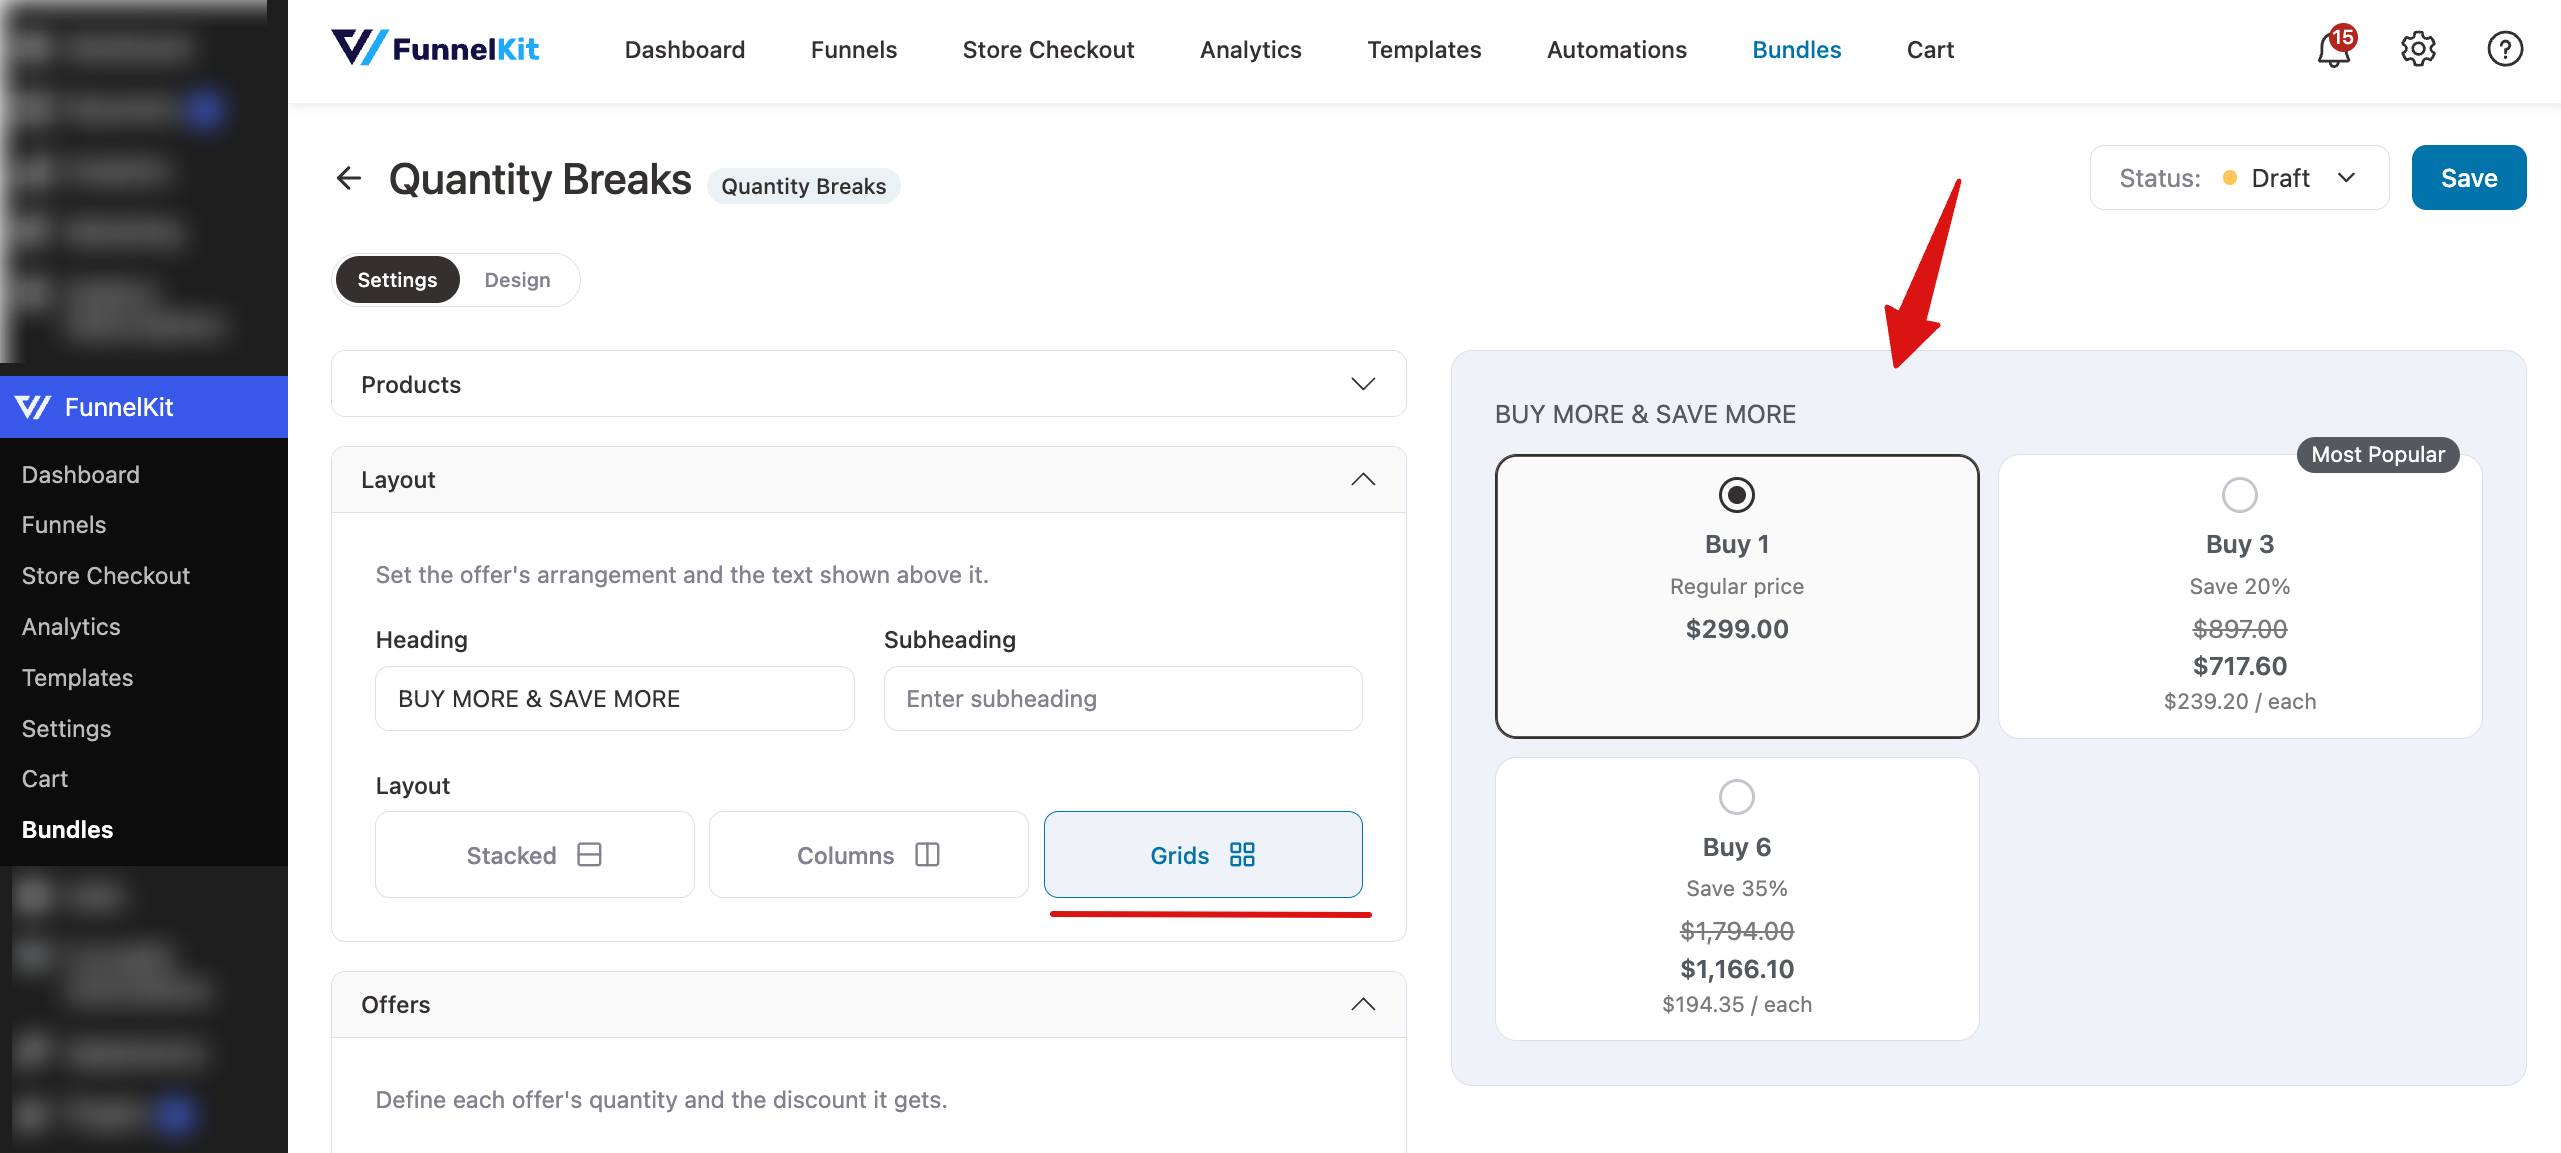
Open the Layout section to set the text shown above your offers and how the offers are arranged. Enter an optional Heading and Subheading, then pick a layout:
- Stacked: offers sit one above the other in a list.
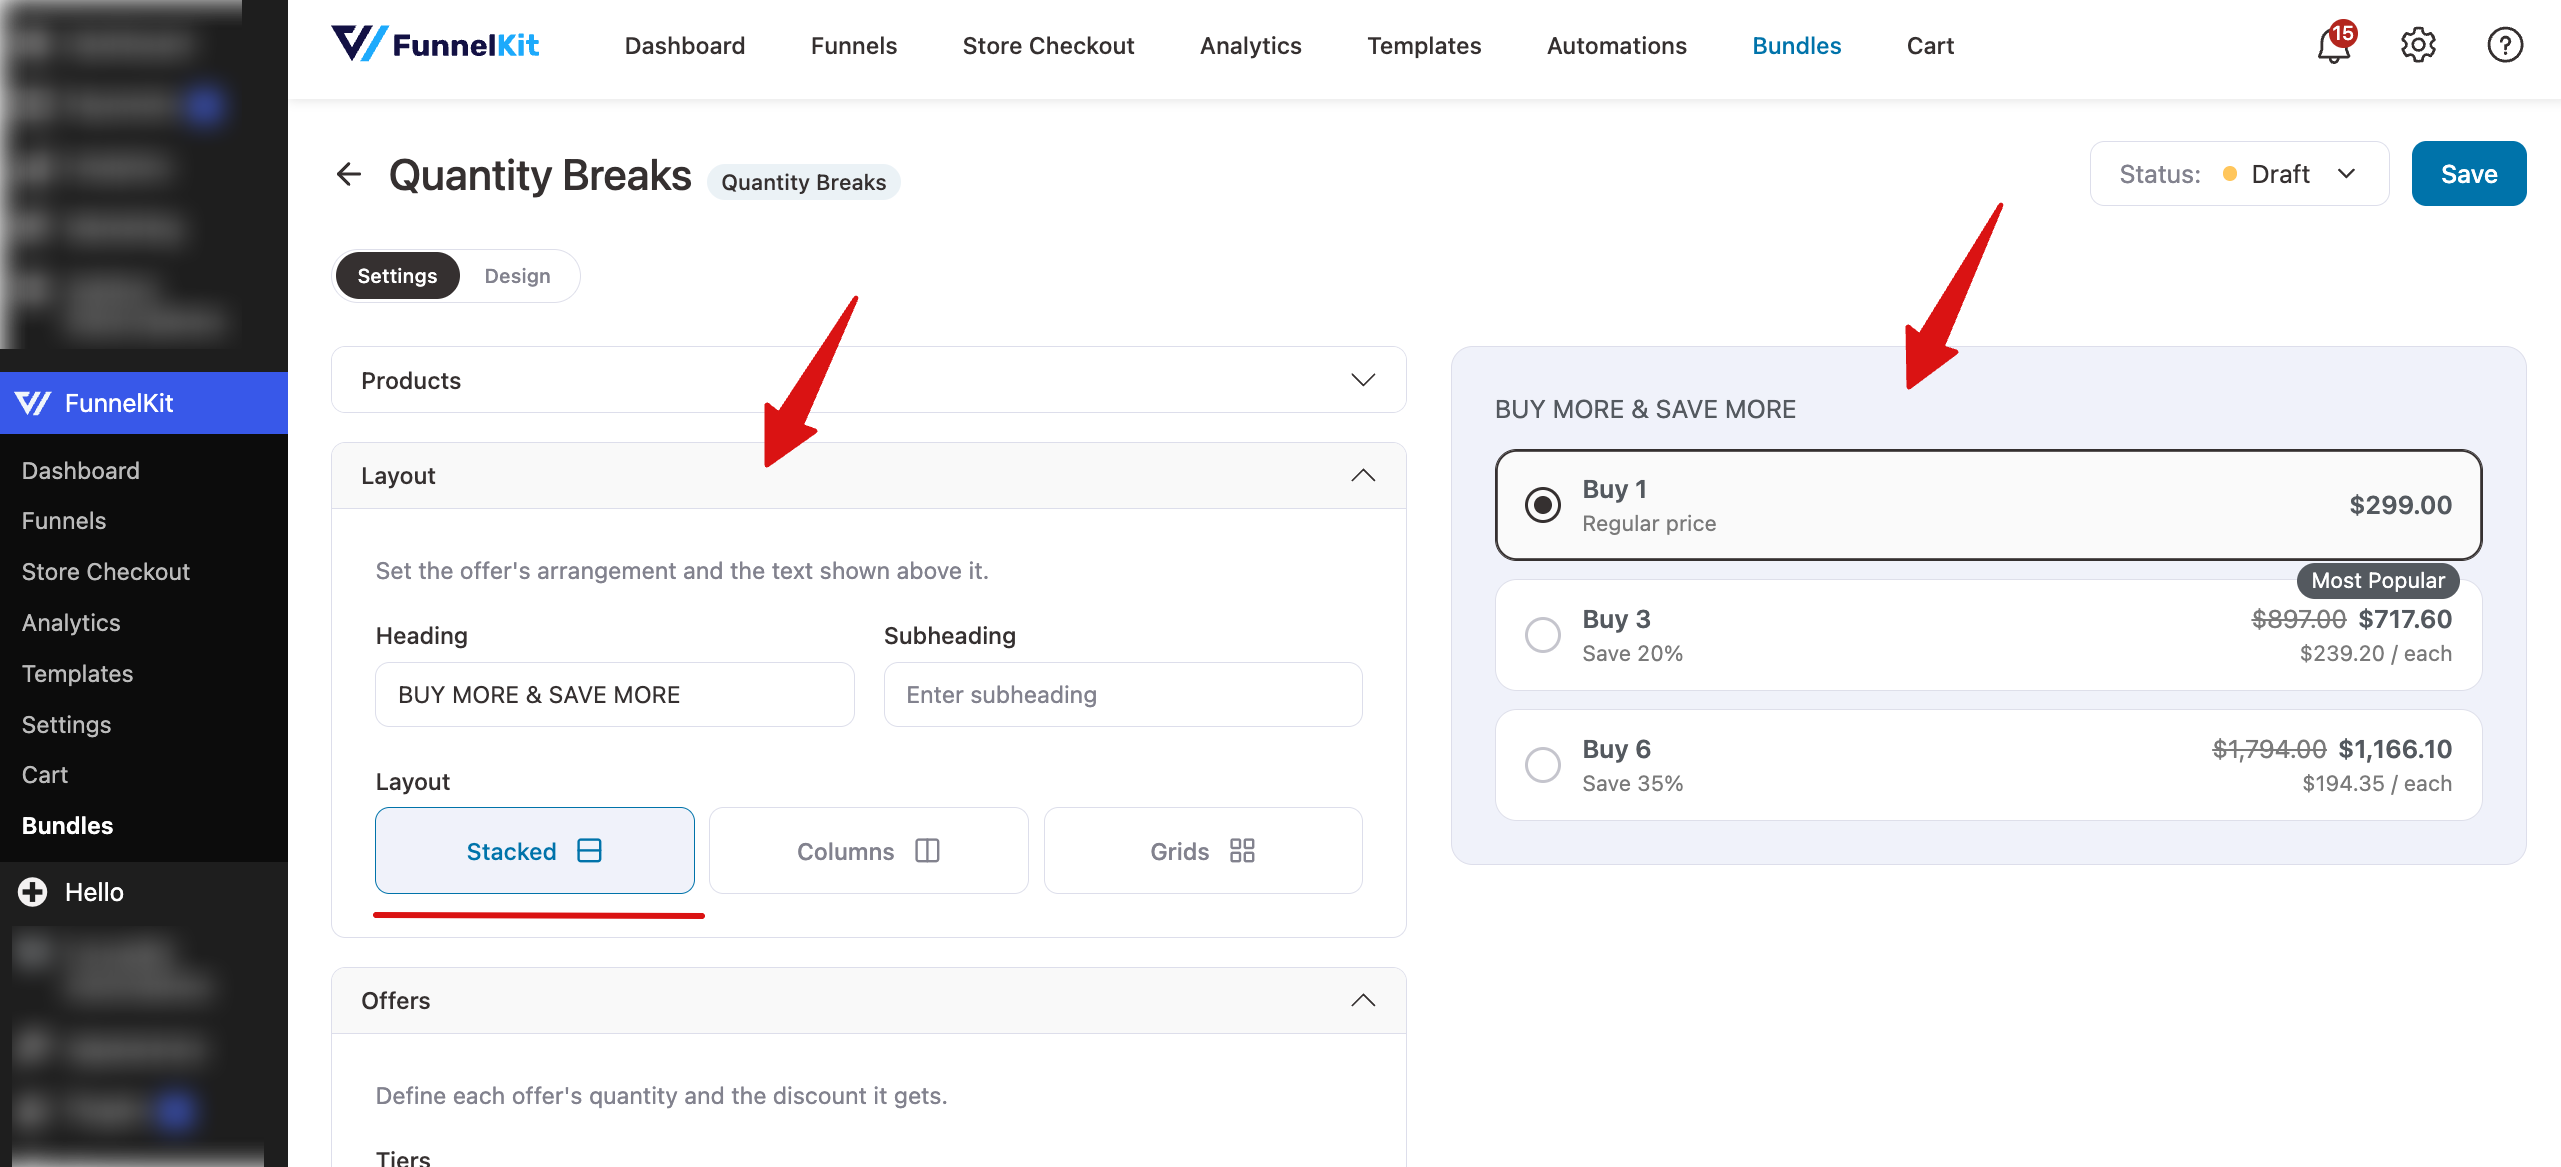
- Columns: offers sit side by side in a row.
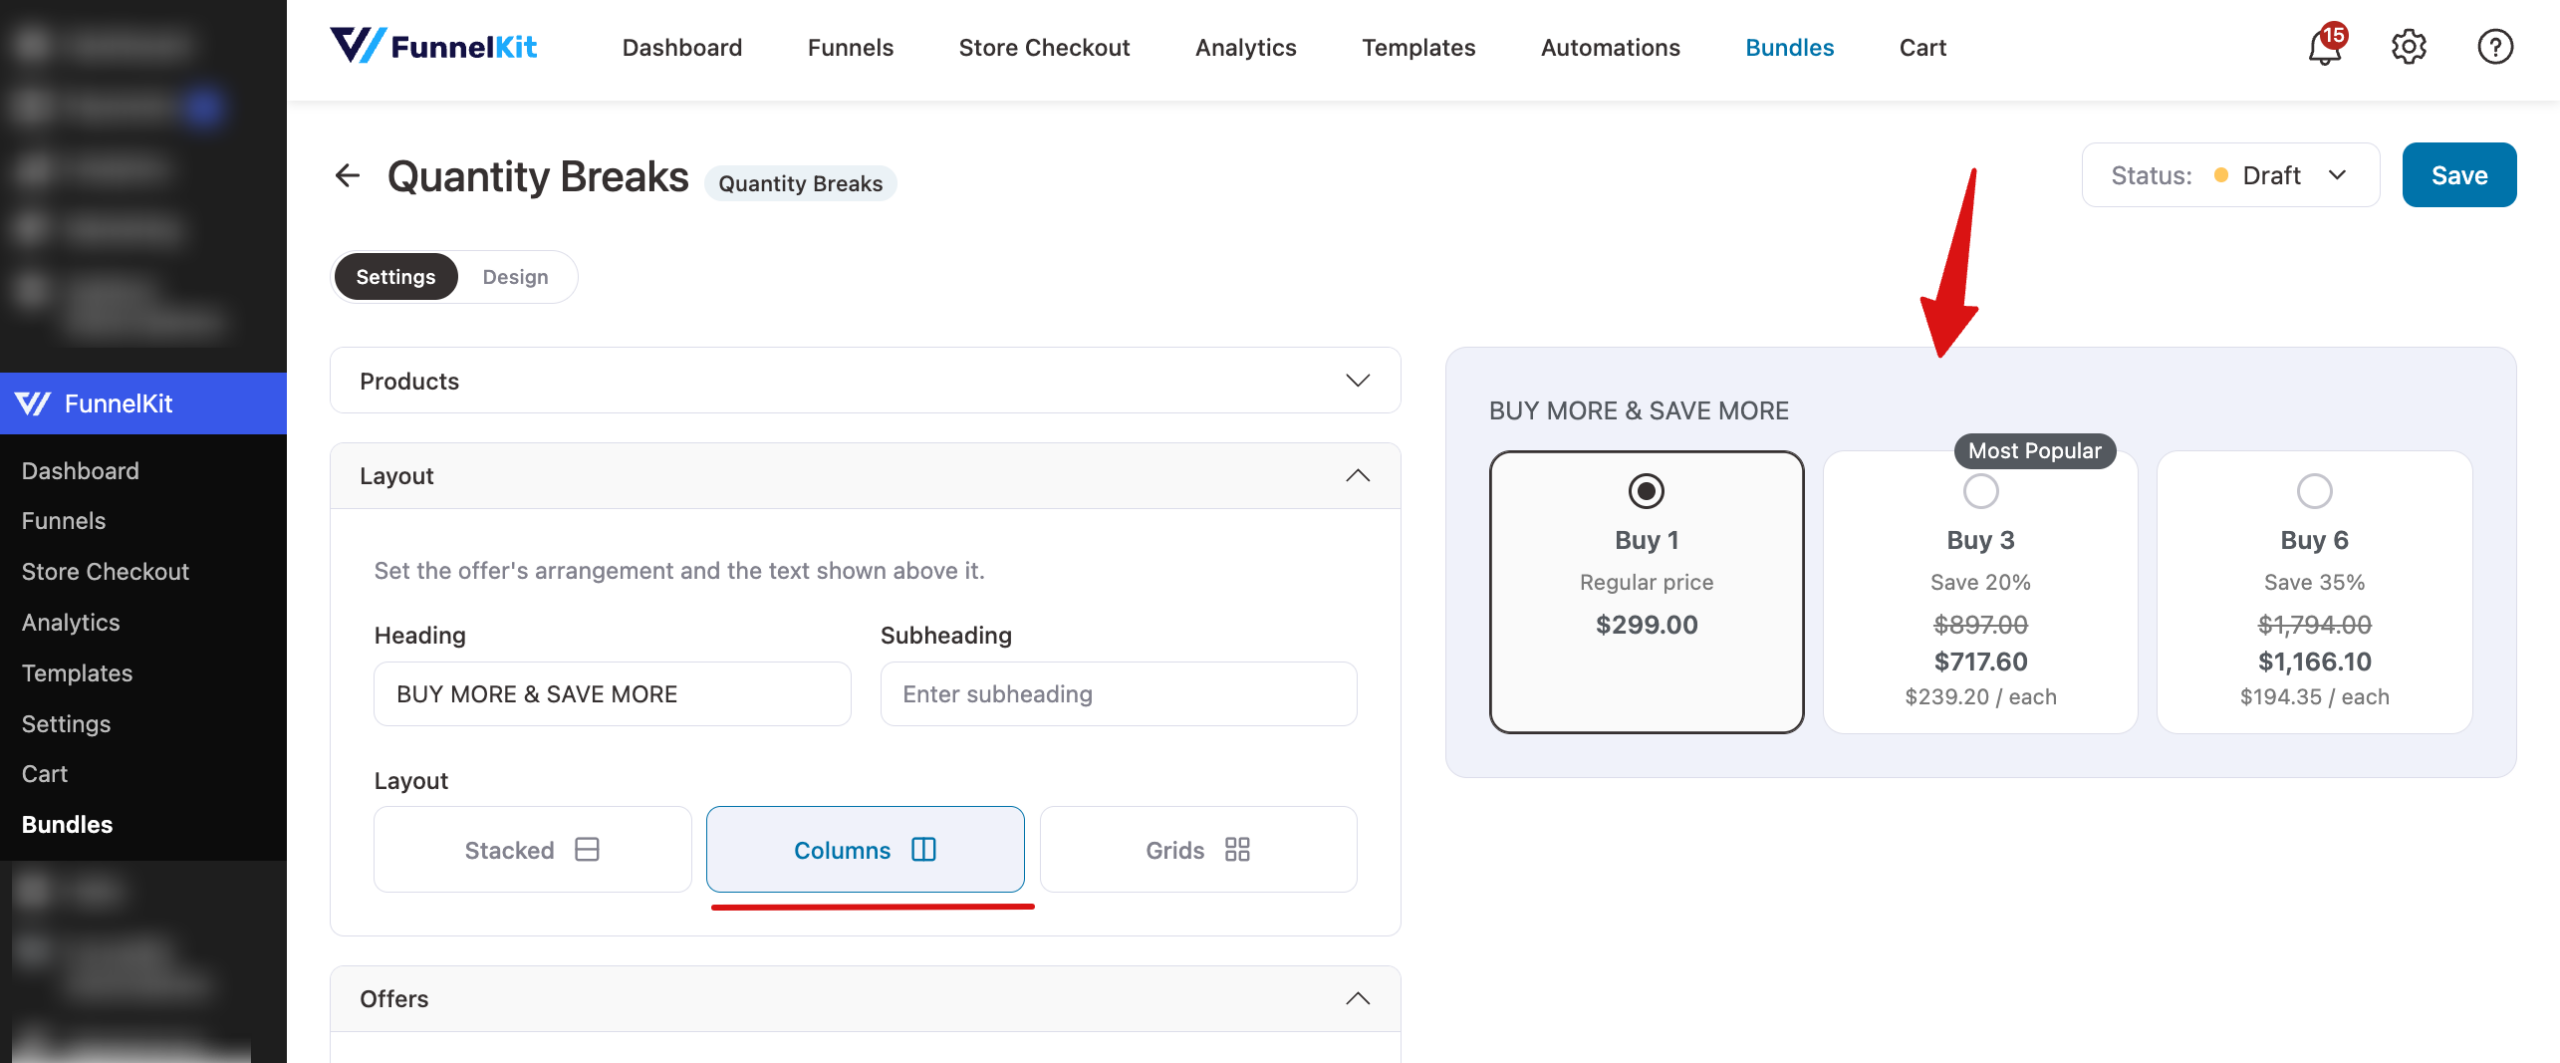
- Grids: offers form a grid of cards.
Step 4: Building Your Offer Tiers
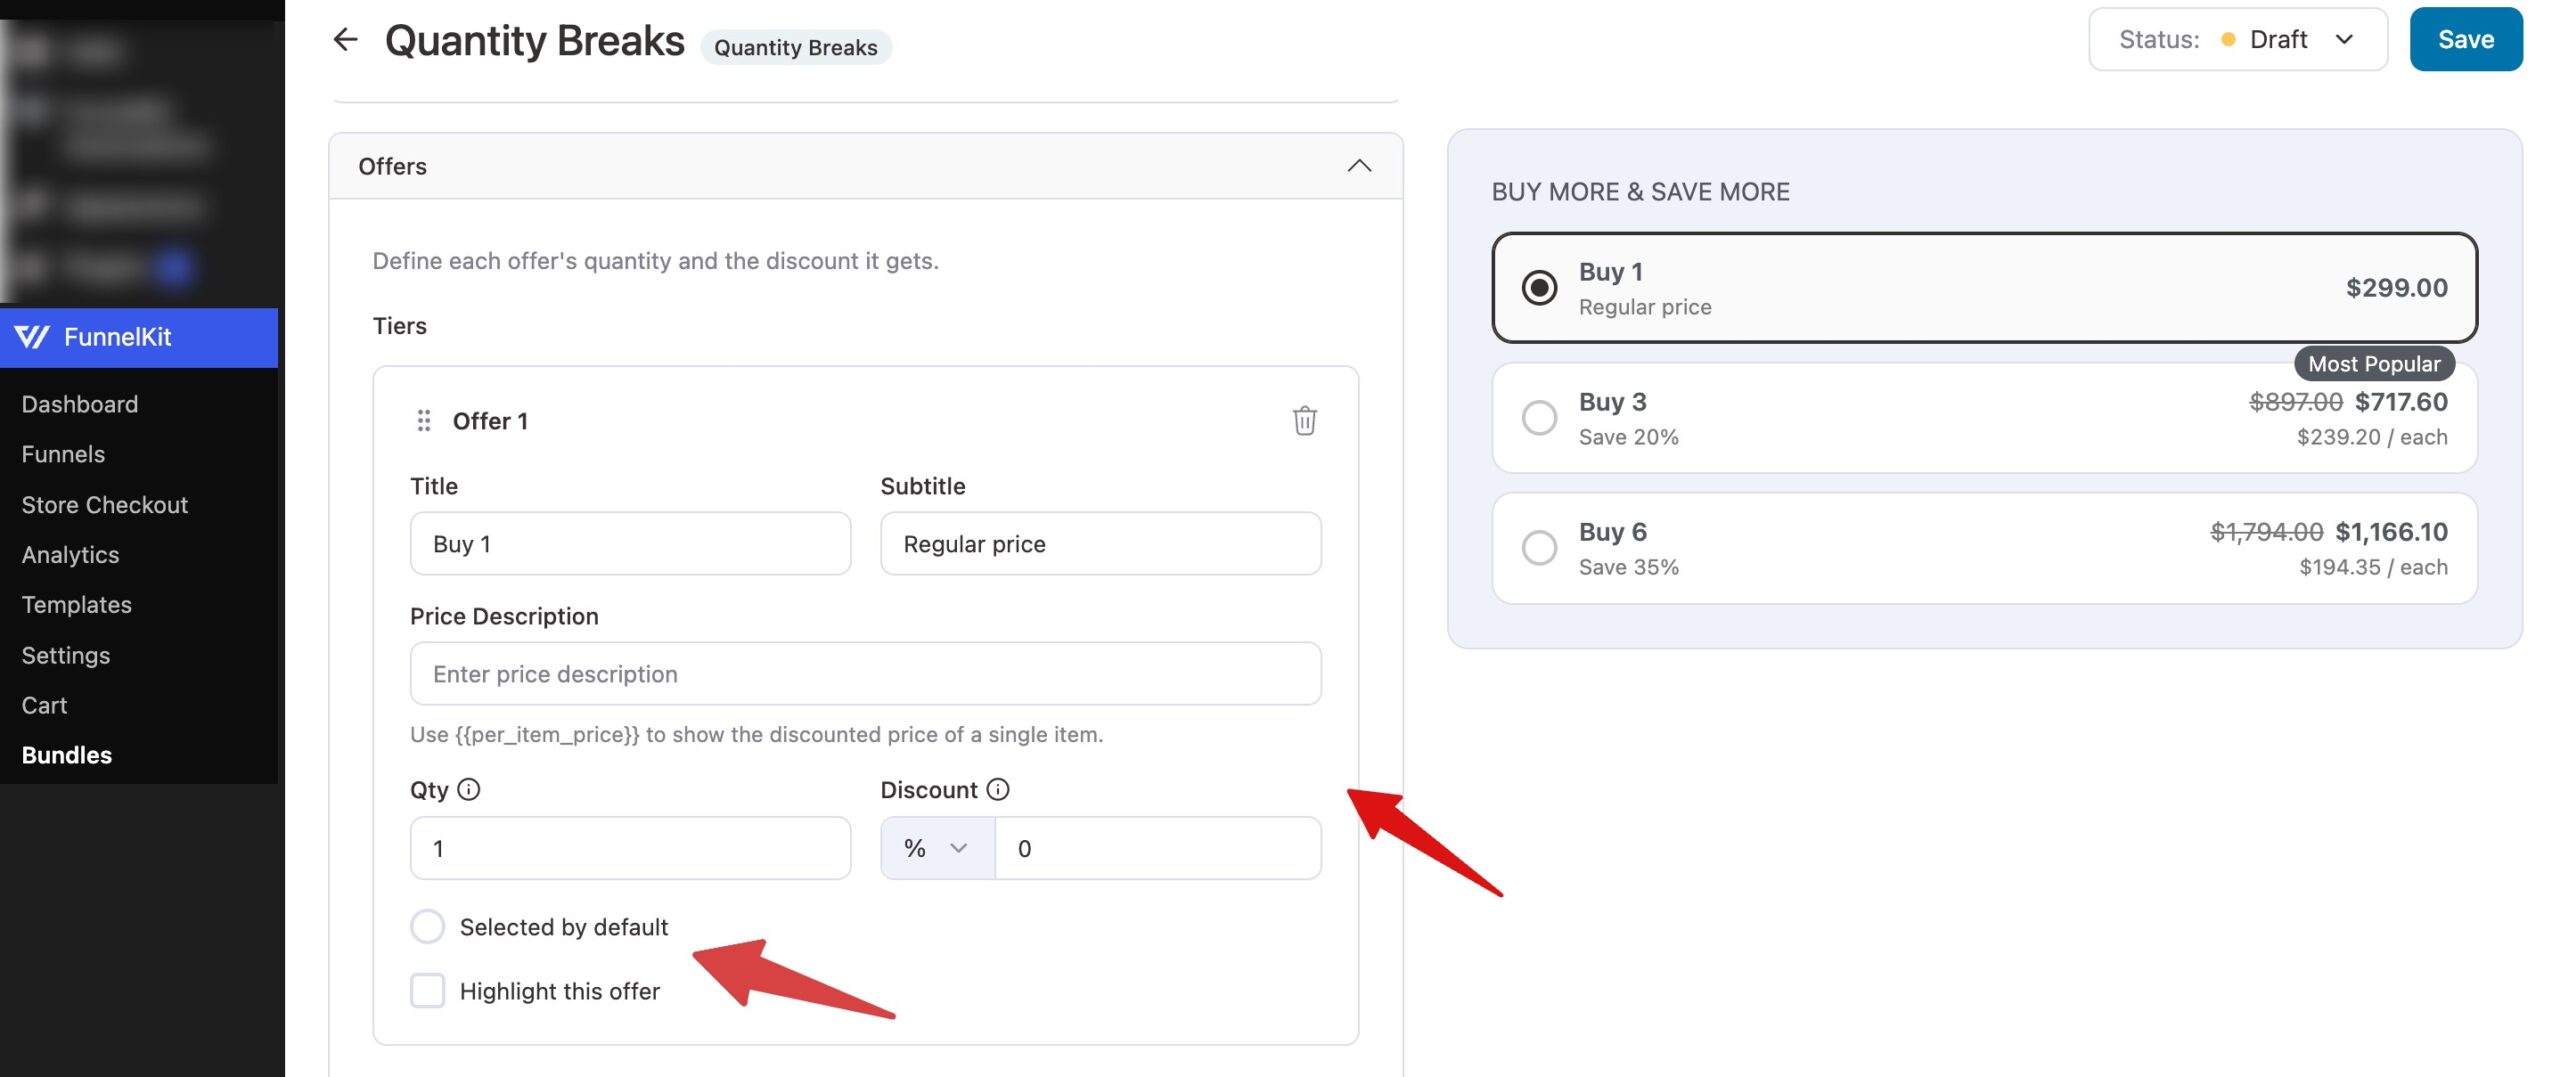
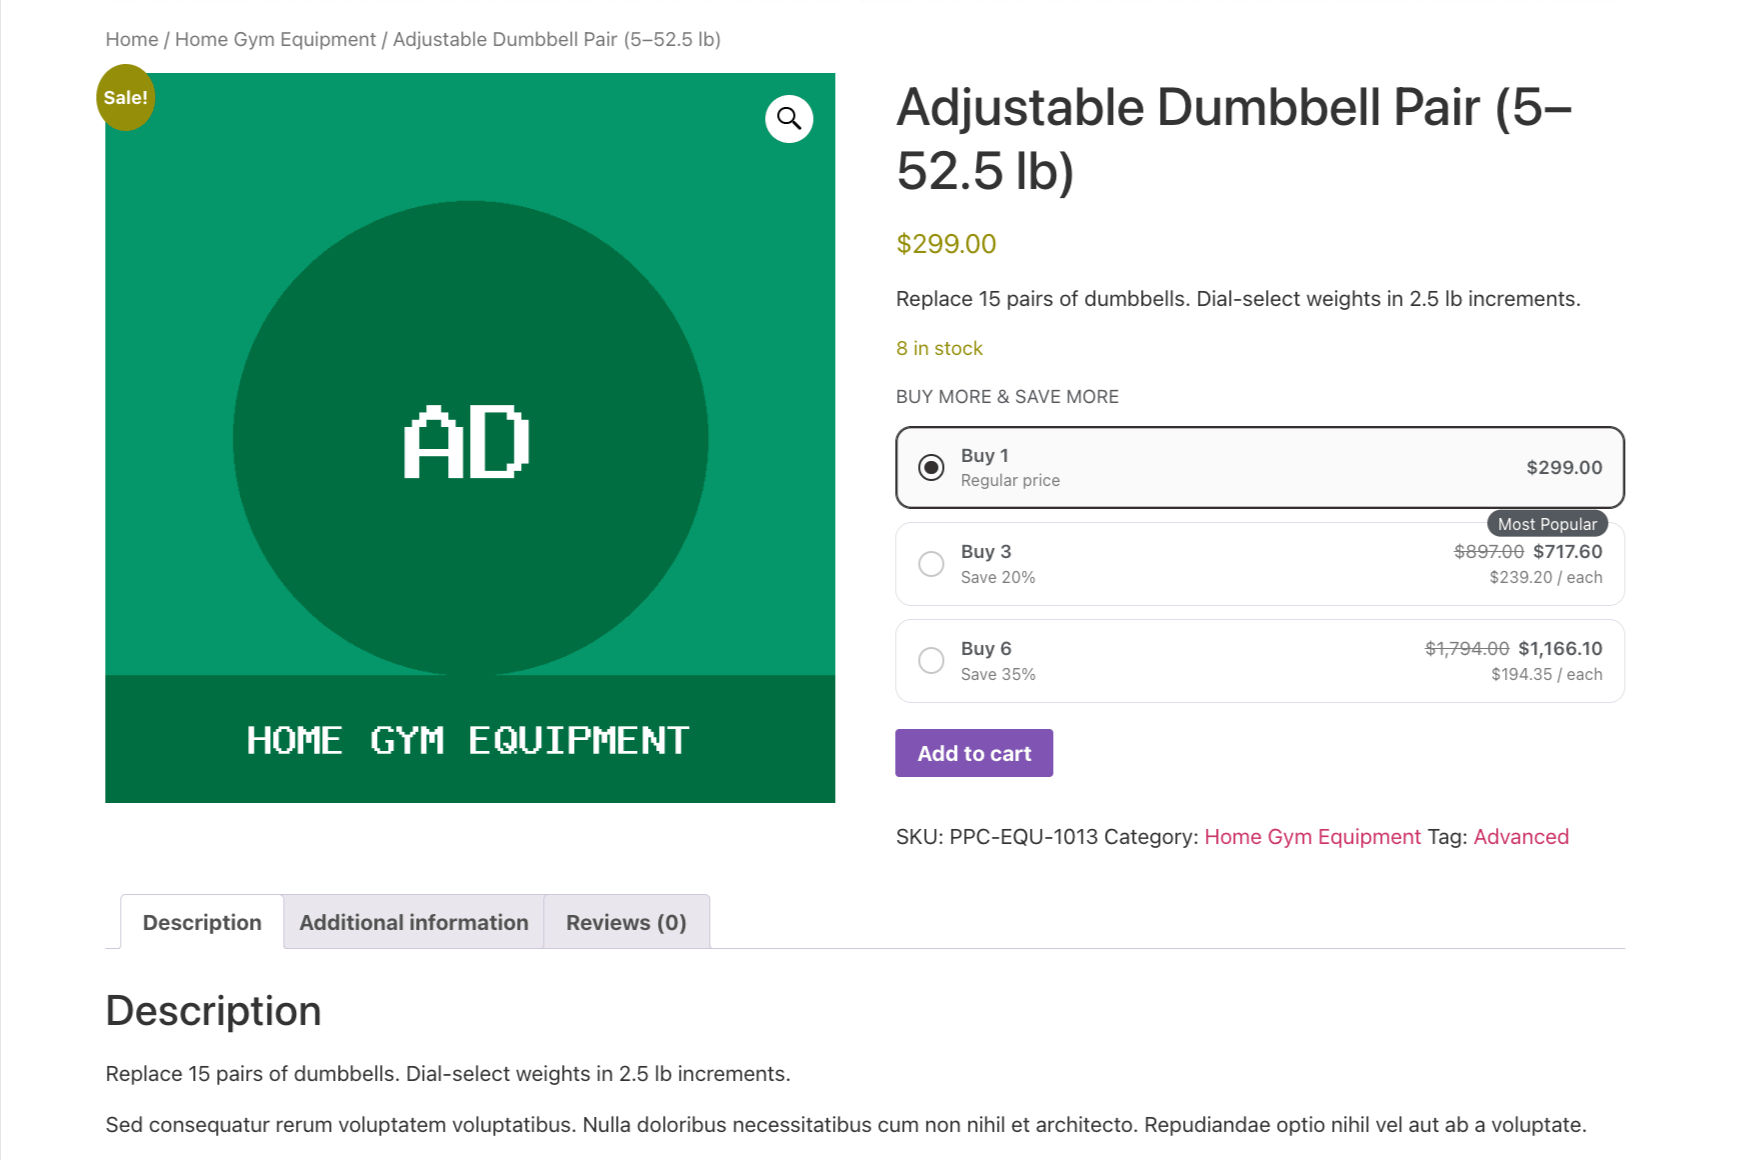
The Tiers section is where you set each quantity and its discount. Every tier shows up as its own offer card (Offer 1, Offer 2, and so on), and each one is a choice shoppers can pick on the product page, like Buy 1, Buy 3, or Buy 6.
For each offer, fill in these fields:
- Title: the name shoppers see for this choice, such as Buy 3. This field is required.
- Subtitle: a short line under the title, such as Regular price or Save 20%.
- Price Description: optional price text. Type
{{per_item_price}}to show the discounted price of a single item, for example{{per_item_price}} / each. - Qty: how many units this offer adds to the cart. Each offer needs a different quantity.
- Discount: pick the discount type from the dropdown, such as % for a percentage, then enter the amount. A single-unit offer often keeps the discount at 0 so shoppers have a regular price to compare against.
Below the fields, two options help steer shoppers:
- Selected by default: makes this offer the one already chosen when the page loads.
- Highlight this offer: adds a badge to the offer. Once you tick it, a text field appears beside it where you enter the badge text, such as Most Popular or Best Value.
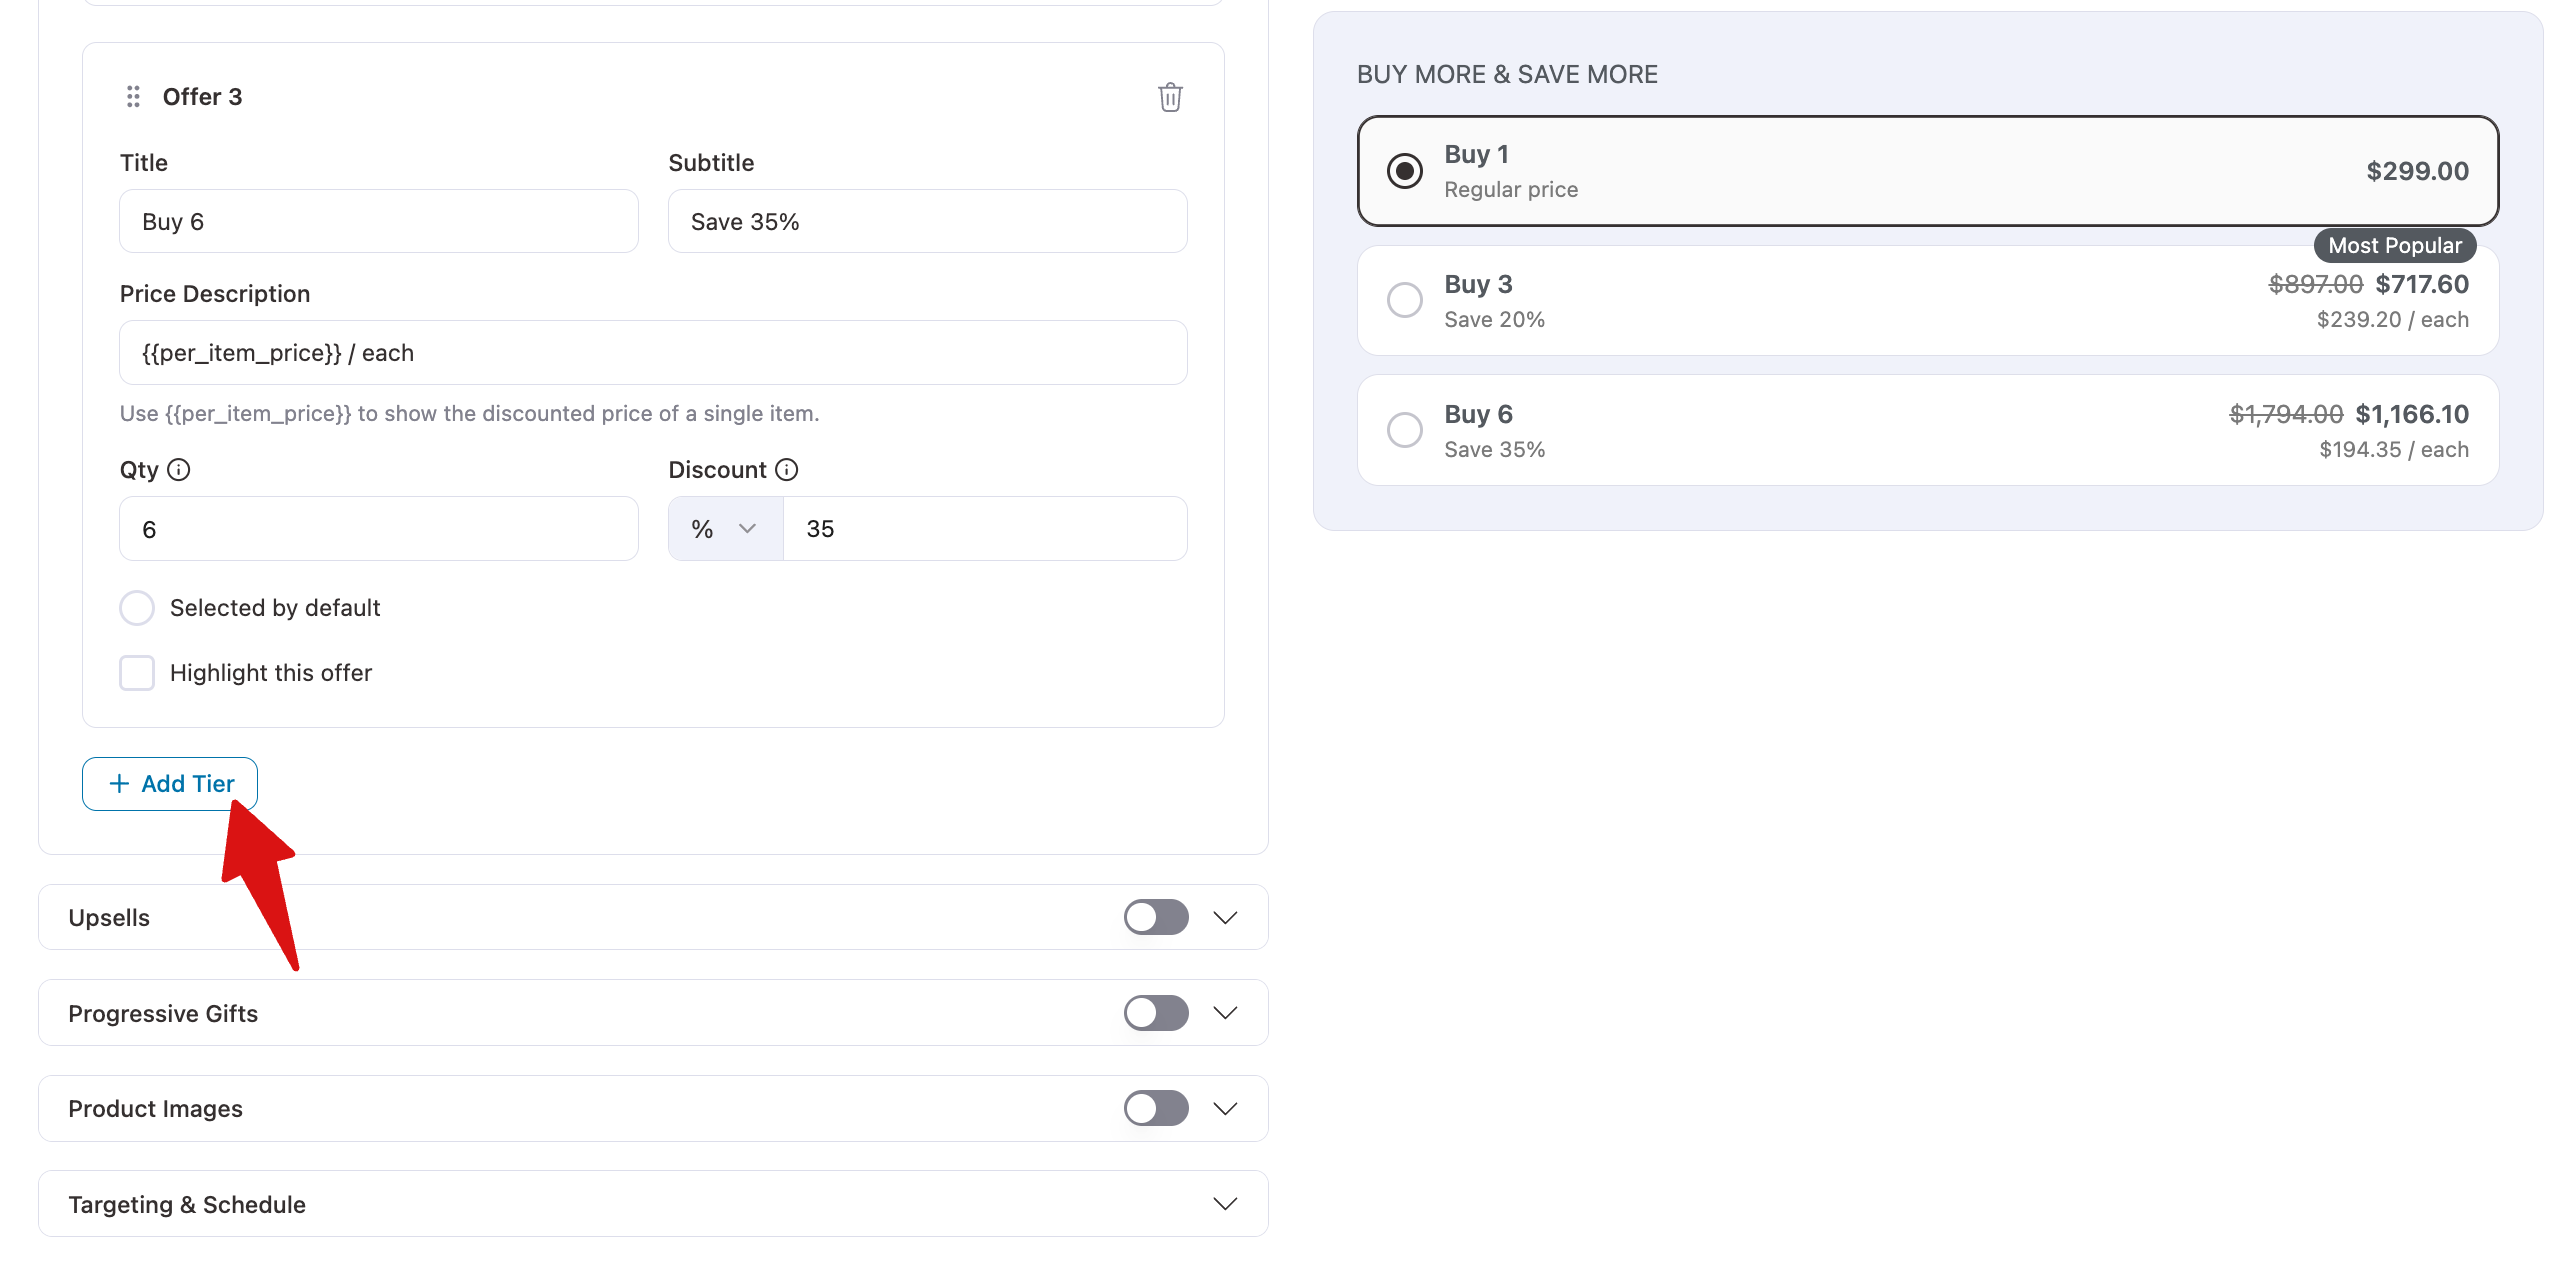
To add another quantity, click Add Tier at the bottom of the section.
Step 5: Checking the Preview
As you work, the preview on the right updates to show your tiers exactly as shoppers will see them, including prices, badges, and any gifts. When the bundle is on more than one product, use the Preview product dropdown to check it on each one.
When the tiers look right, set the status to Active and click Confirm. Your changes are saved, and the bundle goes live.
Adding Extras
Quantity Breaks bundles can use every optional feature in the editor:
- Upsells to offer discounted add-on products next to the tiers.
- Progressive Gifts to unlock free products or free shipping at higher tiers.
- Product Images to show a different picture for each tier.
- Targeting and Schedule to limit the bundle to certain customer roles or dates.
- That's it! You've set up a Quantity Breaks bundle that rewards shoppers for buying more.
Next, you might want to add free gifts that unlock at higher tiers.