Would you like to offer discounted add-on products right next to your bundle, so shoppers can grab one more thing before checkout?
In this guide, we'll walk you through adding upsells to a bundle, from turning them on to choosing the add-on products and styling them.

Before you get started, make sure you've created a bundle. If you haven't yet, see our guide on creating your first bundle.
Step 1: Turning On Upsells
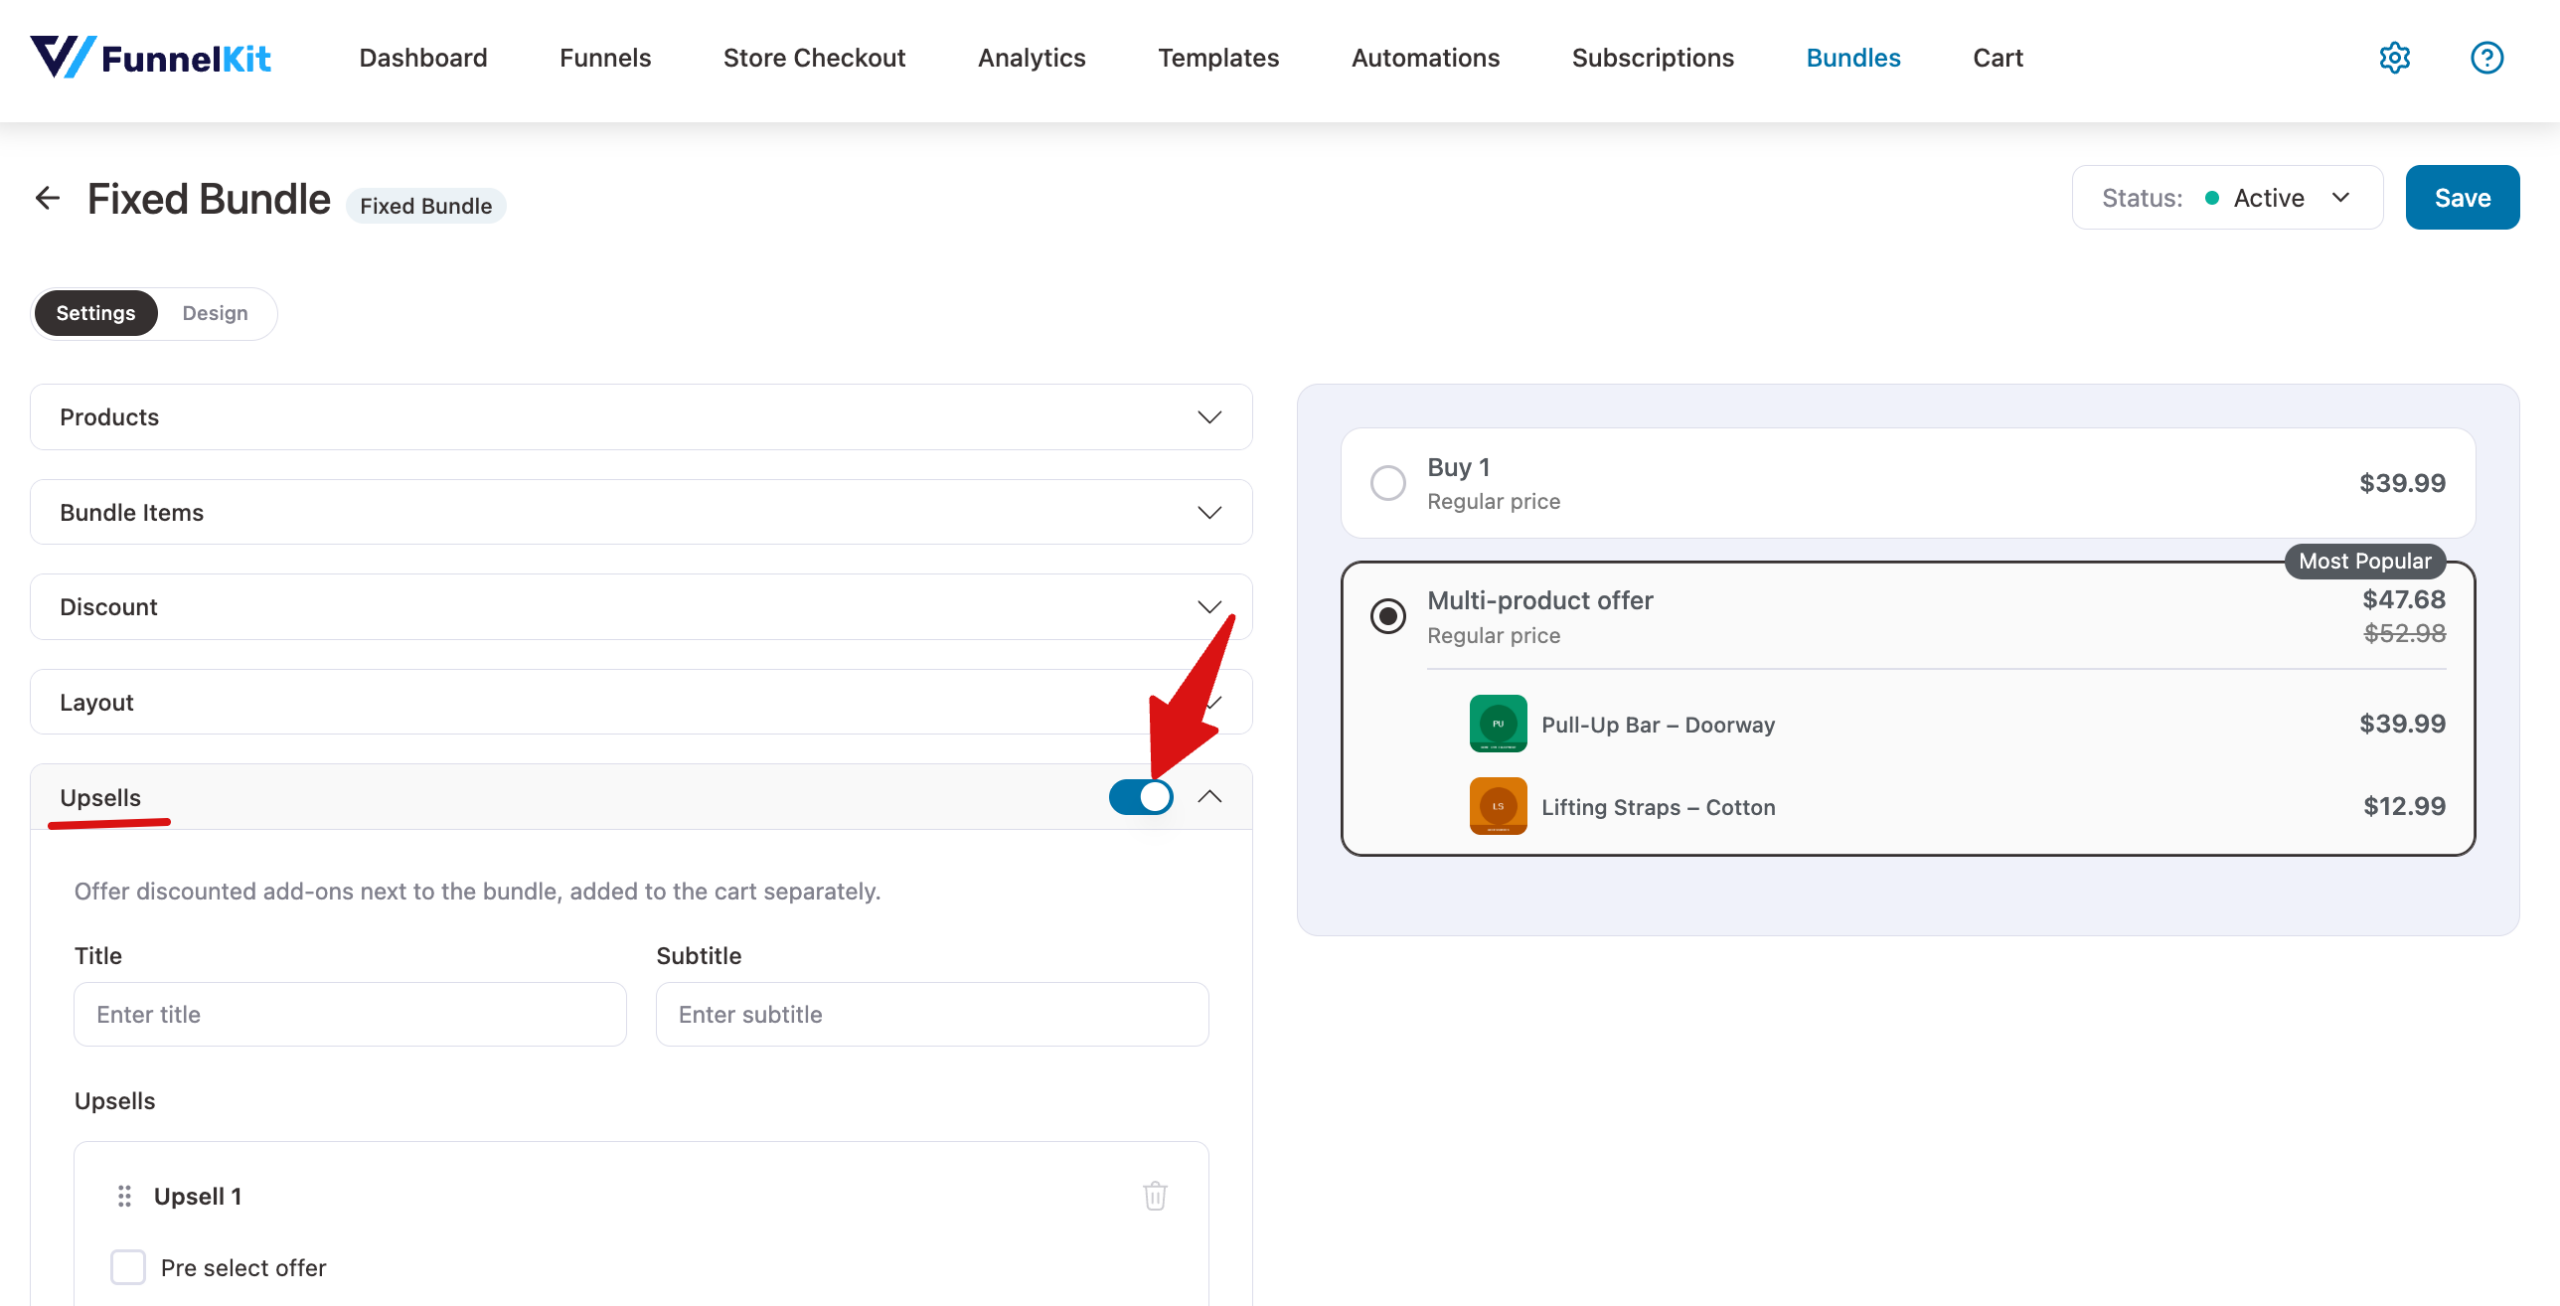
Open your bundle in the editor and click the Upsells section header to expand it. Then turn on the switch next to the header.
Step 2: Adding Upsell Products
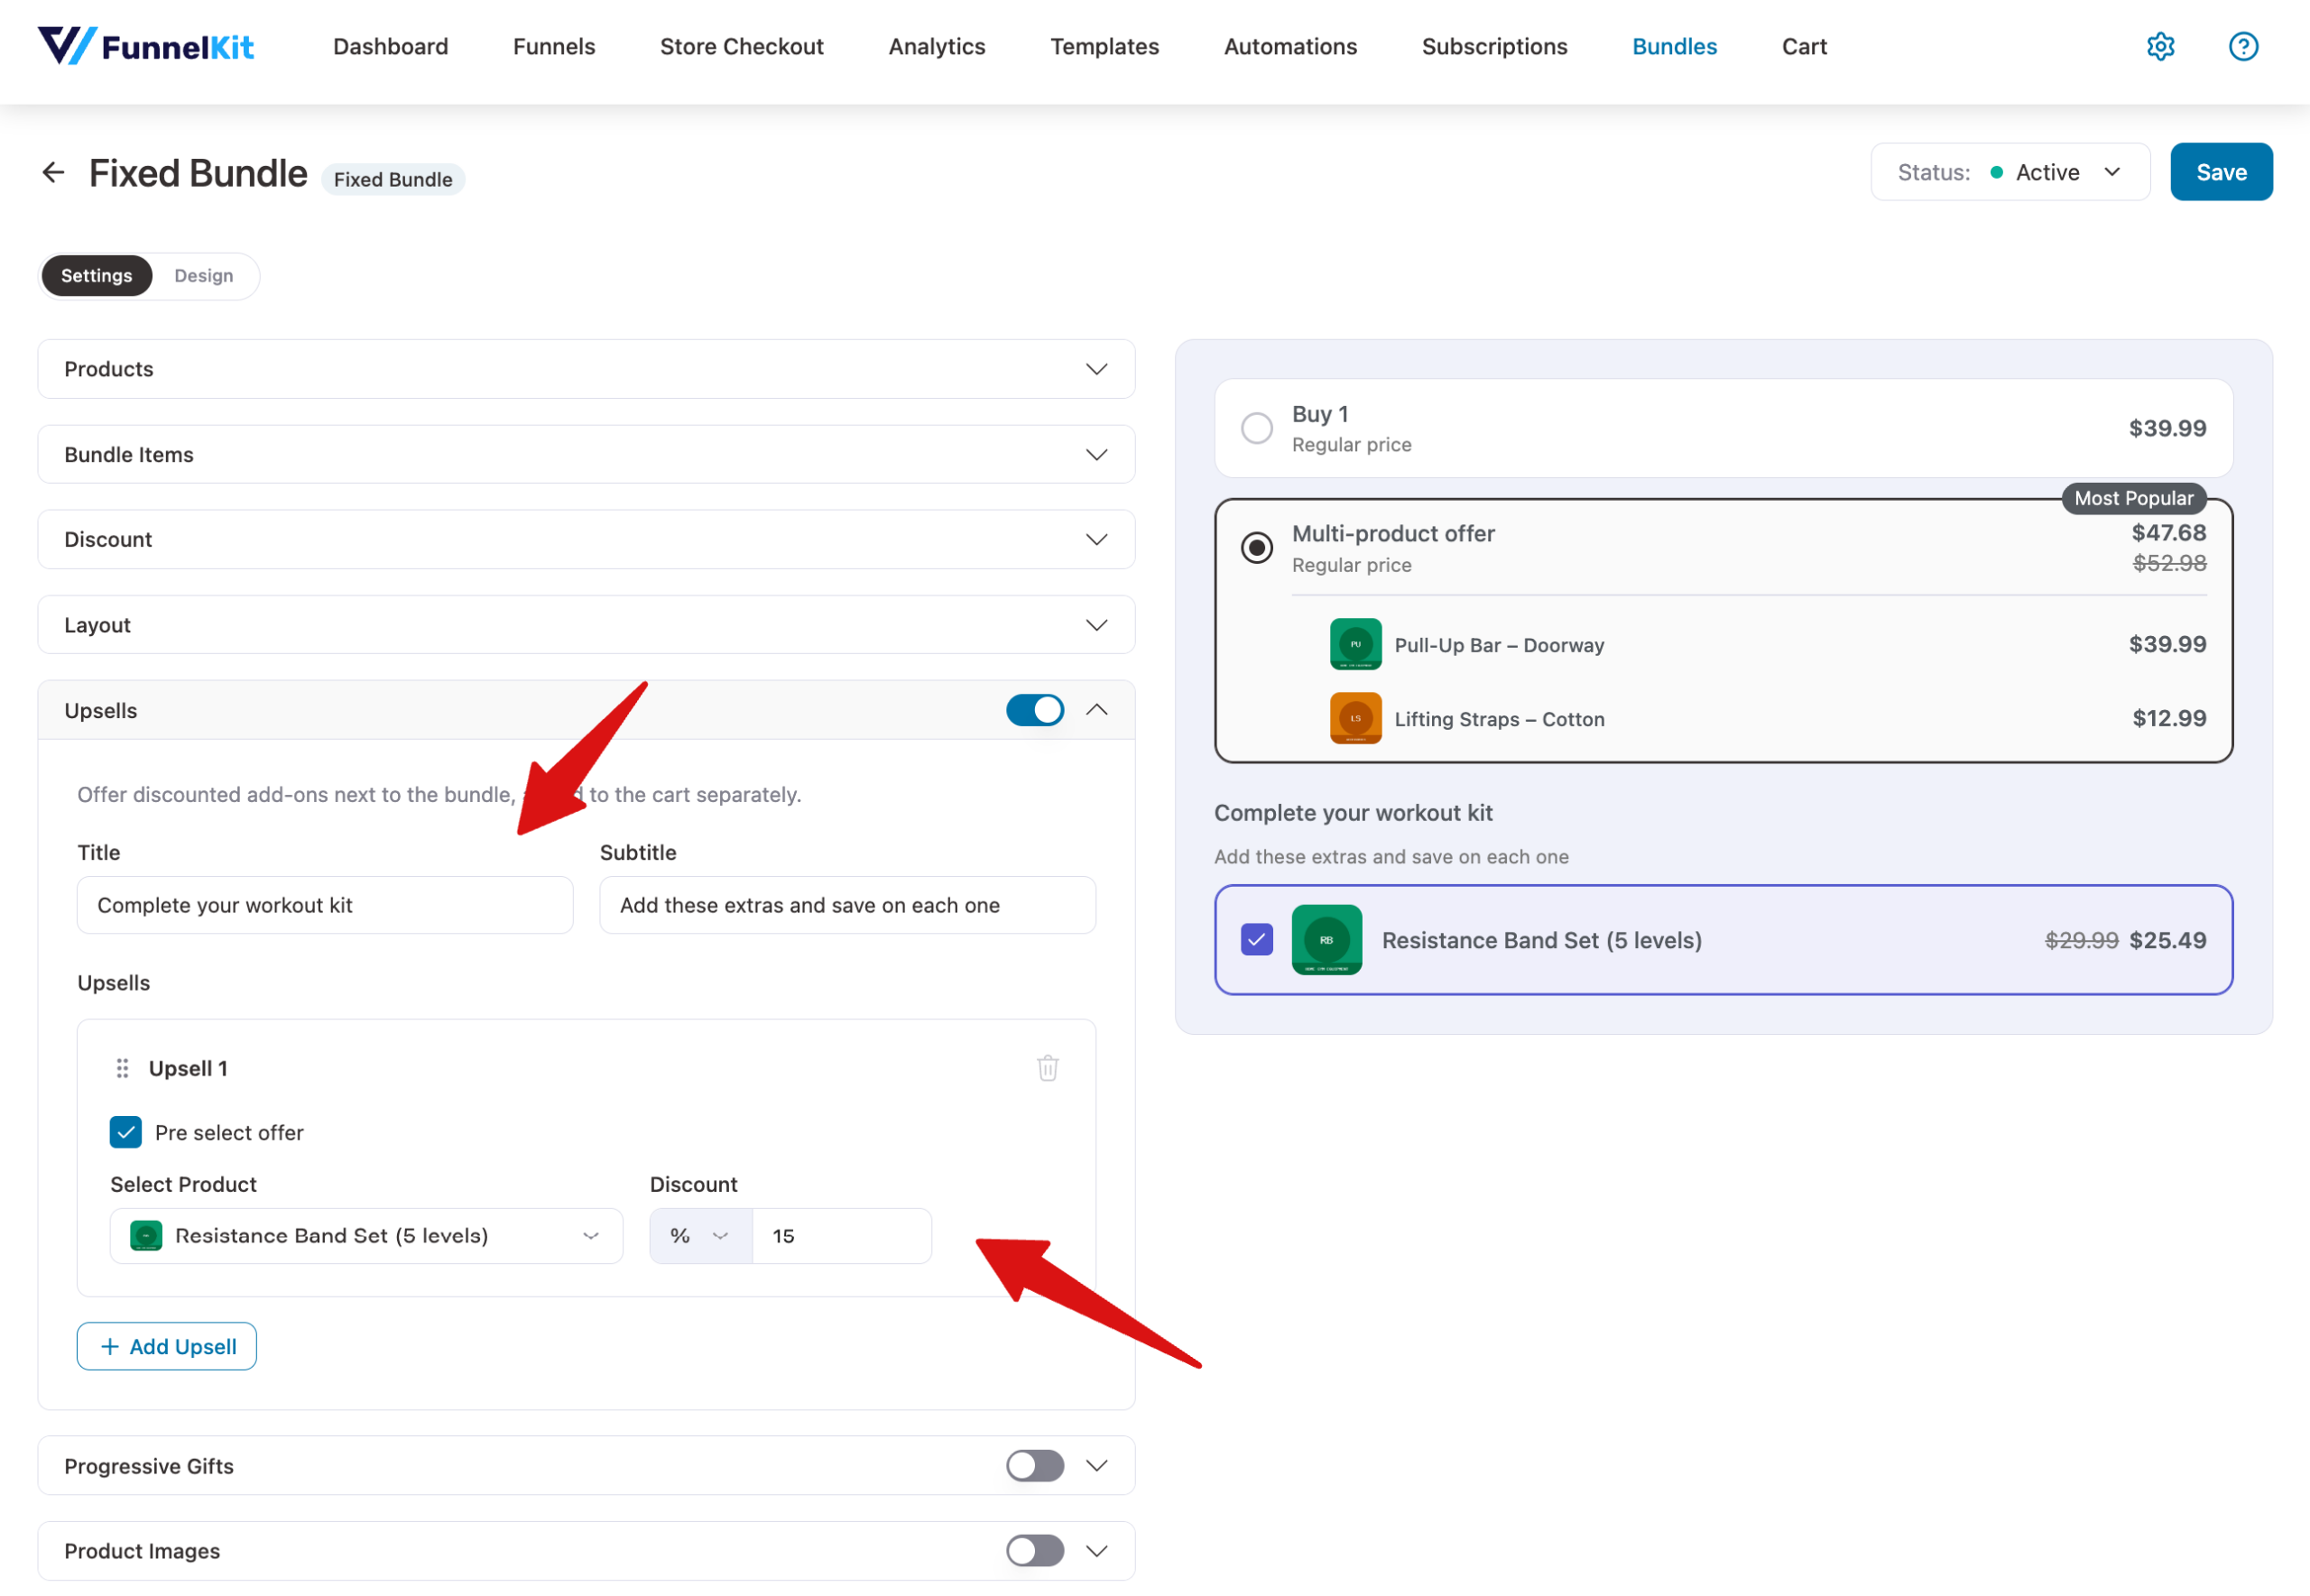
Once upsells are on, the section shows its settings:
- Title and Subtitle: optional text shown above the add-ons, such as Complete your order.
- Select Product: the product to offer as an add-on.
- Discount: the discount on this add-on, as a percentage or a fixed amount.
- Pre-select offer: ticks this add-on by default, so it's already selected when the page loads.
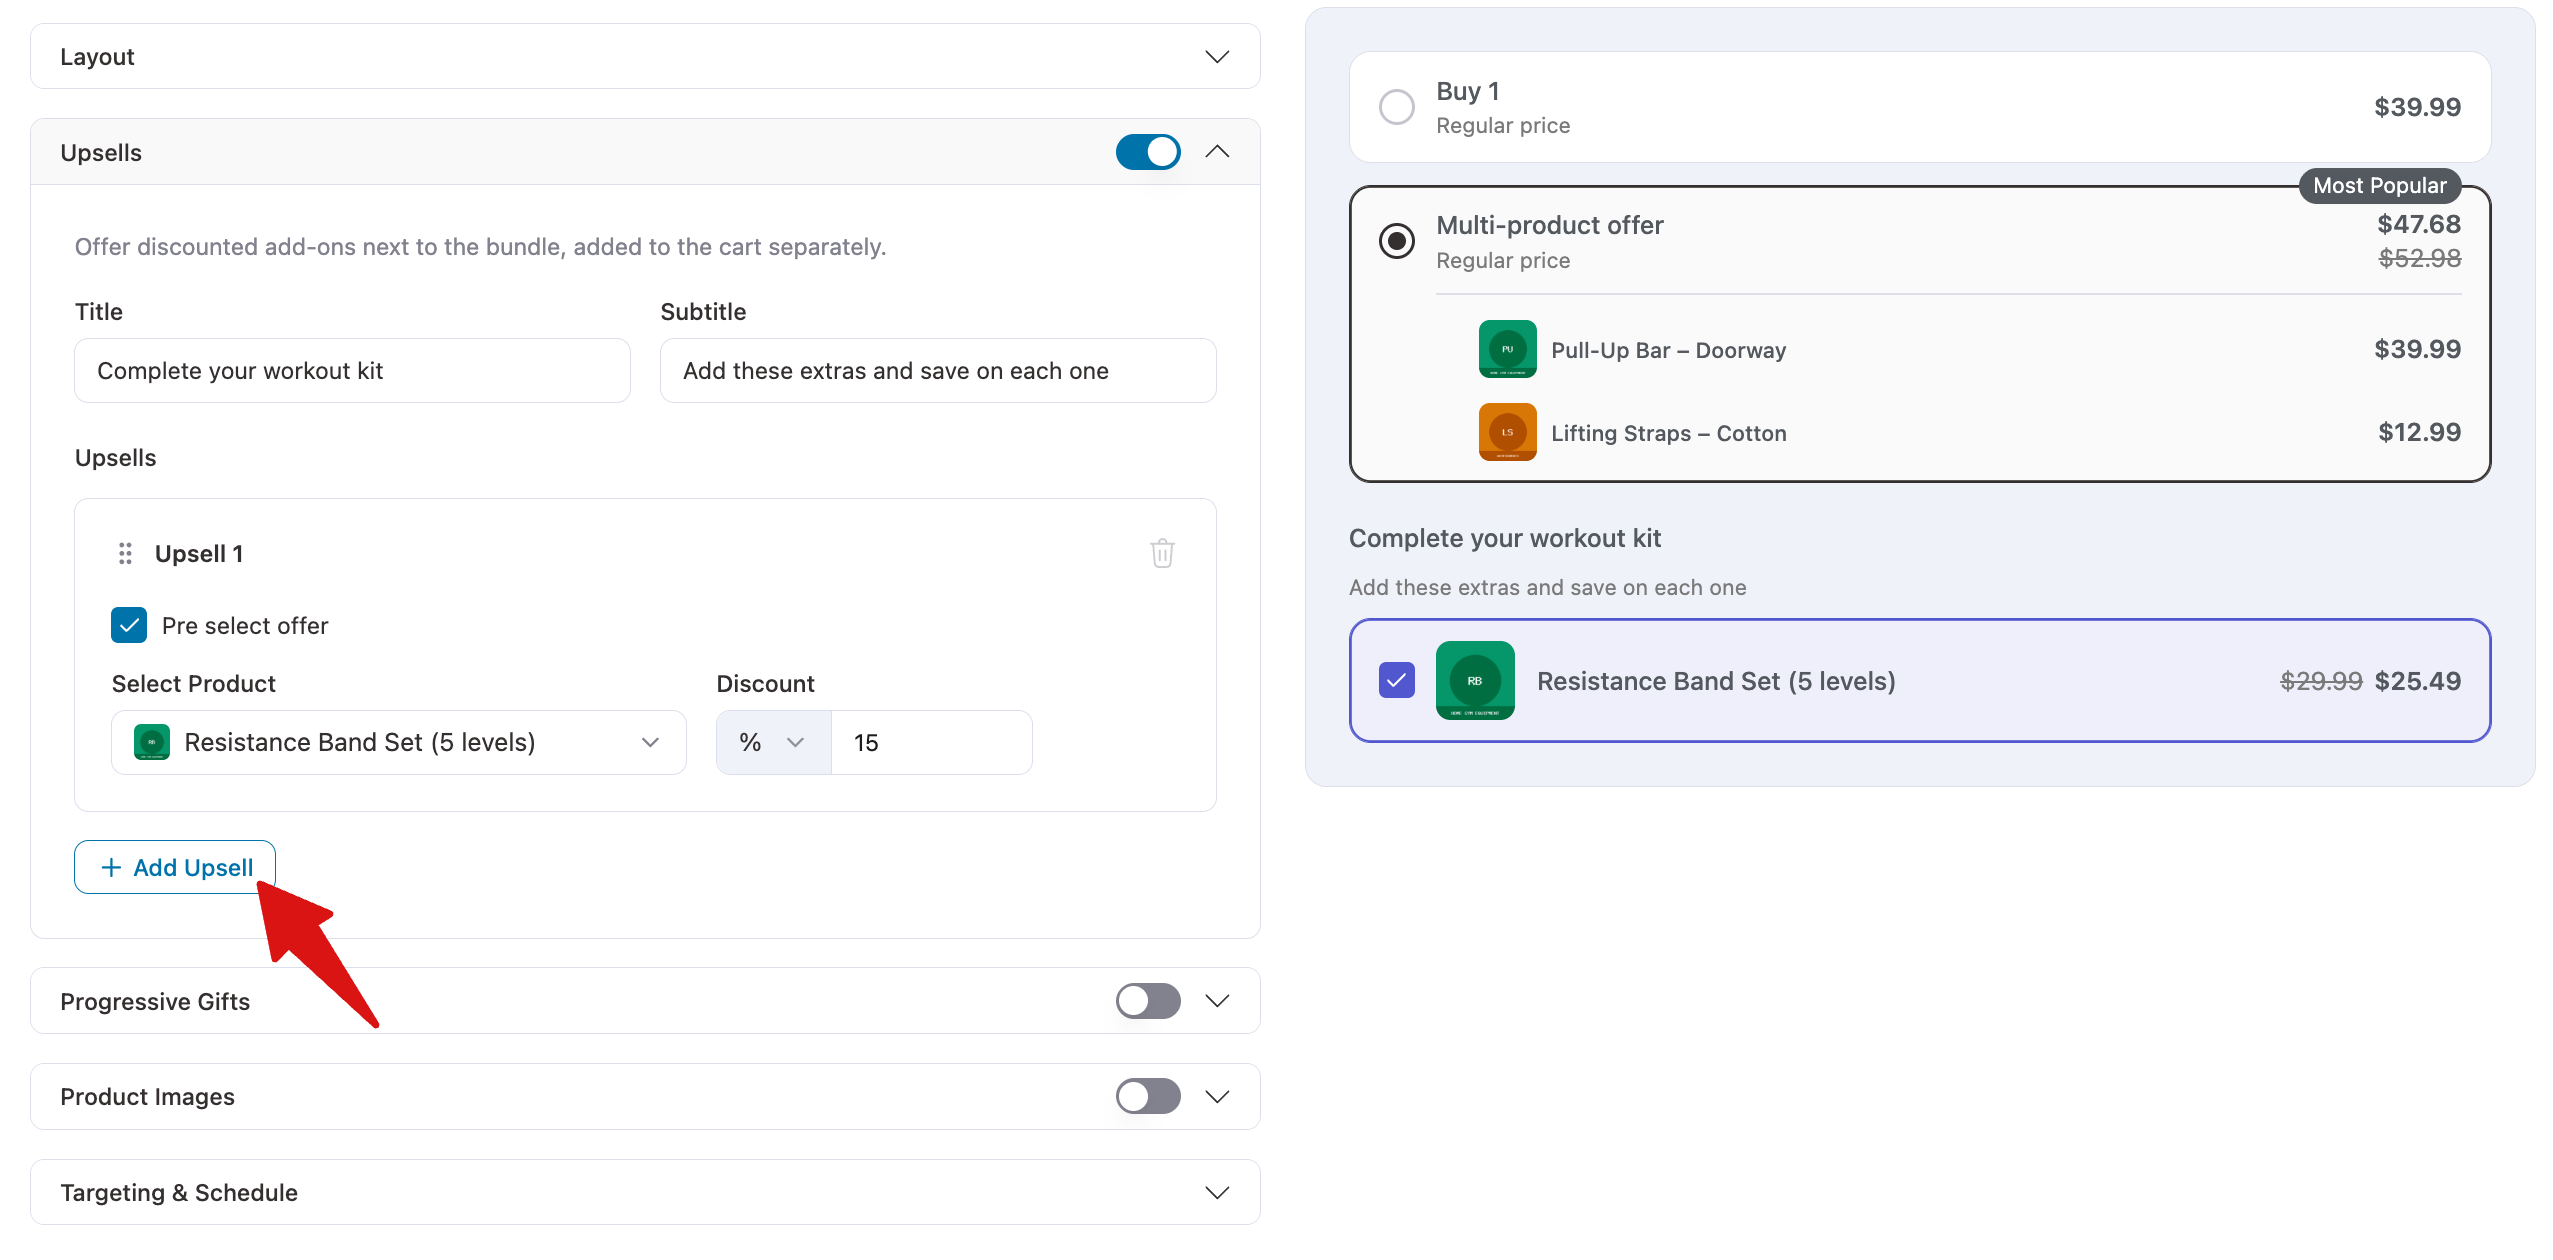
To offer more than one add-on, click + Add Upsell. Drag upsells by the handle to change their order, or click the trash icon to remove one.
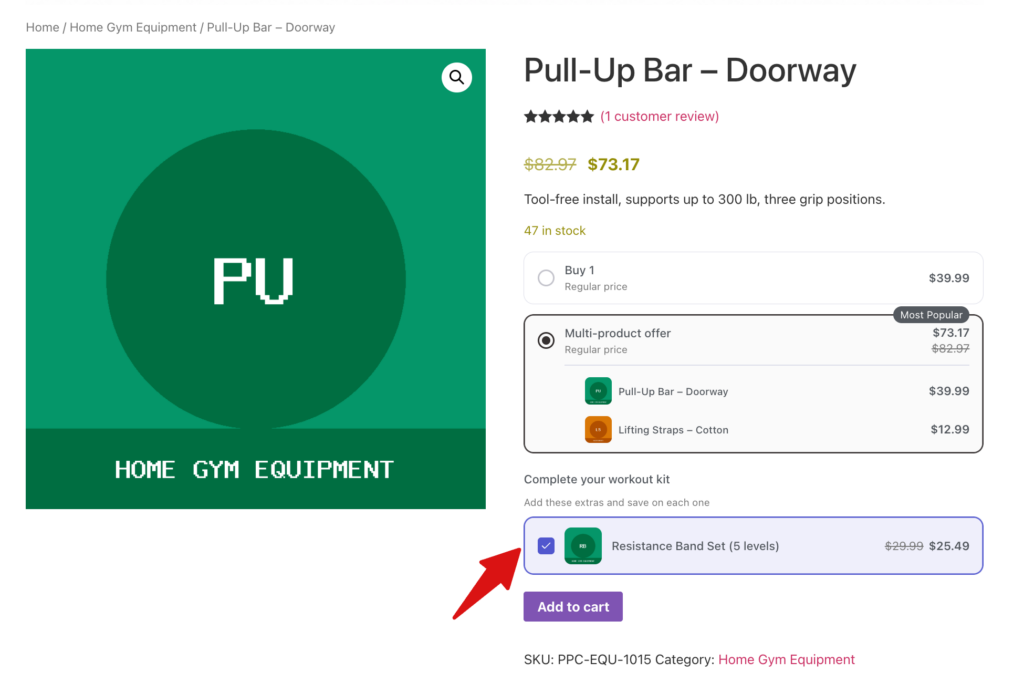
Shoppers see the add-ons below the bundle and can tick the ones they want. Each add-on joins the cart as its own line next to the bundle.
When you're done, click Save.
Here is what the upsell looks like on the product page.
FAQ
Which bundle types support upsells?
Quantity Breaks, Fixed Bundle, and Mix and Match bundles all support upsells.
How do I see which upsells sell best?
The Analytics screen has an Upsell performance table that lists each upsell product, the bundle it belongs to, and its orders and revenue.