In this document, let's learn how to set up an order bump on your checkout page.
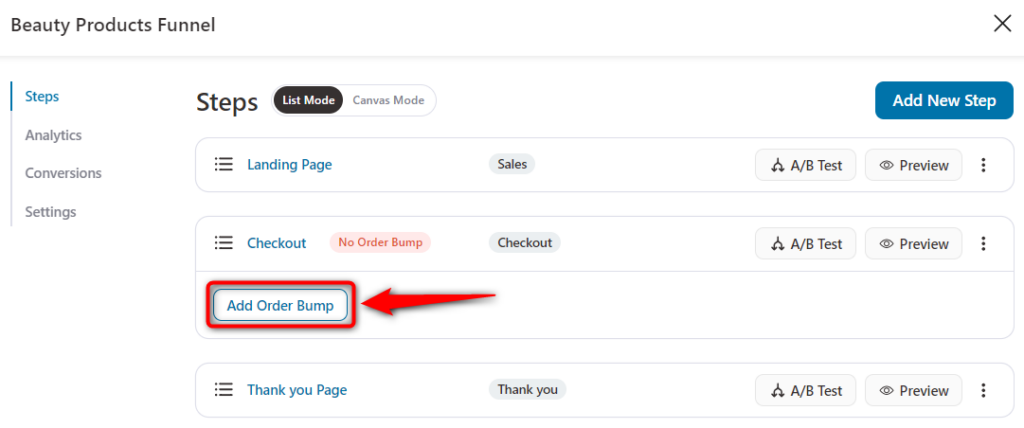
Step 1: Click on 'Add Order Bump' next to the Checkout Page
After adding the checkout page to your funnel, you can add the order bump. To do that, click on Add Order Bump.
When you do so, a pop-up window will open up. Name your order bump and click on the 'Add' button.
Here's how you can name your order bump:
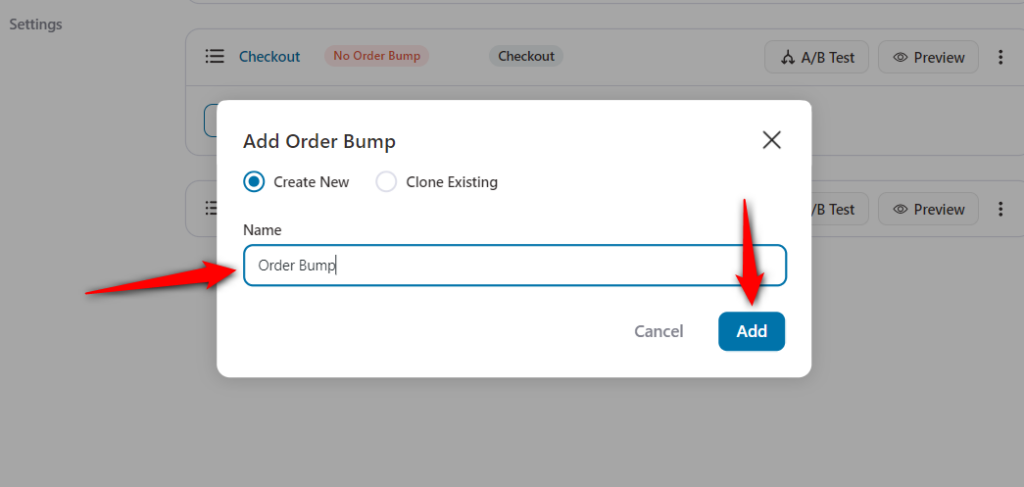
Clicking on 'Add' will add this order bump to your funnel.
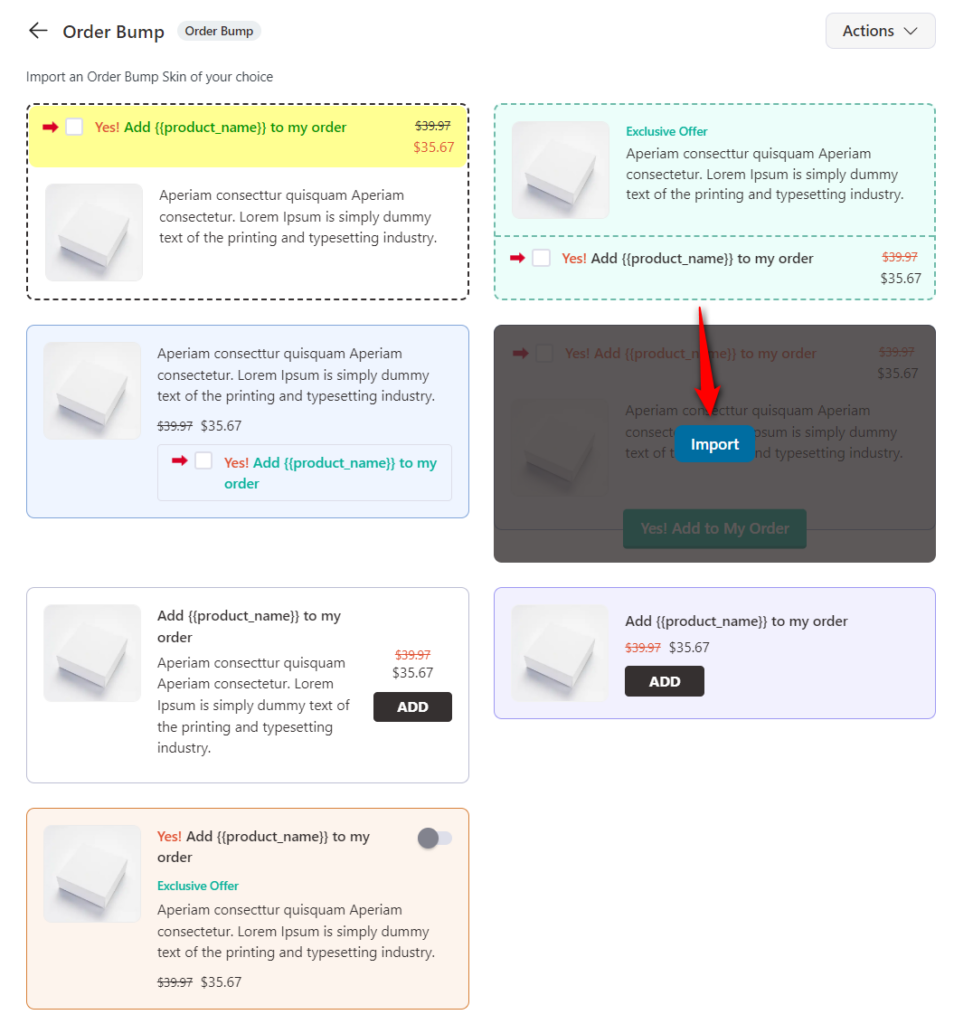
Step 2: Import your Order Bump Skin
Next, browse through the different order bump skins.
Select the one you like by clicking on Import.
Step 3: Add a Product as your Order Bump Offer
Once you've imported your favorite order bump skin, select the product that you want to offer.
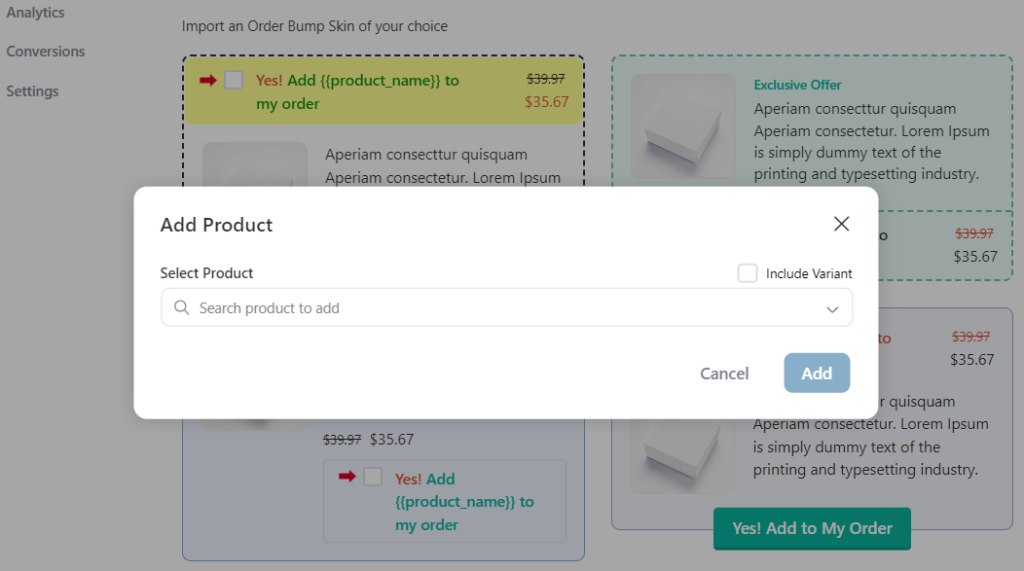
To add a product, type in the name of the product and click on Add. You can even add different variants of your variable products.
Here's how:
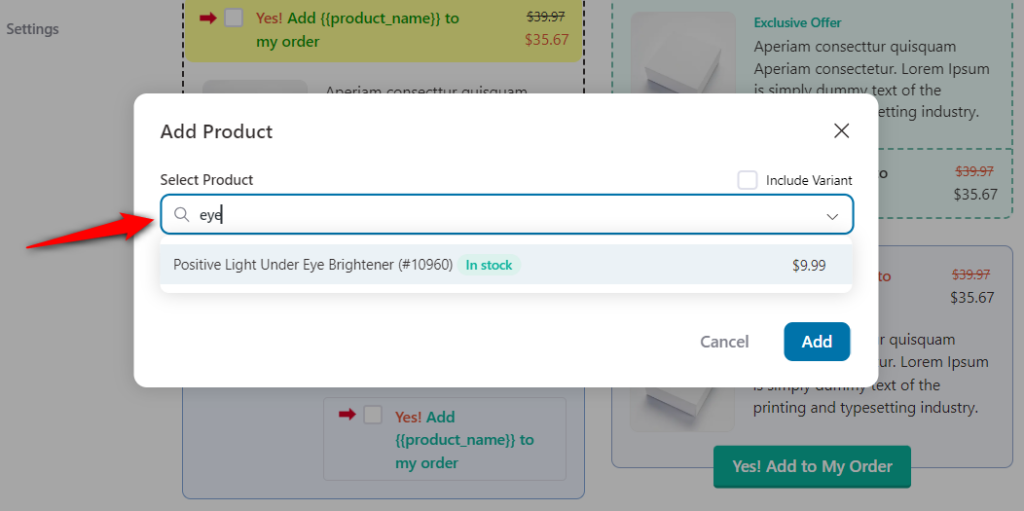
This will create your order bump with this product offer.
Step 4: Design your Order Bump
You'll be directed to the 'Design' tab.
This tab lets you design, choose the skin and style your order bump offer.
Content
Set the text for your order bump - the product title, the content of the offer. You can also choose to specify the product image from here.
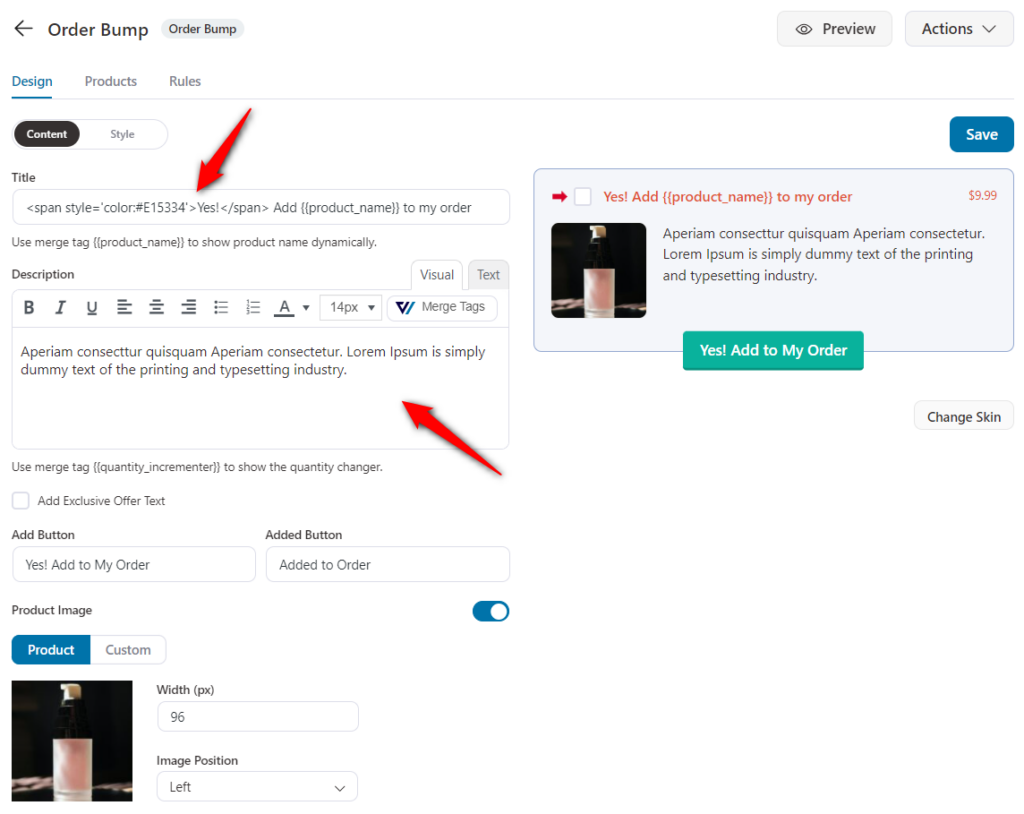
Use different merge tags to personalize your order bump for conversions.
For example, you can use {{quantity_incrementor}} merge tag to allow product increase or decrease.
Also, if you want to show the quantity increment in the right sidebar, add this to your theme's functions.php file.
add_filter('wfacp_display_quantity_increment','__return_true',999);Know more about our order bump description merge tags here.
Order Bump Skins
You can change the skin for your order bump anytime you want. For that, click on Change Skin to import the skin you like.
We have added some new skins to design your order bumps.
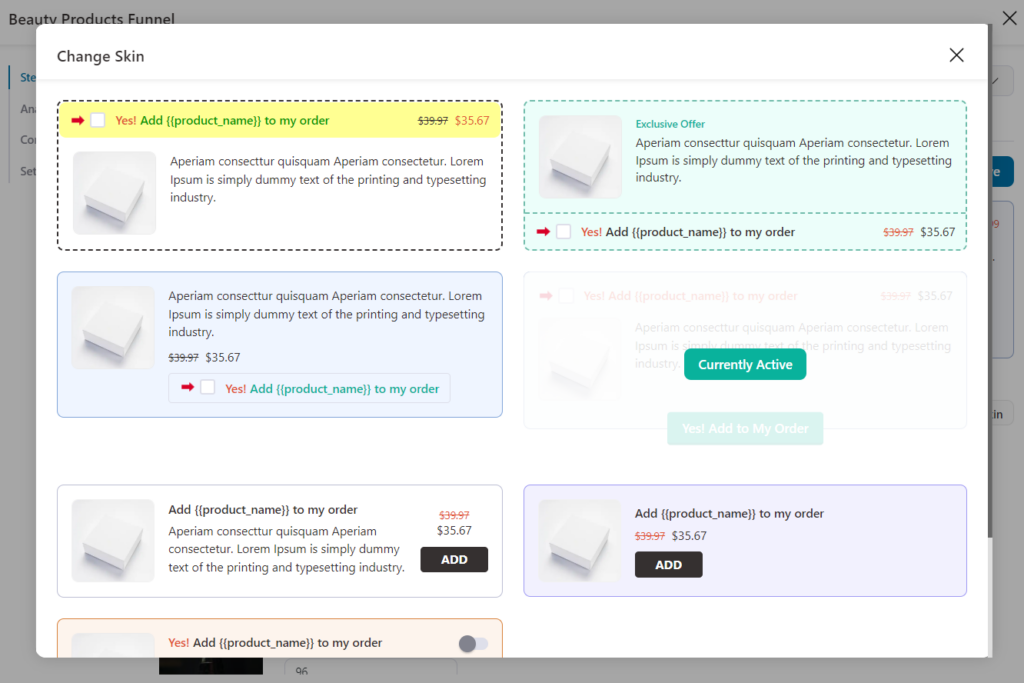
Select the skin you want to change and click on Import.
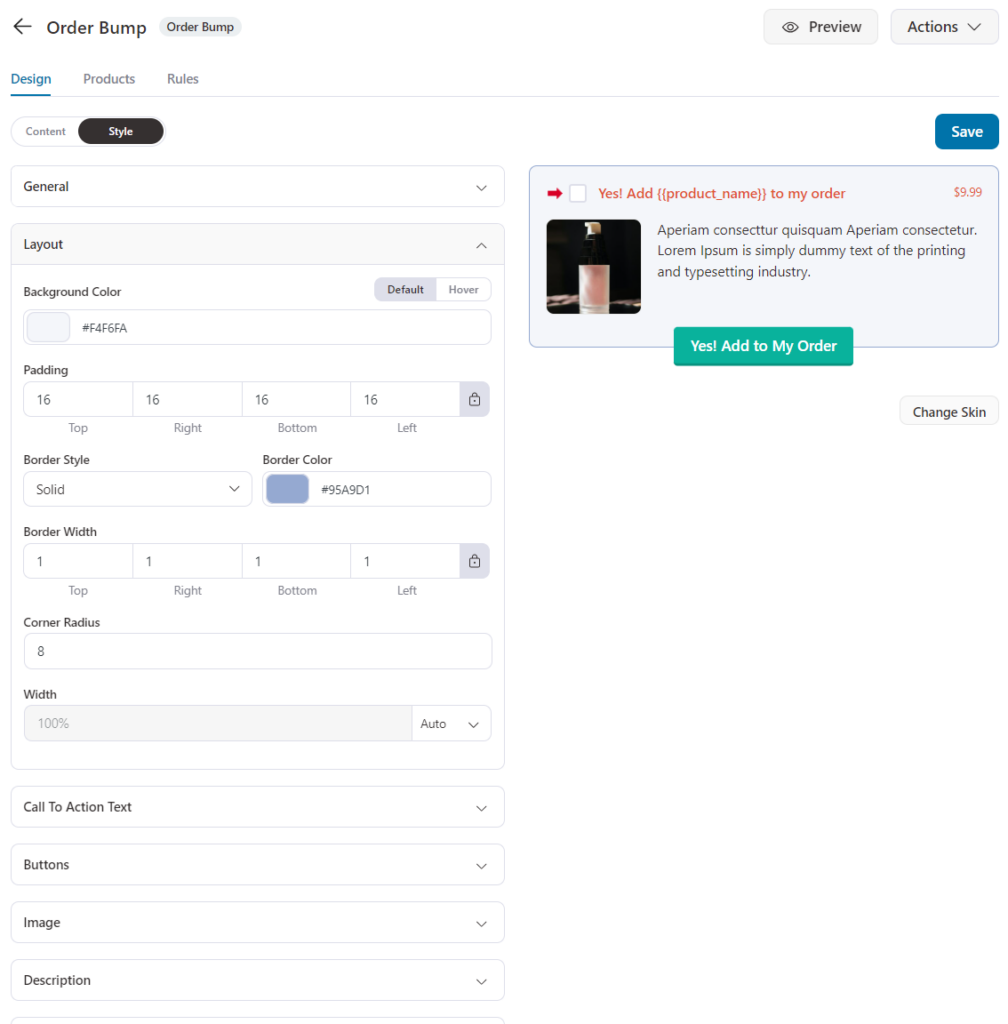
Style
Configure your order bump for an impressive control.
You get three general settings to configure:
- Position - Set the position of your order bumps on the WooCommerce checkout page.
- Pre-select order bump by default - This will pre-select your order bump offer by default and put the product in the mini cart on the checkout page.
- Hide order bump after selection - This will hide your order bump after the selection on the checkout page.
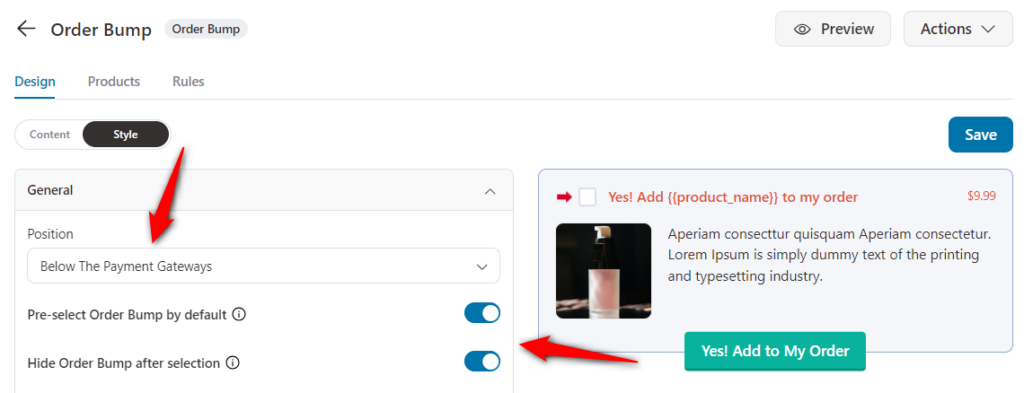
Next, you can tweak the padding, color, border, and more of the bump to make it look the way you want.
Once done, hit the 'Save' button.
Then move on to the next tab - Products tab.
Step 5: Configure your order bump product
You can also set the discount and the quantity of the selected product at the order bump level from here.
You can select to replace order bumps with a cart item (preferably used for subscription upgrades) and set the position of your bump offer.
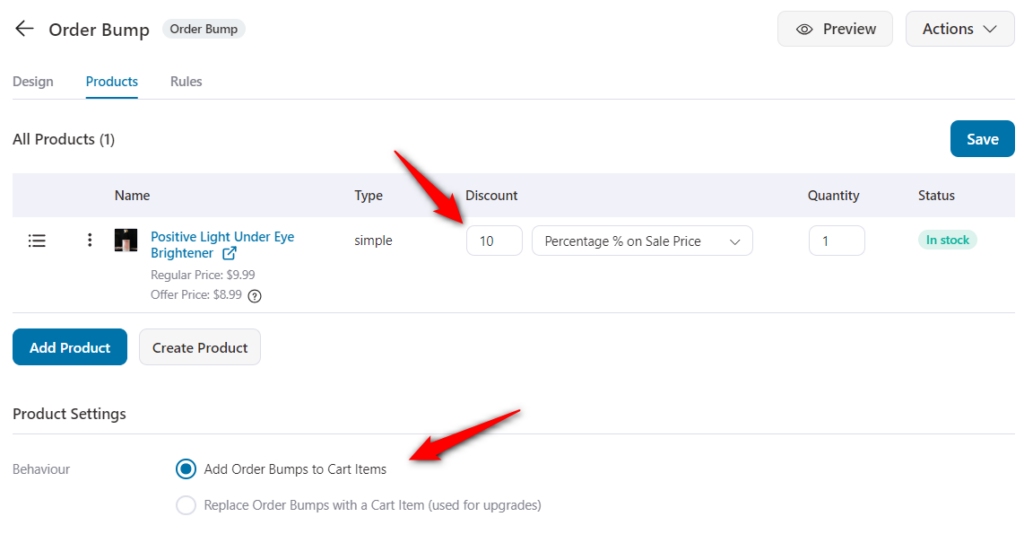
Once done, click on the Save.
Step 6: Add a Rule
Specify when you want to show your order bump.
So once the rule matches the specified conditions, the order bump will be displayed on the checkout page.
To set it up, click on the 'Add Rules' button.
Then, select a rule from the drop-down. You can even add multiple rules in conjunction using the 'And' and 'or' functionality:
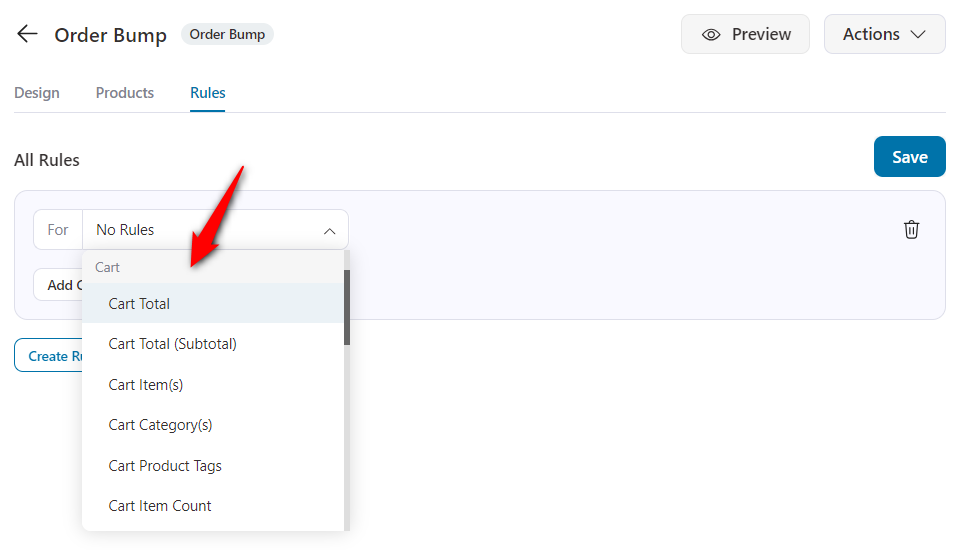
Always means that the order bump will be visible on the checkout page, no matter what they're buying.
Once done, hit the 'Save Changes' button.
Step 6: Do the final settings
You'll find the settings to override the tracking ID for this funnel by placing your Facebook Pixel ID, Google Analytics ID, Pinterest ID, Google Ads Conversion ID, TikTok Pixel ID, etc.
This will help you track user activity from social media ads.

Once you're done with that, hit the 'Save' button to lock all the changes made.
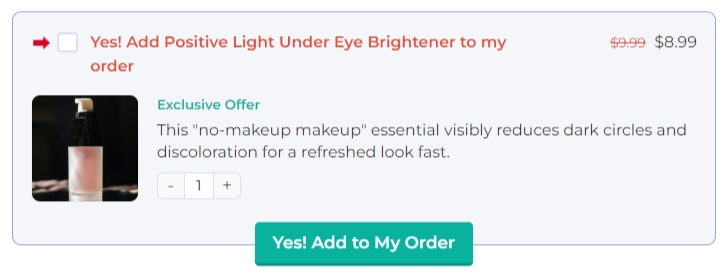
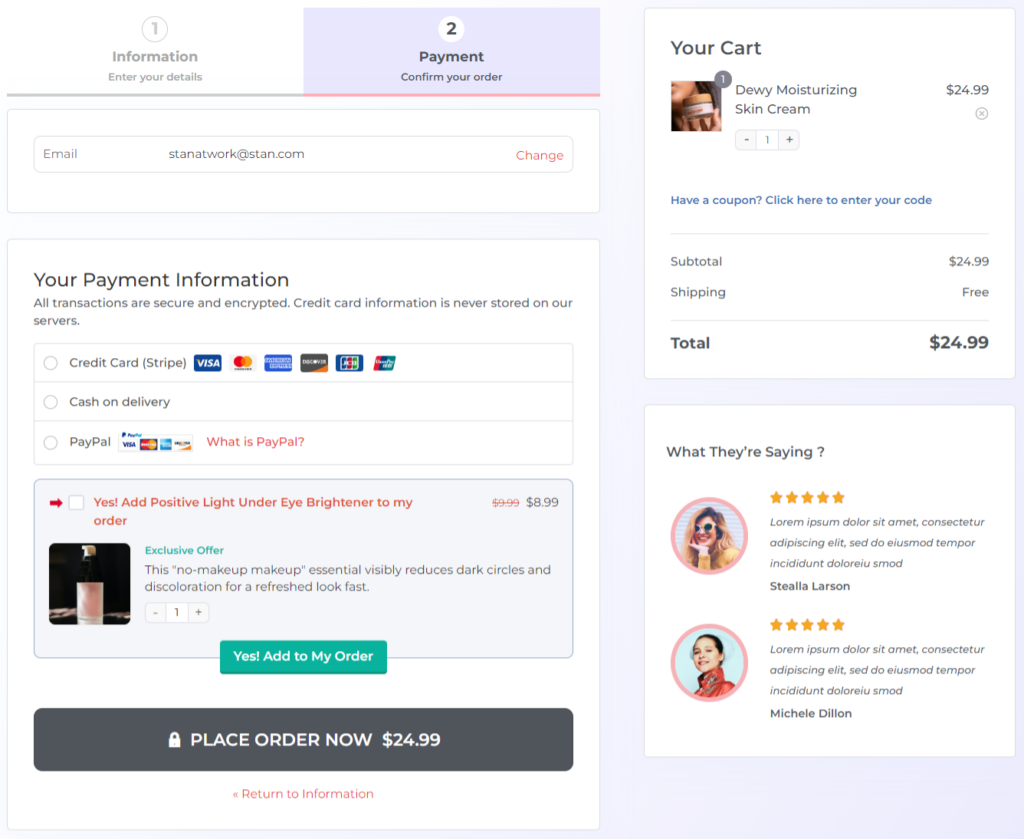
Here's how the order bump will show on the checkout page:
That's done! You've now set up your first order bump for your WooCommerce store.


