
Do you want to provide your customers a seamless shopping experience on your WooCommerce store?
Consider integrating multiple payment gateways.
Shoppers may abandon their shopping carts in the middle if their preferred payment method isn’t available at checkout.
Since WooCommerce's default payment options don’t always cater to every customer’s needs, you could lose potential sales.
Multiple payment gateways can enhance customer satisfaction, increase sales, and streamline checkout.
With the help of the right plugin, you can integrate multiple payment gateways into WooCommerce.
In this blog, we will talk about how you can add multiple payment gateways in WooCommerce.
Table of Contents
- 1 What is a Payment Gateway in WooCommerce?
- 2 How Payment Gateways Work in WooCommerce?
- 2.1 Step 1: Customer selects a payment method at checkout
- 2.2 Step 2: Secure encryption and transmission of payment details
- 2.3 Step 3: Bank verification and transaction authorization
- 2.4 Step 4: Payment gateway notifies the store of authorization status
- 2.5 Step 5: Funds settlement and merchant fees
- 2.6 Step 6: Order placement confirmation
- 3 Why Use Multiple Payment Gateways in WooCommerce?
- 4 5 Top Payment Gateways for WooCommerce
- 5 How to Add a Stripe Payment Gateway in WooCommerce?
- 6 How to Add Paypal Payment Gateway to WooCommerce Store?
- 7 Frequently Asked Questions About Multiple Payment Gateway For WooCommercee
- 8 Ready to Offer Multiple Payment Gateways in WooCommerce?
What is a Payment Gateway in WooCommerce?
A payment gateway in WooCommerce is an online service that processes transactions on your store without requiring customers to leave the site.
It acts as a bridge between your WooCommerce store and different financial institutions, enabling secure transactions for online purchases.
With multiple payment gateways in WooCommerce, you can offer different payment methods, like:
- Credit/Debit Cards (Visa, MasterCard, etc.)
- PayPal for quick transactions
- Buy Now, Pay Later (BNPL) options like Afterpay or Klarna
- Digital Wallets such as Google Pay and Apple Pay
- Local payments or bank redirects such as SEPA, P24, Bancontact, and iDEAL
- Bank Transfers for direct payments, etc.
Move to the next section to find out how a payment gateway works in WooCommerce.
How Payment Gateways Work in WooCommerce?
So far, you know how a payment gateway helps complete a transaction successfully on a WooCommerce store.
Here is a breakdown of how the process works:
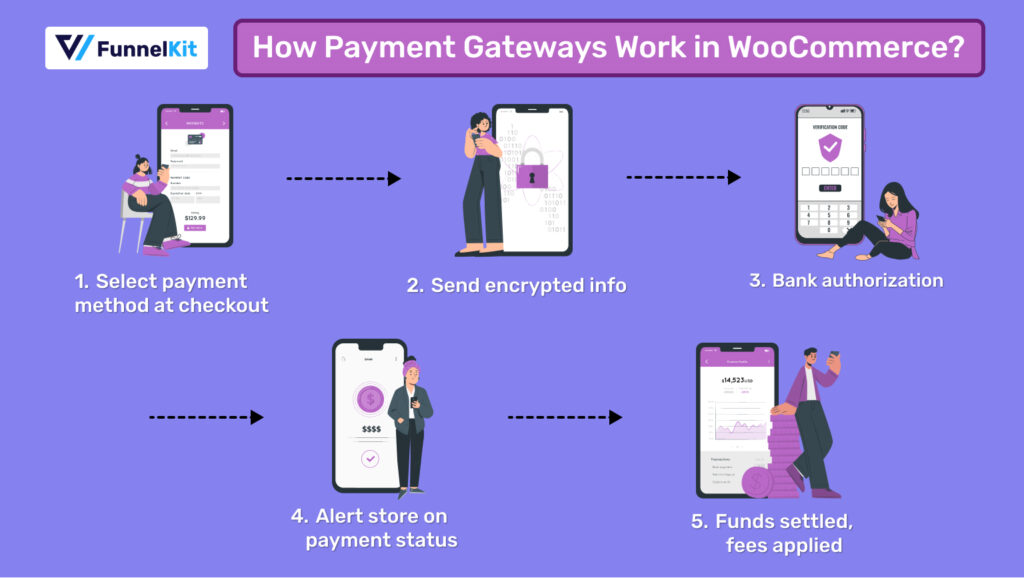
Step 1: Customer selects a payment method at checkout
Customers add items to their carts and navigate to the checkout page, where they choose a payment option such as Credit/Debit Cards, PayPal, or Buy Now, Pay Later (BNPL).
Once the payment method is selected, customers provide the necessary details:
- For Credit/Debit Cards, they enter the card number, expiration date, CVV, and cardholder name.
- For PayPal, they are redirected to PayPal’s site to log in and confirm the payment.
- For Google Pay and Apple Pay, customers may need to authenticate the transaction through their saved cards from their respective Google or Apple accounts.
- For BNPL, users must provide their payment details and select the number of installments needed to complete the payment.
Step 2: Secure encryption and transmission of payment details
After customers submit their payment details, the information is encrypted and securely transmitted to the payment gateway.
Then, the payment gateway sends the transaction details to the customer’s bank for authorization.
Step 3: Bank verification and transaction authorization
Once the bank receives the payment details, the bank verifies the transaction by checking for the following:
- Sufficient Funds: Make sure the customer has enough balance or credit.
- Account Validity: Confirm that the account is active and has no fraud alerts.
After verification, the bank returns the authorization result to the payment gateway.
Step 4: Payment gateway notifies the store of authorization status
The payment gateway communicates the authorization status back to the WooCommerce store.
Depending on the status, the store shows users the message:
- Approved: The customer also receives a notification about the payment to the store.
- Declined: The customer is notified of the decline and can select a different payment method.
Step 5: Funds settlement and merchant fees
For successful transactions, the funds are processed and settled into the merchant's account, typically within a few business days.
The payment gateway charges merchant processing fees, which vary depending on the payment gateway used in WooCommerce.
Step 6: Order placement confirmation
After the payment is successfully processed, the customer’s order is immediately placed in the WooCommerce store, and the customer is redirected to the thank you or order confirmation page.
Why Use Multiple Payment Gateways in WooCommerce?
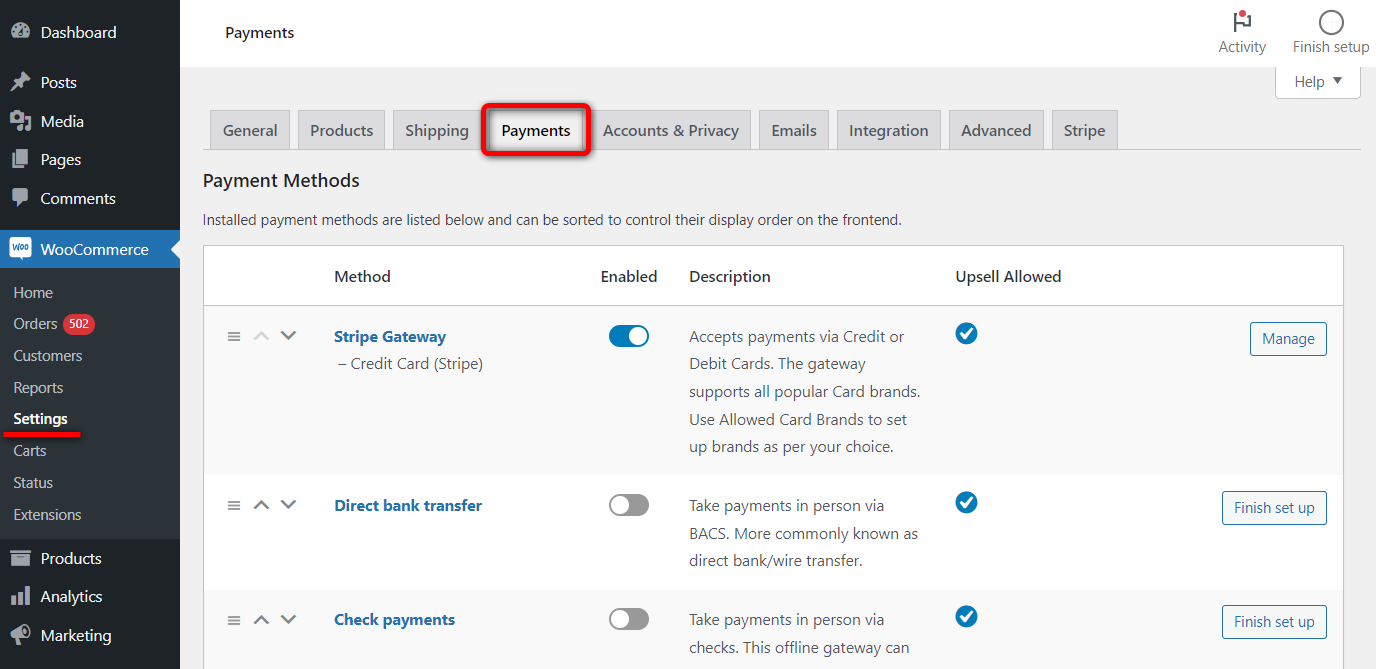
You should use multiple payment gateways in WooCommerce because WooCommerce, by default, doesn’t offer enough payment options.
By default, WooCommerce offers three payment methods:
- Direct bank transfer
- Check payments
- Cash on delivery
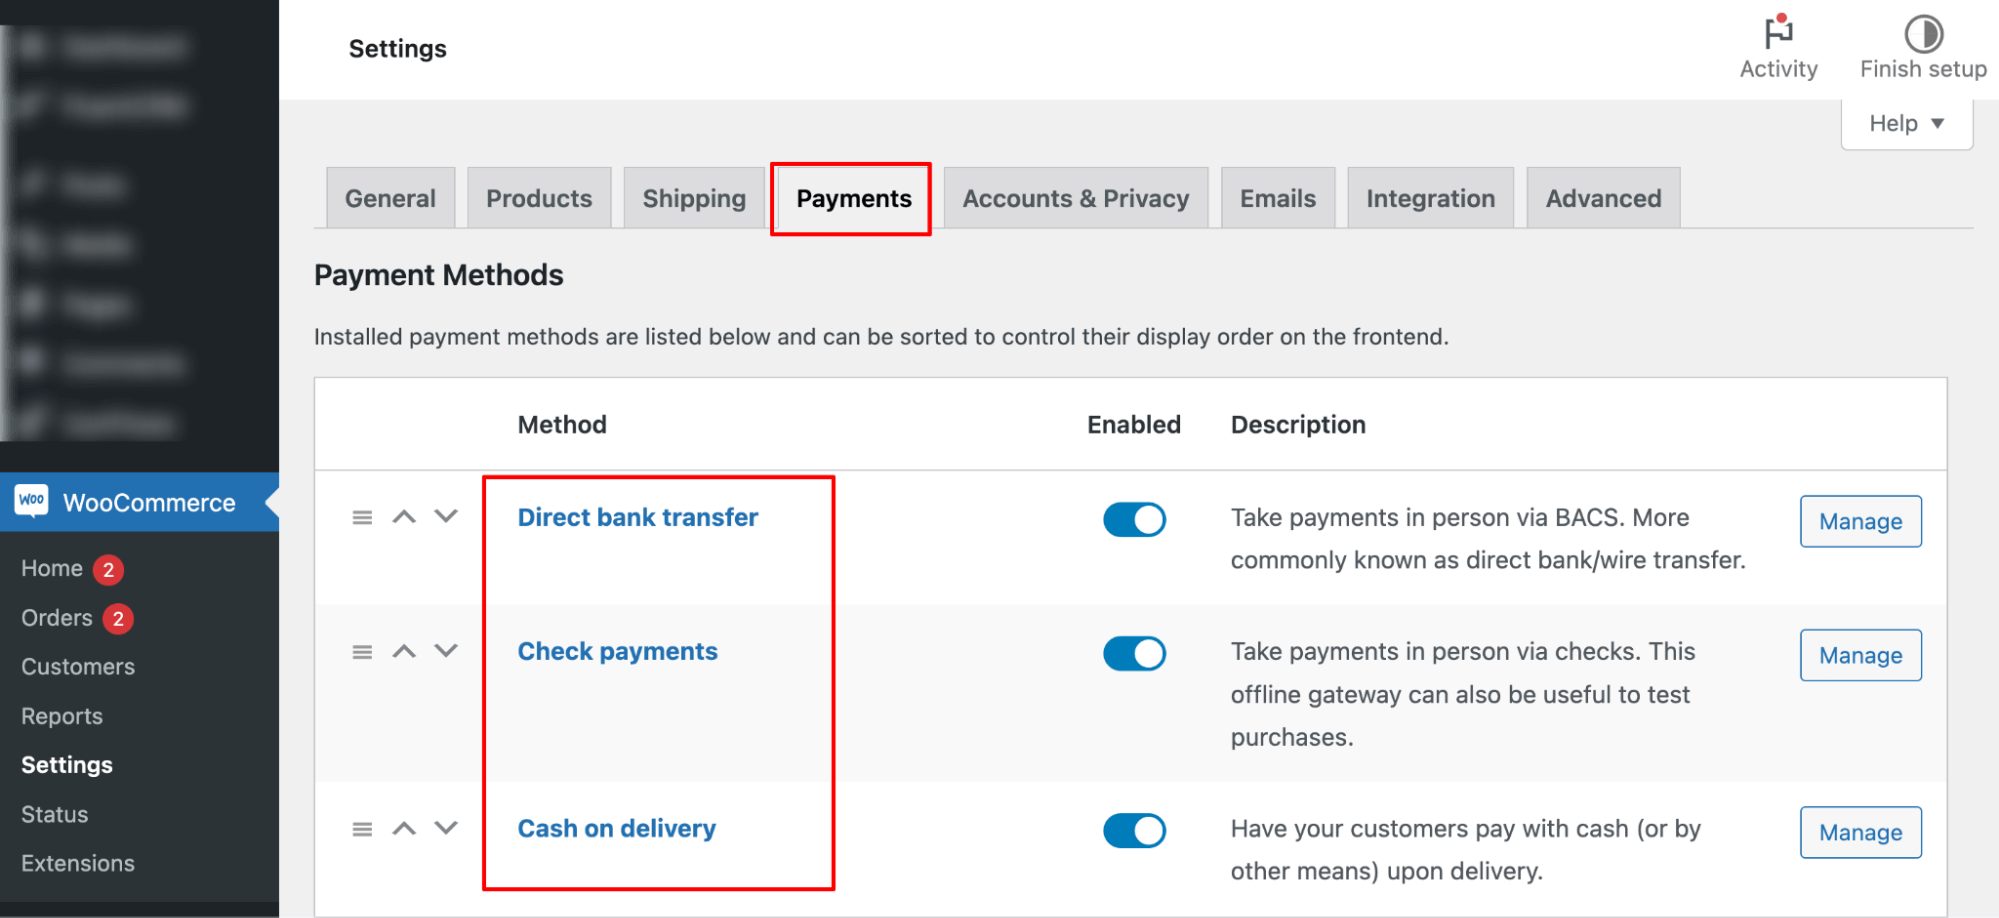
Of course, with the ever-evolving digital shopping experience, offering just the default options is not enough.
Offering a wide range of payment options would be best, which is only possible by integrating multiple payment gateways into WooCommerce.
Here are some of the reasons why you should use multiple payment gateways in WooCommerce:
- Catering to diverse preferences
Every customer has their preferred payment method. Some may prefer credit cards, others express checkout options, and some want cash on delivery. Offering various payment gateways helps you meet everyone’s needs.
- Global reach
Different regions have unique payment preferences. You can tap into international markets and cater to local customers by implementing multiple gateways.
- Enhanced checkout success
Payment failures can lead to cart abandonment. With multiple gateways, you reduce the risk of transaction issues, ensuring a smoother checkout process.
- Improved security
Popular payment gateways are highly secure. Integrating them into your WooCommerce store enhances the security of online payments.
- Flexibility and scalability
As your business grows and new payment trends emerge, multiple gateways offer flexibility, allowing you to add new methods quickly.
In conclusion, using multiple payment gateways enhances customer satisfaction and positions your WooCommerce store for success in an ever-evolving marketplace.
5 Top Payment Gateways for WooCommerce
1. Stripe
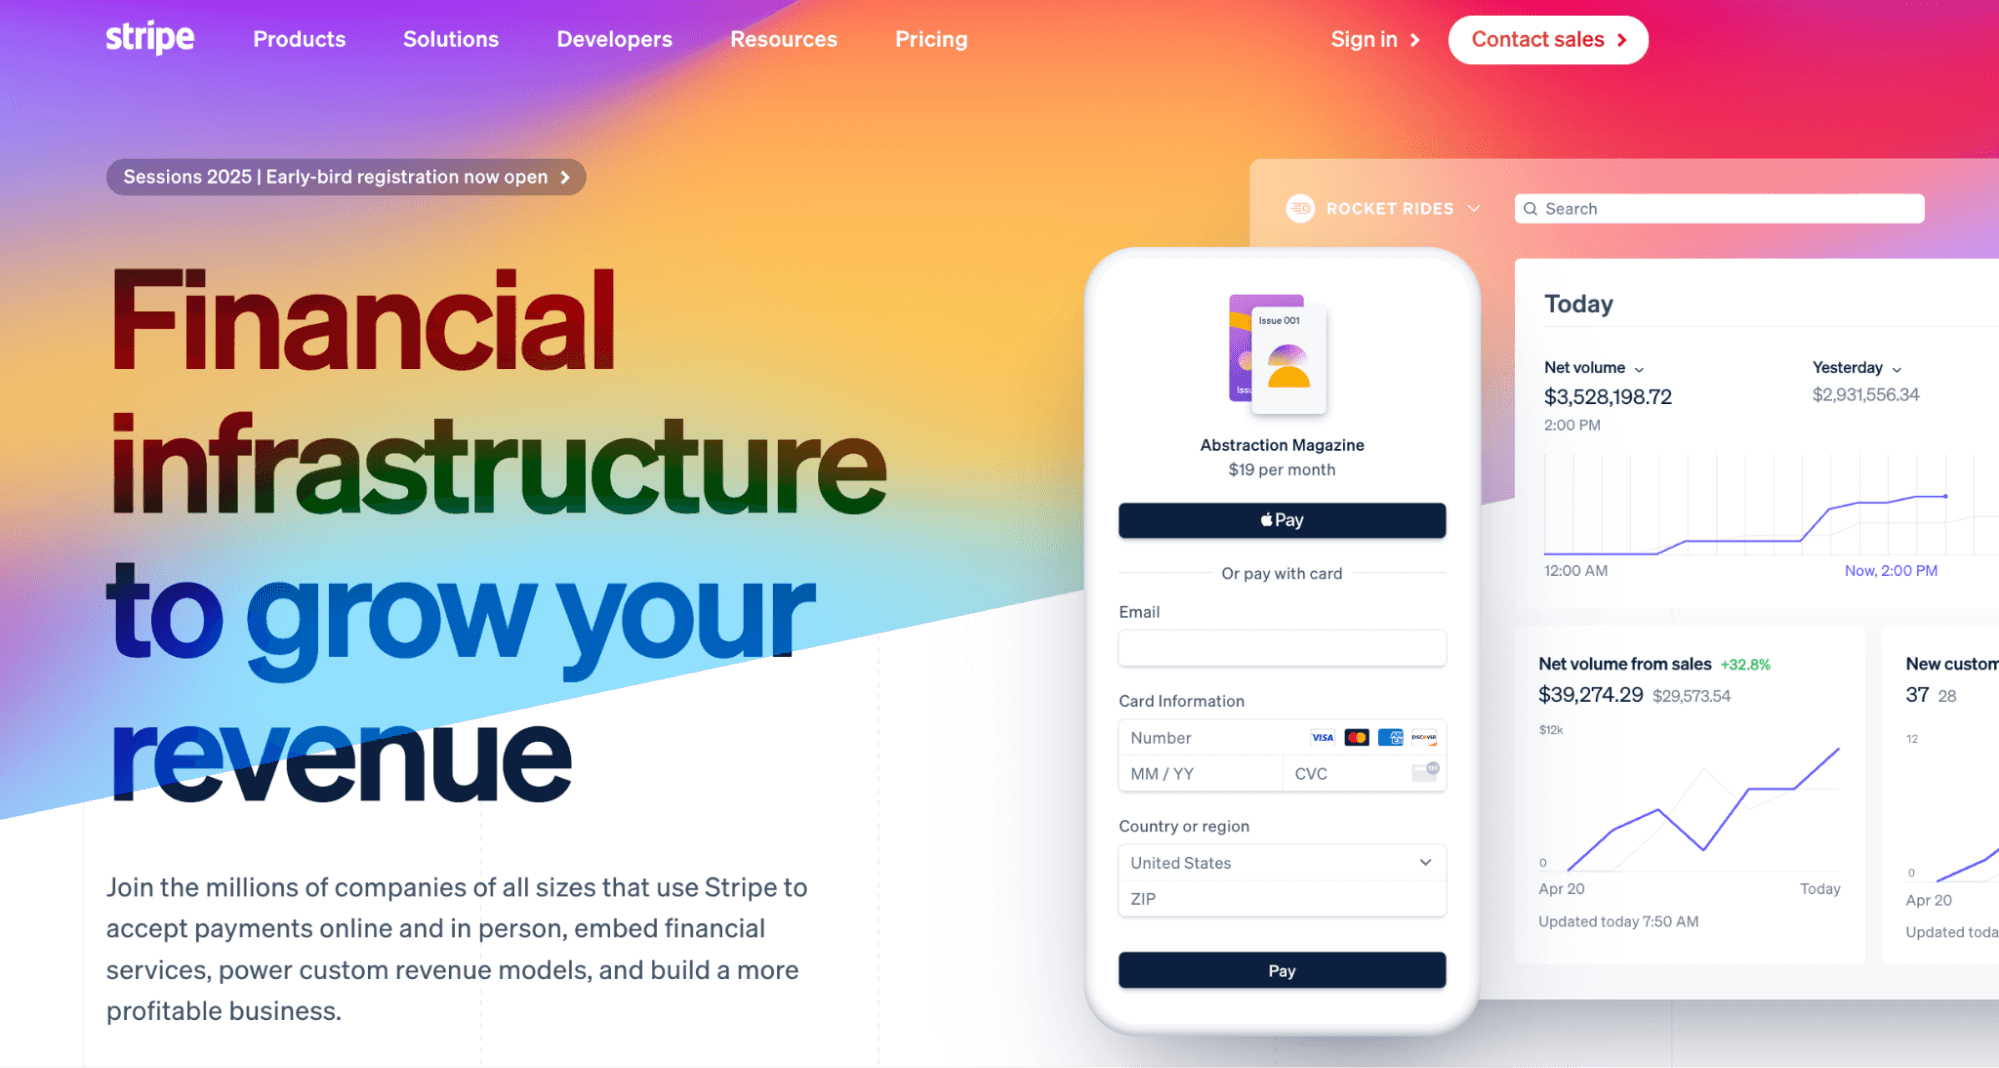
Stripe is a powerful and flexible payment gateway that you can easily integrate with WooCommerce.
It’s super safe, and its advanced fraud detection provides secure gateways for customers to do online transactions.
Key Features:
- Along with one-time payments, this gateway also accepts recurring payments
- Supports 132+ currencies around the world
- Credit and Debit Cards such as Visa, Mastercard, American Express, Discover, JCB, etc.
- Express checkouts such as Apple Pay and Google Pay.
- Local payment gateways include SEPA, iDEAL, P24, Bancontact, and many more.
- Buy now and pay later options like Affirm, Klarna, and Afterpay.
Transaction fees:
- There are no monthly or setup fees, but additional fees apply for each transaction and advanced features like Billing or Connect.
- Online payments: 2.9% plus $0.30 per successful charge.
- In-person payments: 2.7% plus $0.05 per successful charge.
- ACH credit: $1 per ACH credit payment.
2. Paypal
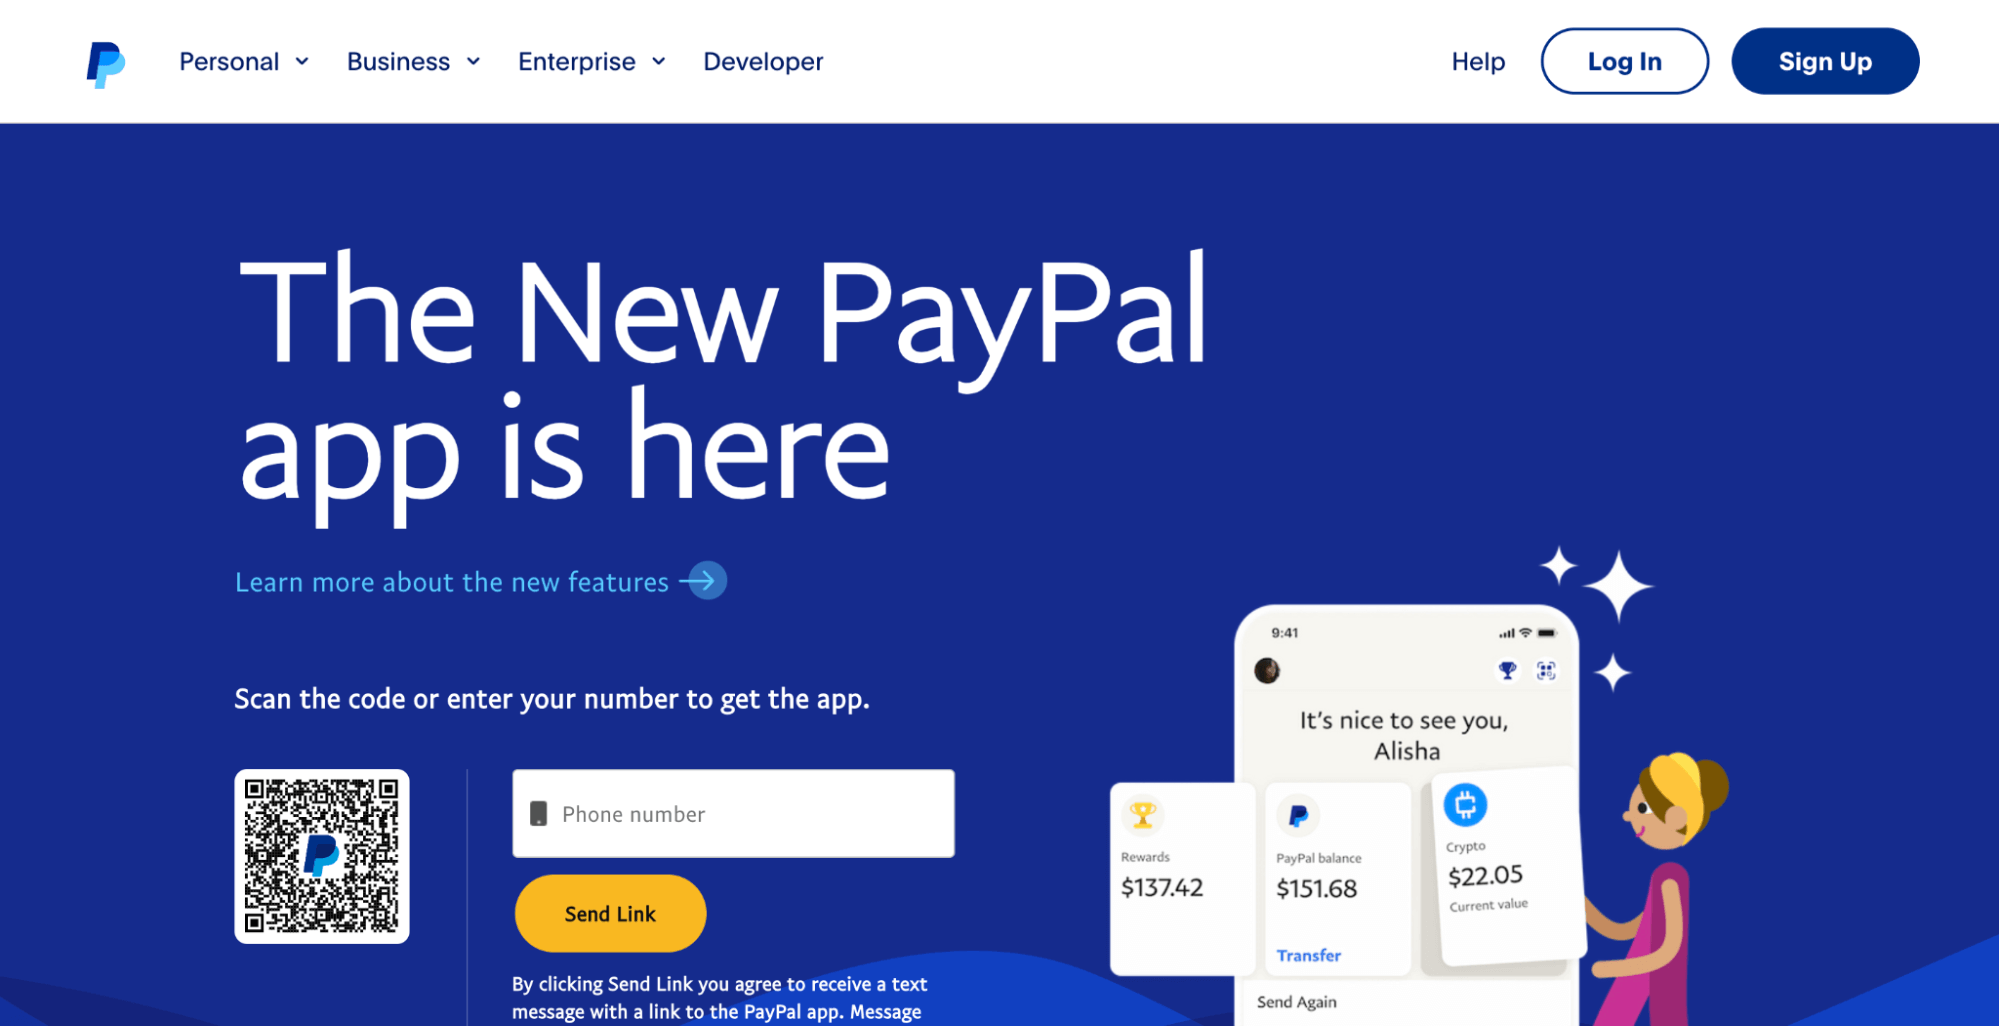
PayPal is one of the world's most recognized and trusted payment gateways, offering a seamless experience for merchants and customers.
It’s quite easy to integrate with WooCommerce to start accepting payments securely.
Key Features of PayPal Payment Gateway:
- Available in more than 200 countries/regions and supports 25 currencies.
- Accepts major credit and debit cards like Visa, Mastercard, American Express, Discover, and more.
- Offers express checkout options such as PayPal One Touch, Apple Pay, and Google Pay.
- Integrates with local payment methods, including SEPA, iDEAL, Bancontact, Sofort, and others.
- Buy now, pay later solutions are available through PayPal Credit and partnerships with services like Klarna.
- Enhanced security with advanced fraud protection tools.
- User-friendly interface and integration options for websites and e-commerce platforms.
Transaction fees:
- Standard transaction fee: 2.9% + $0.30 per transaction for domestic payments.
- A fee of 4.4% + a fixed fee based on currency received may apply for international transactions.
- There are no monthly fees, but additional fees may apply for advanced features, such as PayPal Payments Pro.
3. Square
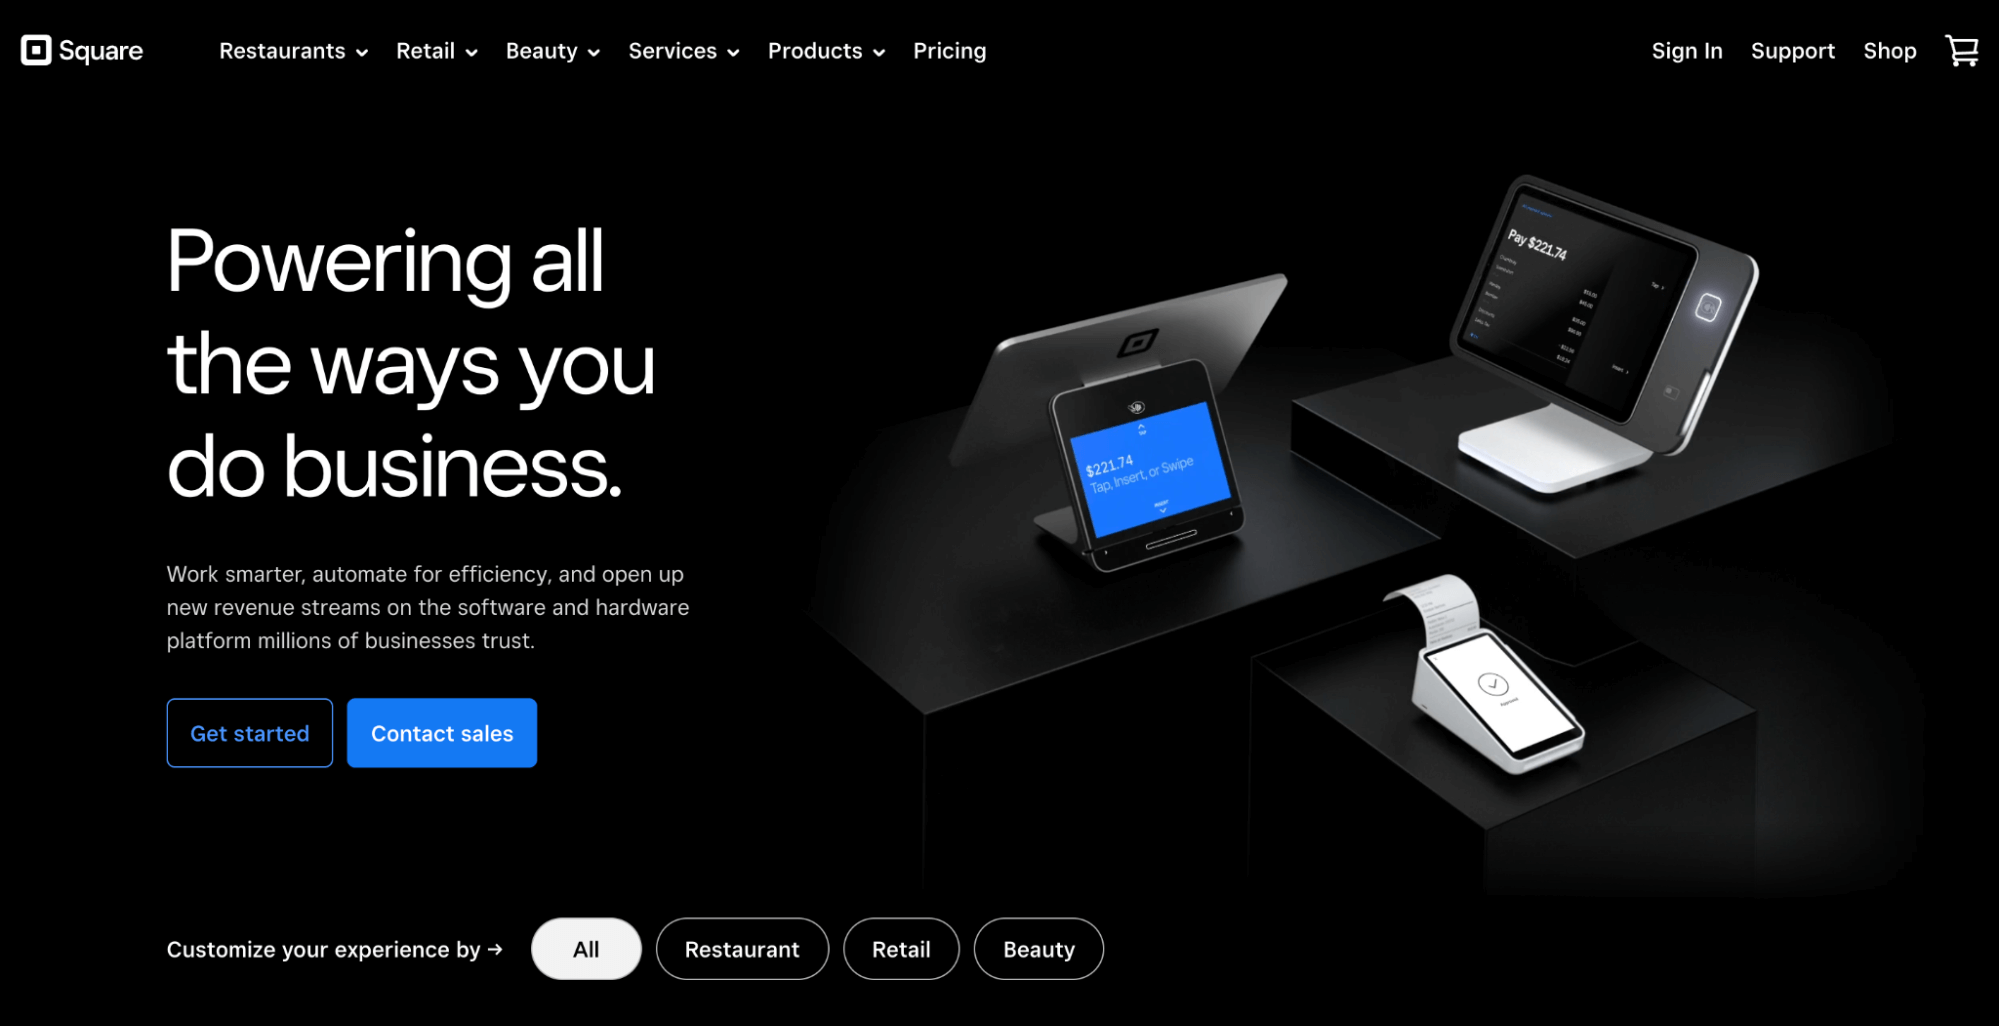
Square is an all-in-one payment solution designed for businesses of all sizes. Known for its user-friendly interface and robust features, Square allows merchants to accept payments seamlessly online and in person.
Its unique capabilities for multi-channel retail make it particularly attractive for businesses that operate both online and offline, providing a cohesive experience for customers.
Key Features of Square Payment Gateway:
- Supports one-time payments and recurring billing, allowing businesses to manage various payment types effortlessly.
- Accepts payments in 130+ currencies, making it a great choice for international sales.
- It accepts major credit and debit cards, including Visa, Mastercard, American Express, and Discover.
- Provides contactless payment options, including Apple Pay and Google Pay, for quick and convenient transactions.
- It integrates with local payment methods such as ACH transfers and supports international cards.
- Offers a built-in point of sale (POS) system for in-person payments and online payment solutions.
- Provides a comprehensive dashboard for tracking sales, inventory, and customer insights.
- Equipped with advanced security features, including encryption and fraud detection tools.
Transaction fees:
- Standard transaction fee: 2.6% + $0.10 per transaction for in-person payments.
- For online payments, the fee is 2.9% + $0.30 per transaction.
- There are no monthly or hidden charges, but additional fees for features like Square Payroll and Square Marketing may apply.
4. Amazon Pay
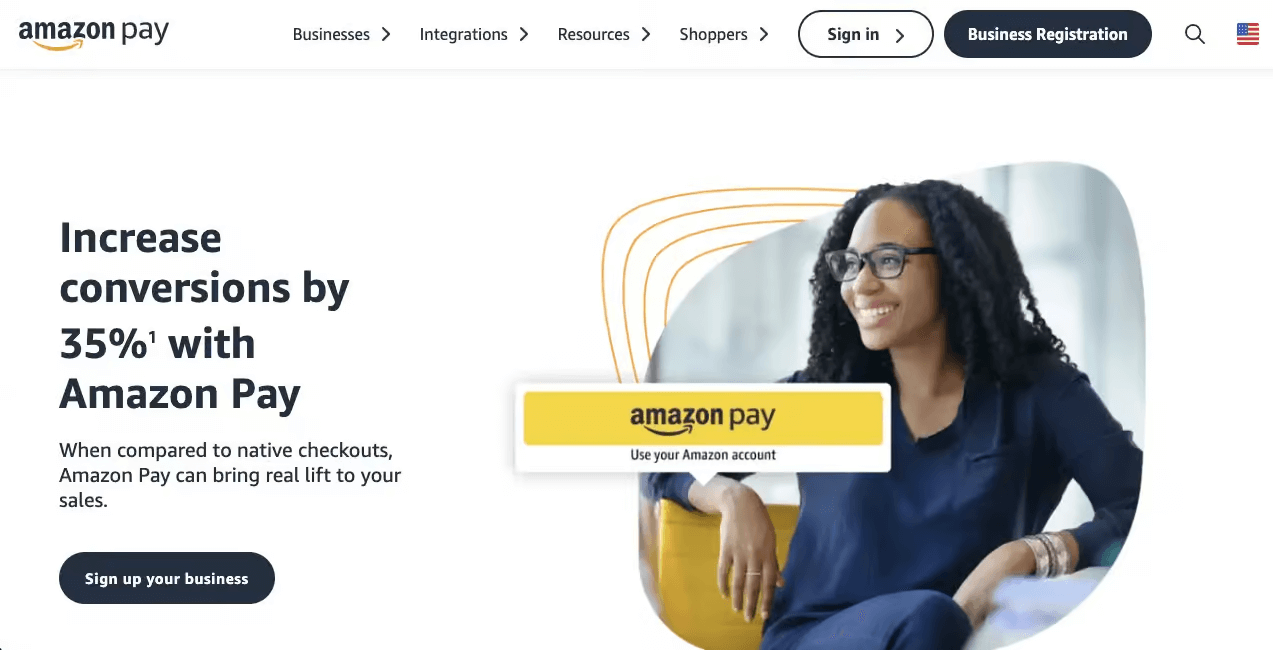
Amazon Pay lets customers use their Amazon account information to purchase on your WooCommerce store.
This familiarity can increase trust and conversion rates, especially for customers who are already comfortable shopping with Amazon.
Amazon Pay is highly secure and offers a streamlined checkout process. Apart from that, there are some other things to consider. Check out below:
Key Features of Amazon Pay:
- Allows customers to use their Amazon account to make purchases, simplifying the checkout process for users already familiar with Amazon.
- Supports multiple payment types, including credit and debit cards and Amazon Pay balance.
- Accepts payments in various currencies, making it suitable for international sales.
- It seamlessly integrates with e-commerce platforms and custom websites, enhancing user experience.
- Offers one-click checkout for Amazon users, leading to reduced cart abandonment and increased conversion rates.
- Fraud protection tools are included, helping to secure transactions and customer data.
- Provides businesses with access to Amazon’s customer base, potentially reaching millions of existing Amazon customers.
- Includes recurring payments and subscription services for businesses with ongoing billing needs.
Transaction fees:
- Transaction fees: Typically 2.9% + $0.30 per transaction for domestic sales (this may vary based on the seller's volume and country).
- For international transactions, fees can be higher, typically 3.9% + a fixed fee based on currency.
- There are no monthly or setup fees, but additional fees may apply for specific services.
5. WooCommerce Payments
WooCommerce Payments is a payment solution built by WooCommerce specifically designed for WooCommerce stores.
It offers seamless integration and lets you manage all payments directly from your WooCommerce dashboard. WooCommerce Payments supports all major credit and debit cards and provides detailed insights into your transactions.
Key Features of WooCommerce Payments:
- Accepts major credit and debit cards, including Visa, Mastercard, American Express, and Discover.
- Built-in payment management enables handling payments, refunds, and chargebacks directly from your WordPress dashboard.
- Supports multiple currencies, allowing businesses to accept payments internationally.
- Recurring payment functionality for businesses offering subscriptions or memberships.
- Equipped with advanced security features to protect transactions and customer data.
- Offers automated payouts to your bank account daily, ensuring quick access to your earnings.
- Provides real-time reporting tools to track sales, payment status, and customer insights.
Transaction fees:
- Transaction fees: Typically 2.9% + $0.30 per transaction for domestic payments.
- For international transactions, fees may be higher, typically 3.9% + a fixed fee based on currency.
- There are no monthly or setup fees, but additional fees may apply for specific features.
👉 For more details, read our blog on Best WooCommerce Payment Gateways for Fast and Secure Transactions.
✅ Experts recommendation
The payment gateway you choose depends on your customer base. Our experts highly recommend Stripe.
When you want to offer local payment methods or take payments internationally, Stripe is the right choice because it supports all types of debit cards, credit cards, and local payments.
It also supports recurring payments and integrates with Buy Now Pay Later platforms like Affirm, Klarna, and Afterpay.
Moreover, Stripes will help you achieve your ultimate goal of boosting sales and average order value.
One effective way to boost order value is to offer one-click upsells to users right after checkout. Users are not required to share their payment details a second time; they can accept and add the upsell offer to their main offer with a single click.
Stripe supports multiple payment methods, including buy now and pay later methods for one-click upsells.
So, Stripe should be your number one choice if you want to cater to a large audience that may want to buy from your store using different payment methods.
Let’s move to the next section to find out how to add Stripe payment gateways to WooCommerce.
How to Add a Stripe Payment Gateway in WooCommerce?
To add Stripe to WooCommerce, we will use the FunnelKit Stripe gateway plugin.
This plugin streamlines the onboarding process for users. After connecting to Stripe, it automatically retrieves live and test keys, eliminating the need for manual input. Additionally, it simplifies webhook integration by instantly syncing webhooks from your Stripe account, removing the hassle of manual copy-pasting.
With this plugin, you can add all the goddesses of Stripe to WooCommerce and seamlessly integrate all the payment methods for checkout and upsell offers.
Make sure to install and activate this plugin.
Next, follow these steps:
You can also refer to the video if you are not in the mood to read 👇
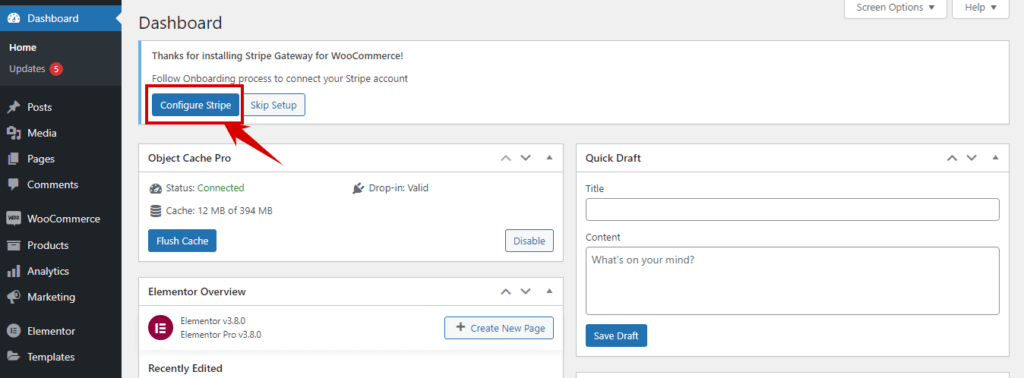
Step 1: Connect and configure your Stripe account with WooCommerce
After activating the plugin, click the Configure Stripe button to start onboarding.
Next, provide the email address you used to open your Stripe account. Then, click on Continue. Next, provide the password and click login.
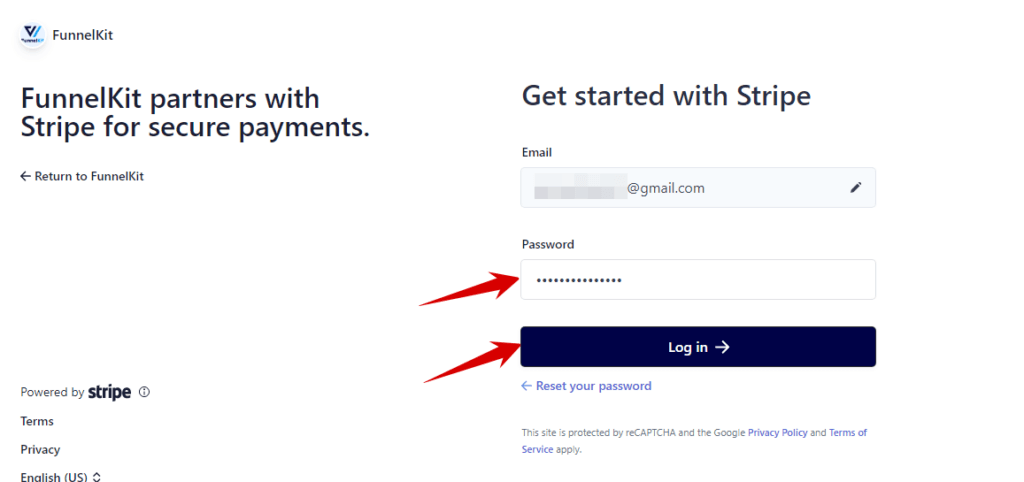
After that, you must provide a verification code, which you will receive on your registered phone number.
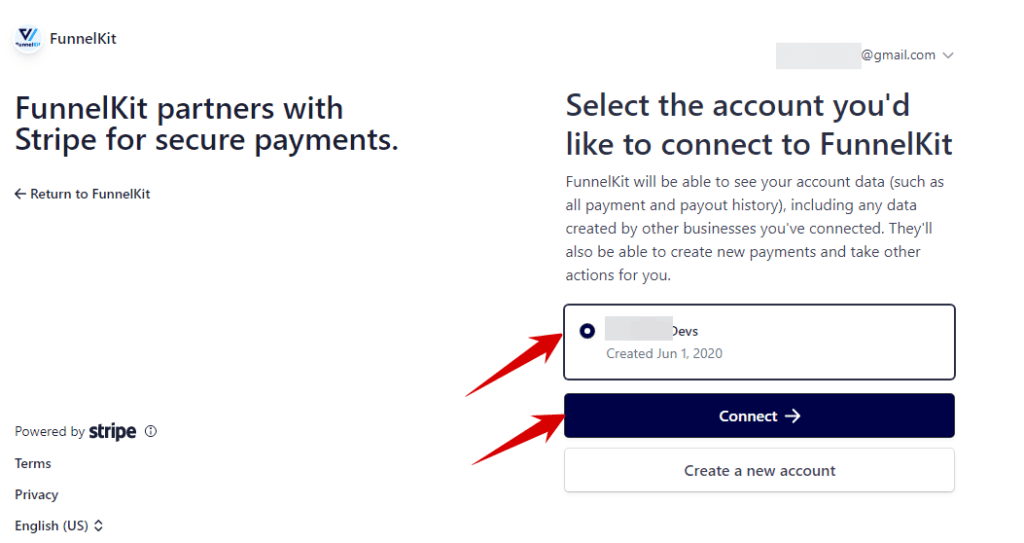
Now, choose the account and click on Connect.
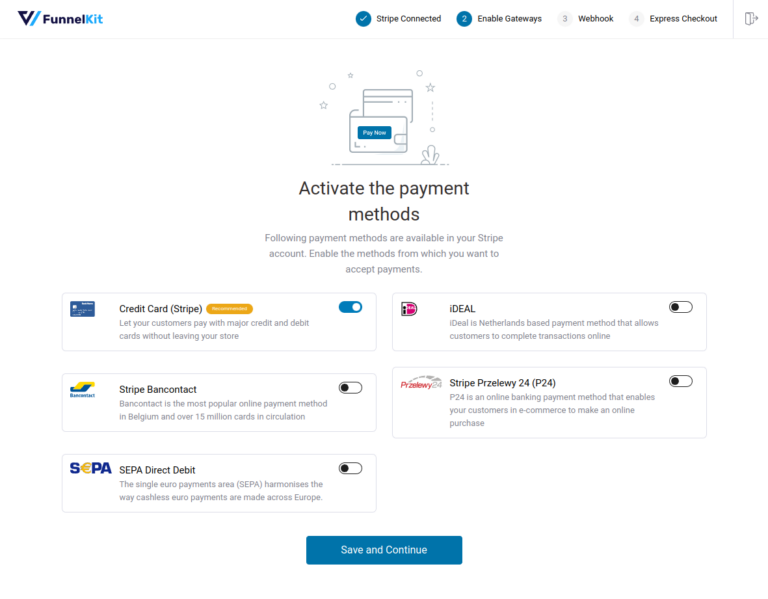
Now, turn the toggle button to enable all the credit card (Stripe) options. This option will allow your customers to pay with major credit and debit cards.
Then click on Save and Continue.
Now, turn the toggle button to enable all the credit card (Stripe) options. This option will allow your customers to pay with major credit and debit cards.
Then click on Save and Continue.
Next, you need to create a webhook. To do that, click on Setup Webhook Now. Stripe Gateway for WooCommerce By FunnelKit will take care of everything for you.

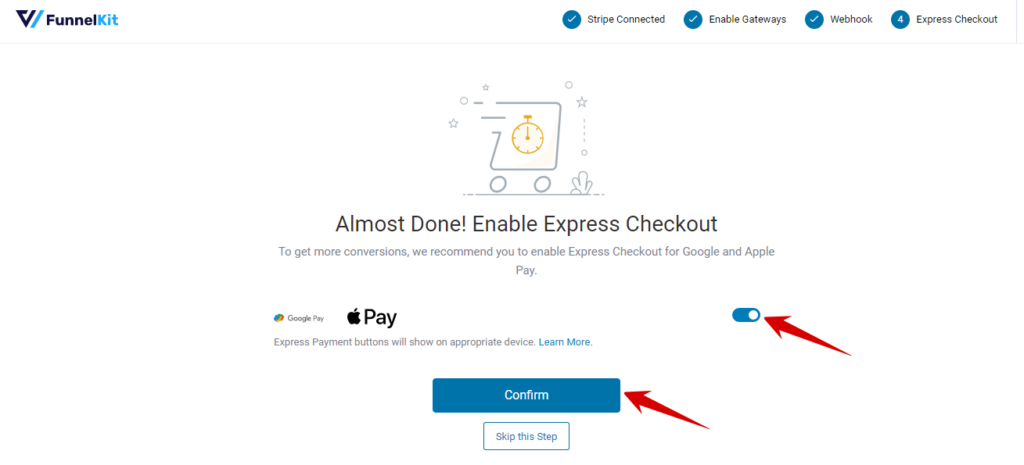
To enable the Express Checkout, turn the toggle button and then hit Confirm.
Lastly, you need to click on choose the mode weather test or live and then save the settings.
Note: It's recommended to check the whole process first with test mode.
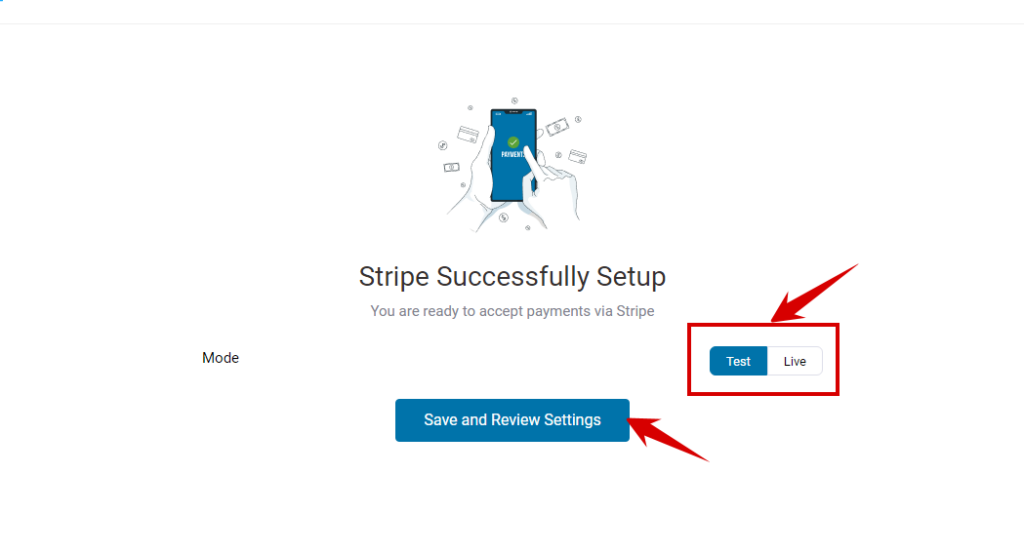
Clicking on 'Save and Review Settings' will integrate Stripe with your WooCommerce store.
After that, you will be redirected to the WordPress dashboard.
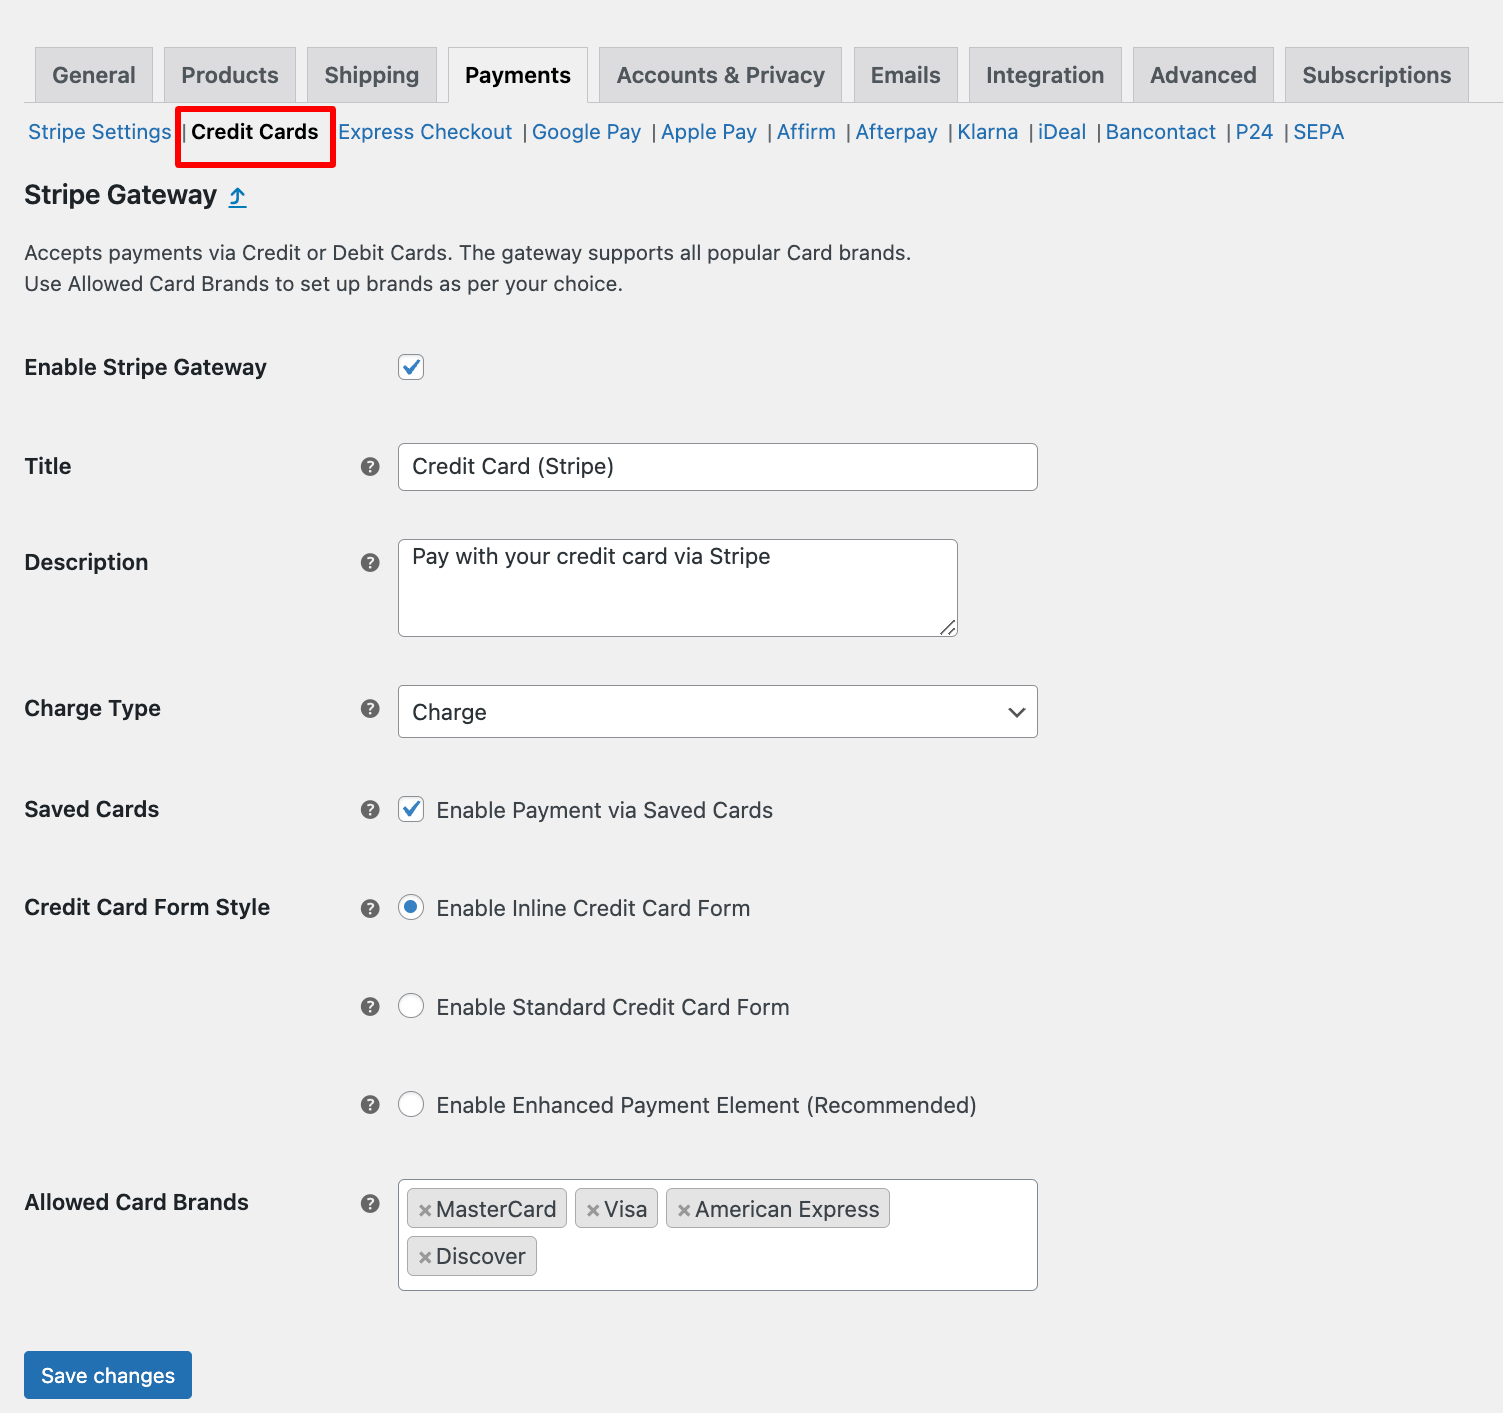
Step 2: Enable credit card payments
Under the Credit Cards Section, you can customize the following settings:
- Enable Stripe Gateway: Enable to use Stripe's online credit card payment service.
- Title: Provide the title that will show up on the checkout page.
- Description: Here, you can provide the description.
- Statement Descriptor: Provide a separator that will show up on the customer's statement.
- Charge Type: Here, you can choose the charge type. There are two options: Charge and Authorize. The Charge method authorizes and captures a credit card payment, while Authorize authorizes the payment.
- Saved Cards: Enabling this option will save card details for future transactions.
- Inline Credit Card Form: You can turn this option to enable inline credit card payment.
- Allowed card: Add the cards you want to allow for payment in your store.
Once you make all the changes, click on Save Changes to update.
Note: To learn what each setting is about, hover on the “?” icon.
Step 3: Enable express checkout Google Pay and Apple Pay
Next, move to the express checkout option to enable a one-click express payment option like Google Pay and Apple Pay.

You can also add Google and Apple pay options line like the other payment options in case customers need to fill out any required information before they come to the payment section.
You can enable the Inline payment option under Google Pay and Apple Pay tab.
For more details, check our blog on Google Pay and Apple Pay.
Step 4: Enable local payments
You can allow local payments in your store on the related tab.
Let's say you want to configure the iDeal payment option on your site. You need to go to the iDeal tab, enable the option, and configure the necessary settings. For more details, read our blog on WooCommerce iDEAL Payments.
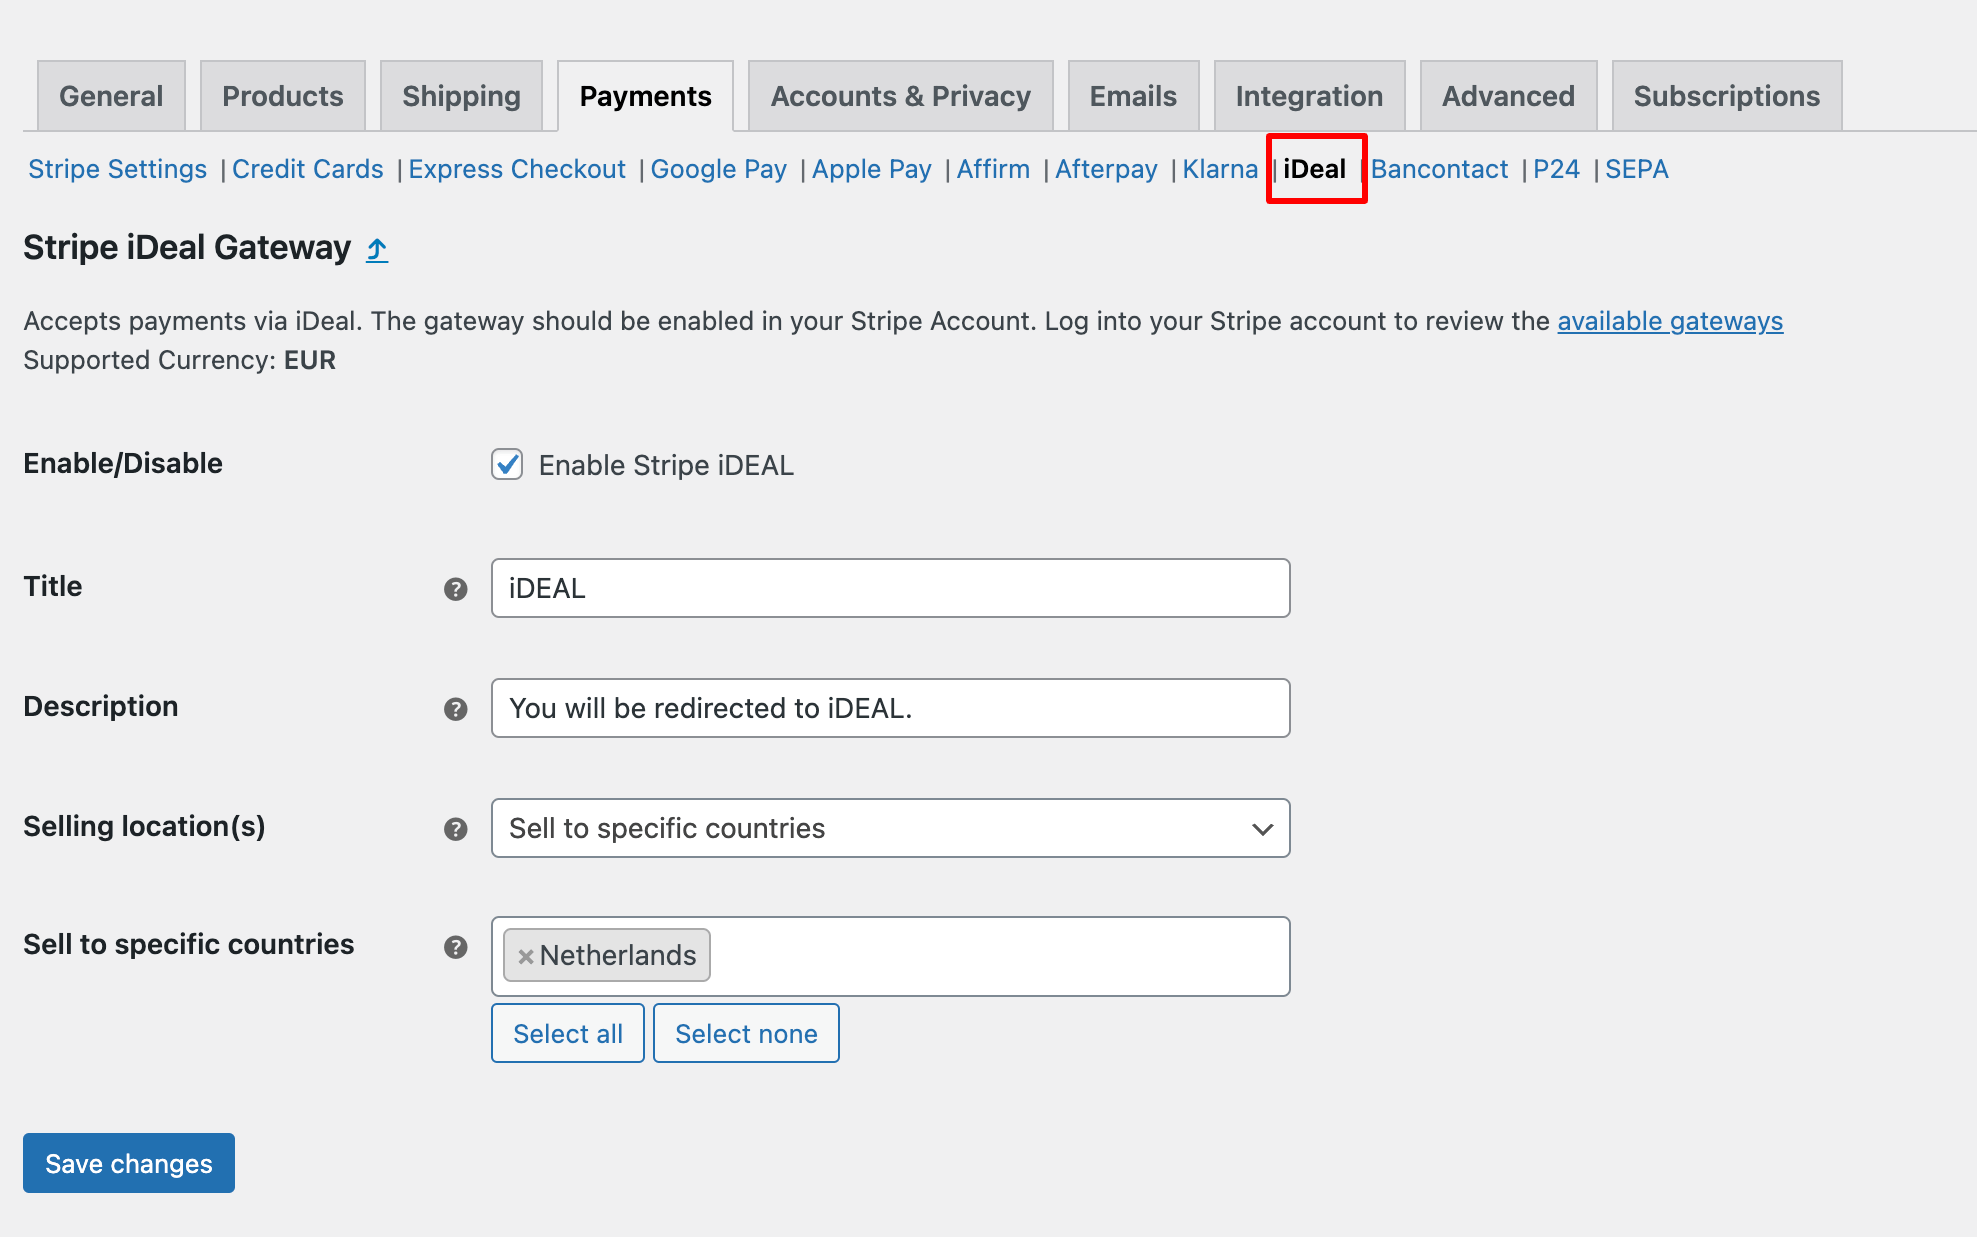
Like Ideal, customize other payment options like Bancontact, P24, and SEPA.
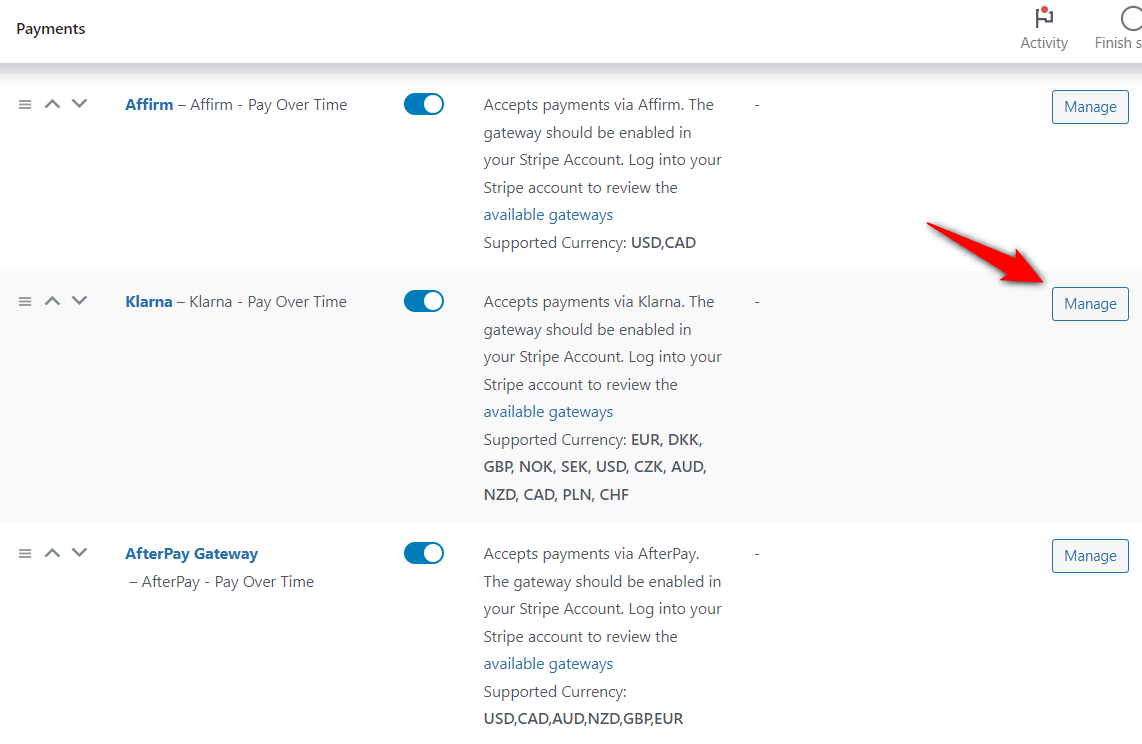
Step 5: Enable Buy Now Pay Later options

With Stripe, you can also offer buy now and pay later payment options. To do this, go to the WooCommerce Settings ⇒ Payments section.
You will find all the BNPL options like Affirm, Klarna, and AfterPay here.
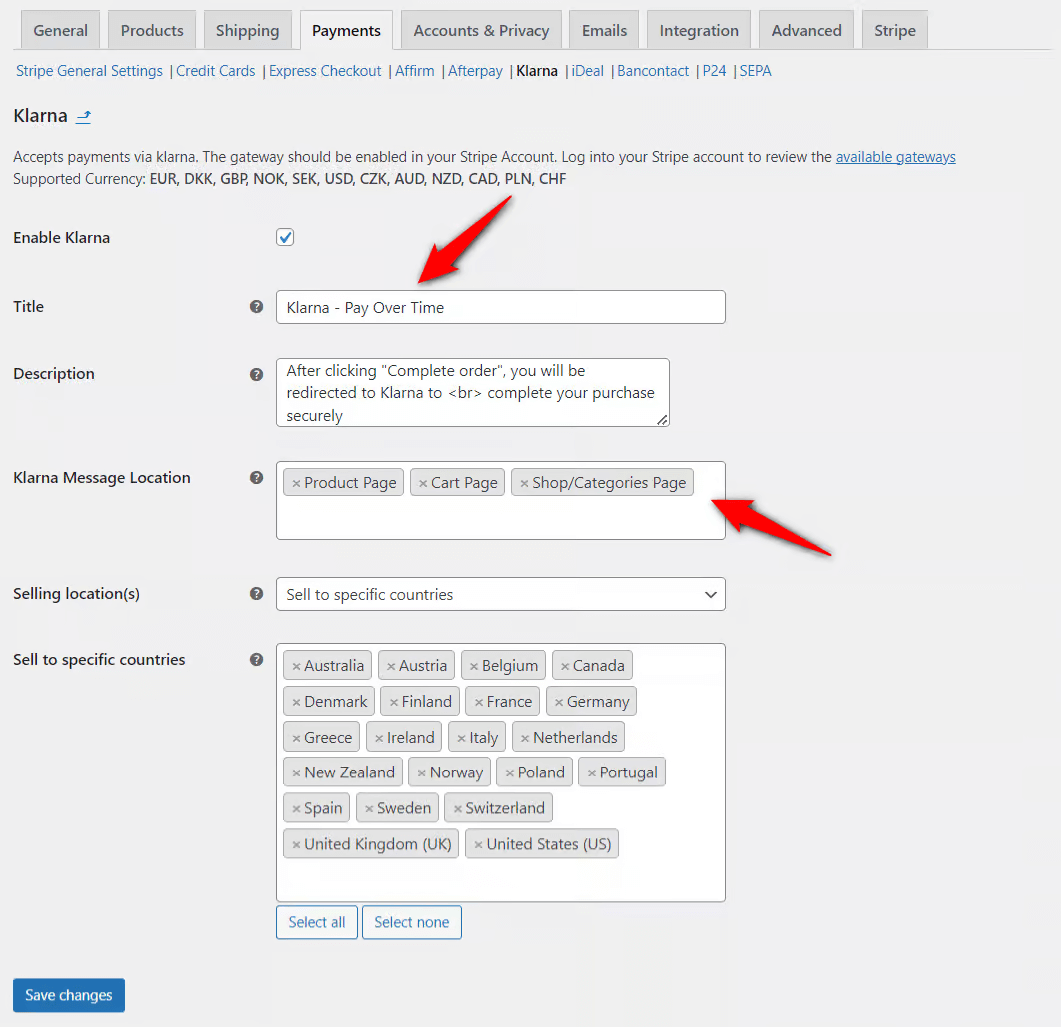
Hit the ‘Manage’ button next to it you want to use. Here, we are showing Klarna as an example.
Next, check the option to ‘Enable Klarna Payments’.
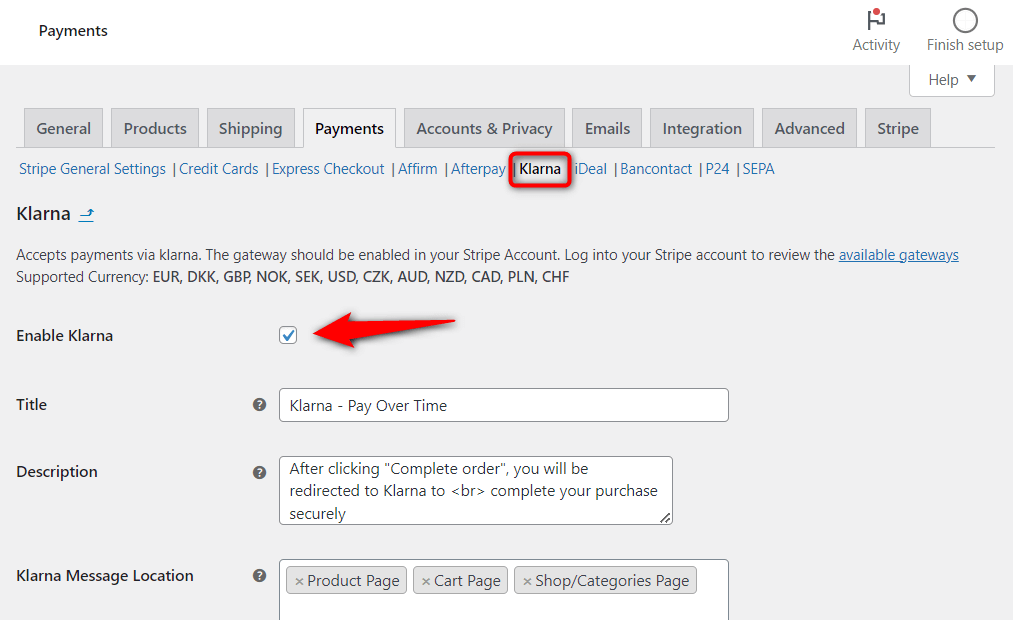
Next, configure the necessary settings and save them to update the status.
For more details, read our blog on “WooCommerce Klarna Payments.”
You can also check our guide on WooCommerce Affirm payments and Afterpay payments.
You can set up many payment options using Stripe in WooCommerce.
🔔 The beautiful 2-step checkout page you can see above is built with FunnelKit Funnel Builder.
How to Add Paypal Payment Gateway to WooCommerce Store?
To add a PayPal payment gateway t to your WooCommerce store, follow these steps:
Step 1: Connect the WooCommerce store to PayPal
You must install and activate the PayPal AngelEye payment gateway plugin and connect to your account.
Step 2: Enable PayPal commerce
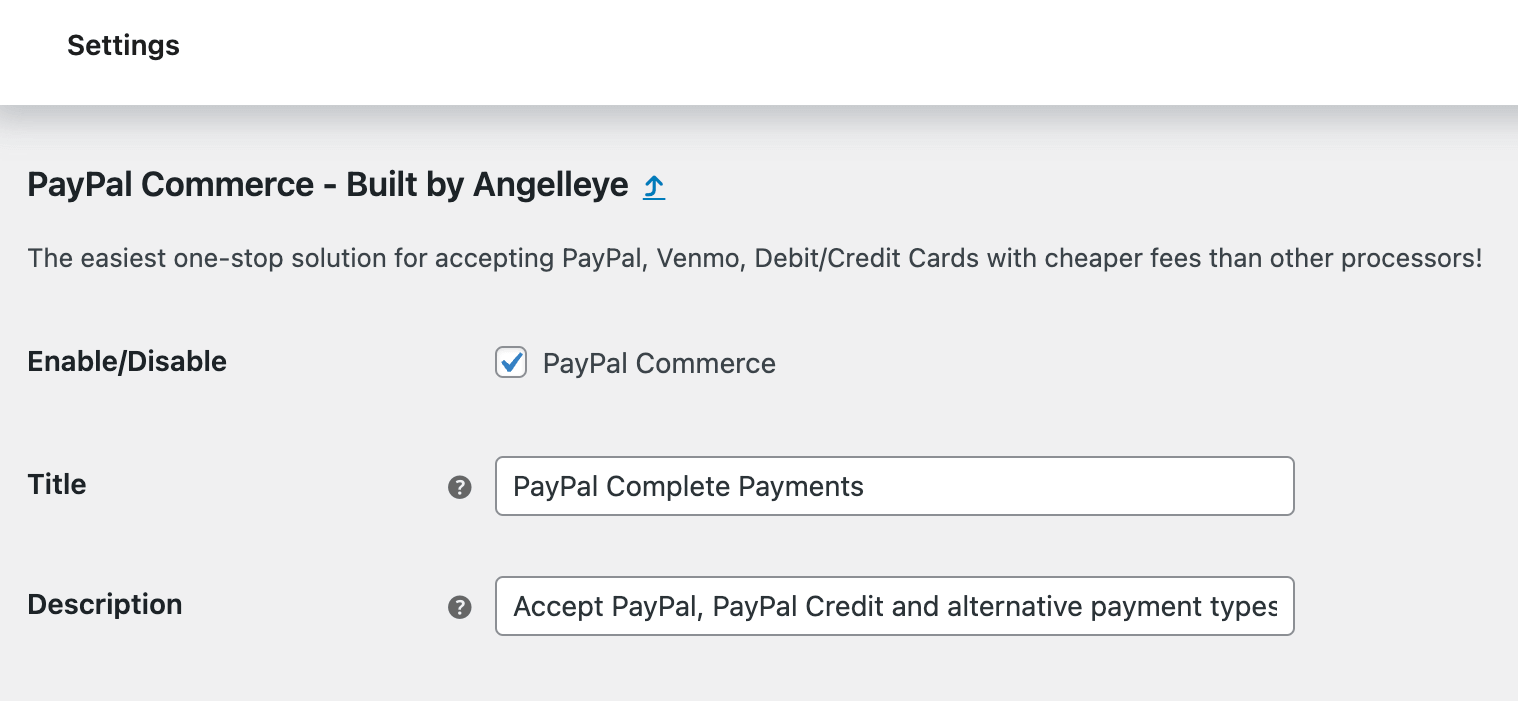
Next, navigate to WooCommerce ⇒ Settings ⇒ Payments and hit “Manage” for the option "PayPal Commerce - Built By Angelleye".

Enable the “PayPal Commerce” option and set up the title and description.
Step 3: Configure Paypal for the checkout page
You can configure different settings on Paypal to show WooCommerce pages, including the Product page, cart page, and checkout page.
For instance, you can exclusively enable or disable it for the checkout page.
Then, choose the display position and enable or disable the smart buttons. You can also change the button layout, color shape, and size.
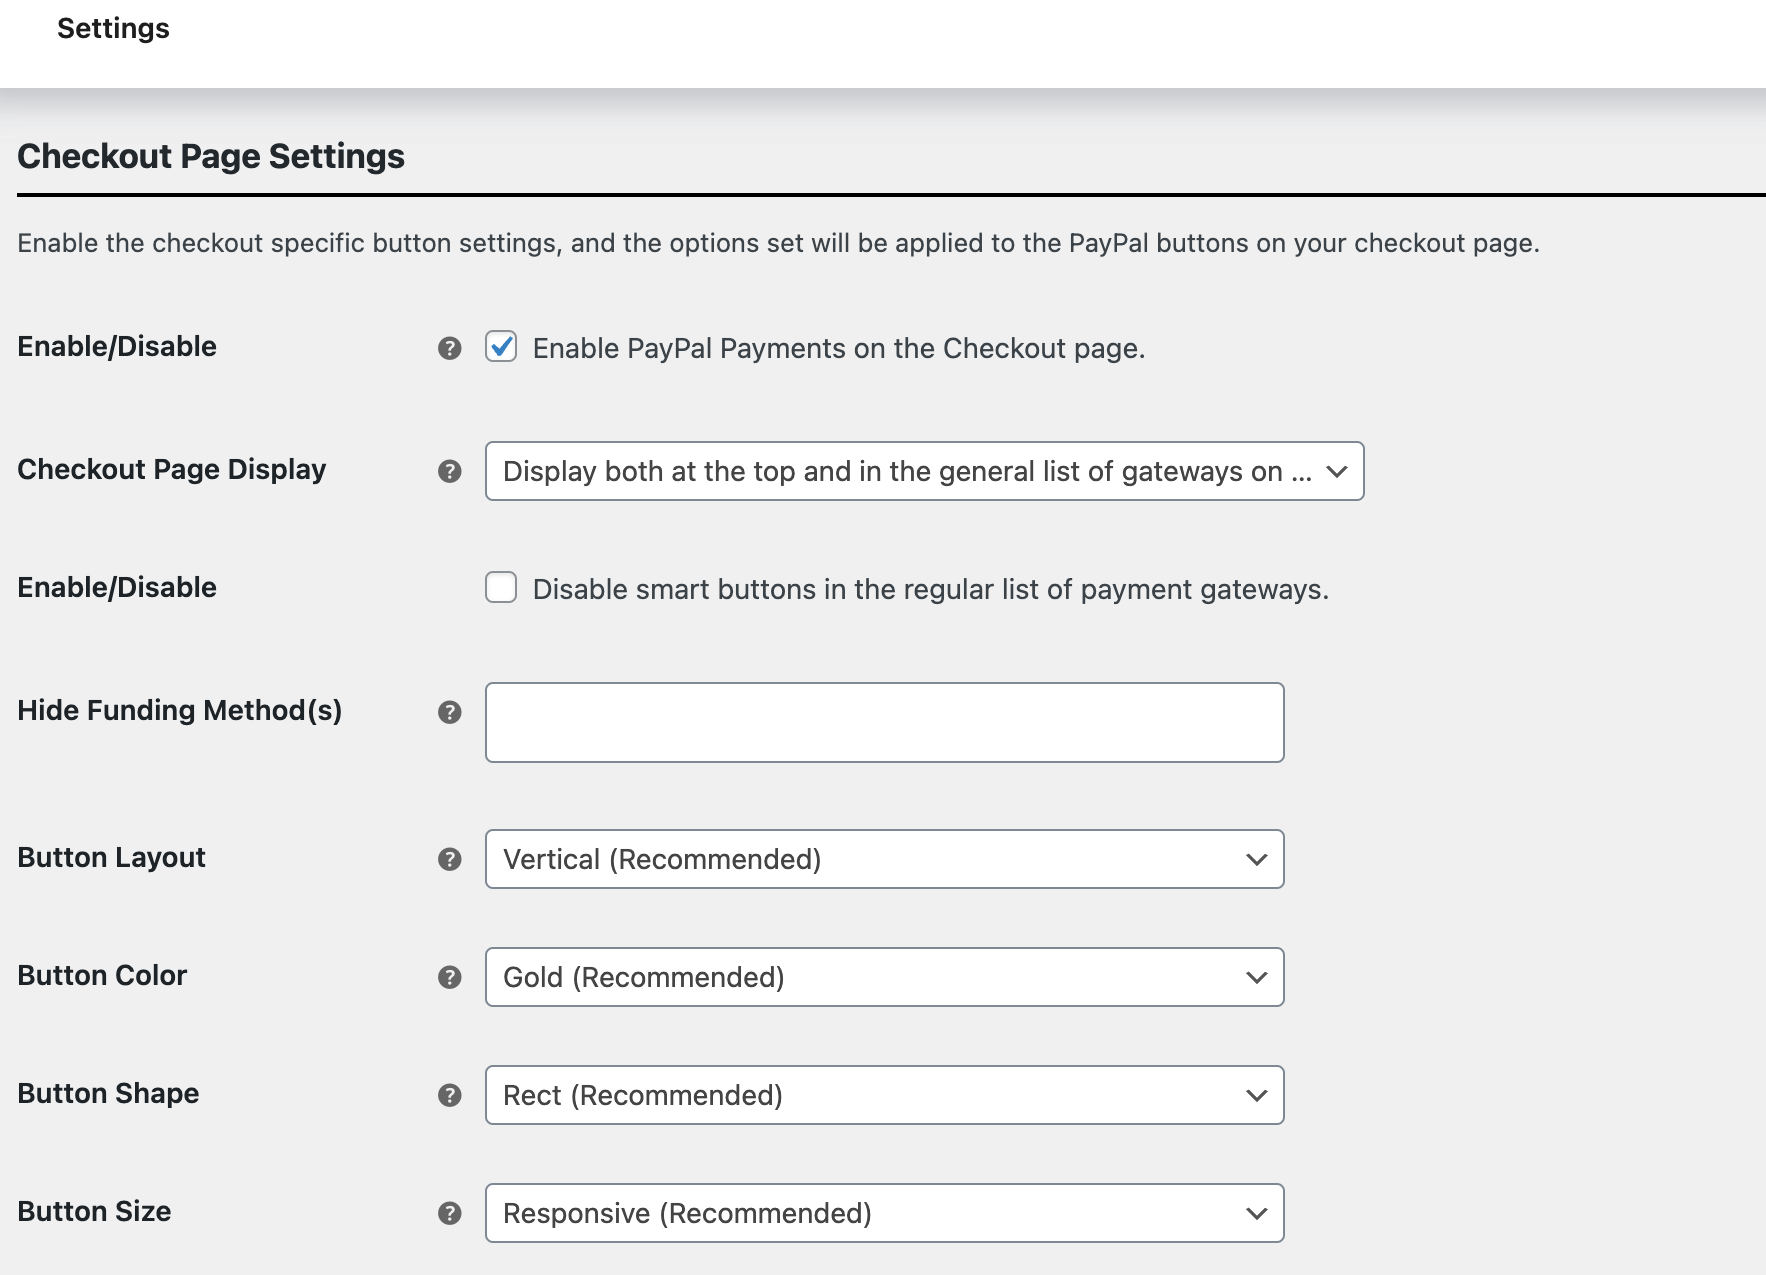
For example, on the checkout page, configure settings for the product page and cart page.
Once done, make sure to save the changes.
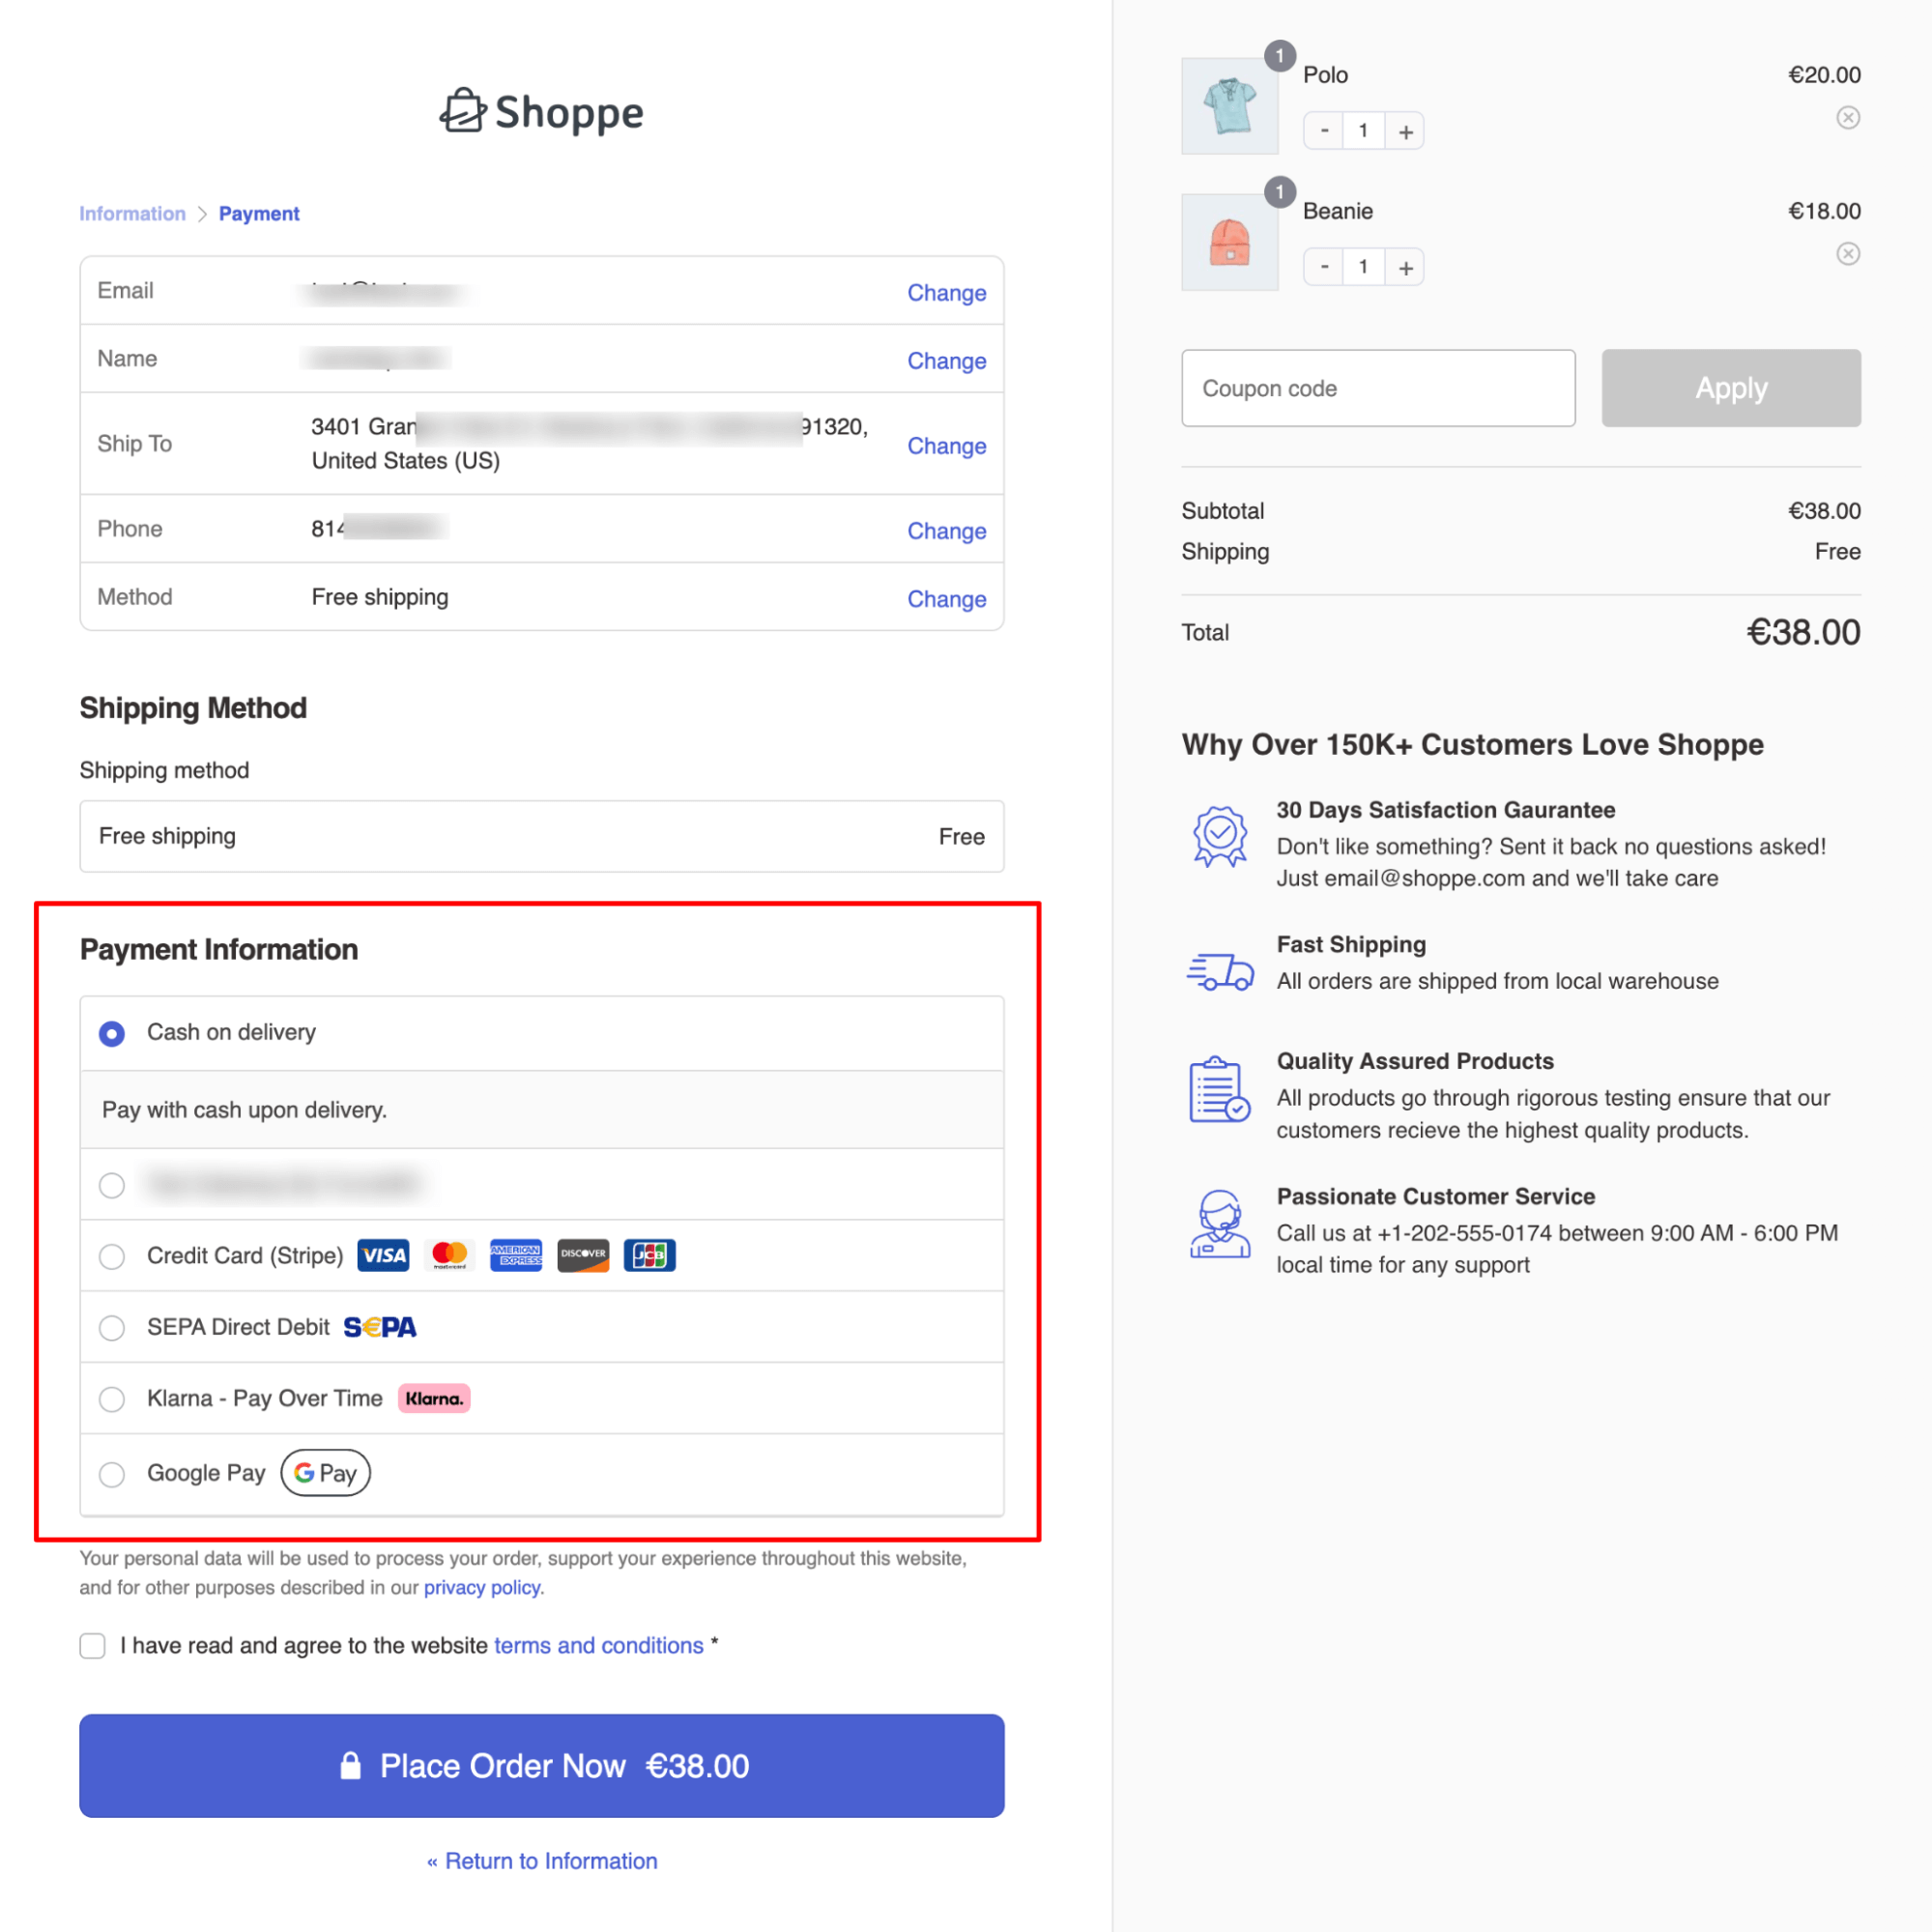
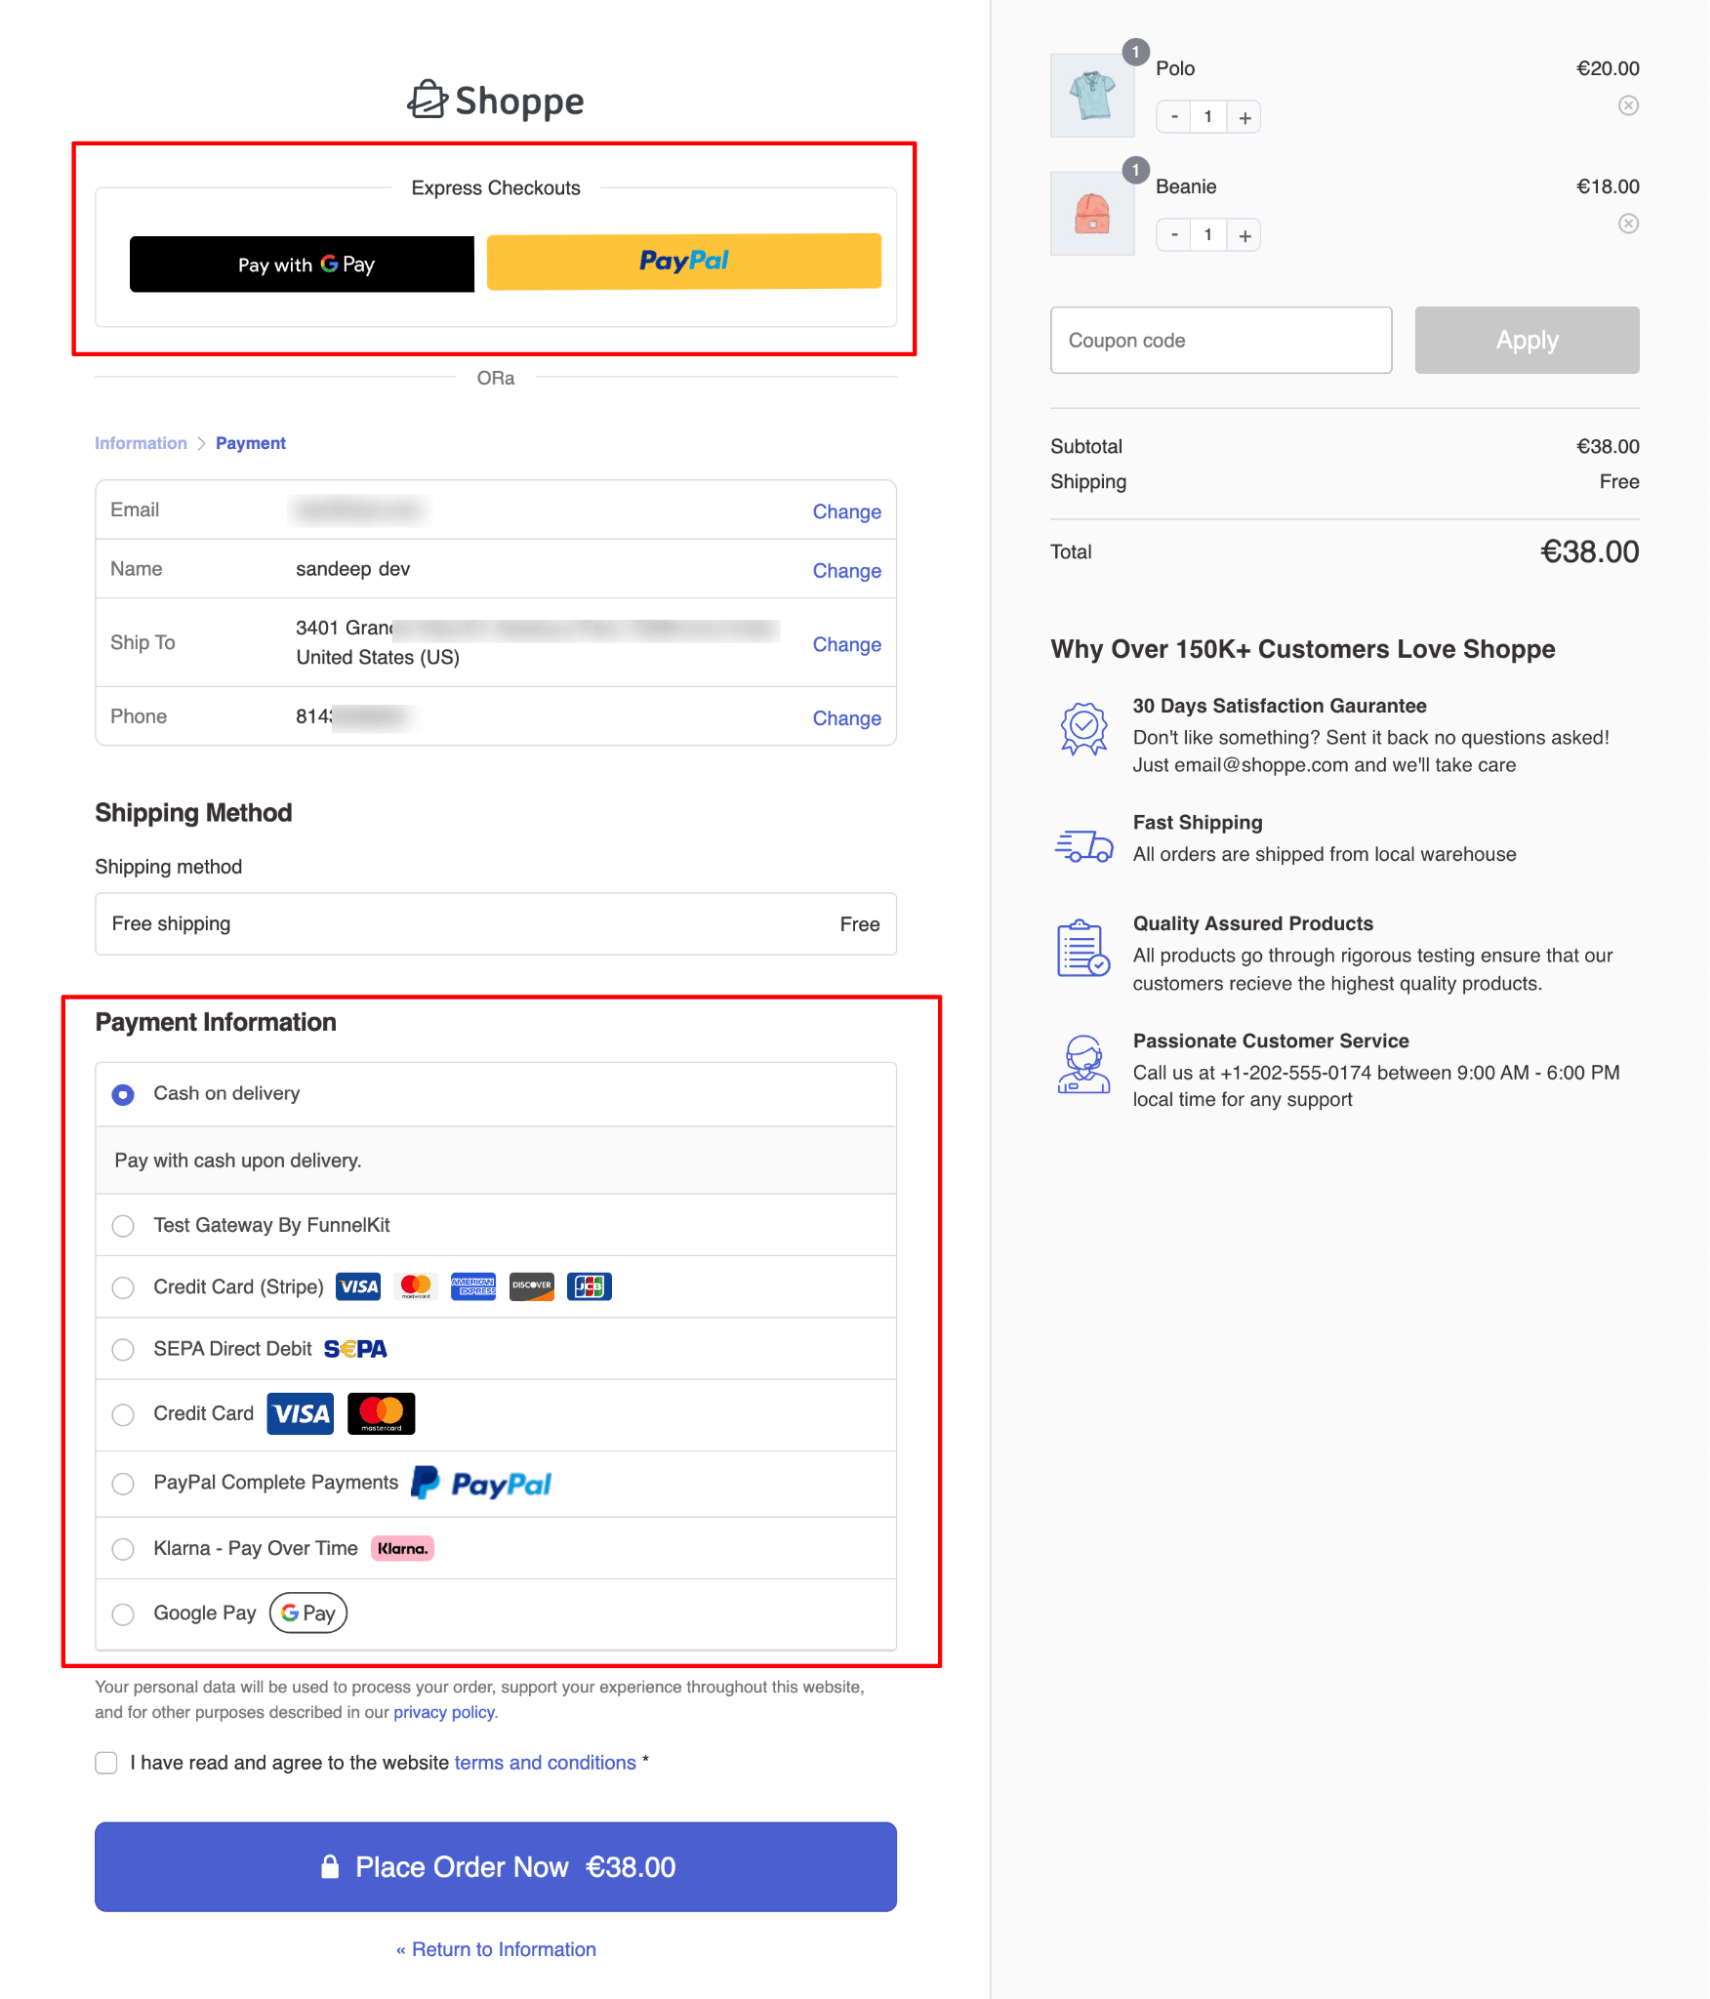
Here is what PayPal payments look like on the checkout page. Both Stripe and PayPal appear beautifully.
🔔 Note: FunnelKit Funnel Builder is totally compatible with Stripe and Paypal plugins. As you can see, payments through multiple gateways are displayed in a clean, streamlined, and user-friendly way on FunnelKit’s checkout page.
Frequently Asked Questions About Multiple Payment Gateway For WooCommercee
- Will using multiple payment gateways affect my website's performance?
Generally, using multiple payment gateways should not significantly affect your website's performance. However, it’s essential to choose reputable payment gateway plugins and ensure they are updated regularly to minimize any potential impact.
- Can I customize the checkout process when using multiple payment gateways?
Yes, WooCommerce allows customization of the checkout process when using multiple payment gateways. To make your WooCommerce checkout page more conversion-optimized, use the FunnelKit Funnel Builder.
- Are there any additional fees associated with using multiple payment gateways?
While WooCommerce does not charge fees for using multiple payment gateways, each payment provider may have its fee structure, including transaction fees, monthly fees, or setup costs. In this blog, we have shared the fees of popular payment gateways like Stripe, Payal, Square, etc.
- How do I troubleshoot issues with payment gateways in WooCommerce?
To troubleshoot issues with payment gateways, start by checking the gateway settings and ensuring that API keys are correctly configured. Look for error logs in WooCommerce to identify specific issues, and consult the documentation or support resources for the payment gateways you are using.
Ready to Offer Multiple Payment Gateways in WooCommerce?
Multiple payment gateways are crucial for catering to customers with different payment preferences.
While Stripe covers many needs, adding multiple payment gateways is a smart move to maximize reach if your audience prefers options like PayPal or Amazon Pay.
However, always ensure the plugins you are using for the integration are compatible with each other, WooCommerce, and other existing plugins and themes you use.
If you want to enhance the shopping experience in your store beyond offering multiple payment methods, you should get FunnelKit Funnel Builder.
With this checkout page customizer plugin, you can optimize your page with features like Google address autocomplete, auto-apply coupons, etc., which will surely boost your conversion rate.
You can also replace the default checkout page with a multi-step checkout or a stylish, customer-friendly one-page checkout.
So, don’t just limit yourself to utilizing multiple payment gateways; start optimizing your checkout page for reduced cart abandonment and better conversion rates.
Get FunnelKit Funnel Builder today!

Editorial Team
June 10, 2026If you run a WooCommerce store and you're serious about email marketing and automation, chances are FunnelKit Automations and Klaviyo are both on your short list. Klaviyo is a cloud-based...

Editorial Team
June 8, 2026If you run a WooCommerce store, the difference between a good funnel builder and a great one shows up directly in your average order value. Your checkout, your bumps, your...
Editorial Team
May 25, 2026WooCommerce variable products let you sell different versions of the same item from one product page. Sizes, colors, materials, styles, etc. Instead of a separate listing for each option, customers...


