
Dealing with VAT rules in the EU can be complicated.
For domestic transactions (B2B or B2C), VAT is charged at checkout.
However, in cross-border B2B transactions within the EU, VAT-registered businesses are exempt from paying VAT at checkout.
Instead, they’re responsible for self-assessing and paying VAT in their own country through the reverse charge mechanism.
Failing to comply with VAT regulations can lead to fines and legal issues.
That's why adding an EU VAT number field at checkout is essential. It validates B2B transactions and ensures compliance with EU VAT rules.
In this blog, we'll walk you through how to add the EU VAT number field to your WooCommerce checkout.
Table of Contents
- 1 EU VAT Number: What It Is and How It Works?
- 2 Why Adding an EU VAT Number Field to WooCommerce Checkout is Crucial?
- 3 Does the WooCommerce Checkout Have a VAT Number Field by Default?
- 4 3 Best WooCommerce VAT Number Field Plugins
- 5 How to Add the VAT Number Field in WooCommerce Checkout?
- 6 Frequently Asked Questions About EU VAT Number Field in WOoCommerce
- 7 Ready to Add the WooCommerce EU VAT Number Field To Your Checkout?
EU VAT Number: What It Is and How It Works?
VAT compliance is crucial for domestic and international purchases for businesses operating within the European Union.
Here’s a breakdown of the EU VAT number and how it works.
What is an EU VAT Number?
The EU VAT number, or the European Union Value Added Tax identification number or VAT ID, is a unique identifier assigned to businesses and individuals registered for Value Added Tax (VAT) purposes within the European Union (EU).
Each EU member state issues VAT numbers to businesses and traders within their jurisdiction.
The primary purpose of the EU VAT number is to facilitate the collection and tracking of VAT on goods and services within the EU.
It allows businesses to engage in cross-border trade with other EU member states while ensuring proper VAT compliance.
A typical VAT number consists of:
- A country code (two letters representing the EU member state)
- A unique number (digits or a combination of letters and numbers assigned by the tax authority)
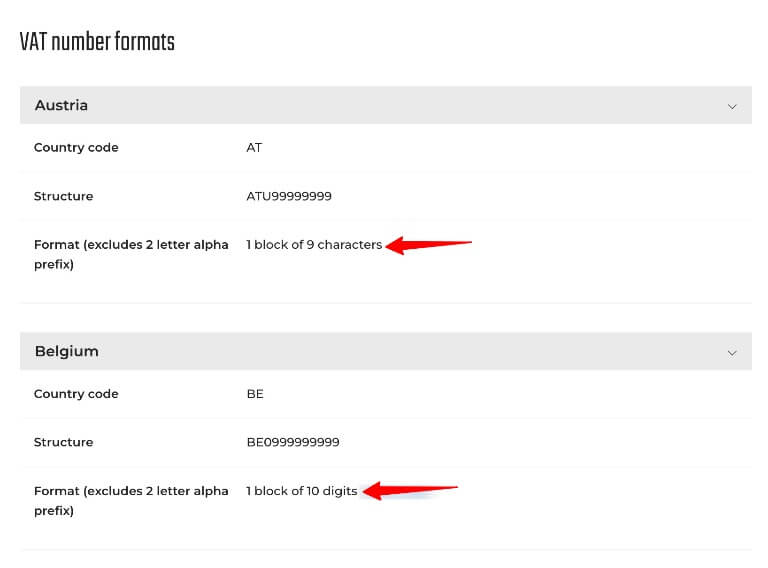
For example:
- Austria (AT): ATU99999999 (Prefix AT, followed by U and 8 digits)
- Belgium (BE): BE09999999999 (Prefix BE, followed by 10 digits)
It's important to note that the format and specific requirements for EU VAT numbers may vary from one EU member country to another.
Here, you can see the difference between the VAT Number format of two EU countries: Austria and Belgium.
How Does the EU VAT Number Work?
The EU VAT number is essential for determining how VAT is applied in EU and non-EU transactions.
Here’s when and why a VAT number is required:
1. Domestic Transactions (Same Country)
VAT treatment varies depending on whether the buyer is a business or an individual. Businesses may be eligible for VAT deductions, while consumers always pay VAT at checkout.
- B2B (Business-to-Business): VAT is charged unless an exemption applies. A VAT number is required for proper invoicing, VAT deduction eligibility, compliance with tax regulations, and qualifying for exemptions or reduced rates.
- B2C (Business-to-Consumer): VAT is always charged based on local VAT rates. Consumers don’t need A VAT number, as they cannot reclaim VAT.
2. Cross-Border Transactions (Within the EU)
When goods or services are sold between EU member states, VAT rules depend on whether the buyer is a VAT-registered business or a consumer.
- B2B Sales: If the buyer provides a valid VAT number, the seller does not charge VAT, and the reverse charge mechanism applies. The buyer self-assesses VAT in their own country. The seller must validate the VAT number through the VIES system and maintain records for tax compliance.
- B2C Sales: VAT is charged based on the buyer’s location under the One-Stop Shop (OSS) scheme. The seller must collect and remit VAT in the destination country. A VAT number is not required for B2C sales.
3. Transactions with Non-EU Countries
VAT rules differ when trading with businesses or consumers outside the EU. Exports are typically VAT-exempt, while imports are subject to VAT.
- Exports (EU to non-EU Buyers): VAT is not charged at checkout, as exports are zero-rated. However, the seller must retain proof of export (such as shipping documents) to justify the VAT exemption.
- Imports (Non-EU to EU Businesses): VAT-registered businesses must pay import VAT when bringing goods into the EU. They may reclaim this VAT using their VAT number through their country’s VAT return system, provided they meet the requirements.
Now you know why an EU VAT Number is so important for VAT compliance in EU transactions. To ensure compliance with EU VAT rules for WooCommerce stores, adding and validating an EU VAT Number field on the checkout page is very important.
More details are in the next section.
Why Adding an EU VAT Number Field to WooCommerce Checkout is Crucial?
As you know, the EU enforces specific VAT rules for both domestic and cross-border B2B transactions, and failure to follow them can result in penalties or delays.
That's why adding an EU VAT number field to your WooCommerce checkout is a crucial step to ensure your business stays compliant and avoids potential issues.
Not only does this help you meet legal requirements, but it also improves your customers’ shopping experience by providing transparency and simplifying the checkout process.
Here’s why you should add an EU VAT number field to your WooCommerce store’s checkout:
- Ensure compliance with EU VAT regulations
Adding a VAT number field helps your business comply with EU VAT rules, ensuring accurate VAT application and preventing errors in VAT calculation.
- Avoid penalties
A VAT number field reduces non-compliance risk, helping you avoid fines or legal trouble for improper VAT handling.
- Improve transaction transparency
Displaying VAT information during checkout builds trust with EU customers, reduces cart abandonment caused by unexpected charges, and provides greater price transparency.
- Streamline the checkout process
A VAT number field helps calculate VAT correctly, ensuring a smooth purchasing experience for B2B customers and reducing errors in pricing.
- Simplify invoicing
Collecting VAT numbers helps streamline invoicing, especially when operating across multiple EU countries with varying VAT rates.
By adding a VAT number field to your checkout page, you ensure VAT compliance while providing a better experience for your customers, keeping your business running smoothly within the EU.
Does the WooCommerce Checkout Have a VAT Number Field by Default?
No, unfortunately, WooCommerce, by default, does not offer any option to add a VAT number field to the checkout page.
But with the help of an additional plugin, you can easily add a VAT number field and validate it to ensure VAT compliance for transactions in EU businesses.
Move to the next section to find the best 3 VAT number field plugins.
3 Best WooCommerce VAT Number Field Plugins
Here are the top 3 plugins to add an EU VAT number field to your WooCommerce checkout page and validate it.
1. EU/UK VAT Validation Manager for WooCommerce
EU/UK VAT Validation Manager for WooCommerce simplifies the process of handling VAT for B2B transactions within the EU. Validating VAT numbers in real time ensures compliance while streamlining the checkout experience for both sellers and buyers.
Key Features:
- Add EU VAT number field at checkout: Easily add the VAT number field at checkout without any coding.
- Real-time VAT validation: Automatically validate EU/UK VAT numbers during checkout using VIES services.
- Customizable VAT exemption: Based on valid VAT numbers, the plugin removes or applies VAT as required by tax laws.
- Custom progress messages: Inform customers about the validation process with customizable messages.
Price: A free version is available. The pro version costs $4.17.USD/month, billed annually.
2. EU VAT Number for WooCommerce
The EU VAT Number for WooCommerce is designed to make VAT compliance effortless for businesses selling across the EU.
It provides an easy way to collect and validate VAT numbers, ensuring EU-based B2B customers are exempt from VAT charges and that your store stays compliant with EU tax laws.
Key features:
- Seamless VAT number validation: Validate VAT numbers in real time during checkout, ensuring only eligible businesses are exempt from VAT.
- VAT exemption for EU businesses: Automatically exempt VAT for customers with a valid VAT number, streamlining the transaction process for B2B sales.
- B2C transaction compliance: Ensure compliance with EU regulations by validating user location for VAT purposes, particularly for digital goods.
- Customizable VAT field: Tailor the VAT number field with editable labels and descriptions, providing flexibility to suit your store’s needs.
Price: This is a premium plugin that costs $39 for one year.
3. European VAT Compliance Assistant for WooCommerce
The European VAT Compliance Assistant for WooCommerce helps store owners ensure compliance with EU and UK VAT regulations.
It simplifies the process of managing VAT numbers, exemptions, and reporting.
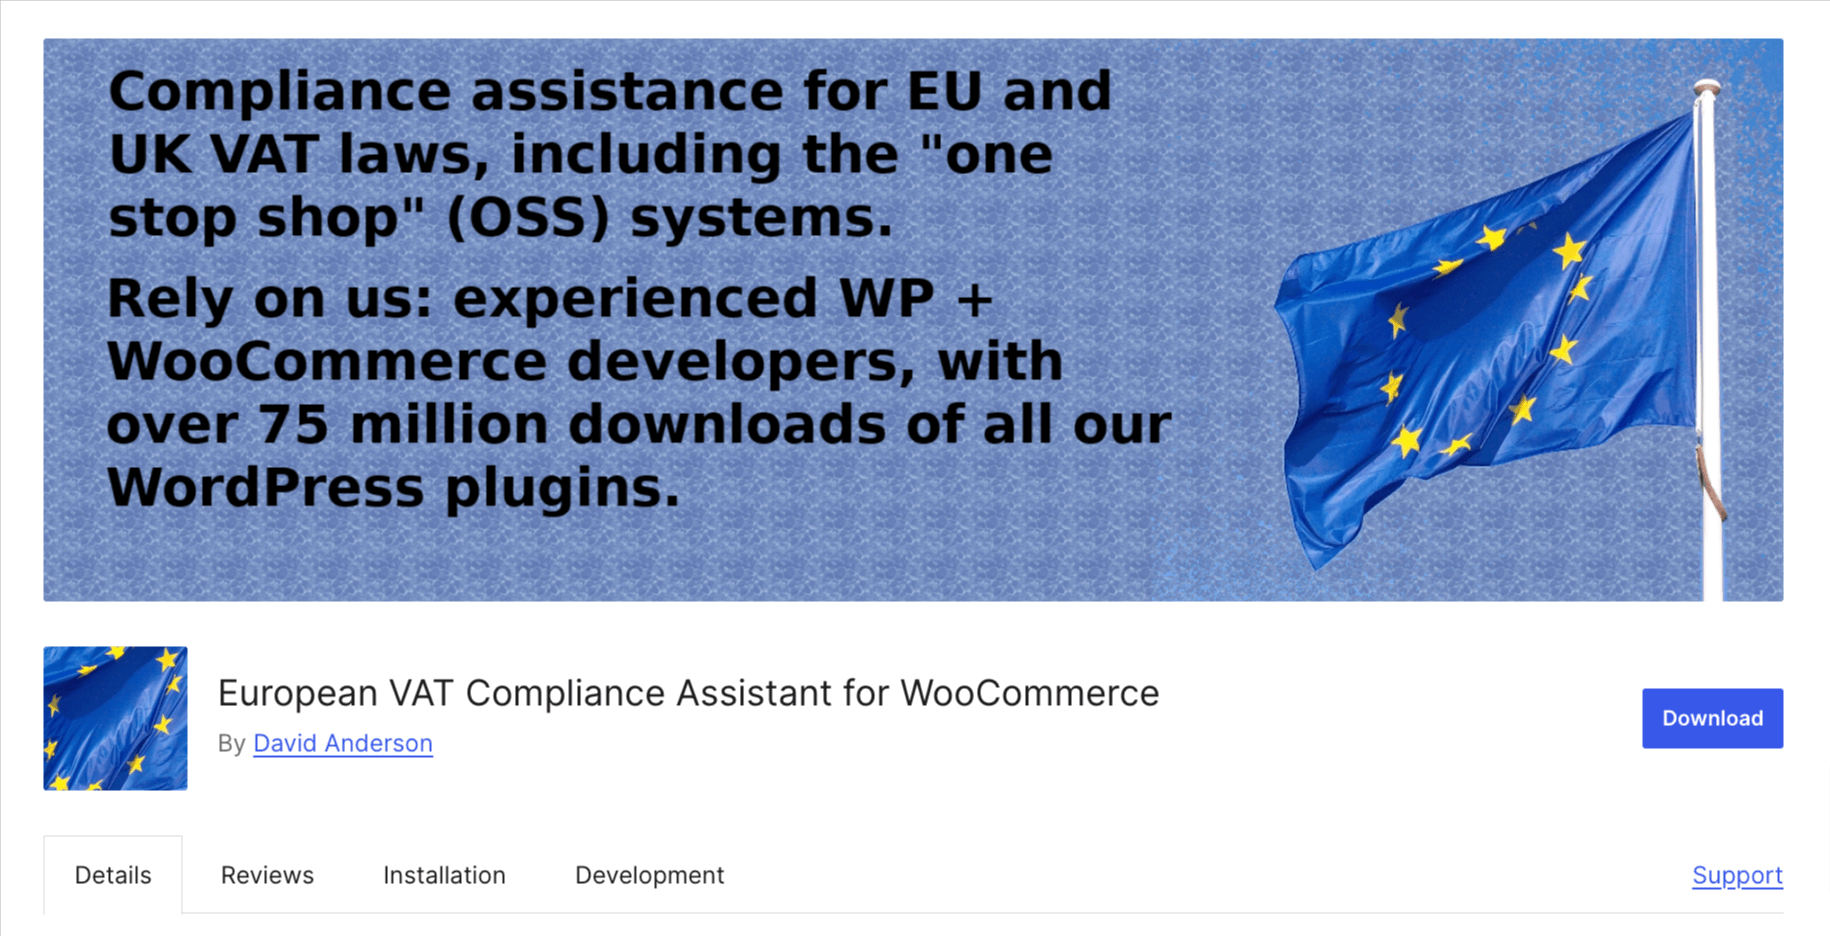
Key features:
- EU VAT number collection: Collect and validate VAT numbers at checkout for B2B customers.
- VAT exemption: Automatically exempt valid VAT-registered businesses from VAT charges.
- EU VAT number Validation (Premium): Uses official services like VIES, HMRC, or VatSense for VAT number validation.
- Invoice integration: Adds the validated VAT number to invoices and order summaries for B2B customers.
Price: A free version is available. The premium costs £55.00/year.
How to Add the VAT Number Field in WooCommerce Checkout?
Anyone doing business with an EU company can verify the validity of their VAT number through various online tools and databases provided by the EU and individual member states. This verification helps prevent VAT fraud.
In this section, we will show a simple process of adding a WooCommerce VAT number field to your checkout and putting the validation and calculation of VAT on autopilot.
To follow along with the process, you will need to install these plugins:
- EU/UK VAT Validation Manager for WooCommerce (Free)
- FunnelKit Funnel Builder (Free )
- FunnelKit Funnel Builder Pro
EU/UK VAT Validation Manager for WooCommerce lets you effortlessly validate UK/EU VAT numbers using VIES (VAT Information Exchange System) services, enabling you to sell to businesses in the EU without the additional tax burden.
It also Integrates with the PDF Invoice and packing slips plugin to generate EU VAT-compliant invoices automatically.
FunnelKit Funnel Builder, on the other hand, is a sales funnel plugin that empowers you to create customized global checkout and add custom fields to your checkout form. With this plugin, you can easily add the VAT Number field to your WooCommerce checkout page.
Not just a custom field, this plugin ensures you provide your users with a frictionless checkout experience with express payment buttons, Google address autocomplete, auto-apply coupons, and more.
In addition, you can also add order bumps and one-click upsells, which helps you increase the order value in your business.
Before we start the main process, make sure to install and activate all the plugins.
If you need help, you can check out the EU/UK VAT Validation Manager for WooCommerce and FunnelKit installation guides.
After activating the plugins, follow the following steps:
Step 1: Configure the EU VAT field
First, you need to configure the VAT field. For this, go to WPFactory ⇒ EU VAT. Next, set the field label, placeholder, and description. Make sure “required” is selected for the VAT field.

Scroll down and hit Save Changes to update.
Move to the Validation tab, here you can configure EU VAT validation and exemption settings for sign-up, checkout, and "My Account" pages.
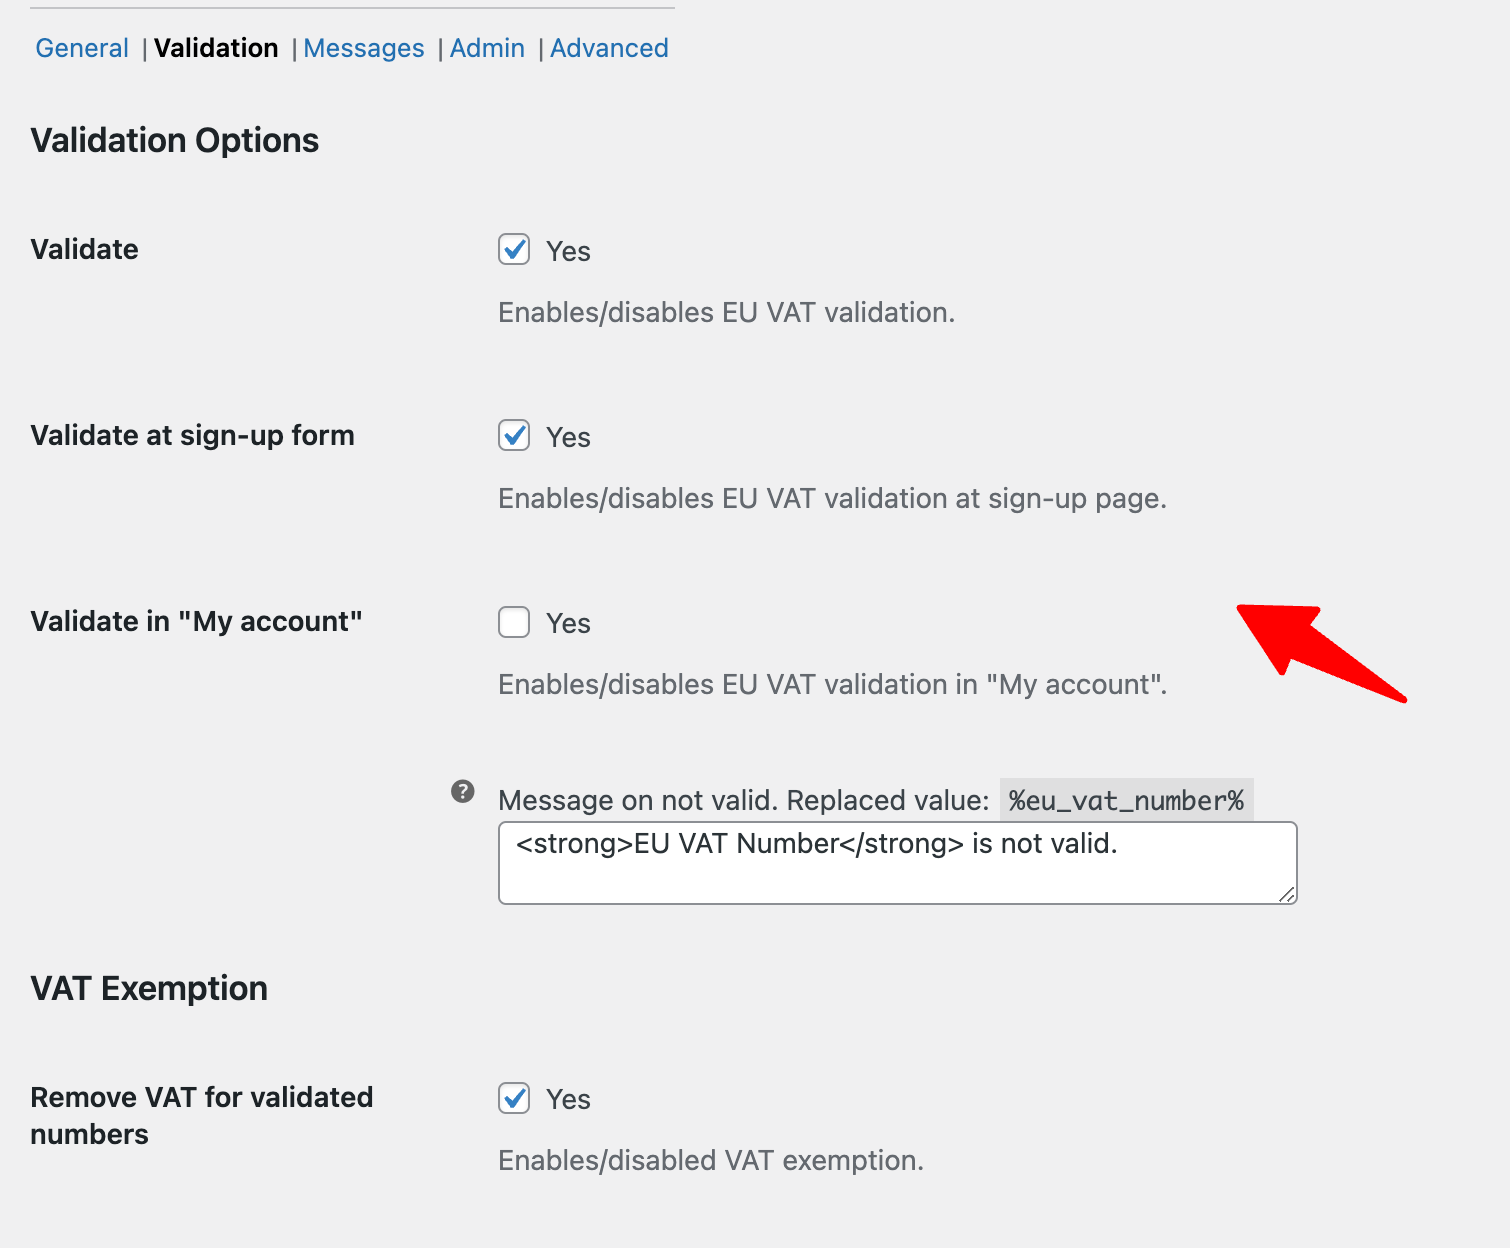
Make sure to save changes.
Step 2: Add a store checkout
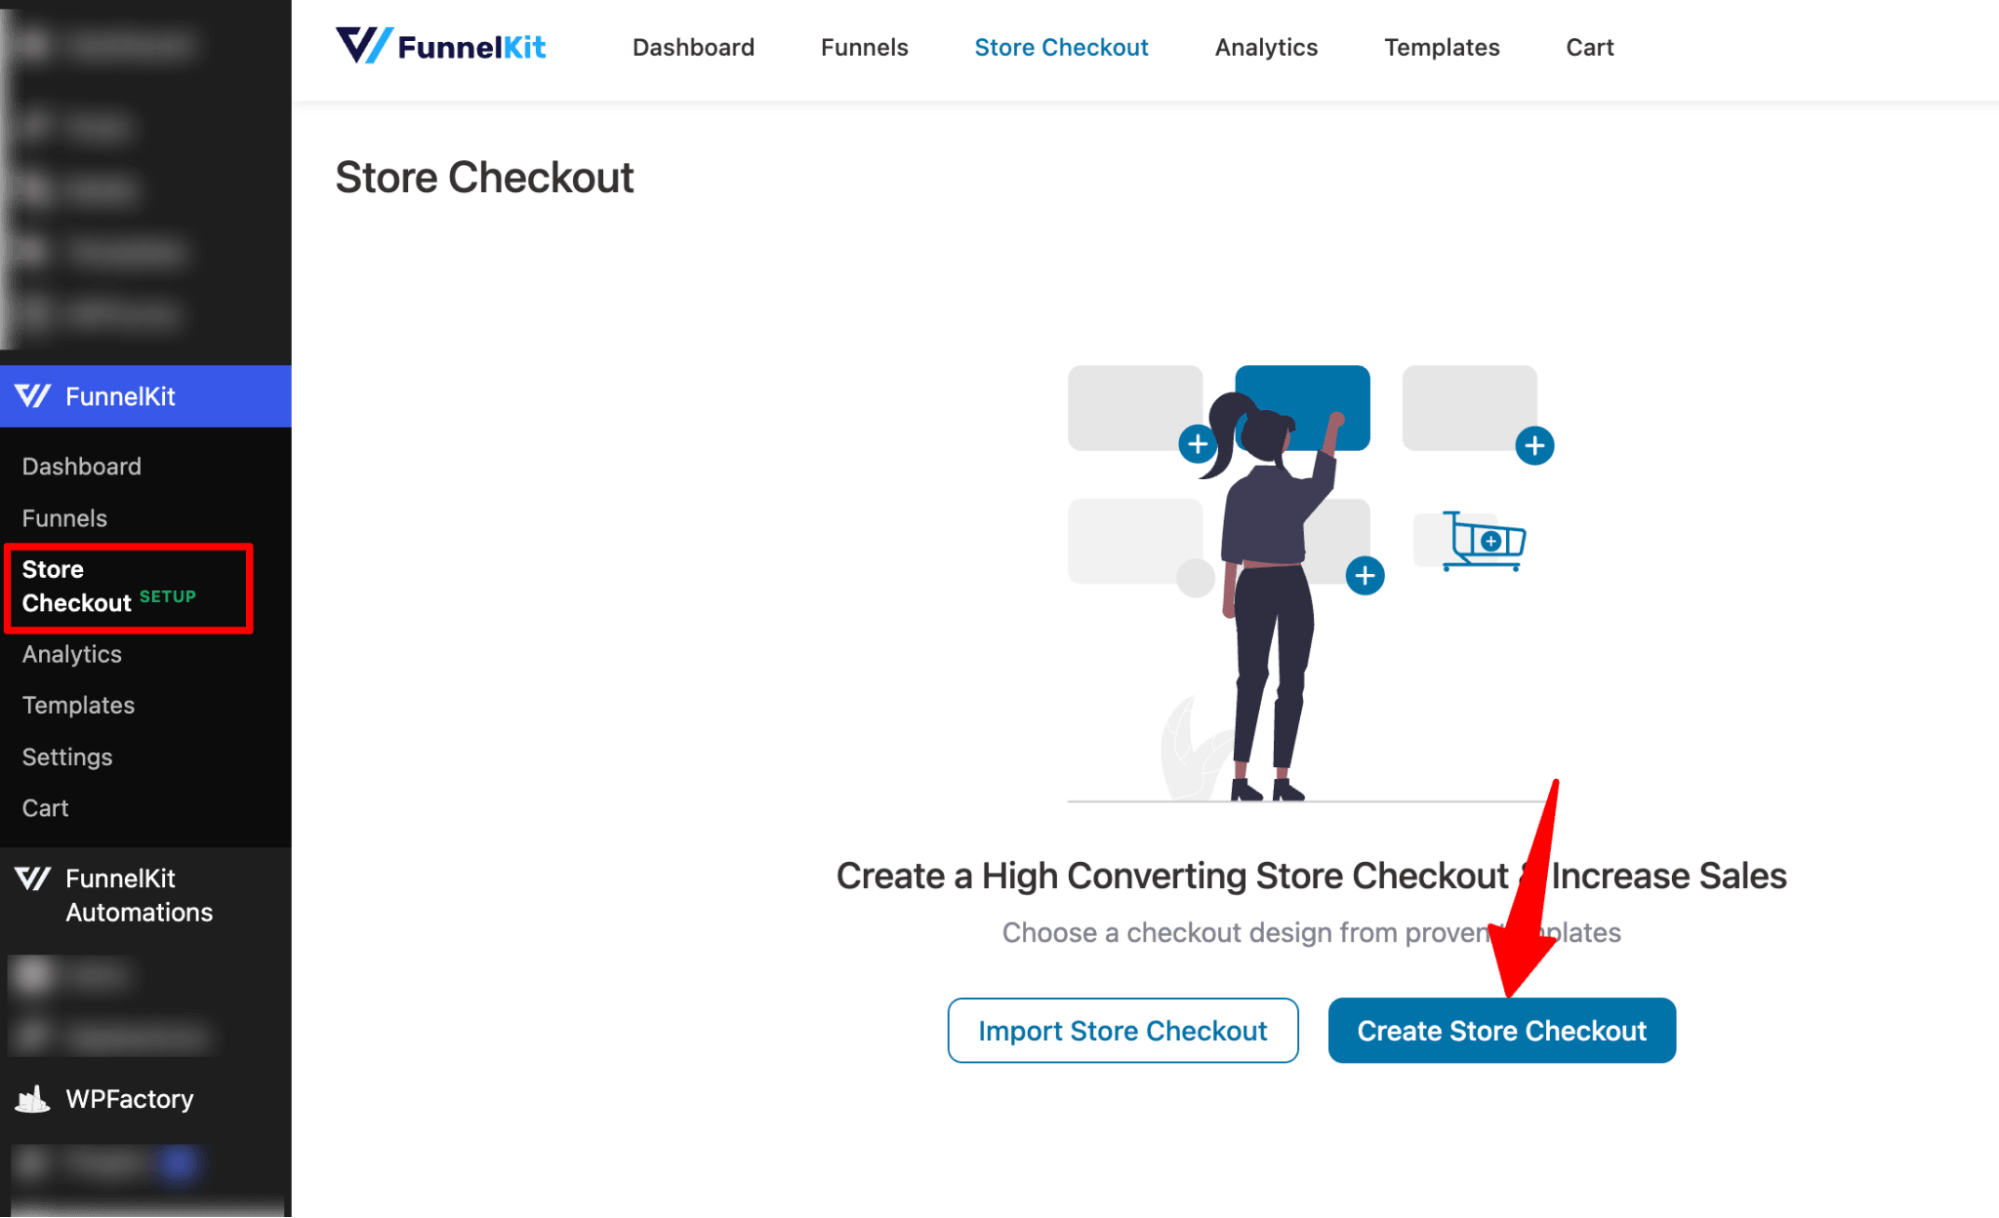
Now, we need to create a global checkout so that you’ll be able to add the VAT number field to the checkout.
This global checkout will replace the default WooCommerce checkout page and add a custom page that looks attractive and has all the conversion-friendly elements.
To create a new store checkout, navigate to FunnelKit ⇒ Store Checkout and click on “Create Store Checkout.”
Now, you should see a new window with all the prebuilt templates by FunnelKit. Choose your favorite page builder and hover on the template you like.
Note: FunnelKit is compatible with most popular page builders such as Elementor, Bricks, Divi, Gutenberg, Oxygen, etc.
To preview the template pages, hover and click on the “Preview” button. Here, we are going with the Elementor page builder and the template “Shoppe”. This template has two steps: checkout and thank you page.
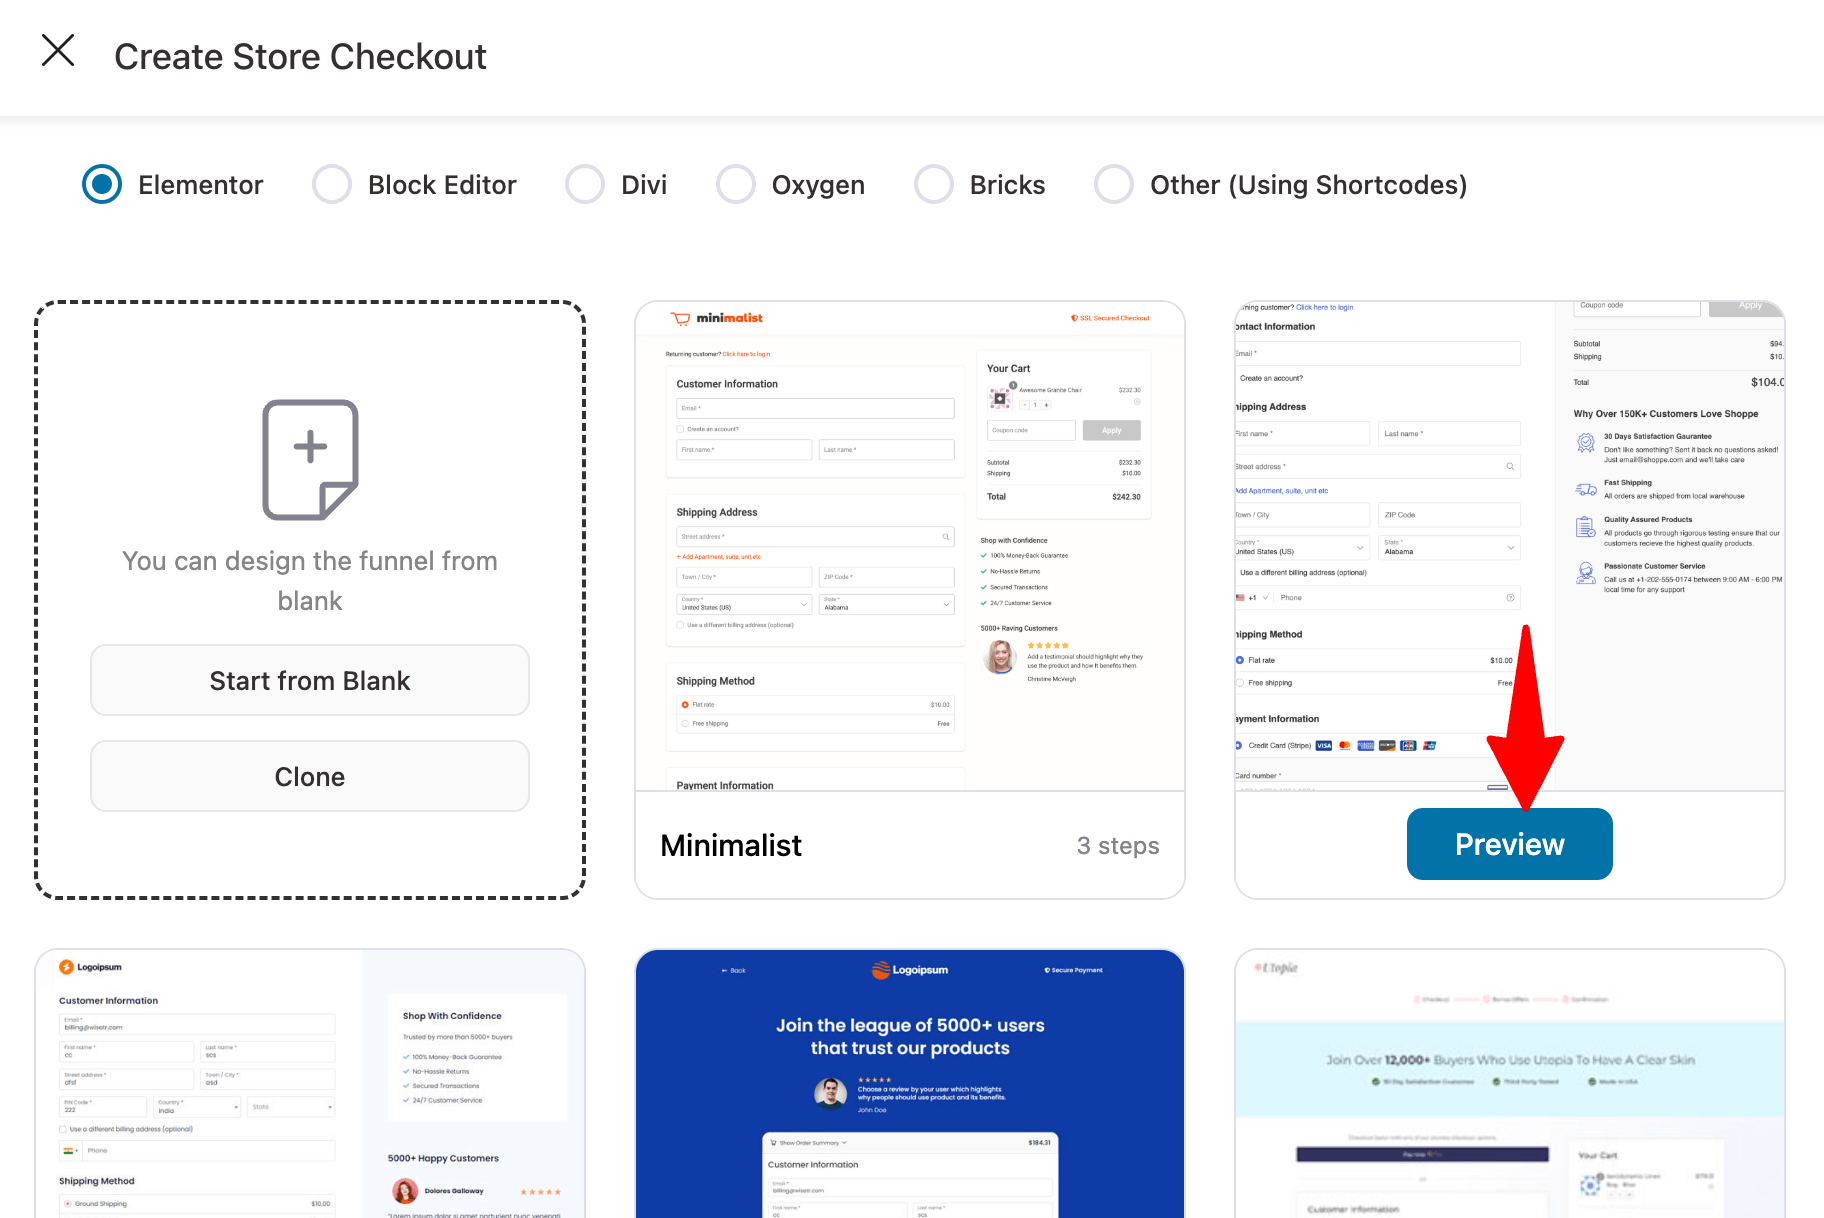
First, choose whether you want a single-page checkout or a multi-page checkout. We are going with the multi-step checkout.
After that, to import the template you choose, click on “Import this funnel,” then provide a name and click on Add.
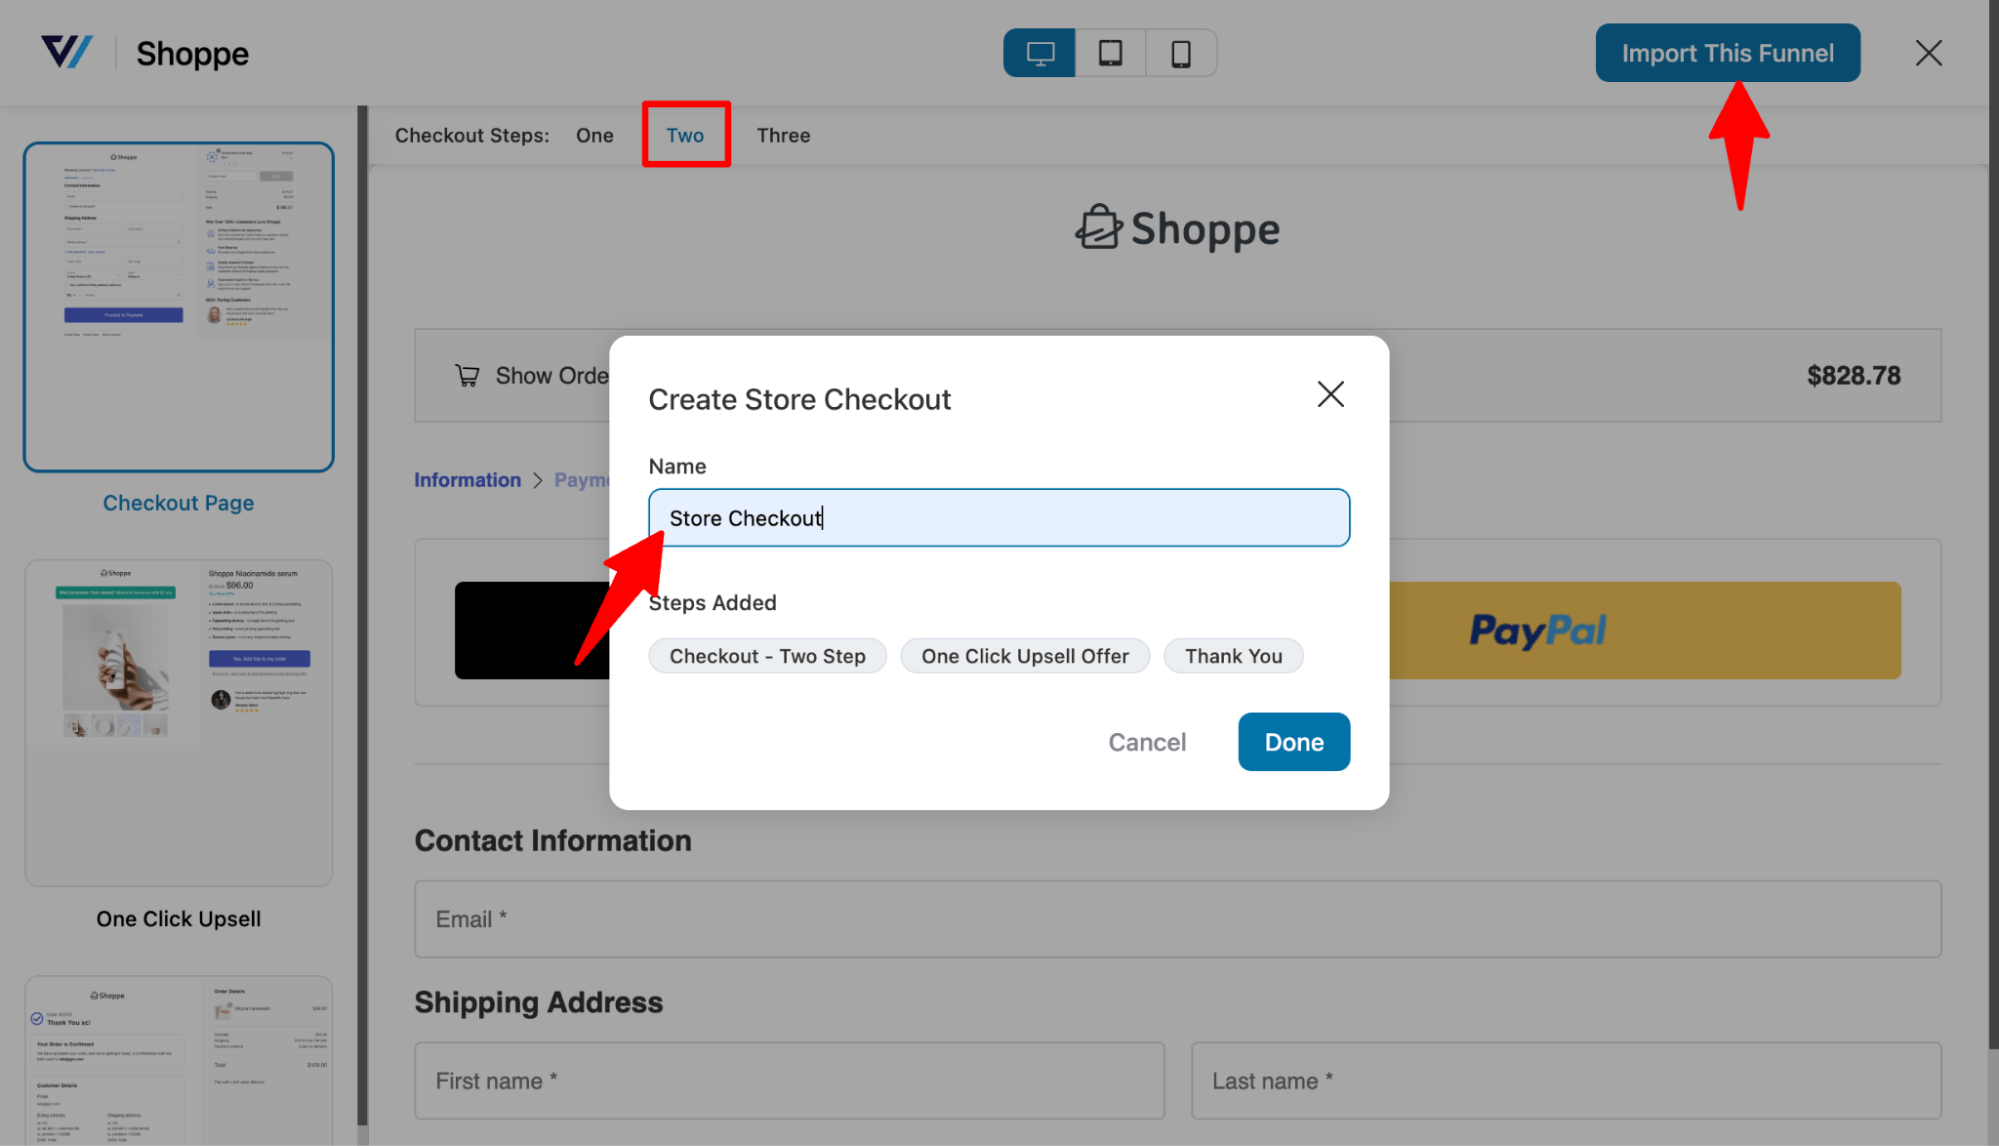
Note: This will add and replace your default WooCommerce checkout with the newly created store checkout.
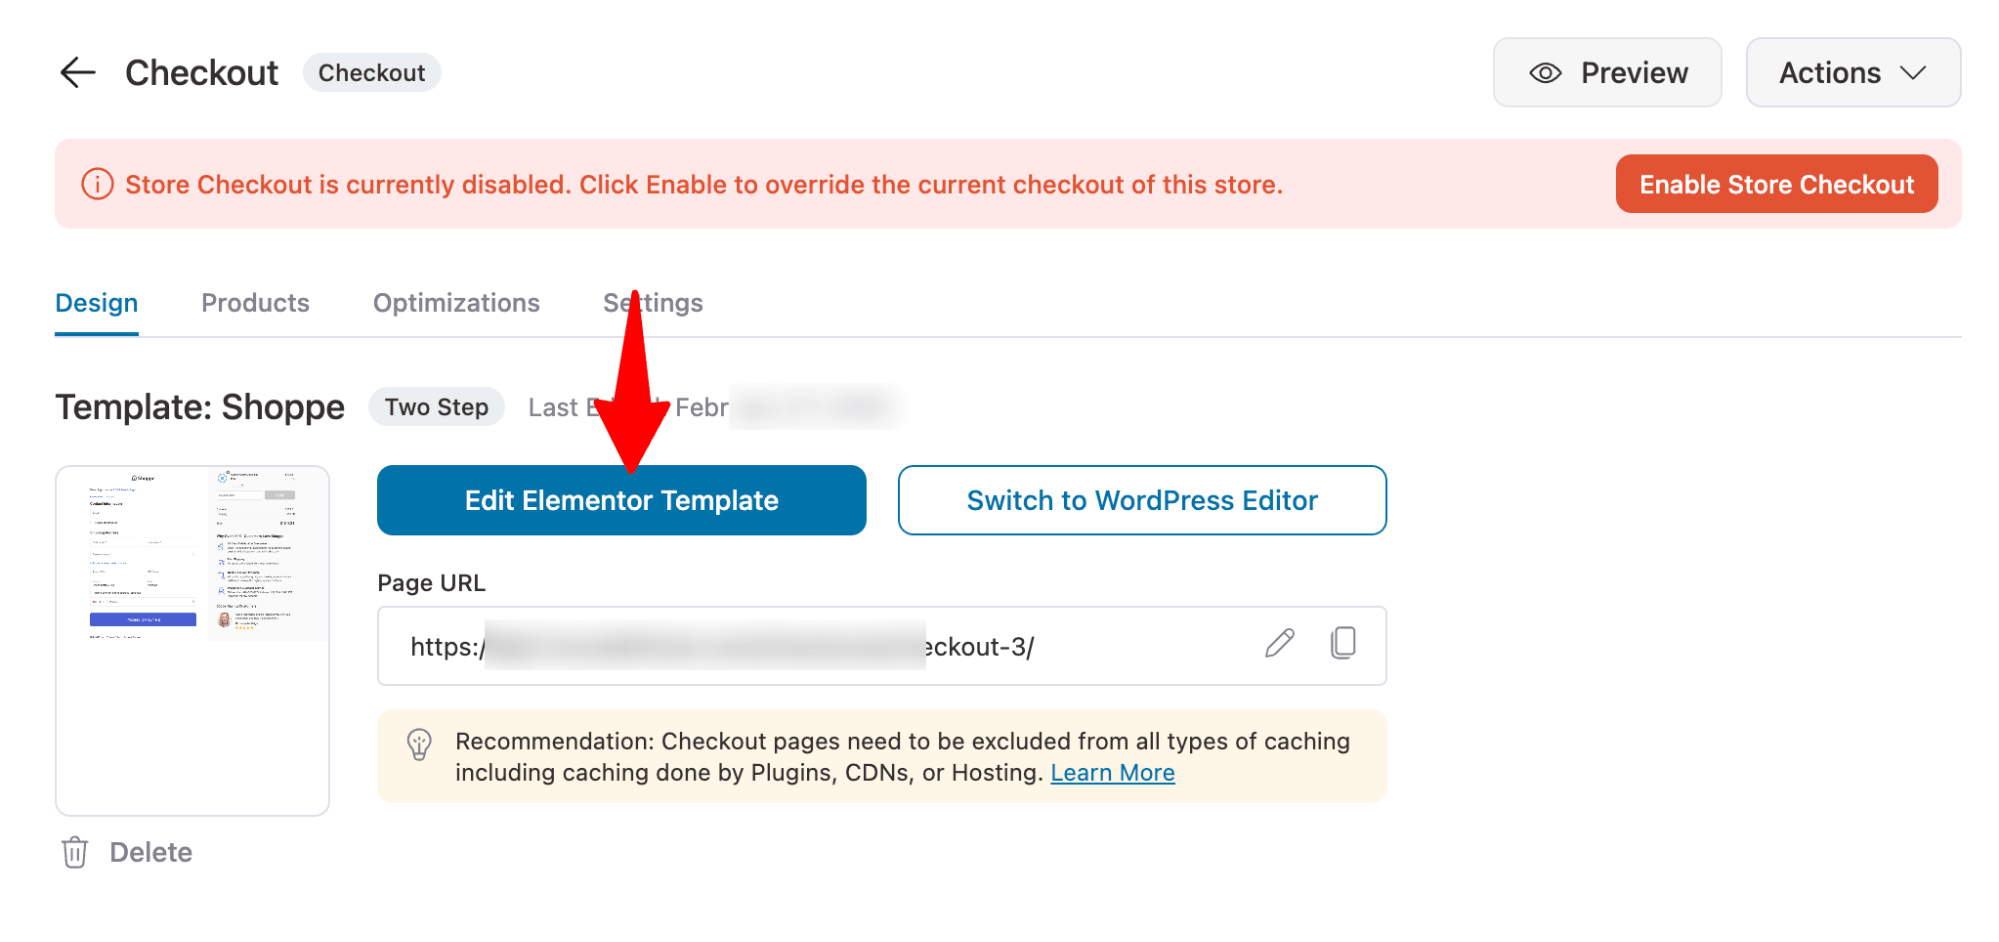
Step 3: Customize the WooCommerce checkout page
Now, hit the checkout page to start the editing process.
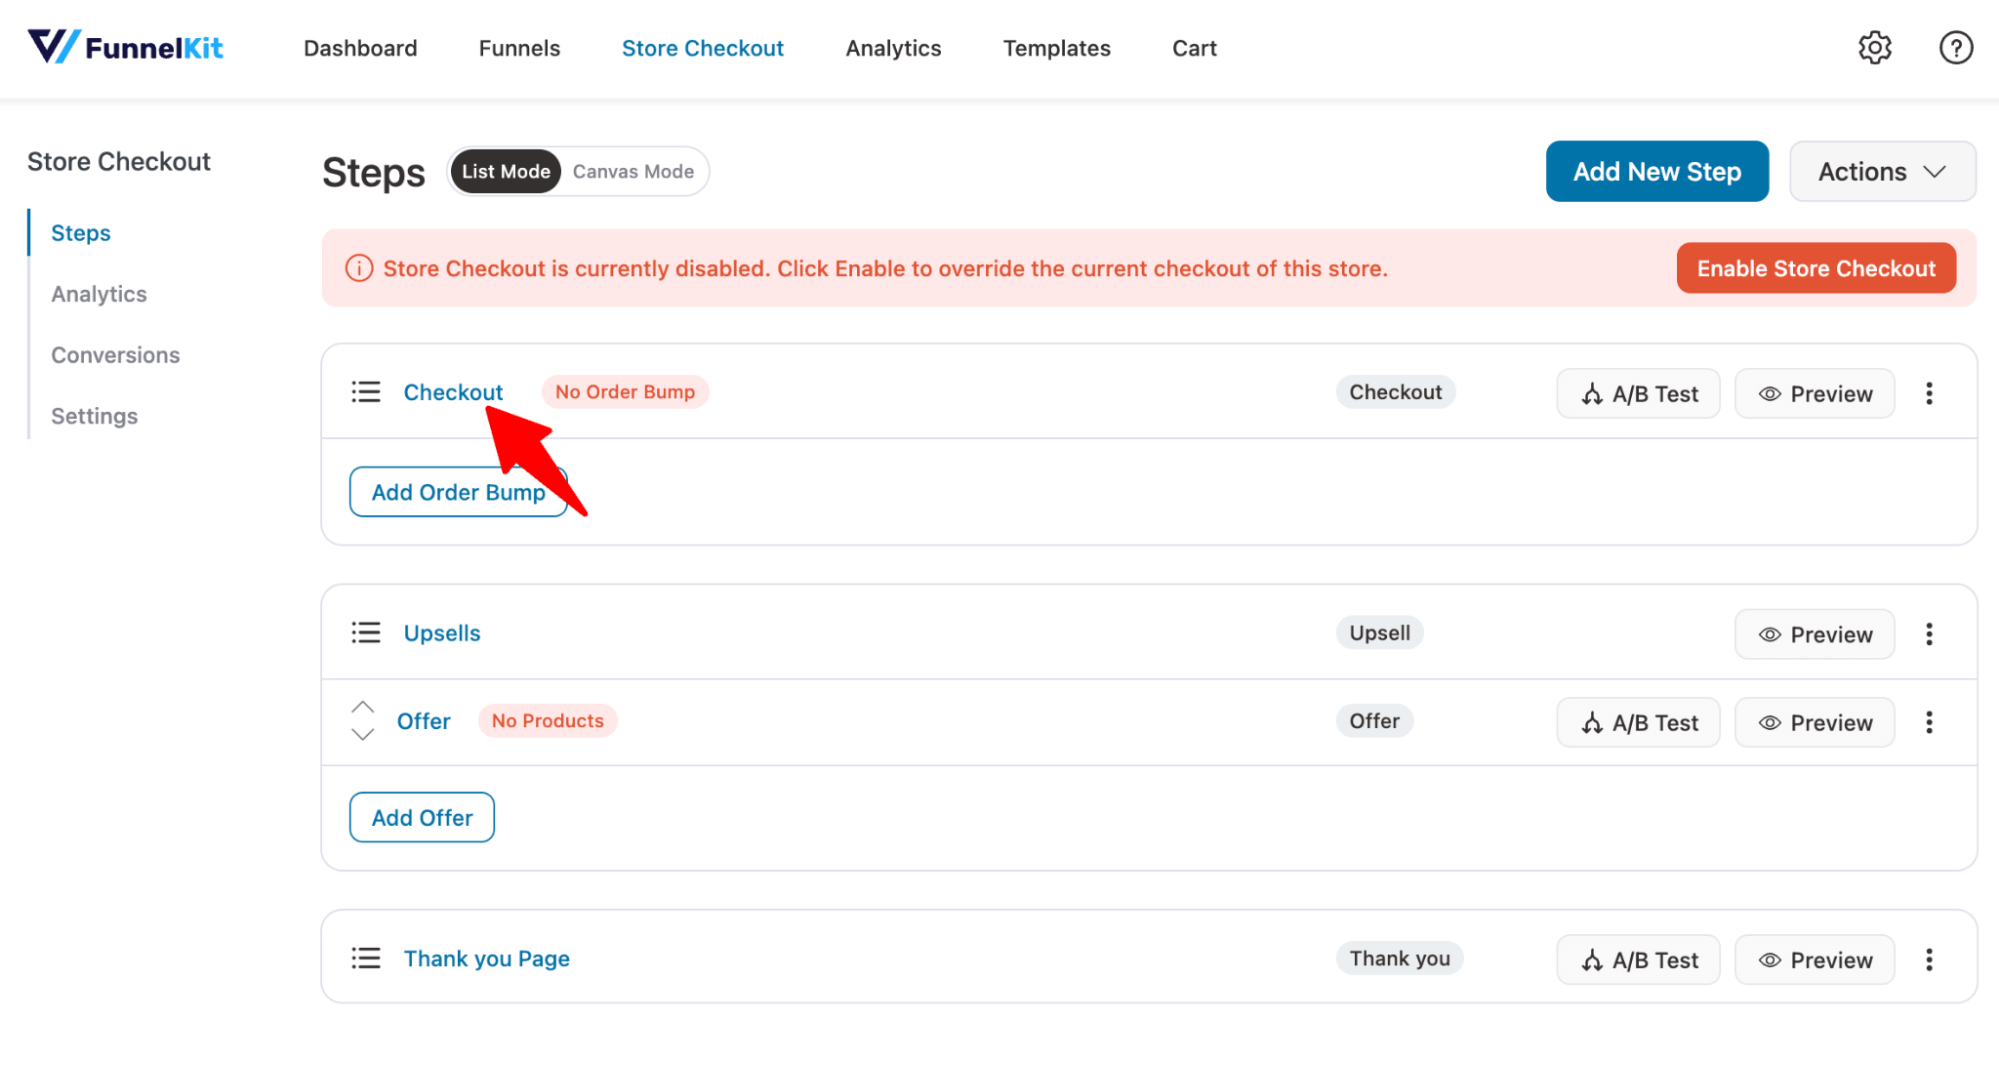
On the Design tab, you can customize the design of the checkout page template. For more details, check our blog “How to Customize WooCommerce Checkout Page”.
Step 4: Add WooCommerce VAT number field
Now to add the VAT number field, scroll down to the “Checkout Form Fields” section. On the right side, under the Advanced Section, you will find a field “EU?UK VAT Manager”.
Drag and drop the field to the form field sections. You can add anywhere on your checkout form.
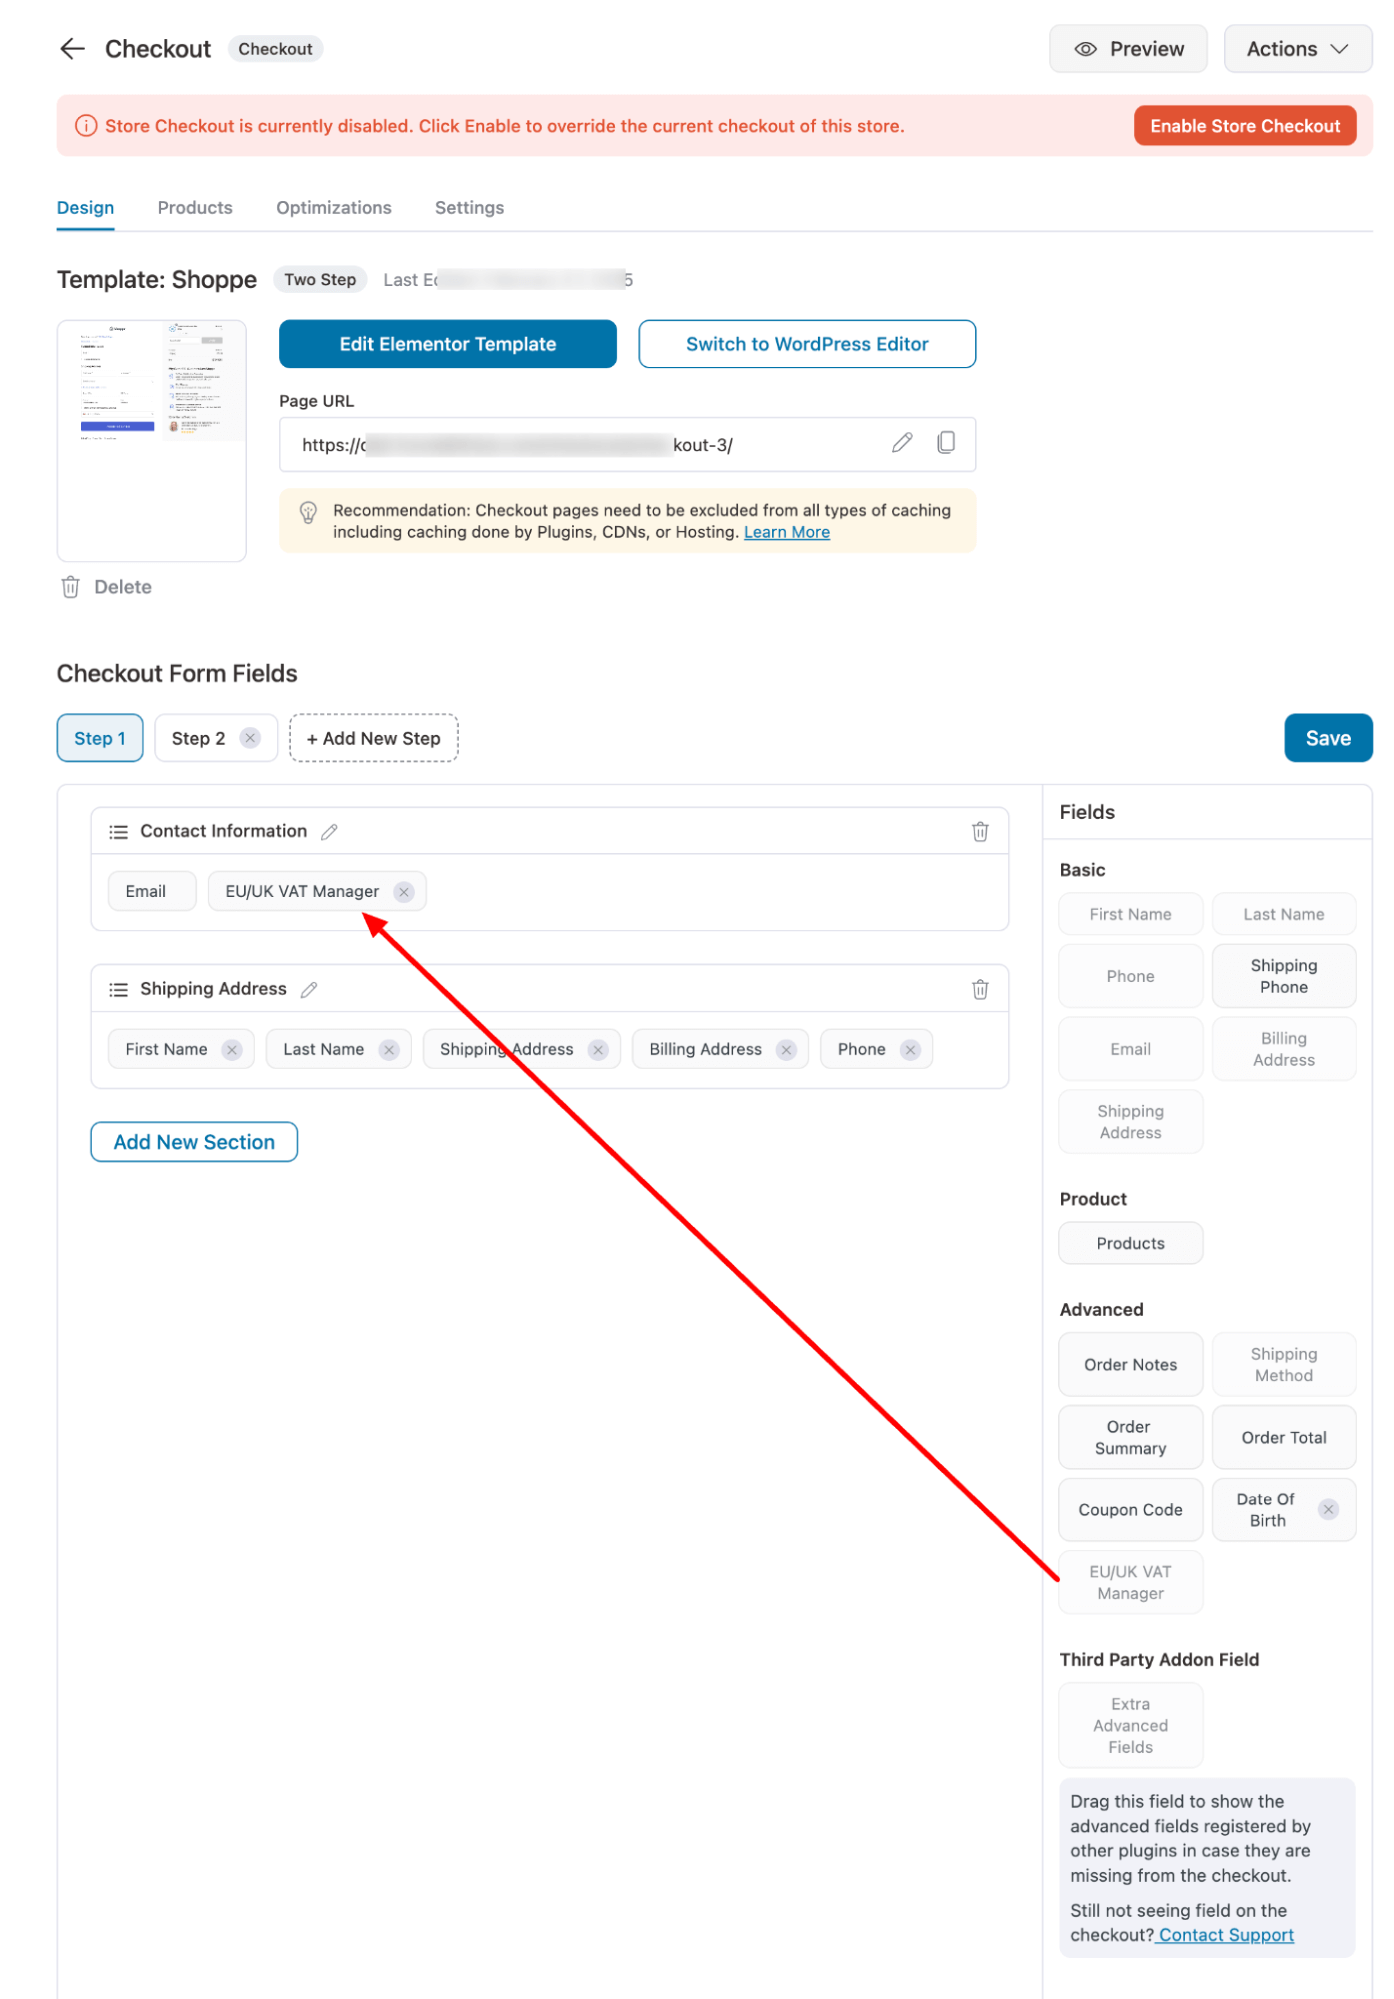
🔔 Note: If you want, you can change the order of the VAT field just by dragging and dropping the order where you want to place it.
Now, hover on the VAT field and click on the “Edit” icon to customize the options.
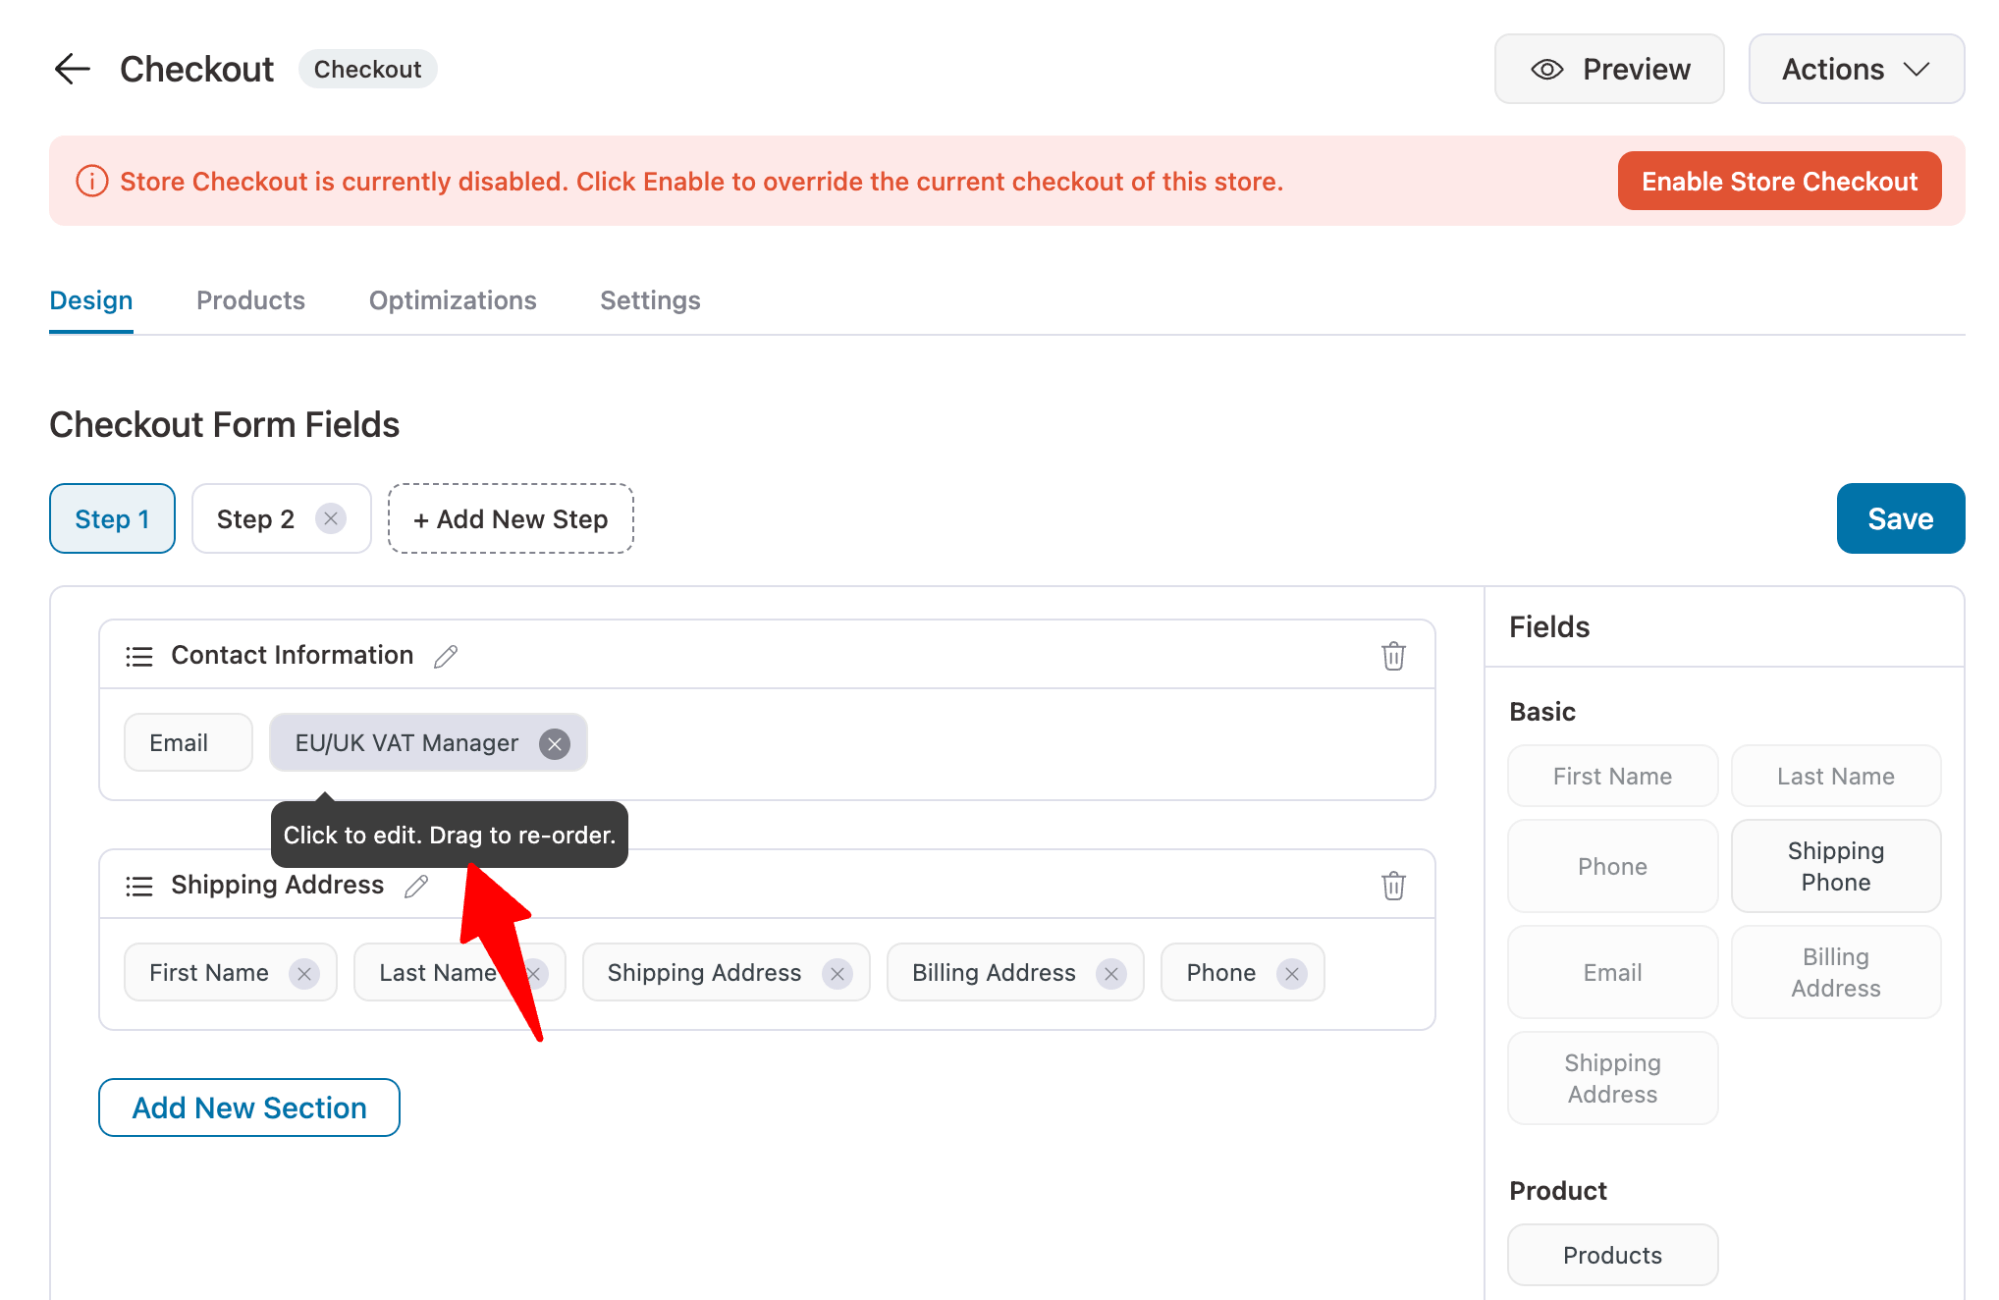
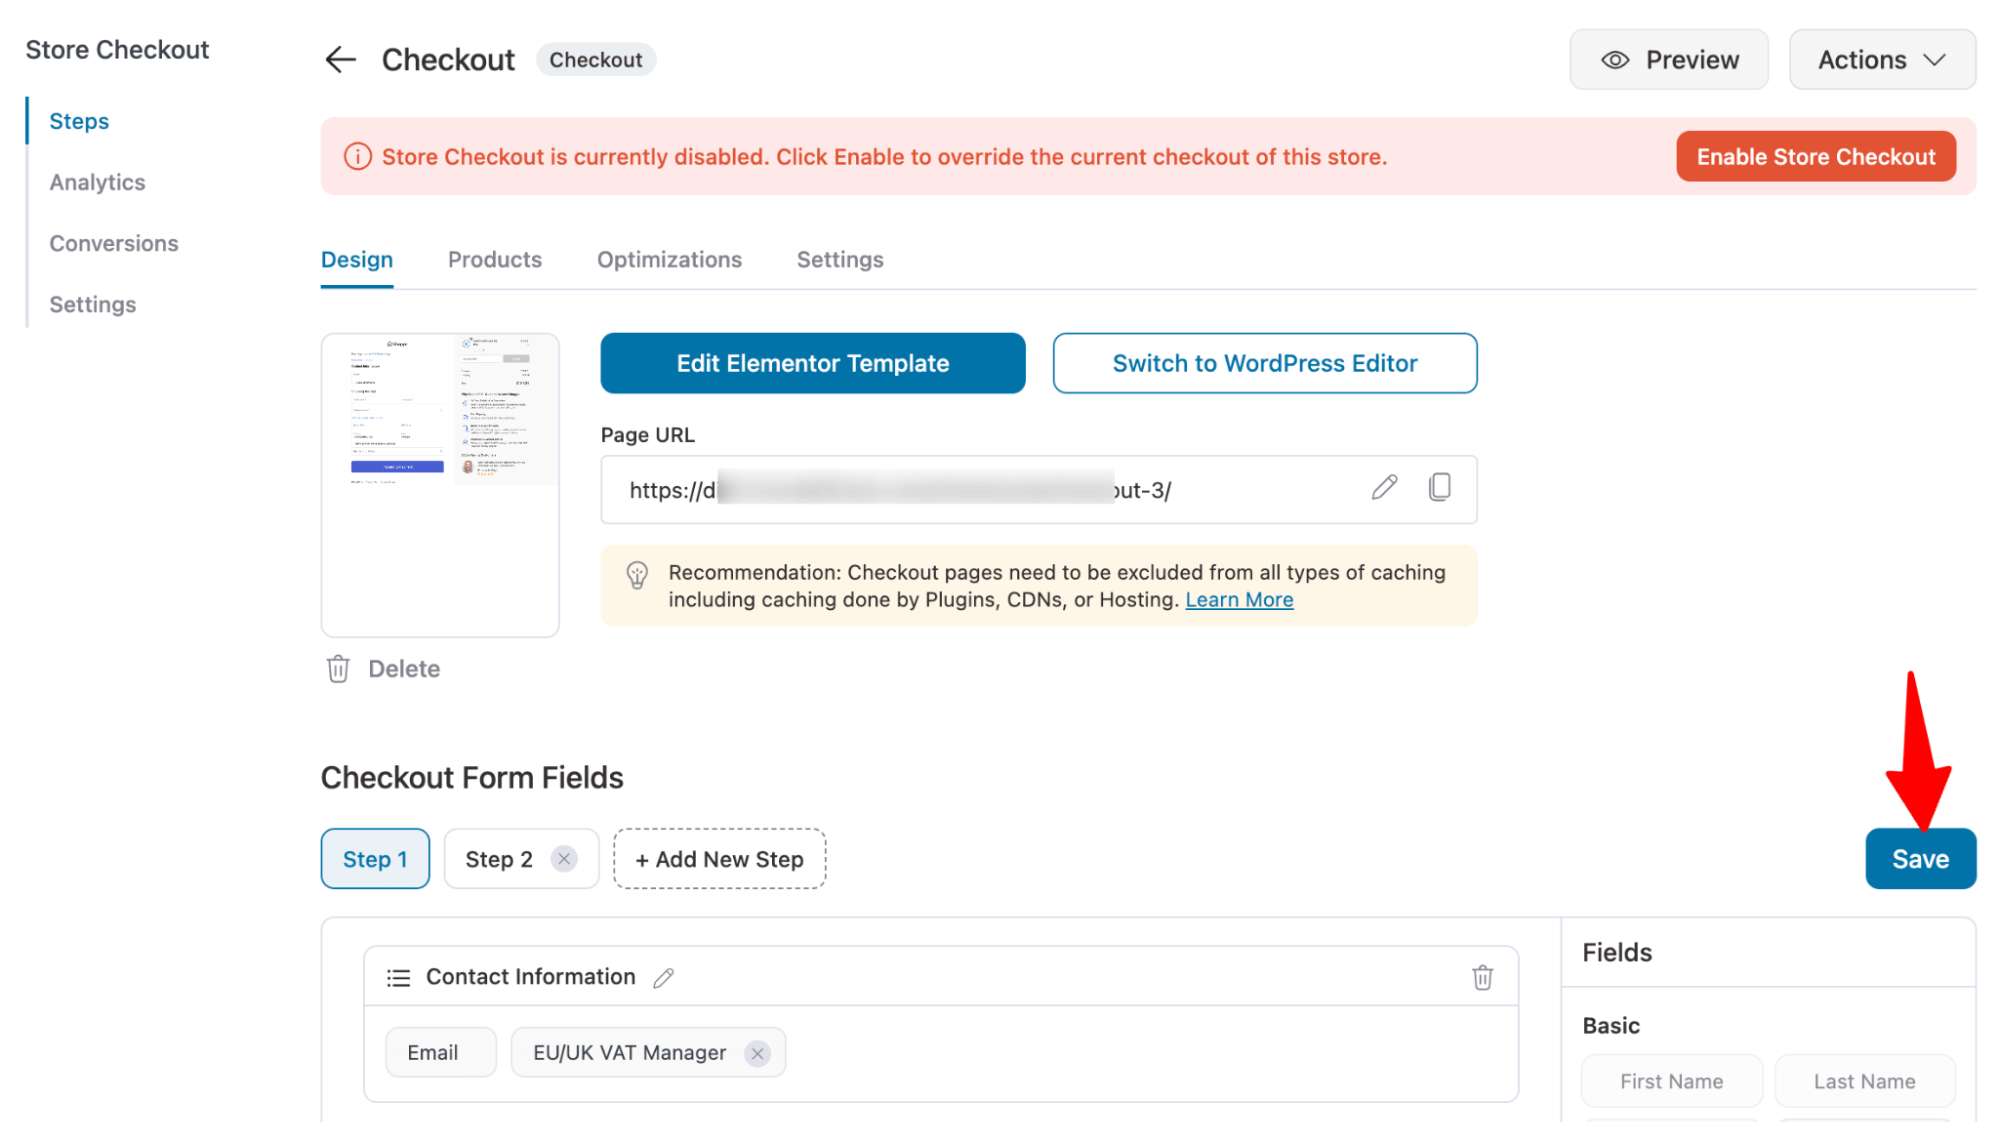
Click on the Save option to save all the changes you made to the form fields.
On the Optimization tab, you can optimize your checkout page with auto-apply coupons, like Google Pay and Apple Pay, google address auto-complete, enhanced phone field, etc.
Check out the checkout page optimization guided for more details on all the optimization options.
To boost the average order value, you can set up order bump and upsells as well.
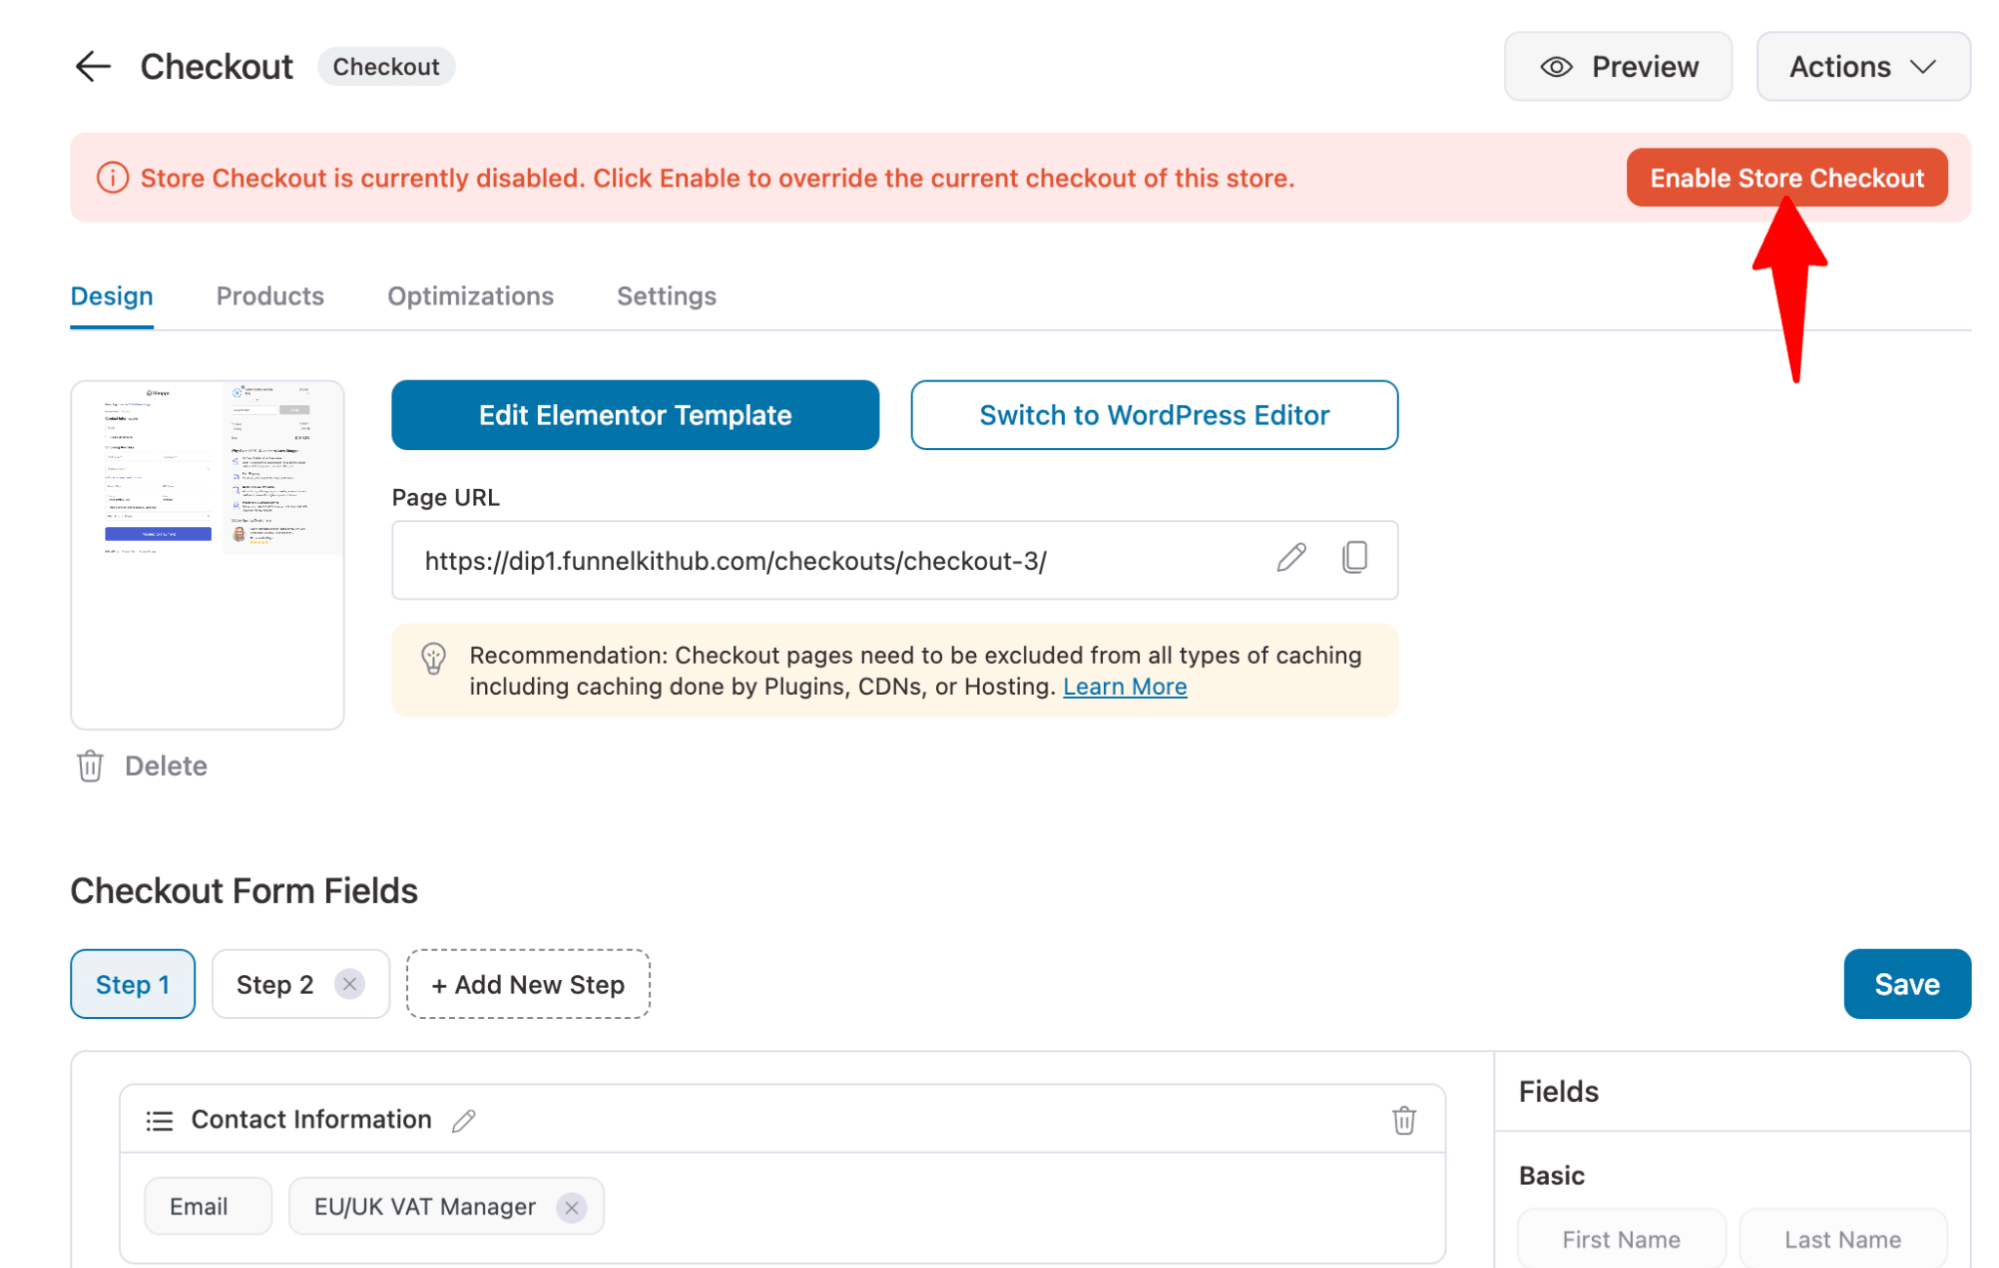
Step 5: Enable store checkout
Like your checkout page, you can customize the thank you page the way you want.
After that, you need to enable the store checkout so this new checkout with the WooCommerce VAT number field becomes the default checkout for your store.
For that, turn on the “Enable Store Checkout” button.
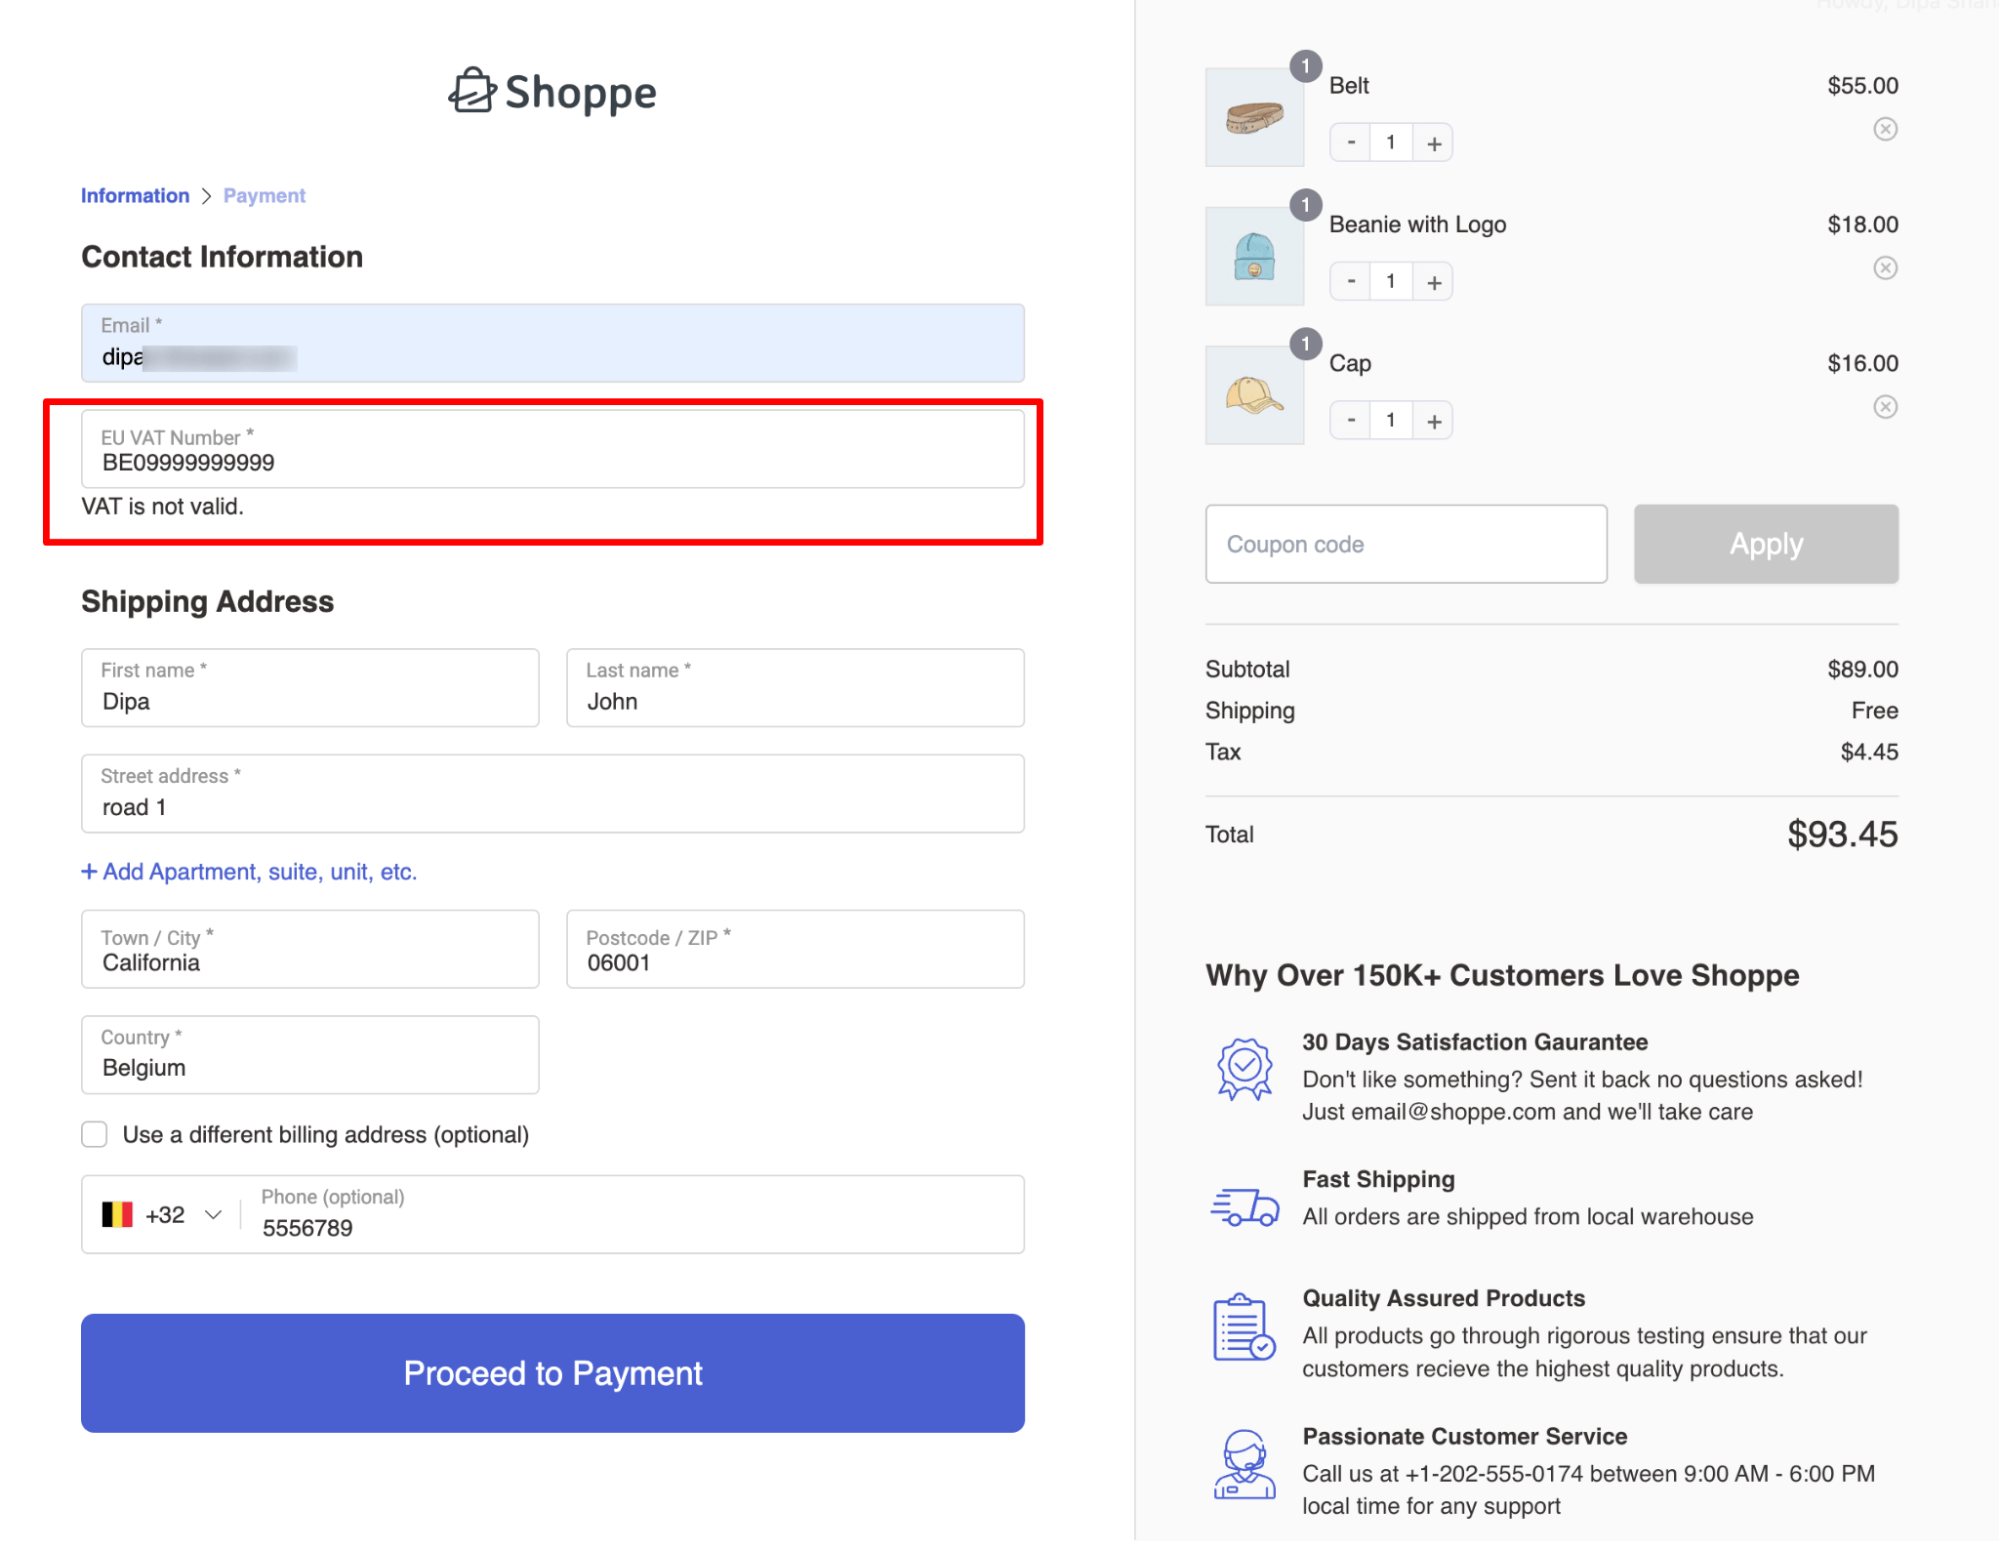
If you try to place an order, you should see the VAT field on the checkout page like this. As we made the field required, it will show the message to the customers.
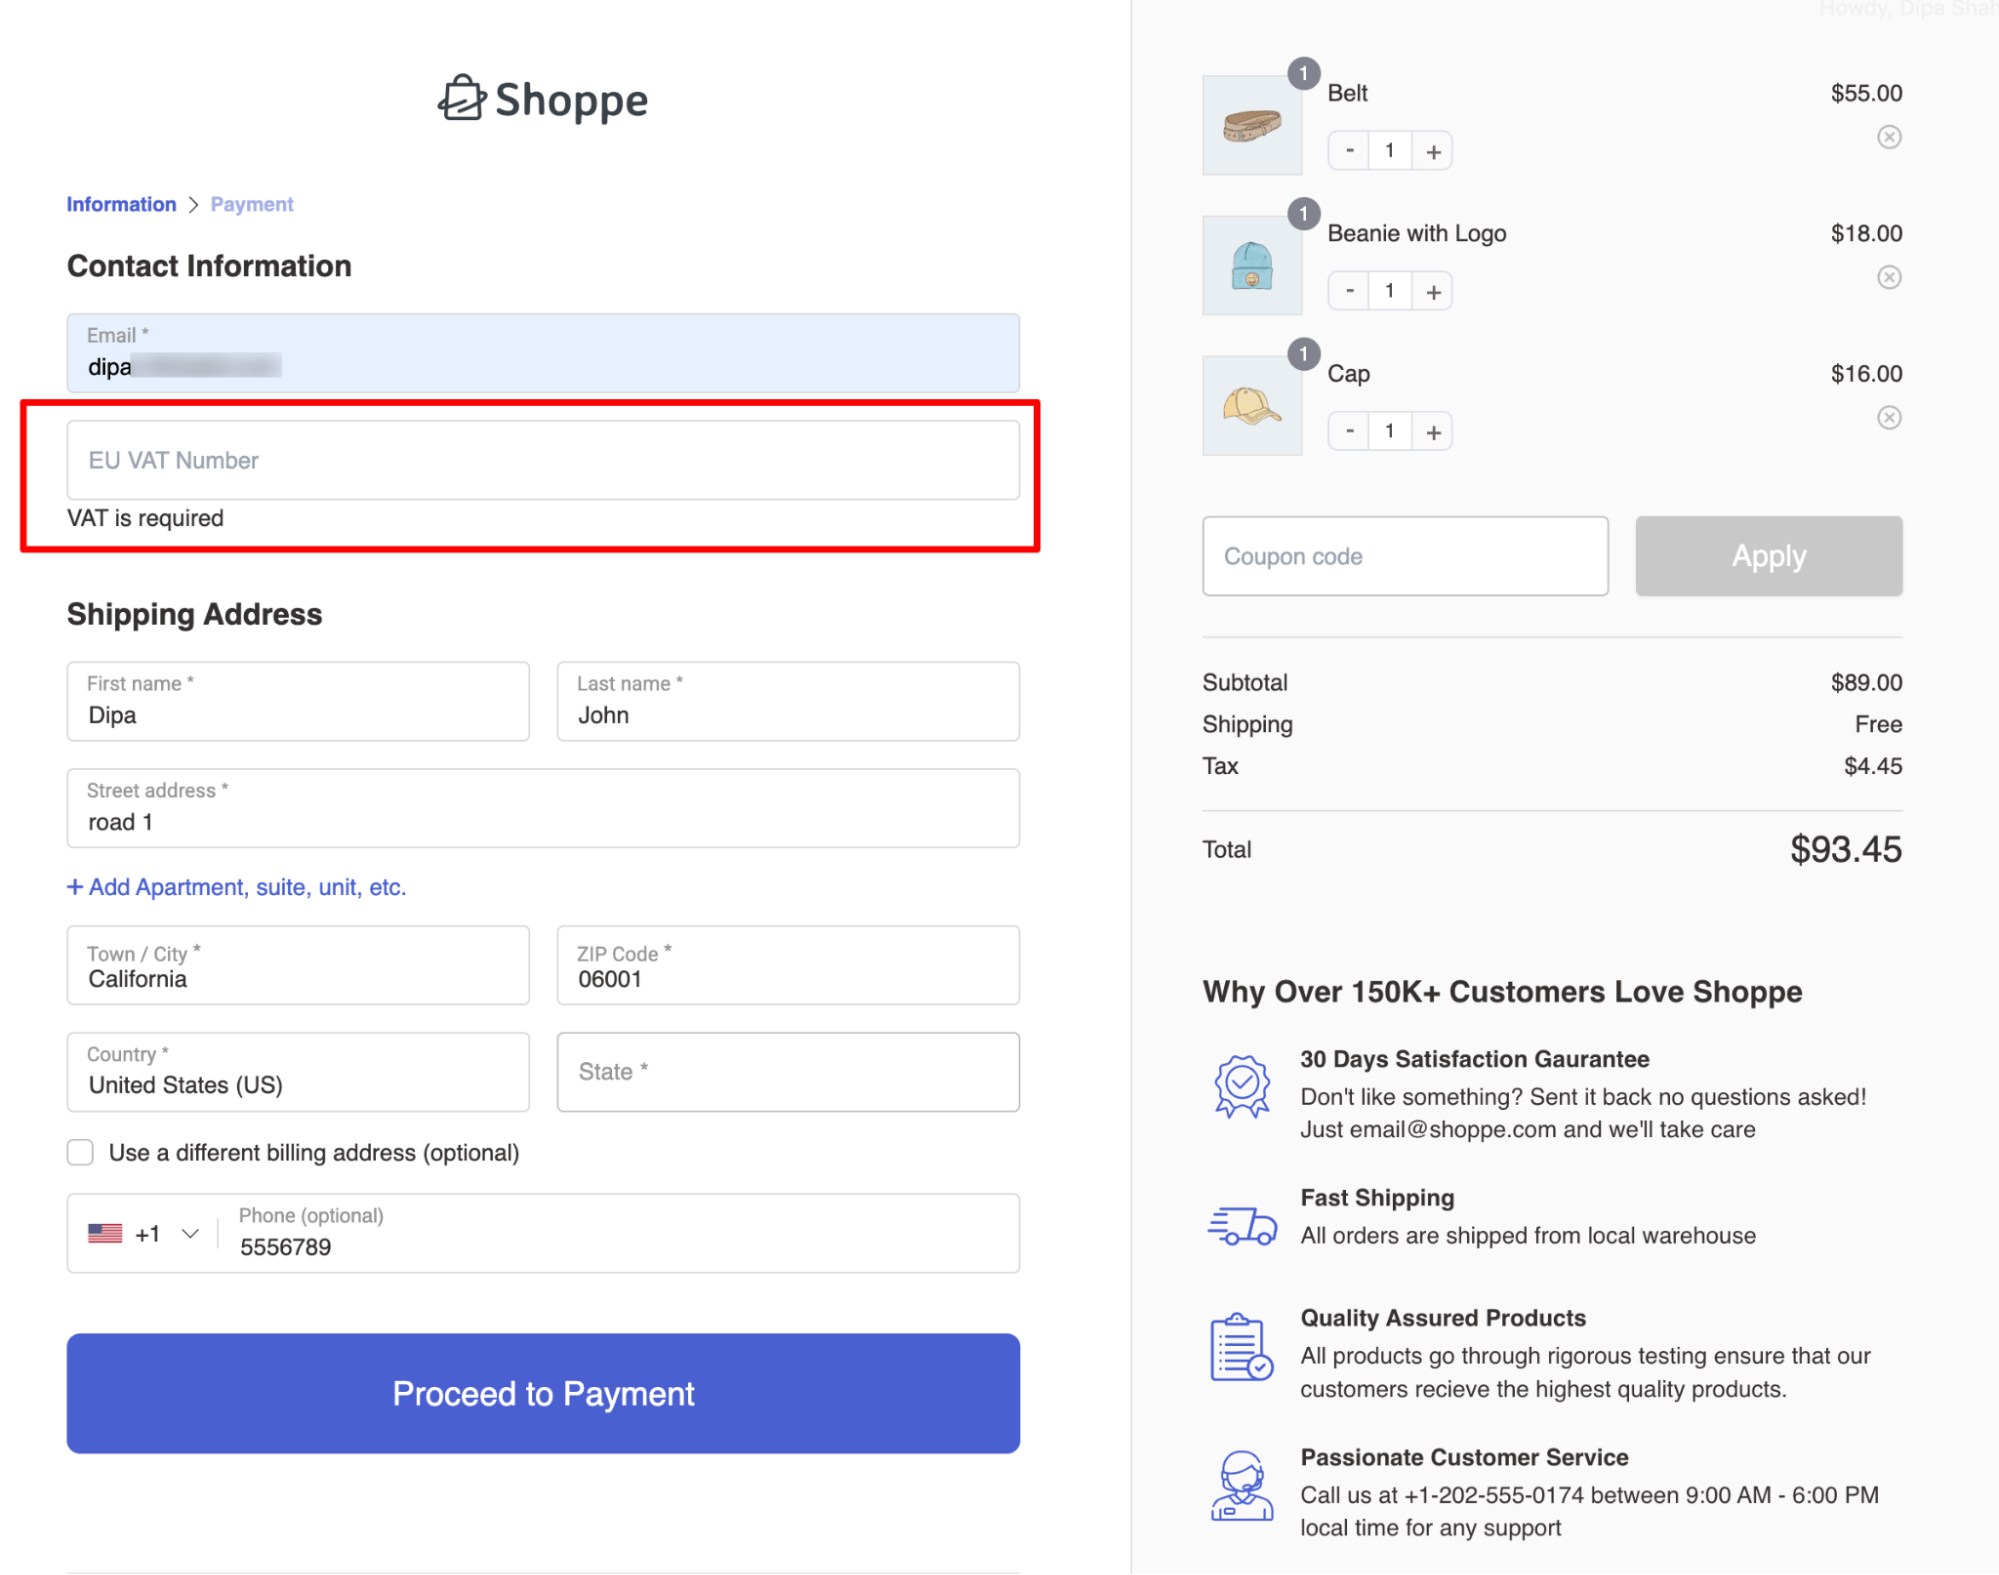
As users enter the EU VAT number, the checkout page instantly validates the information, ensuring that only EU VAT-registered customers can complete the purchase.
That’s it. That is how easily you can add an EU VAT Number field to WooCommerce checkout.
Frequently Asked Questions About EU VAT Number Field in WOoCommerce
- Can I add a VAT number field and charge tax for non-EU countries?
Yes, you can add a VAT number field in WooCommerce and configure tax settings to charge tax for non-EU countries.
In this blog, we shared how you can collect VAT numbers at checkout. To charge tax for non-EU countries, configure tax rates under WooCommerce > Settings > Tax and define rates for specific regions. You can read our blog on WooCommerce taxes.
In this case, the VAT number field should be optional, as non-EU customers will not have an EU VAT number.
- How can I exempt regular B2B customers from VAT in WooCommerce for the EU?
To exempt B2B customers from VAT in WooCommerce for the EU, use a plugin like EU/UK VAT Manager for WooCommerce.
This plugin adds a VAT number field at checkout and validates VAT IDs through the VIES system. If the VAT number is valid, the customer is automatically exempt from VAT.
You can configure these settings under WooCommerce > Settings > Tax to apply exemptions based on VAT validation results.
Ready to Add the WooCommerce EU VAT Number Field To Your Checkout?
Adding an EU VAT number field to your checkout process is a proactive step toward ensuring compliance with European Union tax regulations.
By simplifying the process for customers to provide their VAT numbers, you enhance the user experience and ensure transparency and adherence to tax laws.
This helps build trust among EU customers and potentially opens up new business opportunities within the EU market.
And thanks to FunnelKit Funnel Builder, you can easily add a WooCommerce VAT number field to your checkout page.
Moreover, you can also enhance the shopping experience with a customized checkout page optimized to ensure frictionless checkout.
So, get FunnelKit Funnel Builder today and start your journey to expanding and growing your business.

Editorial Team
May 15, 2026WooCommerce Ajax add to cart lets shoppers add products without reloading the page. This reduces friction, speeds up the buying flow, and lowers cart abandonment. By default, WooCommerce only enables...
Editorial Team
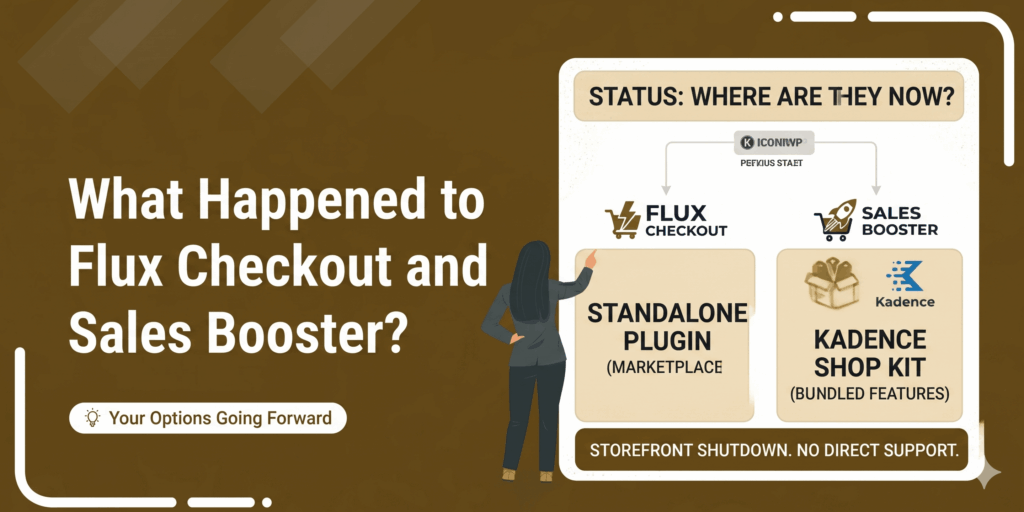
May 13, 2026If you recently went looking for the IconicWP product pages and couldn’t find them, you’re not imagining things. In 2026, Liquid Web restructured its WordPress plugin portfolio, consolidating several products...
Editorial Team
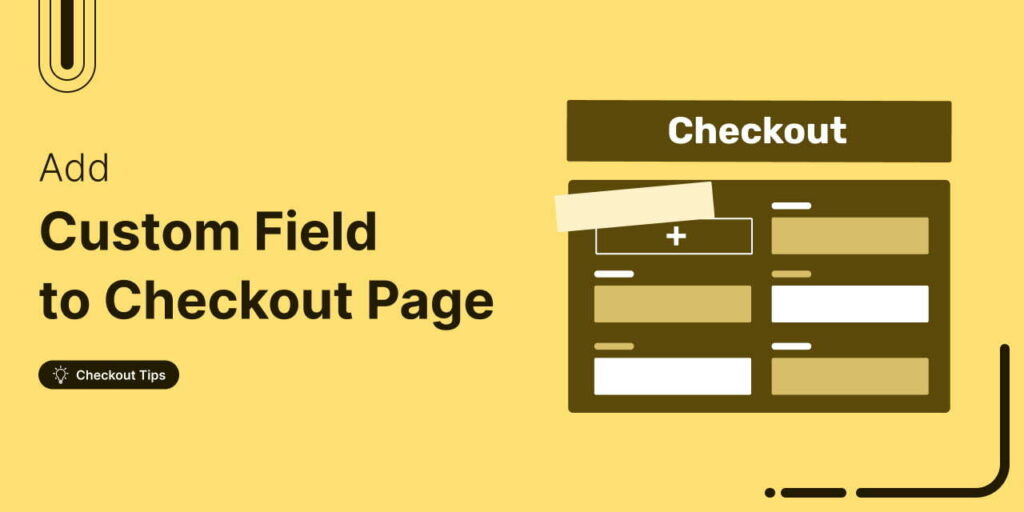
May 13, 2026The default WooCommerce checkout is a one-size-fits-all solution and is not optimized for your unique business needs. But what if you want to add a custom field to your WooCommerce...


