
Your customer finds the perfect product. Adds it to the cart. Reaches checkout and sees a wall of form fields.
Name. Email. Address. City. State. Zip. Card number. Expiry. CVV.
Not every shopper will abandon at this point, but many will. Baymard Institute found that 18% of cart abandonments happen specifically because the checkout feels too long or complicated.
That's not a guarantee you'll lose those customers, but why take the risk when there's a simple fix?
WooCommerce Express checkout removes the friction entirely. One tap. Face ID or fingerprint. Done.
This guide covers how to add Express Checkout to every touchpoint in your WooCommerce store:
- Product pages
- Cart page
- Side mini cart,
- and checkout page.
We've tested this setup across multiple store configurations, and I'll share exactly what works.
Table of Contents
- 1 What is WooCommerce Express Checkout?
- 2 First, Connect Your WooCommerce Store to Stripe to Offer Express Payments
- 3 How To Add WooCommerce Express Checkout to The Product Page?
- 4 How To Add WooCommerce Express Checkout to the Cart Page?
- 5 How to Add WooCommerce Express Checkout on a Slide Cart?
- 6 How To Add Express Checkout to the WooCommerce Checkout Page?
- 7 How to Add Paypal Express Checkout Option to WooCommerce Store?
- 7.1 Step 1: Connect the WooCommerce store to PayPal
- 7.2 Step 2: Enable PayPal commerce
- 7.3 Step 3: Add PayPal Express checkout to the product page
- 7.4 Step 4: Add PayPal Express checkout to the cart page
- 7.5 Step 5: Add PayPal Express checkout to the checkout page
- 7.6 Step 6: Add PayPal Express mini WooCommerce mini cart
- 8 Frequently Asked Questions About Express Checkout in WooCommerce
- 9 Can I use Express Checkout for both physical and digital products?
- 10 What if a customer wants to use a different payment method that is not supported by Express Checkout?
- 11 Does Express Checkout work with WooCommerce multilingual setups?
- 12 Ready to Offer Express Checkout On Your WooCommerce Store?
What is WooCommerce Express Checkout?
WooCommerce Express Checkout is a fast payment option that allows users to complete their orders with a single click, bypassing the need for a lengthy checkout form.
Usually, express checkout offers a “Pay now” or “Buy now” button that users can use to make the payment with popular payment methods like:
- Apple Pay
- Google Pay
- PayPal Express
- Amazon Pay, and many more.
Check the WooCommerce Express Checkout process in the GIF below. One can simply click “Buy with Apple Pay” and pay with Face ID.
The best thing about WooCommerce Express Checkout is that users don’t need to navigate to the checkout page to make a purchase.
You can add an Express Checkout button on the product page, cart page, and checkout page. Additionally, offering Express payment in a slide-in mini cart can further streamline the checkout process.
We will cover how to add an express checkout option to your WooCommerce store later in this blog. Before moving on to the next section, find out why it's crucial to take advantage of this amazing tool.
Why Offer WooCommerce Express Checkout On Your Store?
Whether you sell physical products, digital products, or subscriptions, offering an express checkout option can benefit your business by streamlining the checkout process for your customers.
Here are some reasons why you should consider using WooCommerce Express Checkout:
- Faster checkout: With one-click checkout, customers can skip the cart page and complete their orders quickly.
- Convenience for returning customers: Returning customers can reorder in a snap with their saved payment and shipping details. This quick and easy process boosts customer loyalty.
- Mobile-friendly shopping: WooCommerce express checkout is perfect for mobile users, where space is limited, and data entry can be a hassle. This feature can boost mobile conversion rates.
- Reduce cart abandonment: As mentioned earlier, people sometimes abandon carts because the process is too lengthy. In such cases, express checkout can help reduce cart abandonment.
- More conversions: By providing more convenience, you can encourage customers to place more orders. In fact, one-click checkout can increase store conversions by up to 10.7%.
- Makes buying a single product more convenient: If someone is on the product page and wants to buy only that product, they can easily do this with express checkout without navigating to any other page.
In short, WooCommerce Express Checkout helps upgrade the shopping experience for users by making it faster and more convenient for
First, Connect Your WooCommerce Store to Stripe to Offer Express Payments
Apple Pay and Google Pay run through Stripe, so you'll need to connect your Stripe account before adding express checkout buttons anywhere in your store.
Install and activate it from your WordPress dashboard.
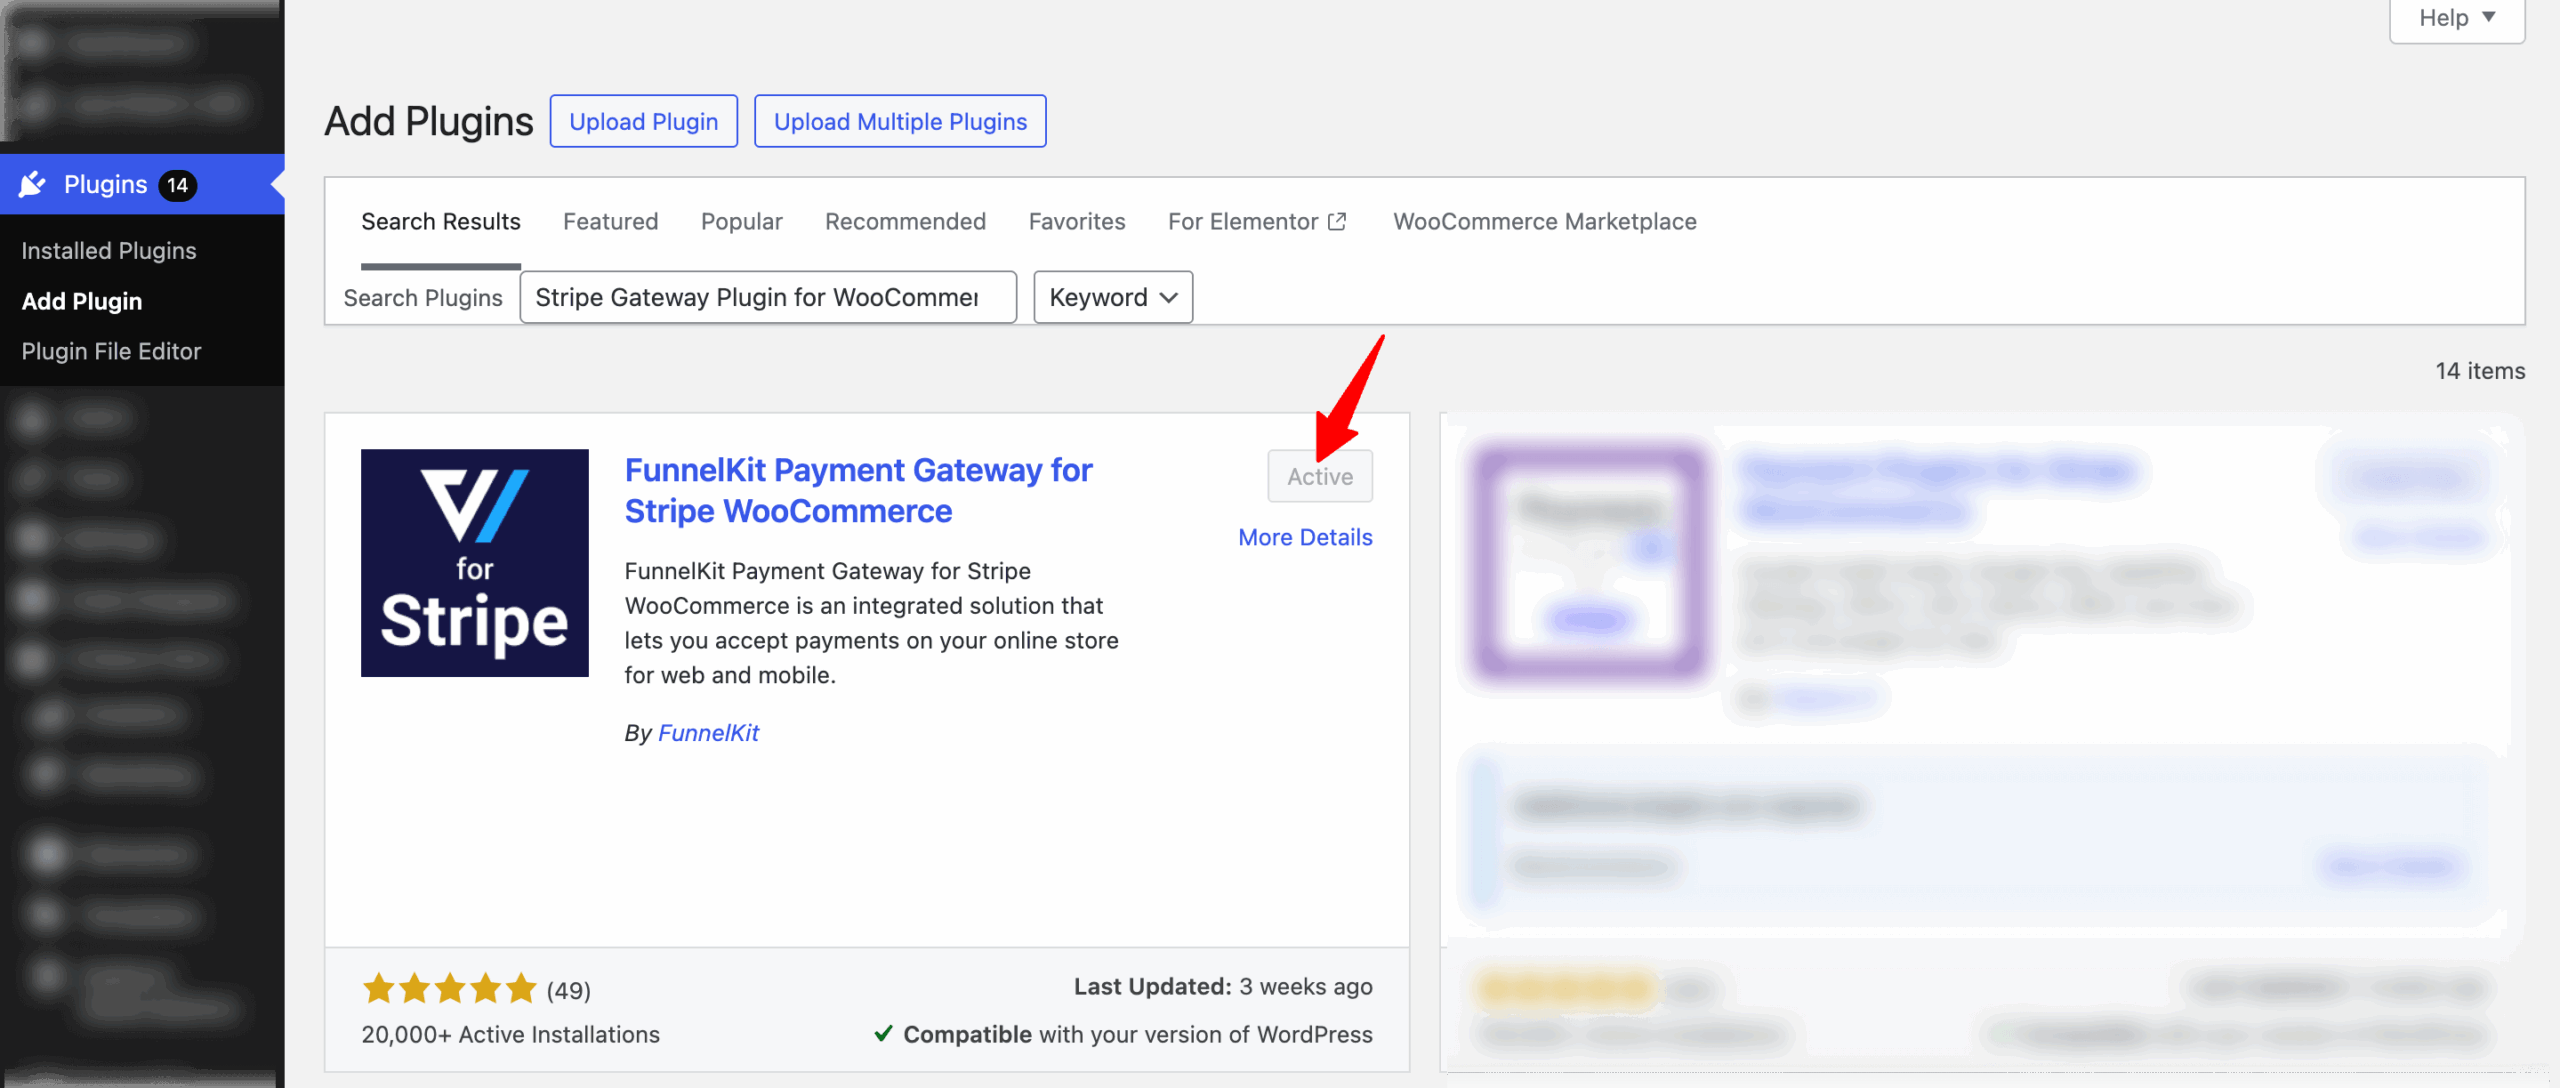
The plugin makes onboarding simple. Connect your Stripe account, and it automatically fetches your live and test API keys, no manual copying required. Setup takes about five minutes.
Once connected, go to the plugin settings and enable Google Pay and Apple Pay under the Express Checkout section.

This is what makes express payment buttons available throughout your store.
How To Add WooCommerce Express Checkout to The Product Page?
As mentioned earlier, adding express checkout on the product page can help people who buy a single product and want a swift checkout.
Follow these steps to add an express checkout on the product page:
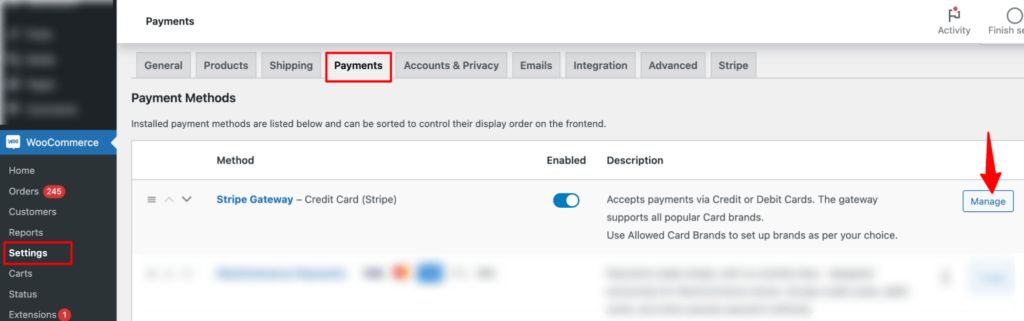
Step 1: Navigate to payments settings
Navigate to WooCommerce ⇒ Settings ⇒ Payments and hit “Manage” next to “Stripe Gateway”.
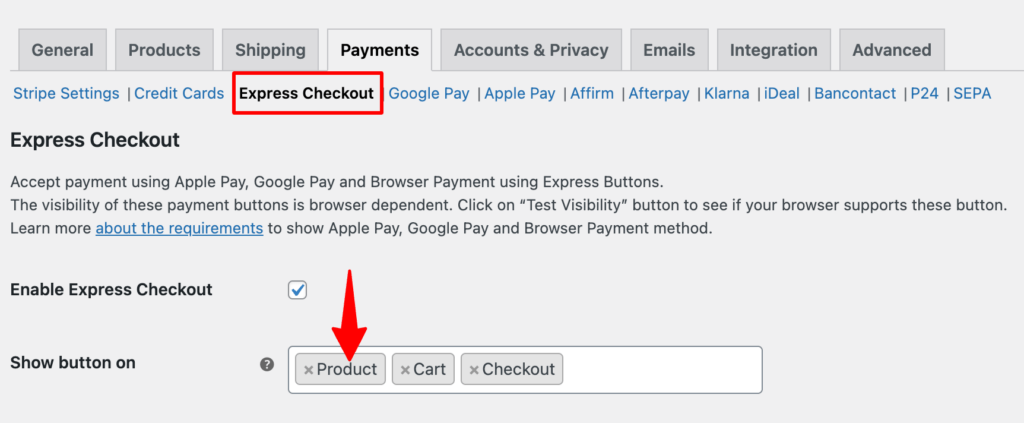
Step 2: Add the express checkout button on the product page
Now move to the “Express Checkout” option and make sure the “Enable express checkout” is checked. Also, the product page is added to the “Show button on” option.
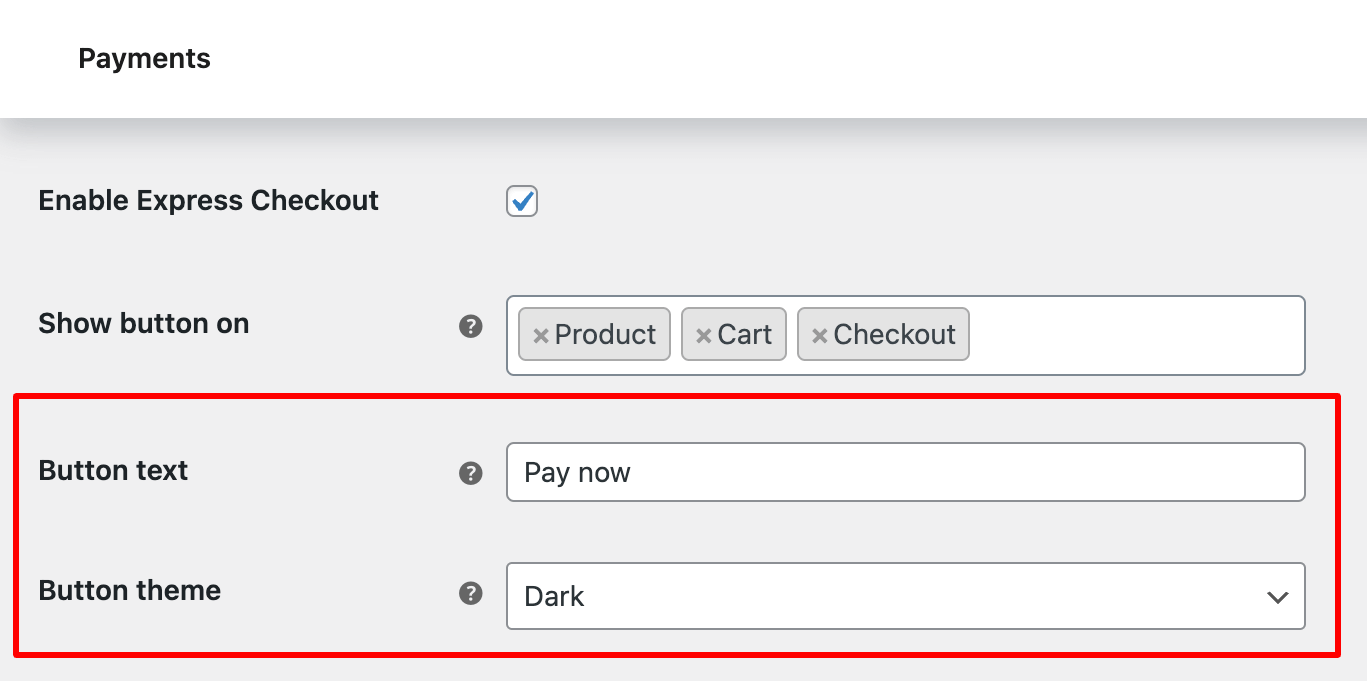
Step 3: Customize the look of the button
You can customize the Button text. You can also set the express checkout button theme.
Step 4: Set up the product page options
Set the button position on the product page. You have three options: Below Add to Cart, Above Add to Cart, and Inline Button.
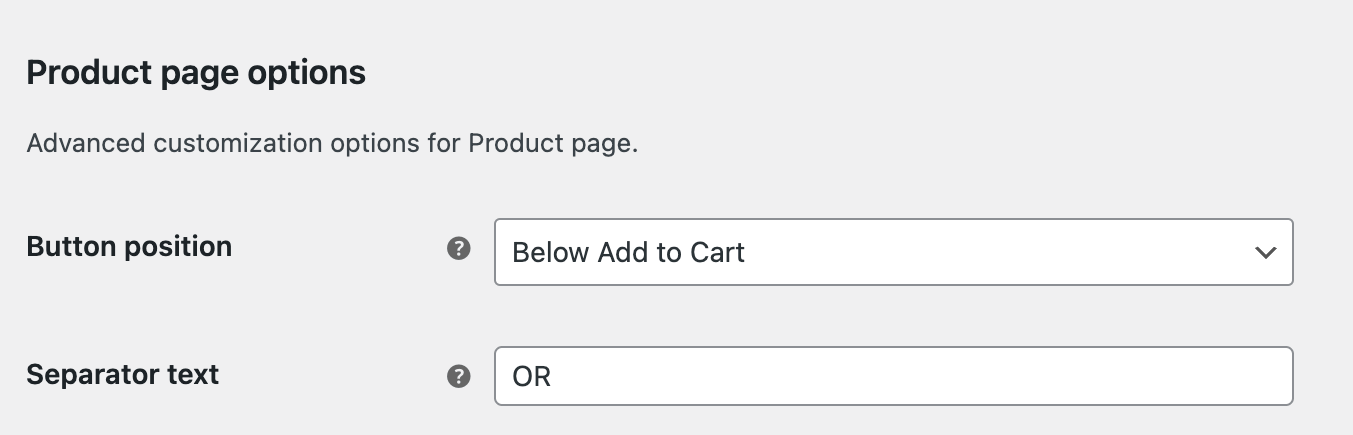
Make sure to save the changes.
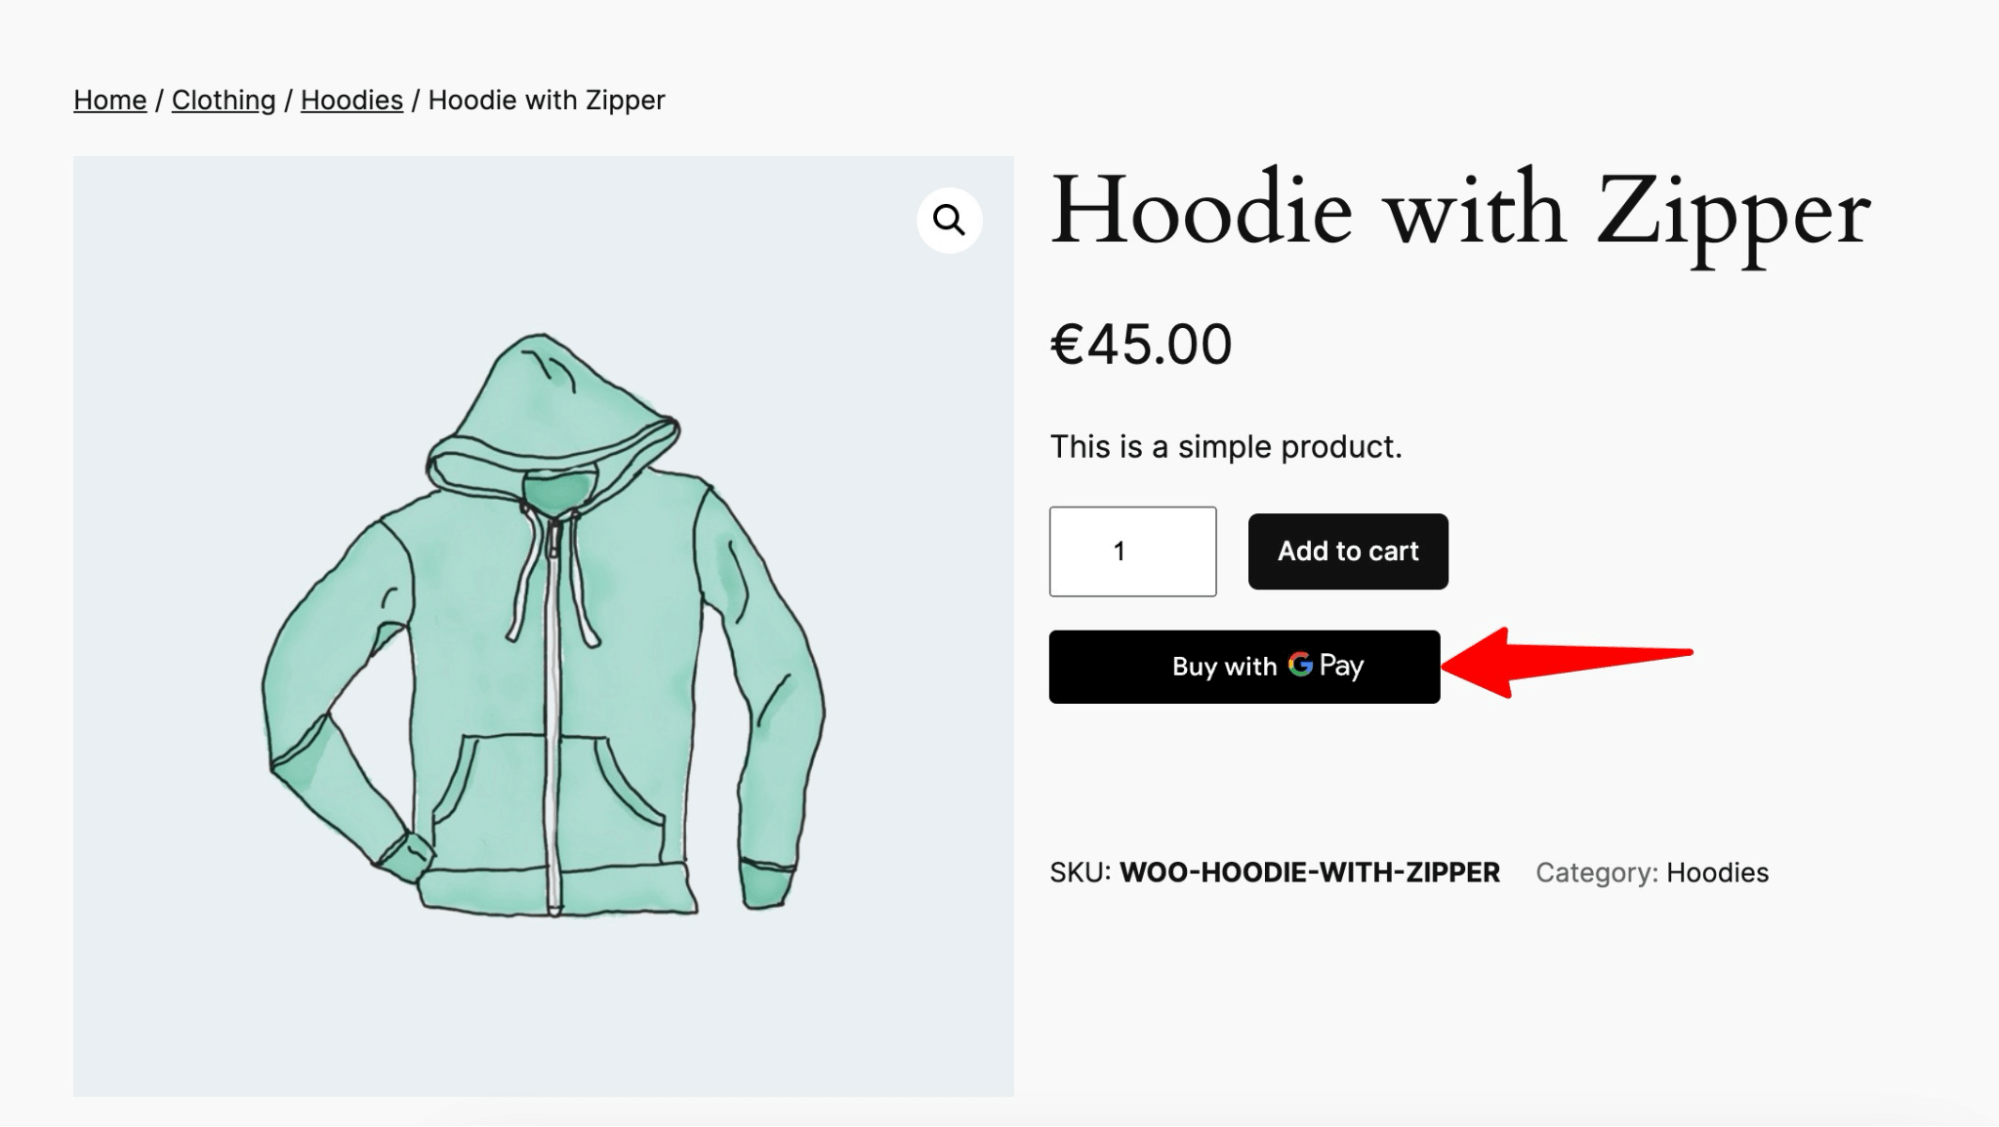
Now if you check the product page, you should see the express checkout button.
How To Add WooCommerce Express Checkout to the Cart Page?
The process of adding express checkout is similar to adding to a cart page.
Follow these steps:
Step 1: Add the express checkout button on the product page
On the “Express Checkout” settings option, make sure the “Enable express checkout” option is checked.
Then add the cart page to the “Show button on” option.
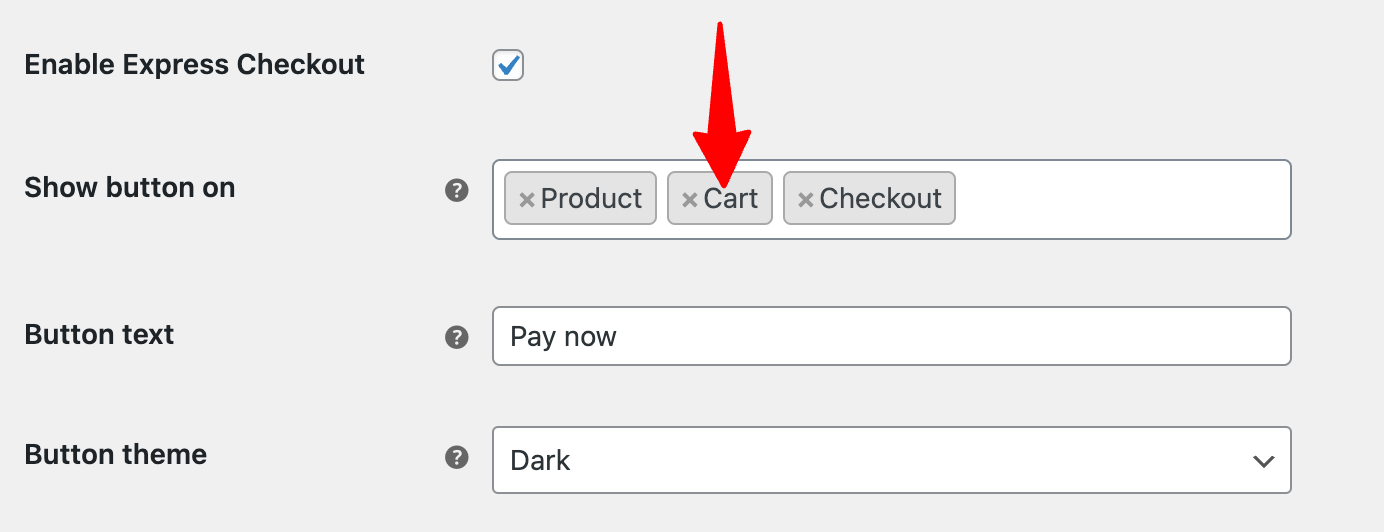
🔔Note: The Button text and button theme, you can’t choose separately for the cart page.
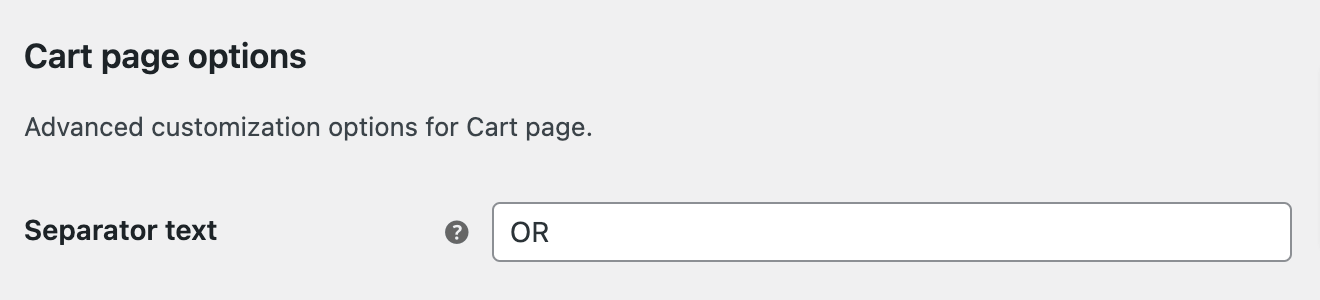
Step 2: Set up the cart page options
As per the cart page option, you can choose the separator text that will show up between Google pay and Apple pay button.
Make sure to save changes.
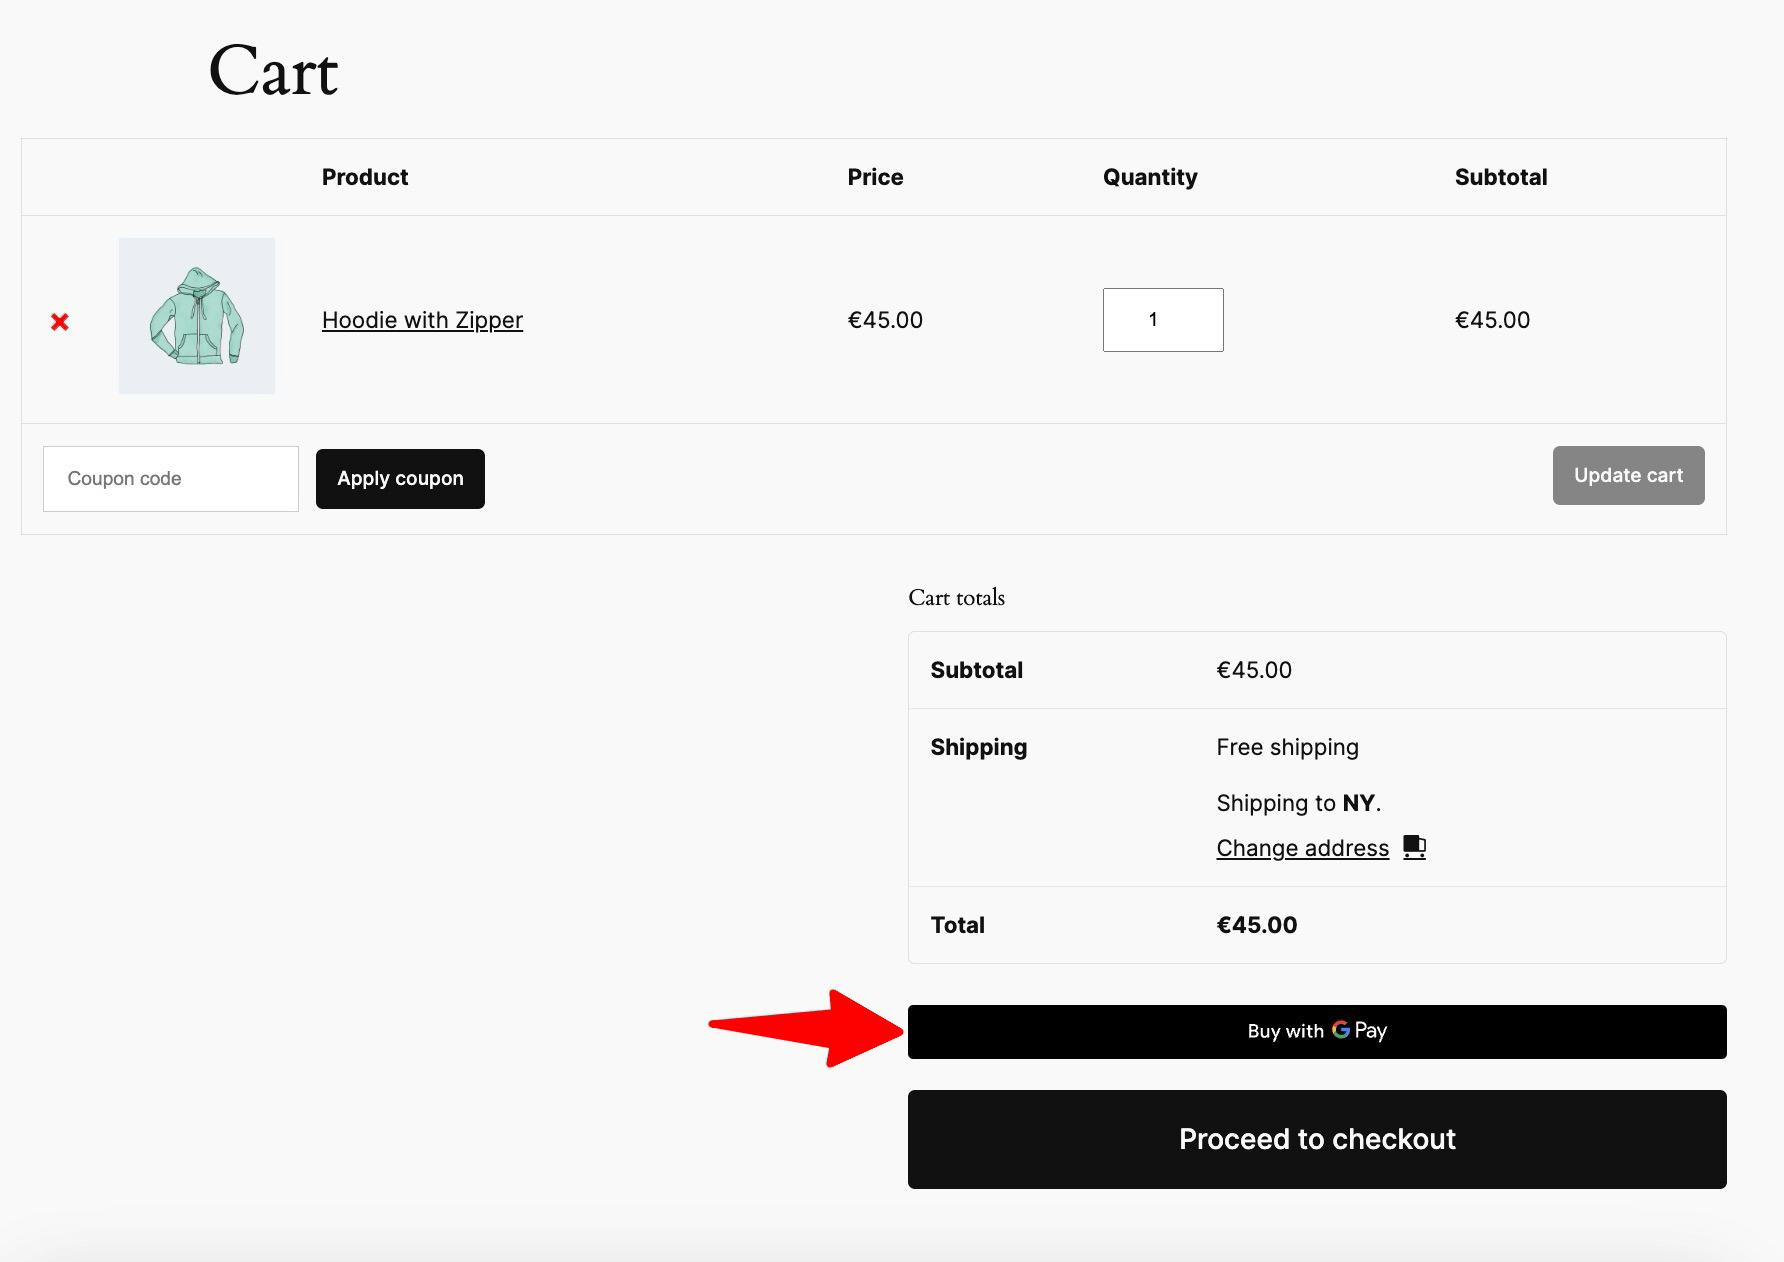
Now add a product and go to the cart page. The express checkout button should be there.
Let’s set up express checkout inside the shopping cart.
How to Add WooCommerce Express Checkout on a Slide Cart?
To add a mini cart that allows you to add a one-click checkout option, we will use FunnelKit Cart. This plugin allows you to add one WooCommerce express checkout option to your mini cart through Google Pay and Apple Pay.
The express one-click checkout option is available in the free version of FunnelKit Cart.
Make sure to install and activate this plugin.
Now follow these steps to add a one-click express checkout to your WooCommerce mini cart.
Step 1: Enable the sliding cart
Now, it’s time to enable the mini cart option. For that, go to FunnelKit ⇒ Cart, turn on the “Enable Cart’ toggle button, and click on Save Changes.
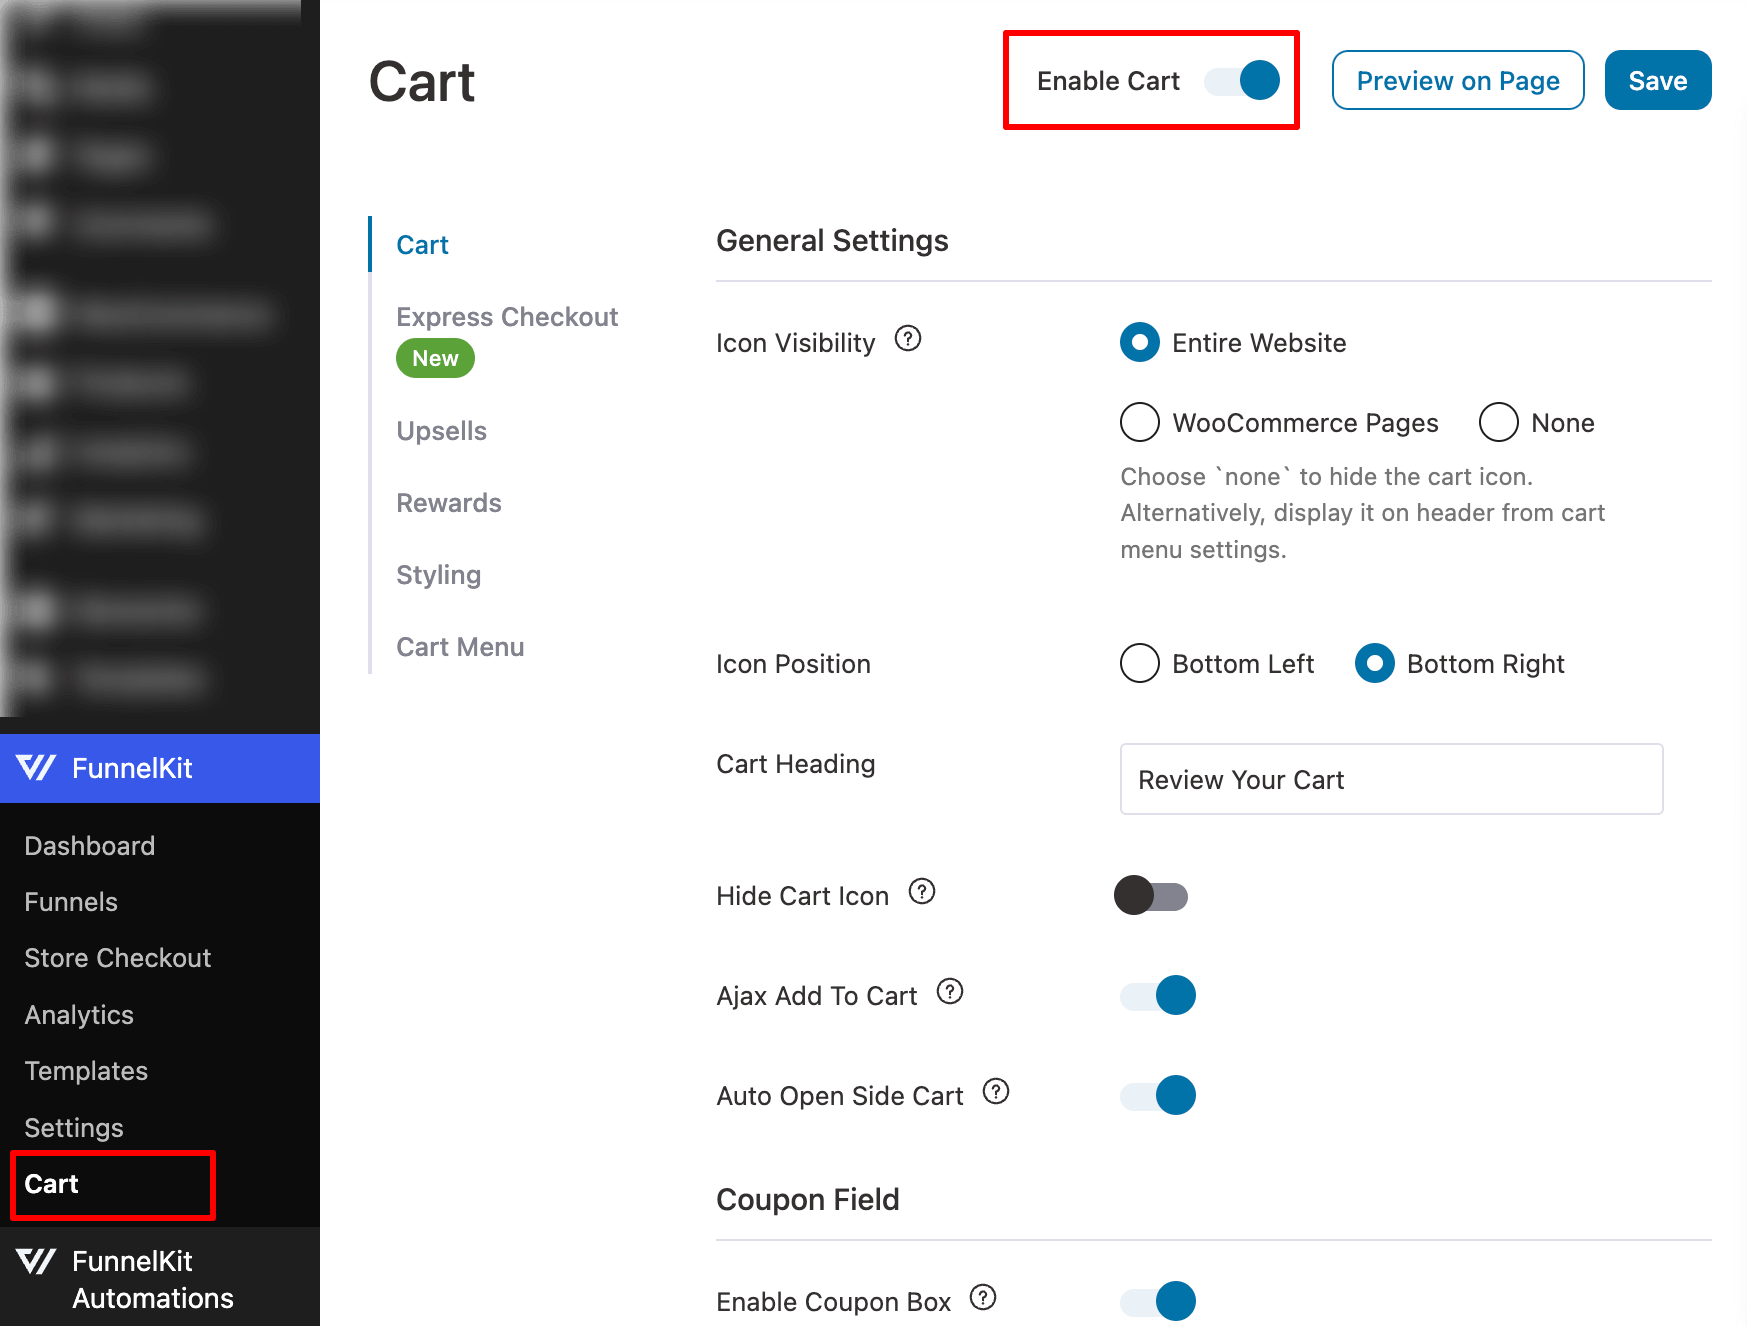
This will activate the WooCommerce side cart in your store.
👉 To learn how to customize the cart look, check our blog on WooCommerce mini cart.
Step 2: Activate the express checkout option
Go to the Express Checkout tab and turn on the toggle for “Enable Express checkout on a cart”.
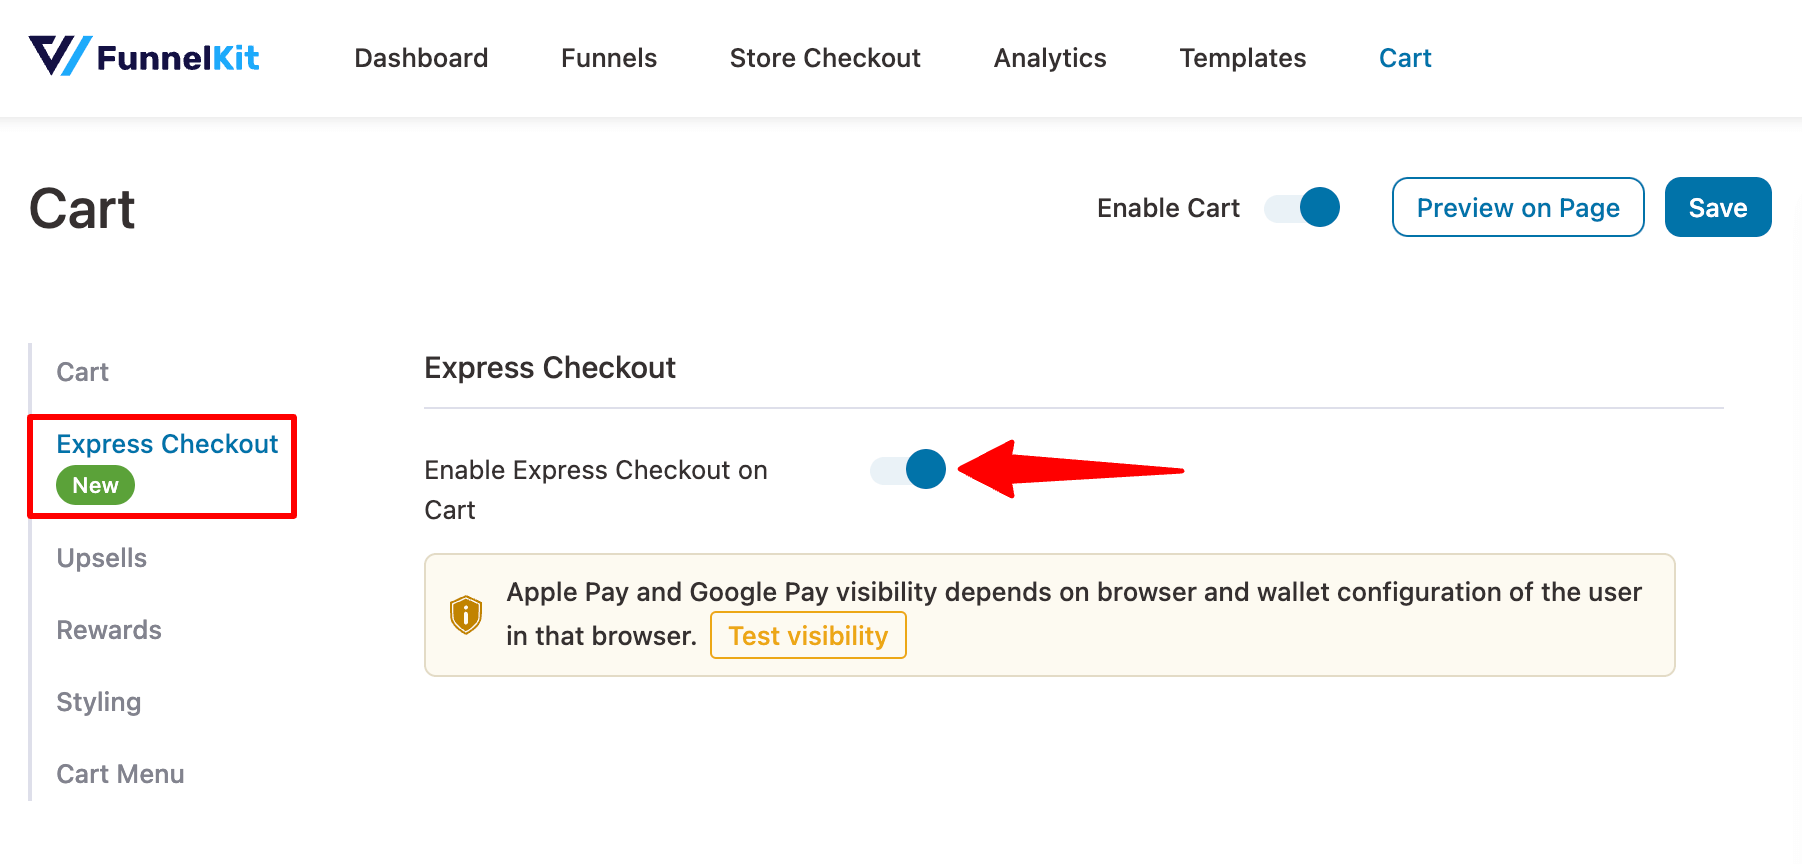
Make sure to hit “Save” to update.
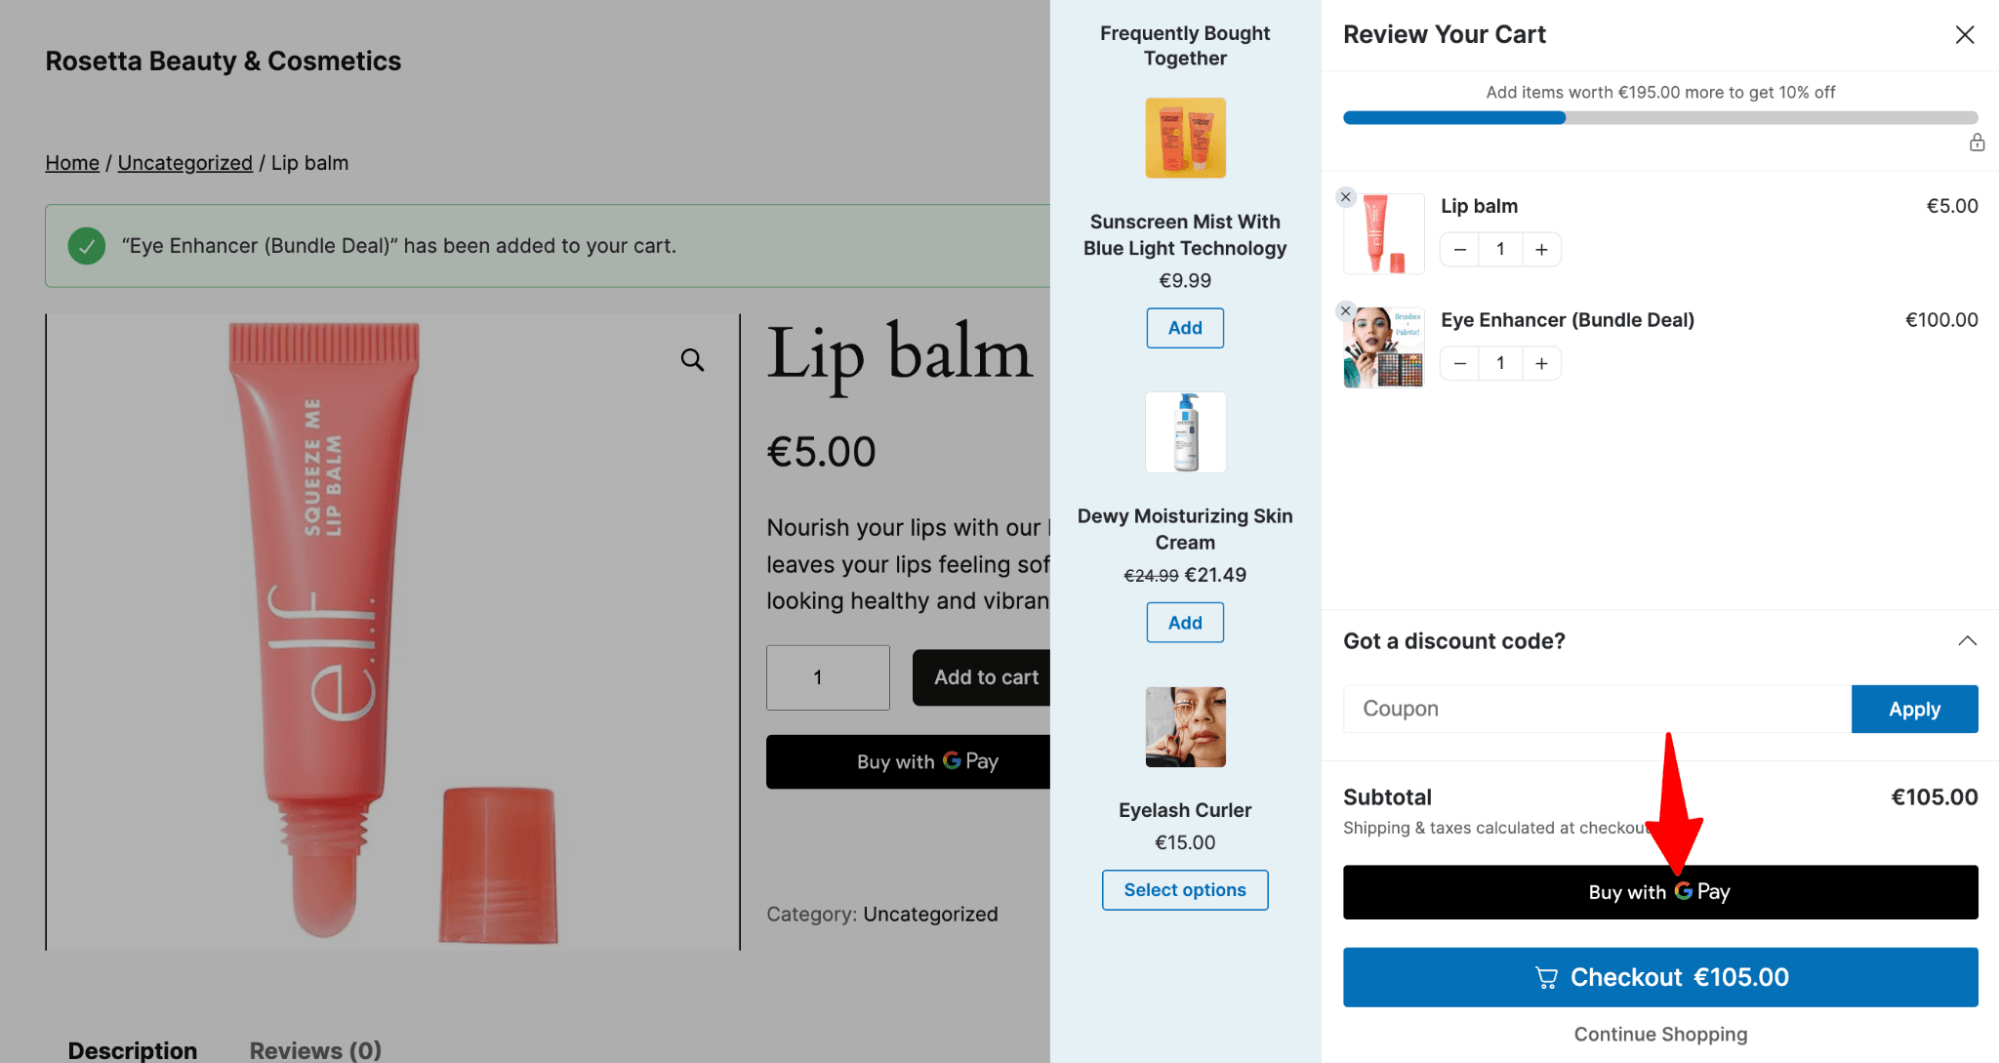
Step 3: Test WooCommerce express checkout on the slide cart
Now add the product to your cart and check the sliding cart, you should find the express checkout options on the mini cart.
How To Add Express Checkout to the WooCommerce Checkout Page?
We will use FunnelKit Funnel Builder to express checkout on the WooCommerce checkout page.
This is the best WooCommerce sales funnel builder that allows you to replace the default checkout page with a custom, high-converting checkout page.
Besides, it also comes with features such as order bumps and post-purchase one-click upsells to boost the average order value of your store.
To follow along with the process, you need to install and activate Free and Pro both. Free version is here but here,
After activating the plugin, follow these steps:
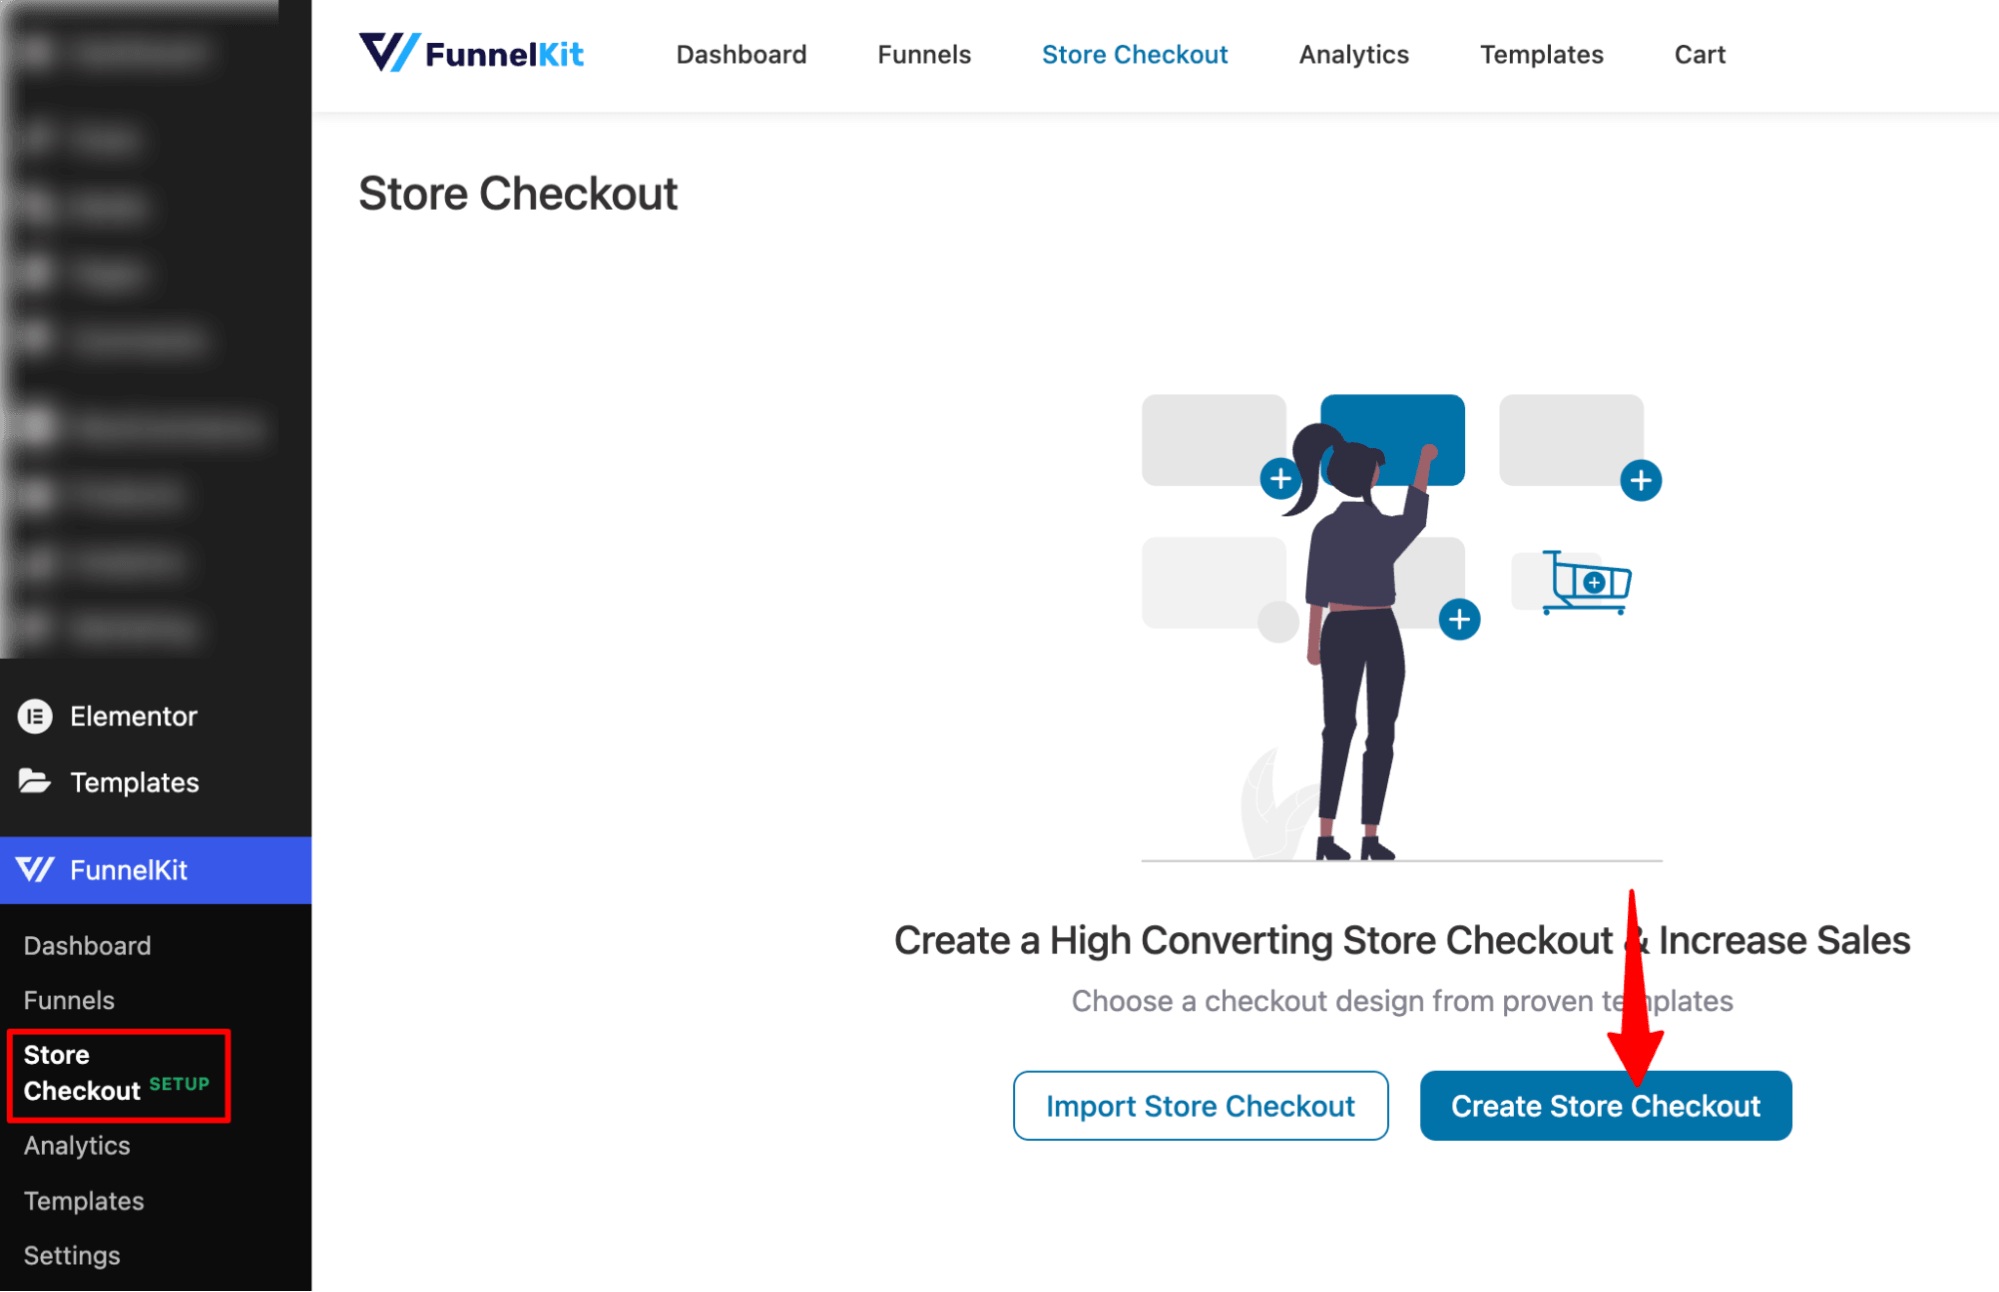
Step 1: Create a store checkout
Firstly, we need to create a store checkout that will replace the default WooCommerce checkout page.
To do so, navigate to FunnelKit ⇒ Store Checkout and click on the ‘Create Store Checkout’ button.
After that, select a template from the list of prebuilt checkout templates FunnelKit provides.
To select one, hover on the template you like and click on Preview.
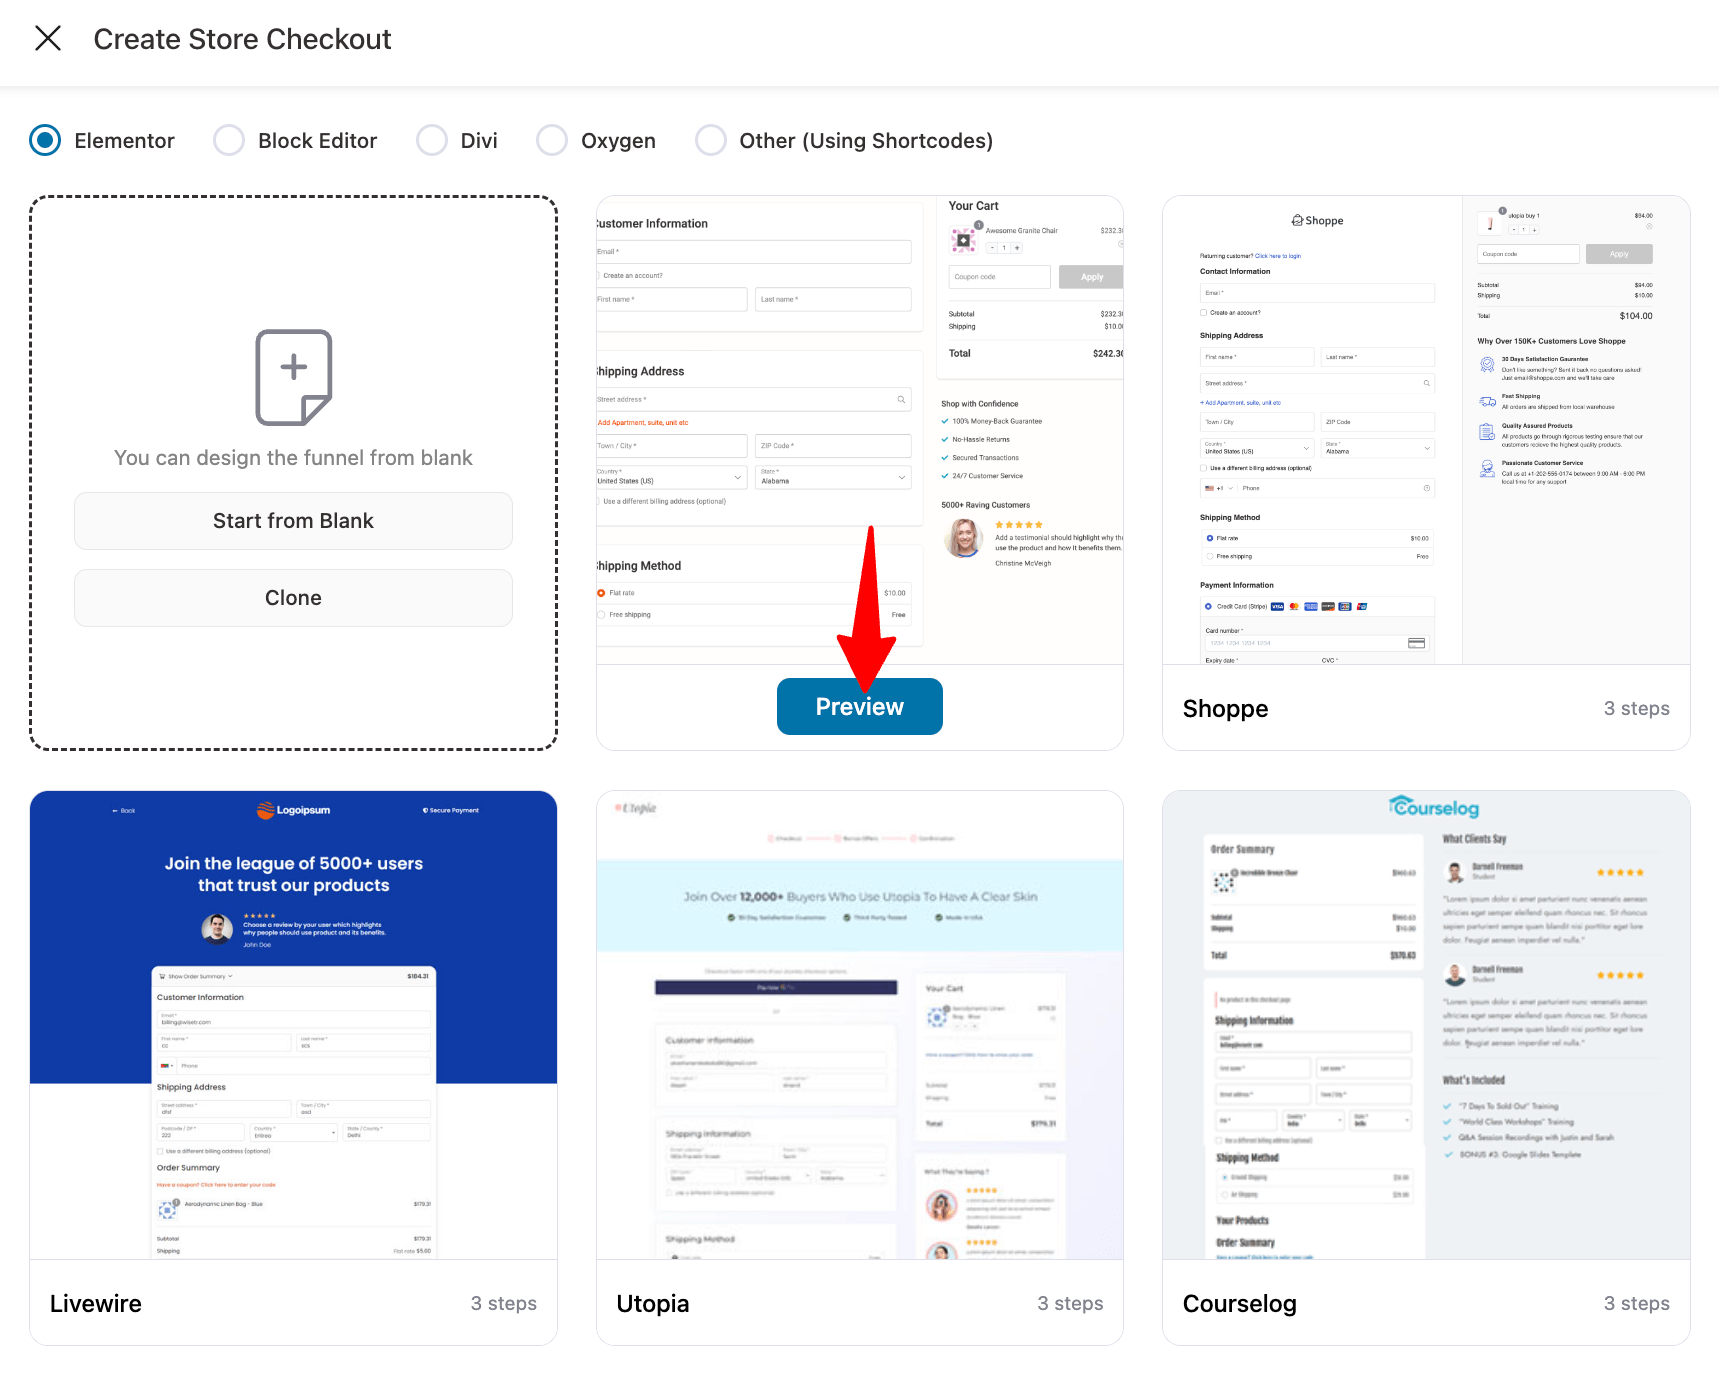
Now, choose whether you want a single-page checkout or a multi-page checkout.
After that, click on “Import This Funnel,” provide a name, and click on "Done" to import this funnel as your default checkout.
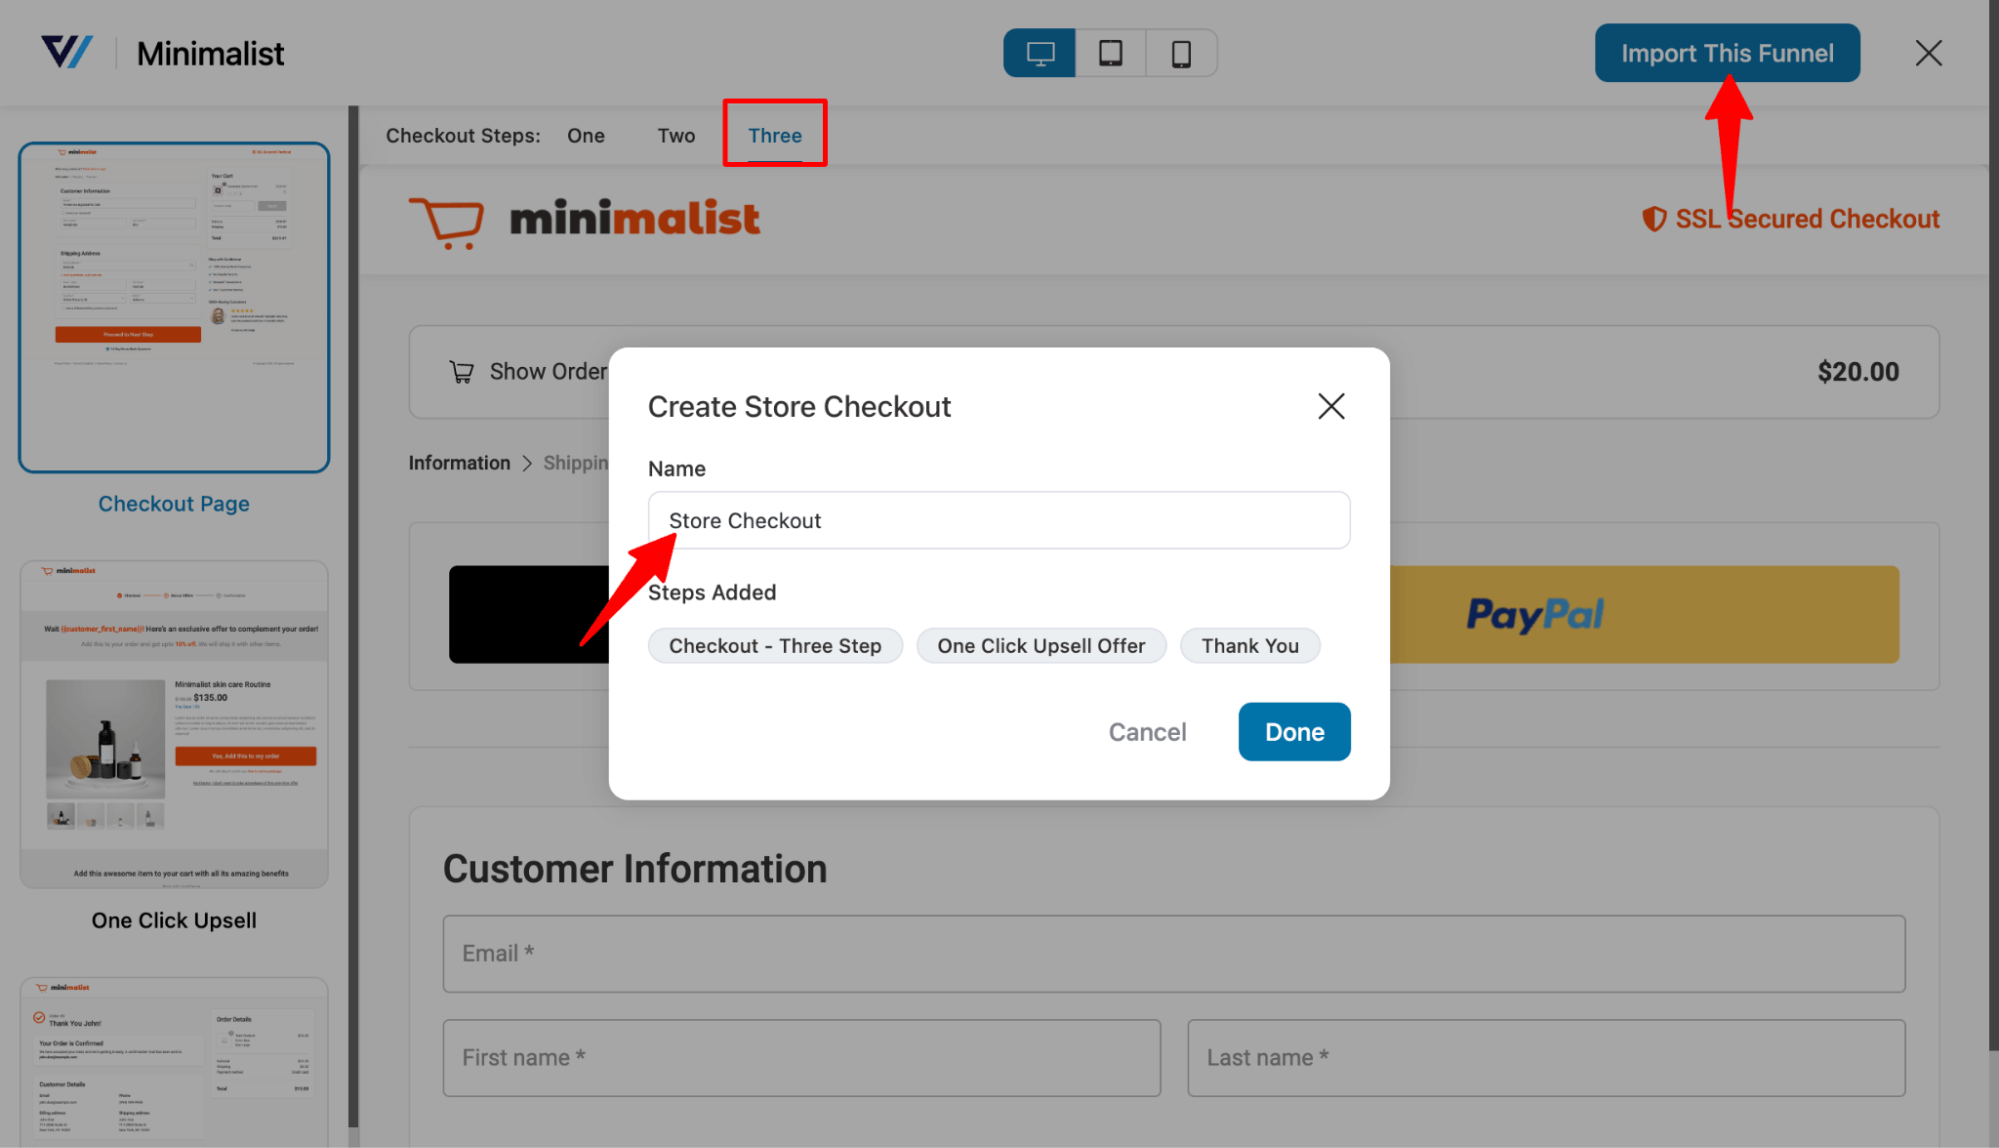
A checkout funnel with three steps—checkout, one-click upsells, and thank you—should be imported now.
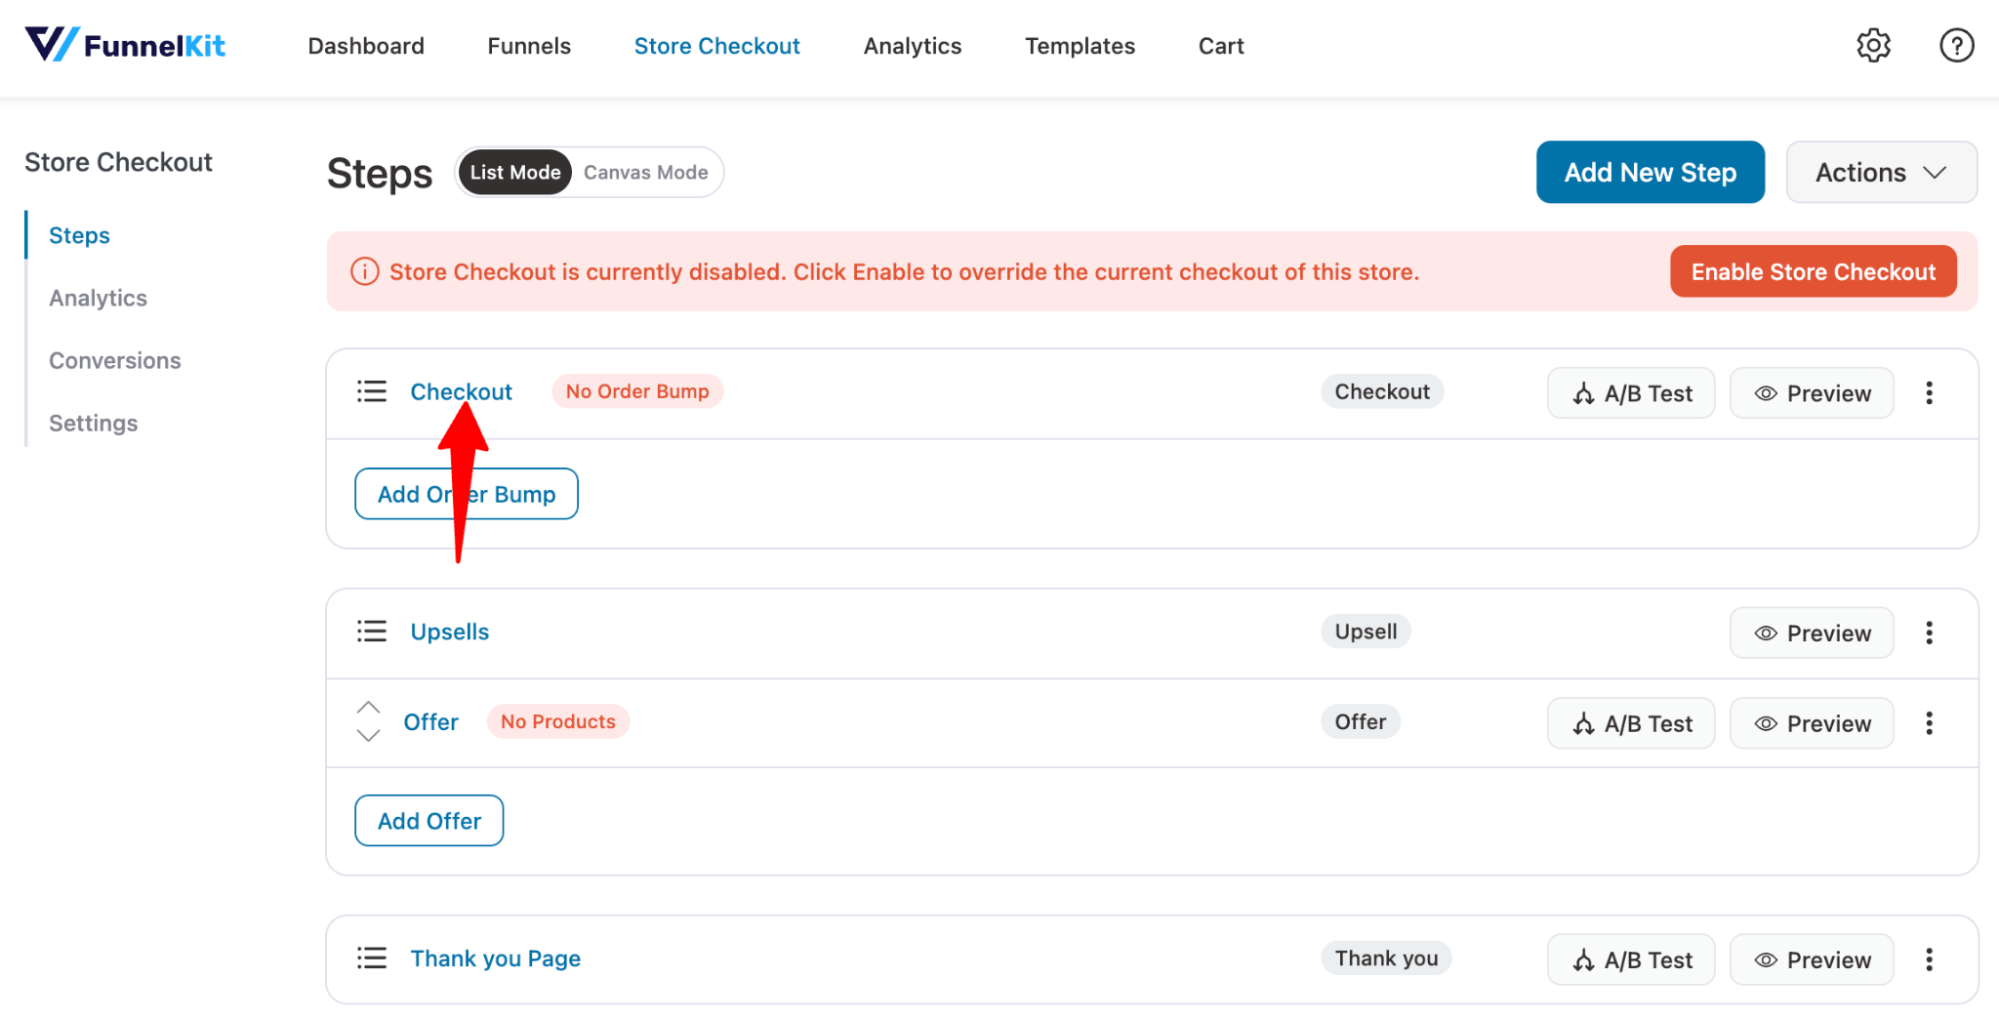
Step 2: Customize the checkout template
Click on the Edit option next to your checkout page to customize it.

Here, you can customize the design and content of the checkout page with the selected page builder.
For more details on how to customize the checkout page, read our blog “How to Customize WooCommerce Checkout Page without Code”.
Step 3: Enable the express checkout option
To activate the express checkout feature, navigate to the Optimization tab. Expand the tab “Express Checkout Buttons”. Choose “Yes” to enable the option and then select the position.
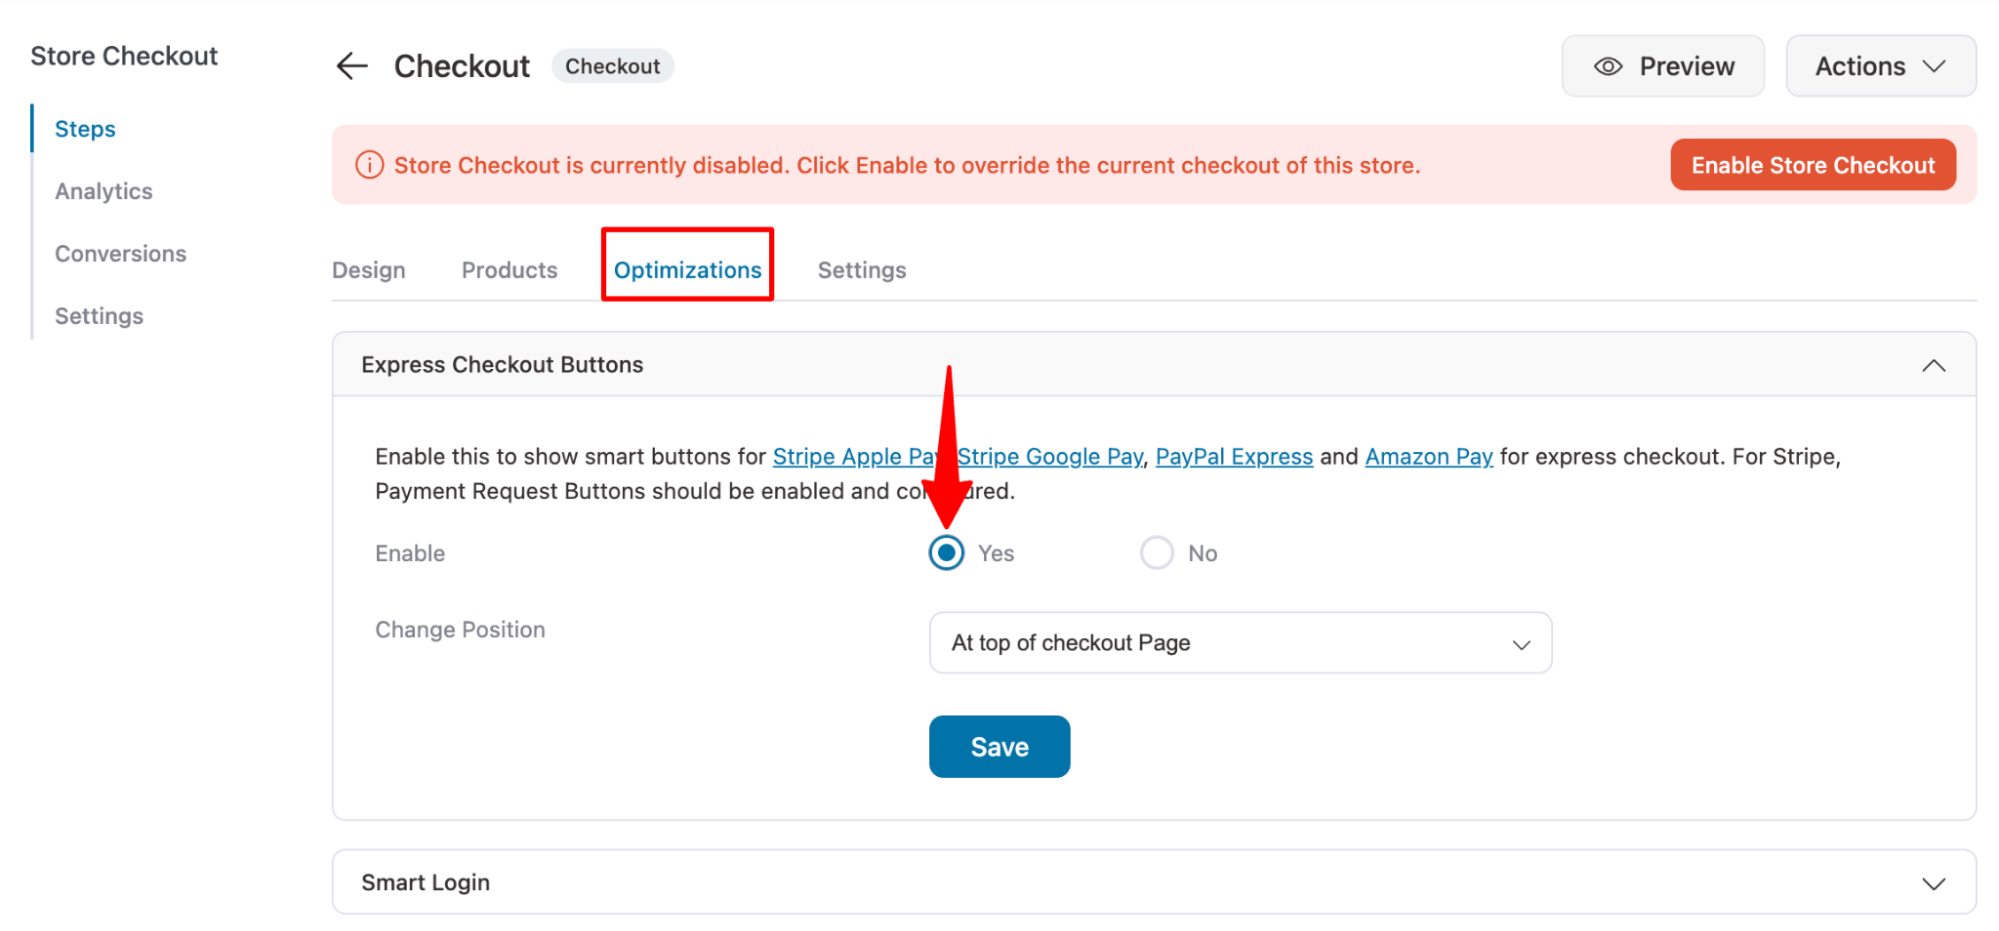
Make sure to Save the changes.
On the optimization tab, you can also make the following optimizations: Inline field validation, Optional fields collapsible, Google address auto-completion, Auto-apply coupon codes, Enhanced phone fields, and so on.
After optimizing the checkout page, you can add an order bump and a one-click upsell offer.
Step 4: Activate your store checkout
Finally, you need to activate the store checkout. For that turn on the “Enable Store Checkout” button.
Now, if you place a test order, you can use the express checkout option on the checkout page.
How to Add Paypal Express Checkout Option to WooCommerce Store?
To add Paypal Express checkout to your WooCommerce store, follow these steps:
Step 1: Connect the WooCommerce store to PayPal
You need to install and activate the PayPal AngelEye payment gateway plugin and connect to your PayPal account.
Step 2: Enable PayPal commerce
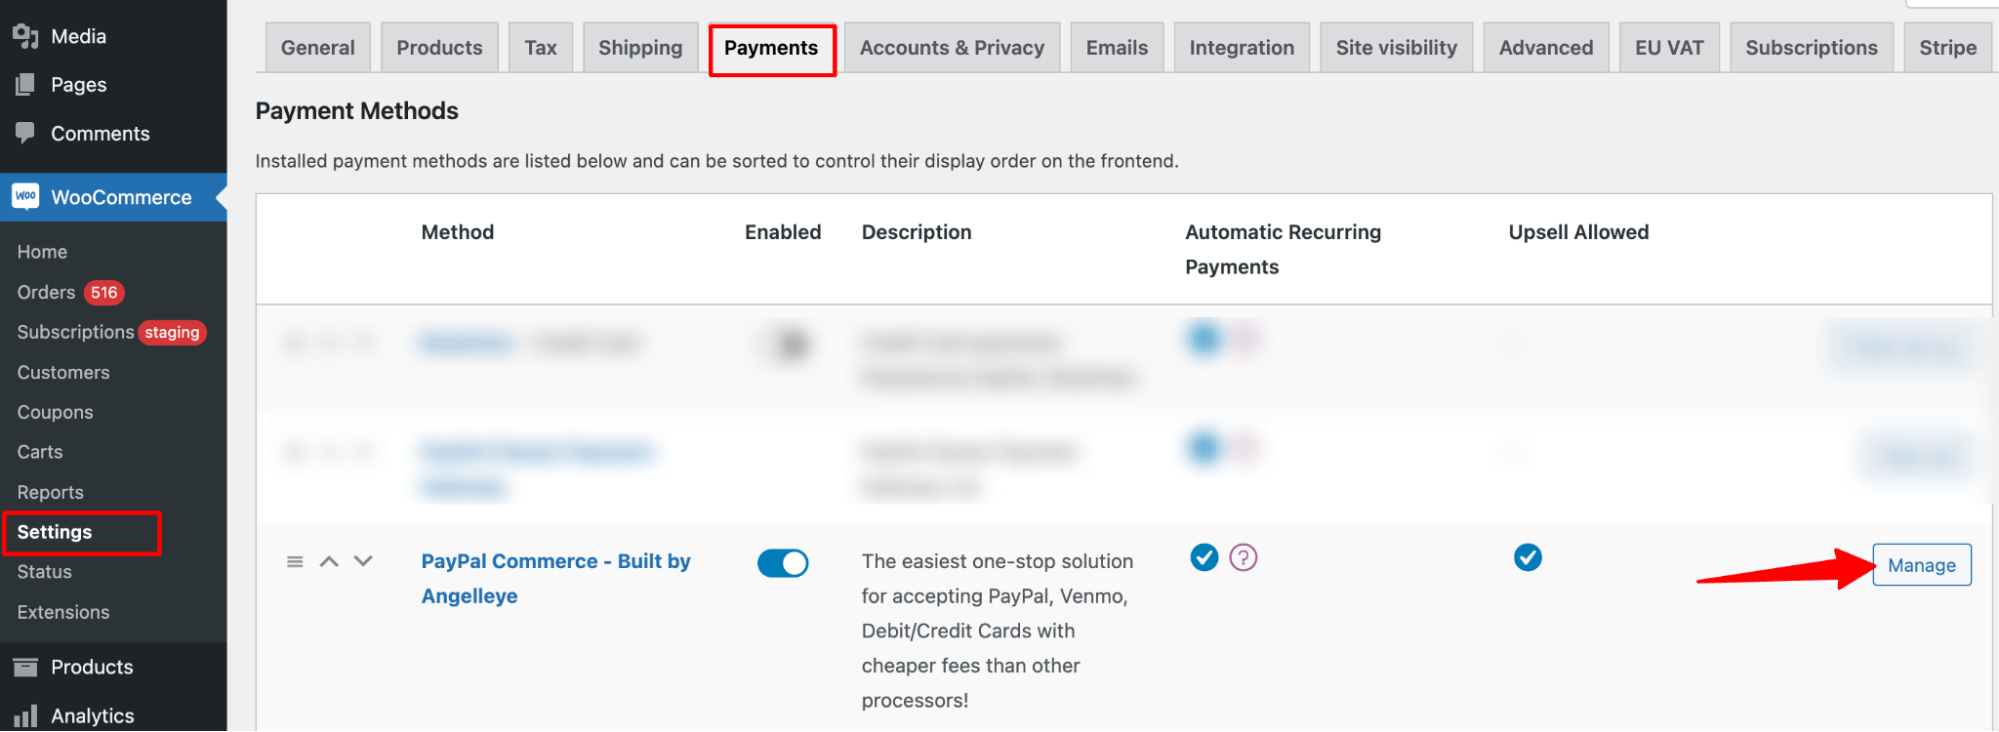
Next, navigate to WooCommerce ⇒ Settings ⇒ Payments and hit “Manage” for the option "PayPal Commerce - Built By Angelleye".
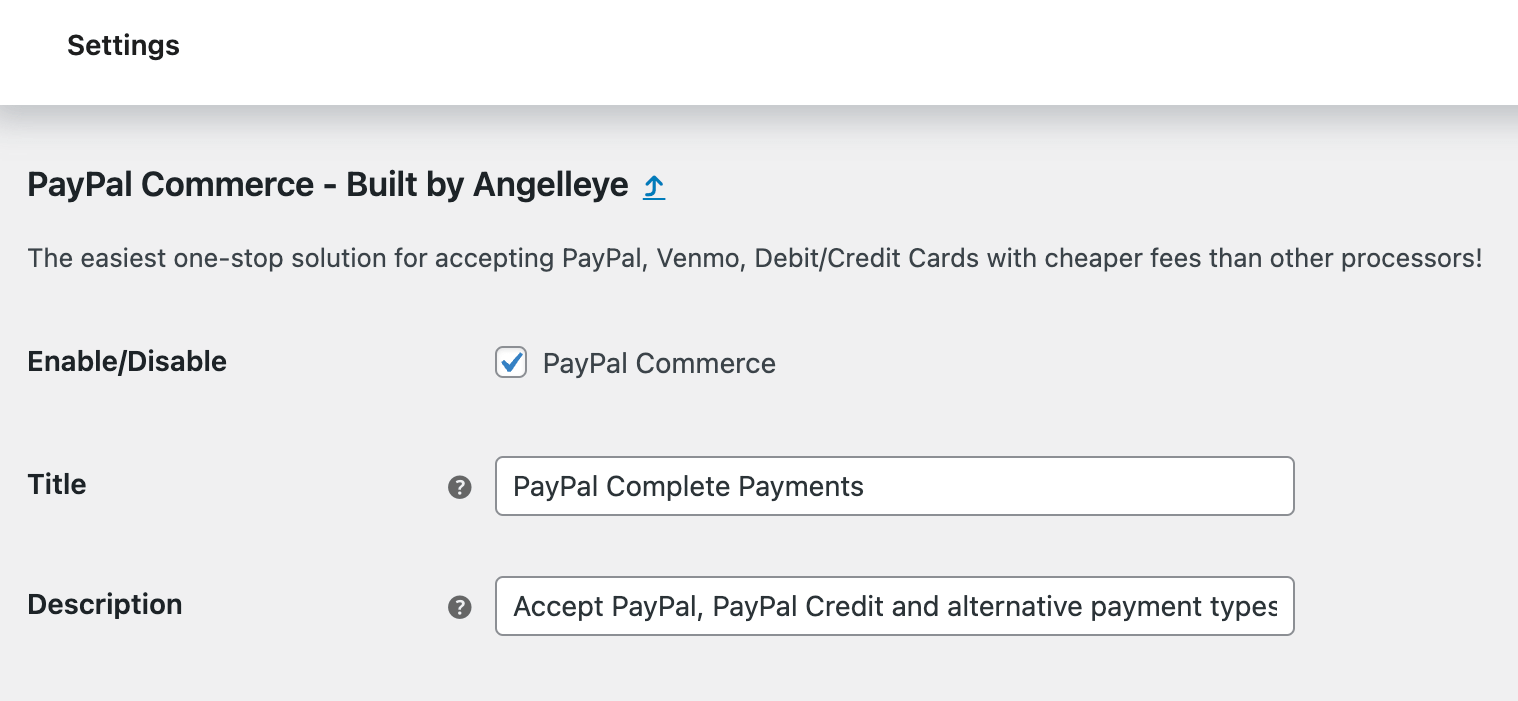
Enable the option “PayPal Commerce” and set up the title and description.
Step 3: Add PayPal Express checkout to the product page
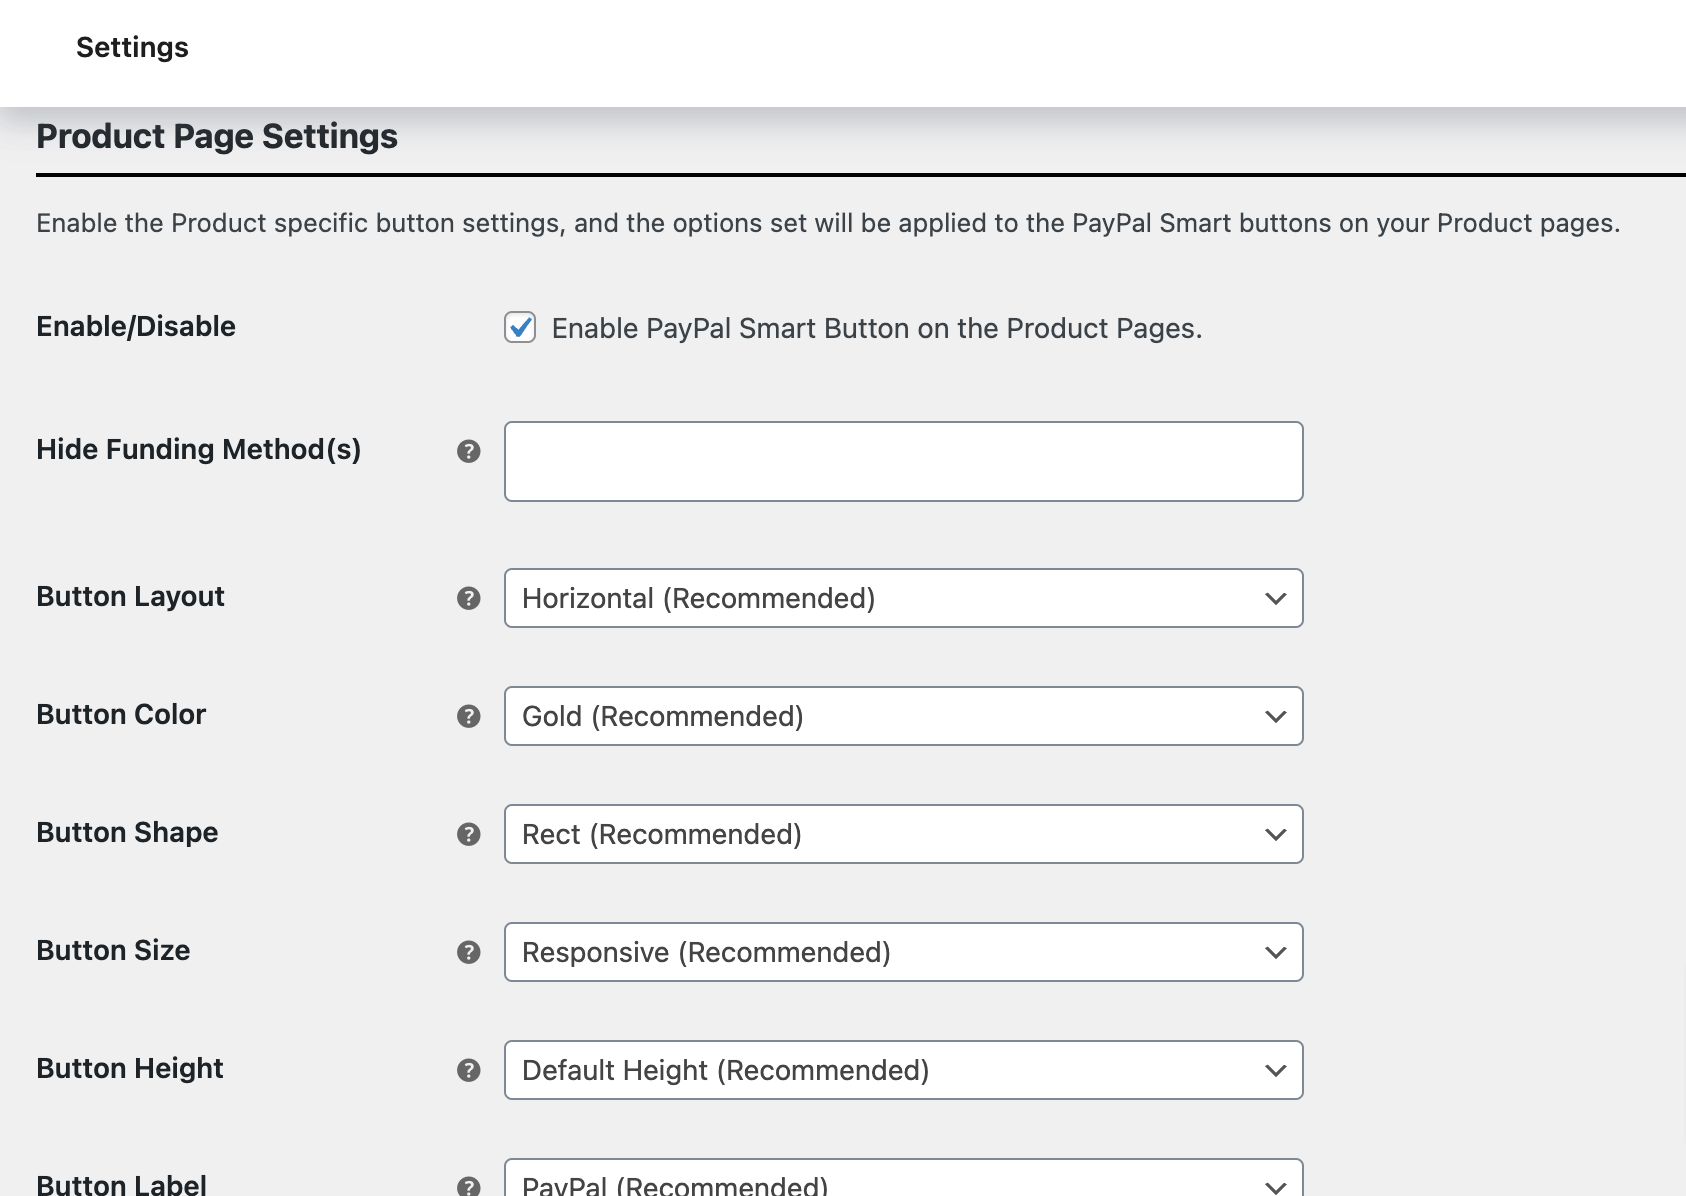
Scroll down and make sure the option “Enable Paypal Smart Button on the product pages” is checked. This will add a smart PayPal button on all the product pages.
You can also customize other options like button color, shape size, label, etc.
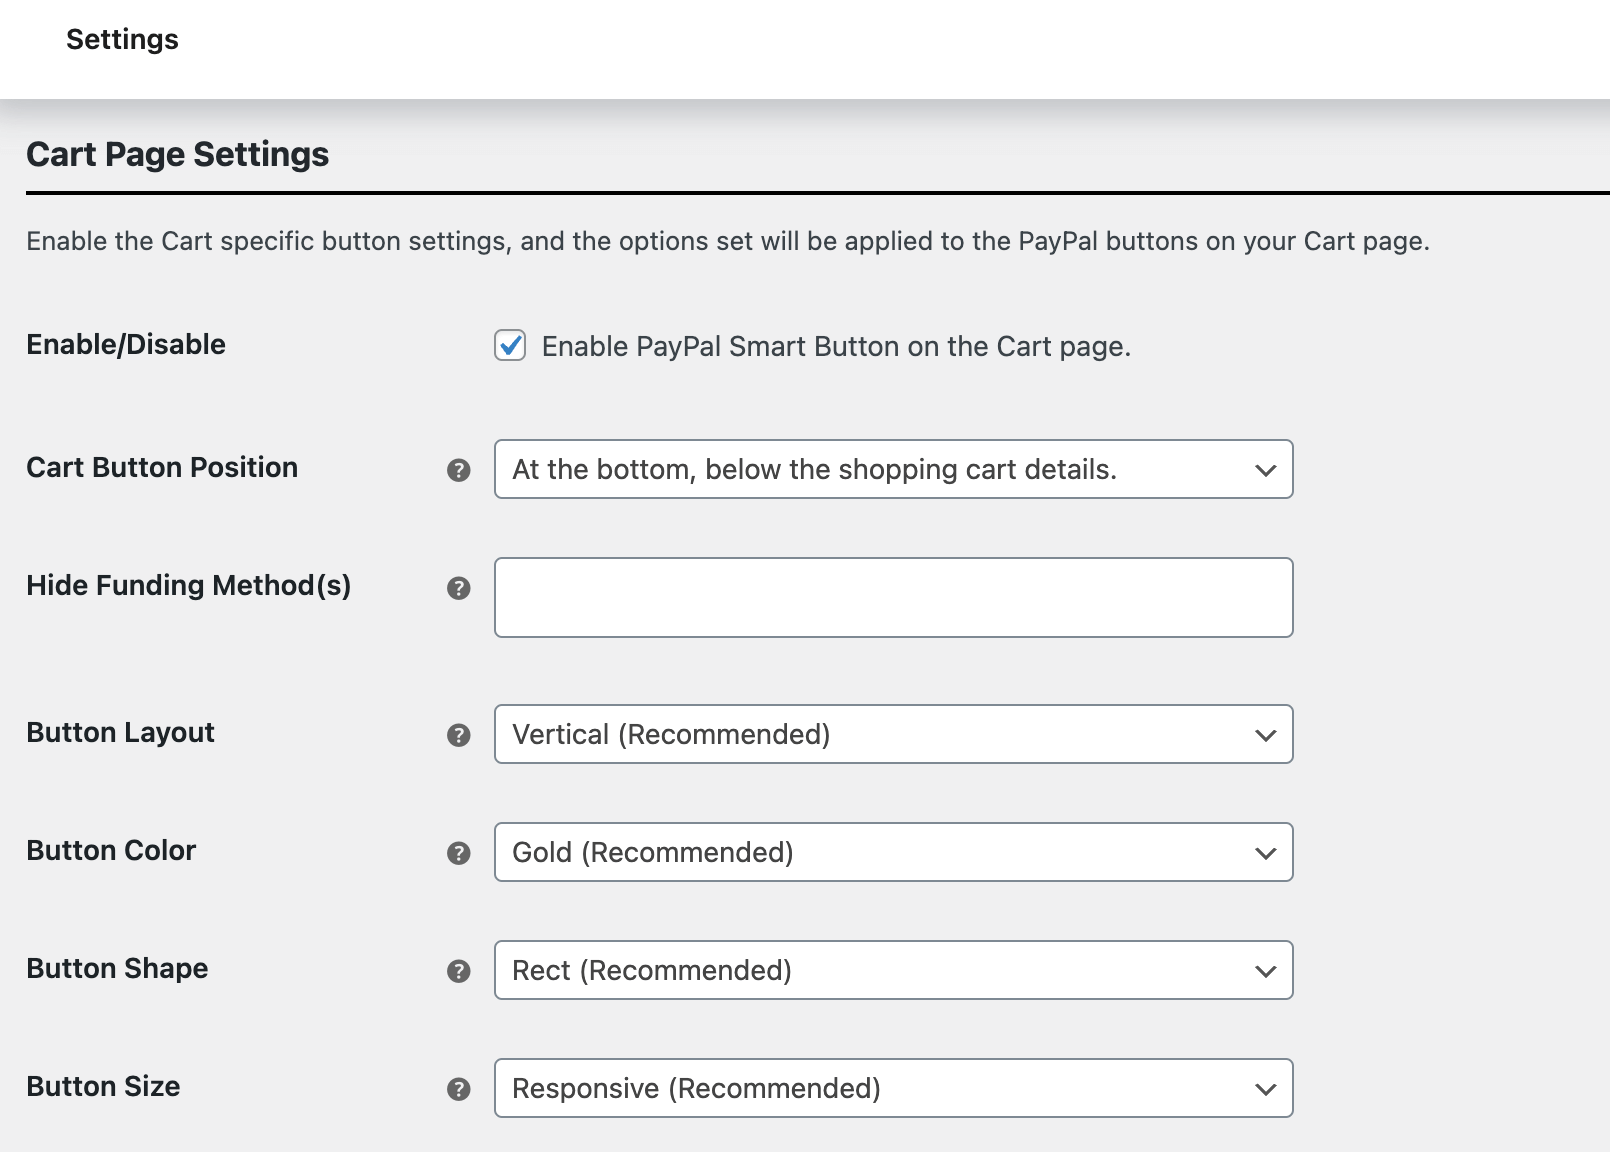
Step 4: Add PayPal Express checkout to the cart page
Scroll down a bit further and check the option “Enable PayPal Smart Button on the Cart page.” Like the product page, you can also customize how the PayPal button will look on the cart page.
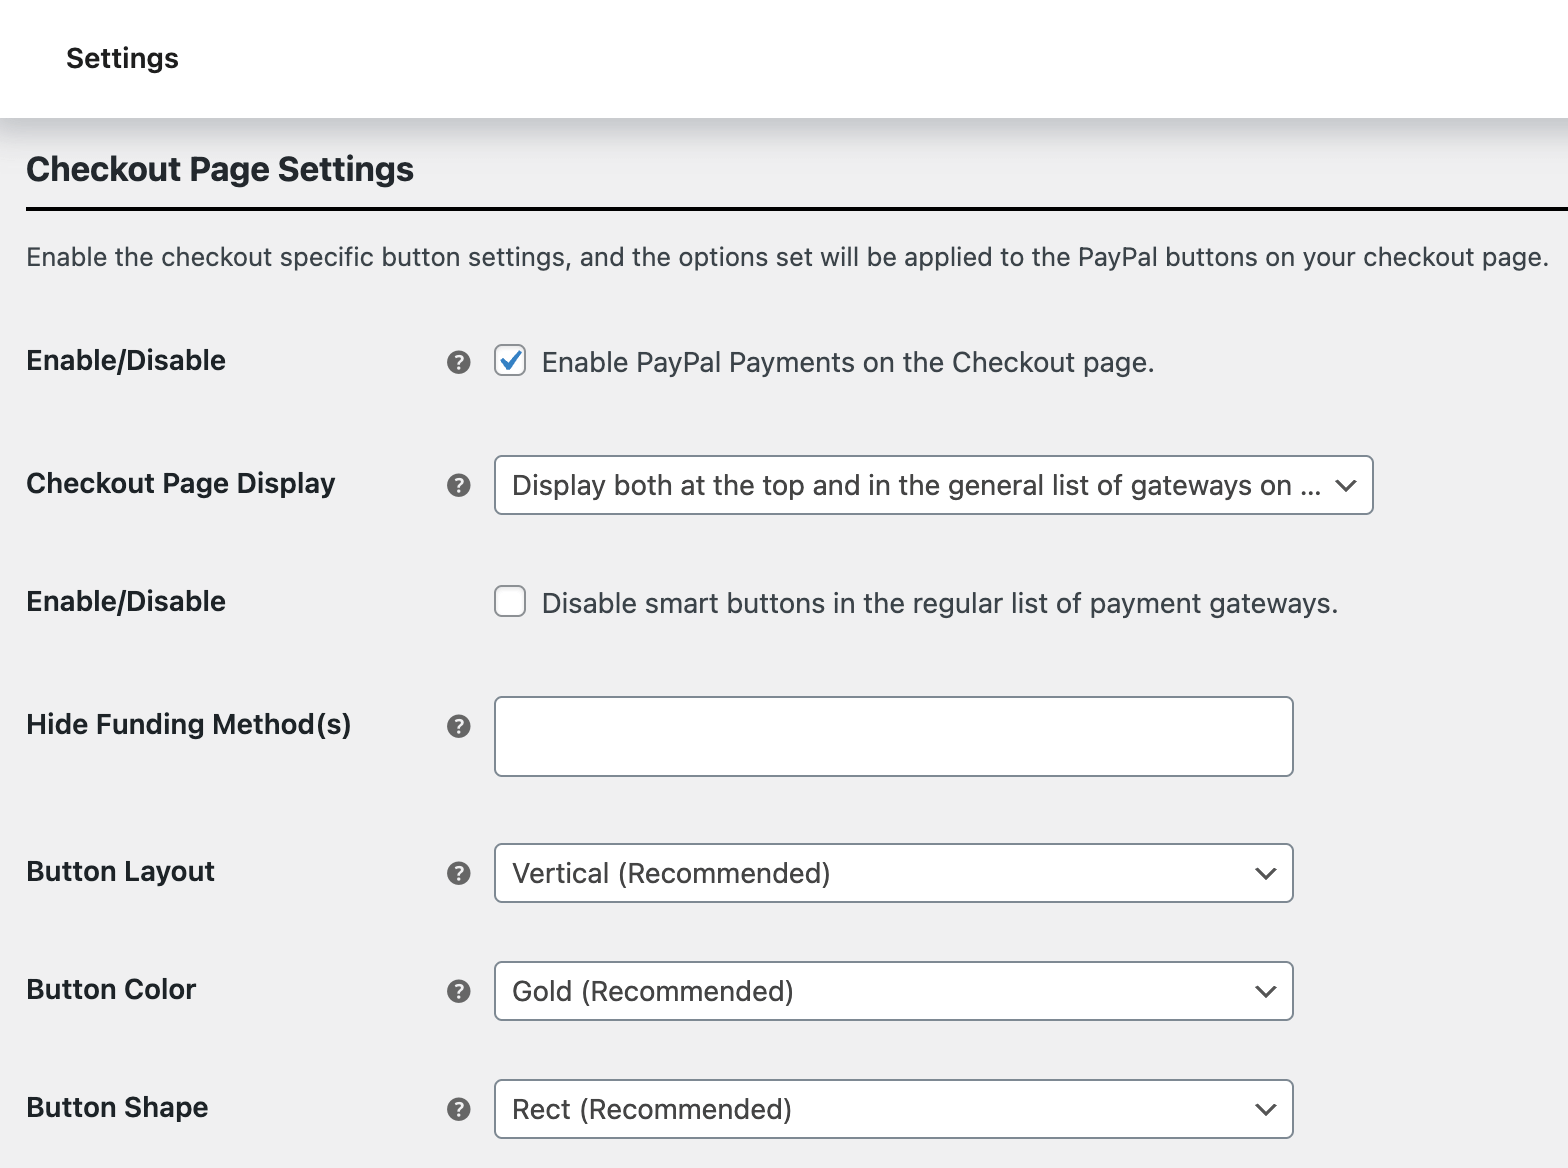
Step 5: Add PayPal Express checkout to the checkout page
If you scroll under the cart page settings, you can add the PayPal Express checkout option on the checkout page by checking the option “Enable PayPal Payments on the Checkout page.”.
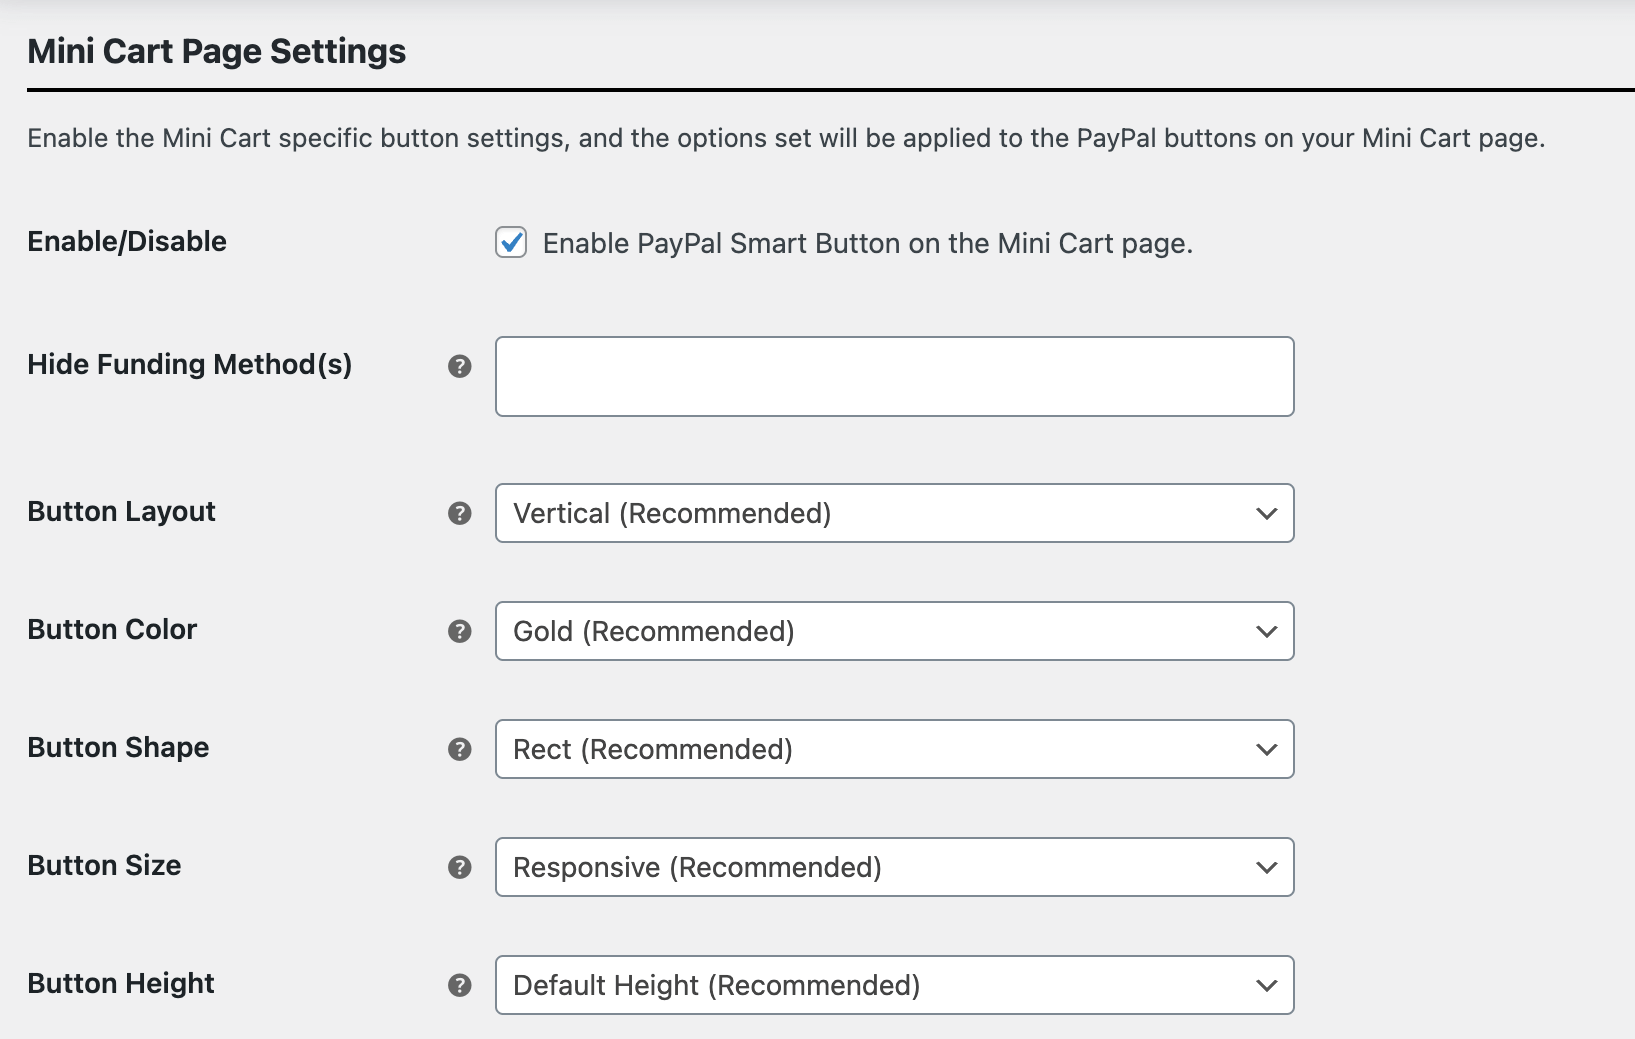
Step 6: Add PayPal Express mini WooCommerce mini cart
To add a PayPal express option to a mini cart, check the option “Enable PayPal Smart Button on the Mini Cart page” under Mini cart settings”.
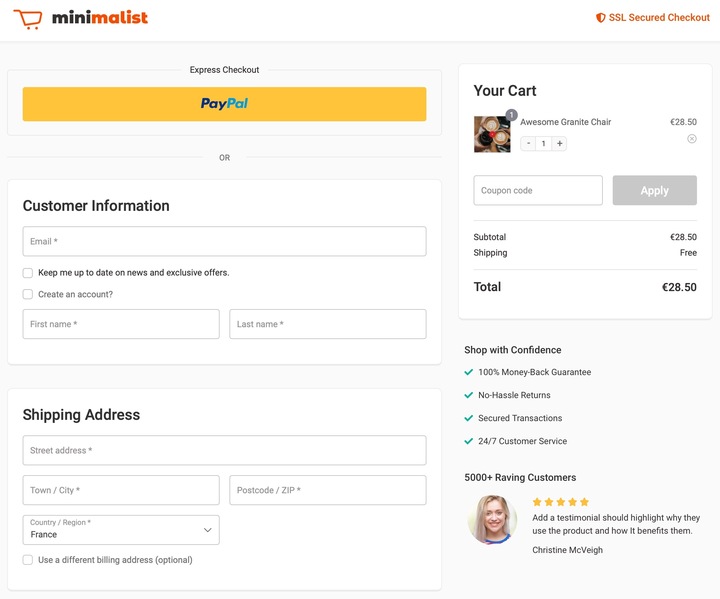
Make sure to save the changes. Now, if you check your WooCommerce store, the PayPal Express checkout option should be available on all the pages where you enabled the option.
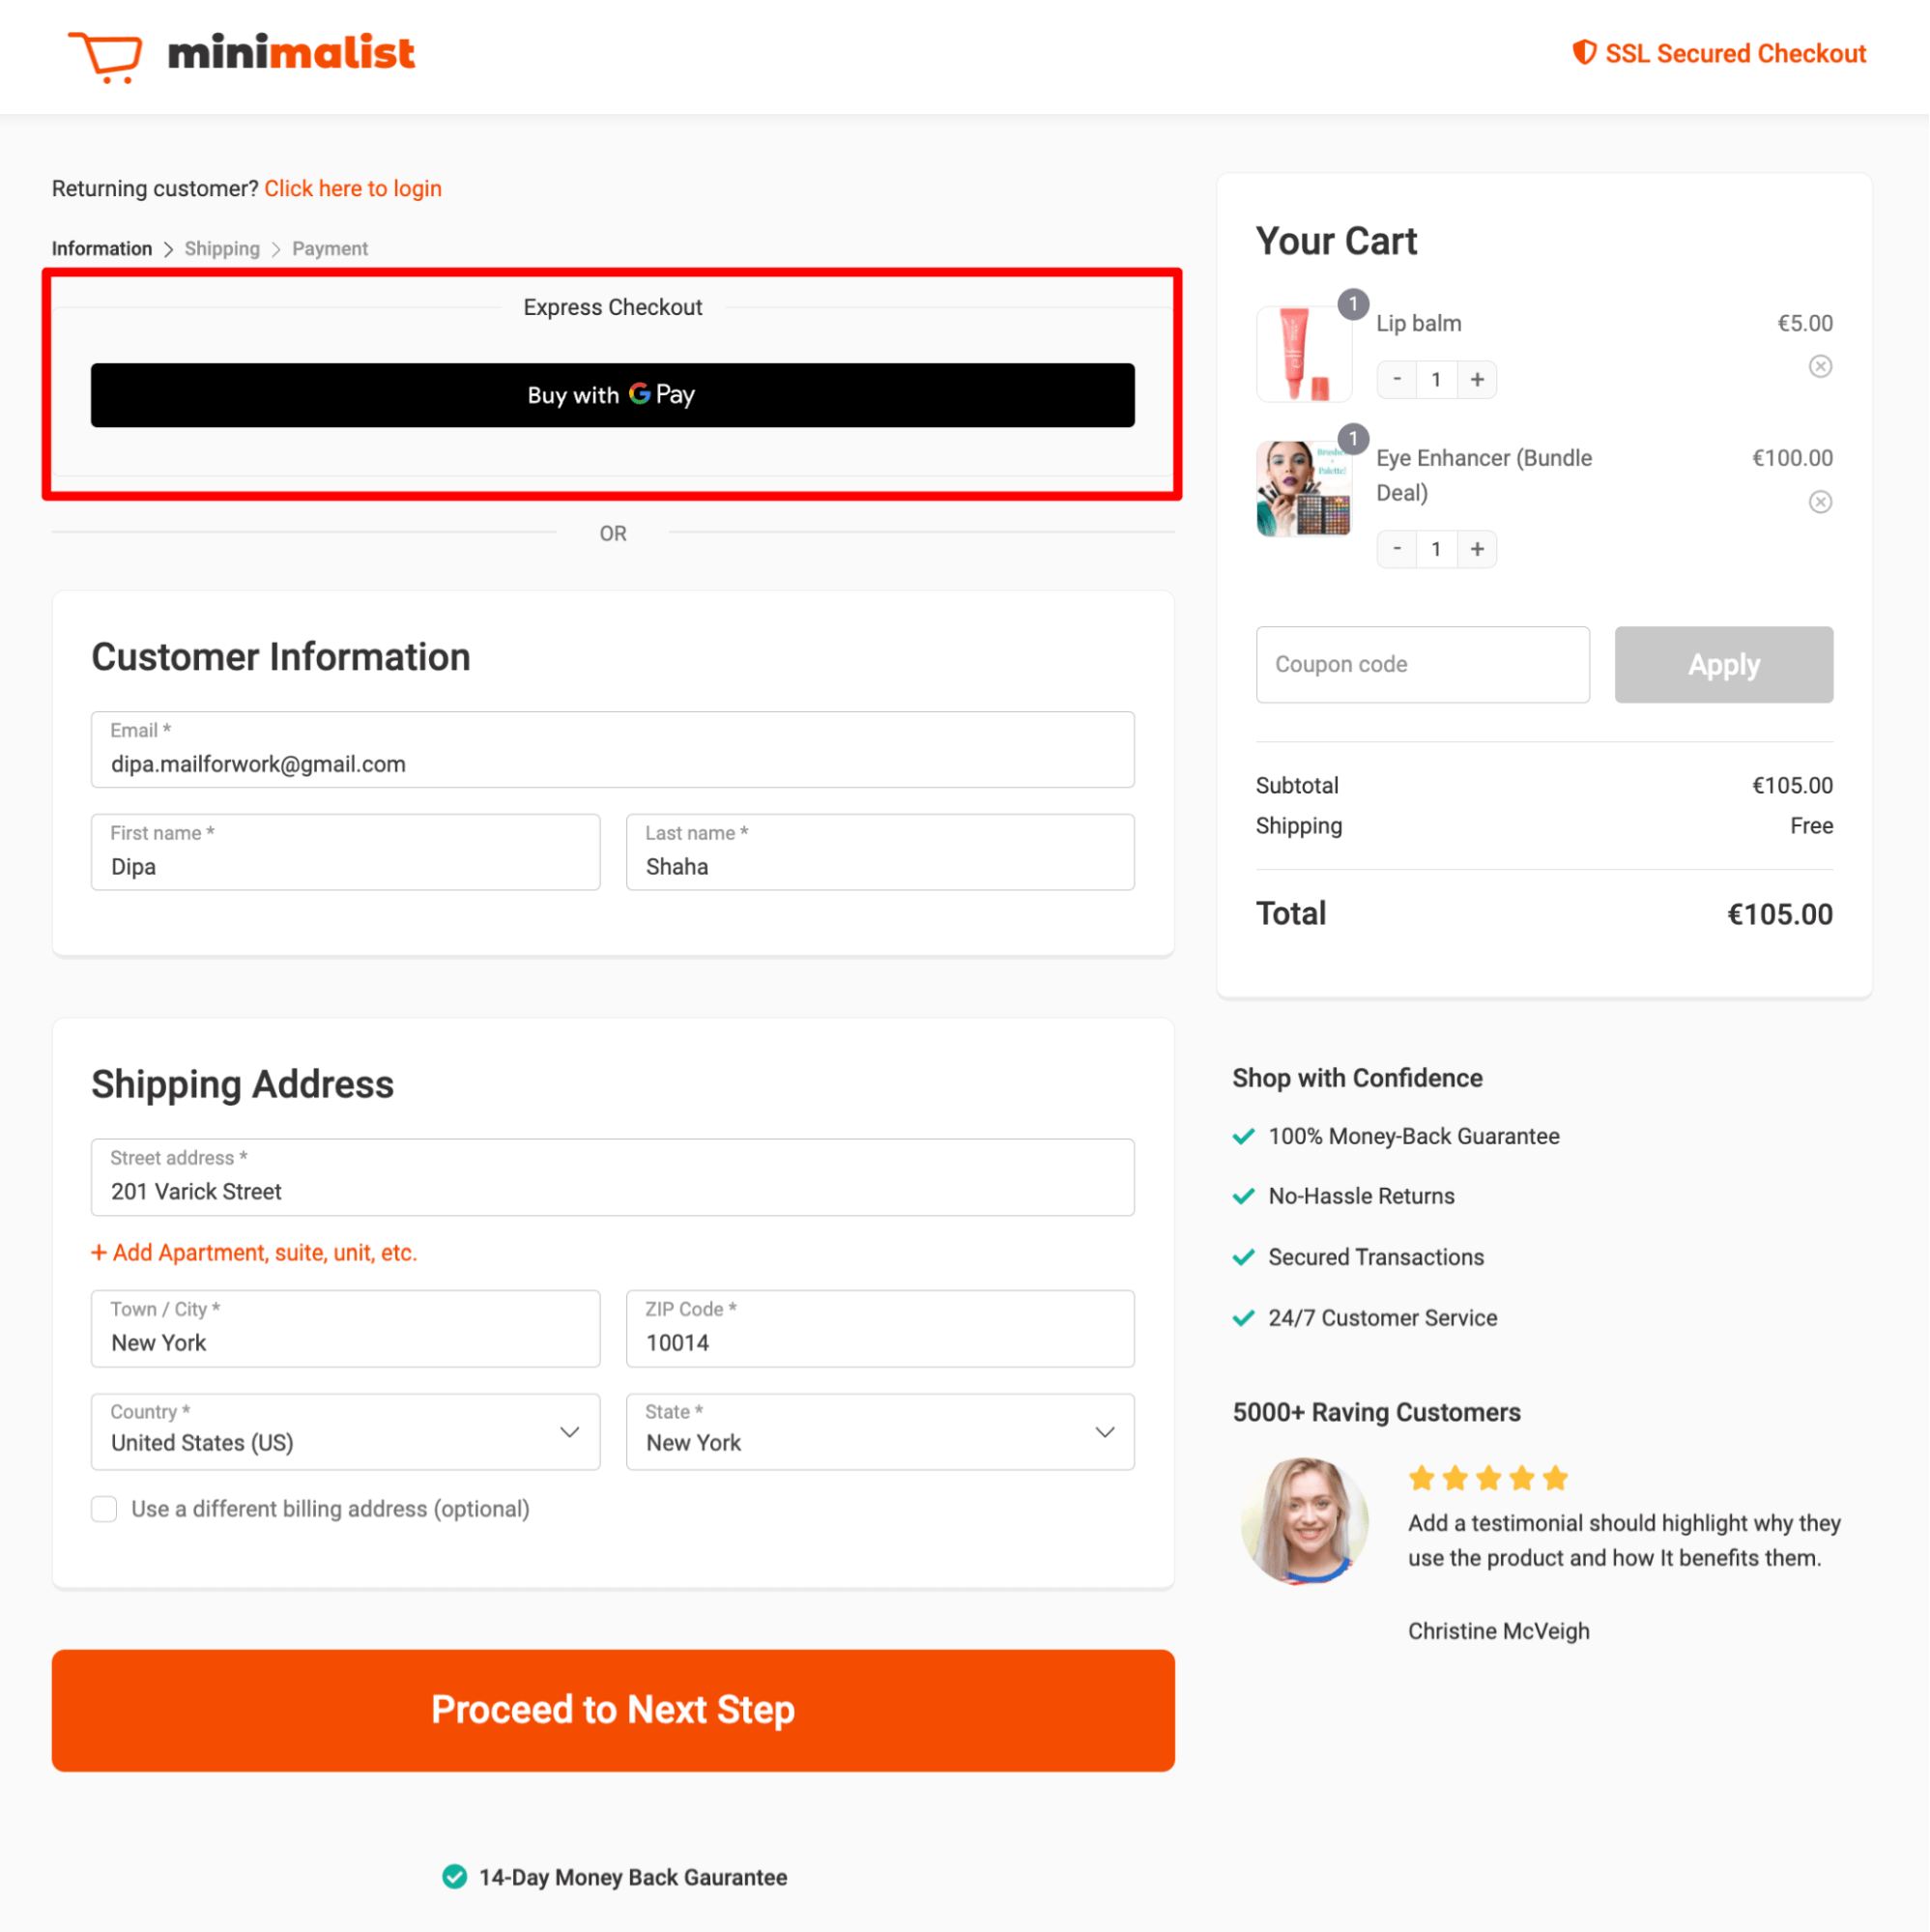
Here is a preview of the PayPal Express Checkout option on the WooCommerce checkout page:
Frequently Asked Questions About Express Checkout in WooCommerce
Here are the commonly asked questions about express checkout in WooCommerce:
Can I use Express Checkout for both physical and digital products?
Yes. You can use Express Checkout for both physical and digital products. It simplifies the purchasing process regardless of the product type, making it convenient for customers to buy any product with ease.
What if a customer wants to use a different payment method that is not supported by Express Checkout?
If a customer prefers a payment method not supported by Express Checkout, they can use the standard checkout process, which lists all available payment options. Ensure your WooCommerce store offers a variety of payment methods to meet customer needs.
Does Express Checkout work with WooCommerce multilingual setups?
Yes, Express Checkout works with WooCommerce Multilingual setups, allowing customers to check out in their preferred language and currency.
Ready to Offer Express Checkout On Your WooCommerce Store?
In this fast-paced world, adding an express checkout option to your store can save users a lot of time. And once customers enjoy shopping on your site, they’re less likely to turn to your competitors.
However, since not all express checkout options are available on every browser or device, it’s recommended to offer multiple express checkout options.
By following this blog, you can easily enable Google Pay, Apple Pay, PayPal, and Amazon Pay on different pages of your WooCommerce store.
Plus, with FunnelKit, you can customize the look of your checkout page to make it more conversion-optimized.
Start offering WooCommerce express checkout and boost your sales today!
Editorial Team
July 30, 2026Are you taking advantage of WooCommerce quantity discounts in your store? WooCommerce quantity discount is the concept of setting innovative pricing strategies by offering discounts on bulk items. Offering quantity...
Editorial Team
July 30, 2026A WooCommerce auto apply coupon adds a discount to your customer's cart without them needing to type or paste a coupon code. It works the way a supermarket loyalty card...
Editorial Team
July 27, 2026WooCommerce subscription upsell can help boost your revenue through subscription-based sales. Moreover, subscription-based products allow you to add predictability to your revenue. You can sell physical and digital products and...


