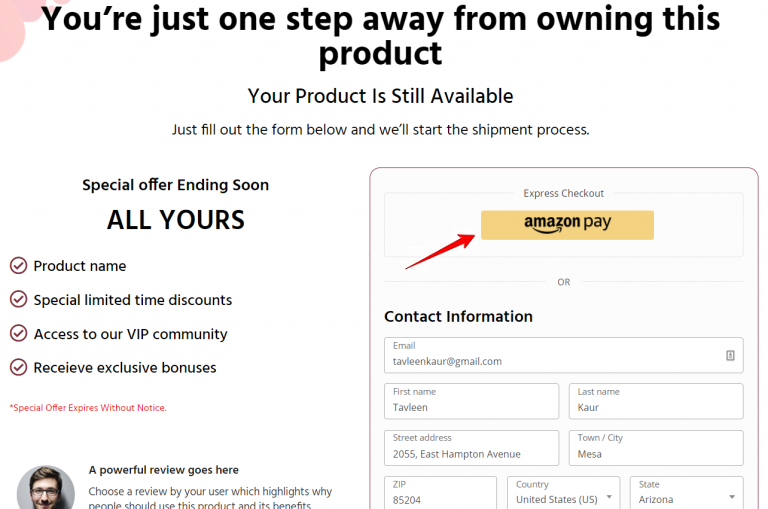
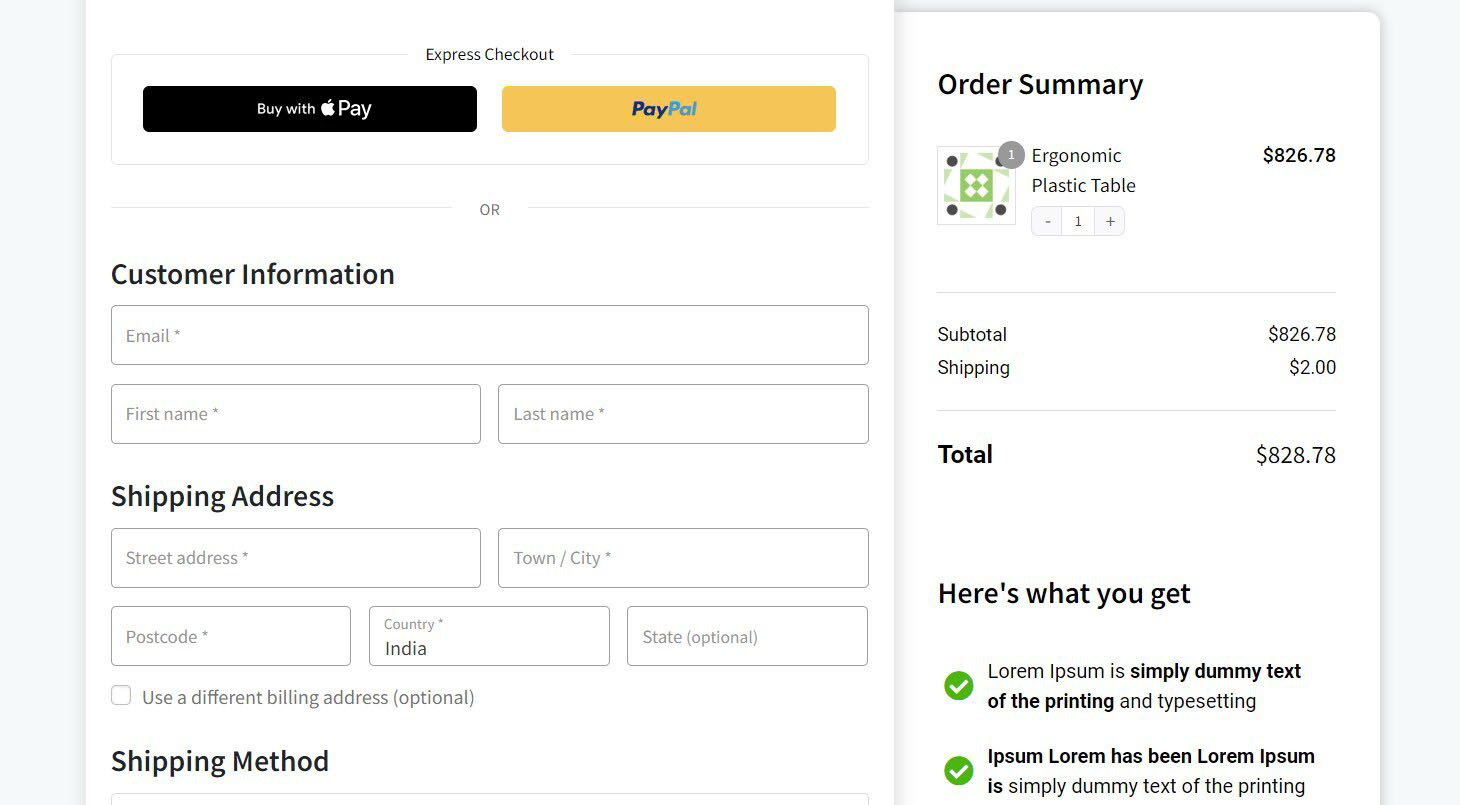
Digital wallets are very effective in increasing sales. Checking out via Apple Pay/Amazon Pay/PayPal reduces the time spent on checkout because it eliminates the need to fill out the form.
A user clicks on their preferred express checkout button and logs in to pay.
No need to enter the address, email, phone number, etc. (everything gets auto-filled).
Here’s how it appears on the checkout page:
You can activate Stripe’s Apple Pay/Google Pay/Amazon Pay/PayPal in your WooCommerce store to enable the express checkout buttons on checkout.
After making the payment through one of these express checkout options, the customer gets automatically redirected to the WooCommerce thank you page.
Here are the supported payment plugins:
- Stripe Payment Gateway for WooCommerce by FunnelKit
- WooPayments
- PayPal For WooCommerce -> PayPal Commerce (their new integration)
- PayPal For WooCommerce -> Paypal Express (old integration)
- Amazon Pay
Let's look at setting up these buttons on your custom checkout page.
Apple Pay and Google Pay
Follow the steps to enable express checkout buttons on the checkout page:
Step 1: Download FunnelKit's Stripe Payment Gateway for WooCommerce
Download this plugin: https://wordpress.org/plugins/funnelkit-stripe-woo-payment-gateway/
Click here to complete the setup and onboarding process.
Step 2: Enable Express Checkout Buttons
Go to WooCommerce > Settings > Payment tab > Stripe Gateway.
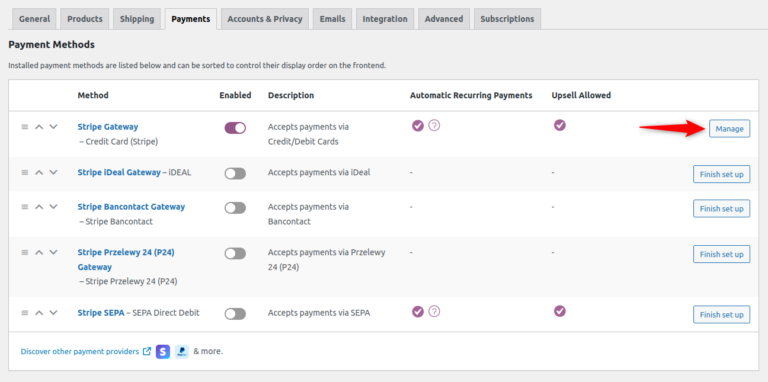
When the Payment Request Buttons option is selected, all types of Payment Request buttons are activated (on your site) at once.
It means that you’re now ready to accept payments via various methods with the WooCommerce Stripe payment gateway.
The available payment options are:
- Apple Pay
- Google Pay

For Apple Pay, customers need to have a payment method from a supported bank or payment card provider.
Find the list of supported ones here.
Find the list of compatible Apple devices here.
Here's how you can offer Apple pay on your site via the WooCommerce Stripe payment gateway:
Go to the stripe.com - Dashboard > Settings > Apple Pay
Next, add your site URL there.
Add your site's domain exactly as it loads, includes the www, or leave it out, but remove https://.
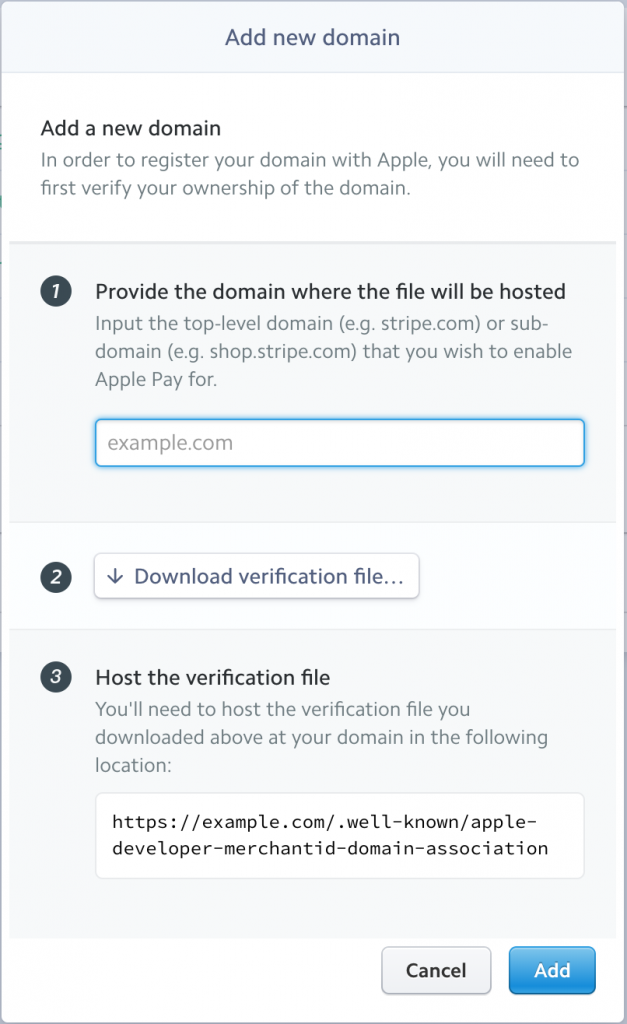
The domain will then show on your Apple Pay Stripe page under 'On the Web domains.'
Customers need to have a payment method from a supported bank or payment card provider.
Visit this troubleshooting doc if you're facing any issues with the button's visibility.
That's it! You've now set up Stripe Apple Pay and Google Pay for WooCommerce.
PayPal Smart Checkout Button for Express Checkout
Follow the steps below to show the PayPal Express Checkout button on the checkout page.
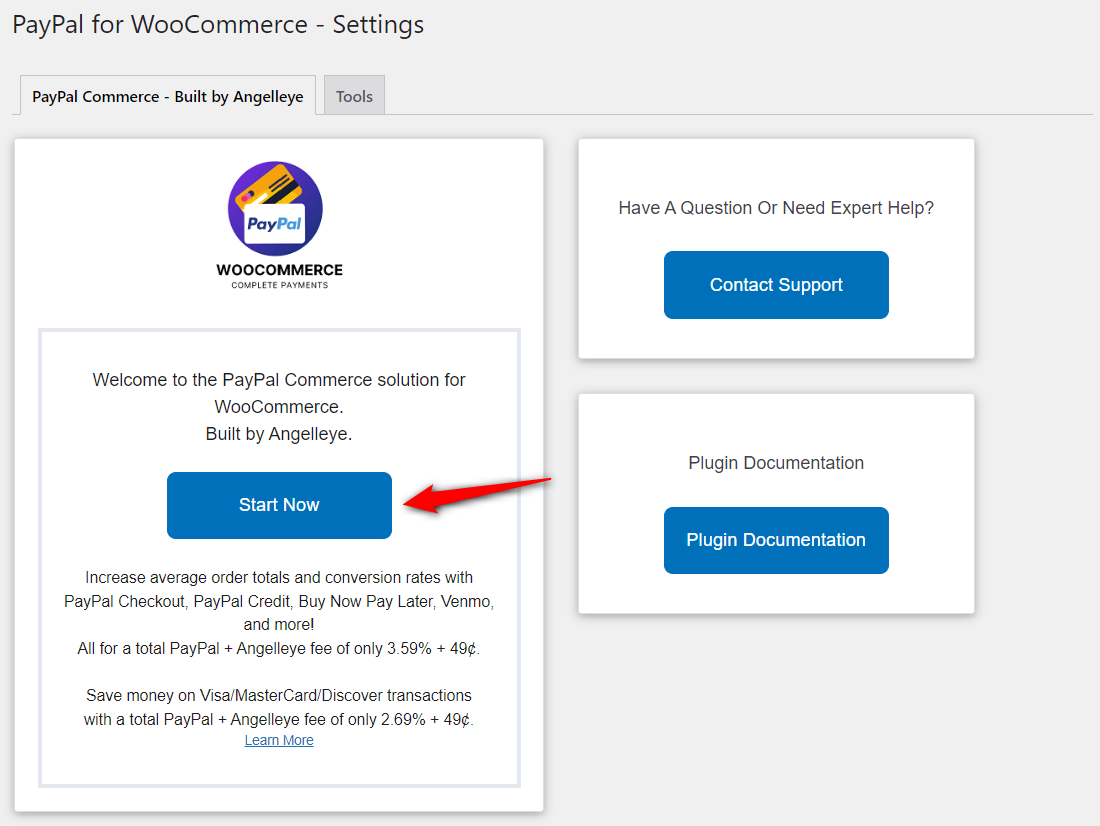
Step 1: Download and install the PayPal AngelEye payment gateway plugin for your WooCommerce store by clicking on the below URL:
https://www.angelleye.com/product/woocommerce-paypal-plugin/
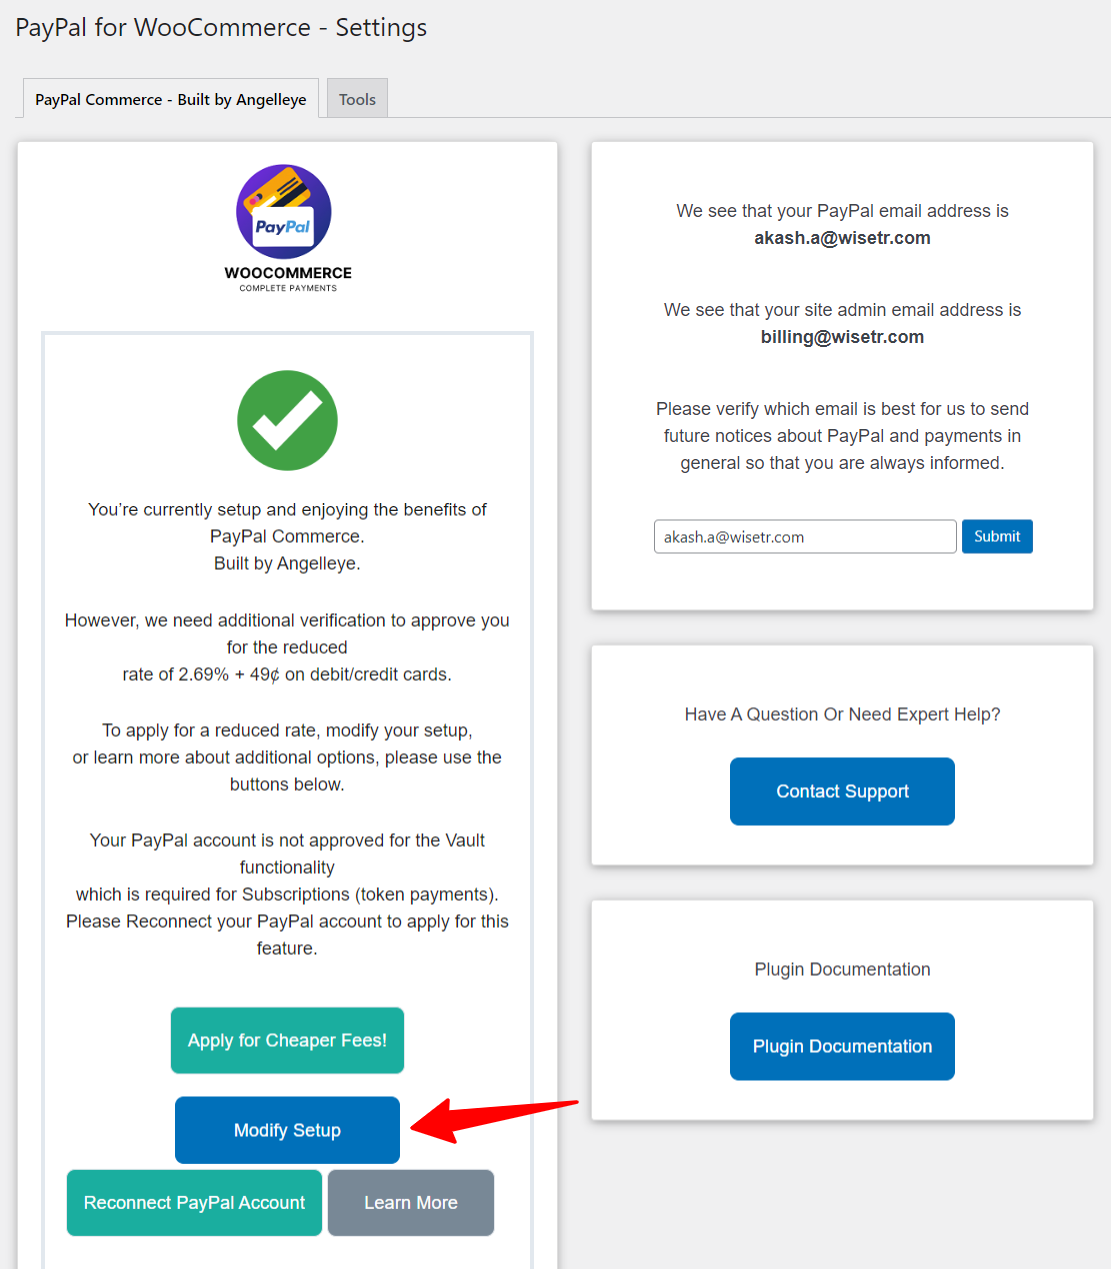
Step 2: Once you’ve installed the PayPal AngelEye payment gateway plugin, go to Settings > PayPal WooCommerce.
Scroll down and click on the View List button next to Paypal Classic Payment Gateway.
Start the onboarding process.
Log in to your PayPal account by entering your registered email address and password. Once done, you'll be directed to your WordPress dashboard with the established connection.
From there, click on the Modify Setup button to set up different payment options.
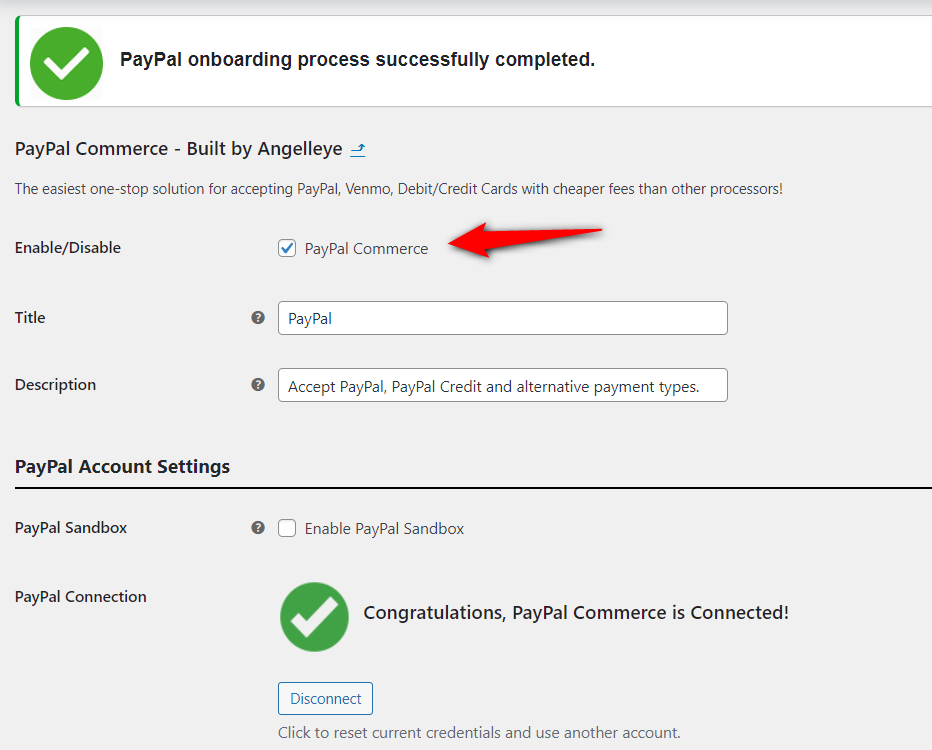
Enable PayPal WooCommerce from here.
You can also enable the Paypal Sandbox from here as per your requirement.
Configure the options of displaying the payment gateway on the product page, cart page, checkout page and mini cart.
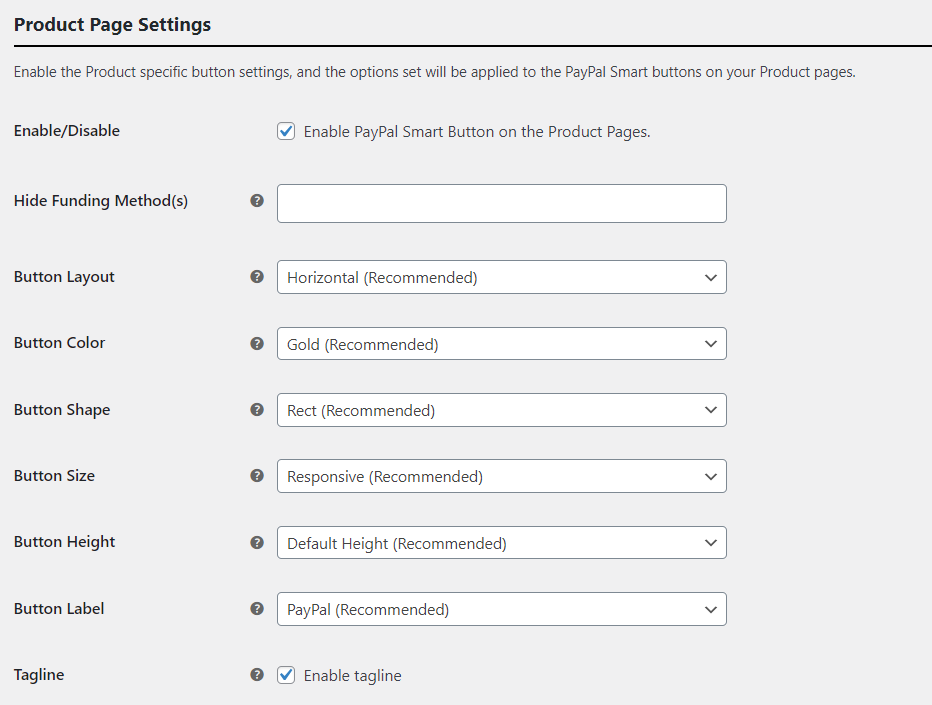
You can even enable/disable Pay Later messaging from here.
Once you’ve set it up, hit the ‘Save Changes’ button.
Amazon Pay
Follow the steps below to show the Amazon Pay button on the checkout page.
Step 1: Download and install the WooPayments plugin for your WooCommerce store by clicking on the URL: https://woo.com/products/pay-with-amazon/
Step 2: Make sure you have configured your Amazon Pay account.
Create the API keys.
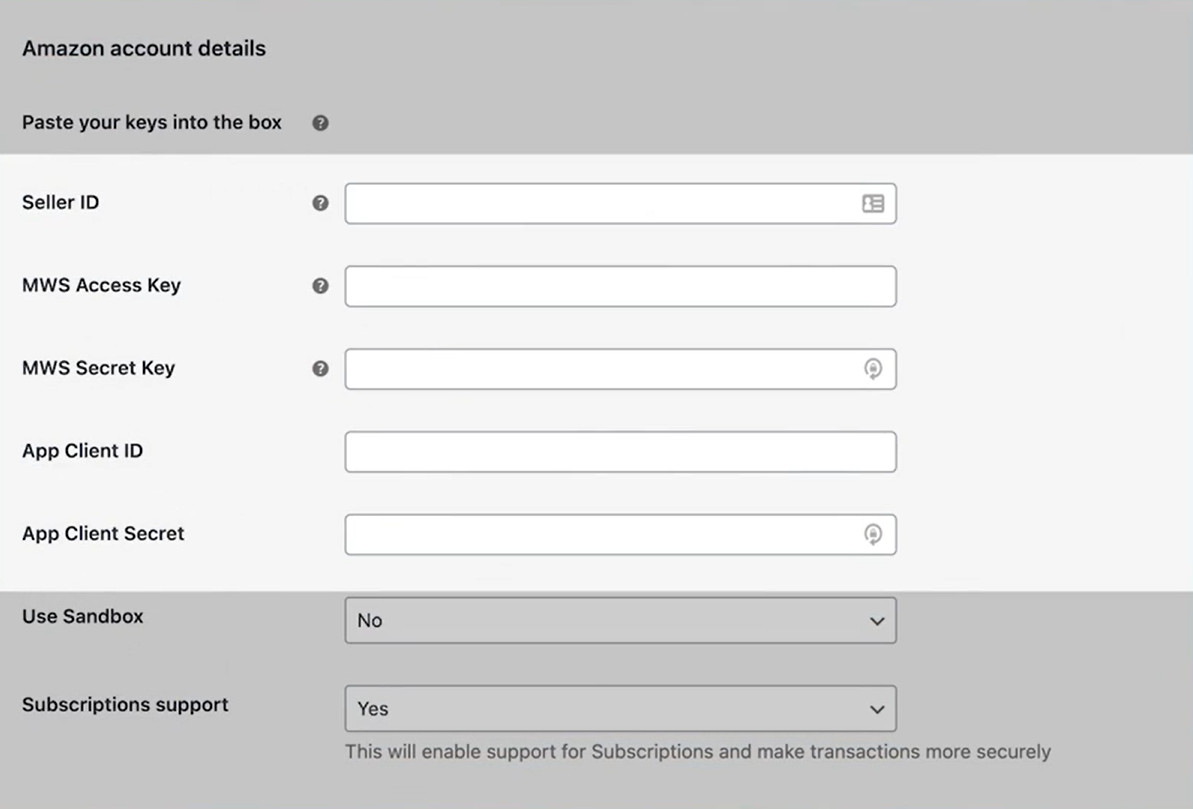
Once everything is set, you'll be able to configure the Amazon Pay button settings.
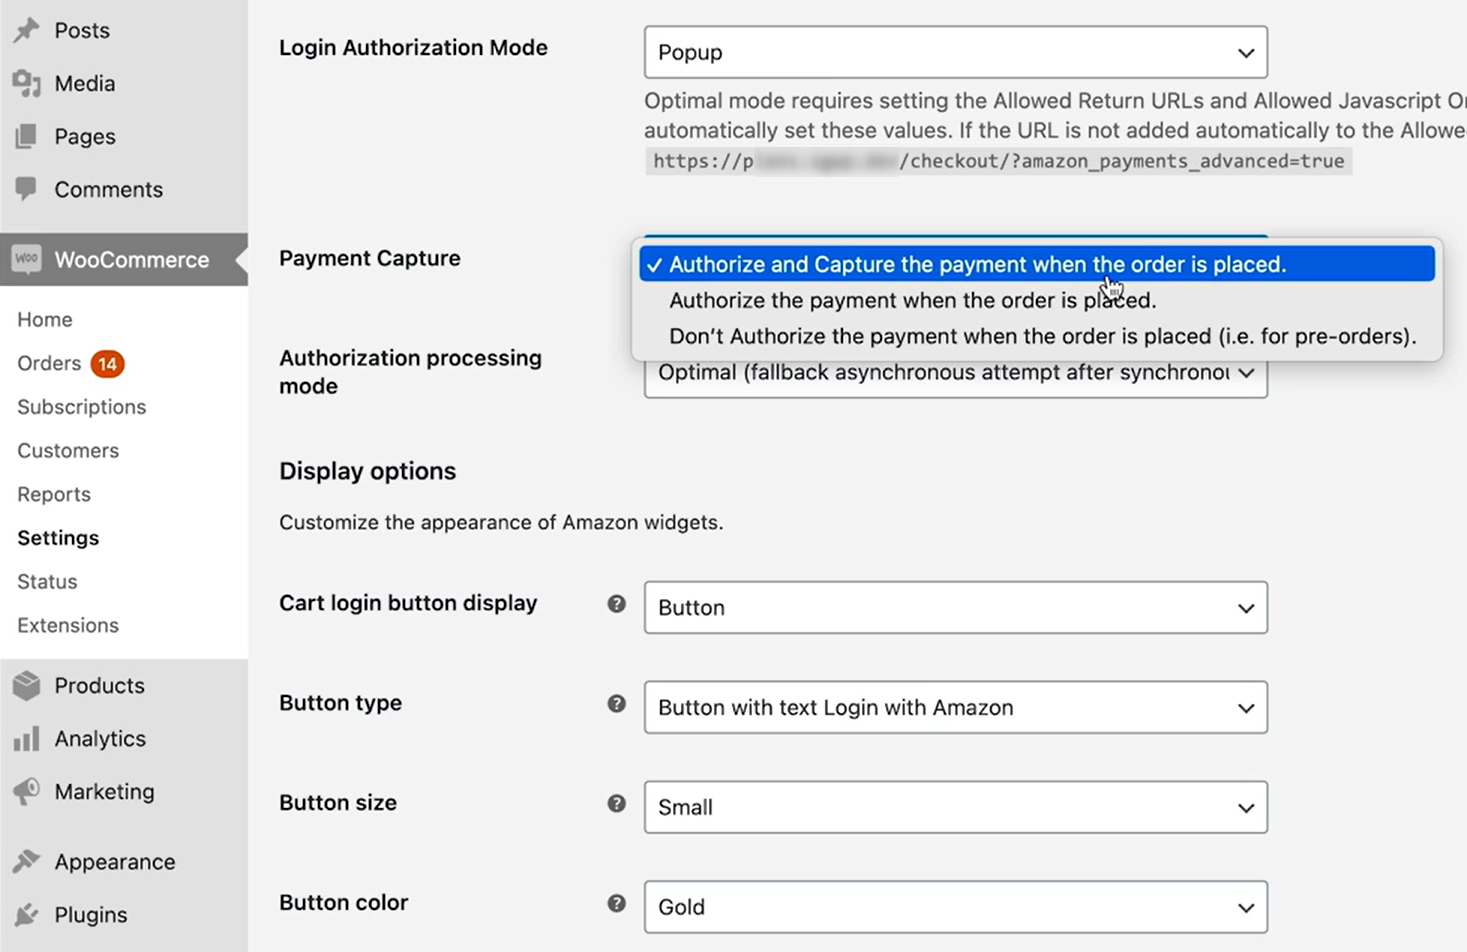
Once everything is done, your Amazon Pay button will appear on your checkout page.
You can read the official Woo document here.
Enable Express Buttons
Once you've configured everything, go to FunnelKit ⇨ Checkouts.
Select the Checkout page for which you want to enable the PayPal Express Checkout option.
Next, go to the 'Optimizations' tab.
When you scroll down, you’ll see the option to enable the Express Checkout buttons.
Simple click on 'Yes' and hit on ‘Save changes’

Additionally, you also get the option to specify these buttons' position - top of the checkout page, Before Order Summary, After Order Summary, etc.
Now click on the ‘View’ icon to preview your checkout page and see how the express checkout button appears.
This is all about the smart buttons for express checkout.


