You can customize the CTA Button in the Checkout Form widget using Elementor.
Follow the steps below to do so:
Step 1: Click on Edit Template
To customize your checkout page in Elementor, click on the Edit Elementor Template button.

The checkout page template opens up in Elementor.
Step 2: Edit the Checkout Form widget
Click on the pencil icon on top of your Checkout Form widget.
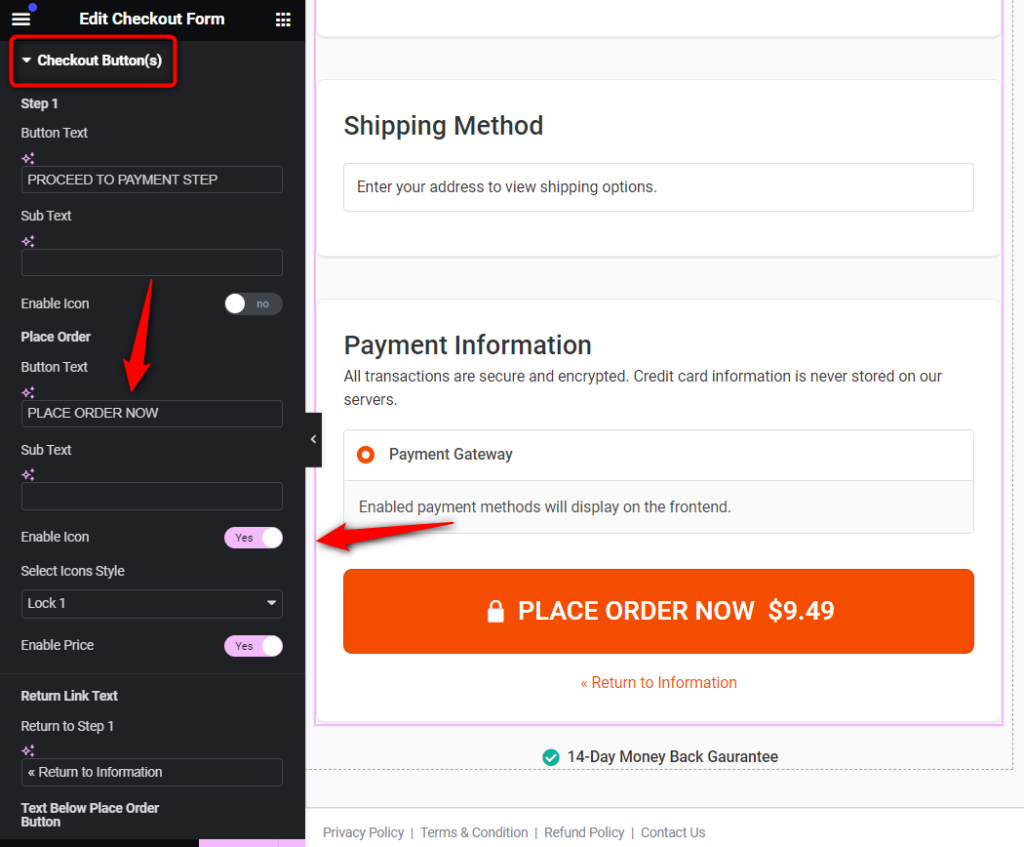
Step 3: Go to the 'Checkout Button(s)' section from the left side panel
Here you'll find options to set the CTA Button text, Heading and Sub-Heading of the Payment Gateways section, and the text below the CTA Button.
Step 4: Design your CTA Button the way you want
Navigate to the Style tab and click on 'Buttons'.
Here you'll see a lot of customization options for the checkout button.
Here are the things you can set from here:
- Make the CTA Button sticky on the mobile
- Set the Button width, alignment, and the typography
- Change the color of the button (in normal and hover)
- Set the padding and margin for the CTA button
and so much more.
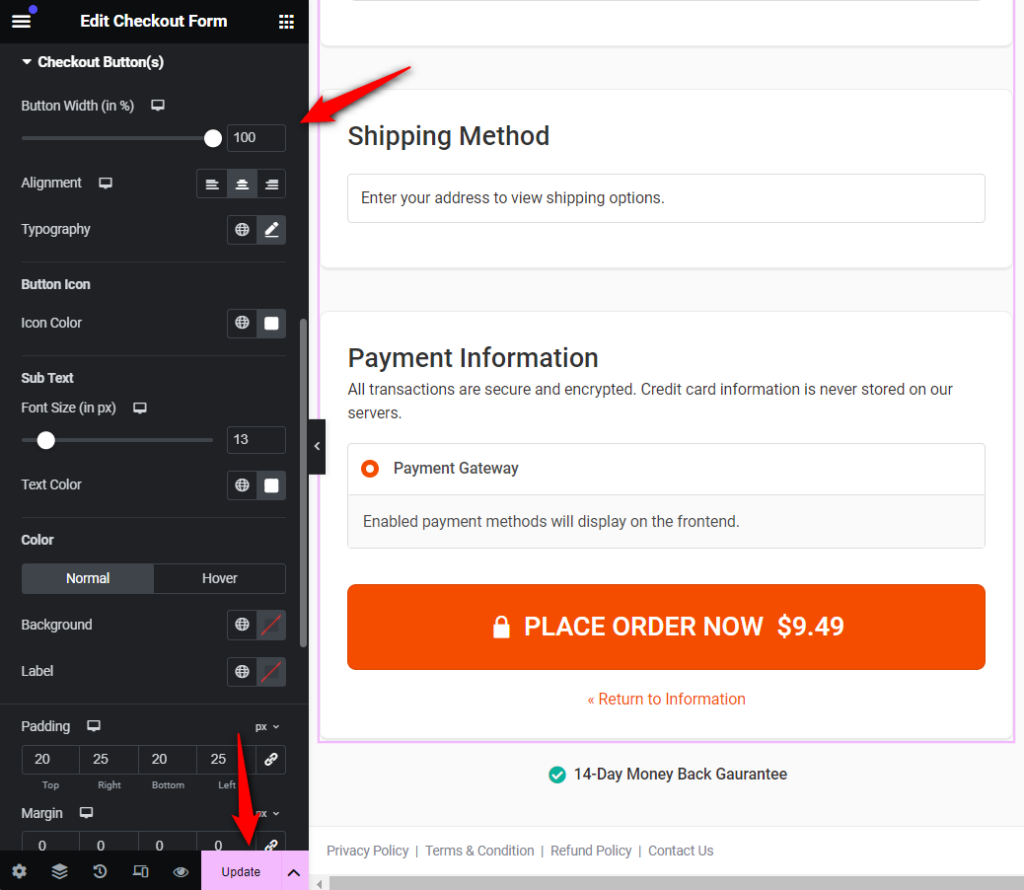
Click on the Update button to save all the changes made.
That's it! You've now successfully changed the text of the CTA Button in the checkout form.