In this documentation, we'll see how to change the logo on any Checkout page.
Follow along:
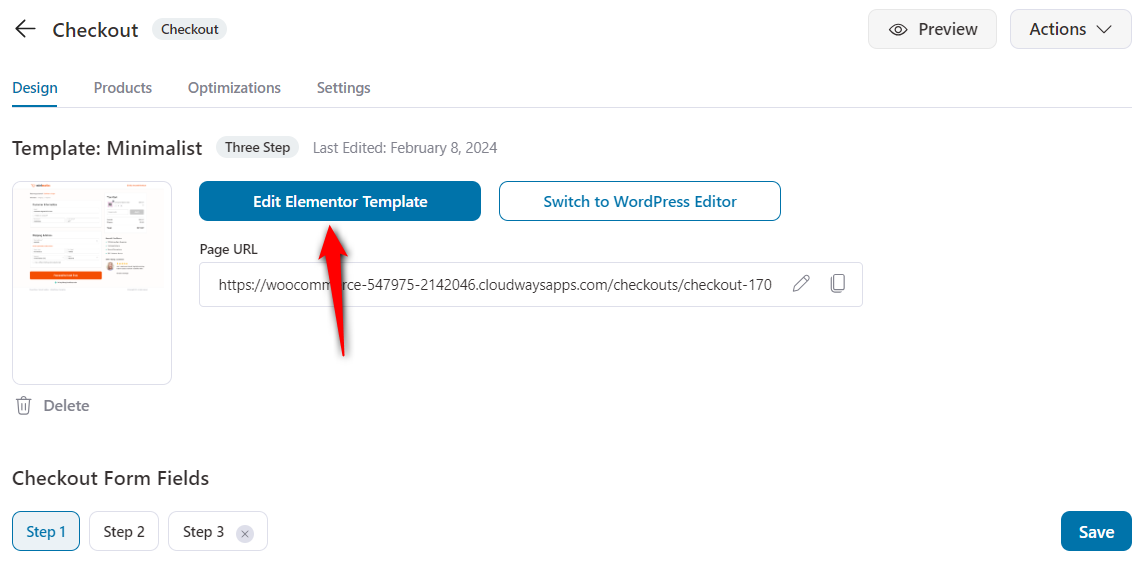
Step 1: Go to the 'Design' tab in Checkout
Next, click on 'Edit Elementor Template' to edit the template using Elementor.
Step 2: Choose the logo
On the left-hand side panel, you'll see the option to change the logo or remove it.
Click on the Choose Image button, and choose the logo you want to use.
Step 3: Hit the 'Update' button
When you've added the logo of your choice, hit the Update button.
This will save your changes.
Here's the final output:
This is how you can change the logo on your Checkout page.


