Our checkout pages deeply integrate with Elementor and let you have complete control over the look and feel of your checkouts.
When you're using a multi-step checkout page template, you can choose to enable the Progress Bar for your checkout form.
Here are the steps you need to follow:
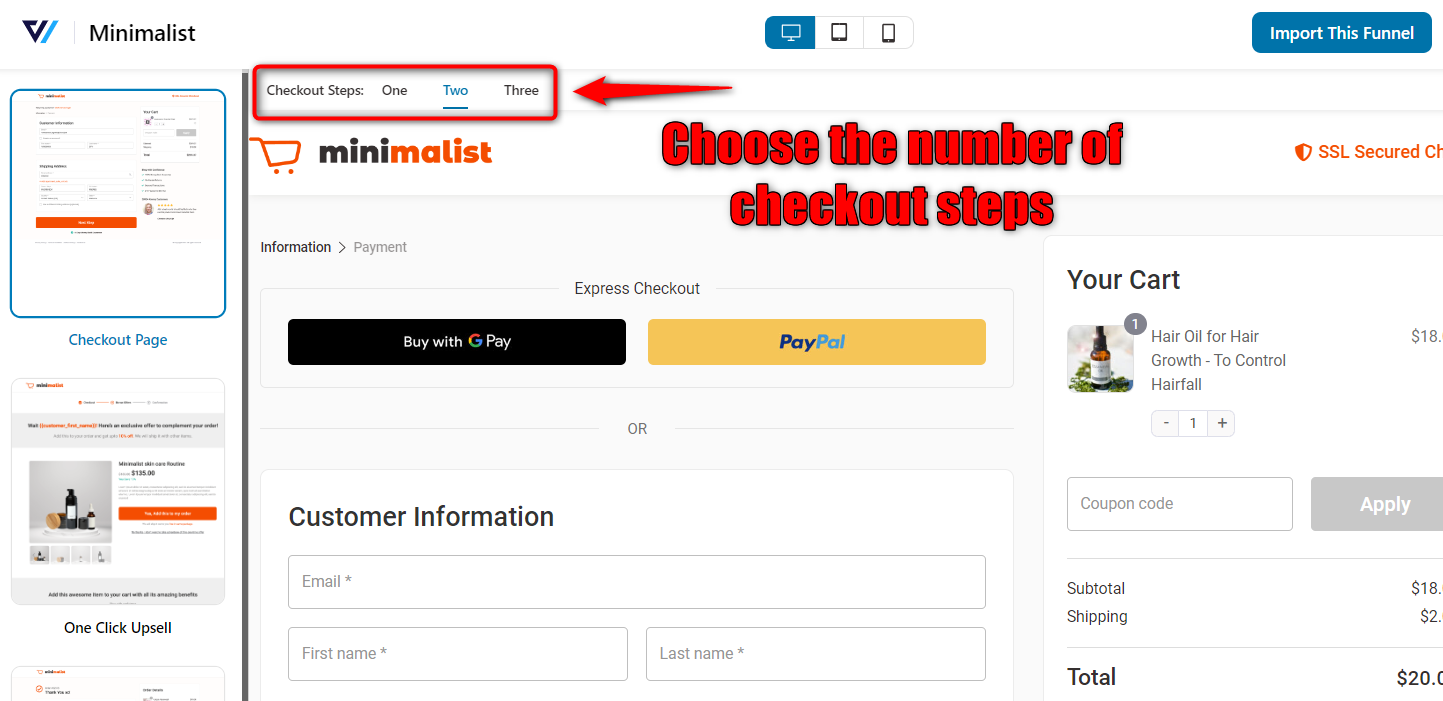
Step 1: Import a checkout template
Select the multiple steps when importing a Checkout page template. Then, click on Import this Funnel.
Name your checkout page.
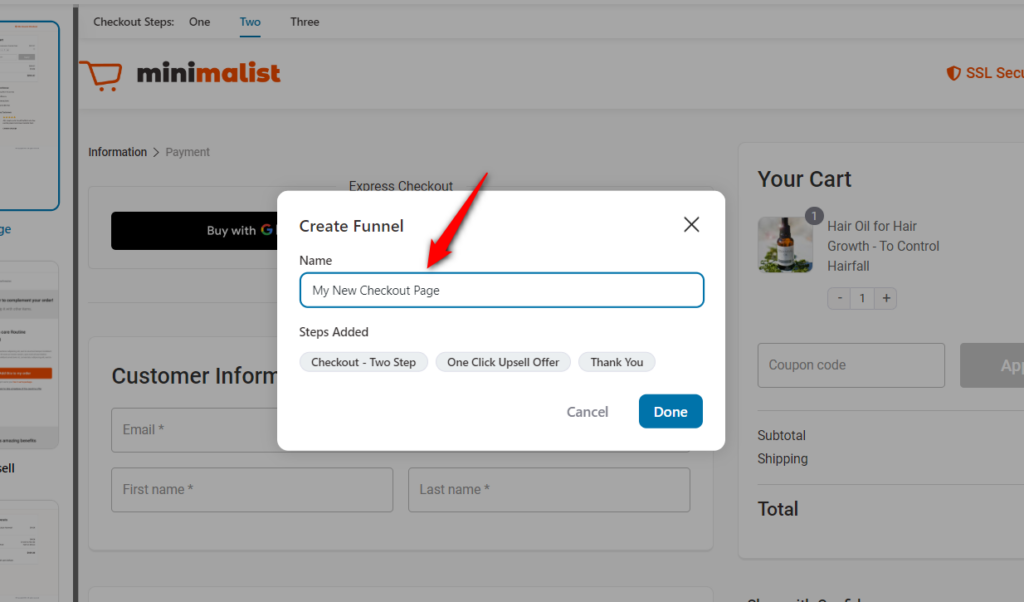
Click on the Done button.
Step 2: Add a step in case of a single-step Checkout Page
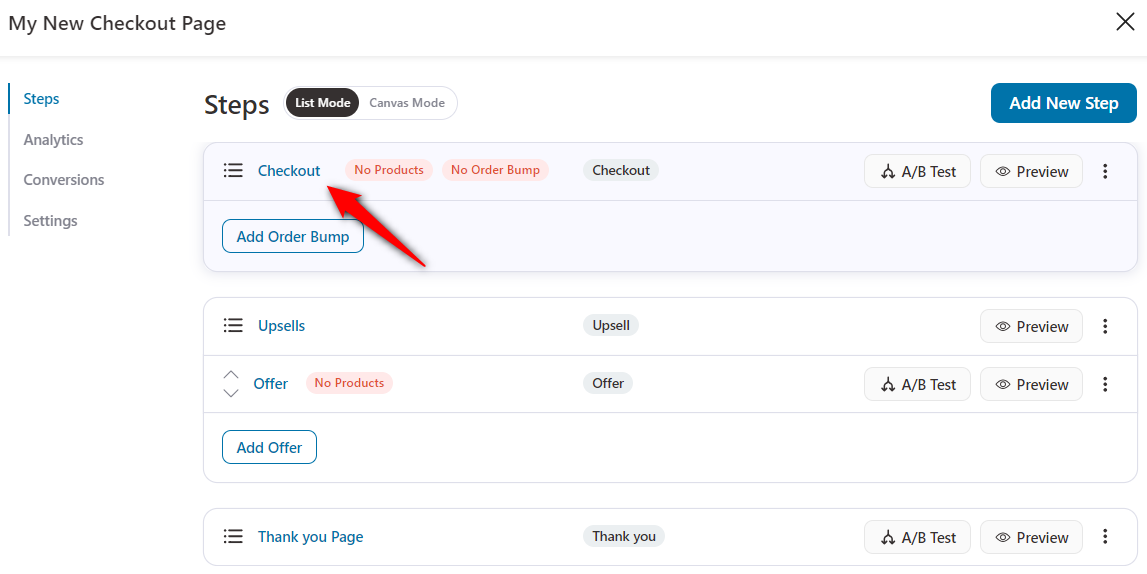
Click on the checkout page name to start customizing it.
It'll take you to the Design tab. Scroll down and you'll see Checkout Form Fields.
Here click on the + Add New Step button to add a new step.
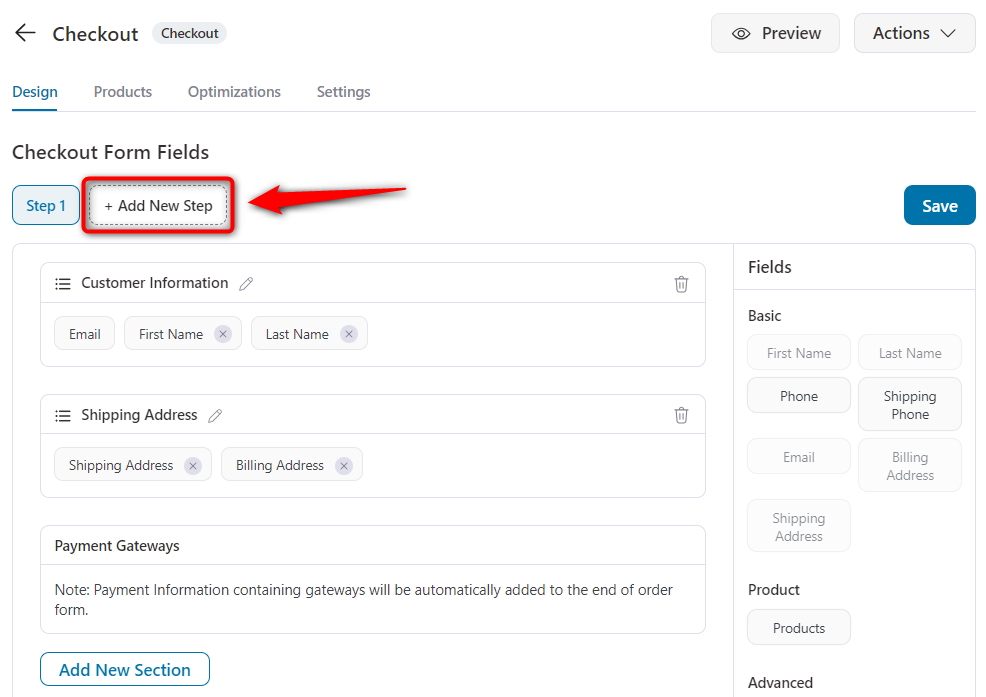
A new step will get added to your checkout form, making it a multi-step Checkout page.
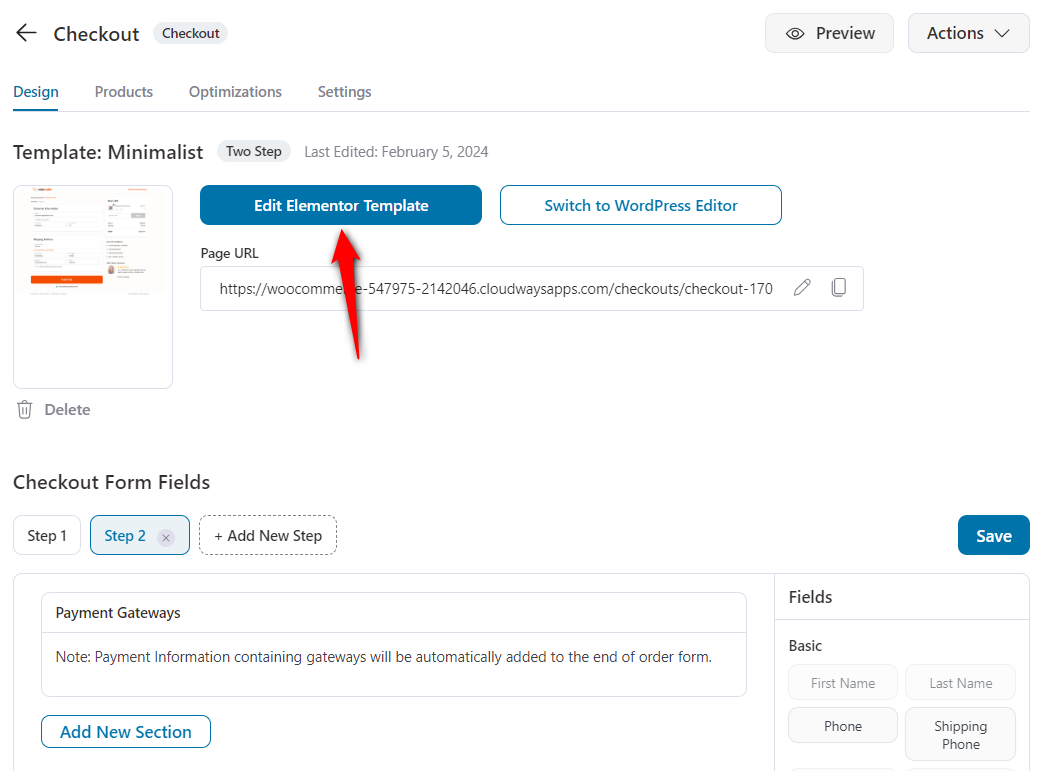
Step 3: Click on 'Edit Template' to customize the checkout page in Elementor
To customize your Checkout page, click on the Edit Elementor Template button here.
Step 4: Click on the pencil icon of the Checkout Form Widget
Click on the pencil icon to start editing your checkout form widget.
In the case of multi-step checkouts, the progress bar is by default active. But, you can always style it as per your needs.
When you do so, all the possible settings will show up on the left side panel.
Step 5: Choose the type of steps for your Checkout Form
First, the enable steps option is already active if you have a multi-step checkout form.
You can select the type of progress bar you want to show - Breadcrumbs or Tabs.
Here, we'll pick the 'Tabs' step type.
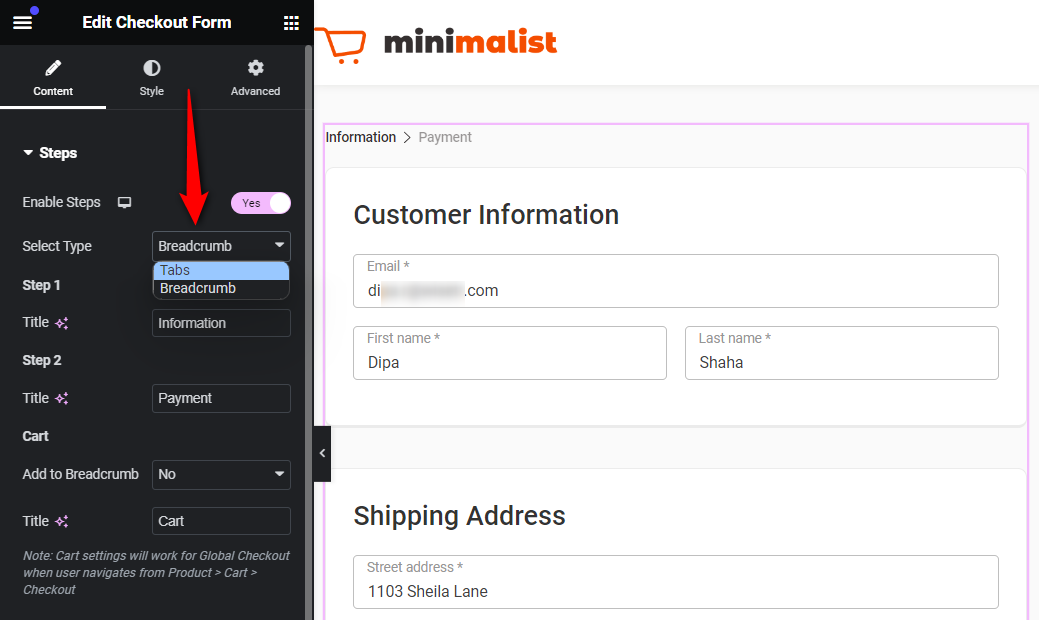
Apart from that, you can also set the title for each of the steps.
Step 6: Go to the 'Style' tab to customize the Progress Bar
Click on the 'Style' tab on the left side panel.
Here, under the 'Steps' section, you'll get to see a bunch of customizations available.
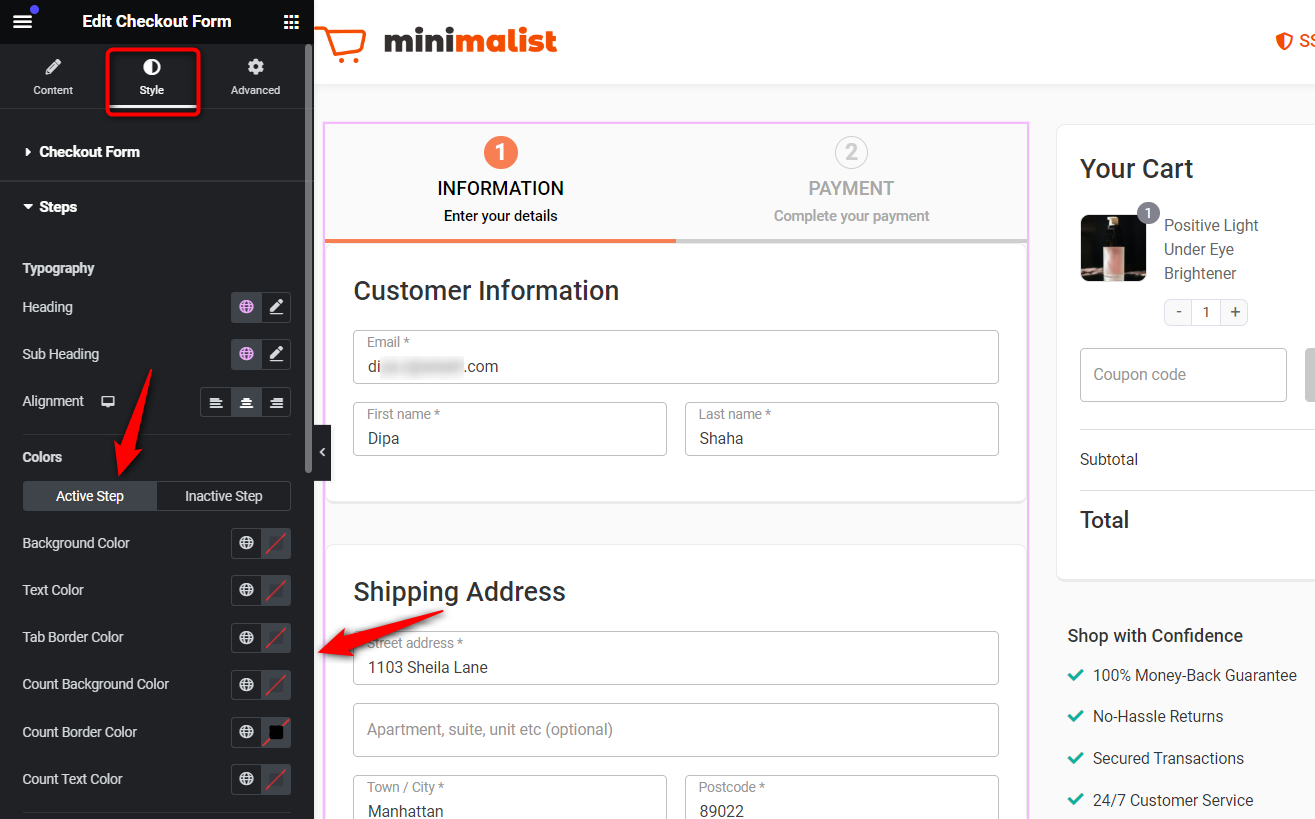
You can:
- Change the color of the active step and the inactive step
- Make changes to the typography of the Step heading and sub-heading
- Set the Progress Bar border-radius and margin
Make sure to hit the Update button to save all the changes.
That's it! Now you can click on the 'Preview Changes' button to preview your checkout page and see how the steps appear.