The CTA button is an essential element of a checkout page. This is what explicitly tells the visitor what the page expects you to do.
Creating an eye-catching yet clear button is a must.
This is how you can customize your CTA button:
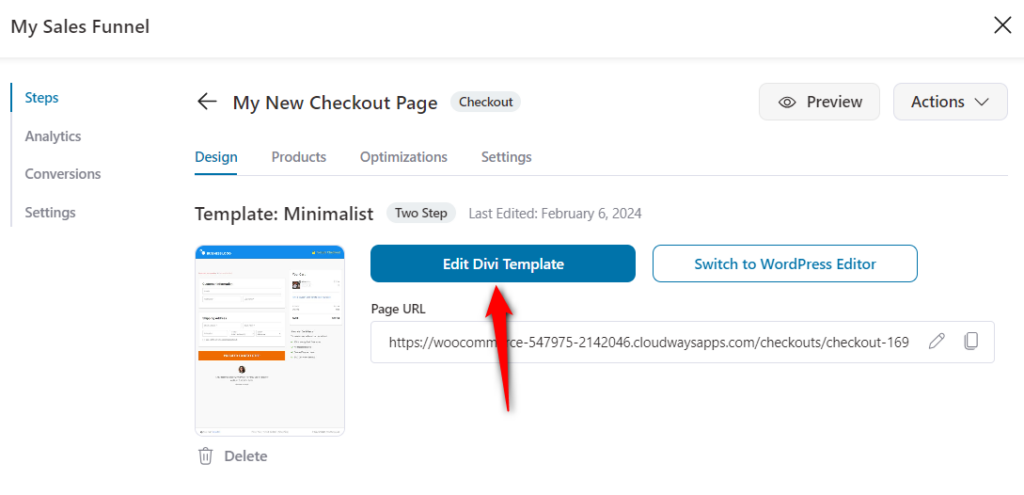
Step 1: Click on the checkout page to start editing.
Go to the checkout page you want to edit. Then, click on the Edit Divi Template button to start customizing it.
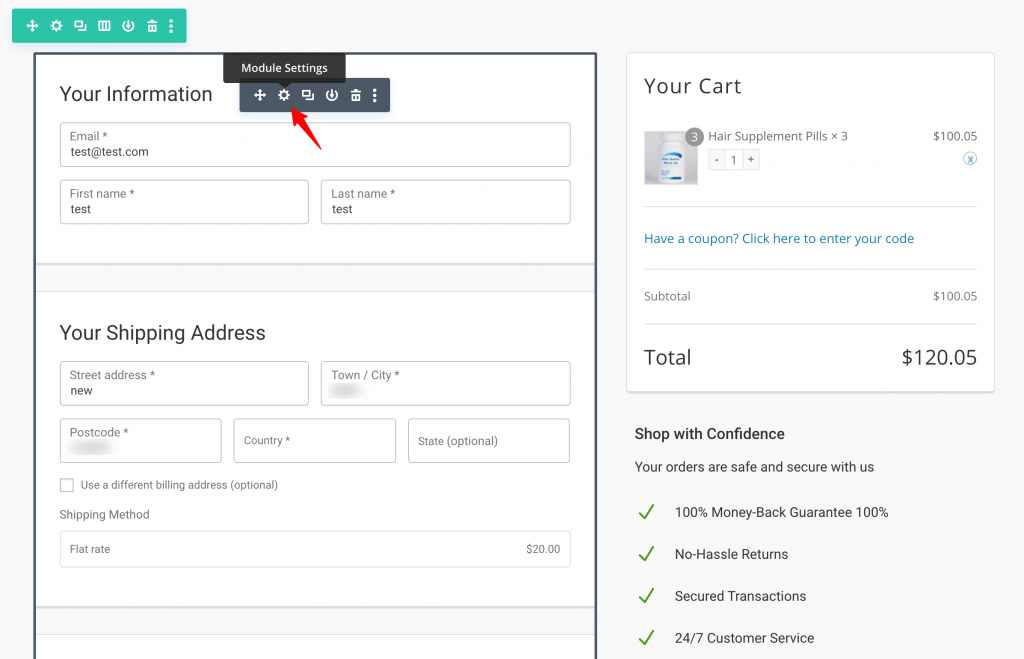
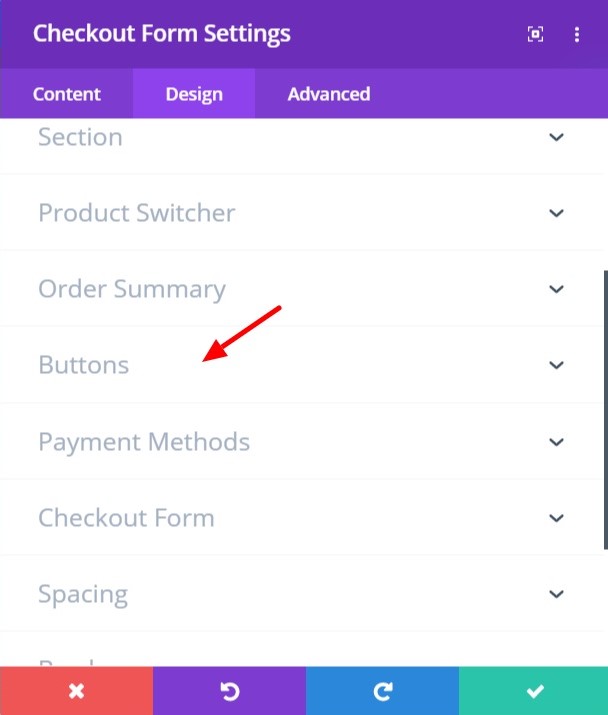
Step 2: Click on the checkout form to edit
Click on the checkout form on the page and select the cogwheel icon to open the settings.
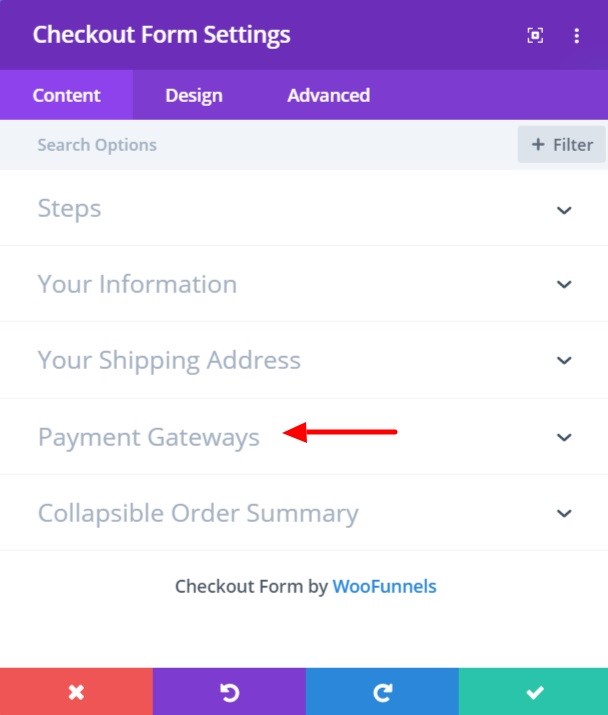
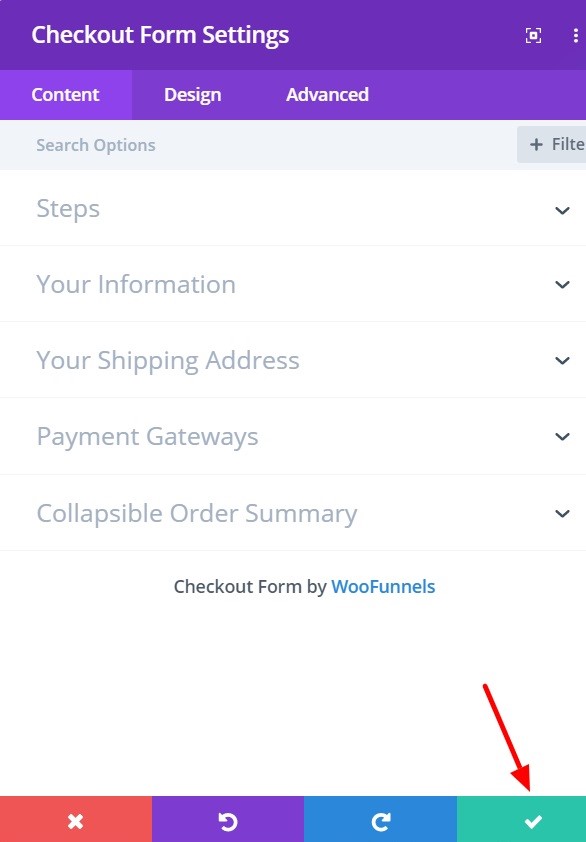
Step 3: Choose the ‘Payment Gateways’ option under the ‘Content’
Payment Gateways is where you get to customize the way your CTA button looks.
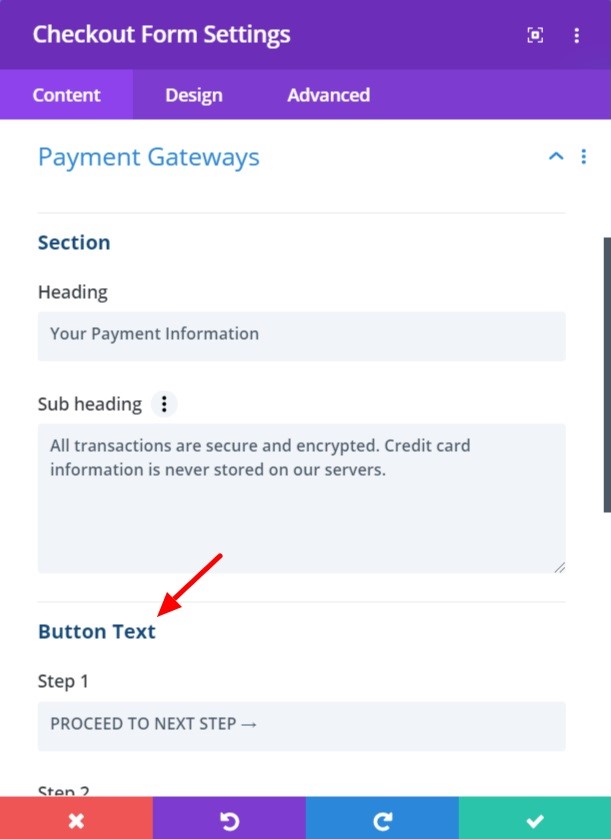
Step 4: Edit the text on the CTA button
You can change what your CTA button says and make it more fitting for your business.
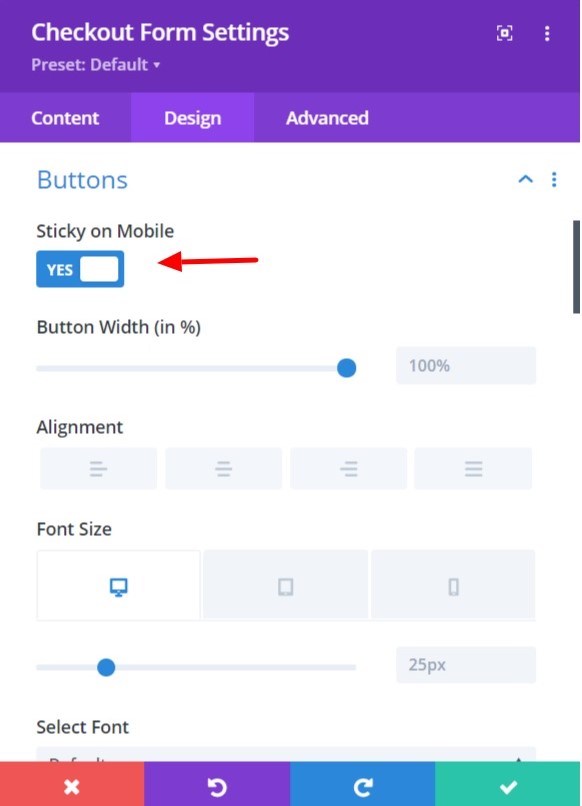
Step 5: Style your CTA button in ‘Design’
If you click on ‘Buttons’ under the ‘Design’ tab, it will show you all the options to change and customize the CTA button.
You can change the typography of the text, add borders, and adjust margins for your button.
Step 6: Make the CTA button sticky for mobile devices
You can also make the CTA button sticky for mobile users not to scroll through the page to look for it.
Step 7: Click on the green tick (✓) to save
Once you’re done editing, click on the green-colored tick (✓) icon on the Settings window's bottom right to save the changes made.
Now you’ve got yourself an attention-grabbing CTA button to convince the customers to engage in the action.