You can add the best value tag or any other tag on a specific option in the product-specific checkout page.
This custom tag such as 'best value', 'limited edition', 'popular choice', 'super save' 'value for money' help users distinguish the preferred option from the others.
Take a look at how it appears:

Follow the steps below to set up the tags for specific products:
Step 1: Go to the 'Field' tab
In the 'Fields' tab, click on the 'Products' field.
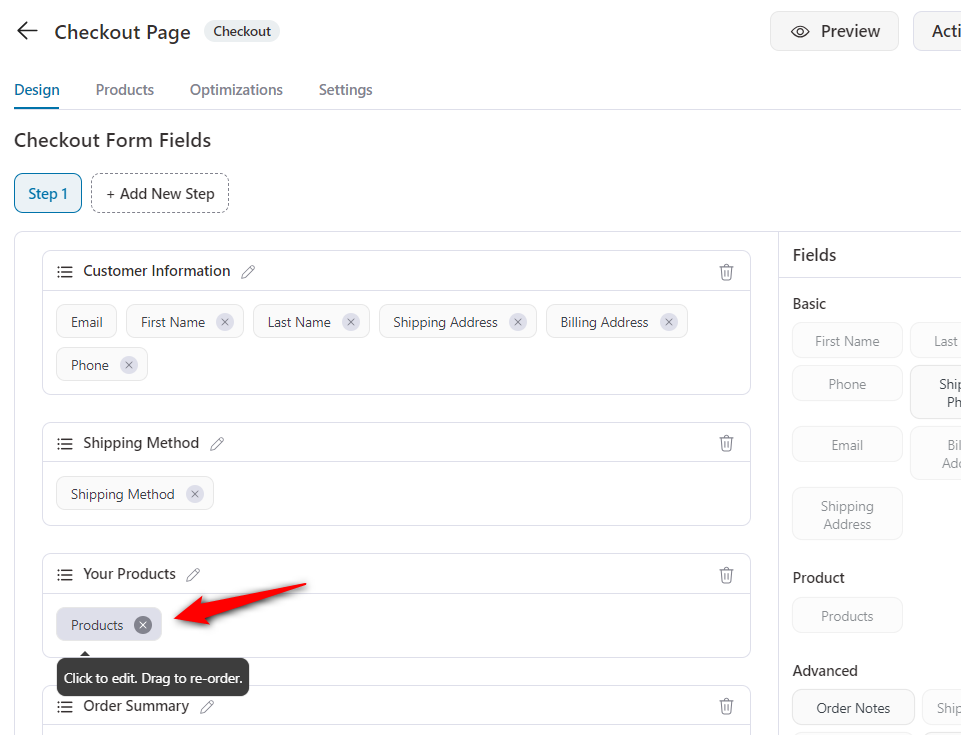
You'll see the Products field editor open up.
Step 2: Click on the 'Advanced' tab
Here, uncheck the 'Hide Best Value Tag' option to show the tag.
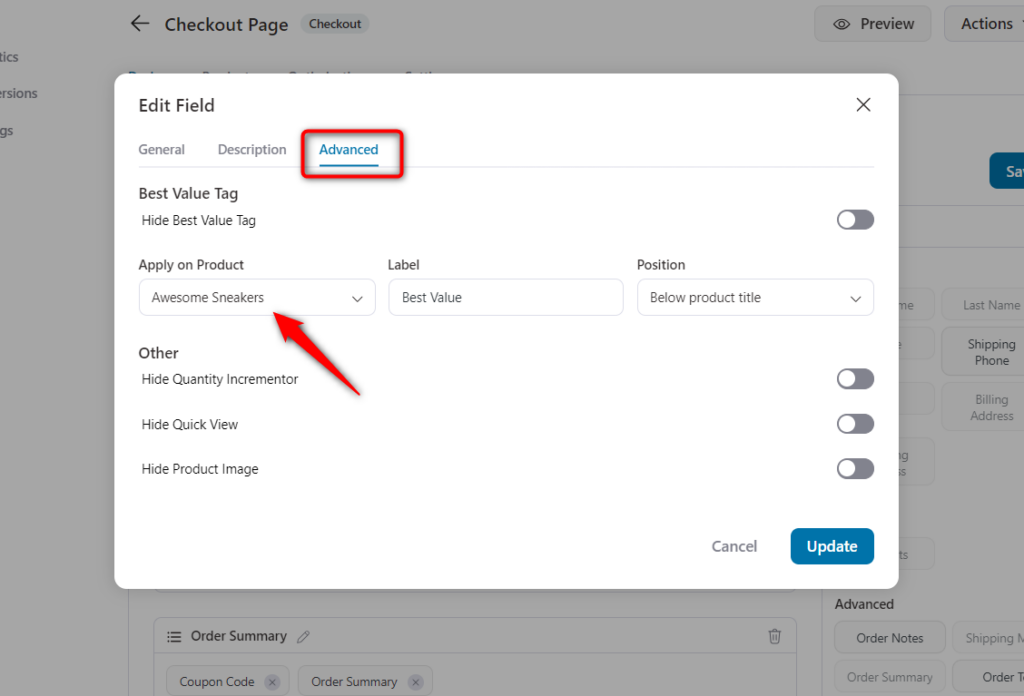
Step 3: Set up the tag which you want to show
You'll have to specify these things here:
- Product Selection - Select the product for which you want to show the Best Value or custom tag.
- Best Value Label - Go with the default 'Best Value' tag or add a custom text here.
- Position - Set the position of the tag.
You have various choices to set the position of your tag.
Select one from the drop-down:
Once done, click on the 'Update' button.
Hit the 'Save' button to save the changes.
That's it. You can now click on the 'View' button to preview your checkout page to see how the tag looks.