

Want to implement WooCommerce skip cart functionality for a seamless user experience?
As per the study conducted by Baymard Institute, the average cart abandonment rate across the eCommerce industry is a whopping 70.19%.
This means that 7 out of 10 shoppers abandon the checkout process, leaving items in their carts without purchasing anything.
One of the reasons for this high abandonment is the complicated checkout process. And the default cart page in WooCommerce contributes to a clunky and time-consuming step that adds friction to the whole buying process.
By bypassing the traditional WooCommerce cart page, you can eliminate unnecessary steps and send your shoppers directly to the checkout page in your store.
In this post, we’ll explore the benefits of the WooCommerce skip cart feature and demonstrate the three step-by-step processes of how to implement it in your store:
- By setting up a dedicated checkout funnel for free
- With a free modern sliding cart for WooCommerce
- With a plugin to redirect to the checkout page
Click and jump to go to any of the above methods to implement this functionality.
Here's a quick video tutorial to skip the default cart page and direct shoppers to checkout in your WooCommerce store:
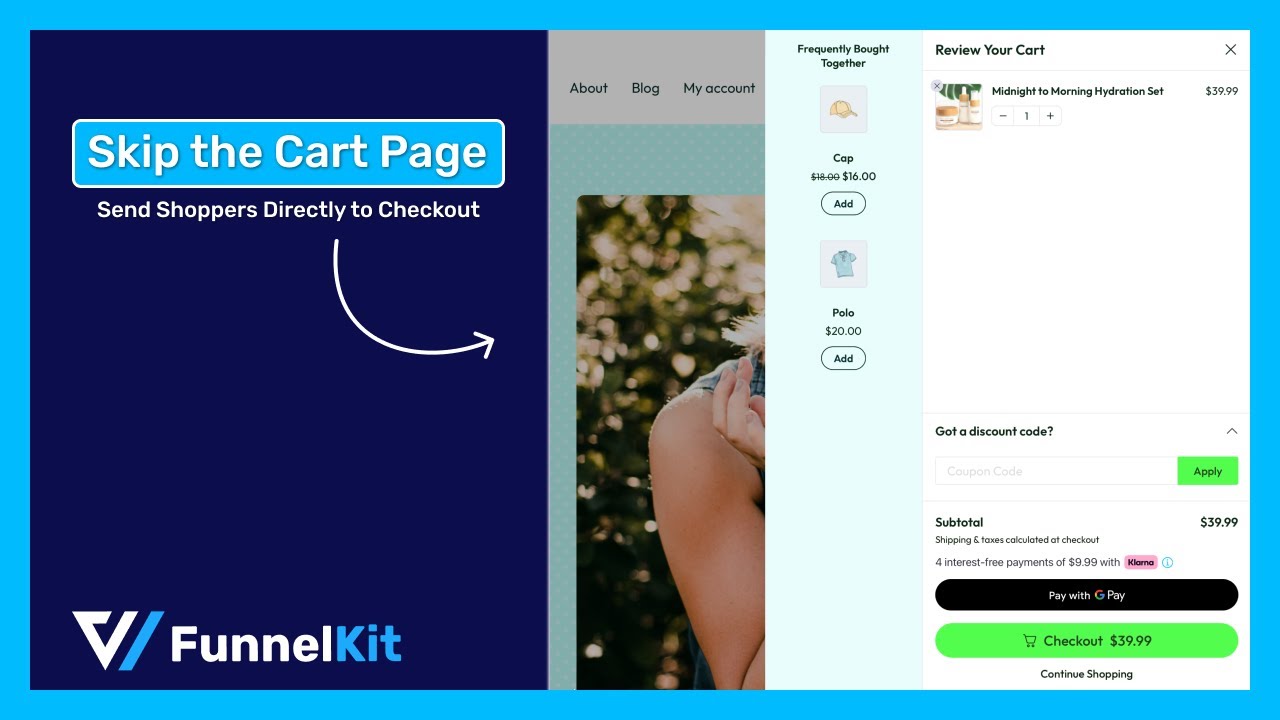
Table of Contents
- 1 Why Skip the Cart Page in WooCommerce?
- 2 How to Skip the WooCommerce Cart Page and Direct Users to Checkout?
- 3 Method-1: Skip the Cart Page URL by Setting up a Dedicated Checkout Funnel for Free
- 4 Method-2: Skip Cart Page and Redirect to Checkout with a Modern Sliding WooCommerce Cart
- 5 Method-3: Skip the WooCommerce Cart Page with FunnelKit’s CartHopper Addon
- 6 3 Best Practices to Follow When Implementing the WooCommerce Skip Cart Functionality
- 7 Simplify Checkout and Boost Revenue with WooCommerce Skip Cart
Why Skip the Cart Page in WooCommerce?
Skipping the default cart page in WooCommerce is a great strategy to streamline purchasing and reduce friction for shoppers.
Here are a few reasons why you should skip the cart page:
- Faster checkout
A study by Deloitte found that a 0.1-second improvement in site speed can help increase conversions by almost 10%.
By skipping the cart page, you reduce the number of steps required to buy an item, making the checkout process faster.
This way, you can significantly reduce cart abandonment and boost your store’s revenue.
- Simplified user experience
The WooCommerce skip cart functionality lets you create a seamless user purchasing experience.
Instead of navigating through multiple pages in WooCommerce, users can directly proceed to the checkout, which saves them time and effort.
This simplified experience can lead to improved customer satisfaction.
- Increased conversions
A shorter and streamlined checkout process brings higher conversions than usual.
Reducing the number of steps and removing potential distractions can help minimize cart abandonment, encouraging shoppers to complete their purchases successfully.
- Optimized mobile experience
Mobile devices have limited space on their screen.
Therefore, skipping the cart page ensures your customers quickly proceed to the checkout page without excessive scrolling or visiting multiple pages.
This functionality enhances the user experience on smartphones and tablets, driving great conversions from mobile traffic.
How to Skip the WooCommerce Cart Page and Direct Users to Checkout?
In this section, we’ll explore 3 different methods to implement the WooCommerce skip cart functionality and direct users straight to the checkout page.
And none of these methods include adding custom code snippets or modifying your theme’s functions.php file.
Please note that these methods will work even if you remove the WooCommerce cart page.
So, let’s begin.
Method-1: Skip the Cart Page URL by Setting up a Dedicated Checkout Funnel for Free
Another way to skip the cart page is by setting up a dedicated checkout funnel.
Let’s say that you construct a path for your cornerstone products on your WooCommerce store. This product could be a membership, subscription product, or luxury item.
In this sort of scenario, you’d want customers to be able to skip the cart in WooCommerce and head straight to checkout. This is where a single product landing page helps your prospects redirect to the cart page after successful addition.
For that, you can set up a free checkout funnel with the help of FunnelKit Funnel Builder.
FunnelKit Funnel Builder is the most powerful sales funnel builder plugin for WordPress. It lets you set up high-converting sales funnels with opt-in pages, sales pages, custom checkouts, order bumps, one-click upsells, and thank you pages.
Using FunnelKit, you can add a checkout form directly to your landing page. In other words, customers can skip carts in WooCommerce and head straight to the checkout page.
Here’s how you can perform the WooCommerce skip cart process for your store:
Step 1: Install and activate the FunnelKit Funnel Builder
You can set up a dedicated checkout funnel for free with FunnelKit’s lite version.
However, you can import a premium template to customize your checkout funnel. For that, you need the premium version of the Funnel Builder.
Check out our detailed guide to install and activate Funnel Builder on your WordPress website.
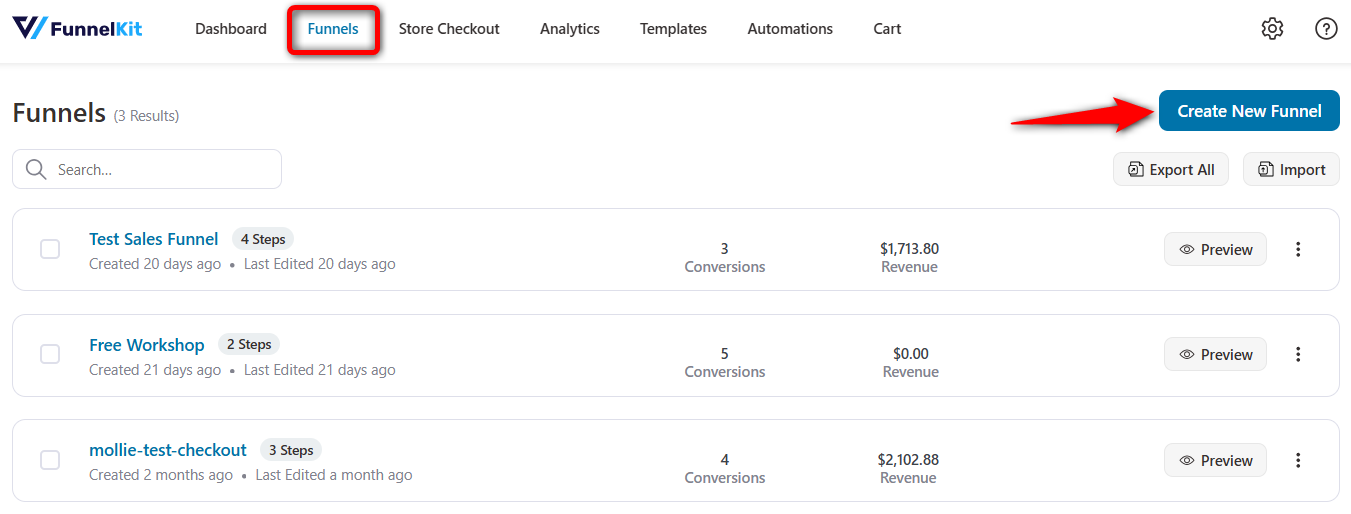
Step 2: Add a new funnel
Go to FunnelKit ⇨ Funnels and hit the ‘Create New Funnel’ button.
You’ll be directed to the templates section. FunnelKit lets you choose your favorite page builders to customize your sales funnels. These include Elementor, Divi, Bricks, Gutenberg, Oxygen, or any other.
To import a sales funnel template you like, just hover over it and click ‘Preview’.
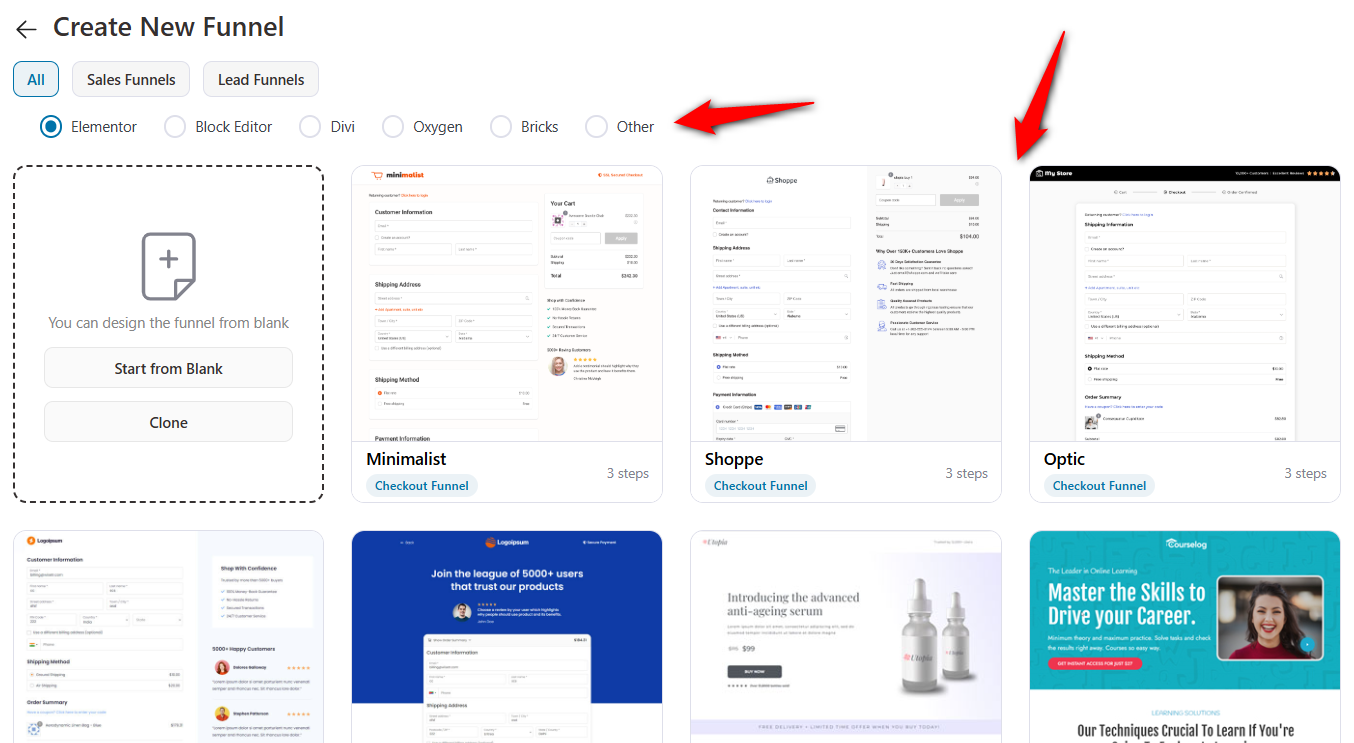
You can choose the number of steps you want on your checkout page. FunnelKit lets you create both one page checkouts and multi-step checkouts.
Once done, hit ‘Import This Funnel’ and name your sales funnel.
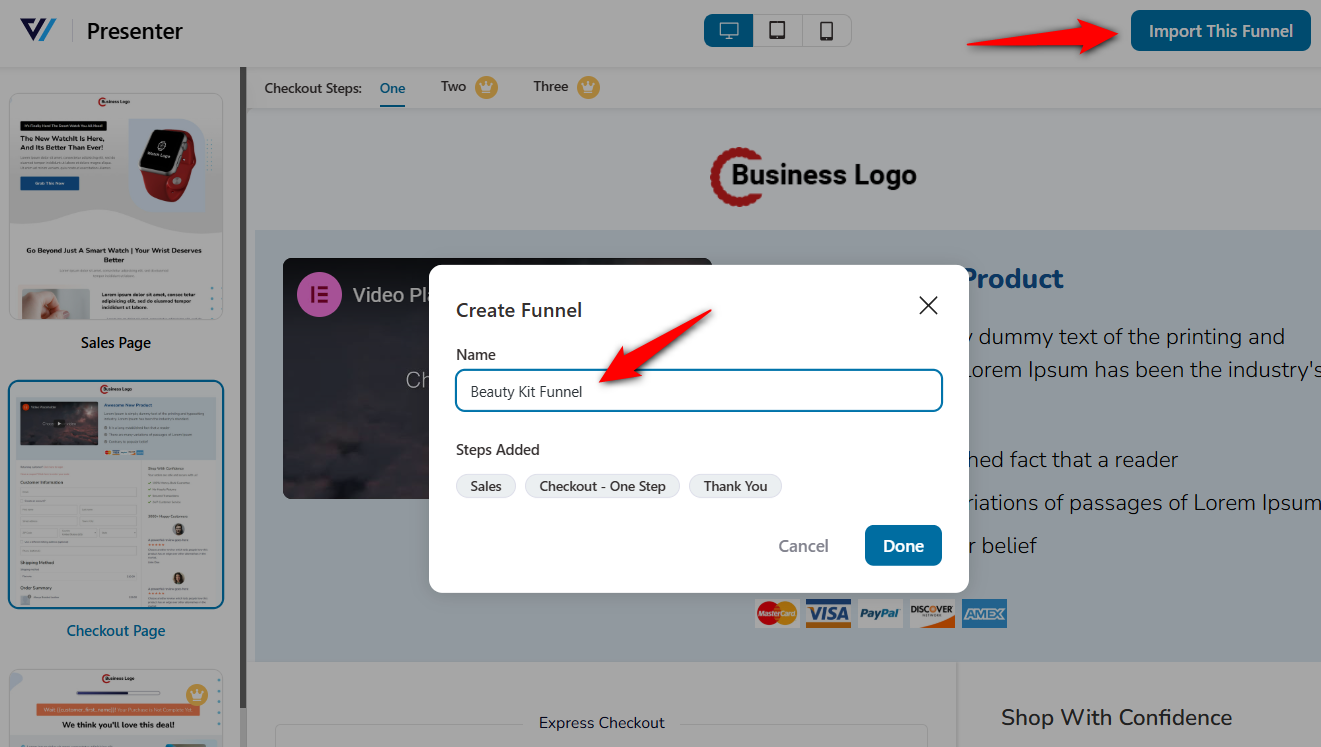
Clicking on ‘Add’ will import this sales funnel with a landing page, checkout page, one-click upsell and thank you page to your workspace.
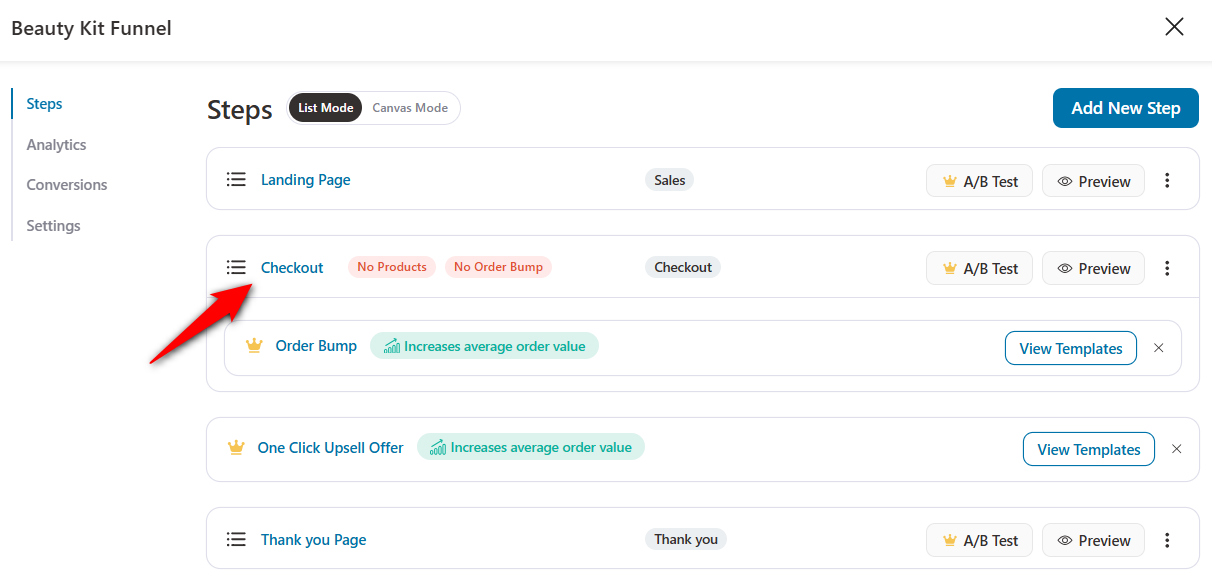
You can add or remove steps as you’d like to optimize the funnel. You’ll need a landing page, checkout page and thank you page in your funnel at the bare minimum.
Step 3: Customize the checkout page design
You can customize your checkout page the way you want. To do that, click on the checkout step.
Next, hit the ‘Edit Template’ button on the Design tab.
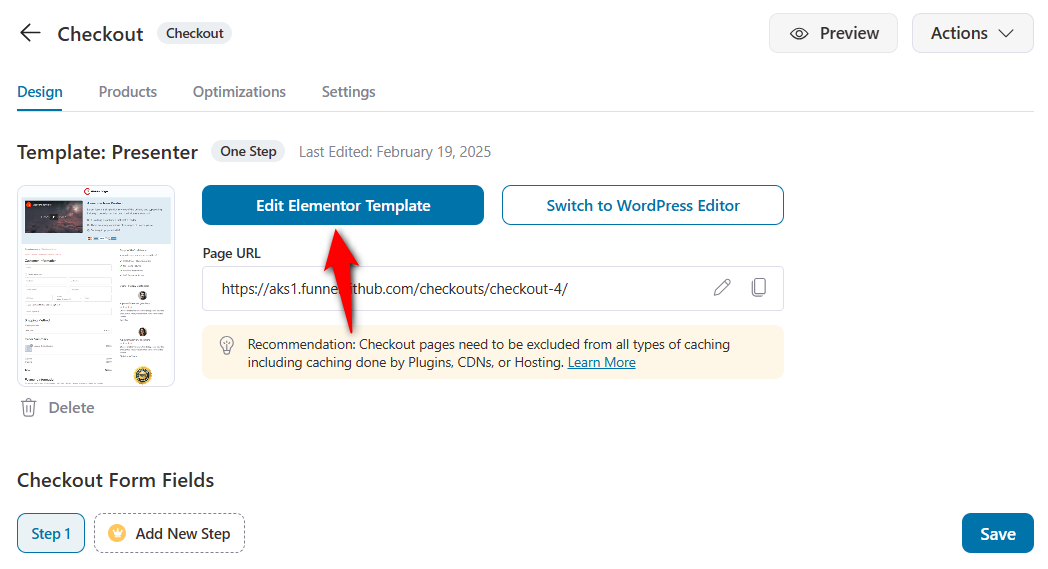
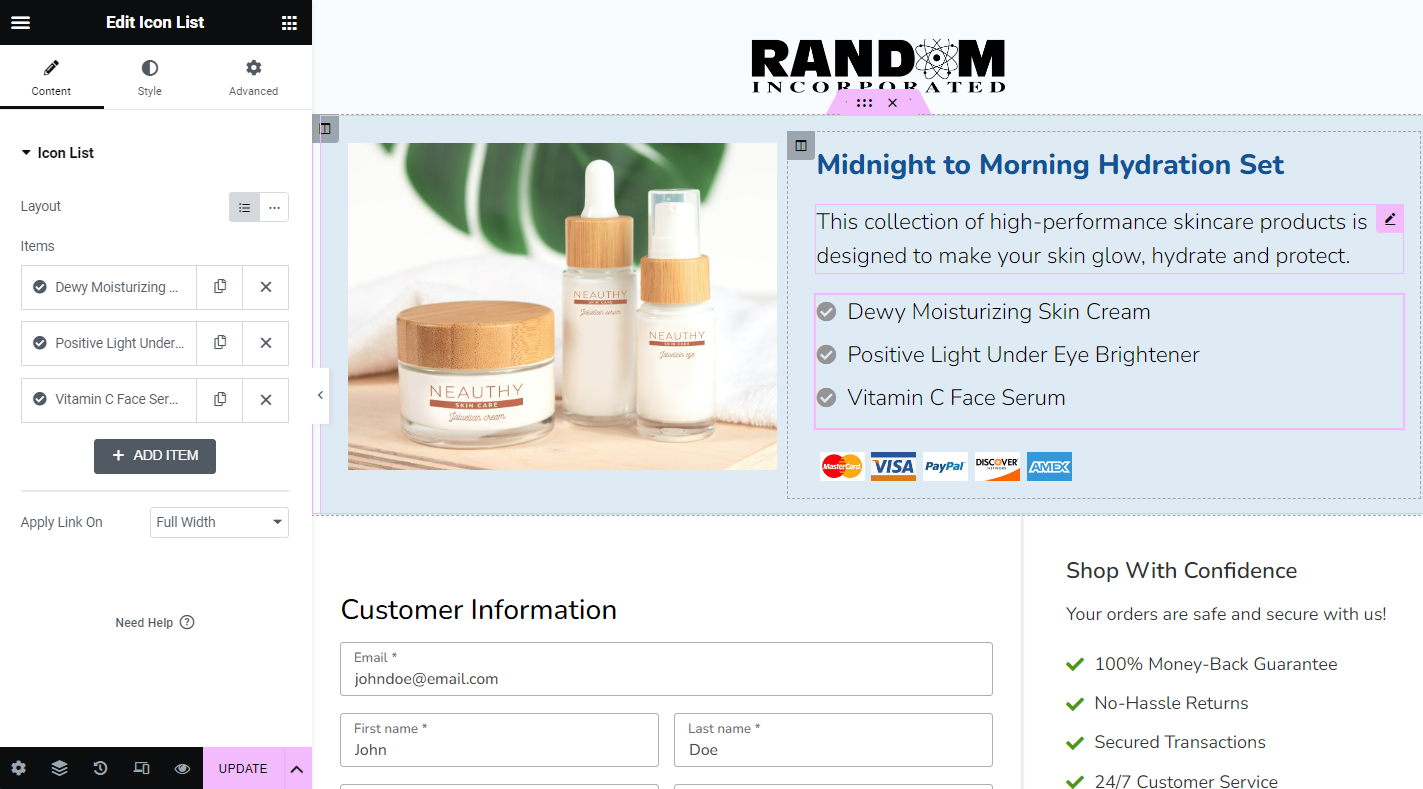
The page will open in the page builder that you chose.
Here you can edit the text, buttons, background colors, fonts, borders, and so much more.
👉 Refer to our detailed guide on customizing the design of your checkout page template.
Step 4: Add the product to your checkout
Go to the Products tab and click on ‘Add Product’.
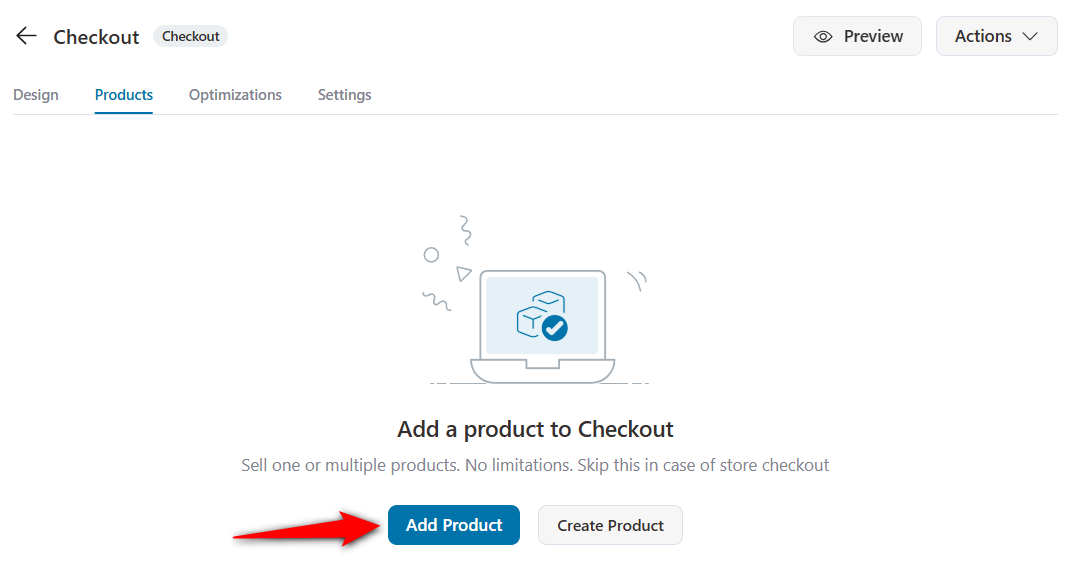
The search option will help you filter the WooCommerce product and add it to the checkout page. You can add a single woocommerce product single or multiple products based on your requirement.
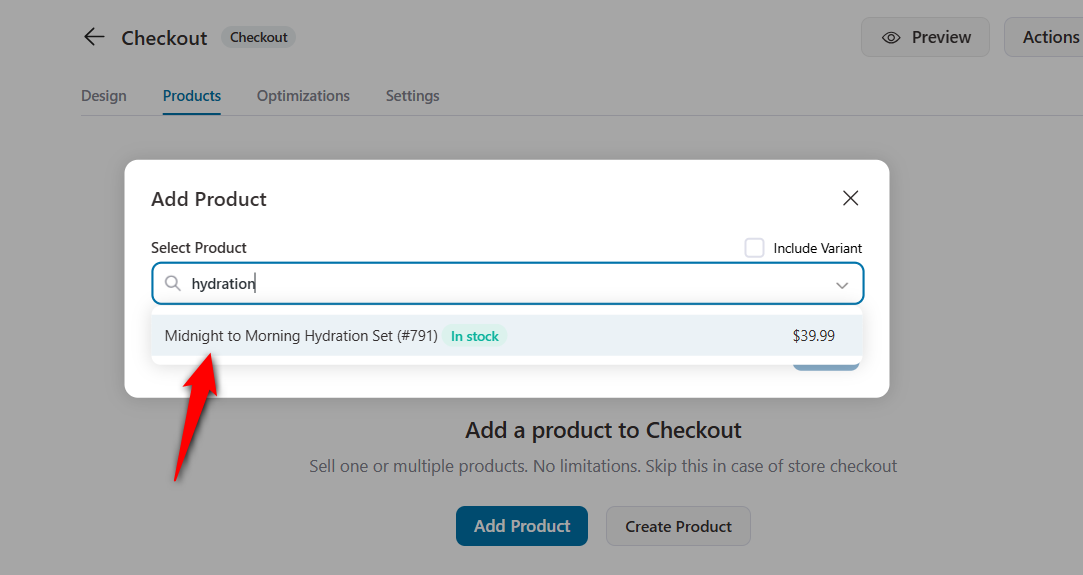
You can further specify some discounts or quantities for this product.
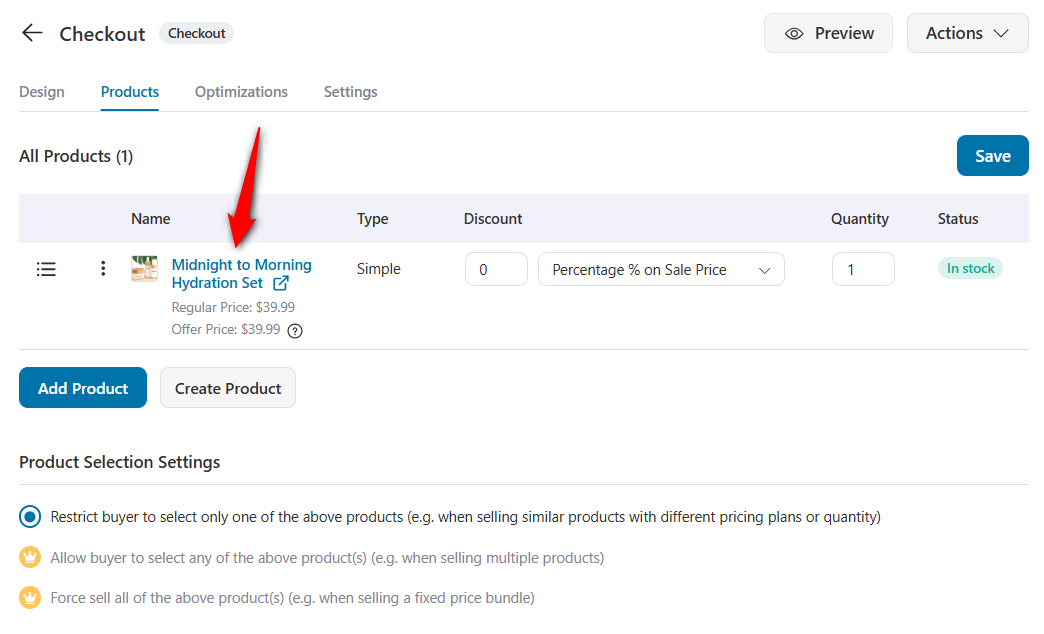
Make sure to save the changes when done.
👉 You can further streamline your checkout page with the following:
Boost your store's average order value
To take things to the next level, you might consider adding some extra steps to your funnel to increase the average order value (AOV).
These extra steps include - Order bumps and One-click upsell offers.
📝 Quick Note: Please note that order bumps and one-click upsells are only available in the premium version of FunnelKit Funnel Builder.
Order Bumps are the offers made to the users on the checkout page. These can be added to the cart with one click.
You can create an order bump below the checkout page in your funnel.
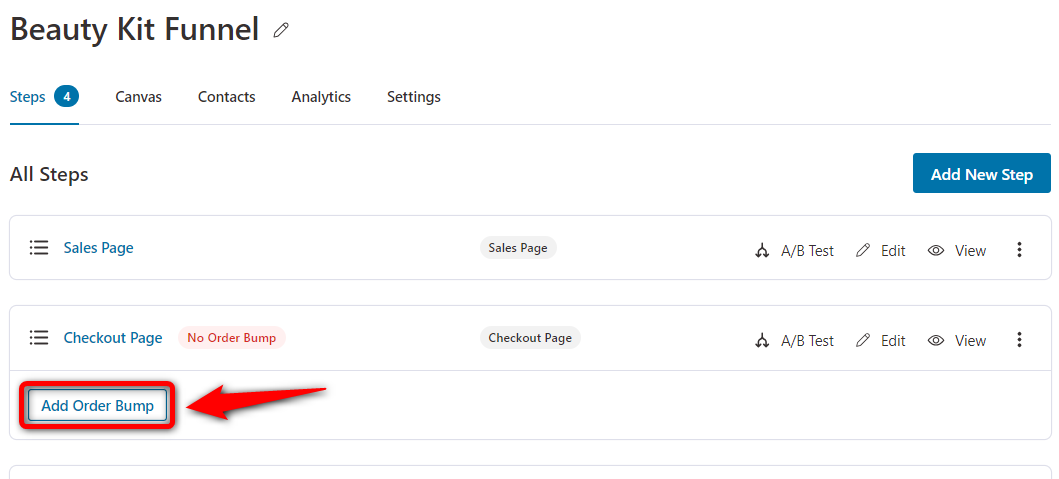
You can add single or multiple products to the order bump just like you did on your checkout. Further, you can offer discounts and set quantities.
👉 Refer to our full post on setting up your order bump offers.
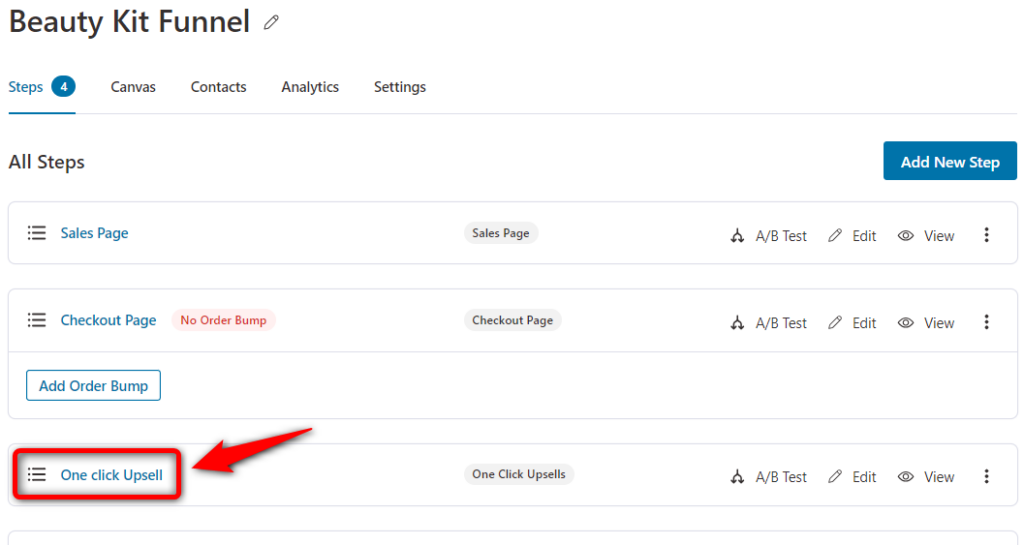
On the other hand, One-Click Upsells are the post-purchase offers made to the customer once their original order is placed and the initial payment is processed.
You can customize your upsells in the funnel. With FunnelKit, you can even link multiple upsell offers together based on the customer's purchase behavior. Or skip an offer if the product already exists in their cart.
👉 Check out our complete post on setting up your one-click upsell offers.
This way, you can increase the average order value while directing your prospects straight to the checkout page.
Step 5: Customize your thank you page
A thank you or order confirmation page is the last page of your funnel that closes the sale. Therefore, you don’t want to end the process abruptly.
That’s why setting up a custom WooCommerce thank you page helps you increase engagement and boost repeat sales.
👉 Read our detailed post on designing your store's custom WooCommerce thank you page.
Well done! That’s how you can quickly you can implement WooCommerce skip cart in your WooCommerce store using a dedicated funnel.
Method-2: Skip Cart Page and Redirect to Checkout with a Modern Sliding WooCommerce Cart
You can skip the default WooCommerce cart page by introducing a modern, stylish sliding cart in your store.
For that, you only need one plugin - FunnelKit Cart for WooCommerce.
FunnelKit Cart brings a seamless slide-in add-to-cart experience to shoppers. You get access to the items in your cart, modify them and go straight to the checkout, skipping the cart page in WooCommerce.

You can even add smart-in cart upsells and cross-sells and set up rewards to encourage your users to keep shopping in your store. However, upsells and rewards are a part of FunnelKit Cart Pro (available to users with the FunnelKit Plus plan and above).
Here, we’ll demonstrate the process of how you can skip the WooCommerce cart page for free.
Step 1: Install and activate FunnelKit Cart
Download the lite plugin (free version) of FunnelKit Cart.
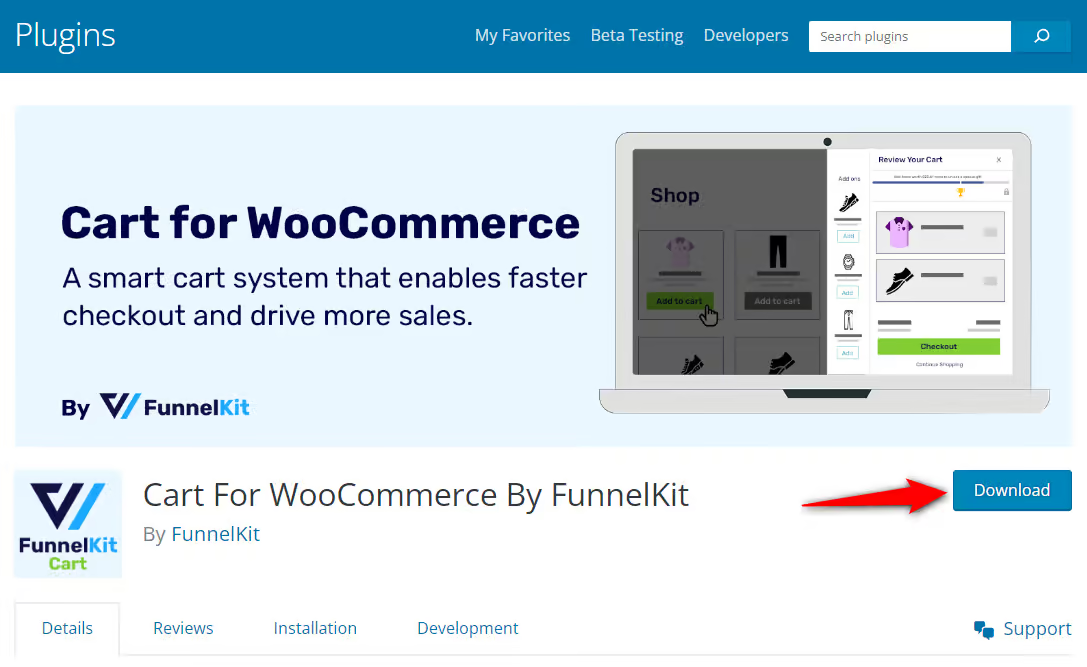
Make sure to install and activate it on your website.
Step 2: Enable cart for WooCommerce
Go to FunnelKit ⇨ Cart and turn on the toggle to enable the sliding cart.
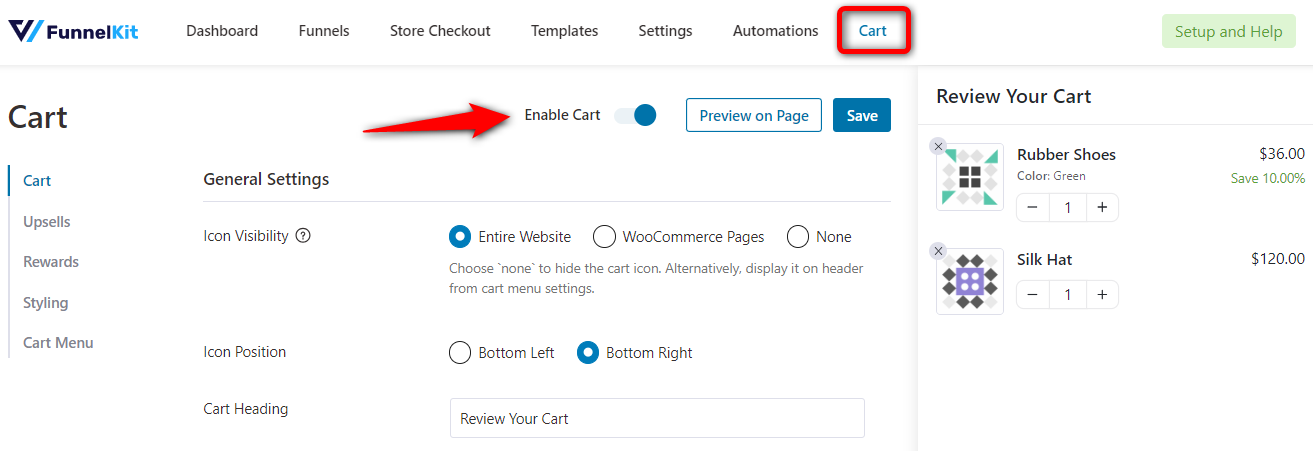
This will enable the FunnelKit cart on your WooCommerce store.
Step 3: Customize your FunnelKit cart
Next, you can customize your shopping cart for your WooCommerce store.
There are various settings such as icon visibility, position, cart heading, ajax add to cart, auto open side cart feature.
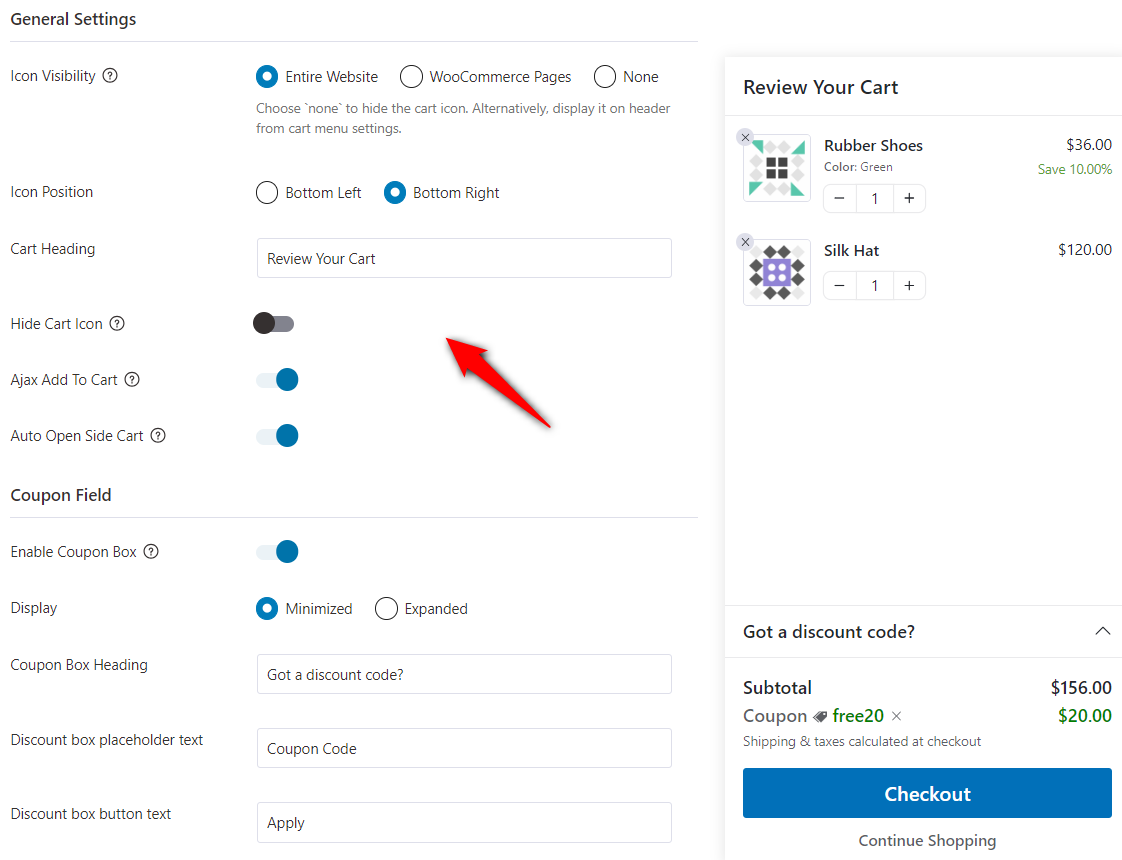
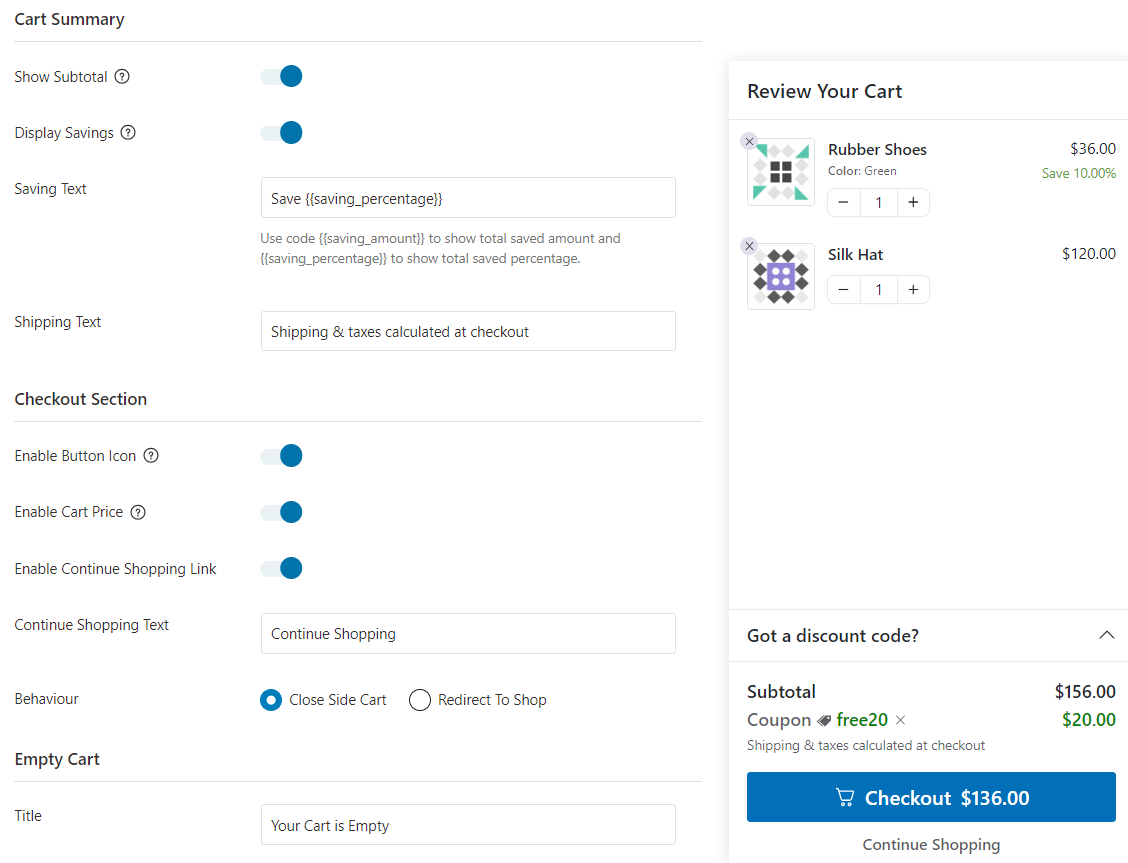
You can even configure different sections in your sliding shopping cart, such as coupon field, cart summary, checkout, etc.
Enable the checkout button icon, cart price, cart behaviour, and so much more.
Next, you can customize your cart and make it on-brand from the Styling section.
Here, you’ll be able to style your cart’s button color, text color, preview width, animation speed, border color, icon style, and so much more.
Make sure to save the changes when you’re done.
👉 You can check our post to learn more about FunnelKit’s sliding cart for WooCommerce.
👉 Also, follow our detailed documentation guide to set up the FunnelKit Cart here.
That’s it! You have successfully set up a beautiful modern cart in your WooCommerce store. It’ll help you implement the WooCommerce skip cart functionality.
Method-3: Skip the WooCommerce Cart Page with FunnelKit’s CartHopper Addon
As an online store owner, you might want to redirect customers directly to the checkout page (i.e., skip cart in WooCommerce), even if they have multiple products in their shopping cart.
This is a great way to simplify and quicken the checkout process that helps bypass the WooCommerce cart page.
This is perfect for store owners who sell multiple products such as online courses, memberships, subscription products, or just about anything else in their WooCommerce store.
The information displayed in the cart is important to some customers. So, in order to do it the right way, you need to show all the cart information somewhere else.
The best way to perform the WooCommerce Skip Cart is by embedding a mini cart on the checkout page.
With a mini cart, you’ll be able to show all the information users might want to see without requiring them to go to the Cart page. This includes:
- A summary of the products in their cart
- The subtotal
- Shipping charges
- The total cost of their order
They can also moderate the quantity of the items added or delete them from the cart just before paying.
This is only possible with the help of a custom store or global checkouts in FunnelKit.
Now that’s solved, we’ll skip the WooCommerce cart page with FunnelKit’s CartHopper add-on.
CartHopper is a WooCommerce direct checkout plugin that lets users redirect to the checkout page in WooCommerce after they add an item to their carts.
This way, you can help shoppers skip the cart page and programmatically redirect to the default WooCommerce checkout page.
Follow the step-by-step instructions on how to do it:
Step 1: Install and activate the CartHopper add-on
First, you have to install the CartHopper add-on on your website. This WordPress plugin is an addon of FunnelKit, which is available with the FunnelKit Pro version.
Step 2: Enable skip cart for product pages
Navigate to FunnelKit ⇨ CartHopper and configure the following options:
- SkipCart - Enable the skip cart for all the products to allow users to go straight to the checkout after clicking the add to cart button text.
- Exclude Product Category (Optional) - Specify the product category in that you don’t want to implement the WooCommerce skip cart feature.
- Exclude Products (Optional) - Same as above, you can exclude any product from the direct checkout process.
- Add To Cart Button Text (Optional) - Change the text of your button that will take users straight to the checkout. You can use buy now, checkout, or anything.
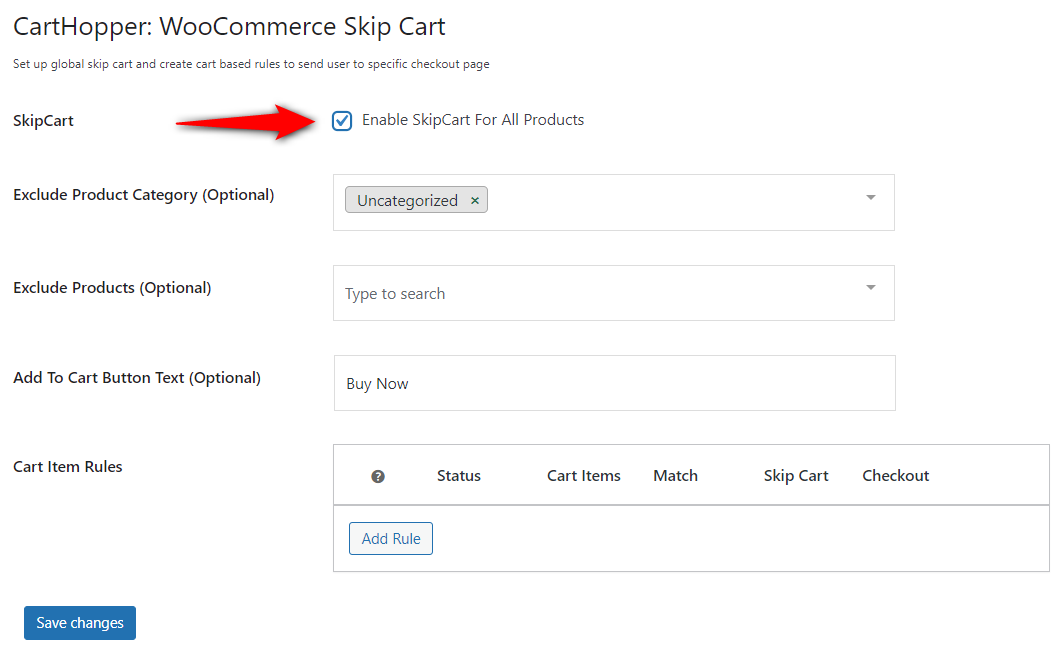
Save the changes once done.
After setting up, the WooCommerce skip cart functionality will work on your product pages:
Step 3: Enable skip cart for archive pages
Now that the skip cart feature is working fine on product pages, you’ll need to activate it on the WooCommerce archive pages.
The WooCommerce archive pages use Ajax to load products to the cart, so Cart Hopper won’t work on these pages. For this, you need to disable AJAX from WooCommerce settings.
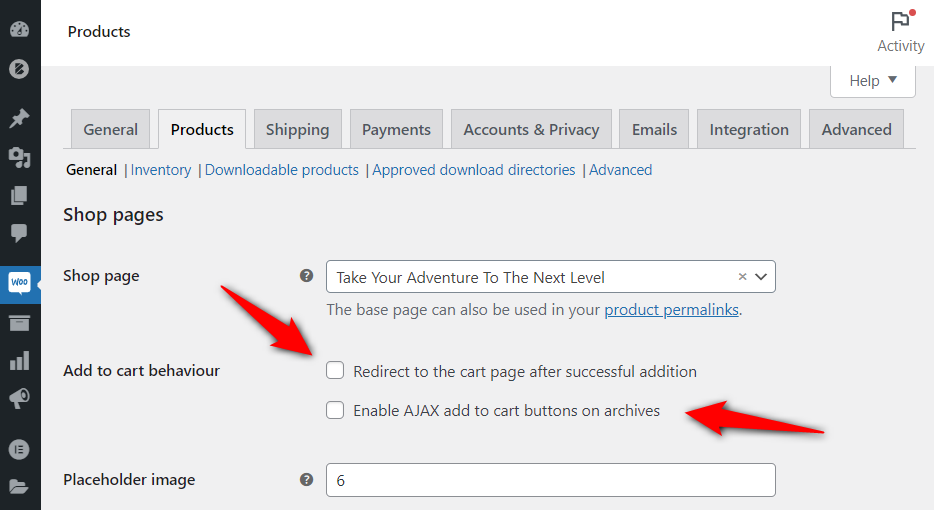
Navigate to WooCommerce Settings ⇨ Products. Under the Add to cart behaviour section, disable the following options:
- Redirect to the cart page after successful addition
- Enable AJAX add to cart buttons on archives
Once done, you’ll be able to go to checkout directly from the WooCommerce archive page.
Well done! That is how you can configure FunnelKit’s CartHopper add-on plugin to skip the WooCommerce cart and take users directly to the checkout page.
3 Best Practices to Follow When Implementing the WooCommerce Skip Cart Functionality
Implementing the skip cart functionality can help significantly in the favor of your business. However, there are some best practices that you should follow to ensure a smooth shopping experience and avoid any pitfalls.
1. Clear communication
When skipping the cart page, the best practice is to communicate it to your shoppers clearly.
You can display a message or an icon that indicates skipping the cart page and users redirecting to checkout.
This way, the missing cart page won't confuse your users.
2. Upsells and cross-sells
Skipping the cart page doesn’t mean limiting your chances of upselling and cross-selling in your store.
With order bumps, you can offer relevant products or special exclusive deals on the checkout page. Further, you can even present post-purchase offers in the form of one-click upsells after the checkout process.
Setting up these two offers certainly helps boost the average order value in your store.
3. Testing and monitoring
It’s important to regularly test and monitor your store's performance once you’ve implemented the WooCommerce skip cart functionality.
Keep a close eye on your conversion rates, cart abandonment rates, and feedback from users to ensure that skipping the cart page has improved the user experience and drive desired outcomes.
It’s important to keep tabs on the metrics that will help you make adjustments to optimize your store’s shopping experience.
Simplify Checkout and Boost Revenue with WooCommerce Skip Cart
By default, WooCommerce sends customers to the cart page and then the checkout page after they’ve added products to their carts.
However, if you don’t need customers to go through the cart page and directly land on the checkout page, you can choose to skip the cart on your WooCommerce store.
By skipping the cart in WooCommerce, you can speed up the checkout process and potentially boost your store's sales.
Plus, with FunnelKit, you have the option to increase your average order value by setting up relevant order bumps on the checkout page and post-purchase one-click upsells.
You can skip carts to quicken the checkout for a better customer experience by introducing a modern sliding cart and CartHopper plugins from FunnelKit.
So what you’re waiting for? Implement WooCommerce skip cart on your online store and offer a quicker checkout experience to shoppers.
Editorial Team
May 14, 2026Looking for the best WordPress order form plugin to take payments and customer details on a single page, without a full WooCommerce store? You’re in the right place. Across 93...
Editorial Team
May 8, 2026A WooCommerce Shopify checkout is a redesigned WooCommerce checkout page built around the design principles that make Shopify's checkout convert. It includes a clean layout, express payment options at the...
Editorial Team
May 8, 2026Quick summary: Do you want to create a webinar funnel to increase conversions and boost your sales? The article is a step-by-step no-code guide to building a webinar funnel, covering...


