With the iOS 14 release, Facebook has become more particular about how the data will be sent over to its servers.
Earlier it was only via the user's browser but now Facebook requires it to be also sent via the server.
In this post, we have covered the following points:
- Enable event-based tracking on your website
- Track Site-wide events
- Log purchase events on the website for troubleshooting
Before that, you need to configure the Facebook Pixel Conversion API events.
Go to FunnelKit Settings > Pixel Tracking and on to the Facebook Pixel.
Let's get started.
Enable event-based tracking on your website
You can enable the PageView Event, Purchase Event, Synced Purchase Event & Advanced Matching with the Facebook Pixel.
1. Enable the PageView Event: With the new sitewide event tracking, you can now track events on your website even though you have no funnels running without any external plugins.
2. Enable Purchase Event: Upsell will send the total order value and store currency based on the order.
- Enable Content Settings for Dynamic Ads: Your Product catalog must be synced with Facebook. Click here to know more.
- Treat variable products like simple products Turn this option ON when your Product Catalog doesn't include the variants for variable products.
- Select either Product ID or SKU to pass value in content_id parameter
- Add prefix to the content_id parameter (optional)
- Add suffix to the content_id parameter (optional)
3. Enable General Event: It will fire a Custom Event for your Custom Audiences and Custom Conversions. post_type, content_name, and post_id will be sent in General Event. You can also rename the event.
4. Enable Advanced Matching With the Pixel: The upsell will send the customer's email, name, phone, and address fields whichever is available in the order.
5. Track Traffic Source & UTMs: Add traffic source as traffic_source and URL parameters (utm_source, utm_media, utm_campaign, utm_term, utm_content) as parameters to all your events.
*Important Note*: If you are using an external plugin such as Pixel Your Site, we strongly advise you to turn OFF Purchase Event from that plugin. And let FunnelKit (formerly WooFunnels) take the responsibility of firing Purchase Event. Read FAQ for more details.
Once done, click on the Save Changes button.
Track site-wide events
You can now track events like add to cart, page view, content view on the product page, etc., even if you've no funnels activated on your website.
Enable the site-wide event tracking to track events outside of the Funnel Builder.
There is no need for external tracking plugins such as PixelYourSite, PixelCaffeine, etc.
FunnelKit manages the entire end-to-end pixel tracking on your website.
Log purchase events on the website
Sometimes you may need to analyze requests and receive responses that Facebook has sent. Therefore, enabling the event logs allows you to capture logs on the website.
To enable the log event, go to FunnelKit > Settings > Pixel Tracking.
Under Facebook Pixel, check the "Enable Purchase Event Logs" box.
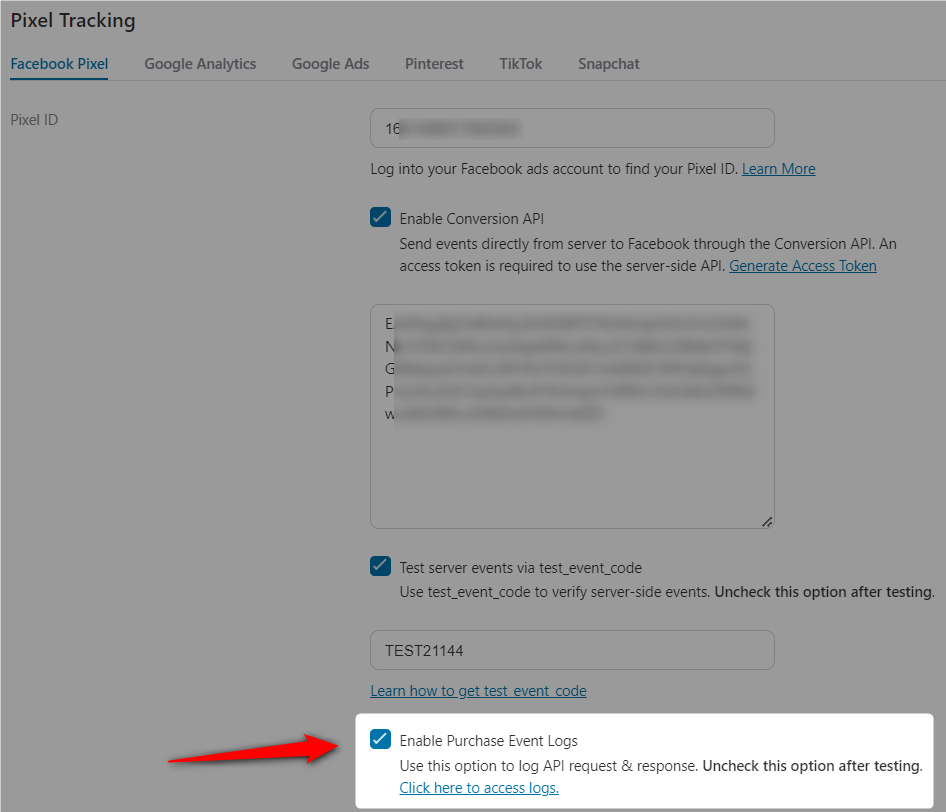
By enabling it, you've allowed WooCommerce to capture your purchase event logs.
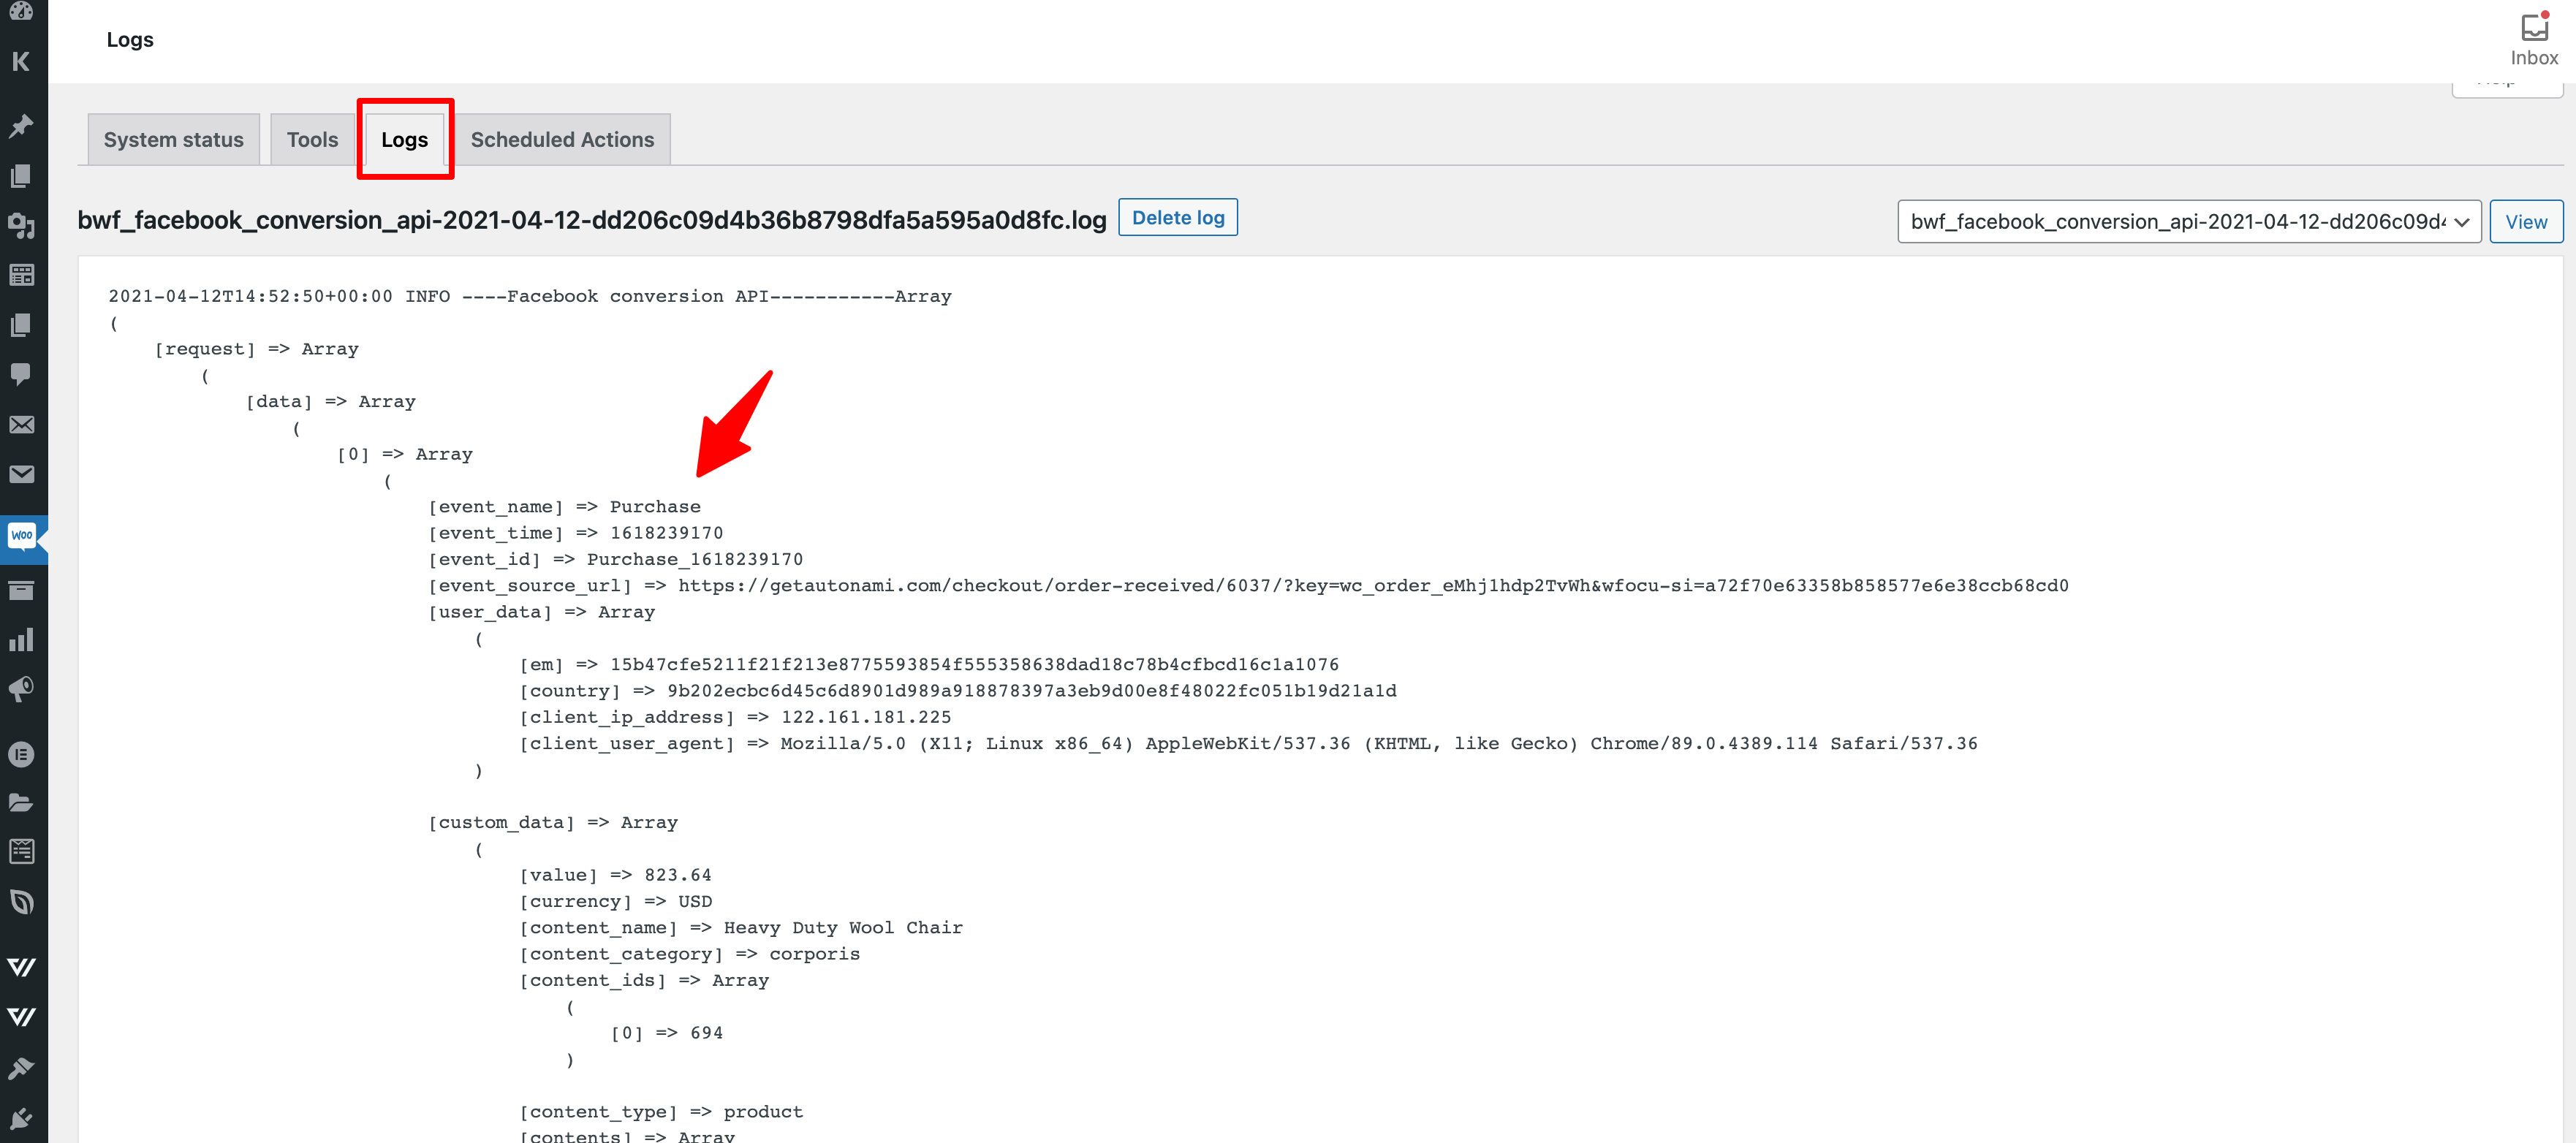
You'll be able to check all the purchase event logs by going through WooCommerce > Status > Logs.
Note: We recommend unchecking the "purchase event log" option after you’ve finished testing the events.
This is how you can log purchase events on the website for troubleshooting.
There you go! This is how you can turn on event-based tracking for Facebook Pixel.


