In this documentation, we will help you get familiar with the Funnel Builder's interface.
Let's look at the interface of FunnelKit's Funnel Builder:
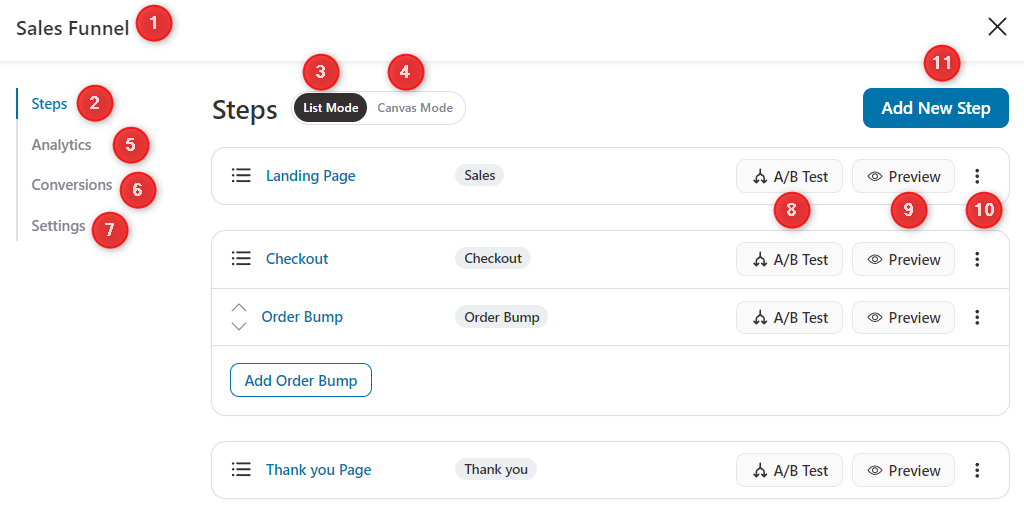
Now take a step closer:
- The name of your funnel that you entered at the time of its creation. You can edit the name of your funnel by clicking on it.
- This tab has all the steps of your funnel.
- It lets you view all the steps involved in building your sales funnel and the order in which they will be shown to the user.
- Build and visualize your entire funnel on a single screen with the all-new Canvas mode introduced with the Funnel Builder. See the stats of your funnels for each step.
- Analyze your funnel's performance by seeing the revenue generated, orders placed, and total visits all in one place.
- This screen allows you to see the contacts and their conversion activity in your funnel.
- Configure the settings of your funnel.
- A/B test your page with multiple variants and find out which one converts better.
- View any page in the funnel separately.
- Access the editing option, which allows you to customize your pages in the funnel.
- It allows you to add a new step to your funnel. You can choose from 6 different options such as Opt-in, Opt-in Confirmation, Sales Page, Checkout Page, One Click Upsells, and Thank You Page.