FunnelKit’s Category feature helps you stay organized and improves campaign targeting. You can easily create, assign, and filter categories to manage your funnels more effectively.
In this documentation, you’ll learn how to create and manage funnel categories step by step.
Note: Using categories allows you to quickly filter and find specific funnels, keeping your campaigns organized and easier to manage.
Create a funnel category
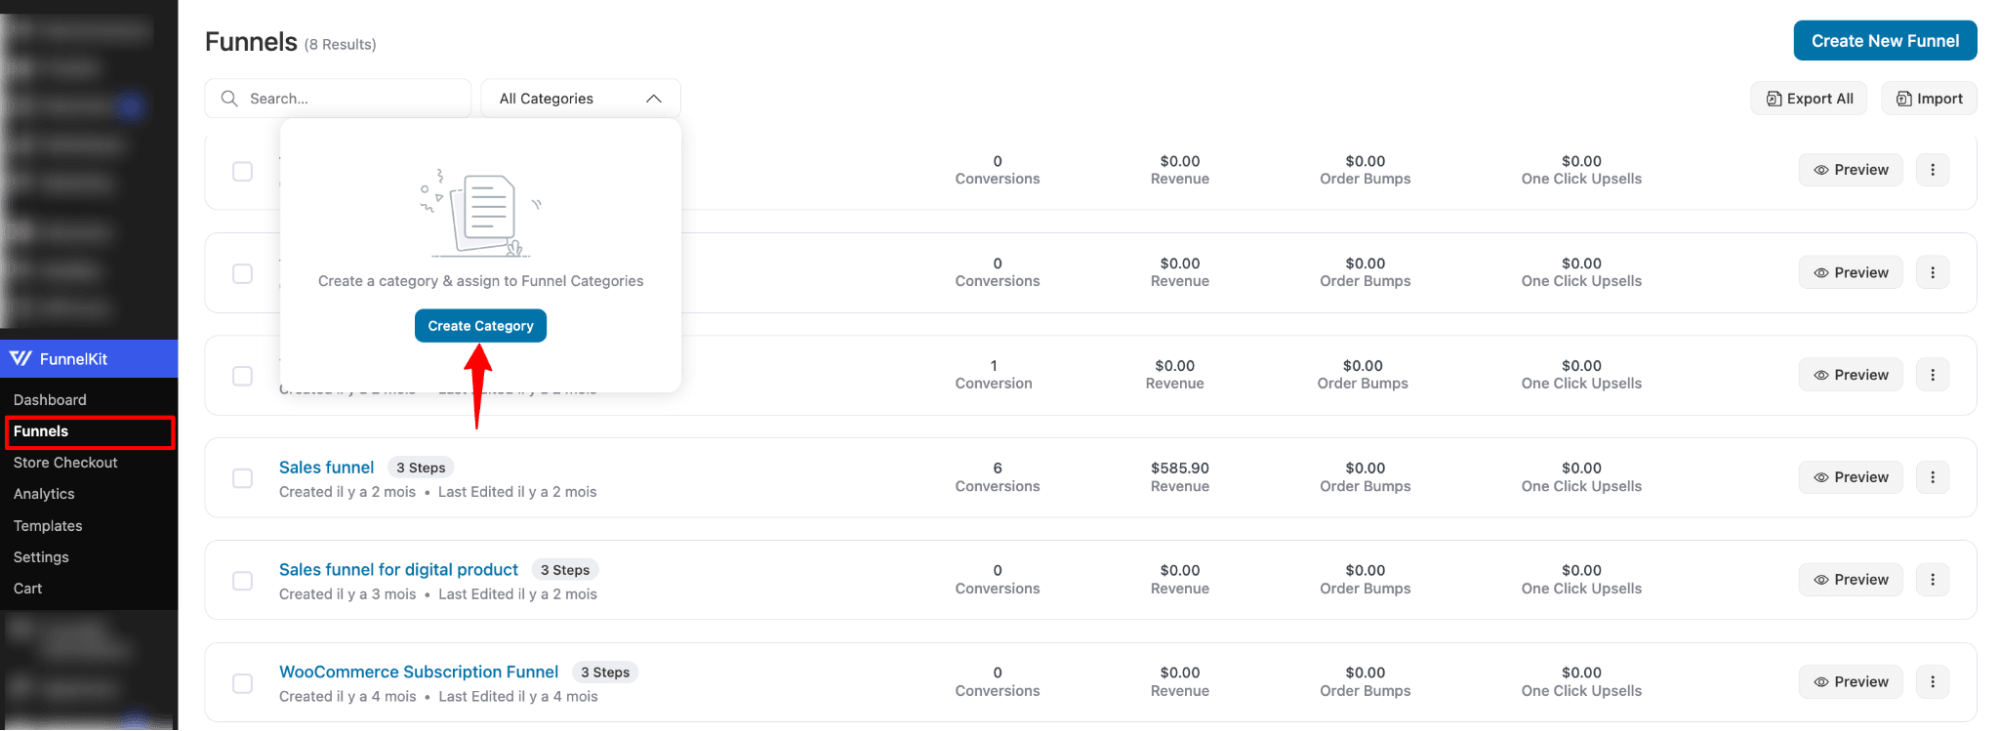
To create a funnel category, go to FunnelKit ⇒ Funnels. Then click on All Categories and hit Create Category.
Next, provide the name and hit Create.

Assign categories to the funnel
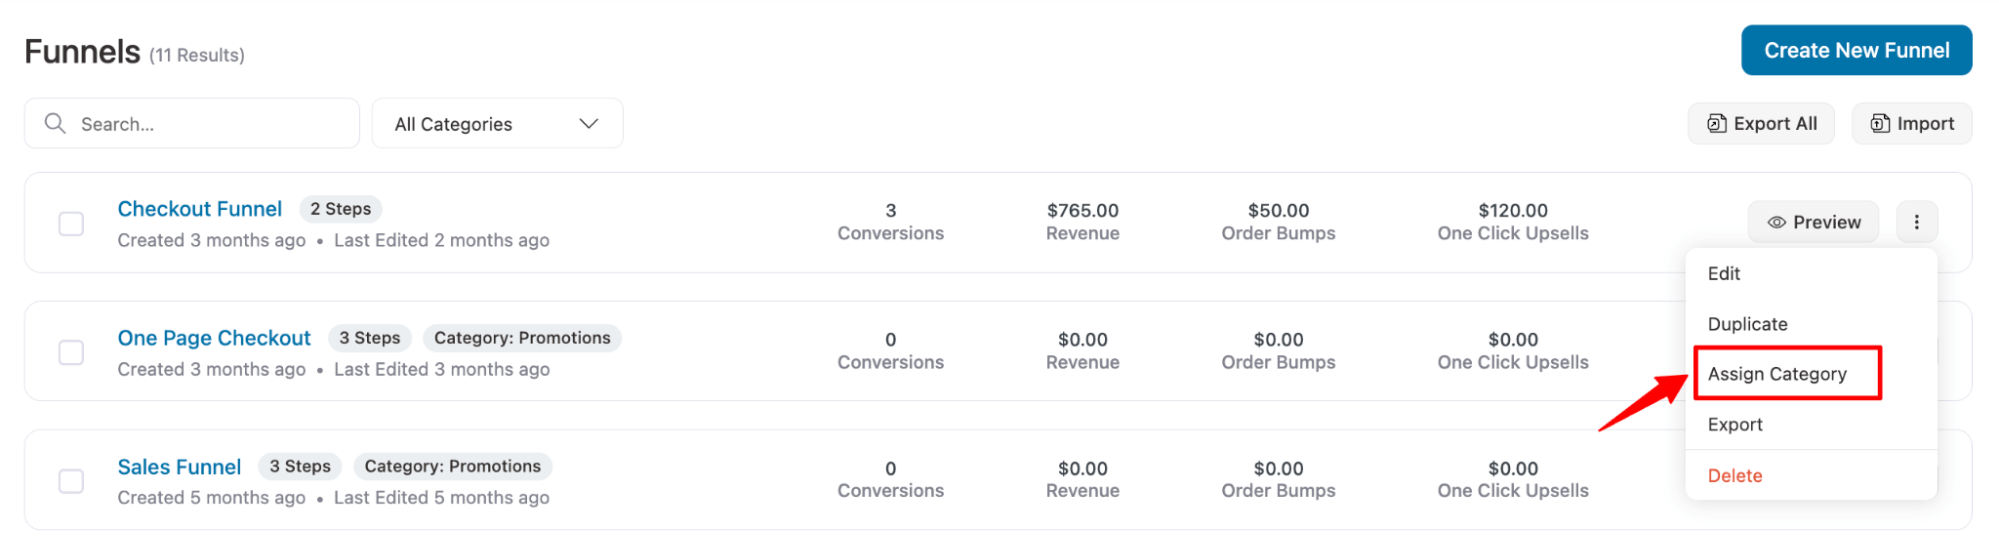
Now, to add any category to Funnel, click on the ⋮ sign and choose Assign Category.
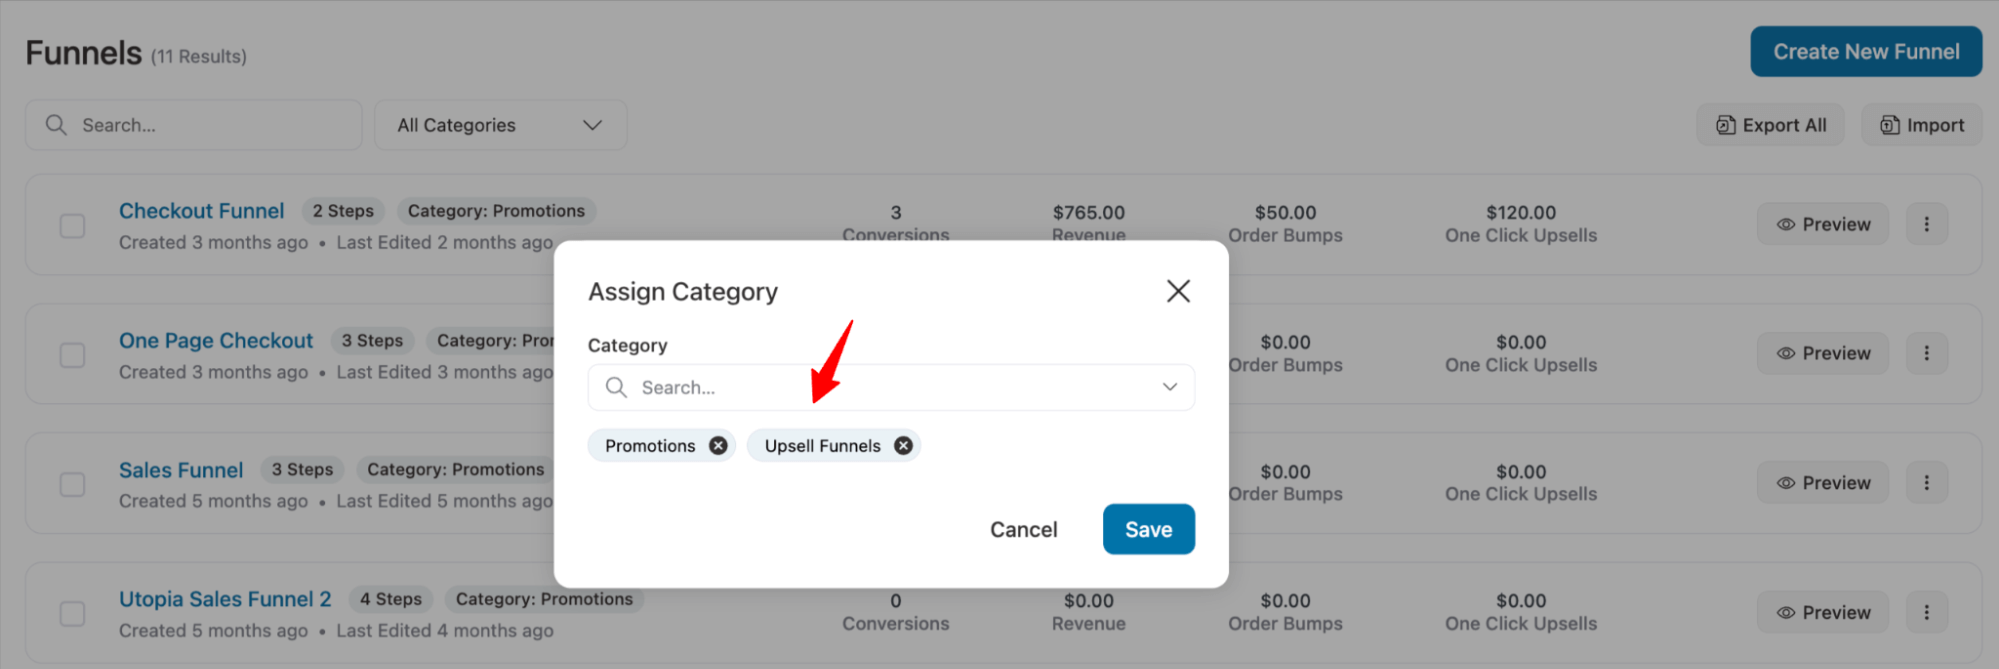
Now you can either assign an existing category or create a new category and assign that on the fly.
You can add multiple categories if you want.
You can add categories to funnels in bulk as well. Select the funnels, then hit the Assign Category button on top.
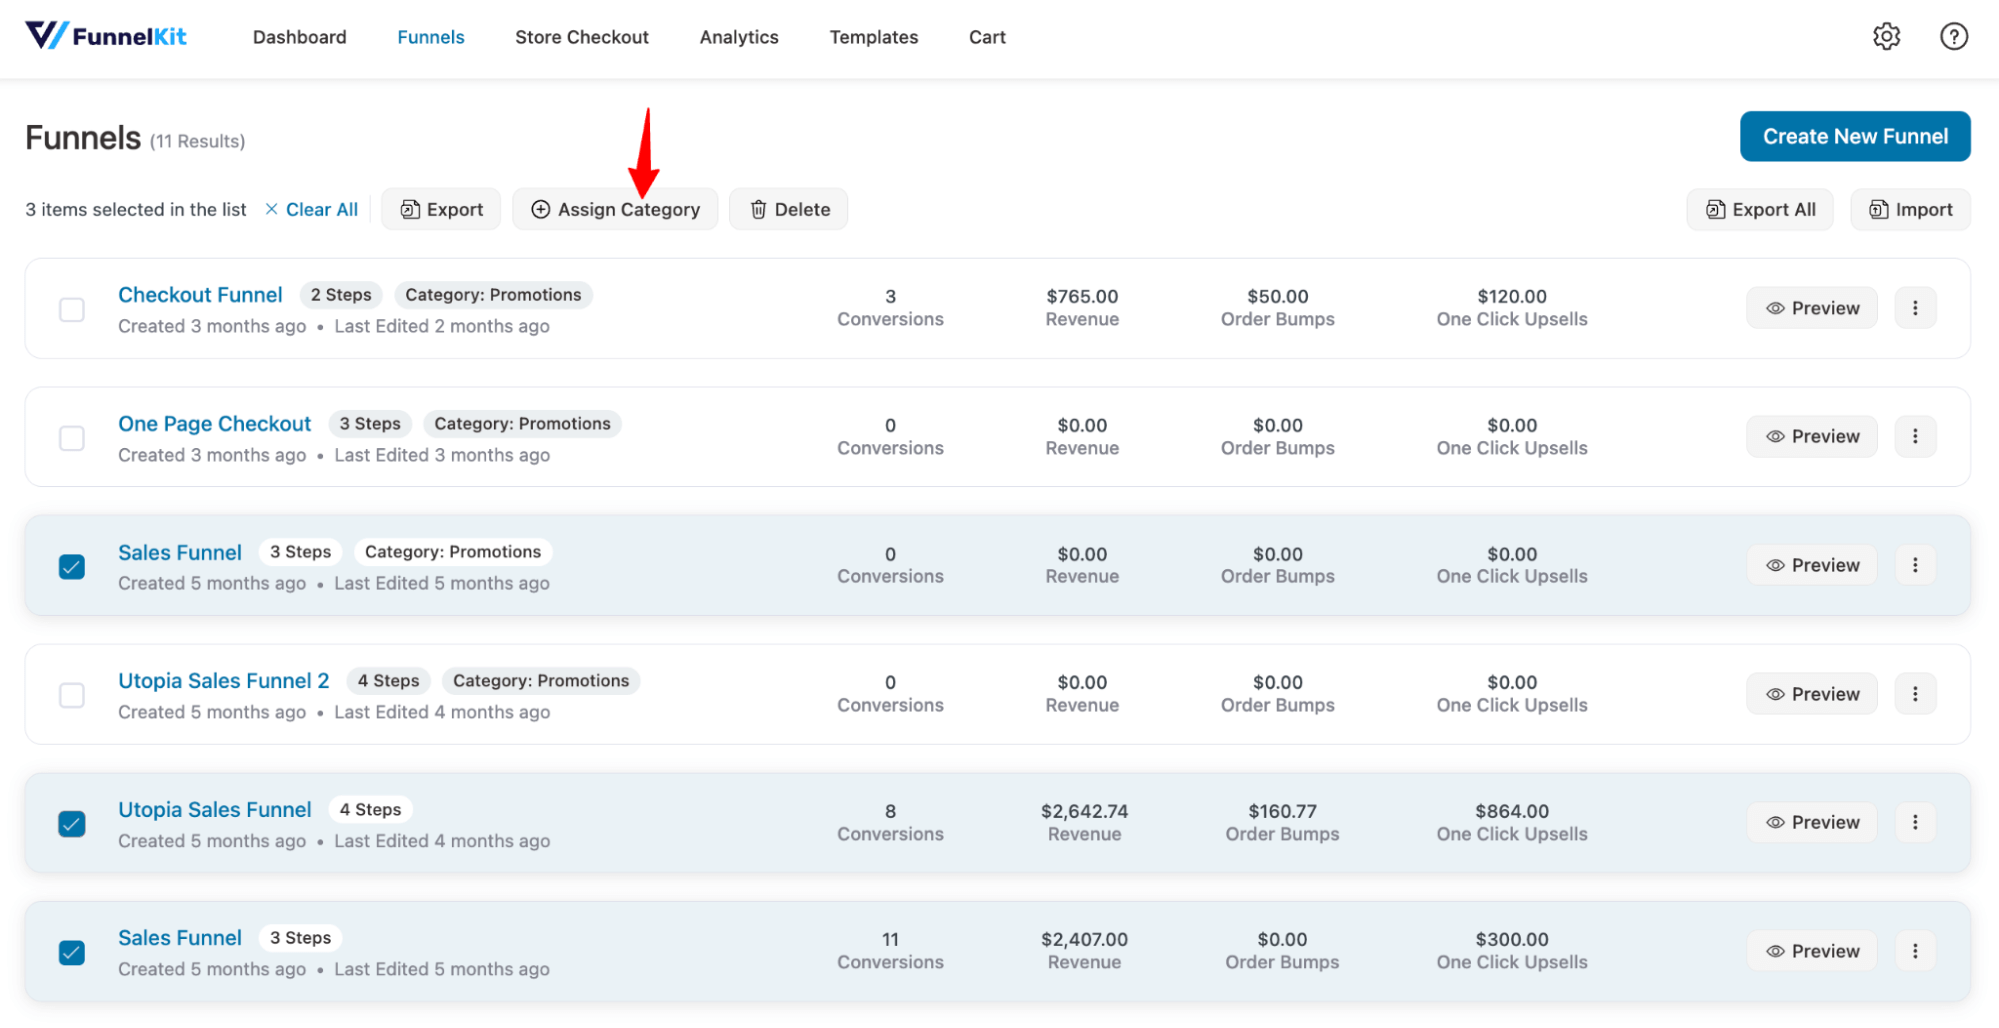
Next, you can add one or multiple categories like you did earlier.
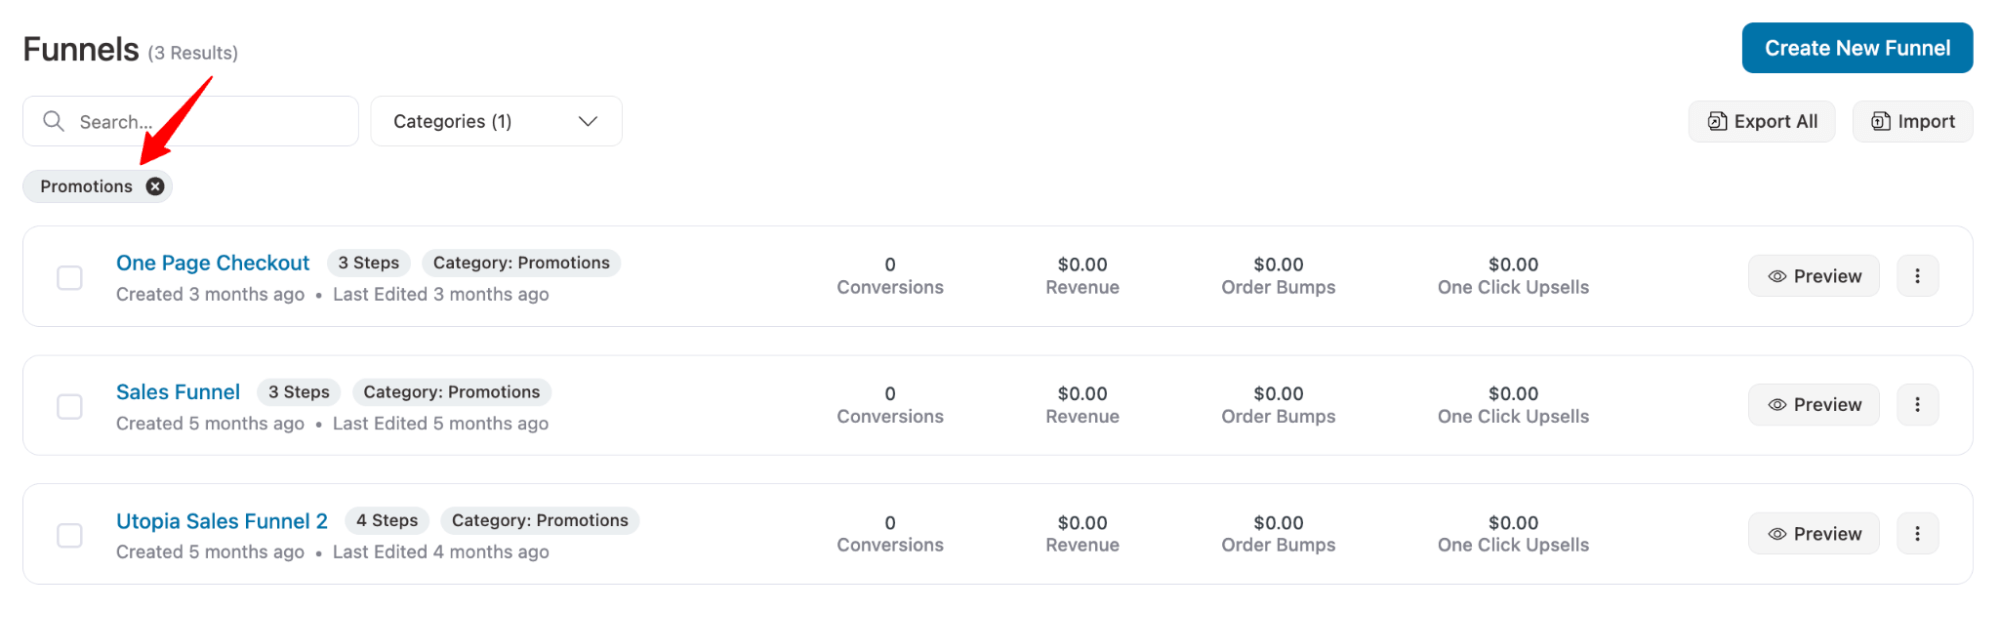
Filter funnels by category
You can filter funnels by Category.
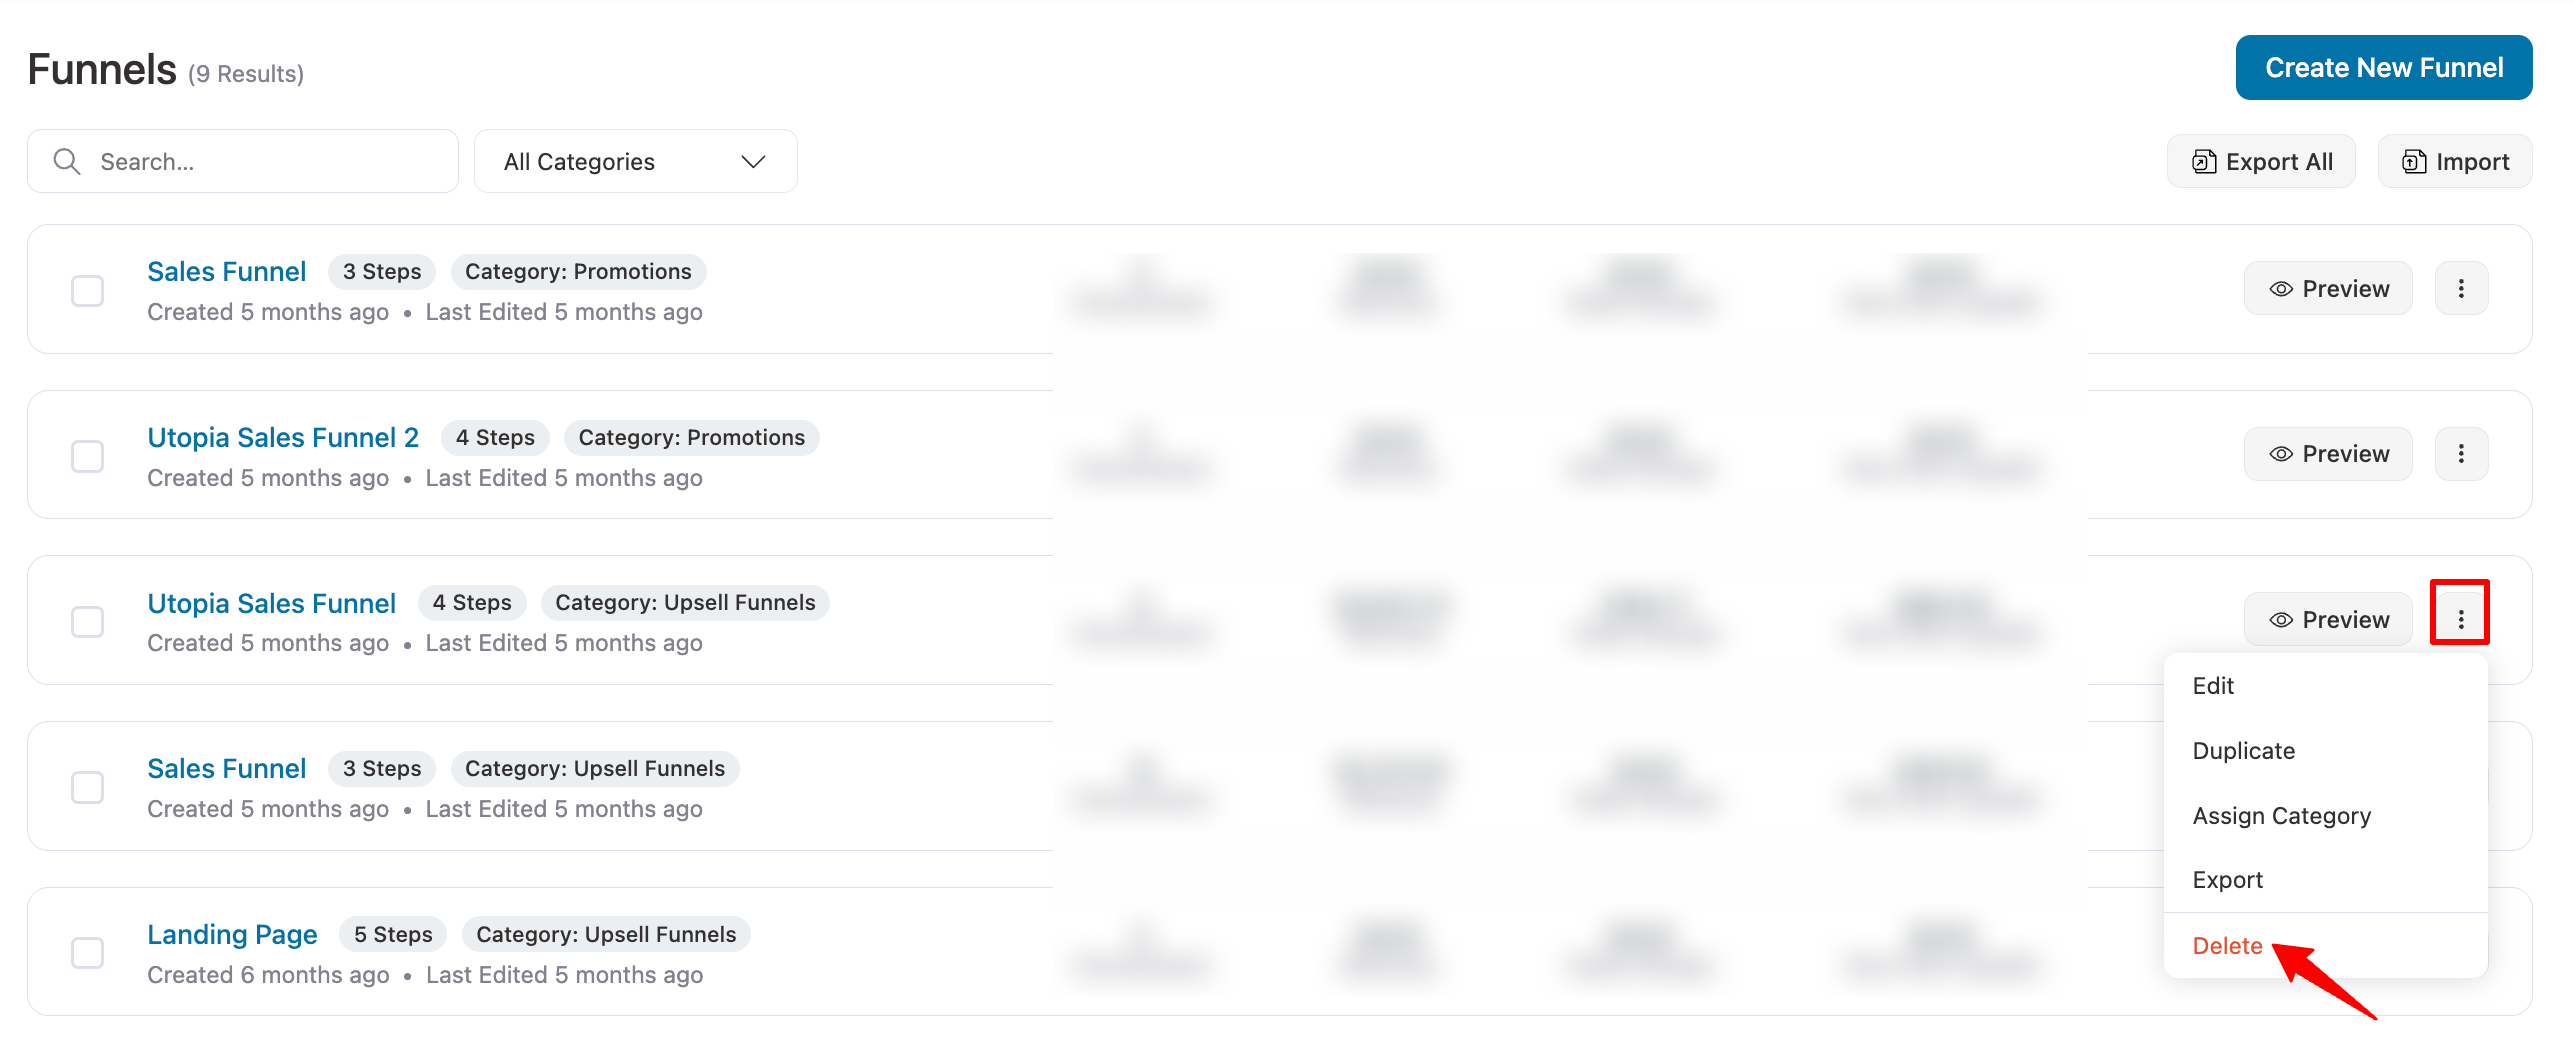
Delete funnels
To delete any funnel, click on ⋮ and hit the delete option.
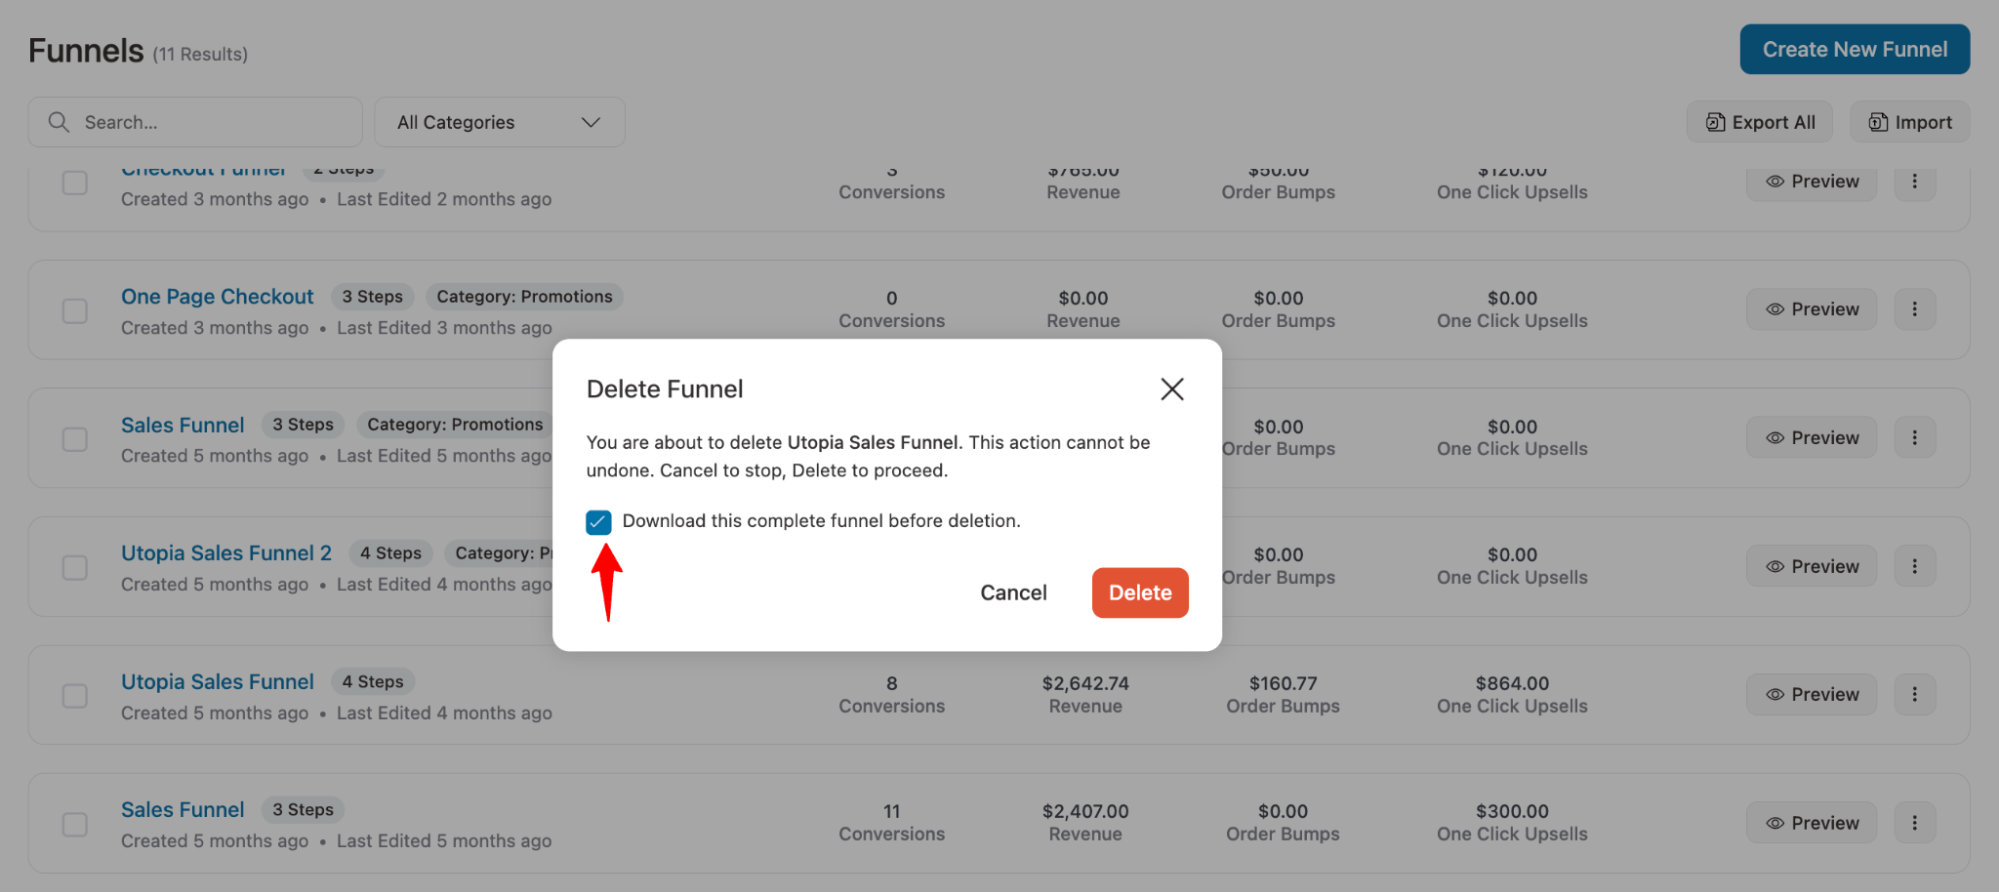
When you try to delete any funnels, before the delete confirmation, FunnelKit will ask you if you want to download a JSON file of the funnel before deletion.
If you select the download option, the file will be downloaded before being deleted.
In short, every possible feature you can ask for to manage your sales funnels efficiently is now available with the new version.


