In this documentation, you'll learn how to add the Google Ads Conversion ID and Label within FunnelKit Funnel Builder.
How to Create & Add a Conversion Label For a Purchase Event
Here are the steps to follow for obtaining a conversion label for a purchase event and adding it to FunnelKit settings.
Step 1: Navigate to Conversions Tools Under the Google Ads Account
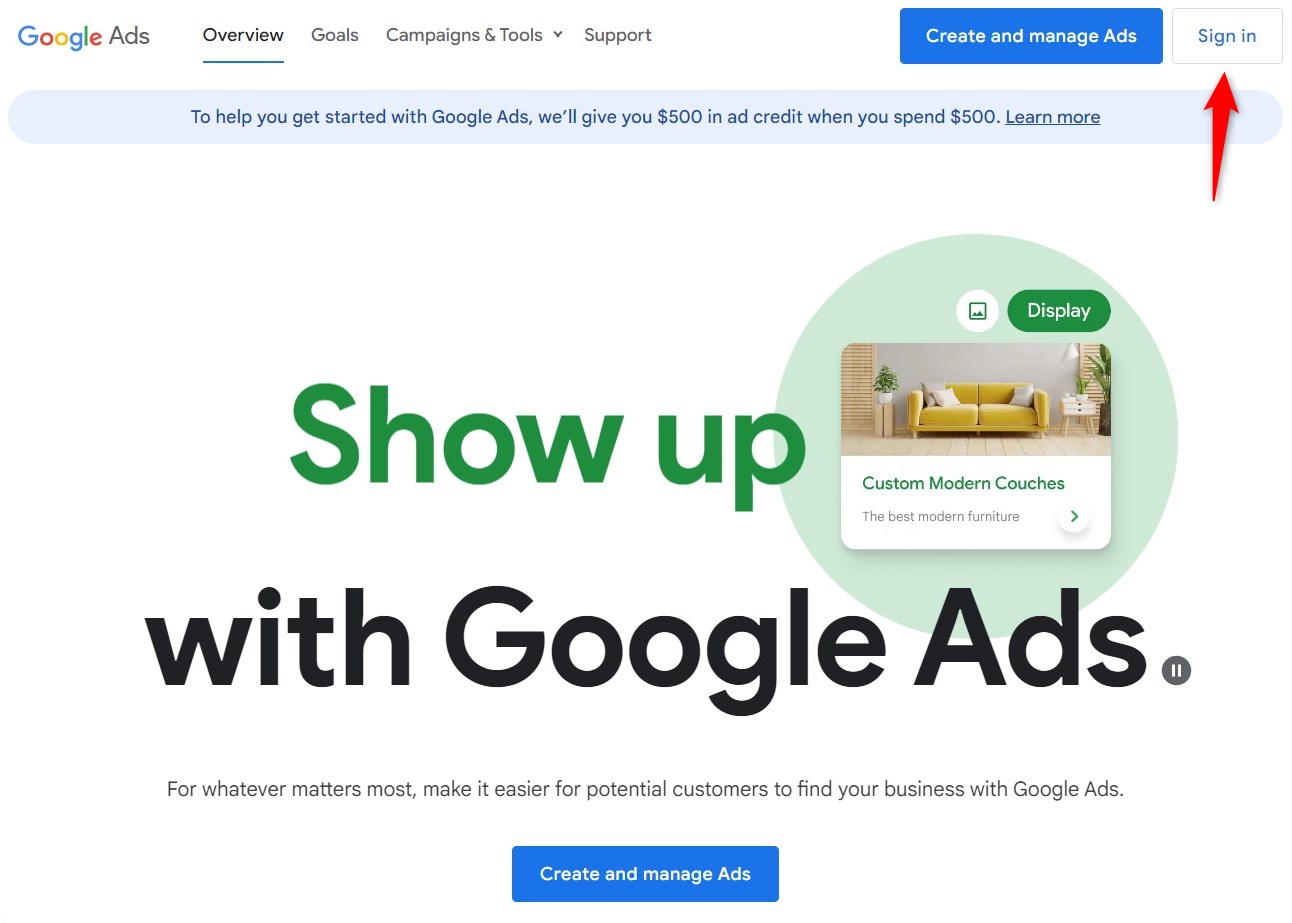
Log in to your Google Ads account.
Next, hit the Tools & Settings icon as indicated by the red arrow below.
If you do so, a menu will appear on the screen. Select Conversions from there.

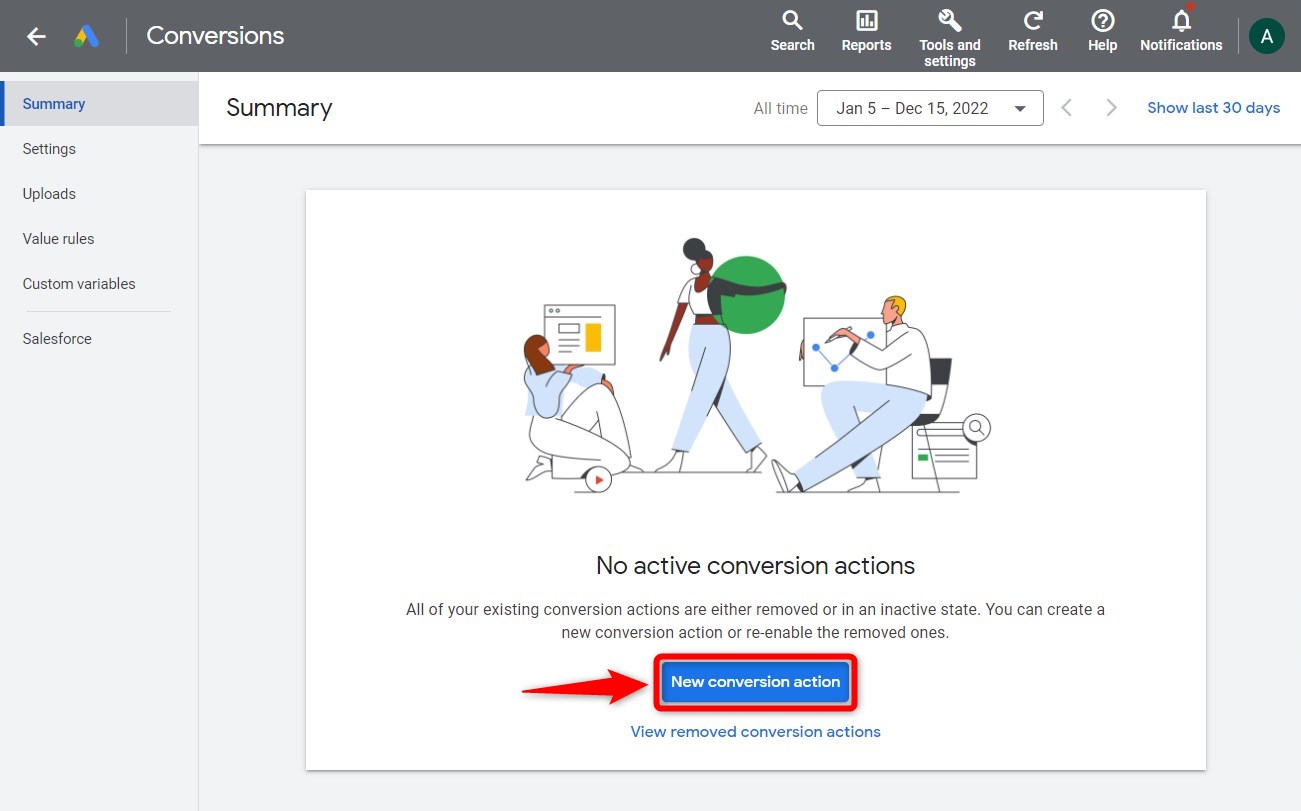
Step 2: Create a new conversion action
Click on the New conversion action button.
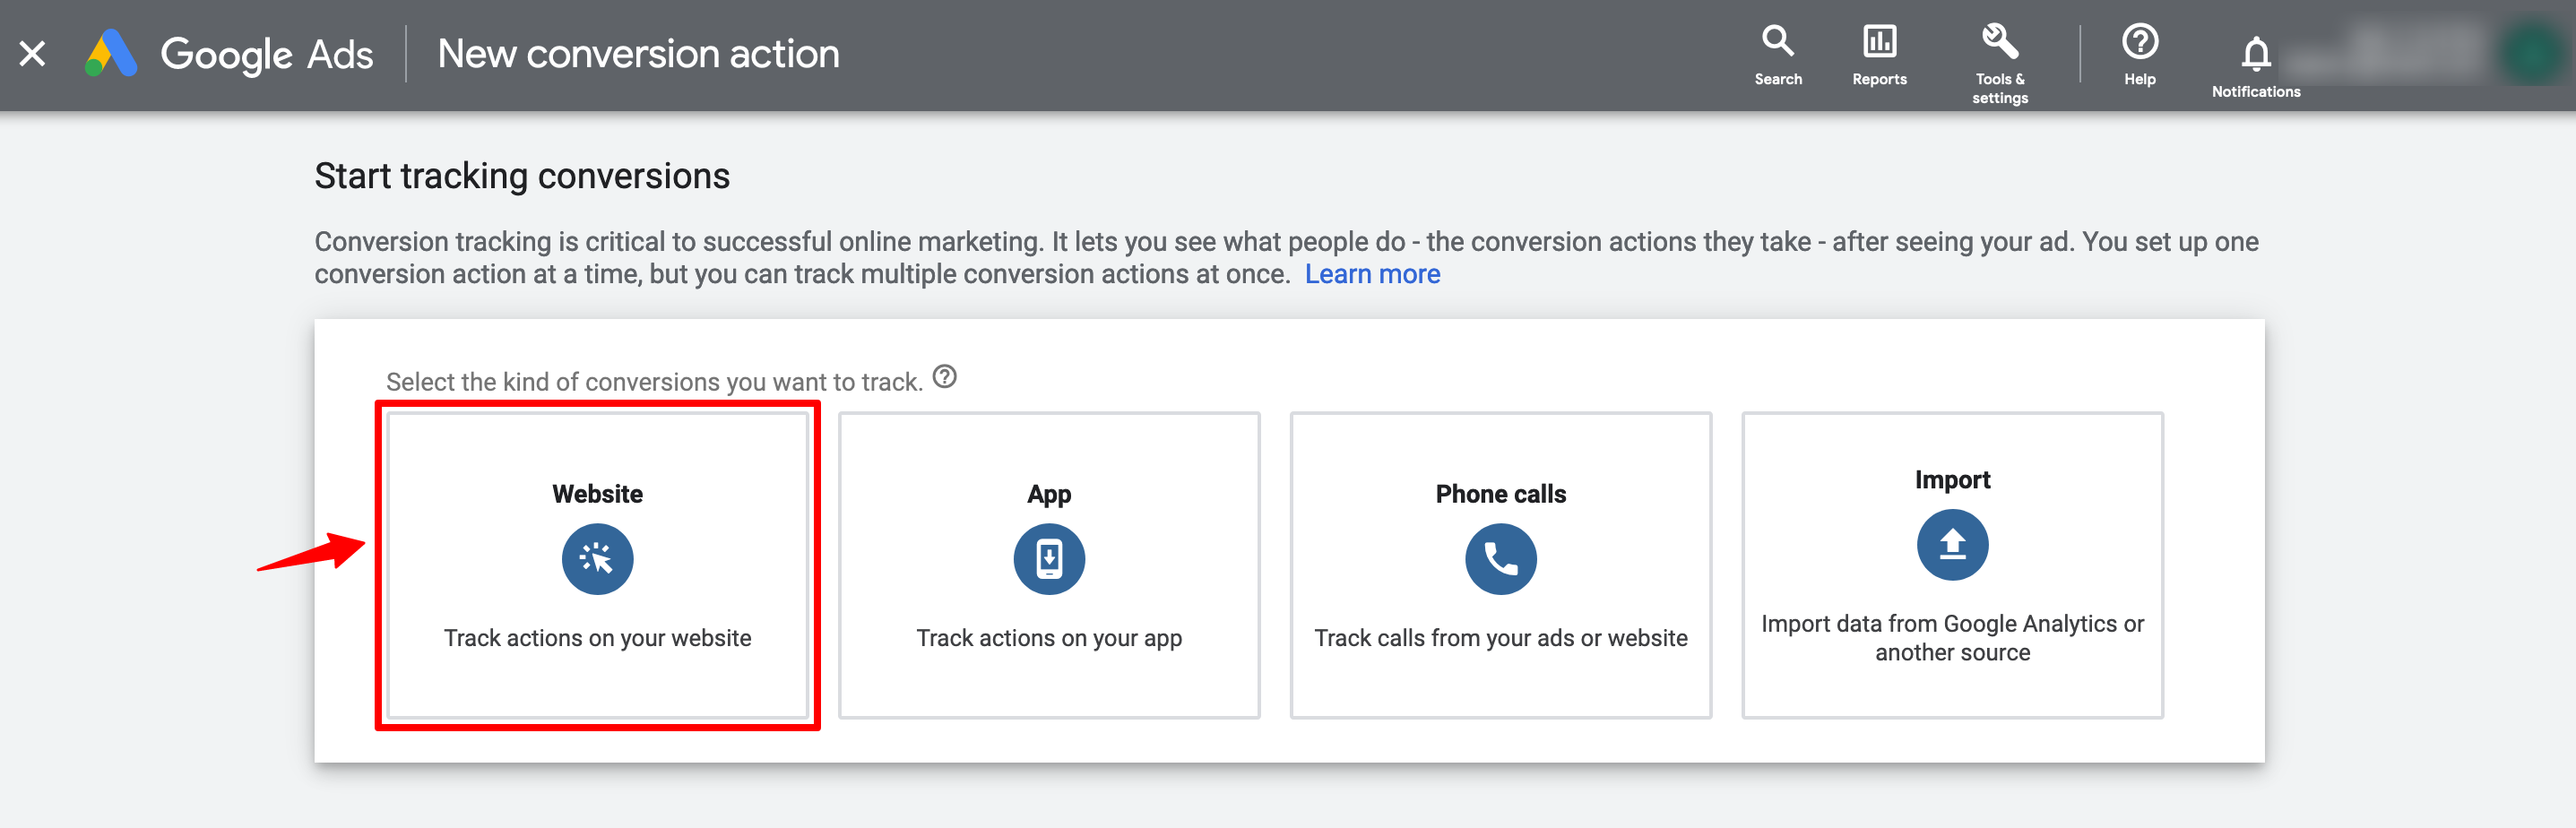
Step 3: Set up the Conversion for your Google Ads account
Select the kinds of conversions you want to track.
To track sales and other options, select the Website option.
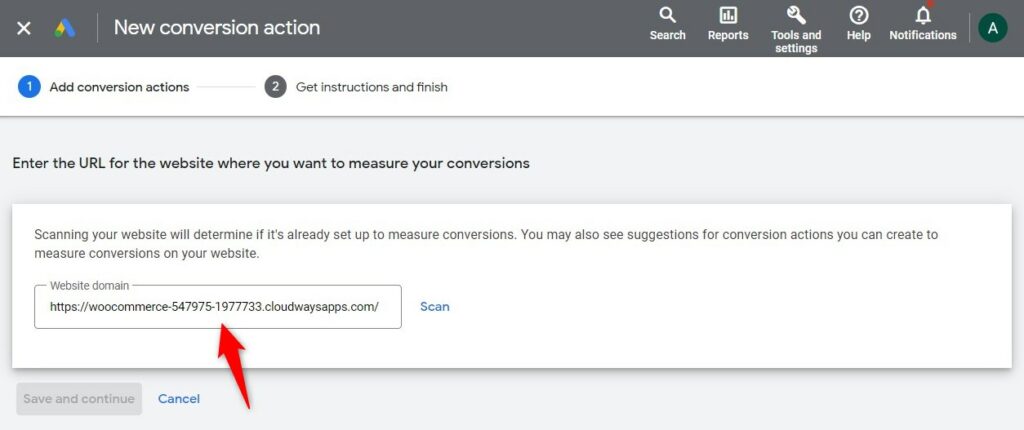
Here, you will be asked to create an action.
Enter the URL of your website and click on Scan.
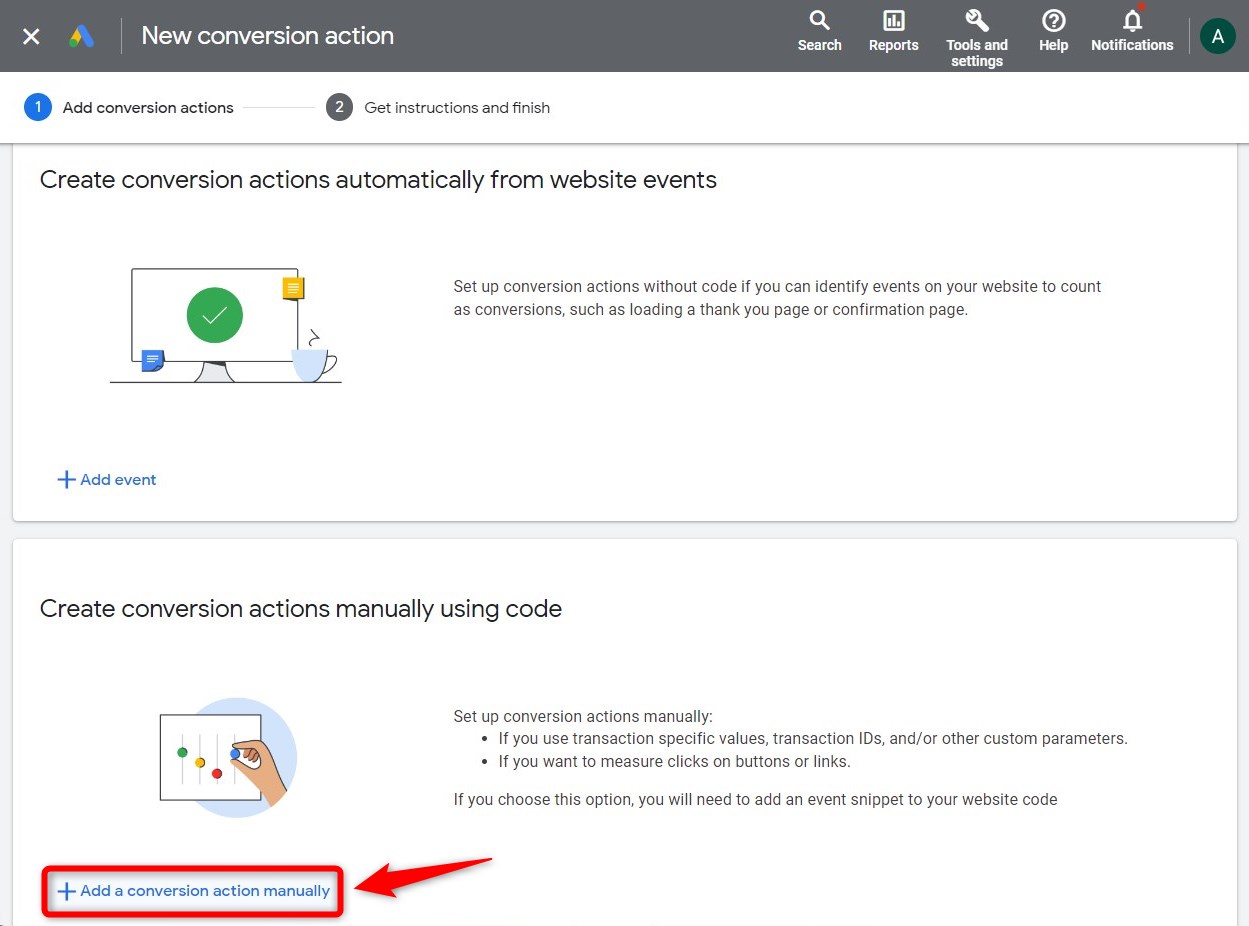
Next, choose the way to set up the conversion action.
Click on the Add a conversion action manually button.
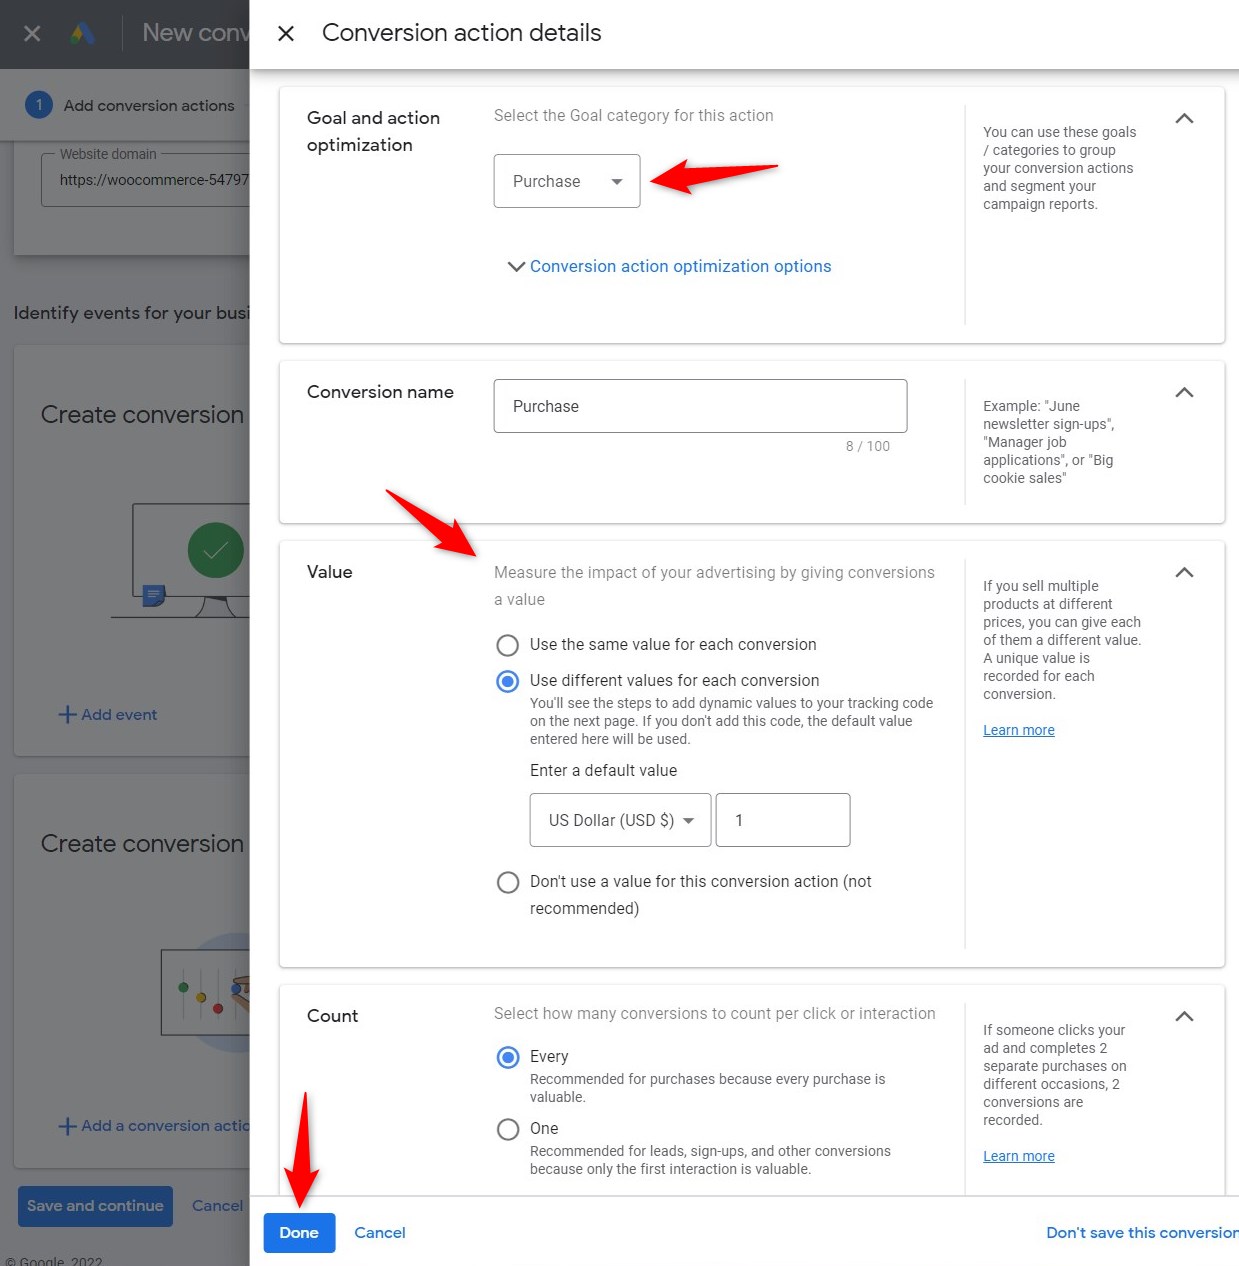
Give a random Conversion name and select an appropriate category option. Here, we have selected the Purchase tag.
Then check the radio boxes for suitable Value and Count options that meet your needs. After that, click on the CREATE AND CONTINUE button.
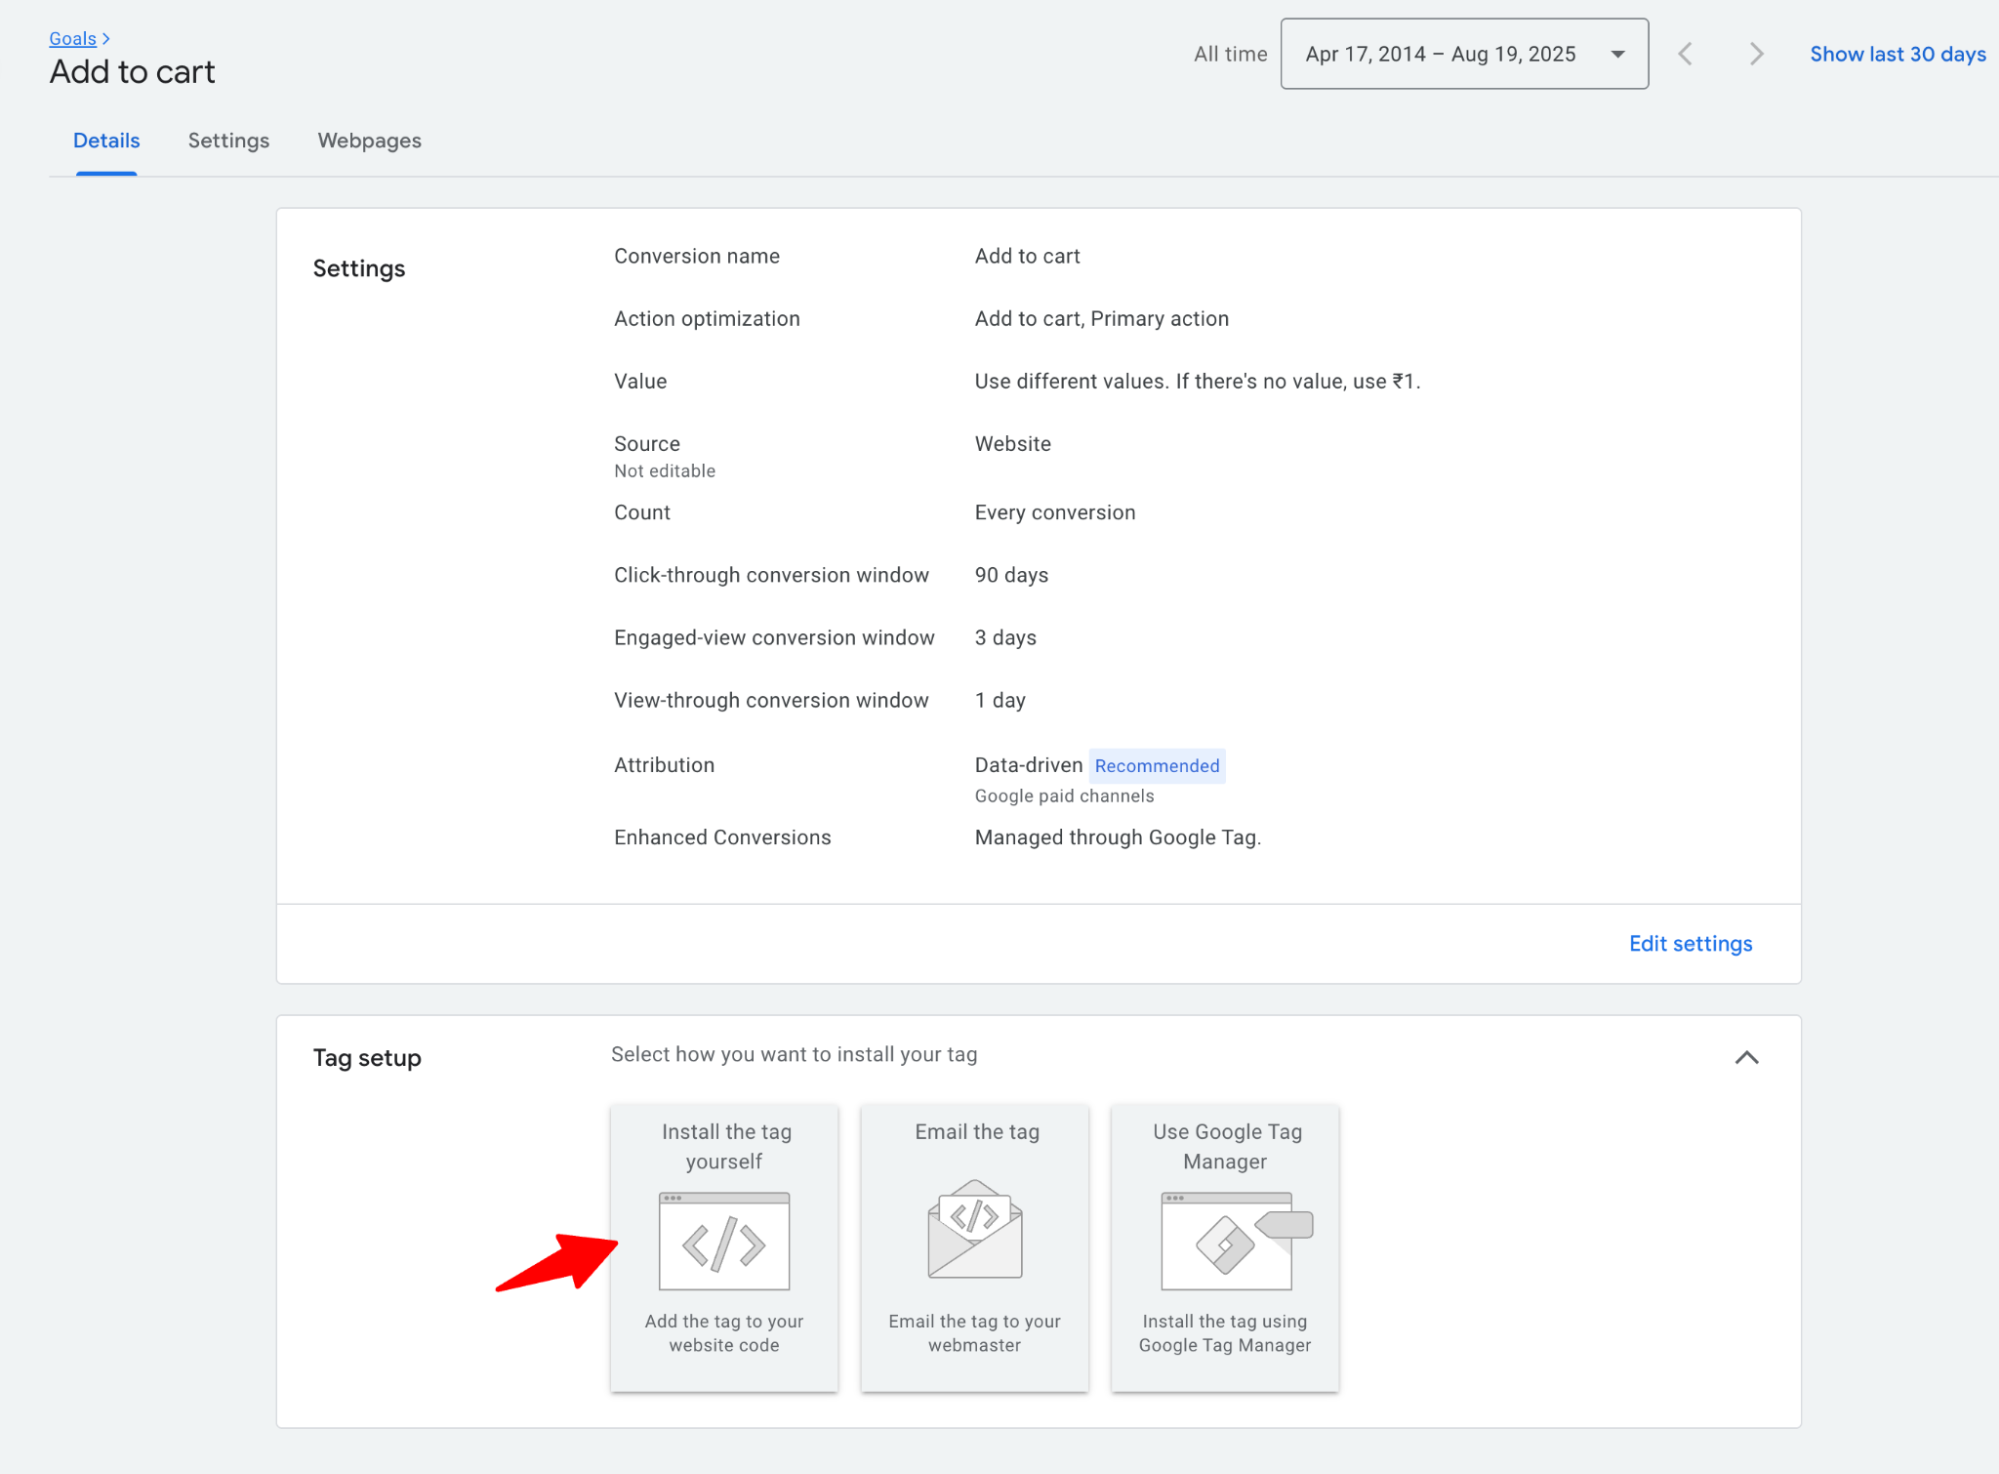
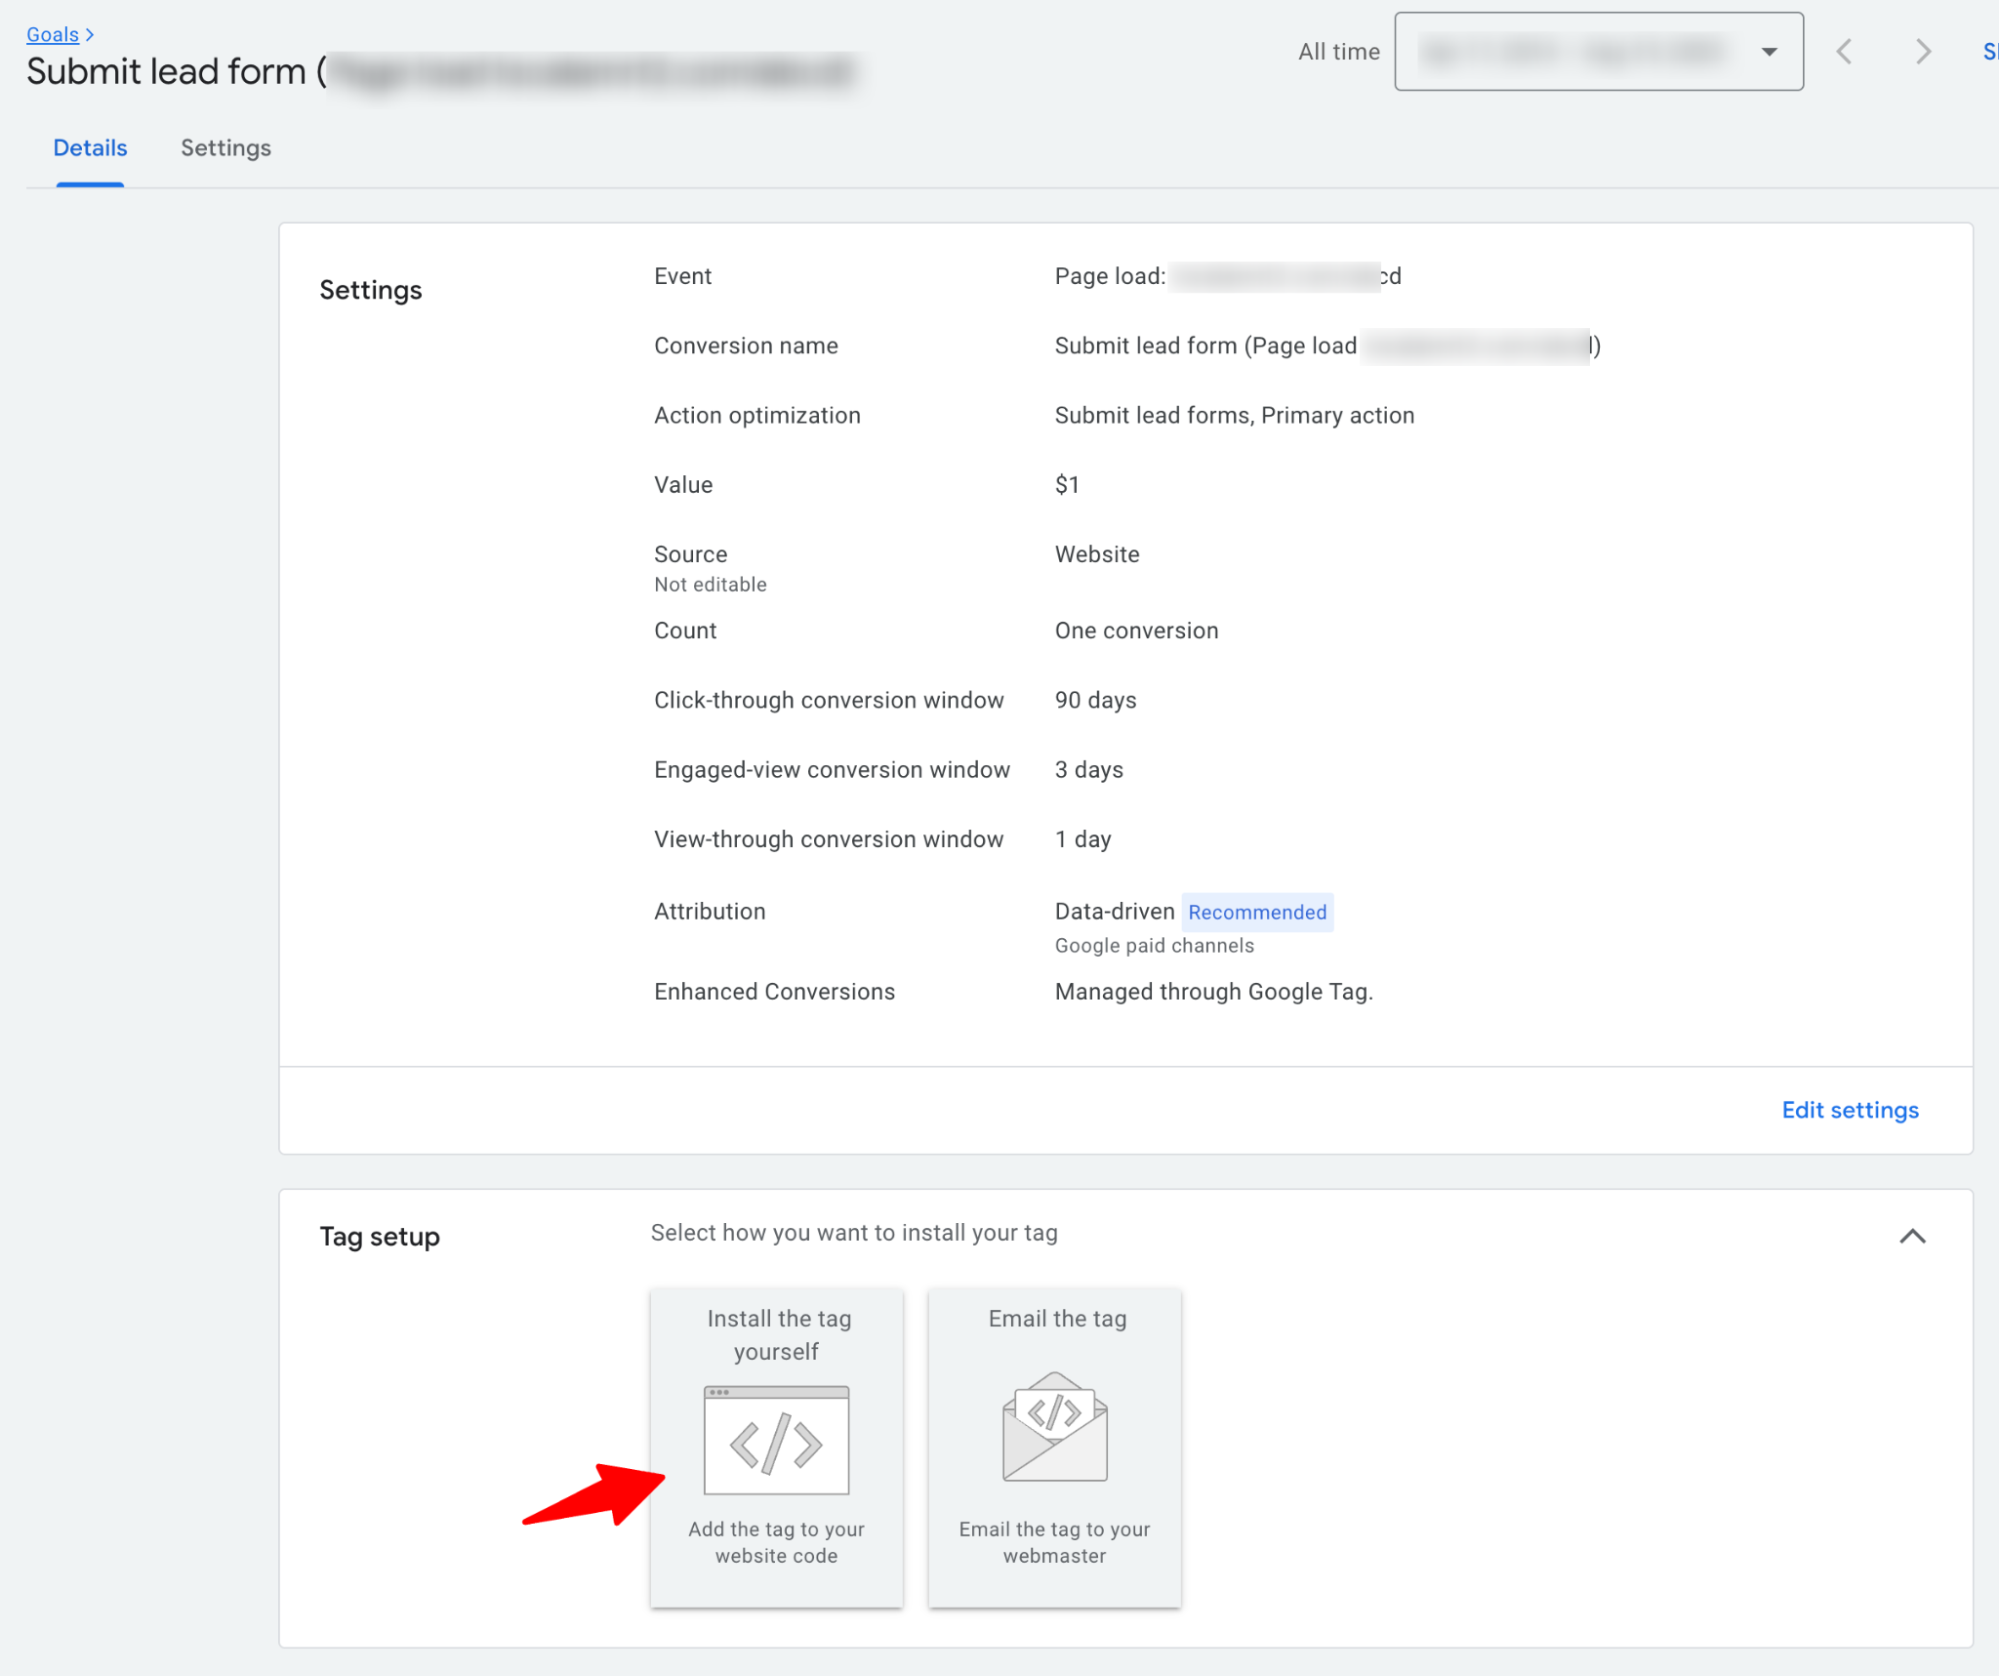
Now, it'll ask you to set up the tag on your website.
You don't need to copy and paste any code because FunnelKit's integration with Google Ads takes care of that.
Just click on the See event snippet button.

This will show the Google Ads Label.
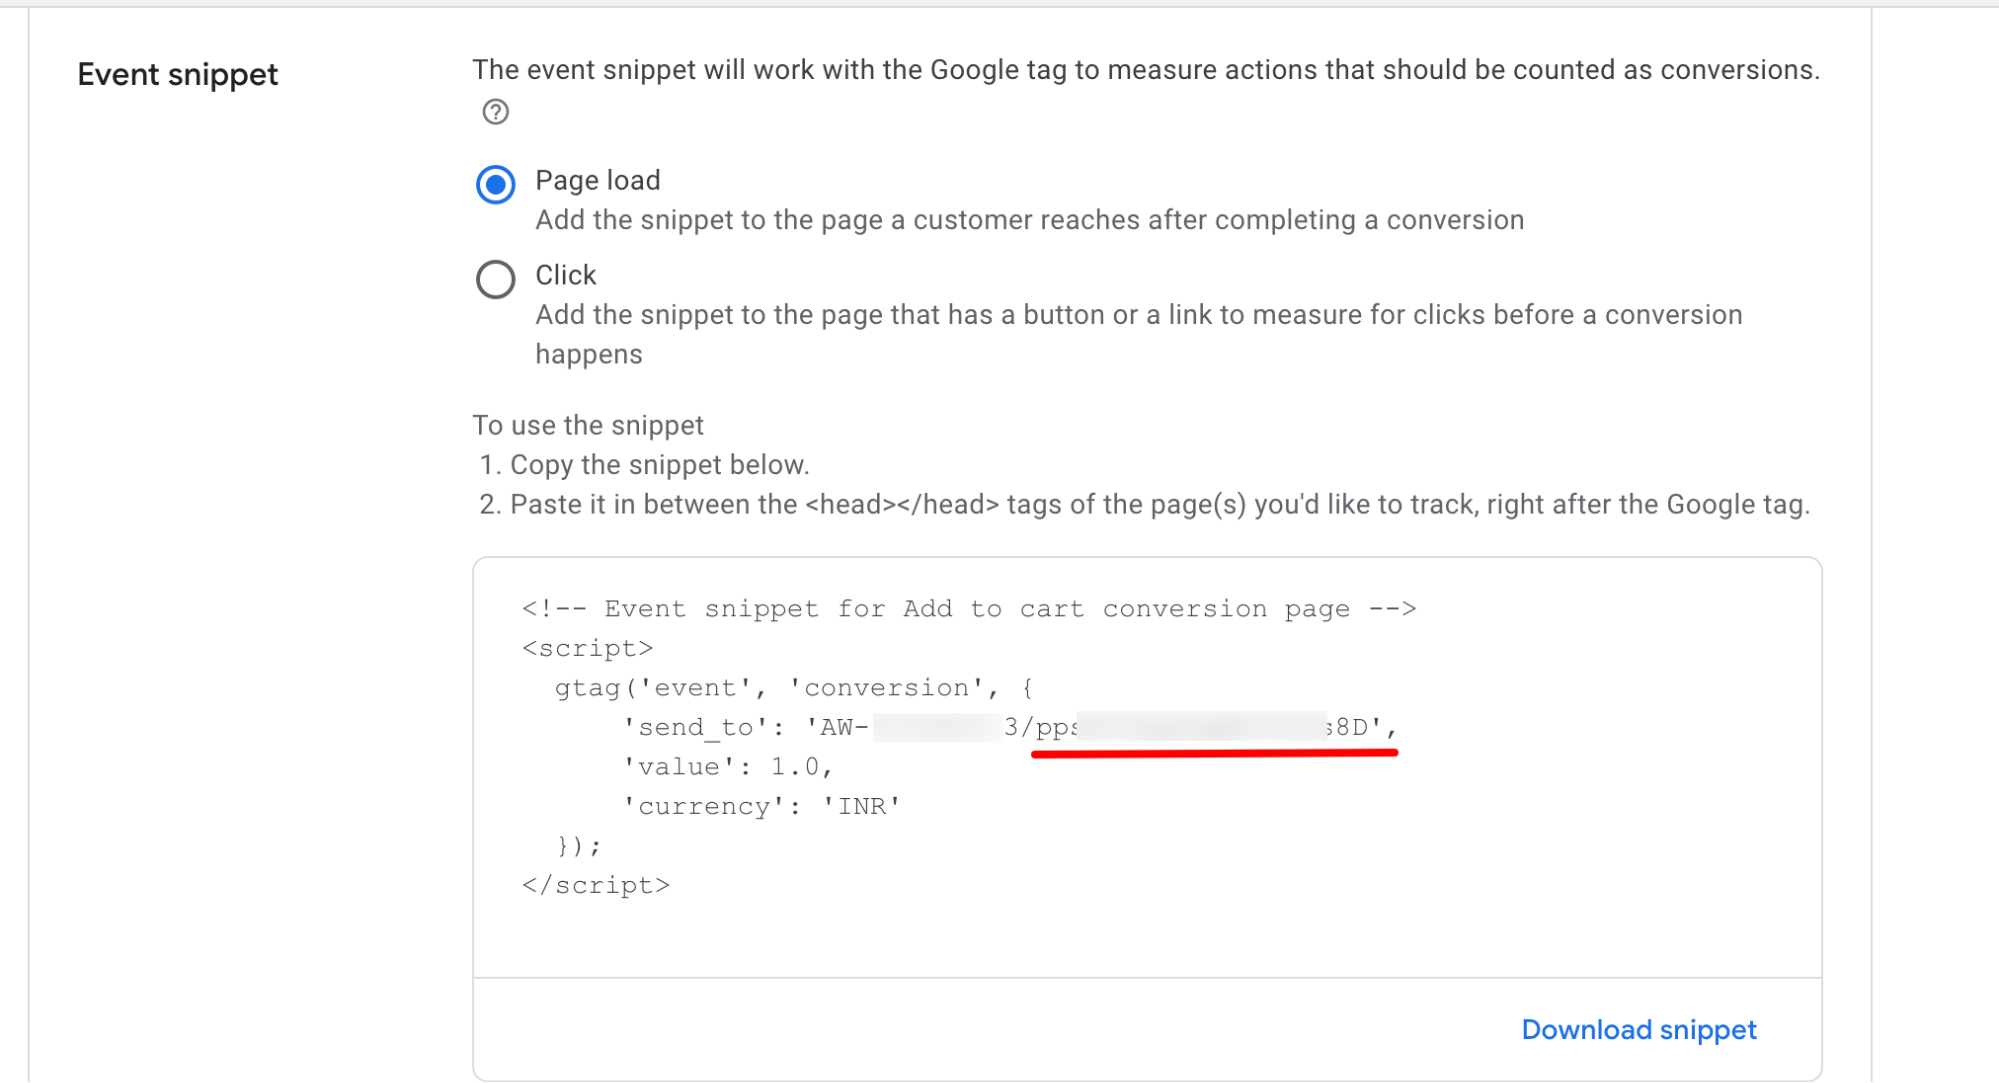
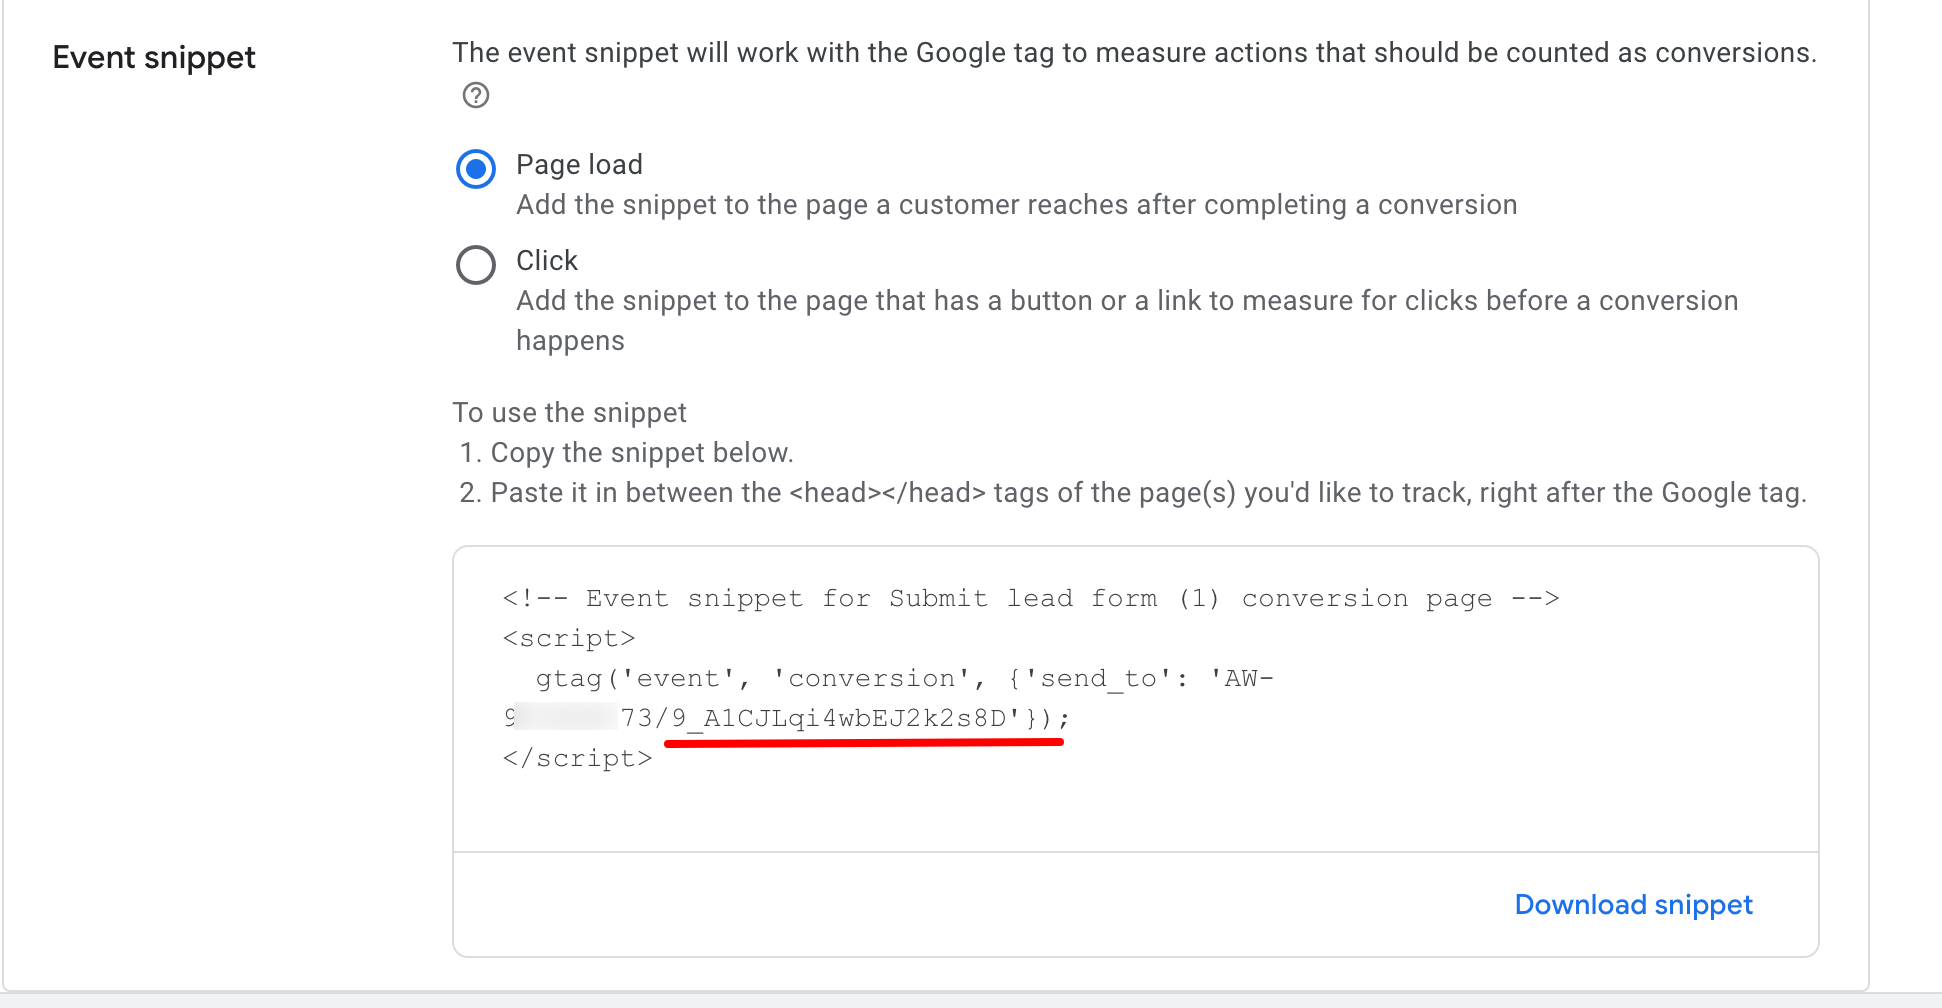
Step 4: Copy the Conversion Label
Now, it's time to get the Conversion Label!
Copy it from the global site tag. Take a look at the following screenshot:
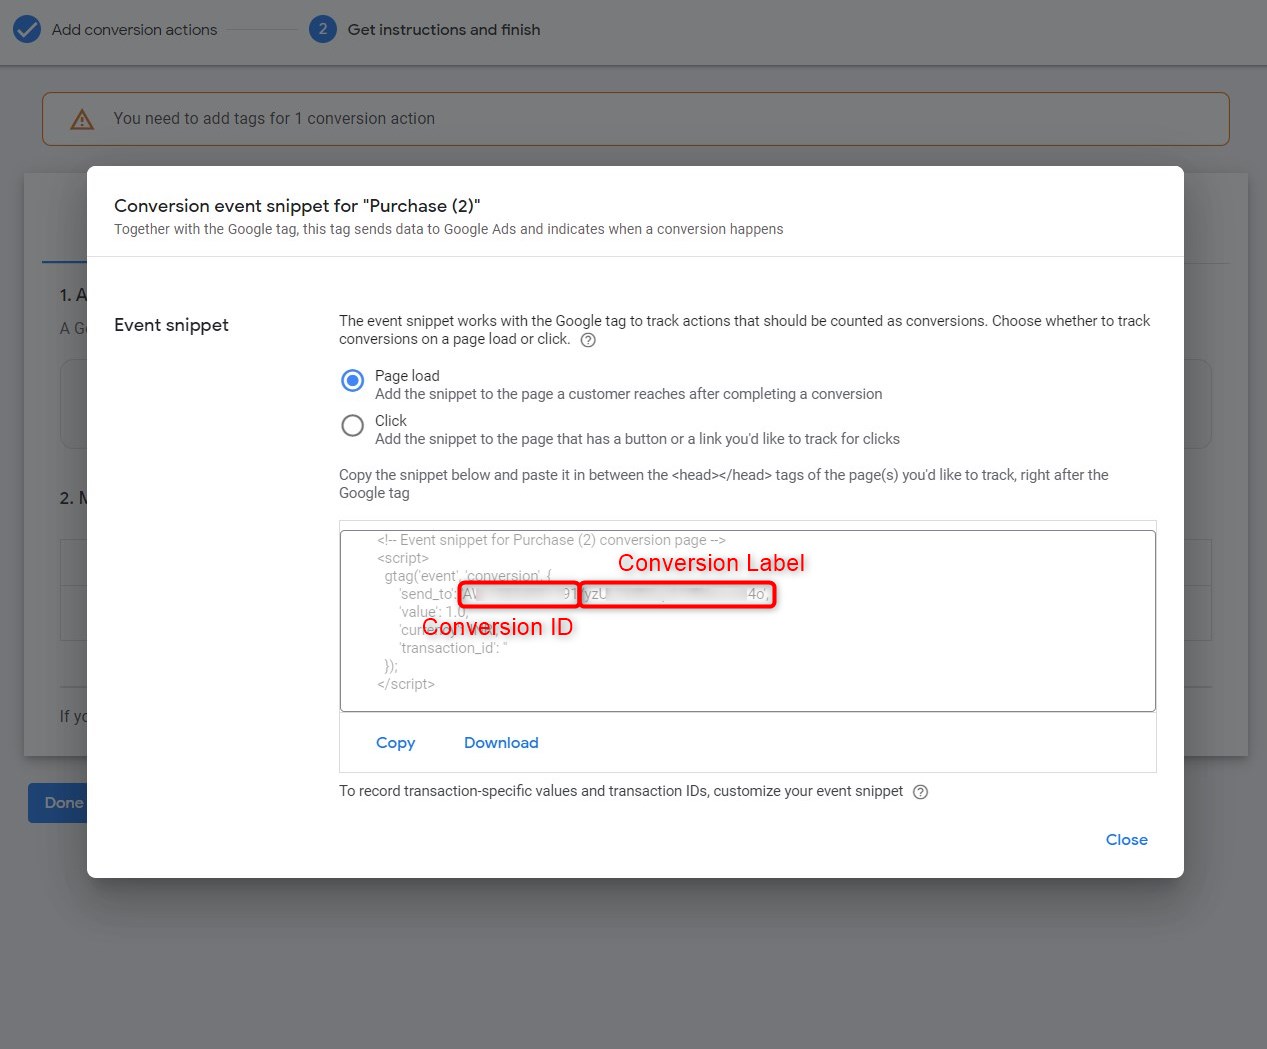
Well done! You have successfully obtained and copied your Conversion Label.
Step 5: Add the Google Ads Conversion Label to FunnelKit
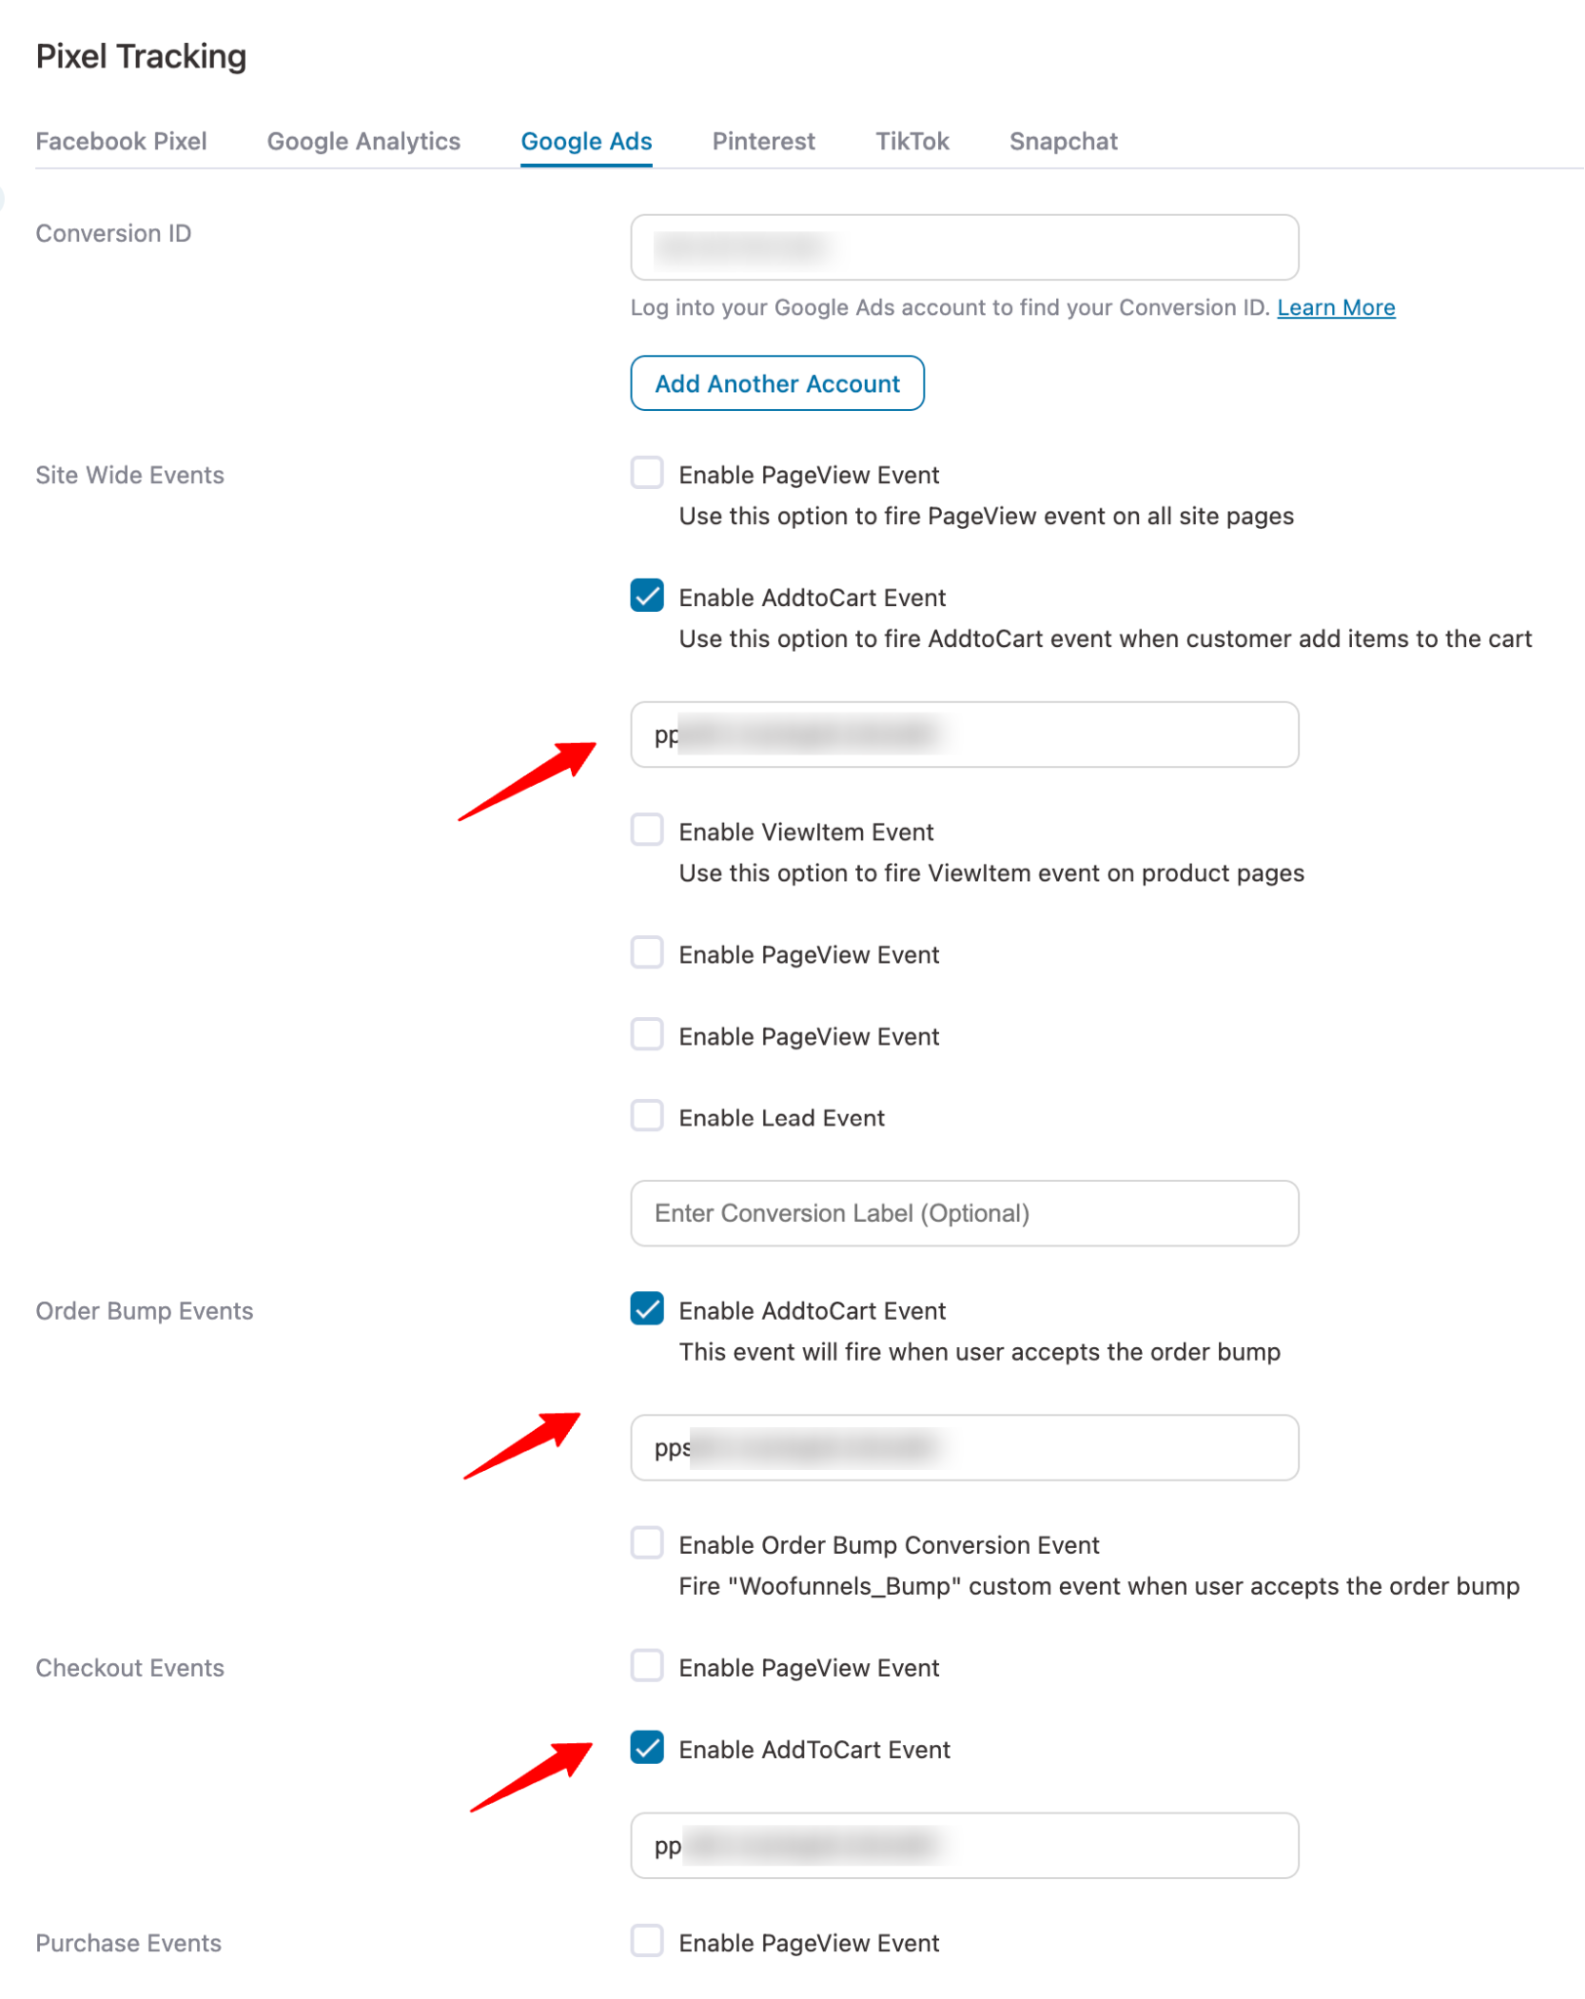
Now navigate to FunnelKit ⇒ Settings ⇒ Pixel Tracking ⇒ Google Ads. Next, scroll down to the “Purchase Events” section, check the “enable conversion event” and paste the conversion label.
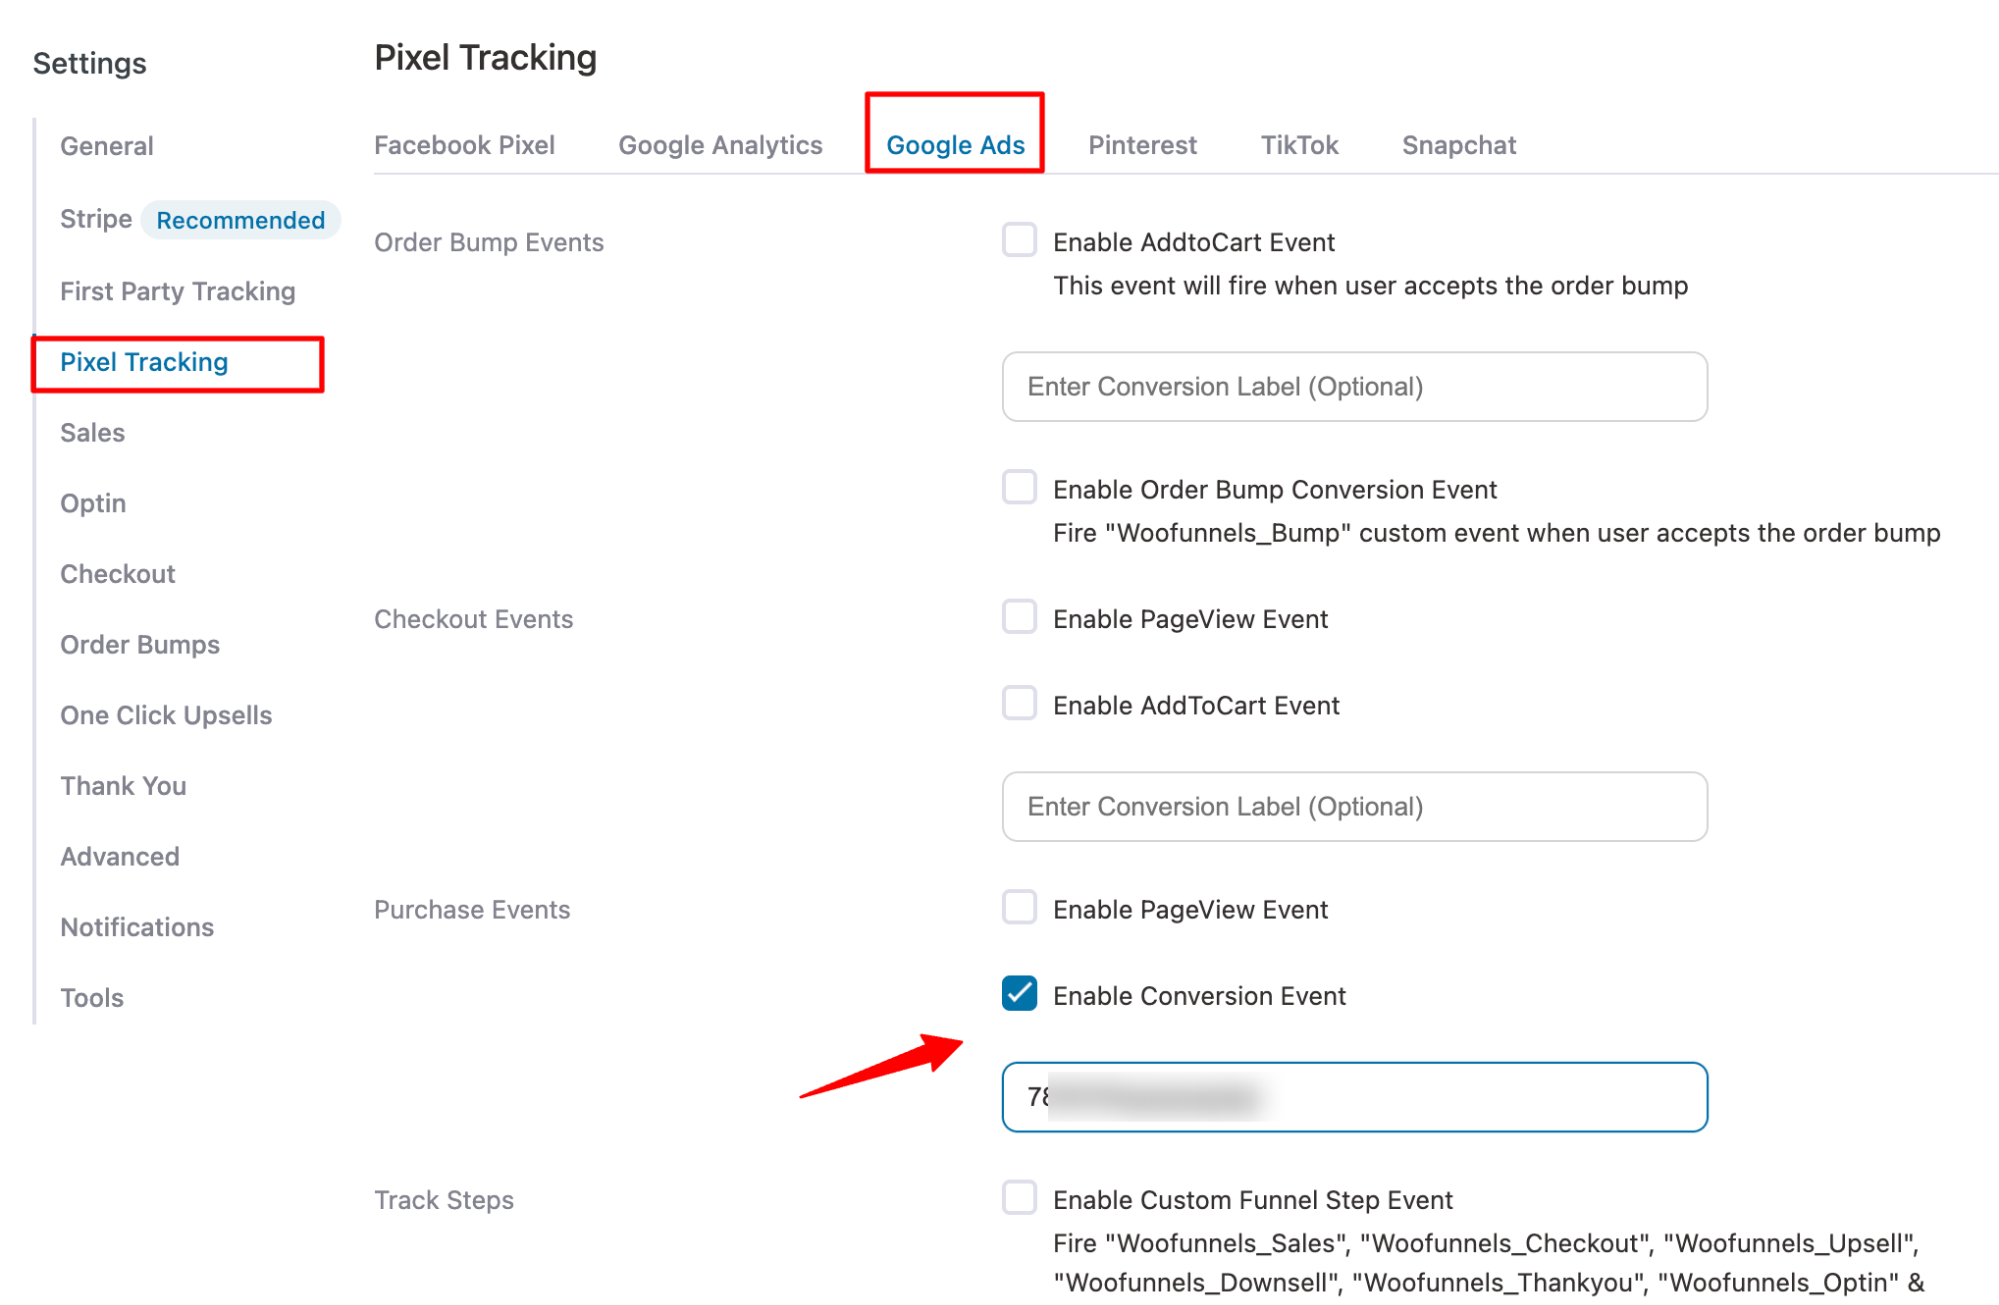
Once done, click on Save Changes.
How to Add a Conversion Label For an AddToCart Event
Here are the steps you need to follow
Step 1: Create an AddToCart Event and Copy The Conversion Label
Just as you created an event for purchase, create another event for AddToCart.To get the conversion label, click the “Install the tag yourself” option.
Then scroll down to the Event Snippet and copy the conversion Label.
Step 2: Add the Google Ads Conversion Label to FunnelKit
Next, return to the Google Ads settings page in FunnelKit. Enable the Add to Cart event and paste the corresponding conversion label.
How to Add a Conversion Label For a Lead Event
Here are the steps you need to follow
Step 1: Create Lead Event and Copy The Conversion Label
Just as you created an event for purchase, create another event for Lead generation. To get the conversion label, click the “Install the tag yourself” option.
Then scroll down to the Event Snippet and copy the conversion Label.
Step 2: Add the Google Ads Conversion Label to FunnelKit
Next, return to the Google Ads settings page in FunnelKit. Enable the Lead event and paste the corresponding conversion label.
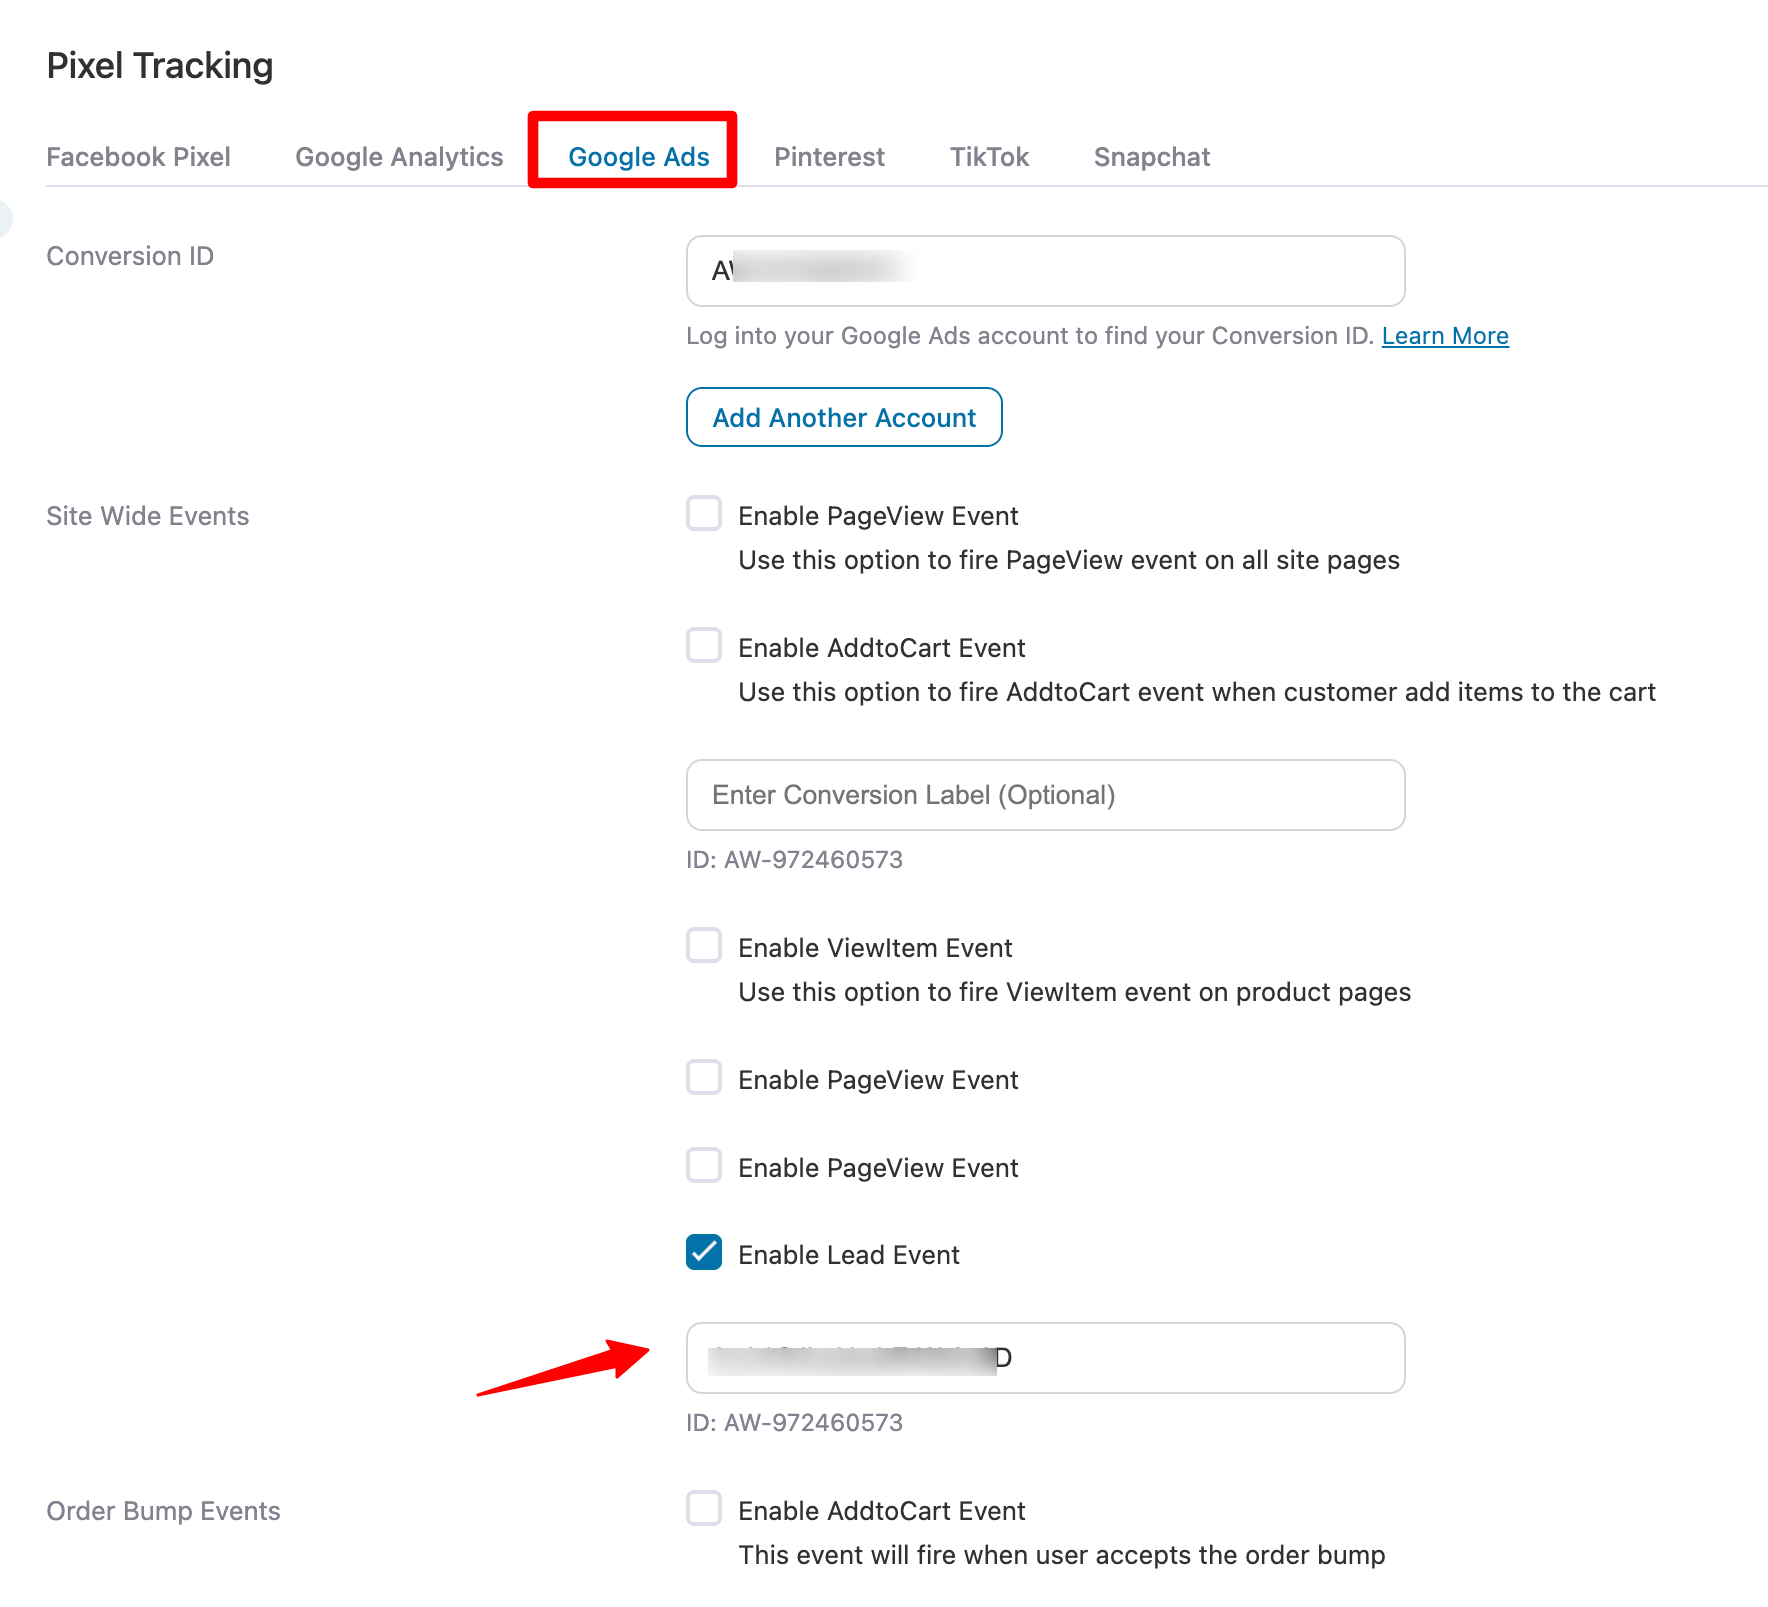
Once done, click on Save Changes.
This is how you can set up Google Ads conversion ID & label in FunnelKit settings.


