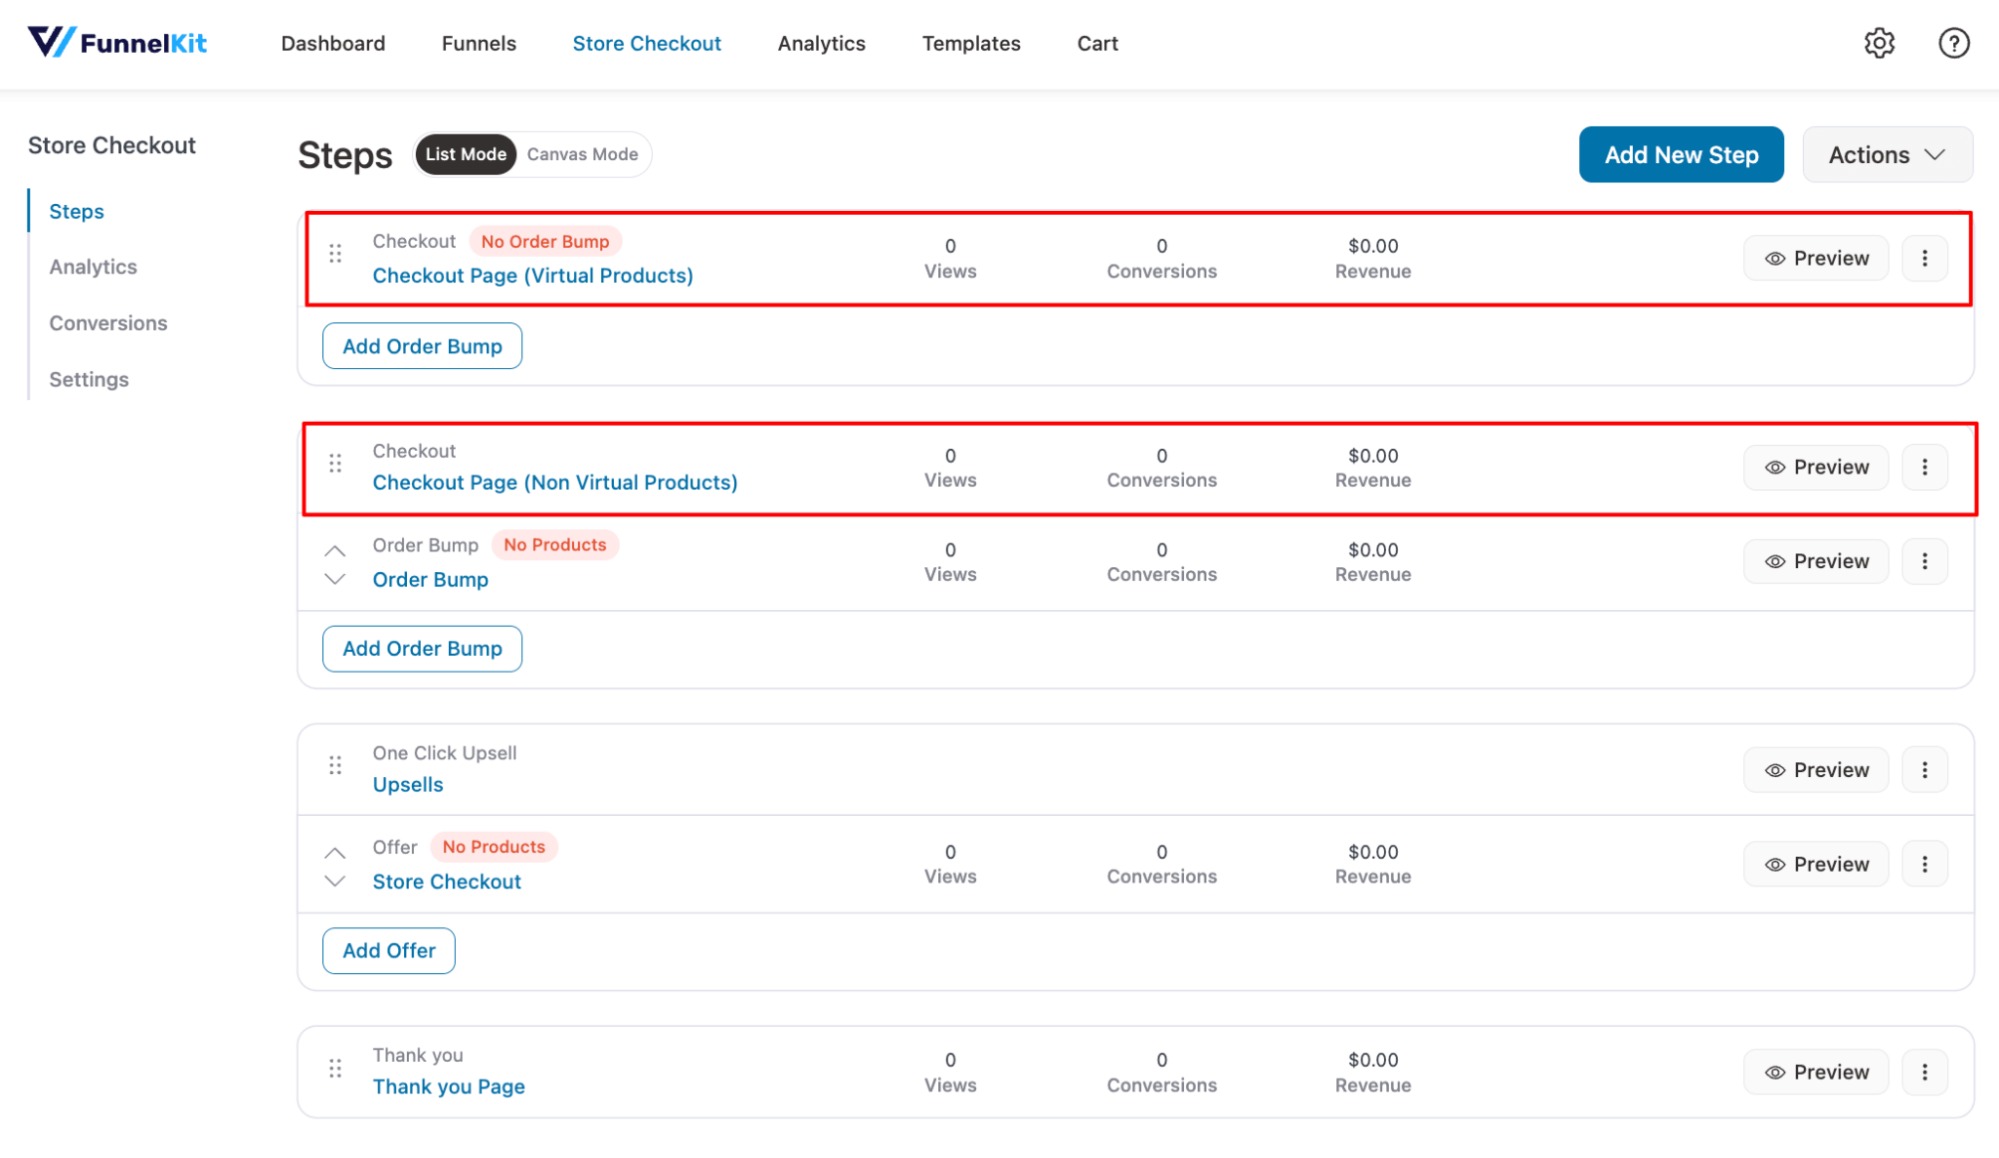
With FunnelKit, you can create different checkout pages for your virtual and non-virtual products.
This way, you can customize the checkout fields that are needed for each type.
Here are the steps you need to follow:
Step 1: Create separate checkout pages
First, go to your store checkout and create two different checkout pages: one for virtual products and another for non-virtual products.
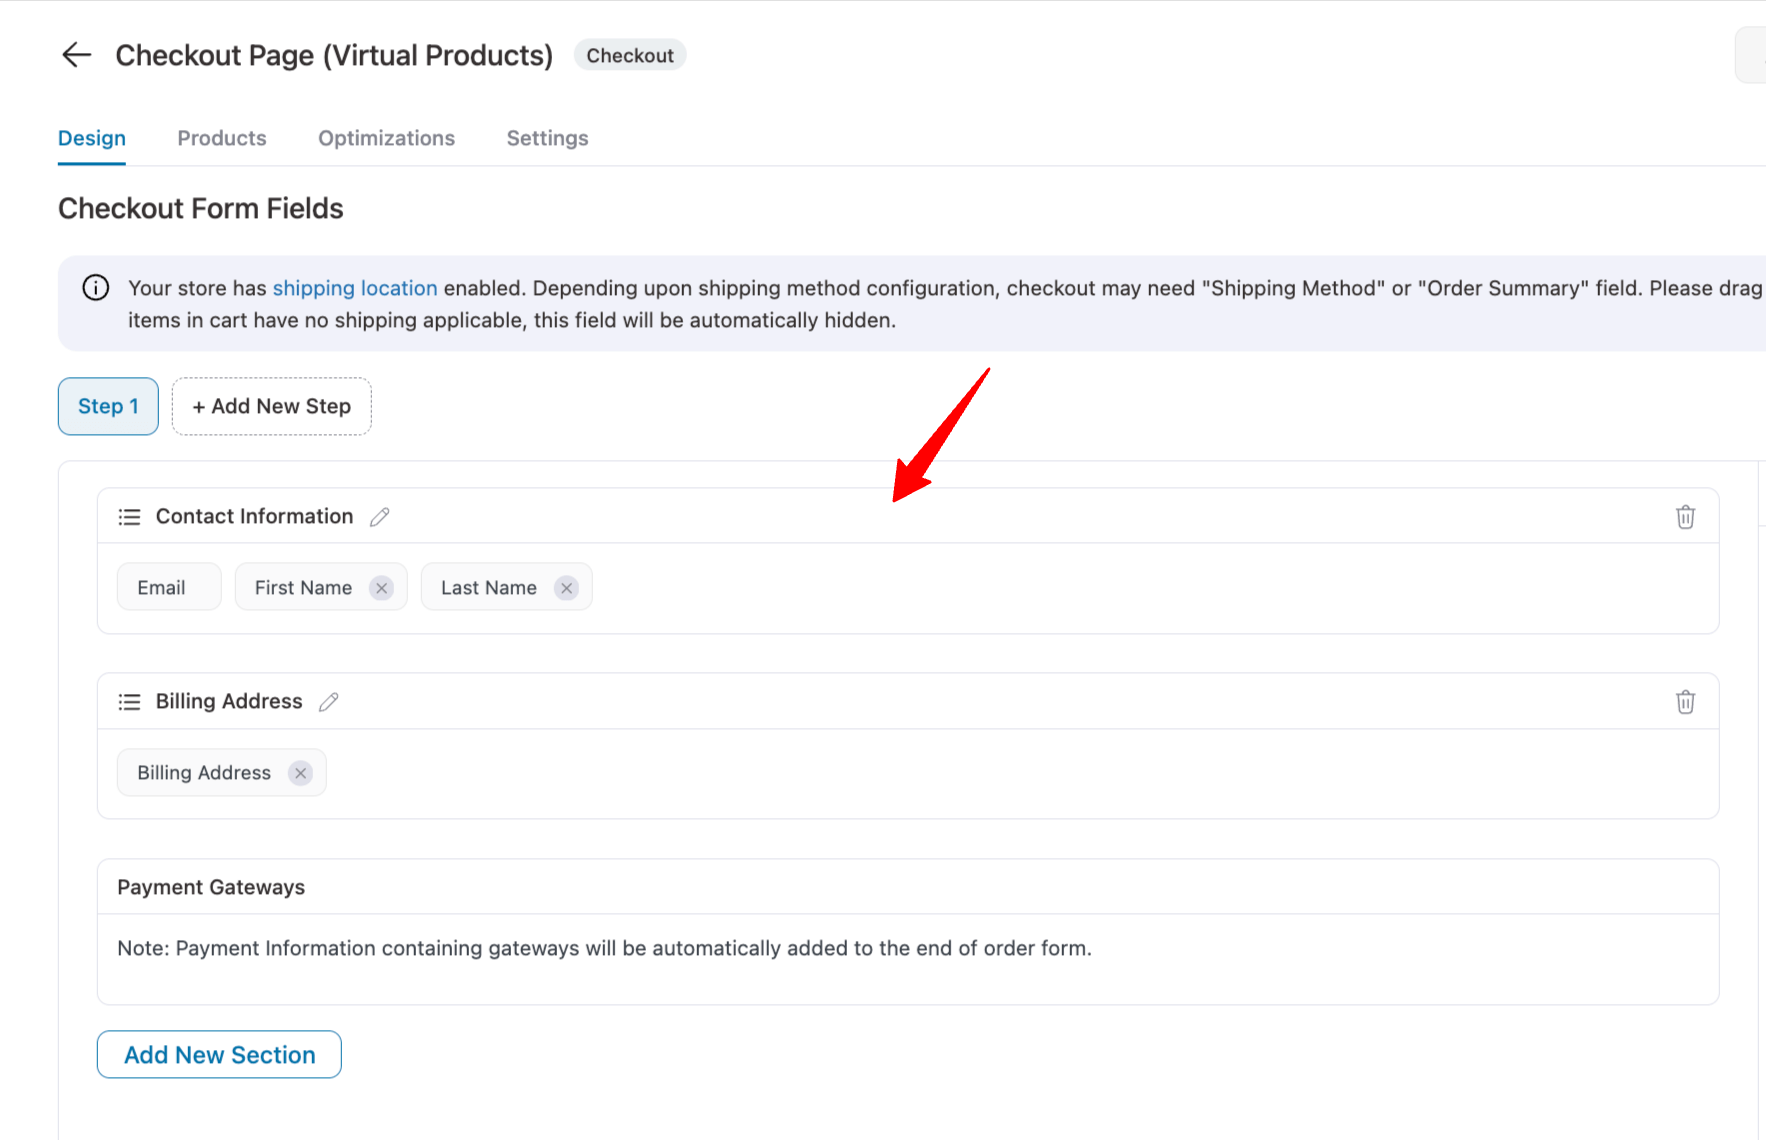
Make sure to adjust the checkout forms according to your requirements.
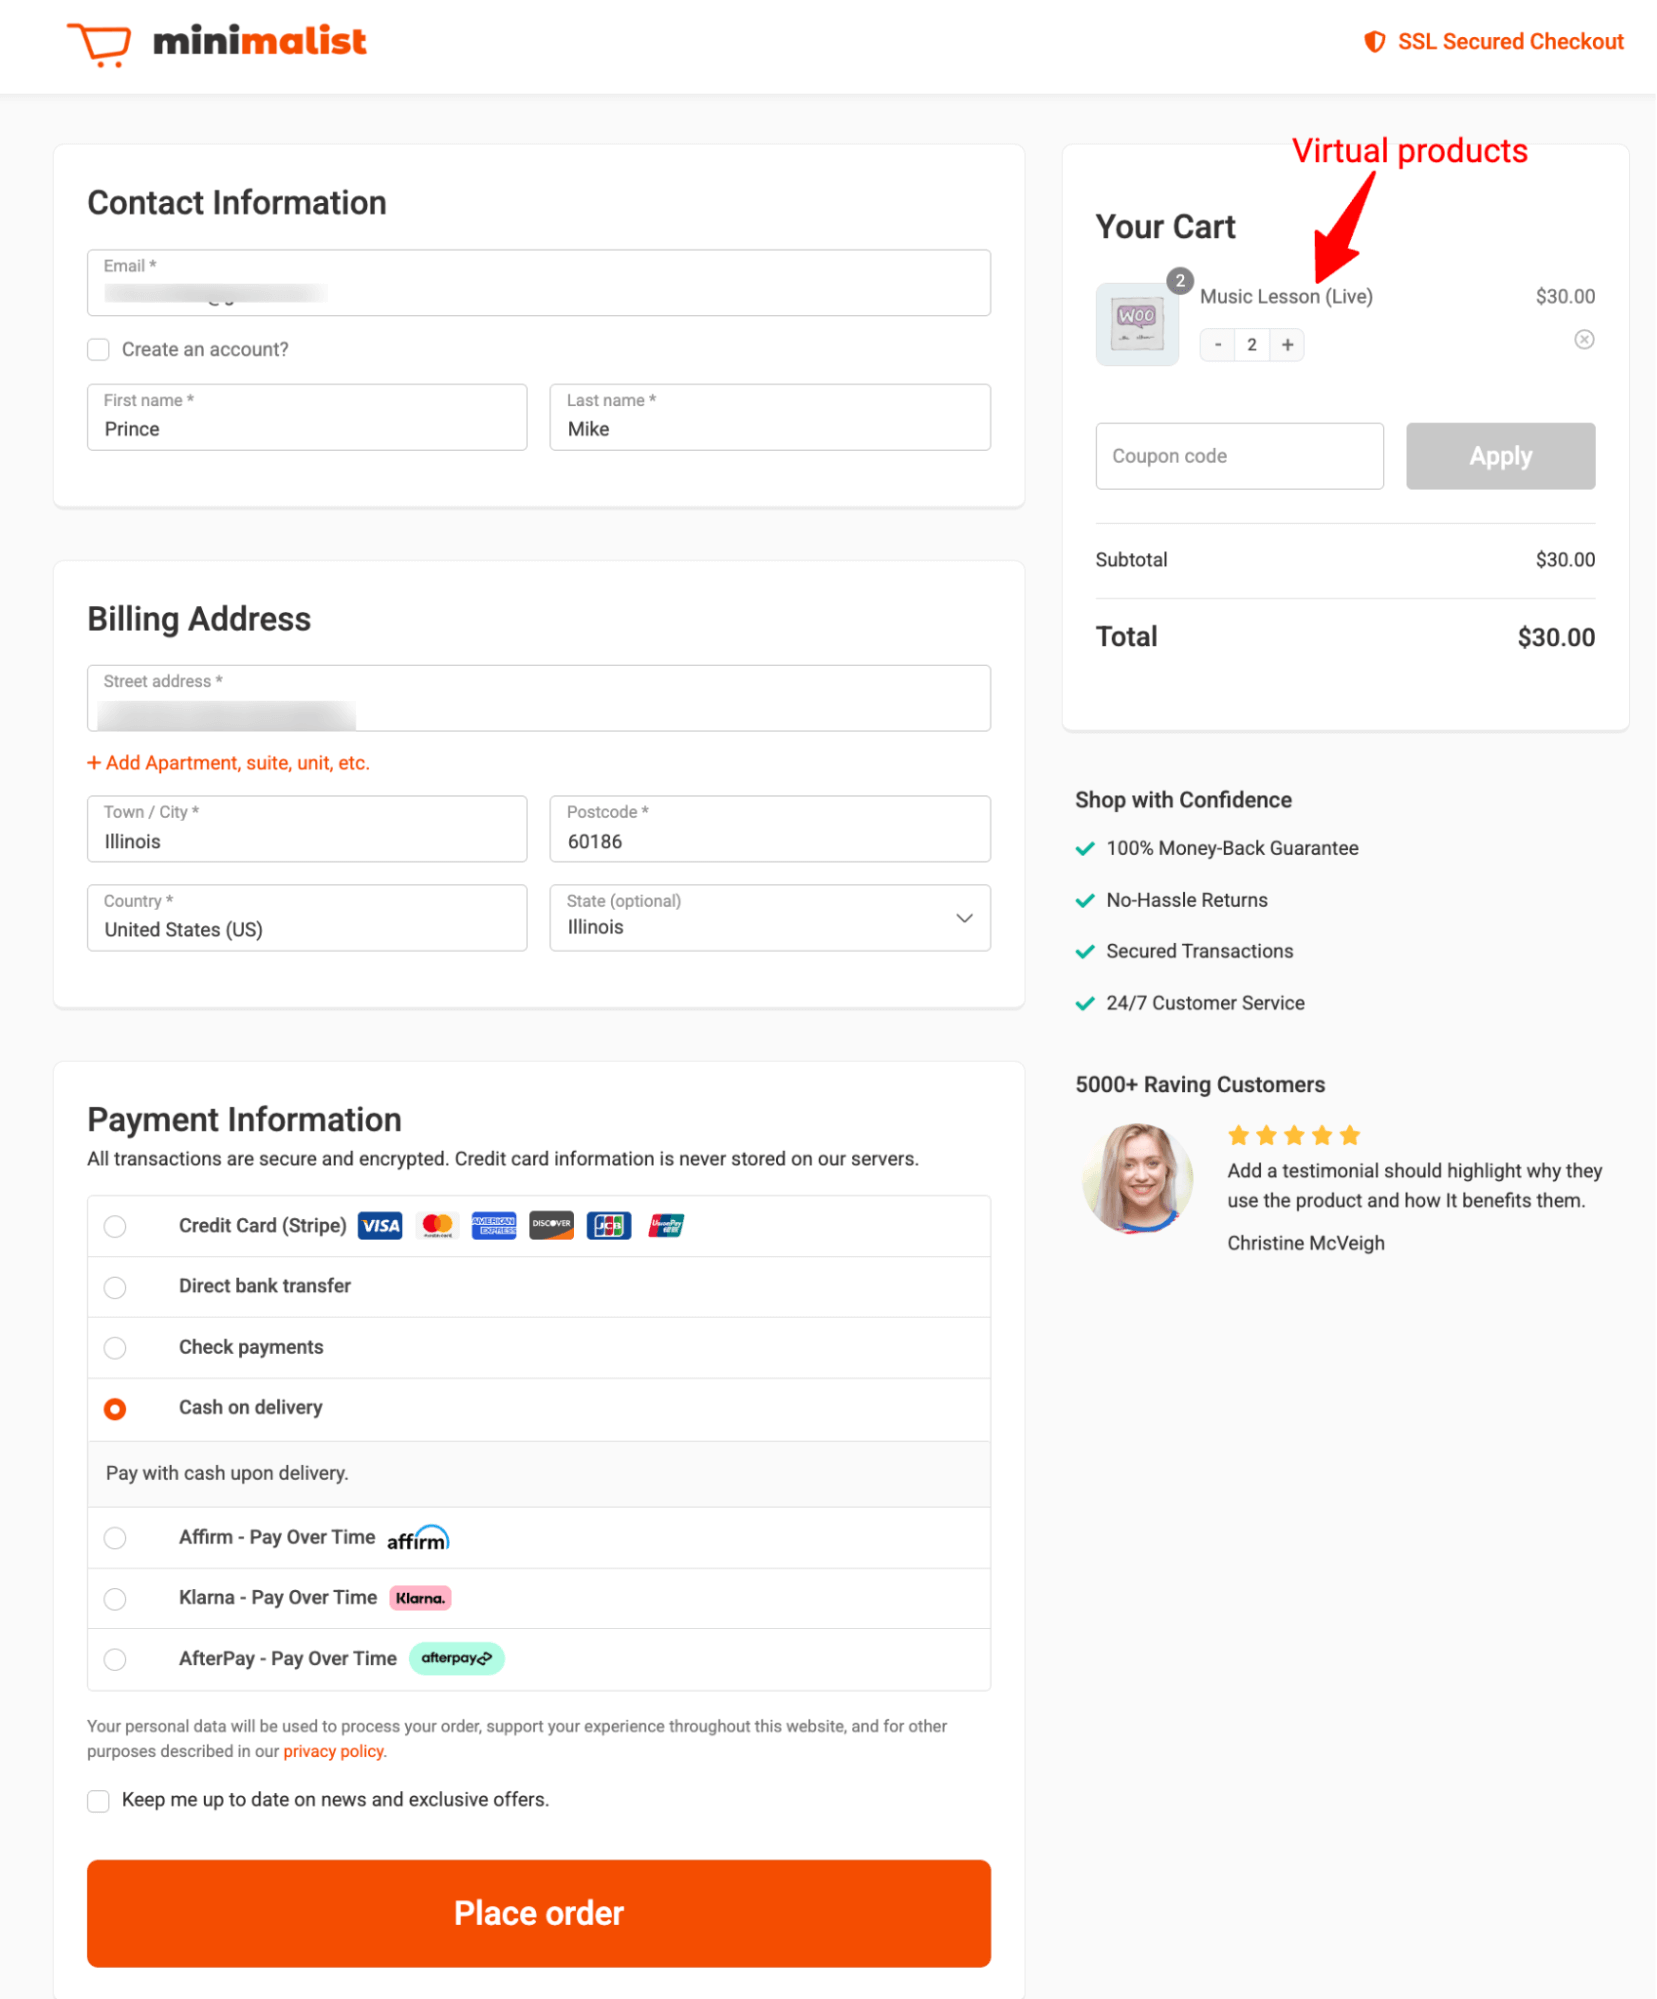
For example, for a virtual product checkout, we created a single-page checkout that includes only the contact details and billing information sections, since shipping is not required.
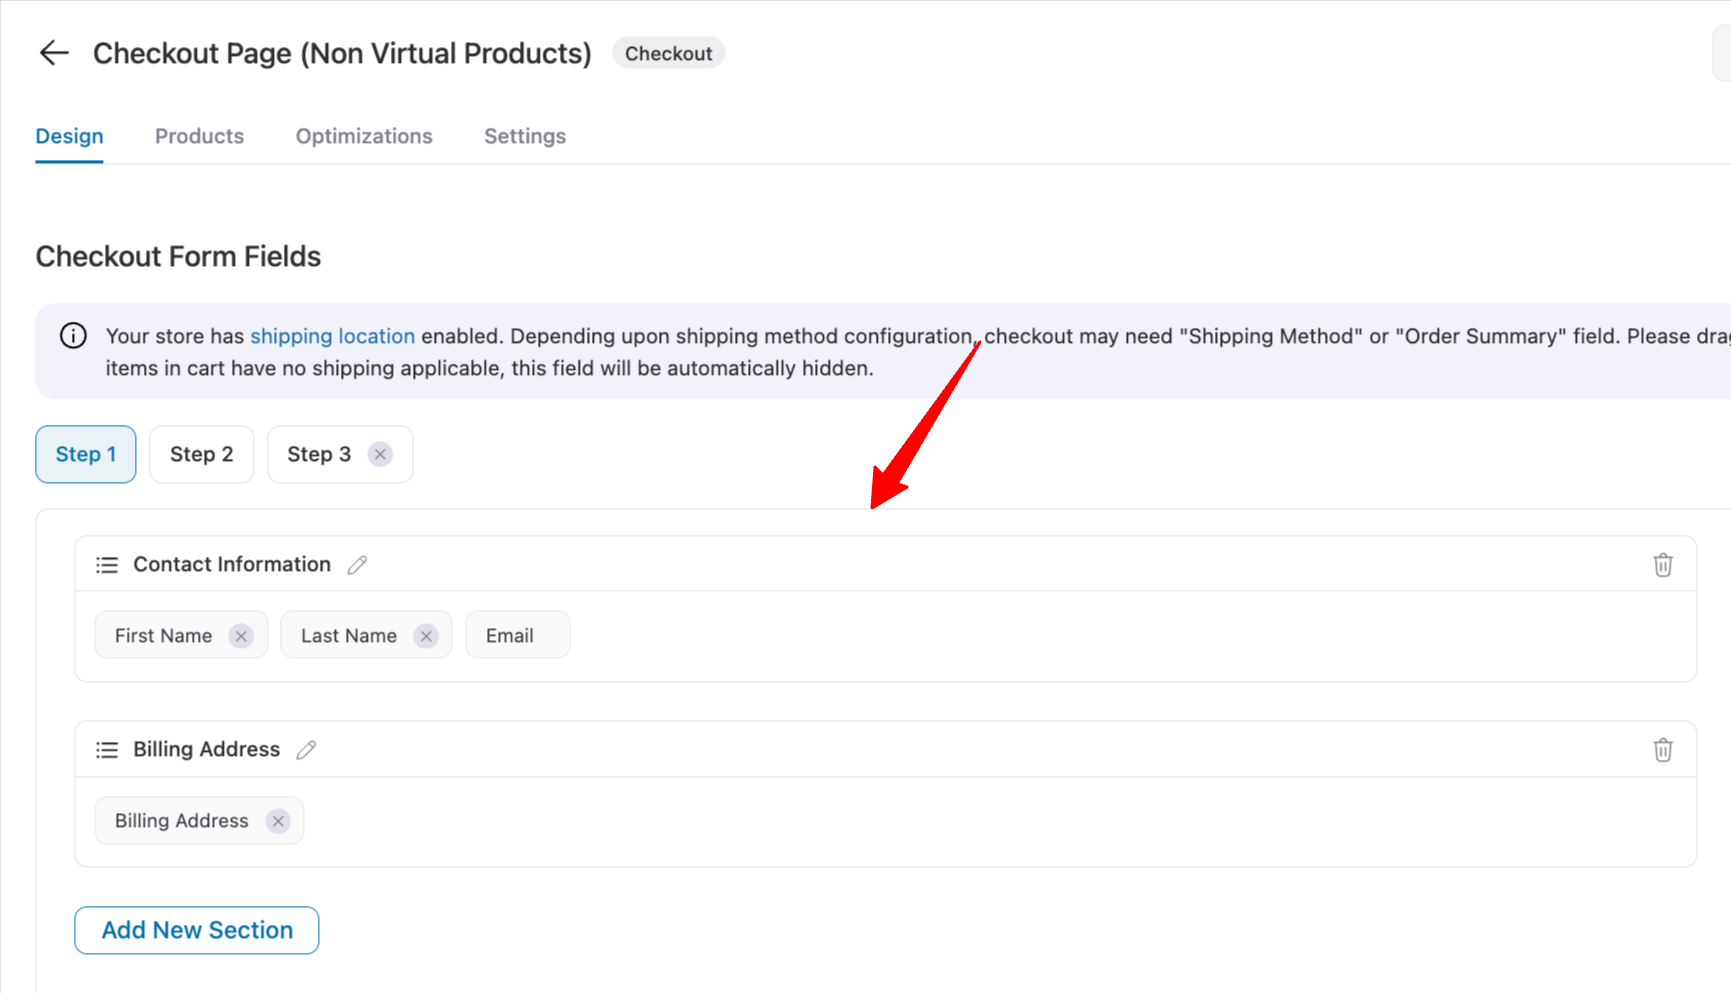
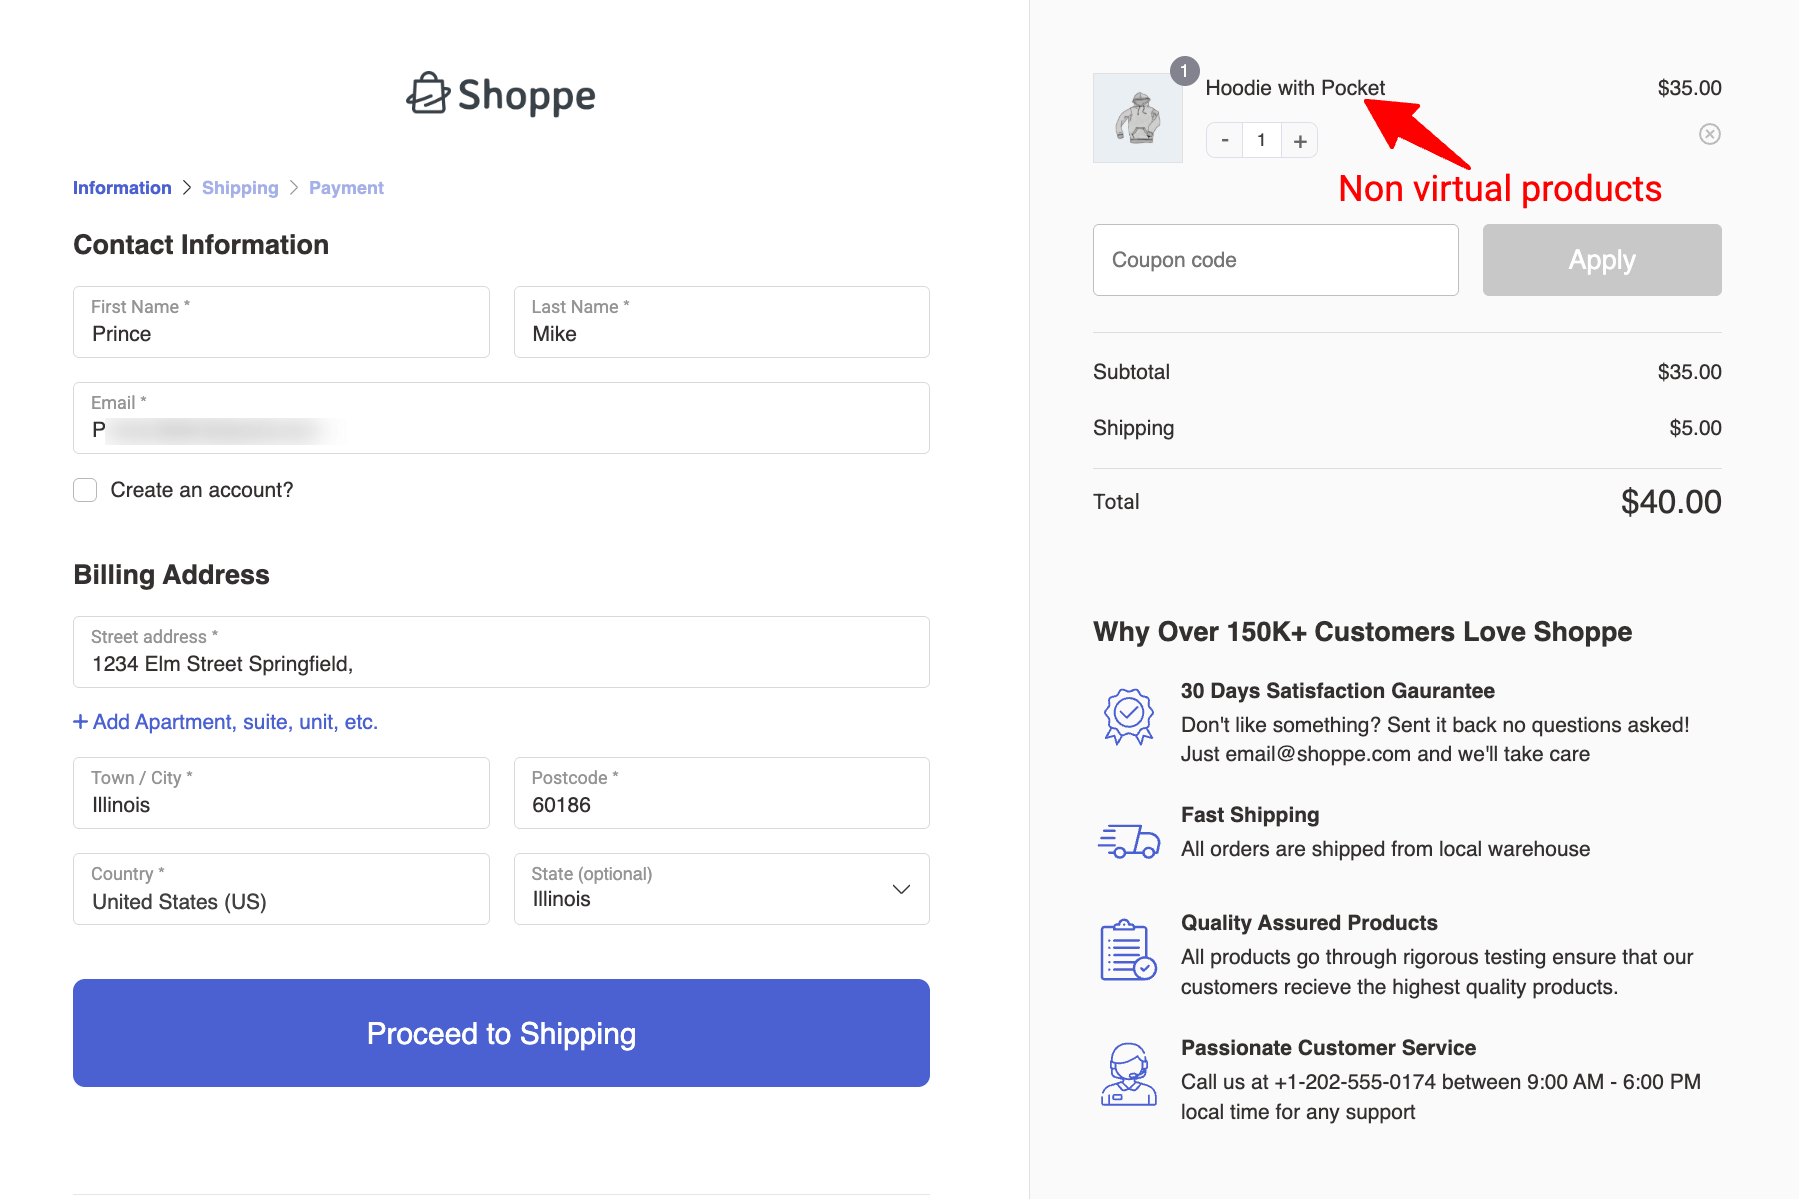
For non-virtual product checkout, we created a two-step checkout that includes customer information, billing, and shipping details.
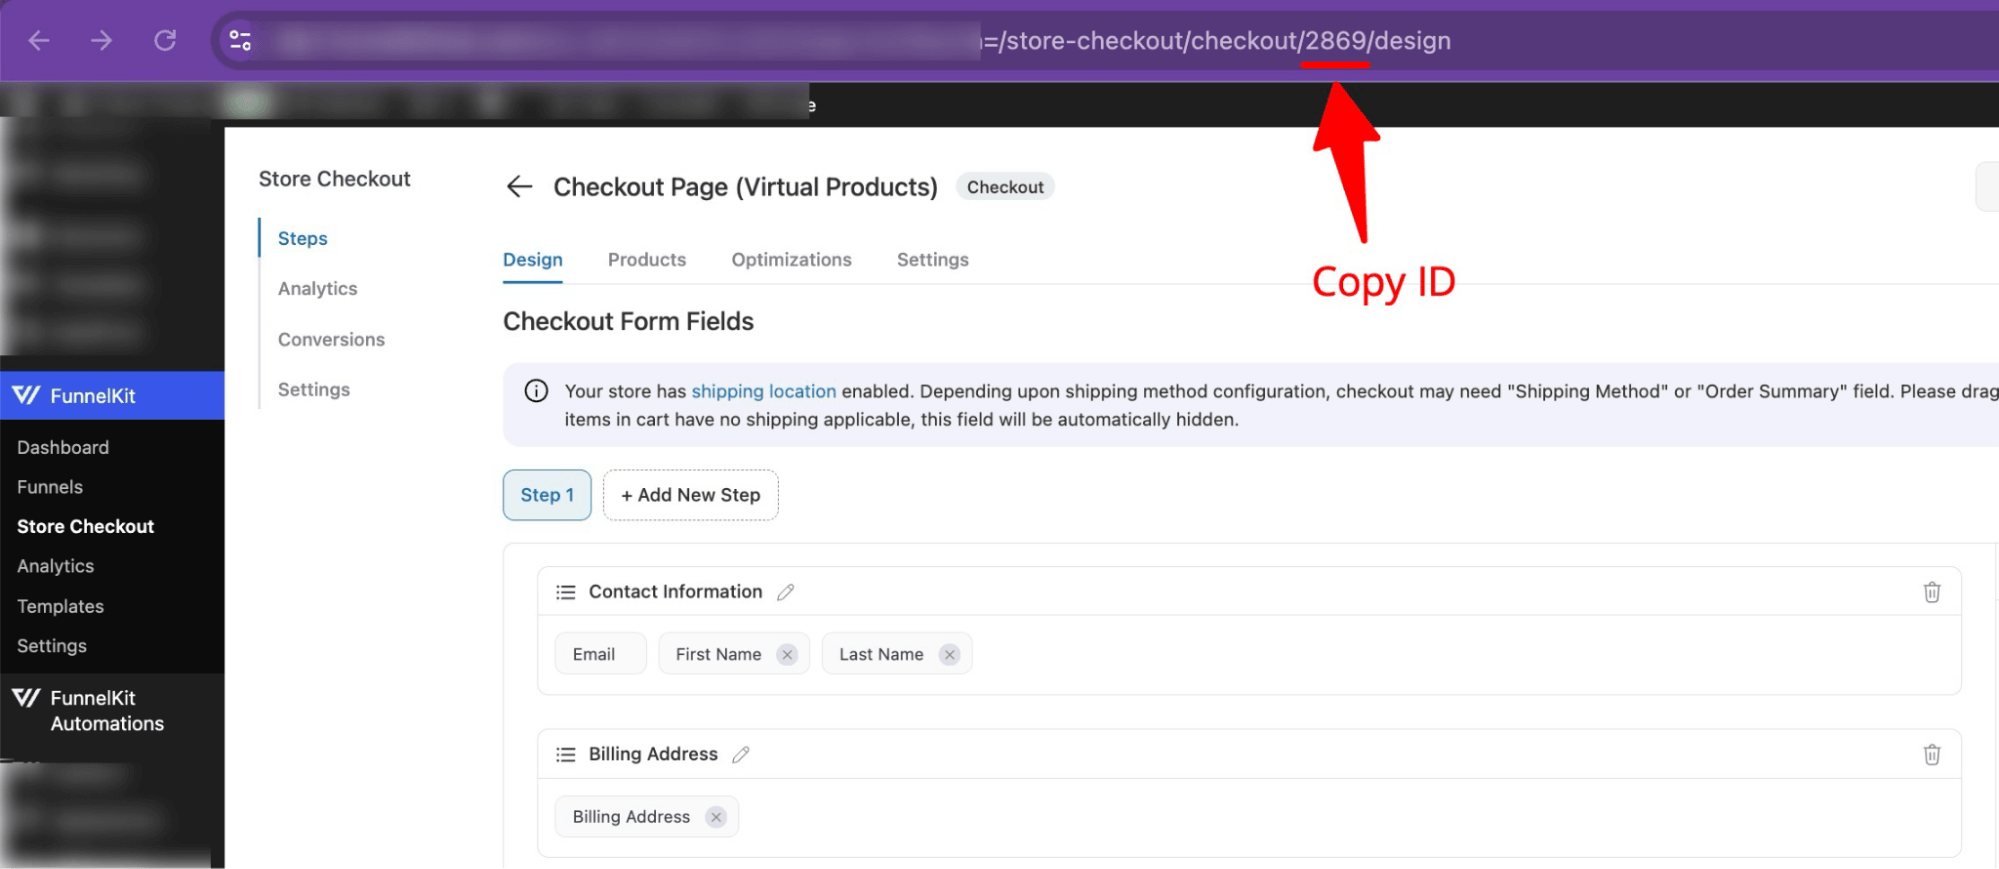
Step 2: Copy the different checkout page ID
Next, you need to copy the IDs of both checkout pages.
For this, click any of the pages.
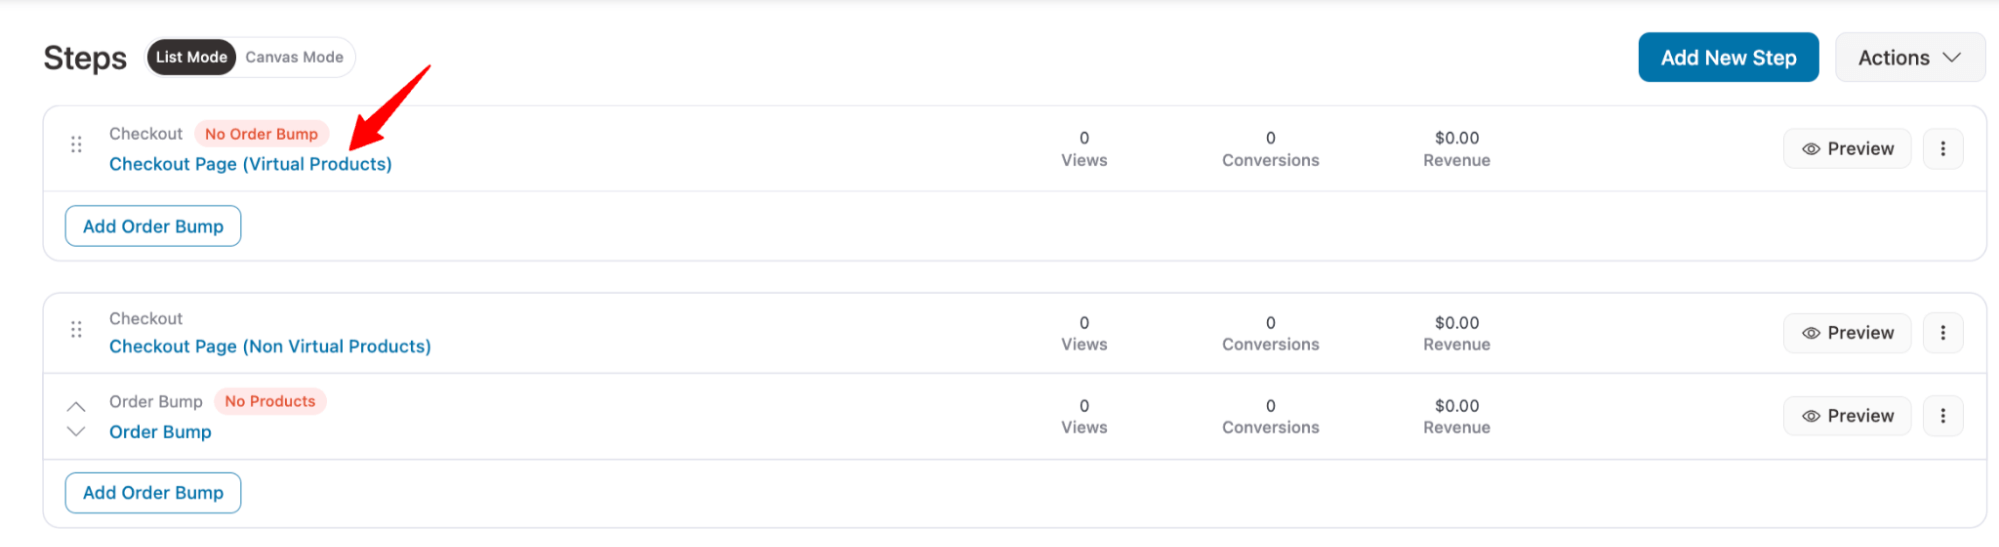
From the URL, locate and copy the checkout ID. The ID is the number that comes after checkout/ and before /design.
Step 3: Add custom code
Now add the following custom code to your store using a code snippet plugin.
Here is the code link:
add_filter( 'wfacp_global_checkout_page_id', function ( $id ) {
    $virtual_product_checkout_id=2930; // Make new checkout page for only virtual product and assign here
	$non_virtual_product_checkout_id=2895; // Make a new checkout page for non virtual product and assign here

	if ( 0 == $id  || is_null( WC()->cart )) {
		return $id;
	}

	$cart_count=WC()->cart->get_cart_contents_count();
	if($cart_count > 1){
		return $id;
	}
	if ( WFACP_Common::is_cart_is_virtual() ) {
		return $virtual_product_checkout_id;
	}
	return $non_virtual_product_checkout_id;


} );
In this code snippet, you’ll need to make two changes:
- The $virtual_product_checkout_id should be set to the page you created for virtual products.
- The $non_virtual_product_checkout_id should be set to the page you created for physical products.
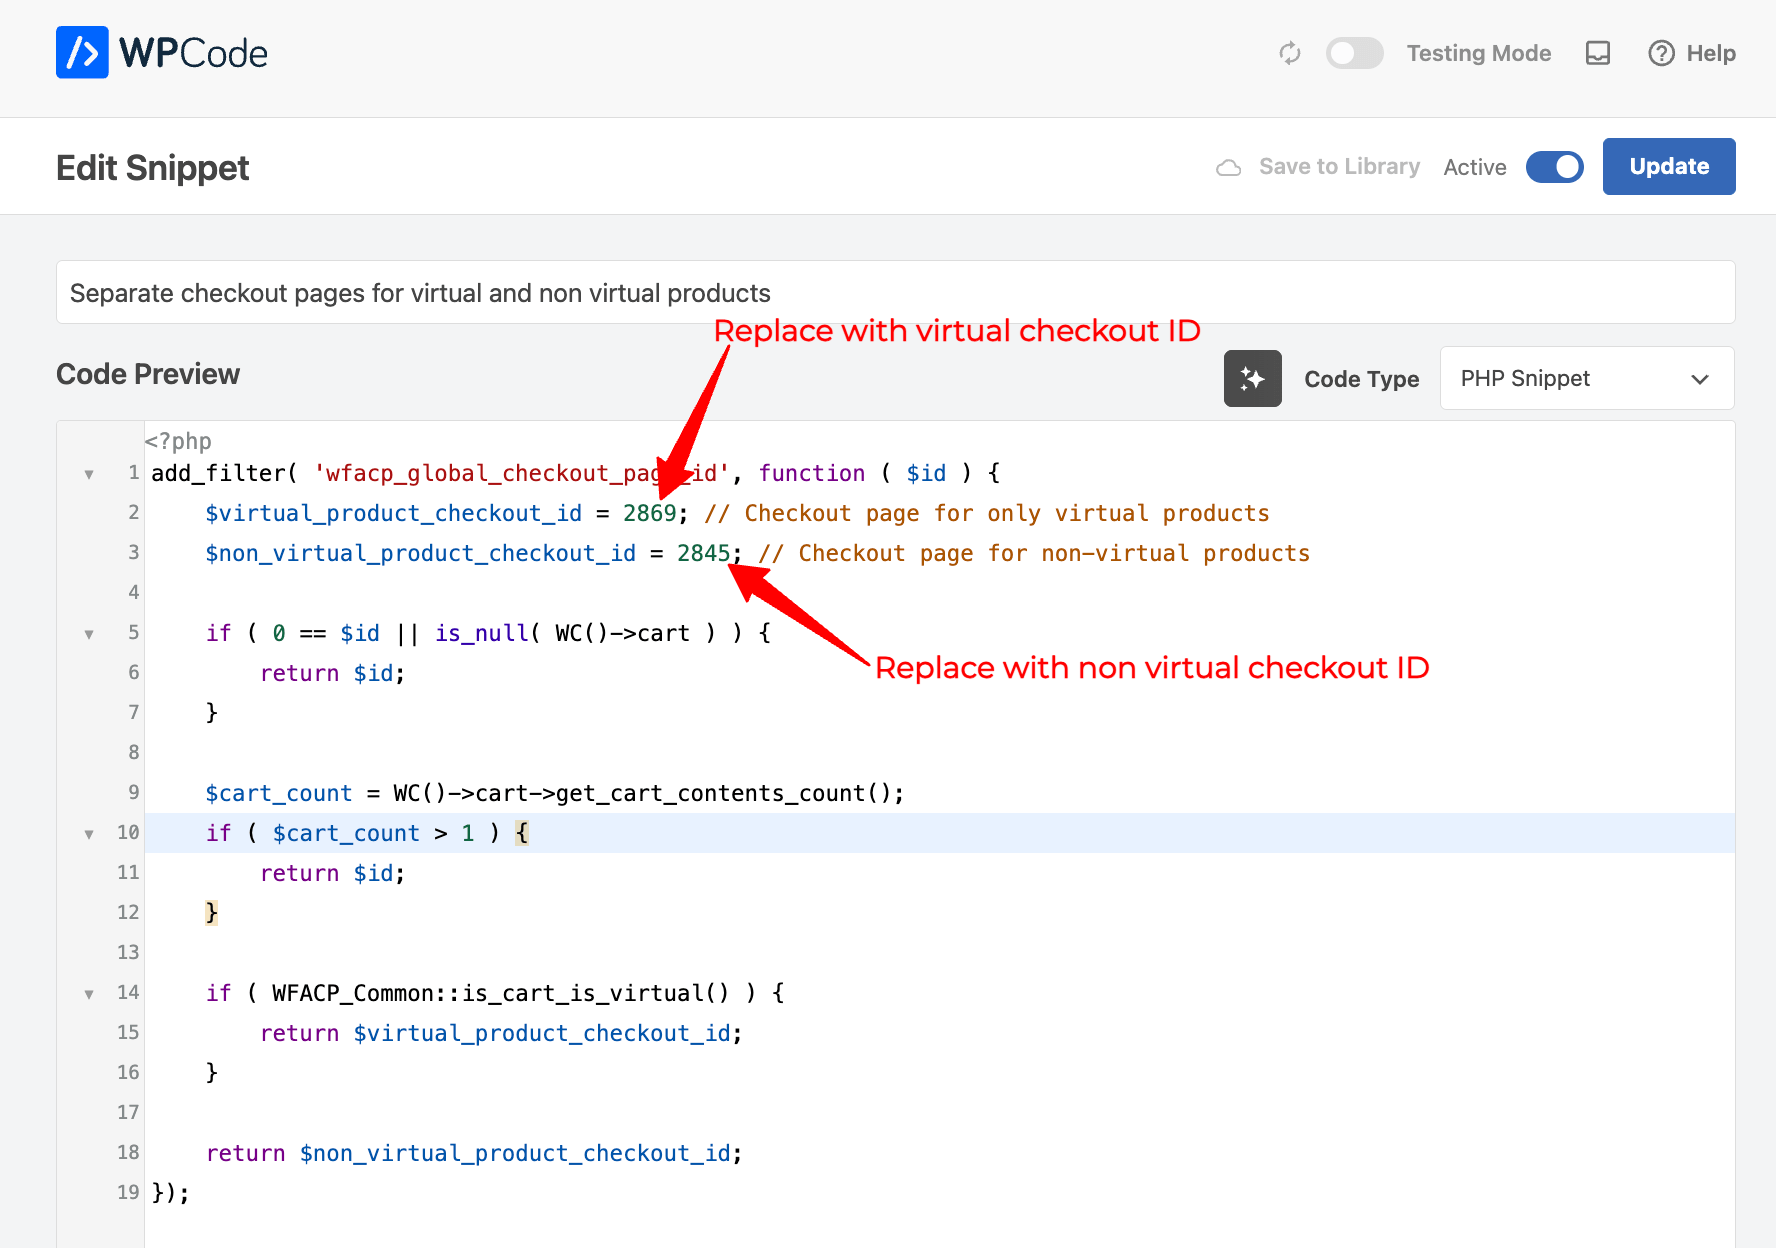
Make sure to save the changes, and the code snippet is activated.
Step 4: Test the process
Now, try placing two different orders: one with a virtual product and another with non-virtual products in the cart to see if different checkouts are showing up and working properly.
For the virtual product, the assigned virtual checkout will show up.
For non-virtual products, the other one should show up. In our case, the multi-step checkout assigned for non-virtual products is showing up.
This is how you can show different checkout pages for virtual and non-virtual products.


