
Quick Summary: A WooCommerce one page checkout cuts the friction that kills conversions on default multi-page checkouts. We tested 7 plugins on live stores, ranked the best free and paid options, and documented the exact 5-minute setup. Comparison table, optimization strategies, and setup walkthrough inside.
The default WooCommerce checkout is a conversion leak. Going towards Product Page → Cart Page → Checkout → Order Received forces buyers through four page loads, three redirects, and a dozen-plus form fields.
Baymard Institute data shows it's costing the average store close to 70% of its potential orders.
A WooCommerce one page checkout fixes this by collapsing the entire purchase into a single screen.
There are fewer clicks, fewer redirects and even fewer reasons to leave. For most store owners, it's the highest-leverage conversion change you'll make this year.
In this article, we'll discuss what WooCommerce one-page checkout is, how it differs from regular checkouts, and how to build your own within a few minutes.
🎥 Watch this quick tutorial to get started:
Table of Contents
- 1 What is One Page Checkout in WooCommerce?
- 2 7 Best WooCommerce One Page Checkout Plugins (2026)
- 3 How to Create a One Page Checkout in WooCommerce? (Step-by-Step)
- 4 5 Optimization Tips to Increase WooCommerce One-Page Checkout Conversions
- 5 4 Best One Page Checkout Templates to Skyrocket Conversions
- 6 Frequently Asked Questions (FAQs)
- 7 Start Reducing Drop-Offs With a WooCommerce One Page Checkout!
What is One Page Checkout in WooCommerce?
A WooCommerce one page checkout is a single-page layout that combines product selection, customer details, shipping and payment into one screen.
It replaces the default multi-page Cart → Checkout → Order flow, reducing cart abandonment by removing redirect-based friction.
As the page eliminates distractions and replaces them with trust symbols and social proof, customers see the products' actual benefits.
These little details help customers make a buying decision and complete their purchase quickly.
All these factors contribute to why modern businesses prefer one-page checkouts!
7 Best WooCommerce One Page Checkout Plugins (2026)
Here's a quick summary of one page checkout plugins.
| Plugin | Embed on any page | Page builder support | A/B testing | Order bumps | Rating on WordPress org and Other Sites | Starting price |
|---|---|---|---|---|---|---|
| FunnelKit Funnel Builder | ✅ Yes | Elementor, Divi, Bricks, Oxygen, Gutenberg | ✅ Yes (Pro) | ✅ Yes (Pro) | 5/5 (990+) | Free version available. Pro starts at $99.50/year. |
| CartFlows | ✅ Yes | Elementor, Beaver, Gutenberg | ✅ Yes (Pro) | ✅ Yes (Pro) | 4.8/5 (450+) | Free version. Pro starts at $99/year (renews at $129/year). |
| Fluid Checkout | ❌ No (rebuilds the default checkout) | Theme-dependent | ❌ No | ❌ No | 4.8/5 (450+) | Free plan available. Premium plan starts at €129/year. |
| Direct Checkout for WooCommerce | ❌ No (has cart to checkout shortcut) | Built-in options | ❌ No | ❌ No | 4.9/5 (150+) | Free version available. Pro starts at $49/year. |
| One Page Quick Checkout for WooCommerce | ✅ Yes | Built-in settings | ❌ No | ❌ No | 4.5/5 (8) | Free plan. Pro starts at $39/year. |
| YITH One-Click Checkout | ✅ Yes | Customization settings | ❌ No | ❌ No | 4.4/5 (85+) on YITH | Starts at $69.99/year. |
| WooCommerce One Page Checkout | ✅ Yes | Limited customization | ❌ No | ❌ No | 2.3/5 (10) on WooCommerce | $79/yr |
Head to our detailed FunnelKit vs CartFlows comparison guide.
Let's look into these plugin in detail.
1. FunnelKit Funnel Builder
Best for: Beginners and advanced stores wanting a complete checkout and funnel solution to grow their online store.
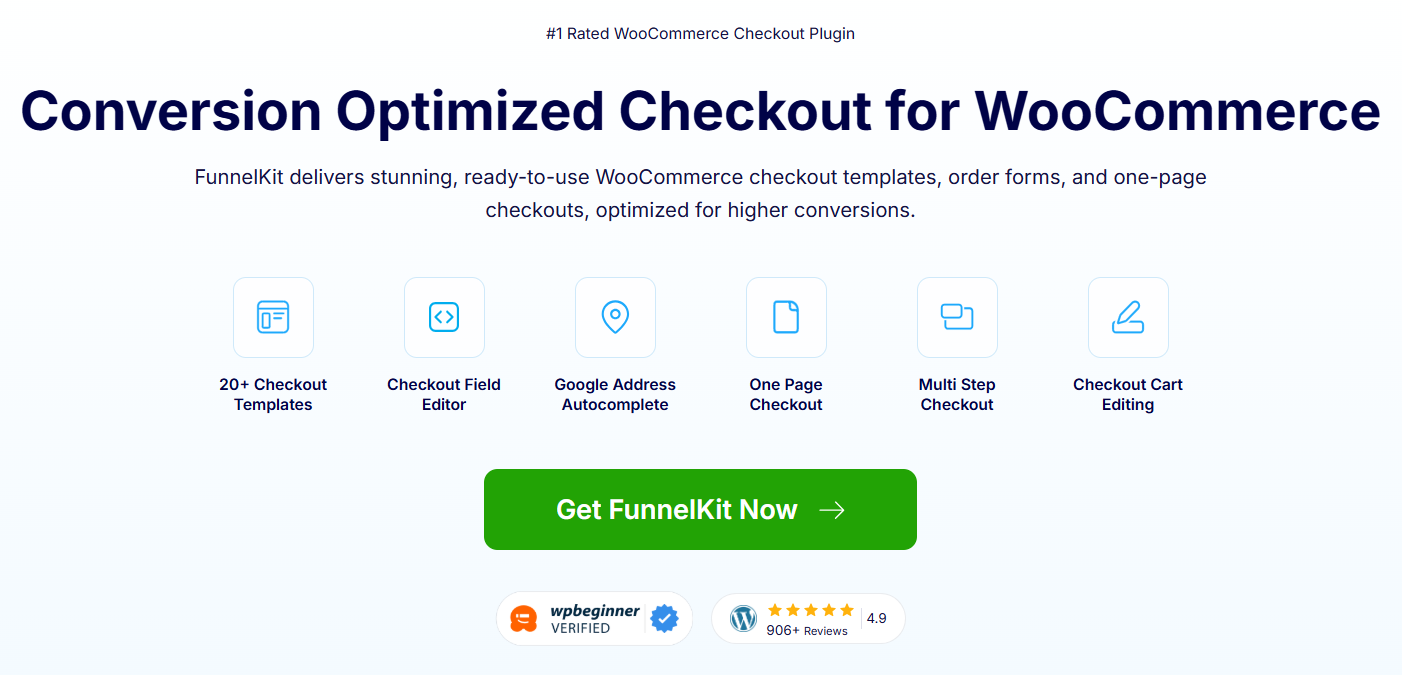
FunnelKit is a complete WooCommerce funnel builder with one-page checkout templates, a drag-and-drop checkout field editor, a side cart, upsells, and analytics.
It features ready-to-use Shopify-style, multi-step, product-specific checkouts and order form templates.
Plus, you can customize your WooCommerce one-page checkout templates with any page builder, such as Elementor, Divi, Bricks, Oxygen, Gutenberg, and more.
Pros
- Checkout optimizations: Optimize your WooCommerce single-page checkouts with express payment buttons such as Apple Pay and Google Pay, Google address autocomplete, auto-apply coupons, and more.
- Drag-and-drop checkout field editor: Add, remove, edit, or rearrange the fields and sections on your checkout form to speed up the process and reduce cart abandonment.
- A/B testing and detailed analytics: A/B test all the elements of your one-page checkout by setting up multiple variations, viewing detailed insights, and declaring the winning variant.
Cons
- Limited site usage: FunnelKit’s most popular ‘Professional’ plan is limited to only three websites.
Pricing
- FunnelKit offers a free (lite) plan on WordPress.org
- The premium version starts at $99.50 yearly
Performance
- FunnelKit loads fast despite offering advanced features. Caching and optimized scripts ensure smooth performance even for high-traffic stores.
2. CartFlows
Best for: Sales funnel builders running landing-page-driven traffic to single products.
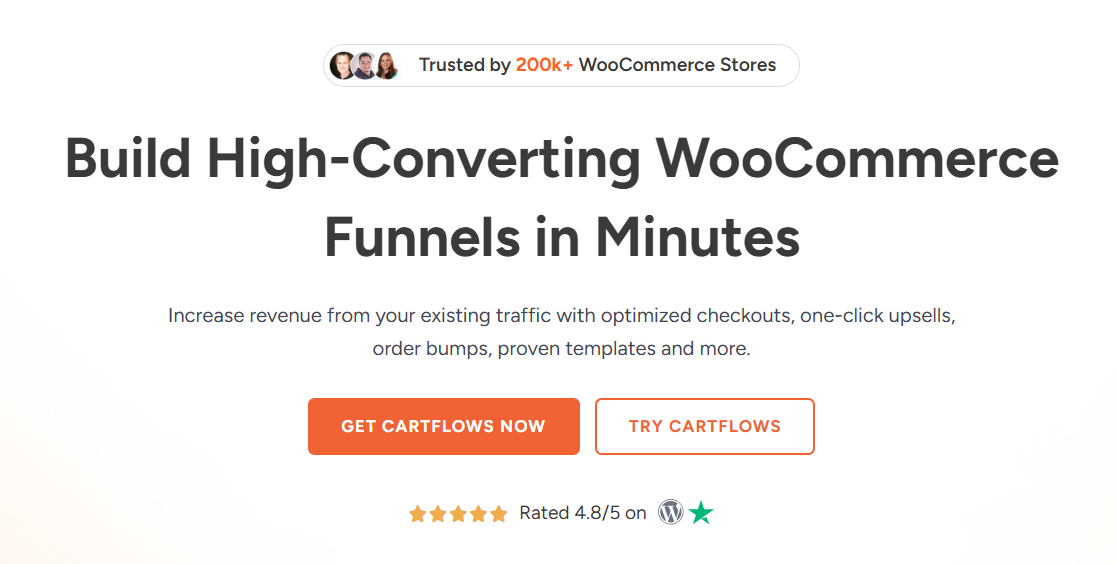
CartFlows is a popular WooCommerce funnel builder with one page checkout templates, order bumps, and split testing.
It ships with a template library for one-step and multi-step checkouts, as well as pre-checkout offer pages, all of which are editable in Elementor, Beaver Builder, or Gutenberg.
Pros
- Funnel-first approach: Build complete sales funnels, including opt-in pages, checkout, order bumps, one-click upsells, and thank-you pages.
- A/B split testing: Test entire funnel steps against each other and route traffic to the winner.
- Order bumps and one-click upsells: Increase average order value by offering complementary products at checkout and post-purchase.
Cons
- Limited block-checkout compatibility: Recent reviews flag conflicts with WooCommerce's new Cart and Checkout blocks; some stores need to fall back to shortcode-based checkout.
- Most features locked behind Pro: The free version is functional, but order bumps, A/B testing, and most templates require the Pro license.
- Limited features: Doesn't include multi-product upsells, dynamic shipping and tax recalculation on upsells, social proof on order bumps, one-click product upgrades, etc.
Pricing
- CartFlows offers a free version on WordPress.org
- The Pro plan starts at $99/year (renews at $129/year)
Performance
- CartFlows performance depends heavily on how many funnel steps and third-party integrations you stack. On stores with multiple active funnels, audit script loading and exclude funnel URLs from aggressive caching.
3. Fluid Checkout
Best for: Stores that want to rebuild their default checkout as a clean, mobile-first one-page flow.
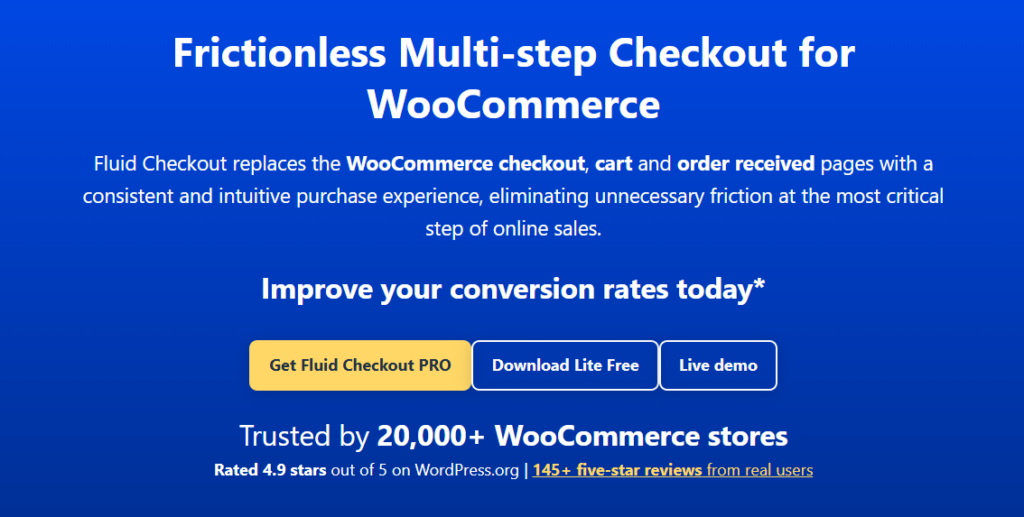
Fluid Checkout lets you customize your default WooCommerce checkout page to make it more optimized.
Instead of embedding checkout on product or landing pages, it rebuilds the default WooCommerce checkout into a streamlined, mobile-optimized one-page experience.
Pros
- Genuinely production-grade Lite version: The free plugin handles most use cases without forcing an upgrade.
- Mobile-first design: Forms are optimized for small screens, with proper input types and tap targets out of the box.
Cons
- Cannot embed checkout on a product or landing page: It only rebuilds the default /checkout/ page, which is not a fit for funnel-driven stores.
- Order bumps: No way to add order bumps or one-click upsells.
- No A/B testing: There's no native split testing for layout or copy variants.
Pricing
- Fluid Checkout offers a free (Lite) version on WordPress.org.
- The Premium plan starts at €129/year.
Performance
- Fluid Checkout loads minimal scripts, doesn't add bloated UI libraries, and stays out of the way of caching plugins like WP Rocket and LiteSpeed.
4. Direct Checkout for WooCommerce
Best for: Single-product stores or budget setups testing the concept.
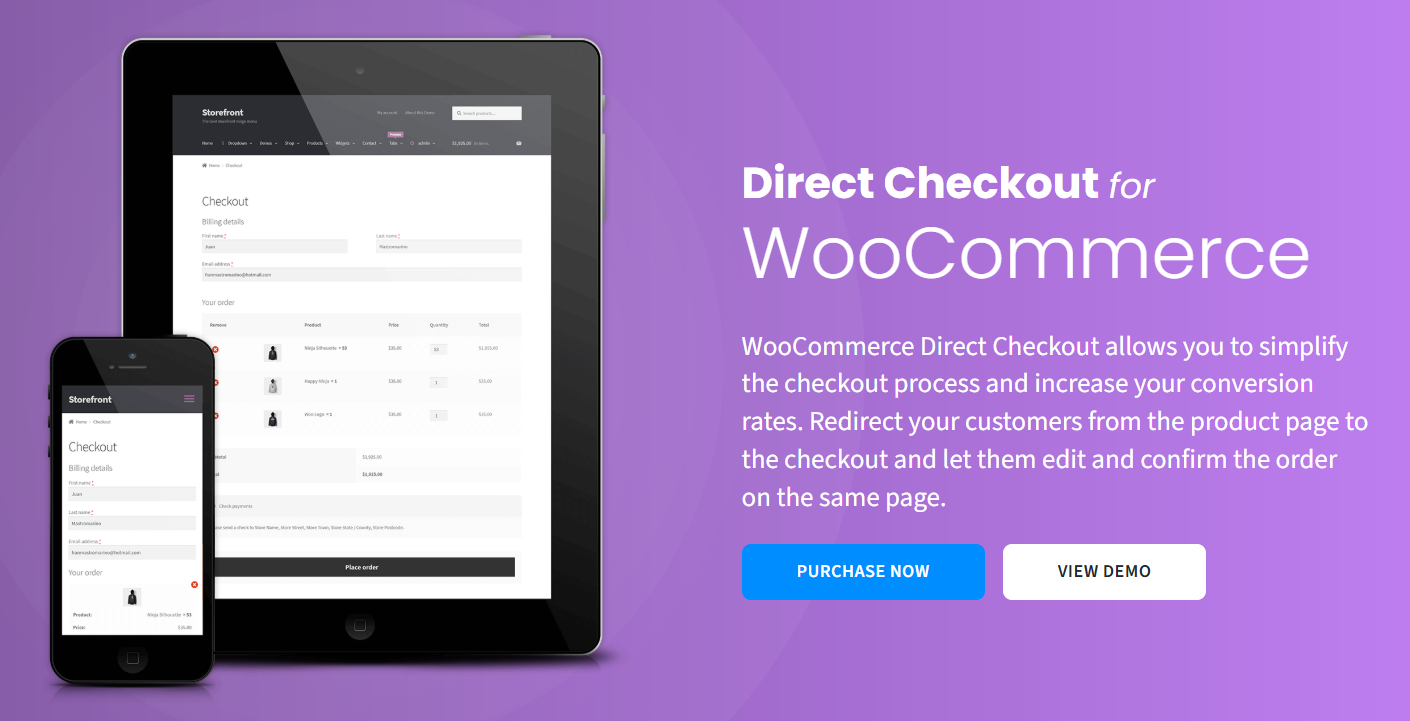
The Direct Checkout for WooCommerce plugin streamlines your checkout process to drive higher conversion rates.
You can easily remove unnecessary fields from your checkout form to speed up the process and increase conversions.
Its Ajax add-to-cart functionality allows users to add catalog items to their carts without reloading the entire page.
Pros
- Faster checkout experience: This redirects users to your products directly in one step. You can modify the items and enter information on the same page.
- Remove unnecessary checkout form fields: Speed up the shopping process by removing them on your default WooCommerce checkout page.
Cons
- No pre-built checkout page templates: You don’t get any pre-built templates or the ability to create your own on-brand checkout pages with custom branding.
- Doesn’t allow checkout page optimization: It doesn’t have any option to optimize your one-page checkout pages to enhance conversions in your WooCommerce store.
Pricing
- Direct Checkout for WooCommerce offers free (lite) and premium versions, with the premium version starting at $49 annually.
Performance
- Lightweight and fast, but not scalable for complex or high-volume stores.
5. One Page Quick Checkout for WooCommerce
Best for: Budget-conscious store owners testing the one page checkout concept.
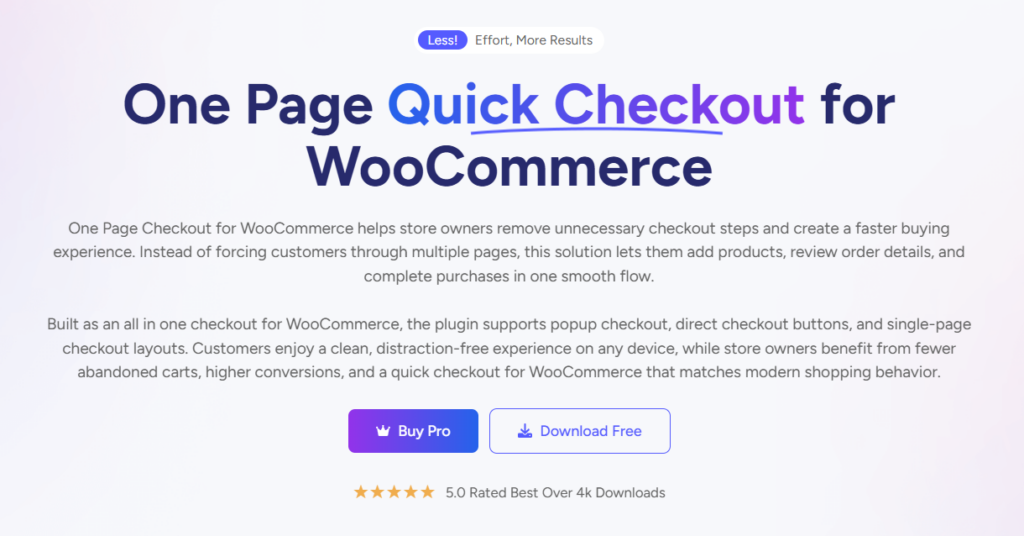
One Page Quick Checkout lets you place a basic one page checkout on any page using a shortcode.
It covers product selection aligned with the checkout form, AJAX-updated totals, and a working purchase flow, without the polish or feature depth of premium alternatives.
Pros
- Genuinely free: No upsells, no gating of core one-page checkout functionality.
- Simple shortcode setup: Drop [wc_one_page_checkout] shortcode on any page and you're all set up.
- Works with any theme: No theme-specific dependencies, no page builder required.
Cons
- No design customization: Inherits theme styles with no built-in design controls.
- Limited features: No order bumps, upsells, or A/B testing.
- Slow update cycle: Updates ship infrequently, which can lead to compatibility issues with newer WooCommerce releases.
Pricing
- The plugin is free on WordPress.org.
- A Pro version is available starting at $39/year for additional features.
Performance
- Loads quickly and adds minimal overhead, but the feature set is quite limited.
6. YITH WooCommerce One-Click Checkout
Best for: Stores with a high rate of returning customers who want to bypass the cart entirely with a "Buy Now" button.
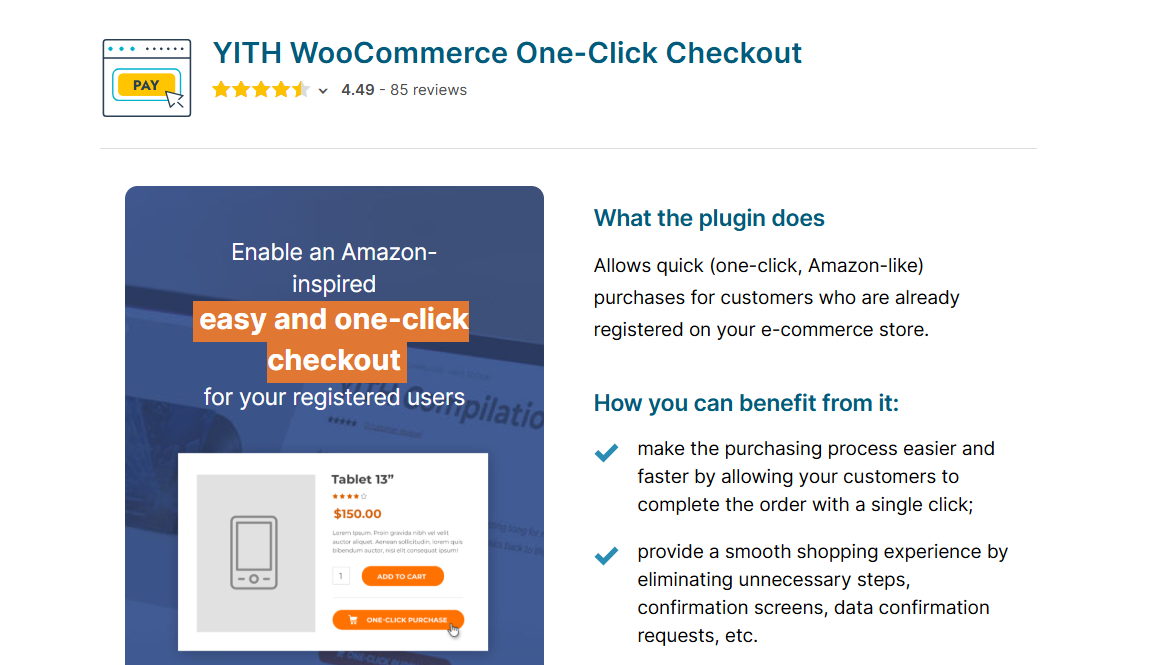
YITH One-Click Checkout adds a "Buy Now" button to your product pages that skips the cart and sends logged-in customers straight to a pre-filled checkout or completes the purchase in literally one click for users with saved details.
It's not a traditional one-page checkout (it doesn't combine product selection with the checkout form). Instead, it eliminates the cart step for repeat buyers.
Pros
- Near-zero clicks for returning customers: Logged-in users with saved billing details can complete a purchase in one tap.
- Works with any product type: Compatible with simple, variable, and most product types out of the box.
- Customizable button placement: Add the buy now button to product pages, shop archives, or anywhere via shortcode.
Cons
- Limited benefit for first-time buyers: New customers still need to enter all their details. They just skip the cart page.
- No checkout form customization: You can't modify the checkout fields or layout.
- No order bumps or upsells: Not designed for funnel-style selling.
Pricing
- YITH does not offer a free version of this plugin.
- The premium version starts at $69.99/year.
Performance
- Lightweight because adding a button and a redirect path. Doesn't load heavy assets on non-product pages.
7. WooCommerce One Page Checkout (Official)
This WooCommerce plugin makes it easier for your users to view their product selection and checkout on one page.
Here, you can add or remove products from your cart and complete payment without leaving the checkout page.
It has different templates, powerful integrations, and shortcodes to design your one-page checkout pages.
Plus, you can create multiple landing pages and easily embed the checkout forms on them.
Pros
- Built-in templates: The plugin includes 4 built-in templates for adding product tables, product lists, pricing tables, and more.
- Curate your products: Set up featured, related, and other products to display on your checkout page.
Cons
- Lacks checkout page design customization: This plugin adds a little customization to the default WooCommerce page, but you can’t design or change the checkout form.
- Doesn’t allow checkout form field modification: You can’t modify the fields on your checkout form.
Pricing
- This plugin doesn’t provide a free version.
- Premium version costs $79 annually.
Performance
- It is lightweight because it doesn’t include heavy customization tools. Good choice for stores that prioritize simplicity.
We don't recommend this WooCommerce.com plugin because it is the worst-rated of the seven. We did not recommend it for any of the 200+ stores we audited in 2025-2026. So it's best to skip it.
How to Create a One Page Checkout in WooCommerce? (Step-by-Step)
To set up a WooCommerce one page checkout without writing any code, we will use FunnelKit Funnel Builder.
FunnelKit is a WordPress funnel builder that lets you replace the default WooCommerce checkout flow with a fully custom checkout page, including both multi-step and one-page layouts.
It offers a free version that includes checkout page templates you can import and customize with your favorite page builders.
The Pro plan lets you add features such as A/B testing, order bumps, one-click upsells, detailed analytics, and more.
Follow the step-by-step instructions below to create a single-page checkout:
Step 1: Create a new funnel and import a checkout template
Go to FunnelKit ⇨ Funnels and click on the ‘Create New Funnel’ button.
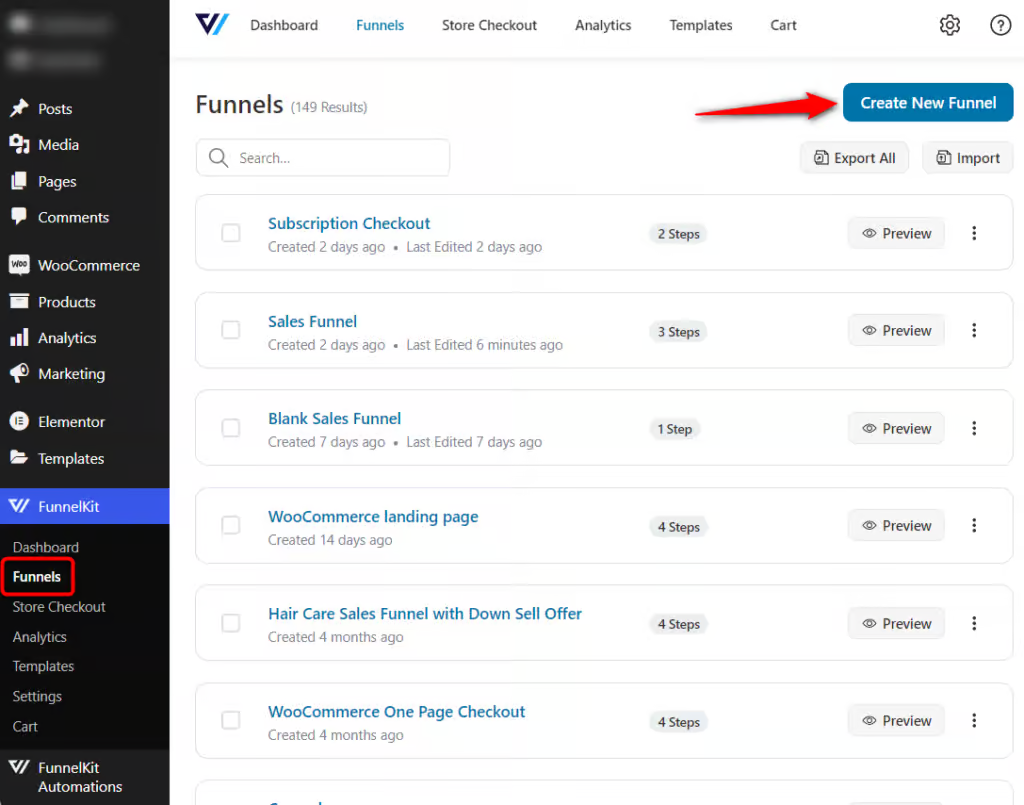
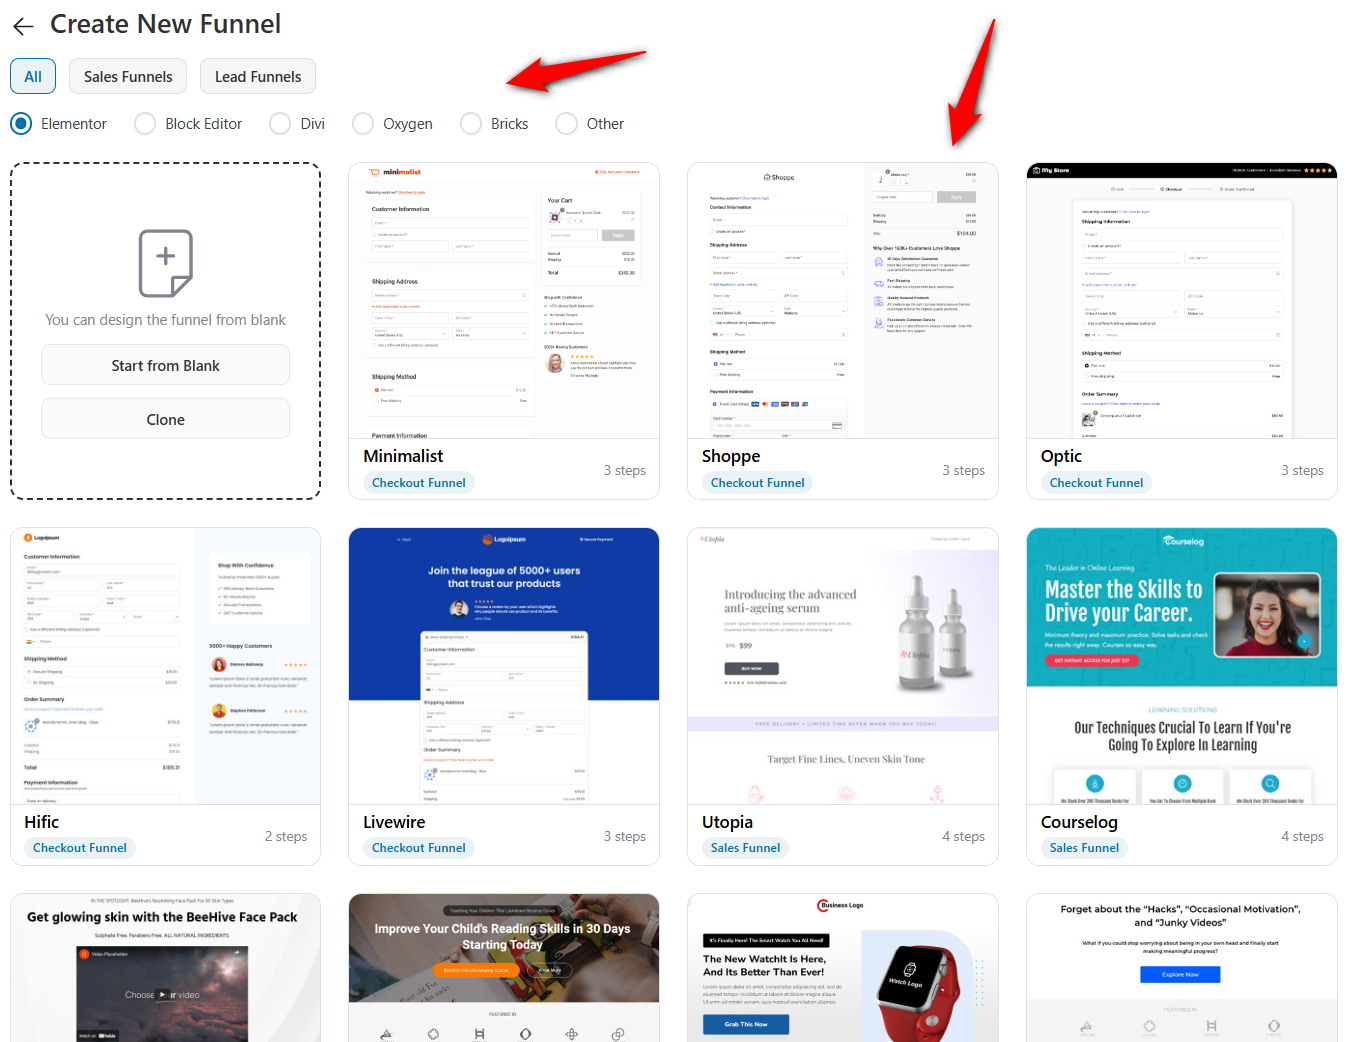
You’ll see a variety of ready-made one-page checkout templates. You can choose one that fits your brand, or start from scratch.
Choose the page builder among Elementor, Bricks, Divi, Oxygen, and the Gutenberg Block Editor. If you want to create it with another builder (e.g., Beaver Builder or Thrive), use shortcodes.
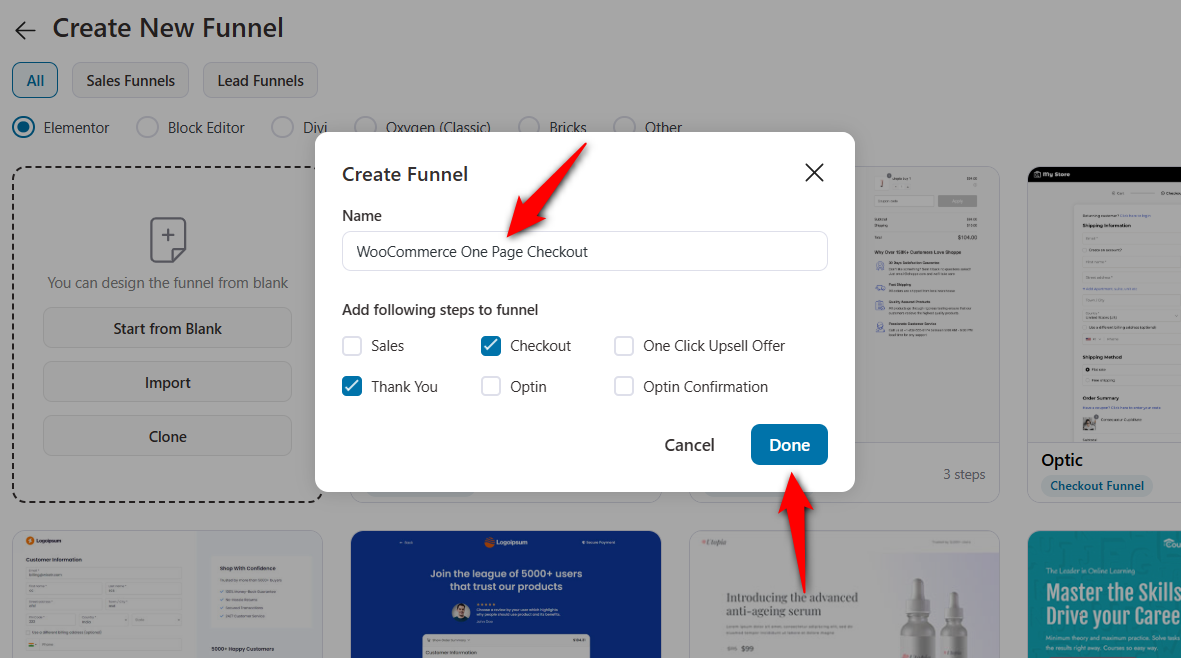
As an example, we’ll create this funnel from scratch. Give it a clear name, such as WooCommerce One-Page Checkout.
You can also choose which steps to include in the funnel, such as:
- WooCommerce Checkout Page
- Thank You or Order Confirmation Page
Once done, click ‘Done’ to create your funnel.
You now have a blank funnel set up in the workspace, ready to design your high-converting WooCommerce one-page checkout!
Click on your checkout page to start customizing it.
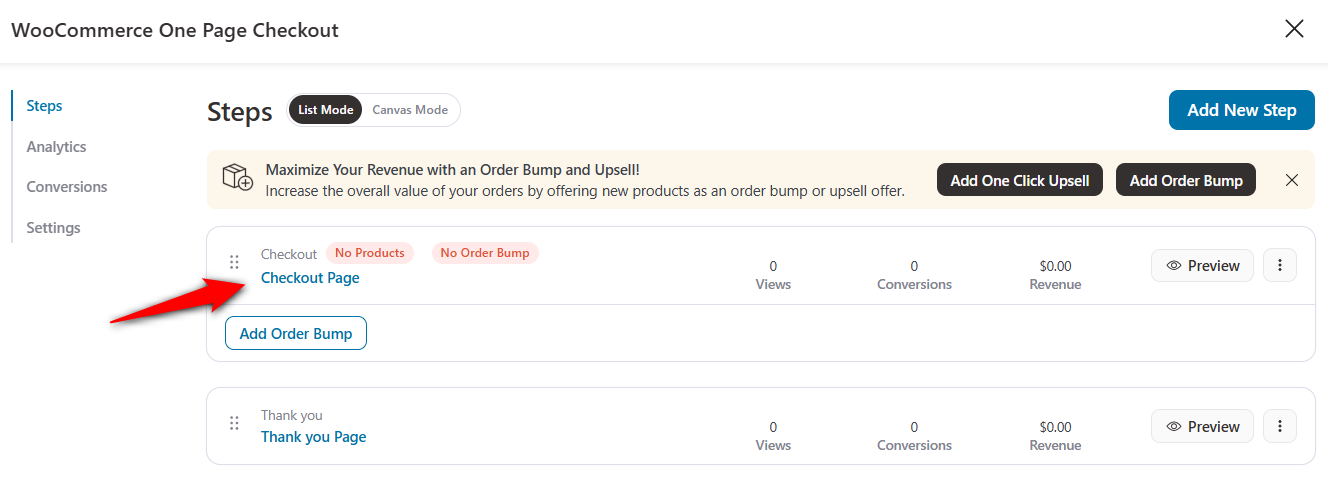
It’ll open up the checkout page templates. As an example, we’ve selected the ‘Closer’ template.
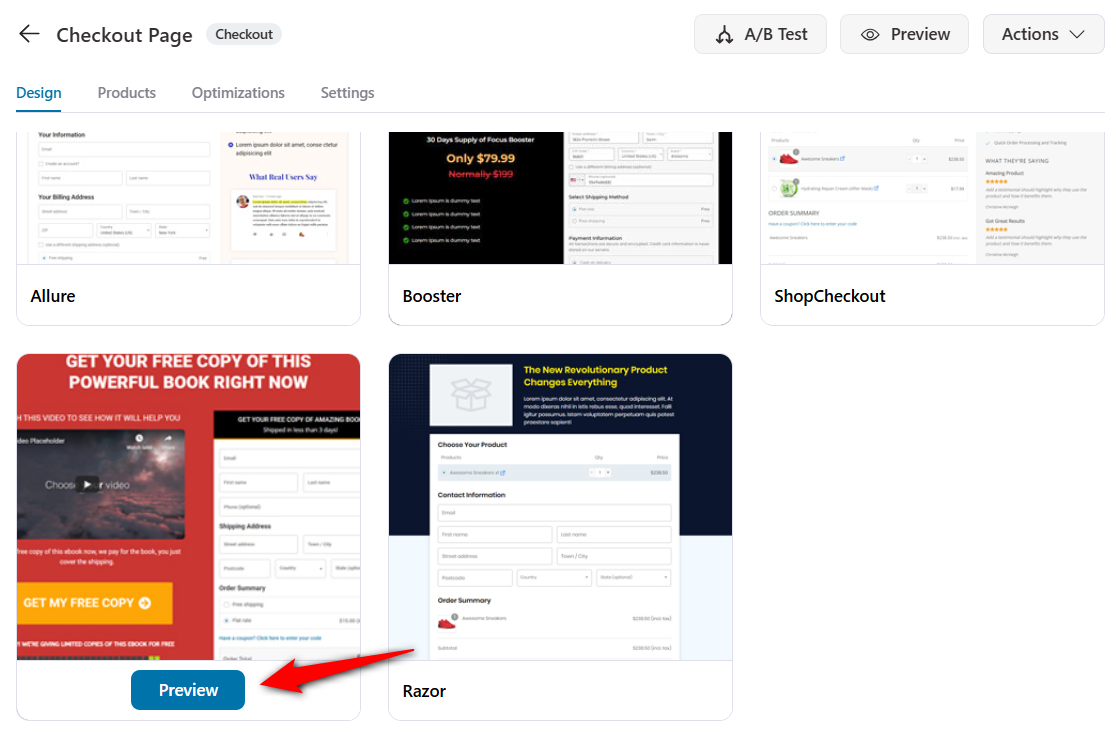
Select the number of steps you want and import this template.
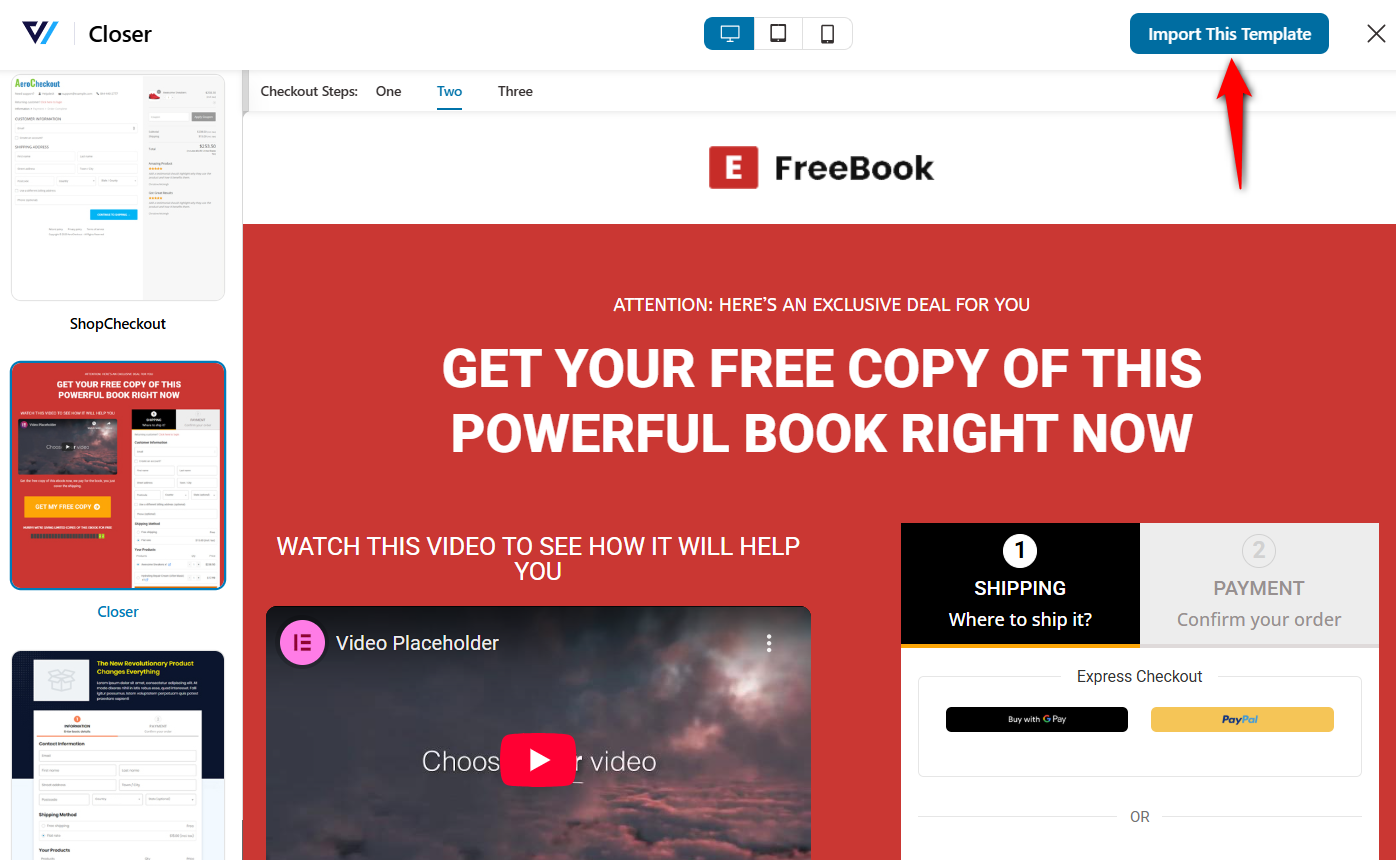
Your checkout page with this template will get imported.
Step 2: Add your products
In this section, we’ll look at how to add products to your WooCommerce one-page checkout.
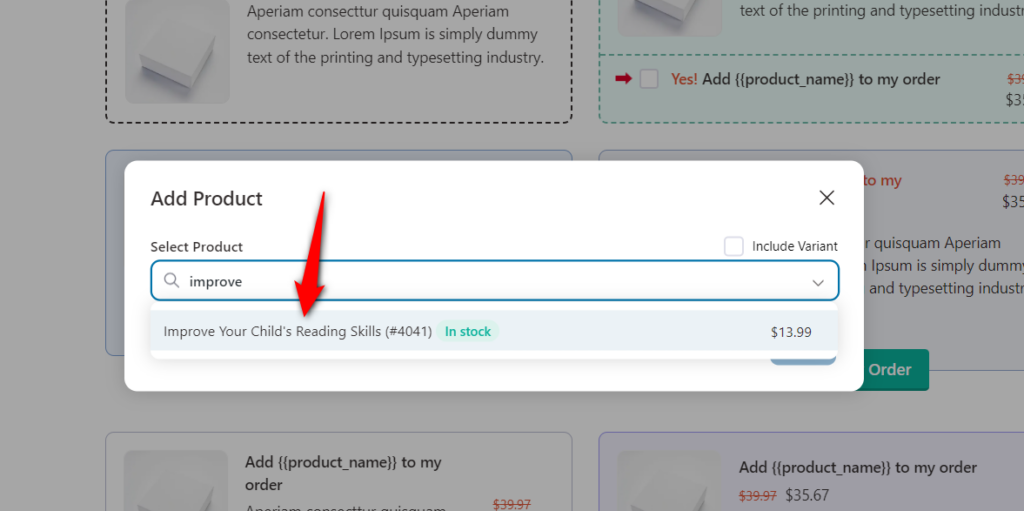
Go to the Products tab and click on the ‘Add Product’ button.
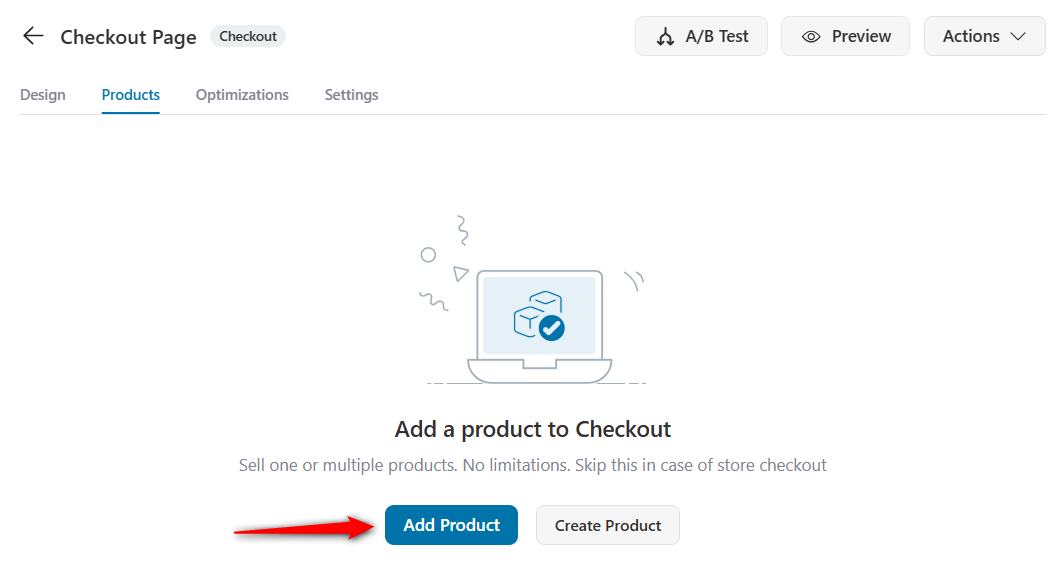
Enter the name of the product you want to add.
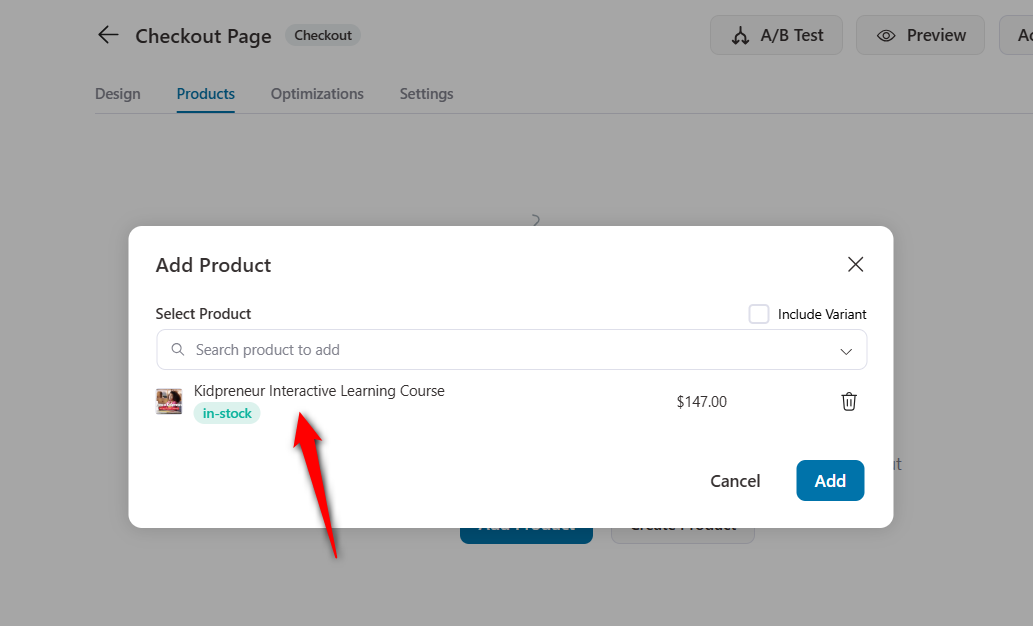
Click on 'Add' when done.
You can add multiple products, configure discounts that aren't available elsewhere on the product page, and even set quantities from here.
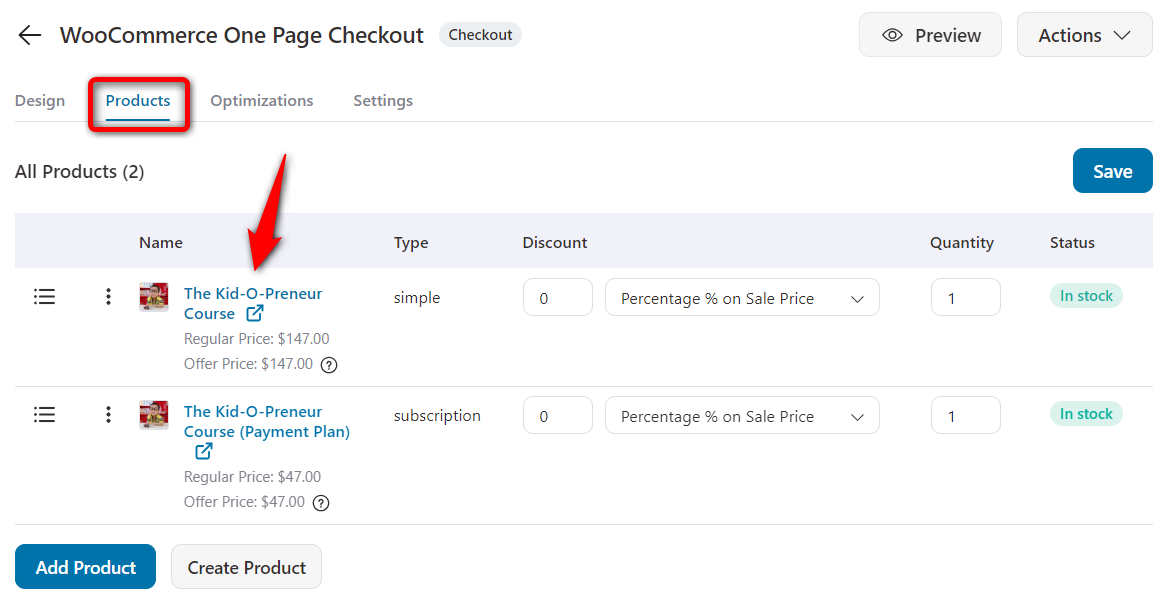
You may choose to sell specific variants of a product.
Finally, you can use drag-and-drop to display the added products in a specific order.
Here, since we’re selling a digital product, here are the two options you can offer:
- One-shot payment plan for the course
- An easy 3-month payment plan for the same course
The user can choose one of the two options, and they’ll be billed accordingly.
The 3-month payment plan is a subscription product. You can use WooCommerce or Sublium Subscriptions.
Remember that when you’re offering a 3-month payment plan, it should appear slightly less lucrative than a single payment.
Step 3: Customize the checkout layout
Go back to the Design tab.
Hit ‘Edit Elementor Template’ to make easy customizations without using any WooCommerce checkout shortcodes or custom coding.

Using Elementor widgets, you can change the brand logo, typography, border radius, colors, fonts, thickness, and other CSS elements here.
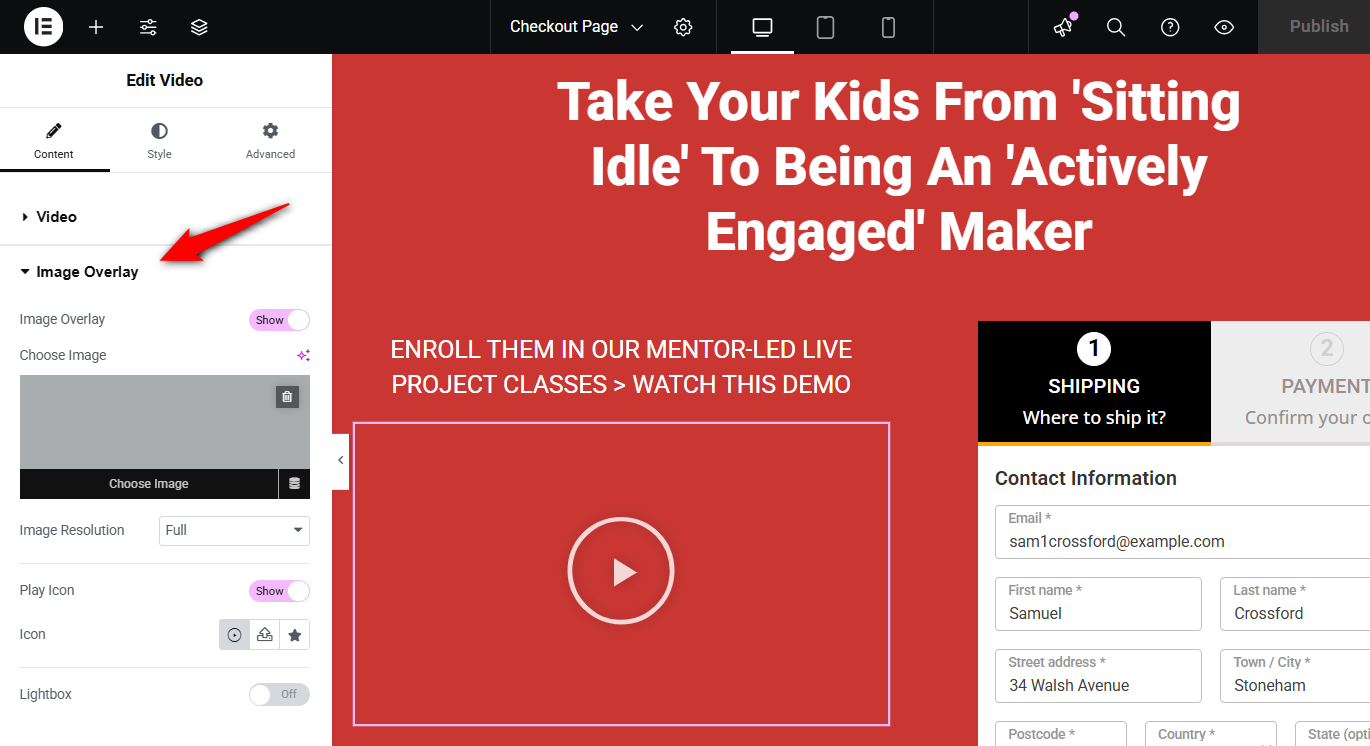
We recommend adding a video to your one-page checkout. It’ll surely improve the checkout experience, and the user will better understand your product.
Plus, to add an image overlay to your video, click on the video widget and select ‘Image Overlay’.
Activate it, choose an image to overlay, and update it.
Similarly, you can change the heading, background colors, and other elements to match the overall aesthetic and brand colors.
Next, make customizations to the WooCommerce one page checkout form widget.
Choose the step type (breadcrumbs or tabs) to add a progress bar to your WooCommerce one-page checkout.
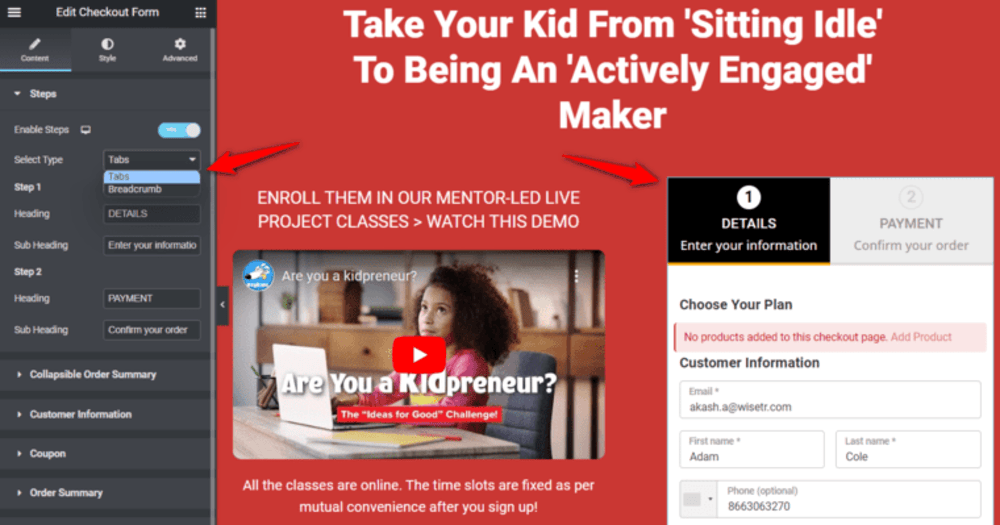
You can also change the checkout button’s color, add icons or prices to it, and customize it the way you want.
Learn how to customize your checkout page in WooCommerce to ensure its design aligns perfectly with your brand identity.
Step 4: Edit the checkout form fields
Now let’s edit the fields on your WooCommerce one-page checkout form using FunnelKit’s built-in checkout field editor.
Return to the Design tab and scroll down for the checkout form fields.
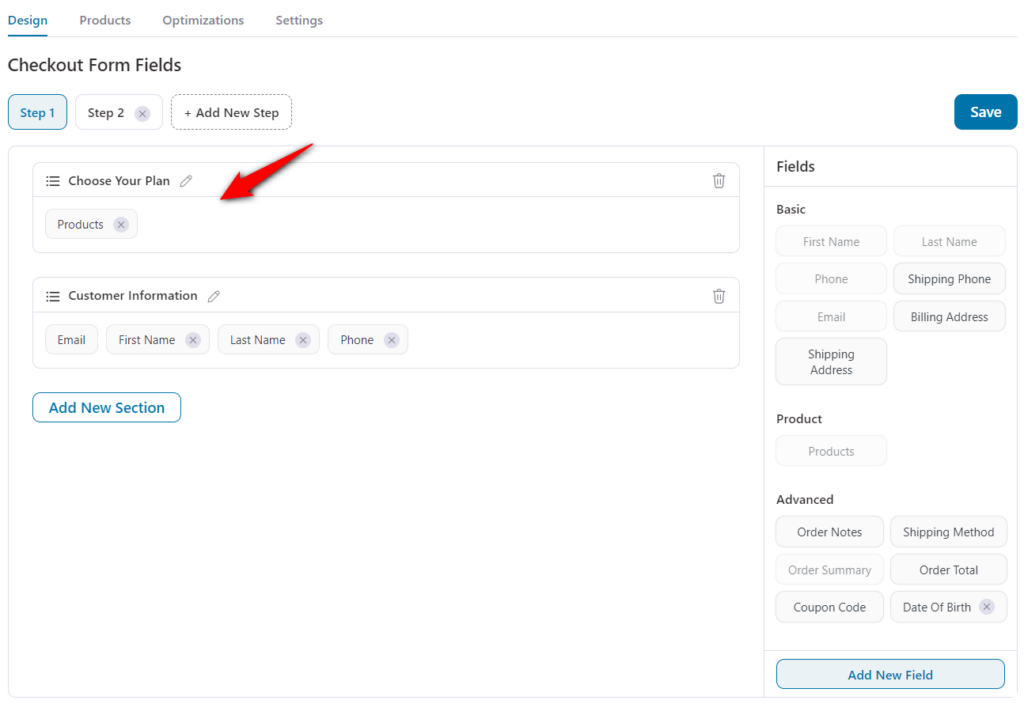
Use the drag-and-drop checkout form builder to:
- Add custom fields (text, dropdowns, checkboxes, etc.)
- Edit existing fields
- Remove unnecessary fields
- Rearrange fields and sections
If this funnel is for a digital product, you can remove shipping-related fields.
So this is what our final form looks like:

The first step contains the basic information fields, including product selection, and the second step contains the order summary and payment-related fields.
To add the ‘Best Value’ tag or description to a product, explore the advanced customization options to make it more appealing to shoppers.
In the ‘Products’ field, you would want to set an option as pre-selected by default.
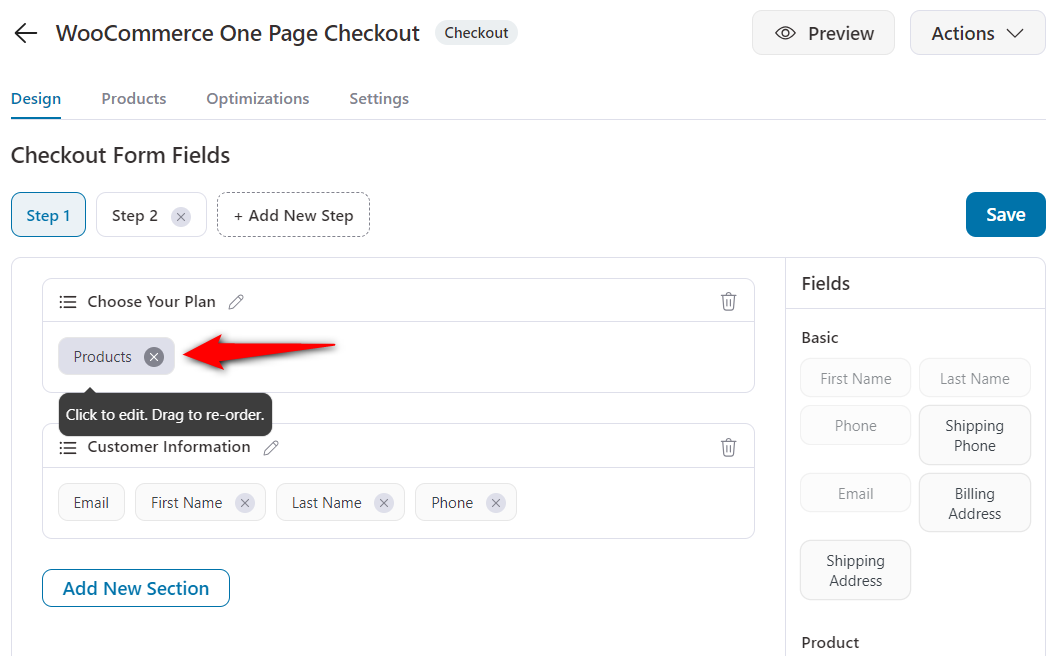
In addition, you can add a ‘Best Value’ tag or any custom tag to highlight other customers' most popular choices.
The tag could be - ‘Money Saver’, ‘Power Bundle’, ‘Super Saver’, or anything you choose.

Click on ‘Update’ when done.
This is how your one page checkout looks:

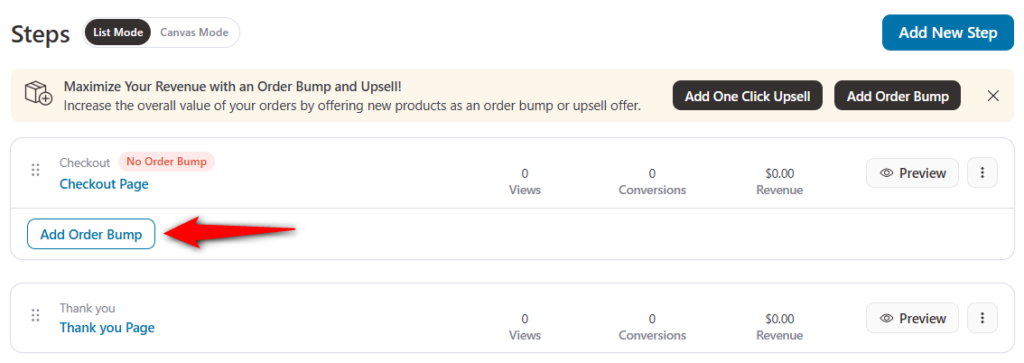
Step 5: Add an order bump to increase order value
You can add an order bump, i.e., a cross-sell offer, to make more dollars per transaction and your ads profitable.
First, add the order bump and name it.
After adding and naming the bump, import the order bump skin you want.
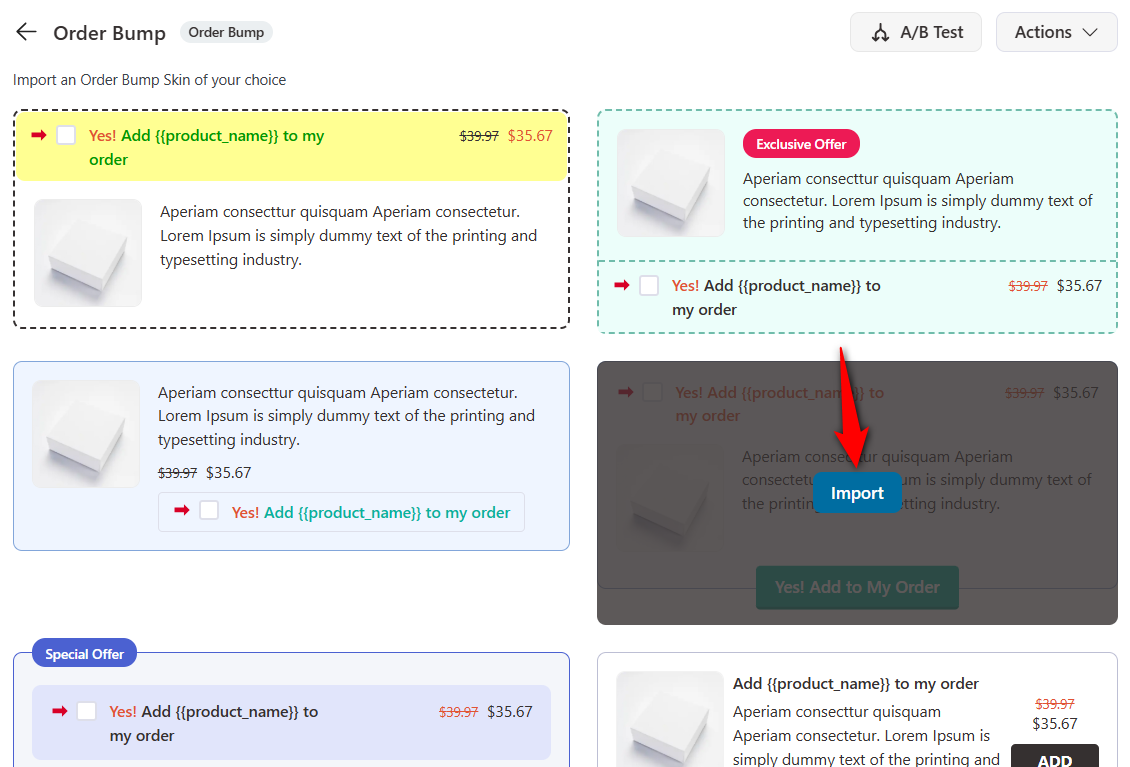
After importing the skin, add a product as your order bump offer.
Once your products are added, you can apply a discount or configure additional settings in the Products section.
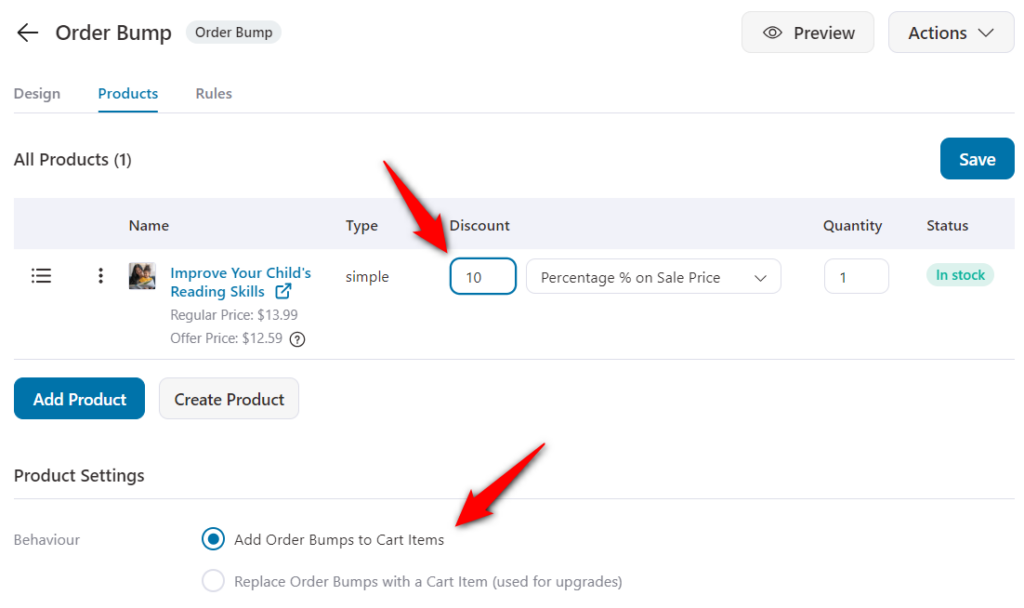
Once done, hit the ‘Save Changes’ button and move on to the next tab.
Customize the look and feel of your bump offer in the ‘Design’ tab.
Also, write a copy of your offer here:
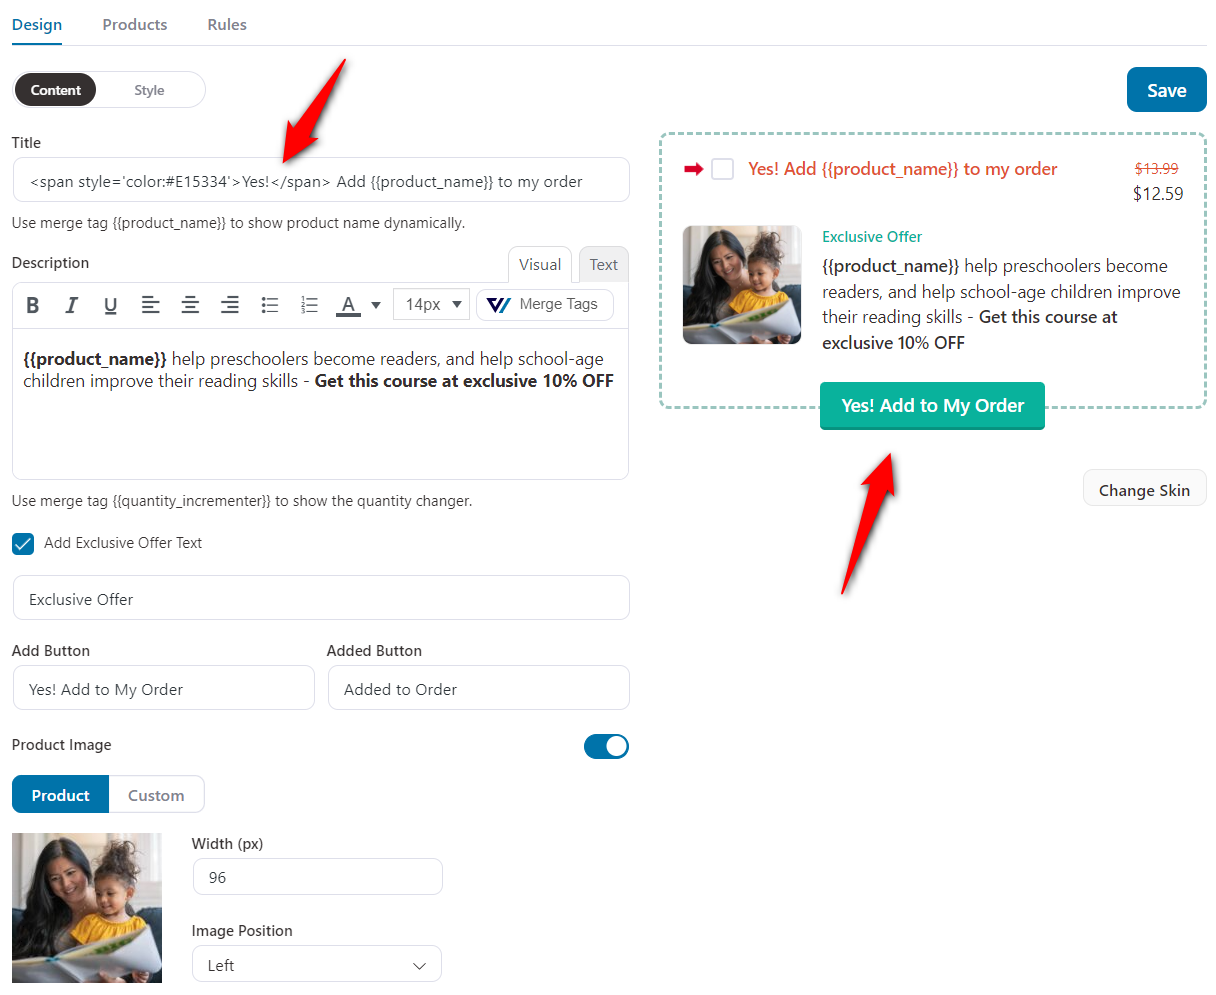
You can also change the title color, padding, price and description colors, and more under the Style sub-tab.
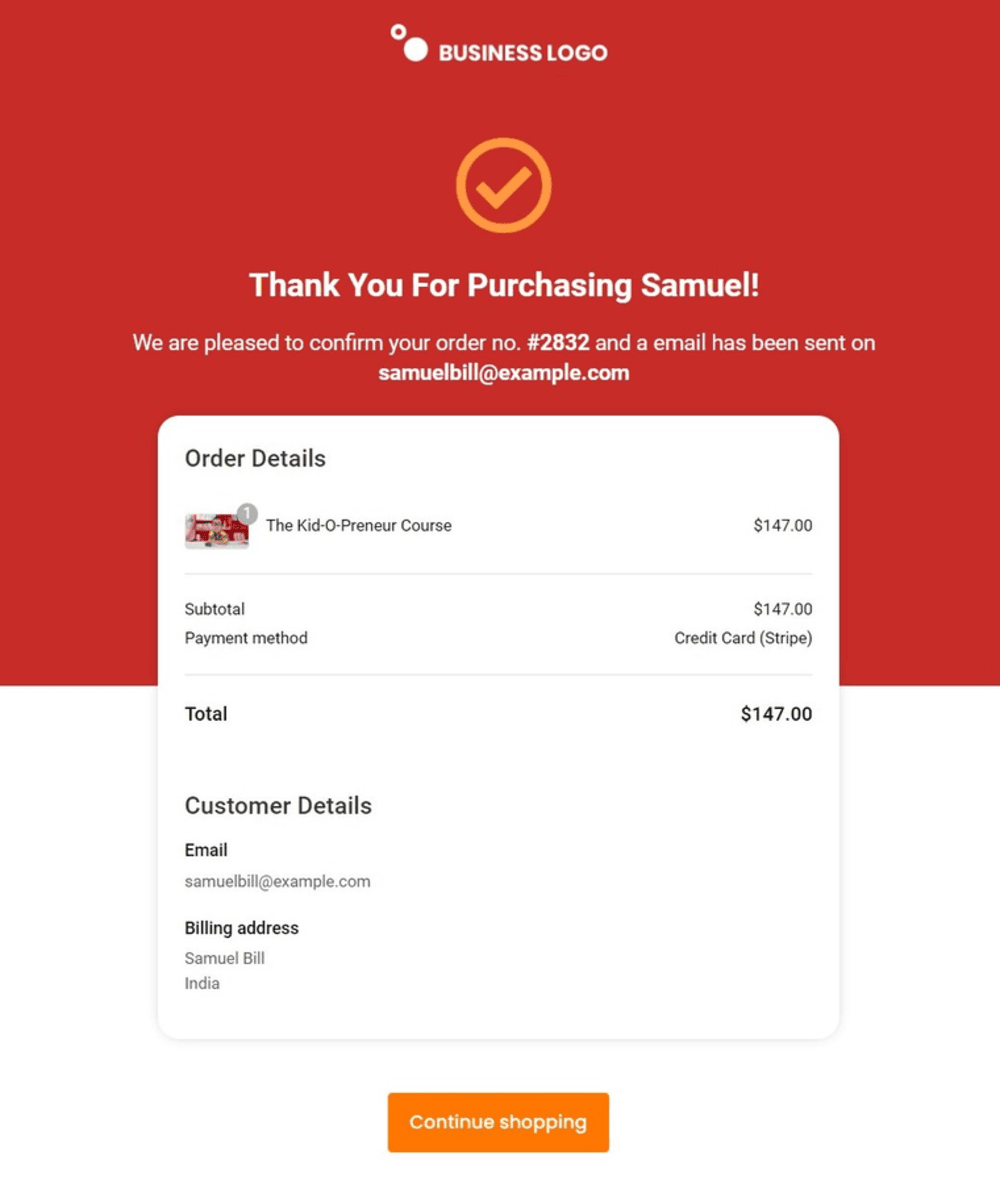
And don't forget your thank-you pages, because these are the last step in your funnel and the perfect place to express gratitude or add crucial order details.
There you go! Save your design and go live with your order bump.
This is how you can set up a WooCommerce one-page checkout that’s beginner-friendly and requires no code.
5 Optimization Tips to Increase WooCommerce One-Page Checkout Conversions
The WooCommerce one-page checkout significantly boosts conversion rates when optimized correctly.
Here are key strategies and tips:
1. Keep the one page checkout form as short as possible
Keep only essential information to minimize friction.
For digital products, there should not be any shipping address fields. For physical fields, combine the first and last names into a single field and make use of optional collapsible fields.
Additionally, enable express checkout options, such as Google Pay and Apple Pay, to speed up checkout.
2. Optimize for mobile view and improve accessibility
More than half of your traffic is coming from phones. Use large, tappable buttons and simplify navigation to minimize distractions for mobile users.
Use high-contrast buttons and legible font sizes, and clearly label all WooCommerce one-checkout form fields.
Test your checkout page on multiple screen sizes before going live.
Ensure the product selection area, form fields, and payment button all render cleanly without horizontal scrolling.
3. A/B test single-step vs multi-step layouts
Testing different variations of your WooCommerce one page checkout helps identify what resonates with your audience and optimizes the conversion rate.
A/B test different elements, such as button text, size, and color, as well as checkout form layouts and trust signals like security badges or customer reviews.
If you’re wondering: Does a one-page checkout always perform better than a multi-step one?
- One-page checkout: Works best for stores with fast-moving products or impulse purchases. It reduces drop-offs by keeping everything in one view.
- Multi-step checkout: Can perform better for high-ticket or complex purchases, as it reduces overwhelm by splitting details into smaller steps.
The best approach is to conduct A/B testing on WooCommerce one page checkout vs multi-step checkout to determine which one resonates better with your audience.
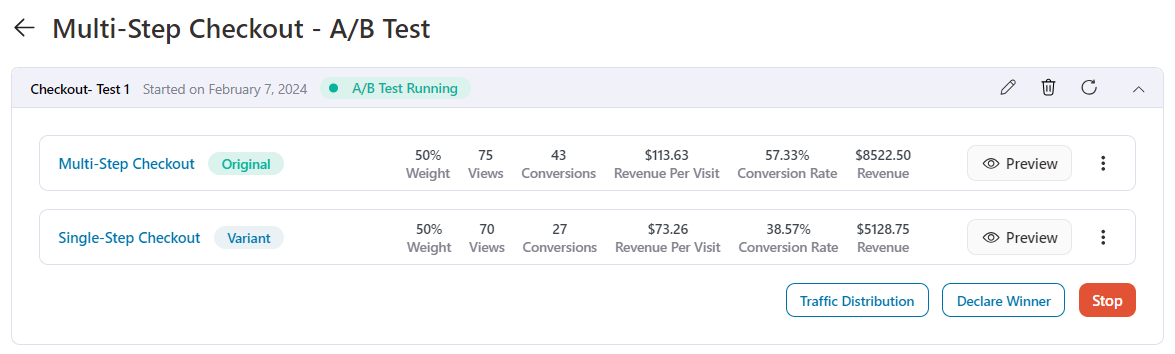
Here's what our tests signify:
| Factor | One Page | Multi-Step |
|---|---|---|
| Best for | Impulse purchases, digital products, single-product stores | High-ticket items ($100+), complex orders, B2B |
| Mobile UX | Better (single scroll) | Not that better (switches steps) |
| Form friction perception | Higher (long form visible) | Lower (chunked steps) |
| Our test data | 31% mobile lift on impulse buys | 18% lift on $100+ orders |
4. Enable multiple payment options
Offering diverse payment gateways ensures customers can choose their preferred payment method to complete their purchases, helping reduce cart abandonment.
Connect Stripe, Square, or PayPal to your WooCommerce store in minutes with gateway plugins.
Add express checkout, credit cards, buy now, pay later (BNPL), and local payment methods such as SEPA, iDEAL, P24, Bancontact, etc., to provide convenience for your shoppers.
5. Capture emails early and automate abandoned cart recovery
Even with a perfectly optimized checkout, some users will still drop off before completing their purchase. That’s where abandoned cart recovery comes in.
By capturing email or phone details early in the checkout flow, you can automatically follow up with customers who didn’t finish their order.
- Trigger automated reminder emails or SMS within 1 to 3 hours of abandonment.
- Include dynamic cart links that take customers back to their checkout with items pre-filled.
- Offer time-sensitive discount coupons or free shipping to incentivize the purchase.
- Use multi-channel recovery (email, push notifications and SMS) for higher success rates.
Just head to the automations tab to set up simple abandoned-cart recovery campaigns for free.
If you want to integrate with full email marketing capabilities with no limitations, get FunnelKit Automations Pro.
4 Best One Page Checkout Templates to Skyrocket Conversions
Explore our ever-growing templates for landing pages, lead generation pages, upsells, and more.
Here are some of the best WooCommerce one page checkout templates available in the FunnelKit Funnel Builder:
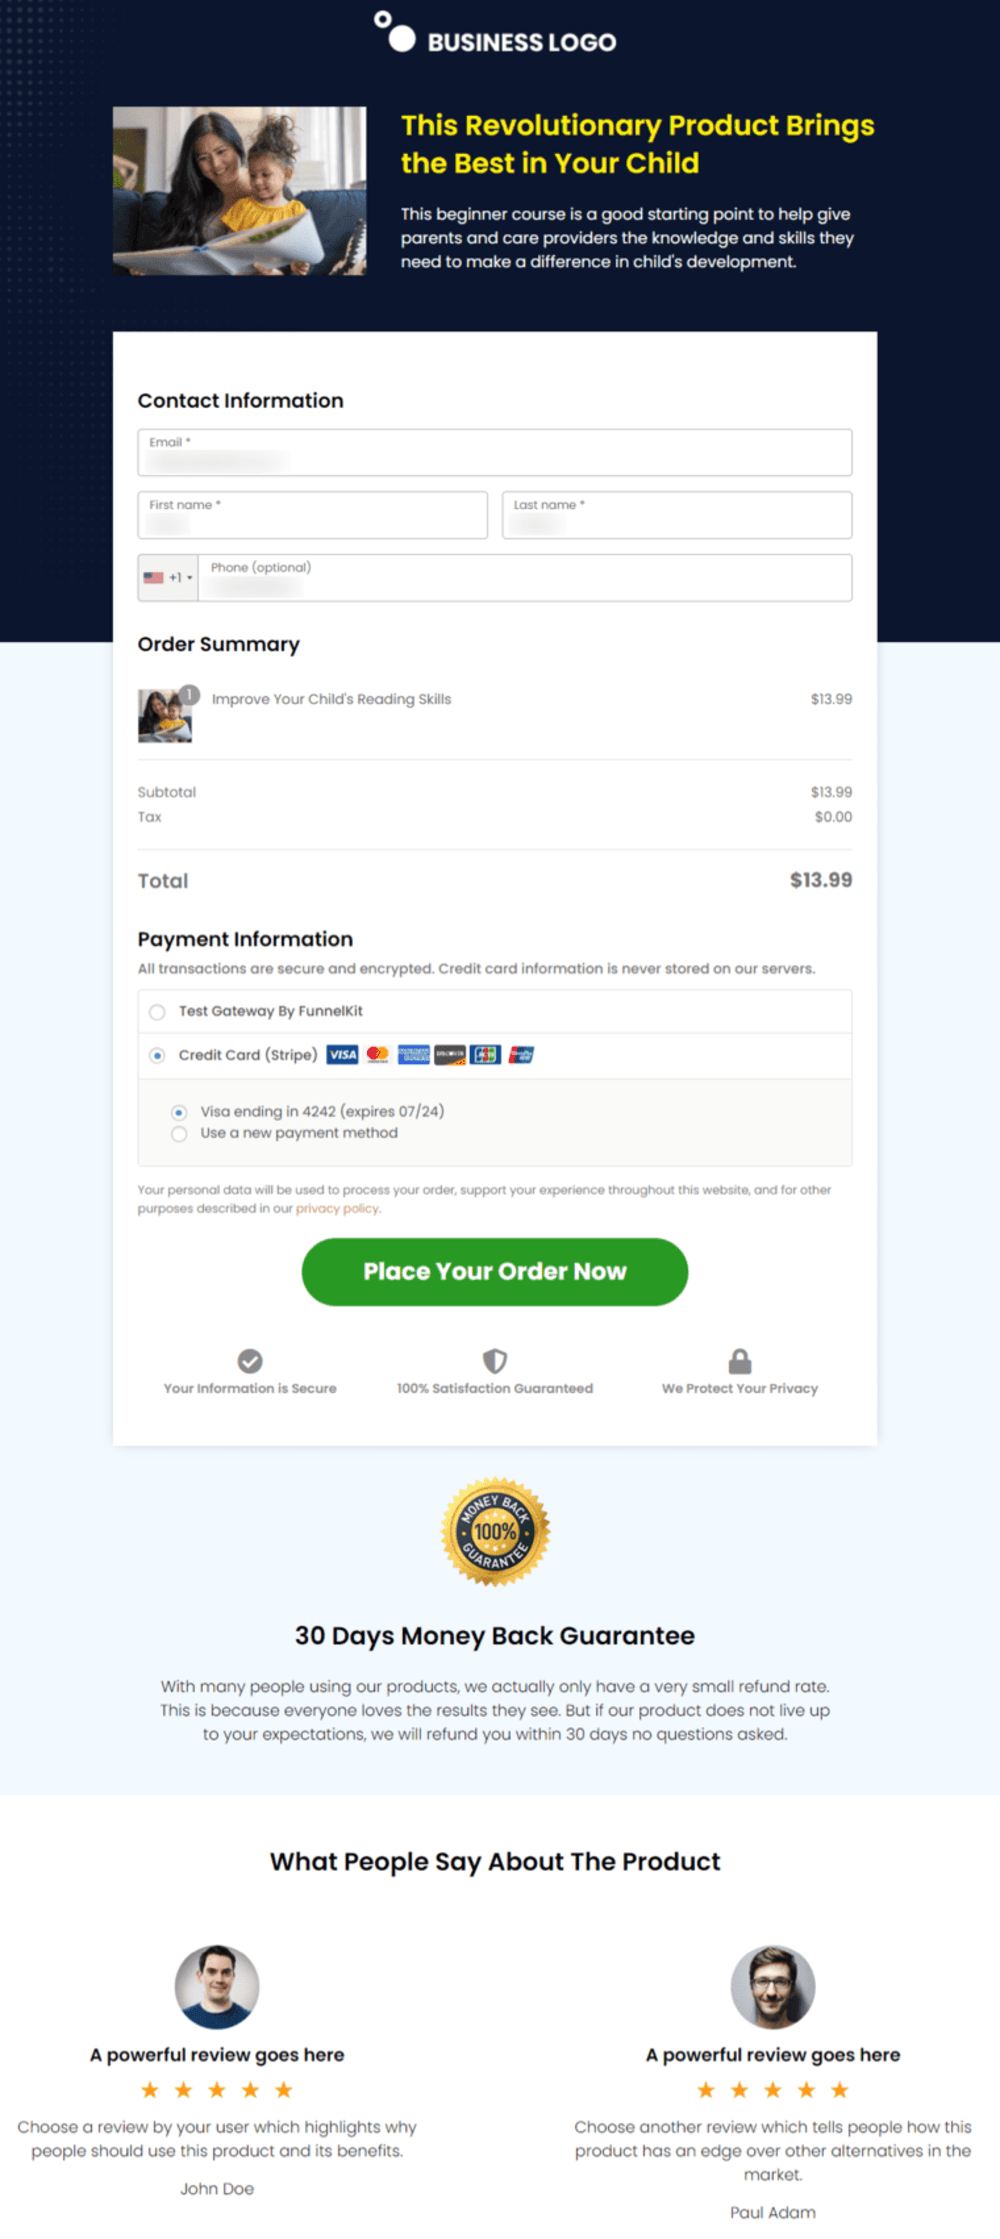
WooCommerce one page checkout template #1 - Closer
The closer template works perfectly for single product checkout. It includes all the elements: the product’s details, an embedded product demonstration video, benefits, and testimonials.

One page checkout template #2 - Razor
FunnelKit’s Razor template for WooCommerce one page checkout is a classic. It has a blue header that can be customized per product on the checkout page.
If you scroll down, you’ll see the complete checkout form, followed by user reviews that further reinforce trust in the product.
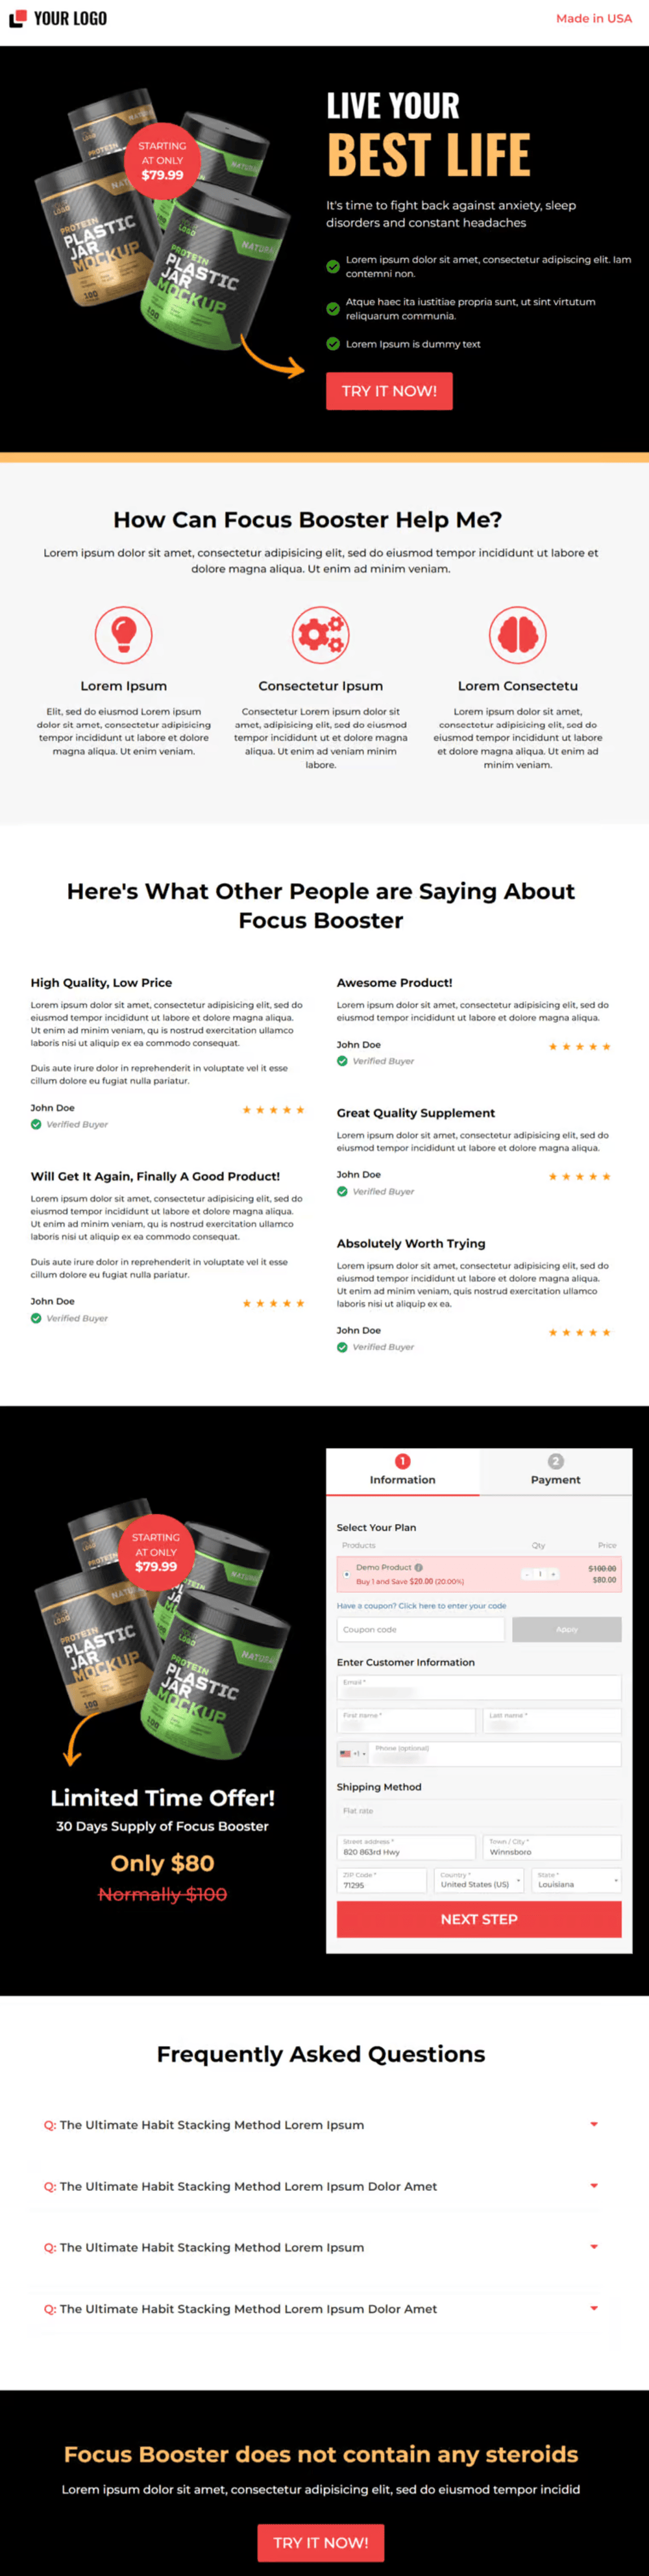
WooCommerce one page checkout template #3 - Booster
The Booster template available in FunnelKit is quite special. It works within the PAS framework by discussing the problem and the agitation, and providing the solution.
This one page checkout template is quite effective for single products.
One page checkout template #4 - Stunner
The Stunner template has been beautifully designed to showcase your product’s information. It displays its benefits, social proof, checkout form and the product's creator to show their credibility.

These were some of the best WooCommerce one page checkout templates available in FunnelKit. You can even design your own custom templates with the page builder of your choice or import one from your device.
Frequently Asked Questions (FAQs)
Here, we've answered some common questions asked by users related to WooCommerce one page checkout:
Yes. You can sell subscription products on a one page checkout by creating the subscription in WooCommerce (using a plugin like Sublium or WooCommerce Subscriptions) and then adding it as a product on your checkout page. Shoppers can choose between a one-time payment and a recurring plan directly on the same page.
The choice between a one-page and a multi-step checkout depends on the products in your online store. One-step checkouts are preferred by digital product sellers, while multi-step checkouts are favored by physical item sellers.
You can always run A/B Tests to see which performs best for you. In our test, for high-ticket items (above $100), the multi-step format performed 18% better because it spaced out commitment and built value.
For impulse purchases (under $50), single-page checkouts led to faster conversions and lower drop-off.
Yes, there are many free one page checkout plugins available. FunnelKit Funnel Builder and One Page Quick Checkout for WooCommerce offer free versions. The official WooCommerce One Page Checkout extension does not have a free version and starts at $79/year.
Free versions typically cover basic layouts, while paid checkout plugins add features such as A/B testing, upsells, and advanced customization.
Yes, FunnelKit one page checkout supports all major page builders, including Elementor, Divi, Bricks, Oxygen and the Gutenberg block editor. You can customize every element of your checkout page visually without writing code. If you use a builder that is not directly supported, you can use shortcodes instead.
Yes, you can create a one-page checkout with custom code, but this method requires significant custom development. You would need to use WooCommerce hooks to merge the cart and checkout templates, handle AJAX form submission, and manage validation errors on a single page.
For most stores, a plugin is far more practical. The code method also requires ongoing maintenance to stay compatible with WooCommerce updates.
The official WooCommerce One Page Checkout extension uses the [woocommerce_one_page_checkout] shortcode, which replaces the current cart and checkout form on any page.
To specify which products appear, add the product_ids and template attributes. For example, [woocommerce_one_page_checkout product_ids="123,456" template="product-table"].
Available templates include product-single (one product + checkout, best for funnels), product-table (multiple products with quantities), product-grid (visual catalog), and pricing-table (tiered options).
The free plugin One Page Quick Checkout for WooCommerce uses a slightly different shortcode, [wc_one_page_checkout product="123"]. To embed any of these in a page builder, drop the shortcode into Elementor's shortcode widget, Gutenberg's shortcode block, or Divi's code module.
Start Reducing Drop-Offs With a WooCommerce One Page Checkout!
A one-page checkout is a game-changer, but it's crucial to use it strategically.
Start by selecting a high-potential product, such as a trending or top-performing item, and pair it with a stunning FunnelKit checkout template.
Customize the design with colors, typography, and layout to align perfectly with your brand.
Don't forget the copy! Craft persuasive, engaging content that resonates most with your users and motivates them to complete their purchase.
Once everything is ready, promote your WooCommerce one-page checkout on platforms like Facebook, Instagram, and email campaigns to drive targeted traffic.
Keeping the process simple, distraction-free, and focused will enhance the shopping experience and maximize conversions.
Start today and see the difference one-page checkout can make in your WooCommerce business!

Editorial Team
May 5, 2026If you're selling products, courses, services or memberships on WordPress and still relying on a single product page to all the heavy lifting, you're leaving money on the table. Dropping...

Editorial Team
May 1, 2026If you sell products online, you need to build an Elementor sales funnel to maximize sales. A sales funnel guide helps you convert visitors into buyers through a well-charted course/well-defined...
Editorial Team
May 1, 2026Are you looking for WooCommerce checkout optimization hacks to streamline your users' shopping experience? Your WooCommerce store may have an attractive layout with a user-friendly interface. You may even have...


