To send pixel events directly to Facebook servers without using a visitor’s browser, you have to set up Conversions API for FunnelKit (formerly WooFunnels).
This doc is divided into:
Let's start.
How to configure Facebook Conversion API events?
Follow the step-by-step instructions on how to set up Facebook Conversion API here:
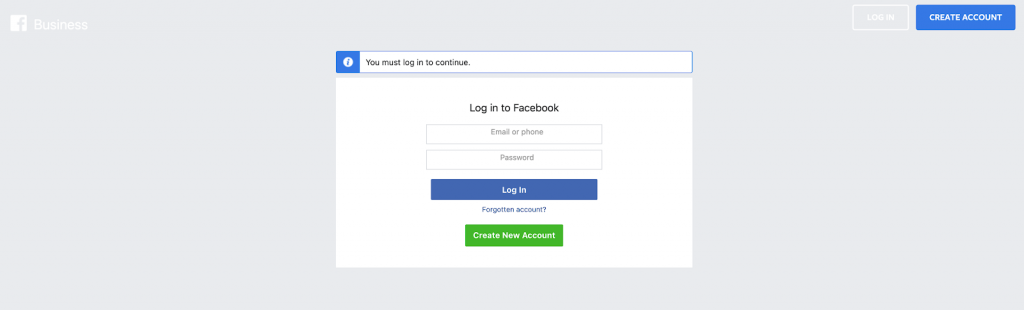
Step 1: Log in to your Facebook Business suite account
Go to your Facebook Business Suite account and log in using the credentials.
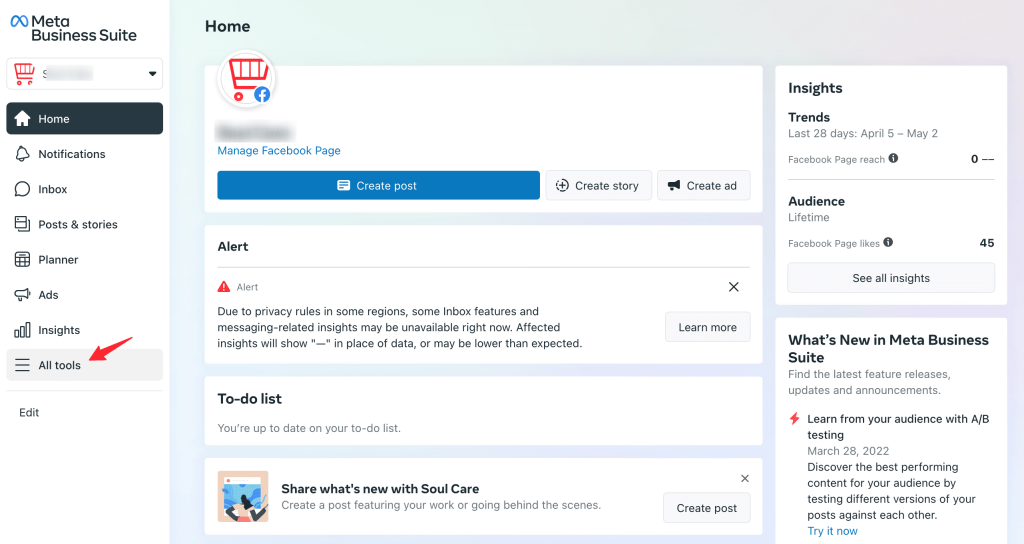
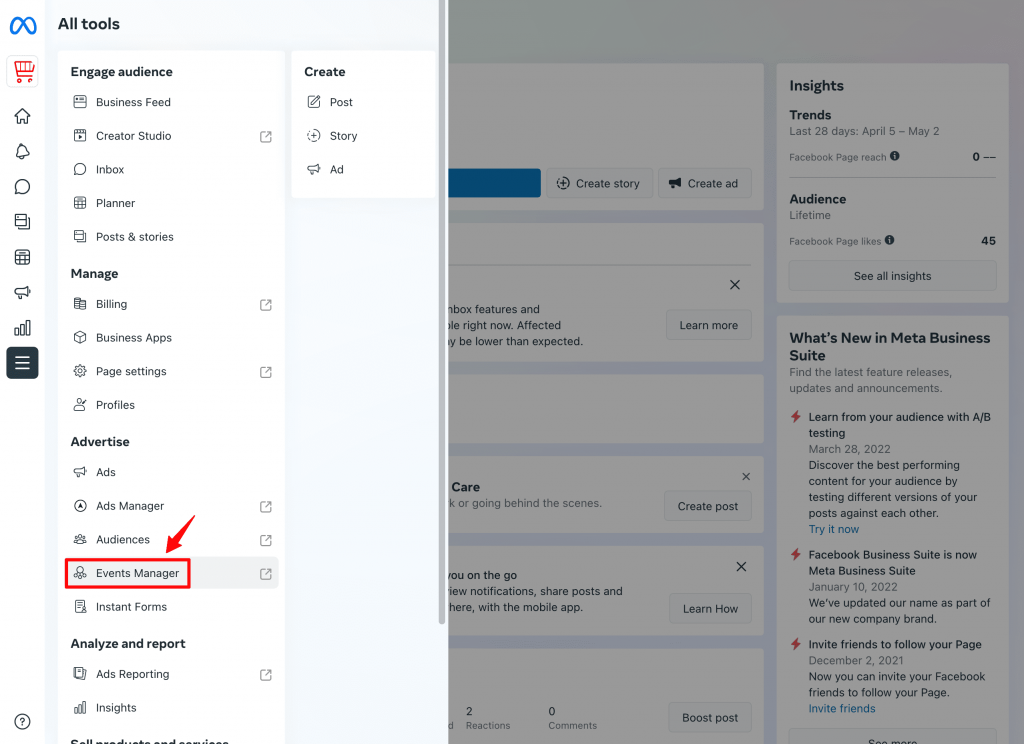
Step 2: Go to All Tools and select “Events Manager”
Click on “All Tools” and you’ll see the options:
Now, select “Events Manager” from the list.
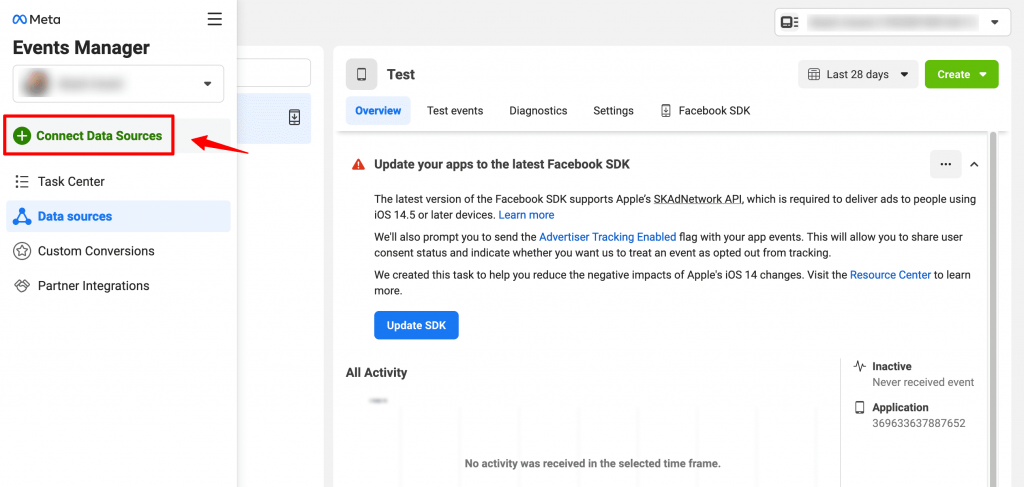
Step 3: Set up Facebook Conversion API and Pixel
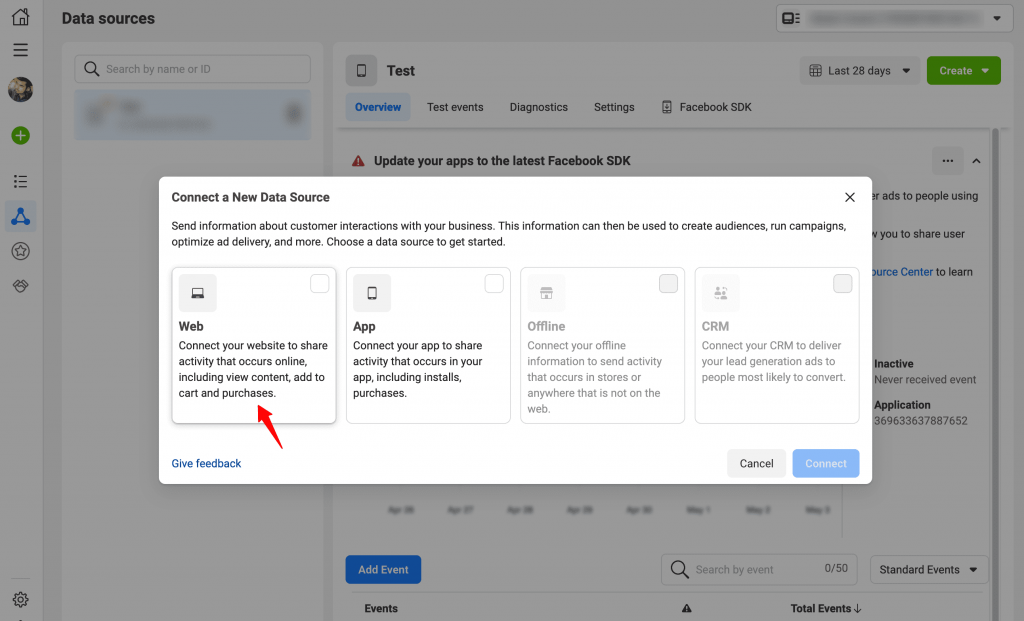
On the left side, click on the (+) icon - Connect Data Sources.
Now select a data source.
Here we have selected Web and clicked on Connect.
Enter the name of your pixel.
Click on Create Pixel when done.
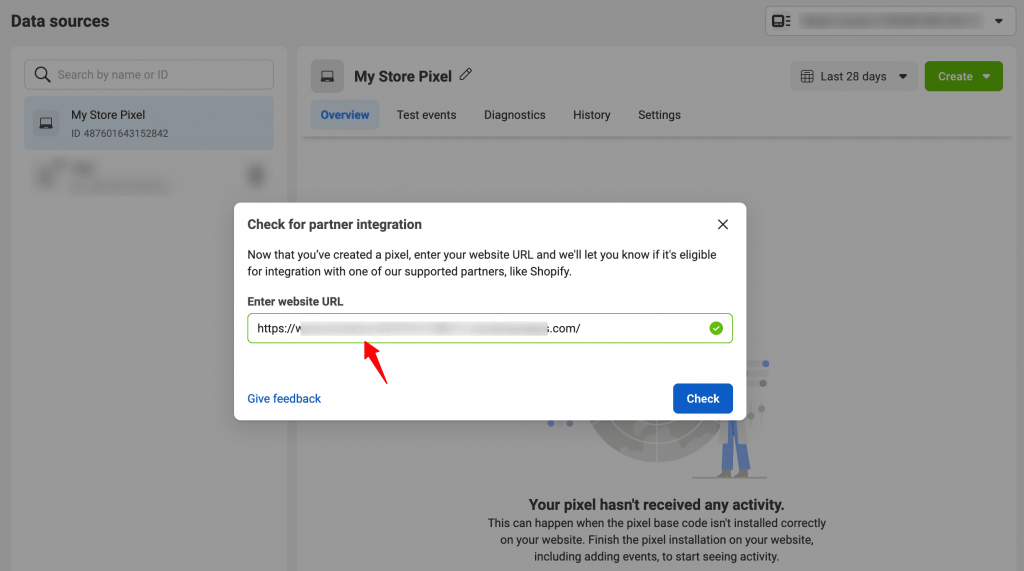
Next, enter the website URL:
Select the Conversions API and Meta Pixel.
Once done, click on Next.
Well done! This will create your Facebook Pixel.
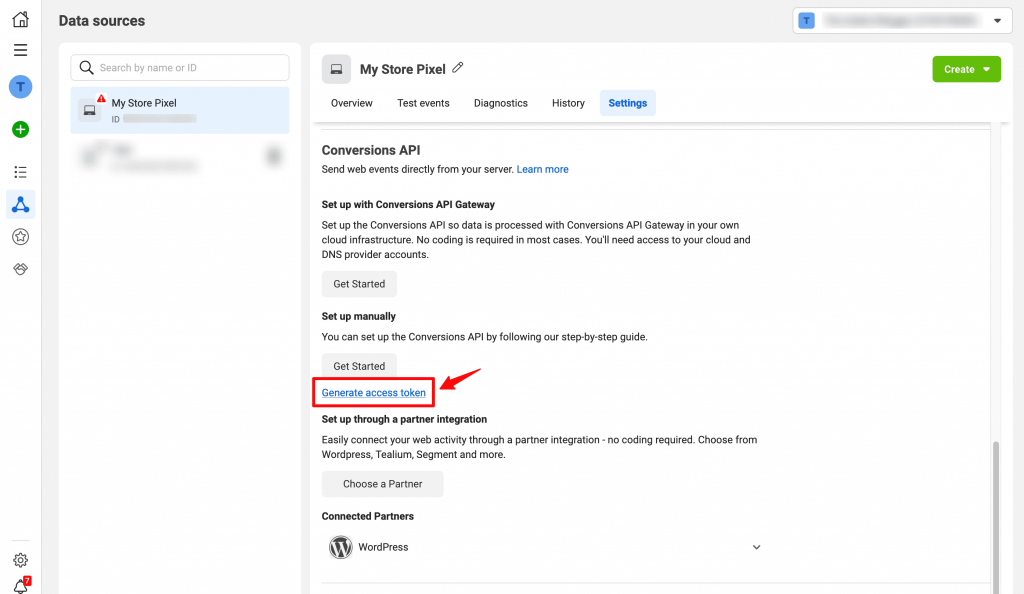
Step 4: Go to Settings
Once you’ve selected your Pixel ID, go to Settings on the right section.
Then copy the Pixel ID from here.
Step 5: Paste the Facebook Pixel ID on FunnelKit (formerly WooFunnels) settings
Open a new tab and go to FunnelKit (formerly WooFunnels) > Settings > Facebook Pixel.
Now, paste your Pixel ID there.
Step 6: Click “Generate access token” and copy the code
Go to the previous tab, scroll down to the section and click on Generate access token.
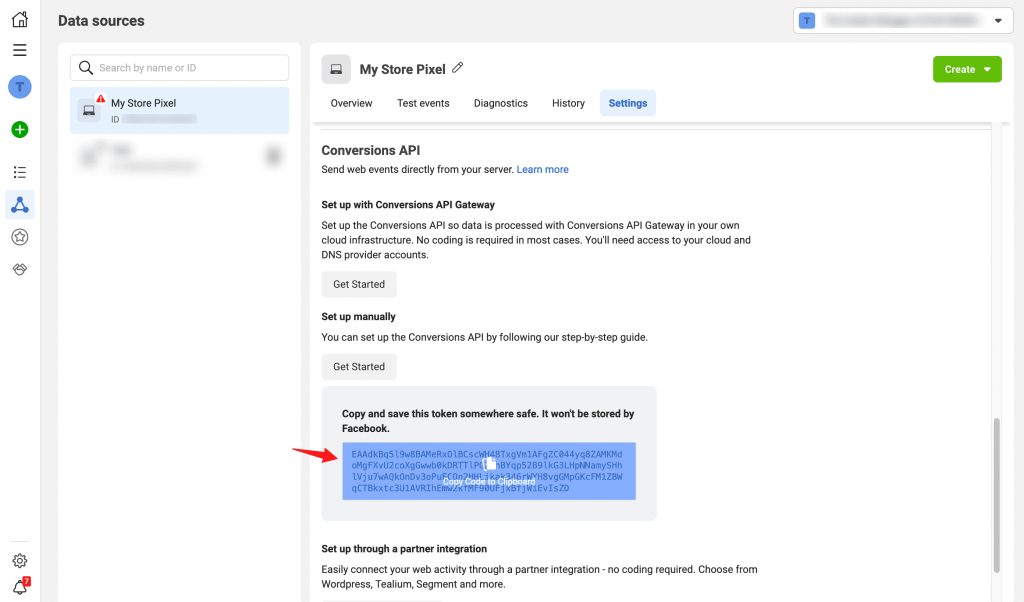
As you click on the link, a code will appear. Click to copy this code to the clipboard.
Step 7: Paste the access token to FunnelKit (formerly WooFunnels)
Click on “Enable Conversion API” below to your Facebook Pixel ID.
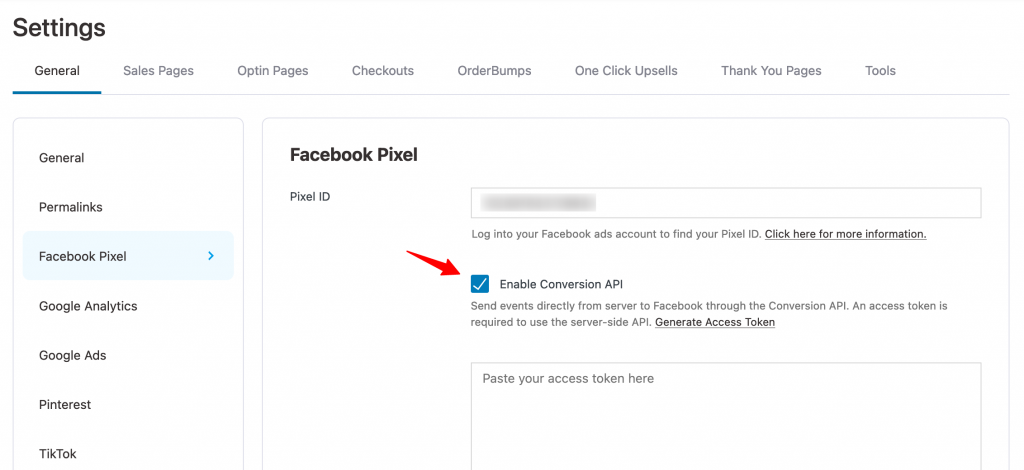
Now, paste the access token there.
Once done, click on “Save Changes”.
Congratulations! You have successfully set up Conversions API for FunnelKit (formerly WooFunnels).
How to perform testing against the server-side events?
You can perform testing on Facebook Conversions API for FunnelKit (formerly WooFunnels).
For this, you need to authorize a test server code from Facebook Pixel to FunnelKit (formerly WooFunnels).
Follow the instructions below:
Step 1: Select your Pixel ID and go to “Test events”
Click on the “Test events” tab.
Step 2: Click on the test event code to copy
Scroll down and copy the test event code by clicking on it.
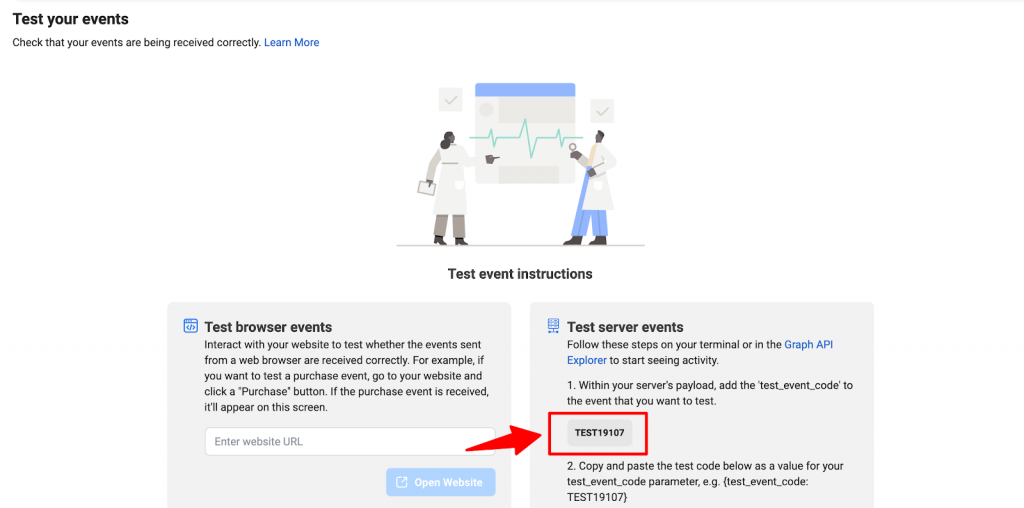
Step 3: Paste the test code to FunnelKit (formerly WooFunnels) Facebook Pixel settings
Go to FunnelKit (formerly WooFunnels) > Settings > Facebook Pixel. Now enable the “Test server events via test_event_code”.
Now paste the test event code there.
Note: We recommend unchecking this option after you’ve finished testing the events.
Step 4: Test and track the events
Run your sales funnels and track the test events here.

That’s it! You have successfully enabled the test server events.


