In this documentation, we will share how you can offer quantity discounts in WooCommerce.
Quantity discounts are tiered price reductions you offer based on how many items a customer buys. For example, you might offer 10% off for 2 or more units, 30% off for 4 or more, or buy-one-get-one-free deals to encourage larger purchases in your WooCommerce store. For more details, check our blog.
Step 1: Create a sales funnel
The first step is to create a sales funnel to promote your quantity discount offers.
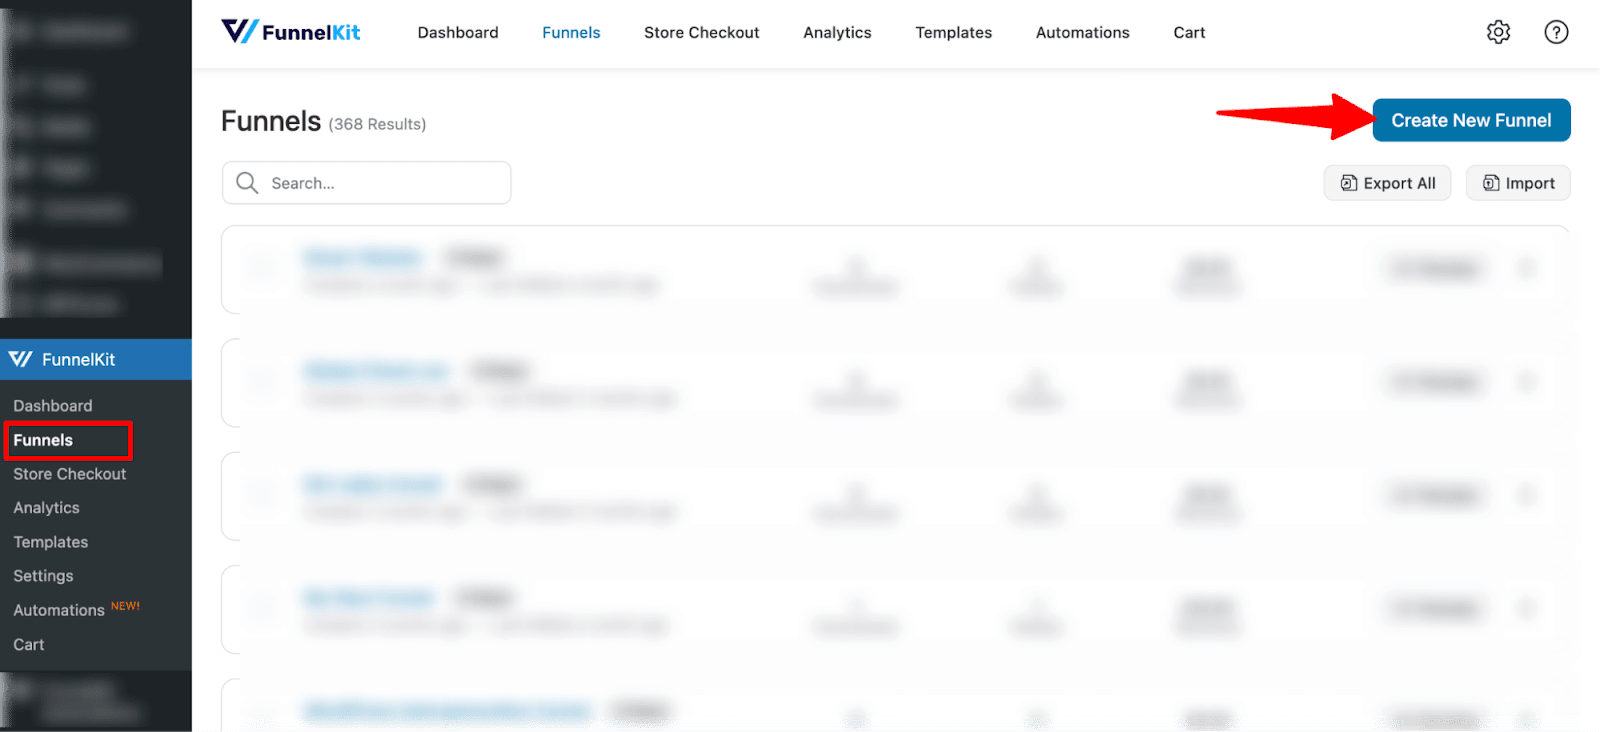
Go to FunnelKit → Funnels and click “Create New Funnel”
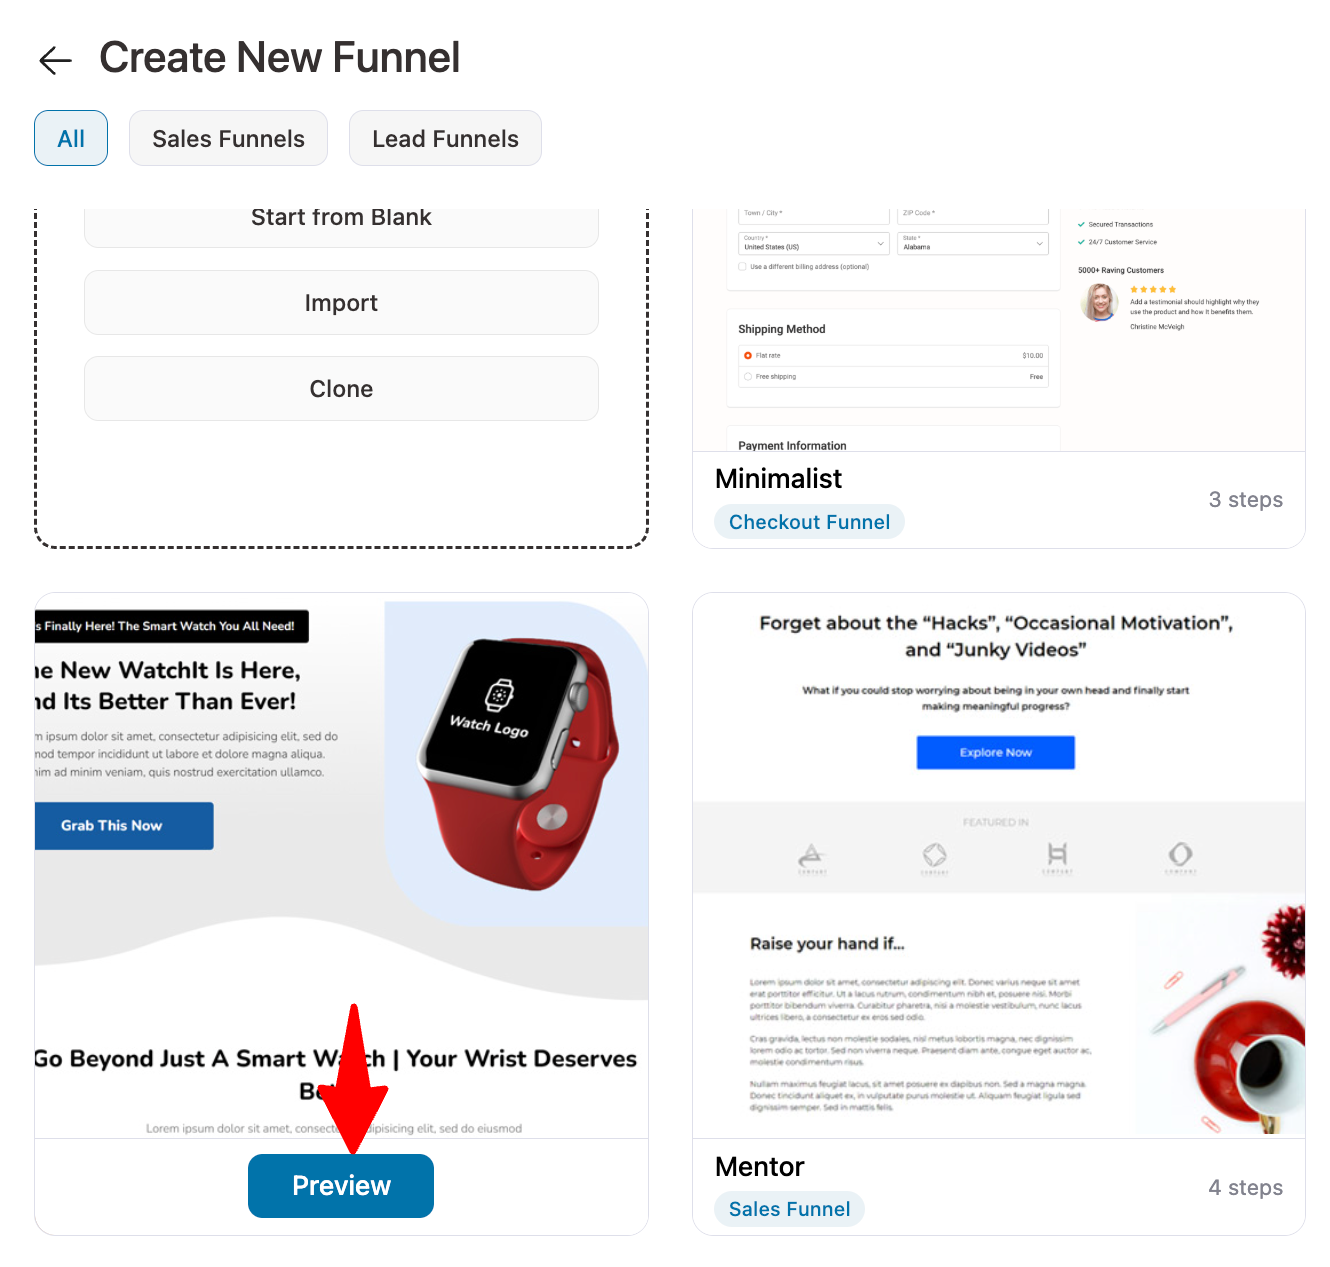
Next, you’ll see a collection of pre-built templates.
Hover over any template and click the Preview button to see how it looks. To show the process, we are going with the Presenter template.
First, decide if you want a single-page checkout or a multi-step checkout. To import a template, click Import This Funnel, enter a title, and then click Add to bring the checkout funnel into your store.

This will import a sales funnel with four steps: sales page, checkout, upsell, and thank you page.
Step 2: Set up the quantity discount
First, set up your WooCommerce quantity discounts and then connect the offers to your sales or landing page.
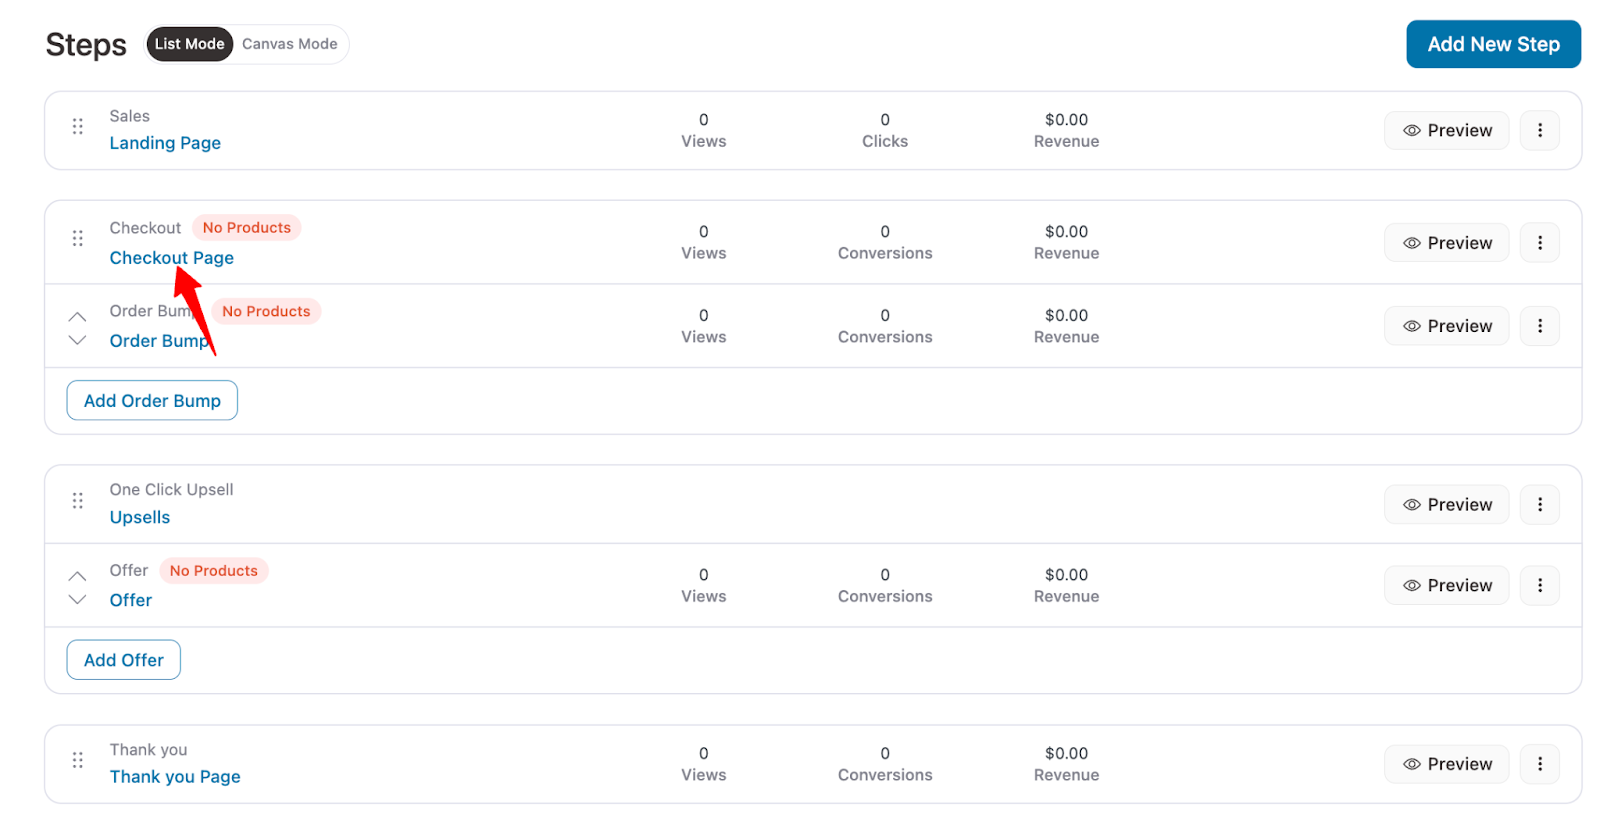
To start, edit the checkout page by clicking on the Checkout step.
On the design tab, you can customize the checkout page template.
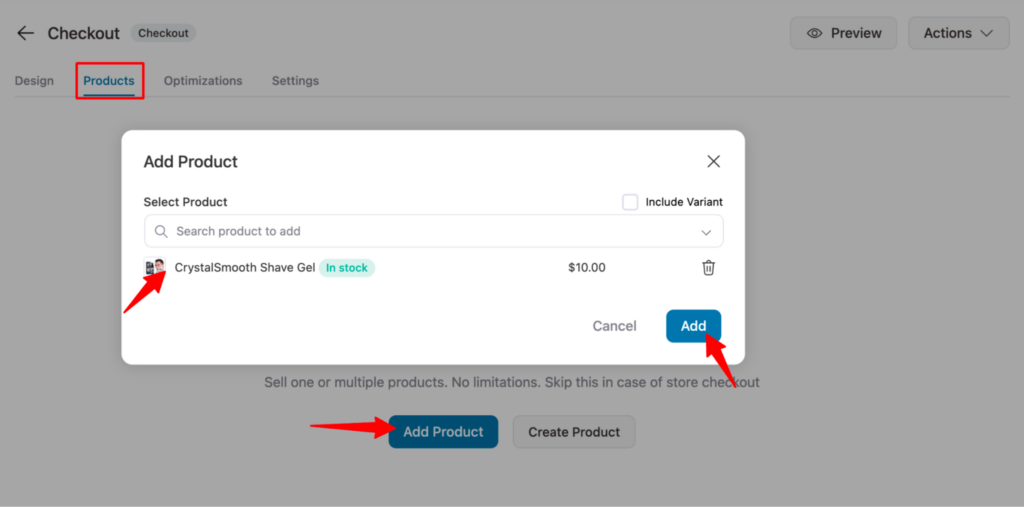
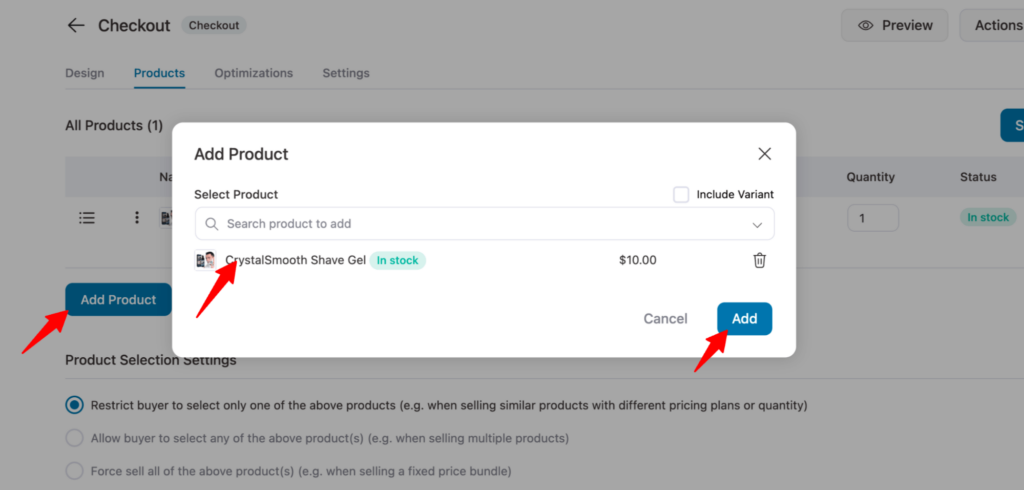
To add products for discounts, go to the “Product” tab and click “Add Product”. Then search for the desired product and click “Add” to include it in the sales funnel.
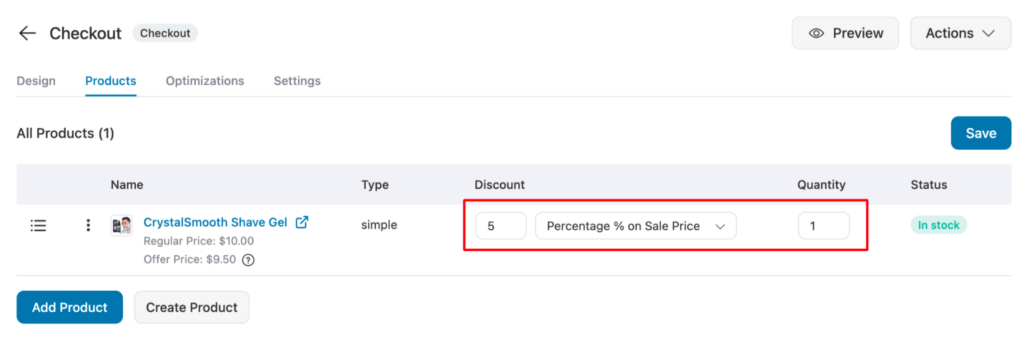
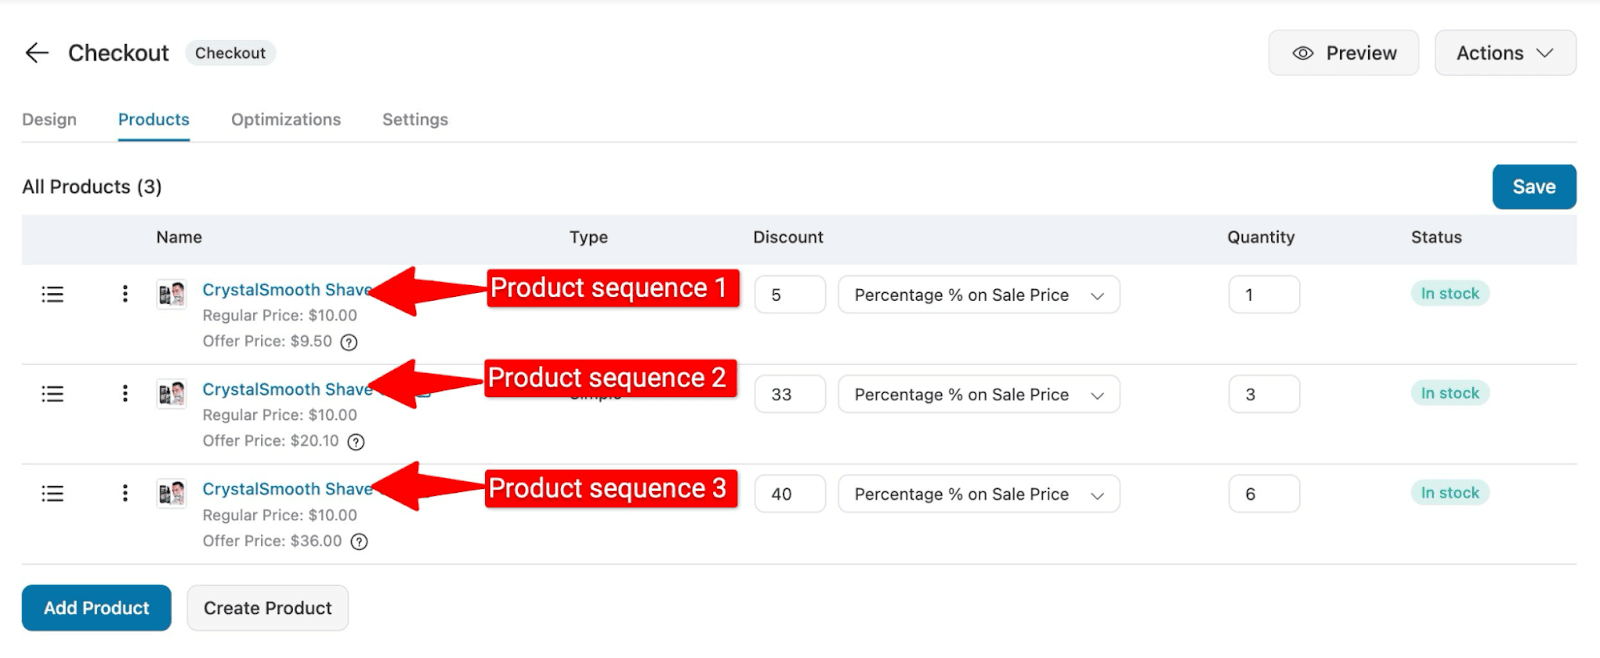
After adding the product, set the quantity discount.
For the first product, we’ll offer a 5% discount when a customer purchases a single unit.
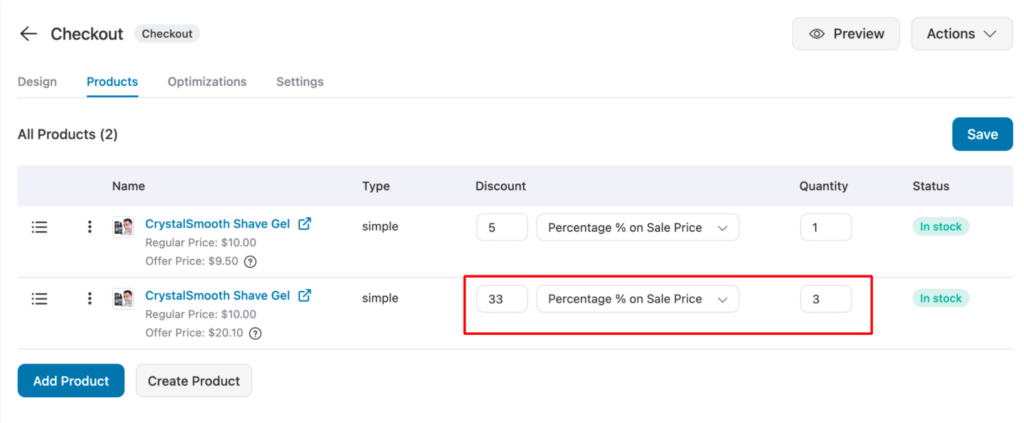
To add another offer, click “Add Product”, search for the product, and then click “Add”.
For the second variation, we will offer 33% on three quantities of the product.
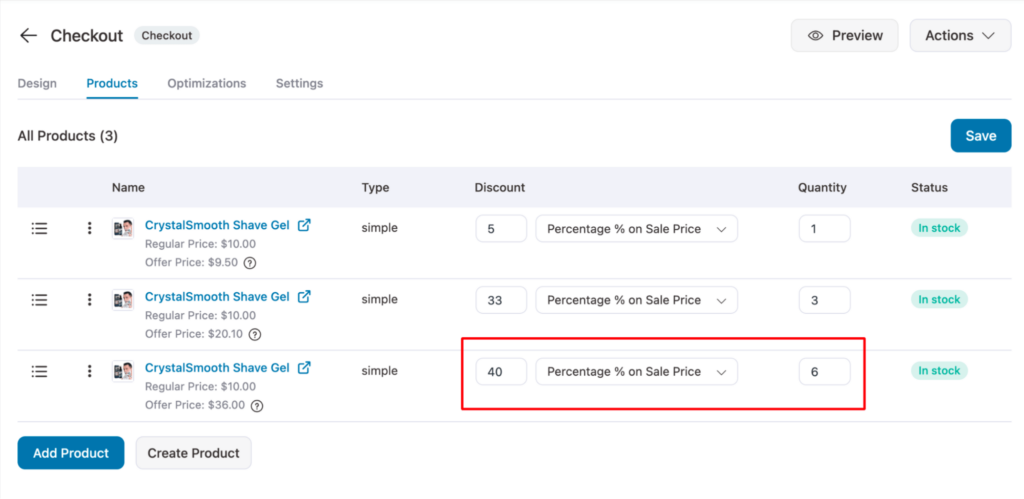
Repeat the same steps to add another quantity discount.
This time, we’ll offer a 40% discount when a customer purchases six units of the product.
Make sure to click on Save Changes.
Step 3: Add the quantity discount offers to the checkout page
Now, let’s set up how the quantity discount offers will appear on the WooCommerce checkout page.
🔔 Note: If your imported template already includes the Product field, you can skip the product field step and move directly to the setup.
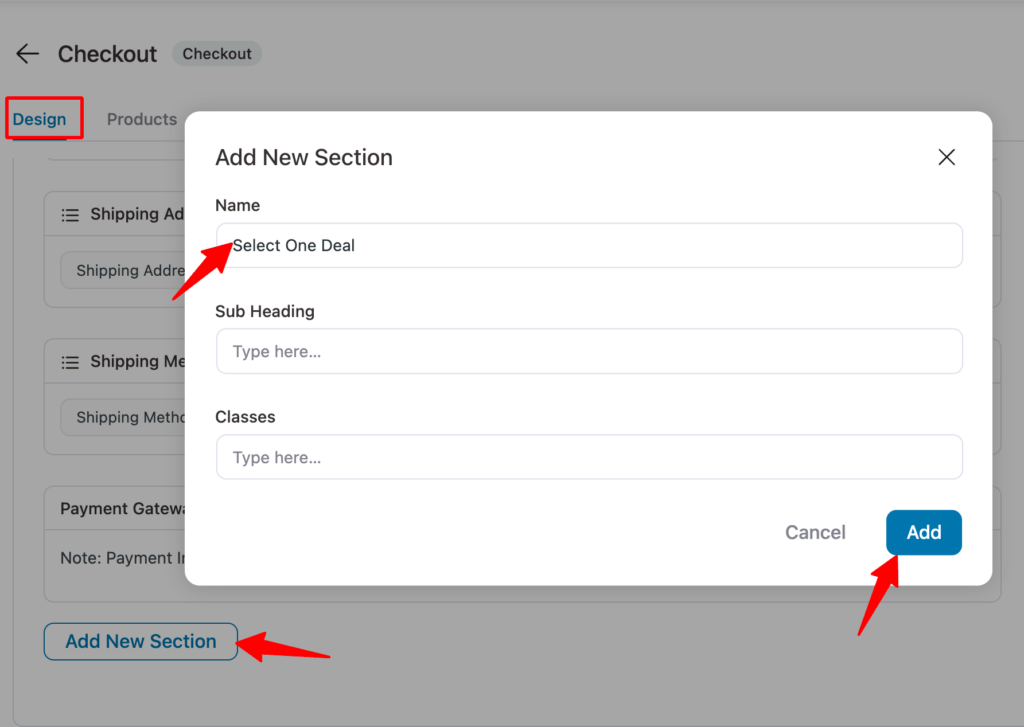
To add a new section, go to the “Checkout Form Fields” tab and click “Add New Section”. Enter a name for the section heading, and optionally add subheadings or classes. Then click “Add Section” to include it in your checkout template.
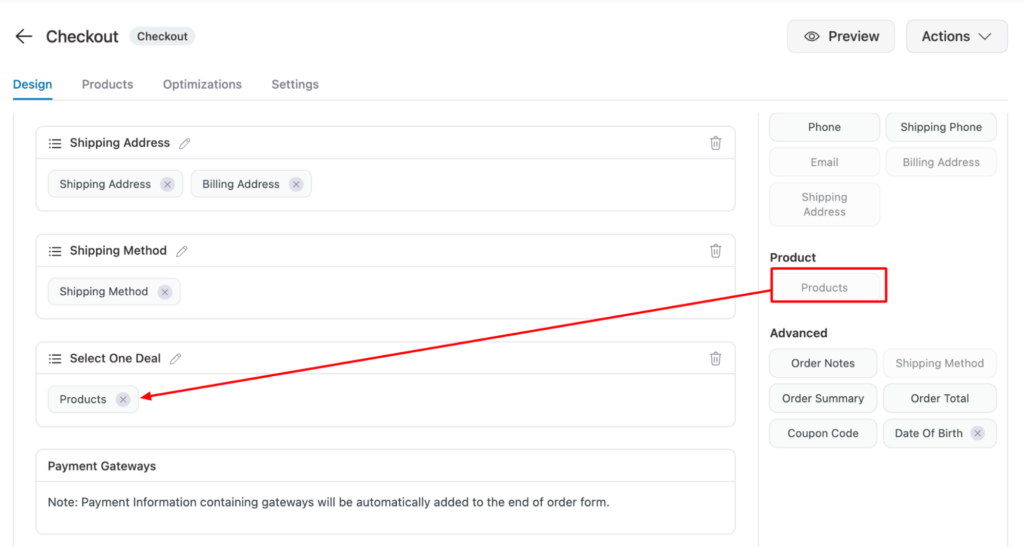
Now drag and drop the “Products” field to the new section.
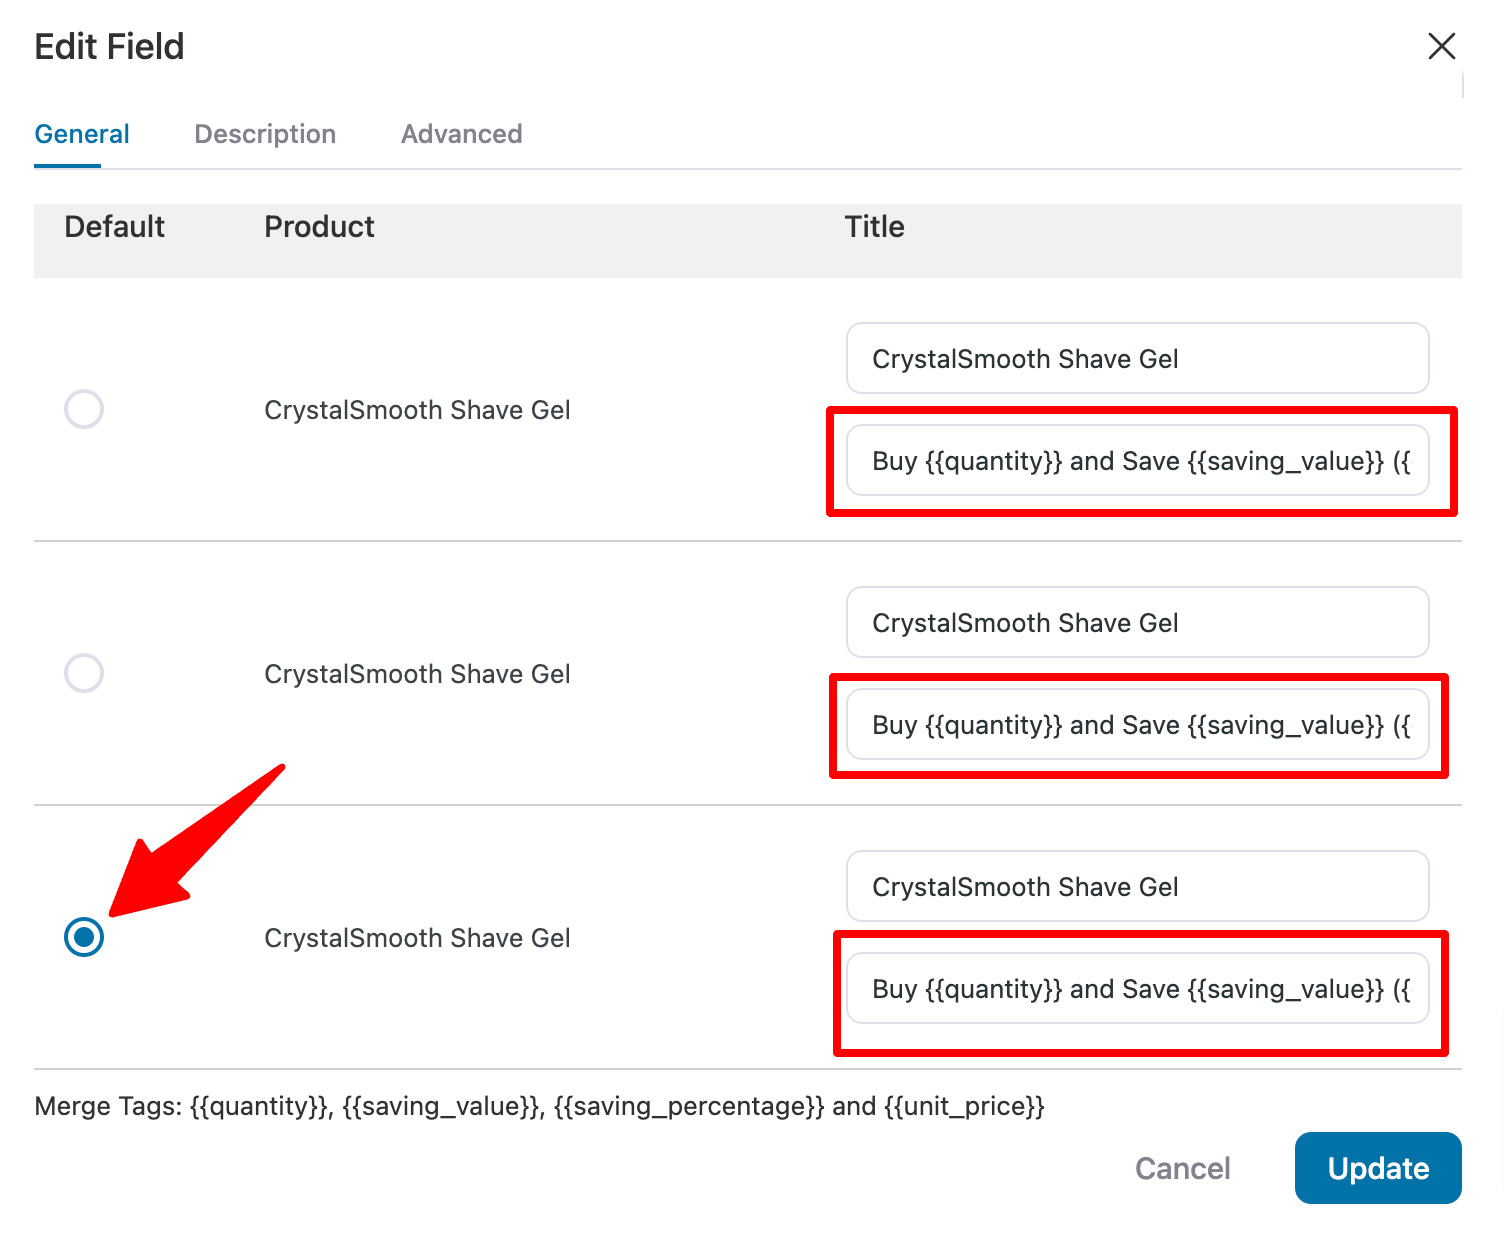
Click on the Products field. Here, you can set the default offer and customize the text that will describe each offer.
You can use merge tags to display the discounts dynamically. You can use the merge tags:
- {{quantity}}: It will display the product quantity.
- {{saving_value}}: It will show the amount users will save if they choose the deal.
- {{saving_percentage}}: Display the percentage customers will save.
- {{unit_price}}: Show the price of a single product.
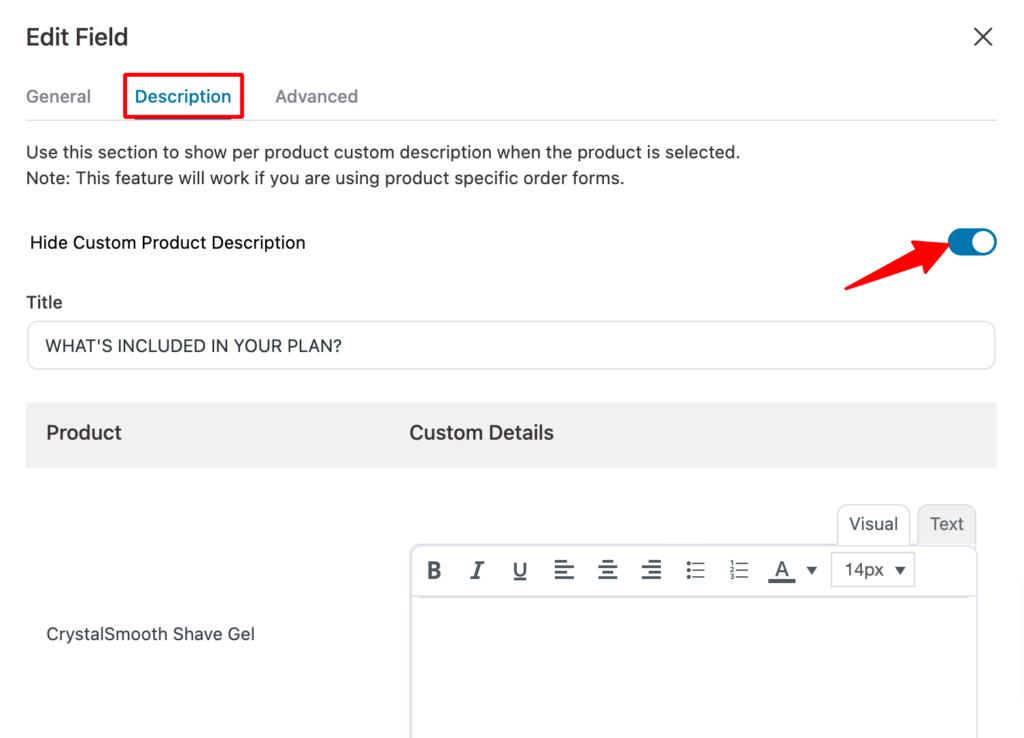
On the Description tab, you can add a custom product description. We don’t want to add any product description, so we will hide it.
On the “Advanced” tab, you can select the product to feature with a “Best Value” label.
Here, you can set the product, customize the label text, and choose its position on the checkout page.
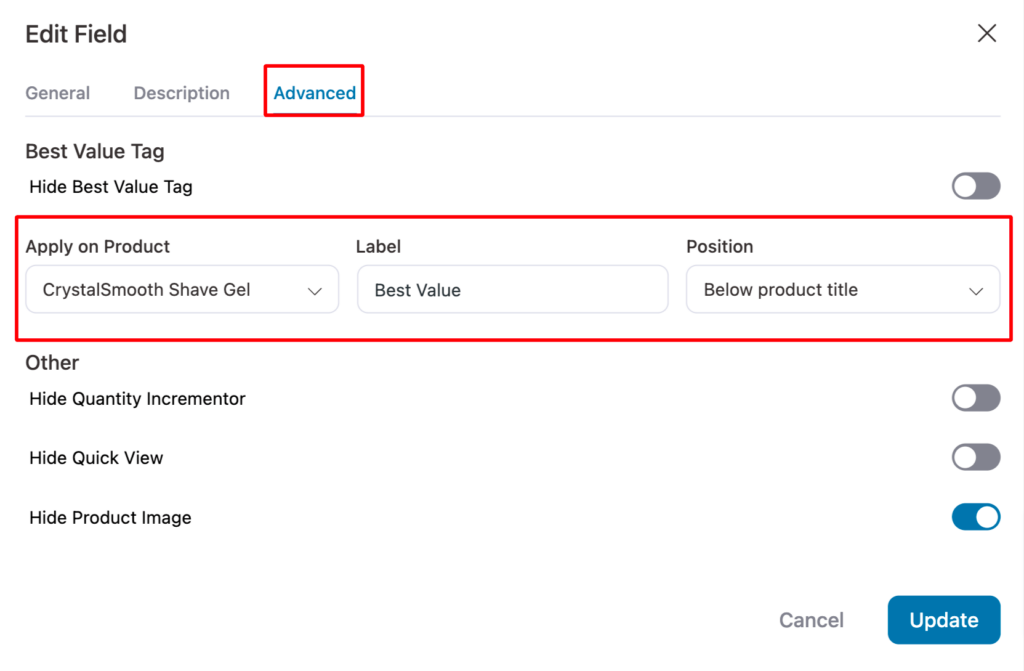
Click on “Update” to save the changes.
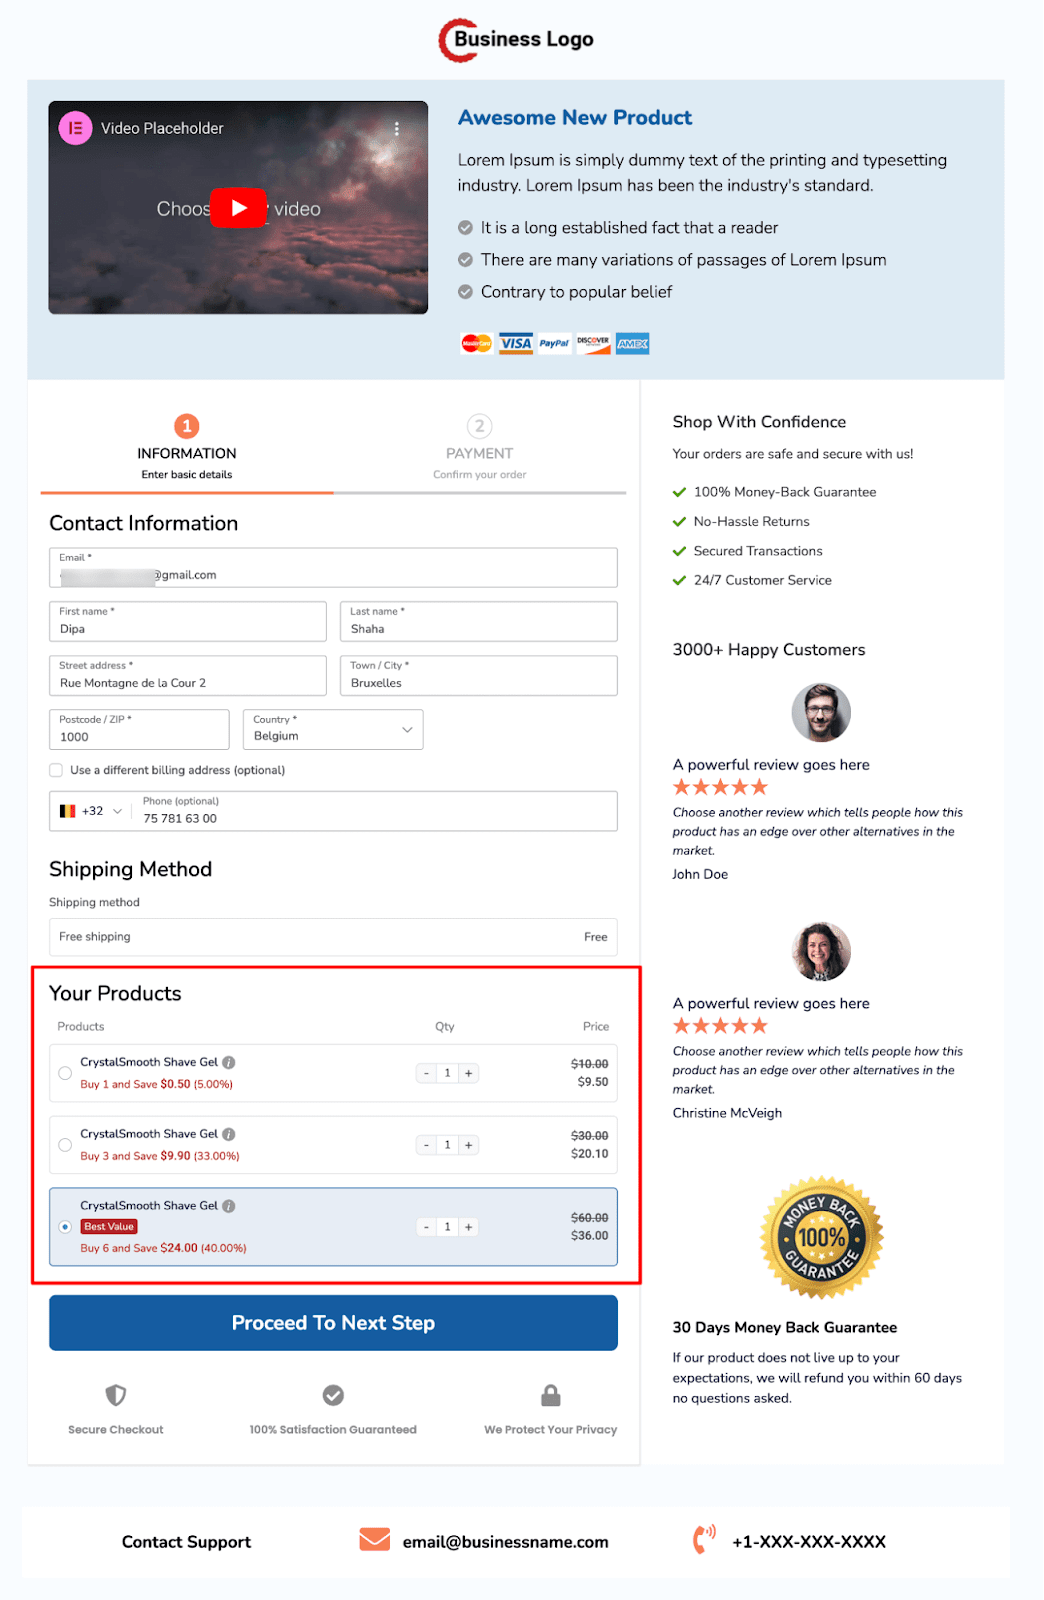
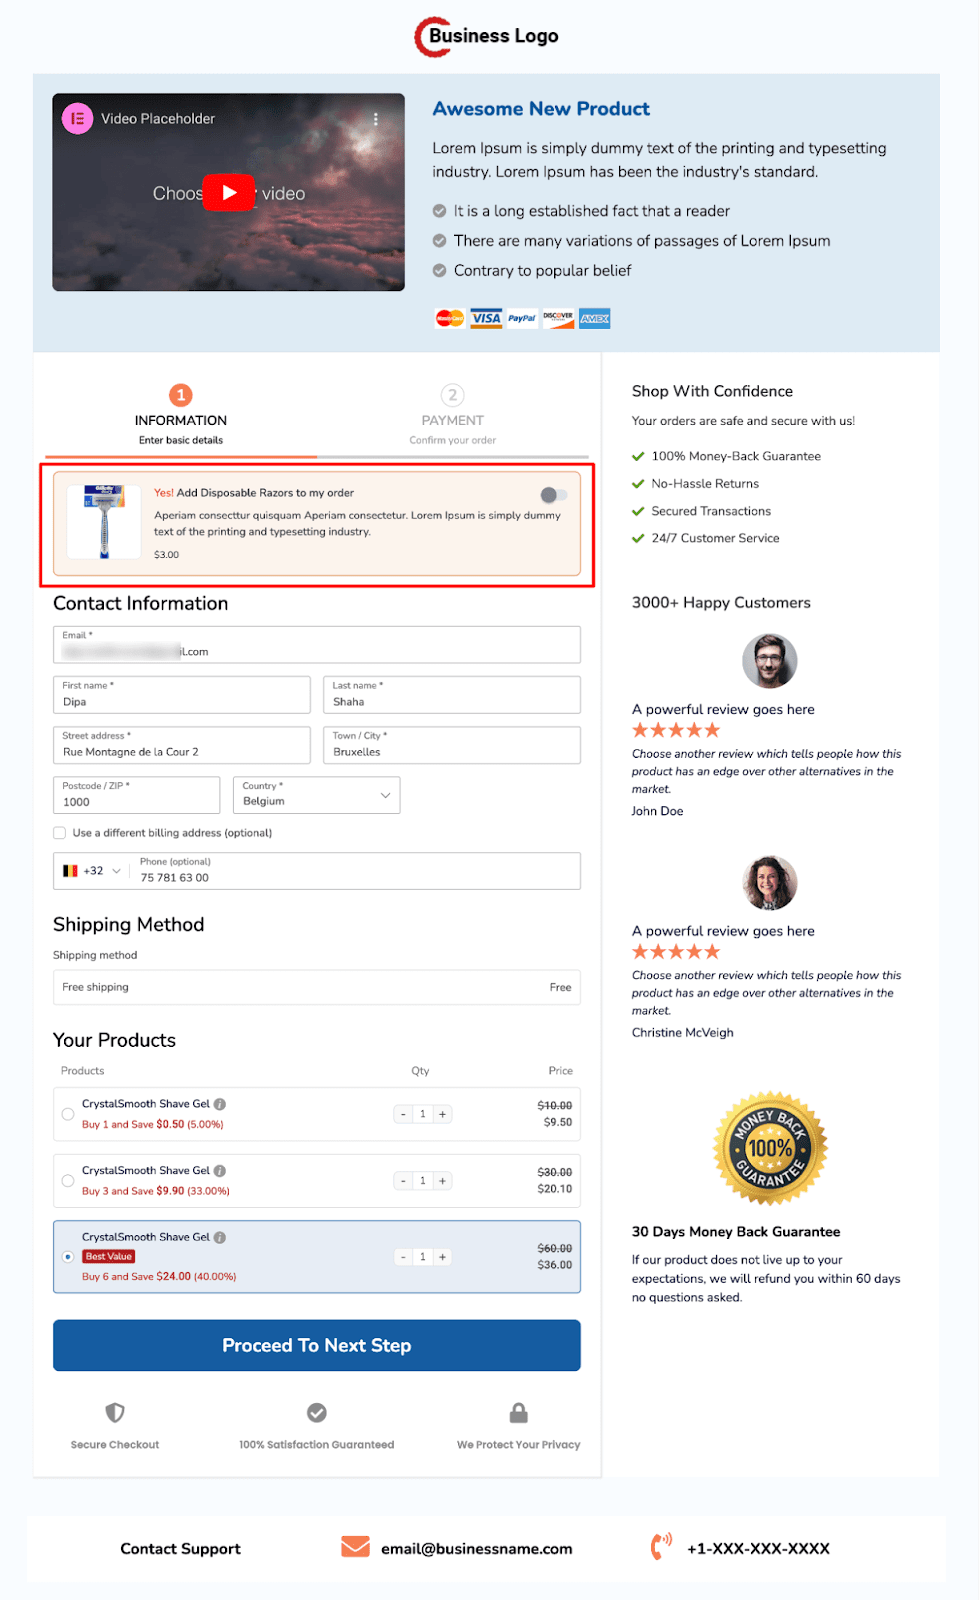
Here is a preview of how the WooCommerce quantity discounts will look on the checkout page.
Step 4: Connect the quantity discount offers to a landing/sales page
Once your WooCommerce quantity discounts are set and displayed on the checkout page, link them to your sales page to promote the products and their discounts.
Customize your sales page to highlight all quantity discounts. Presenter templates already include a product section you can edit for this.
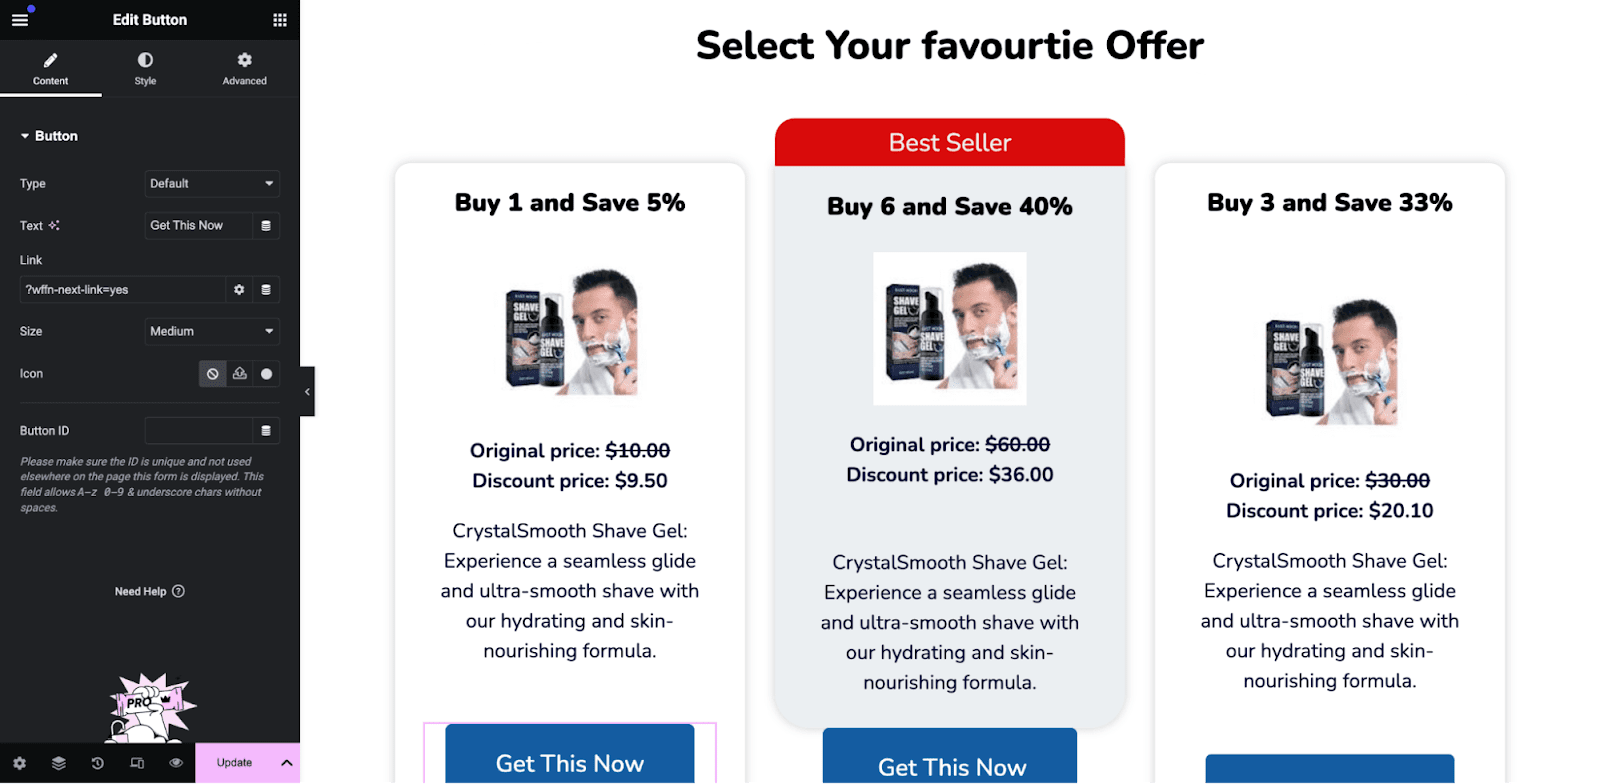
Next, link each product to its corresponding Call to Action (CTA) so that when users click a CTA, the selected product is automatically added to their cart on the checkout page.
Use the FunnelKit Checkout URL structure, which requires the checkout URL and the product sequence number, to create these CTA links.
To create a URL with the product parameter, append “/?aero-default=Product_Sequence_Number” to the Checkout page URL.
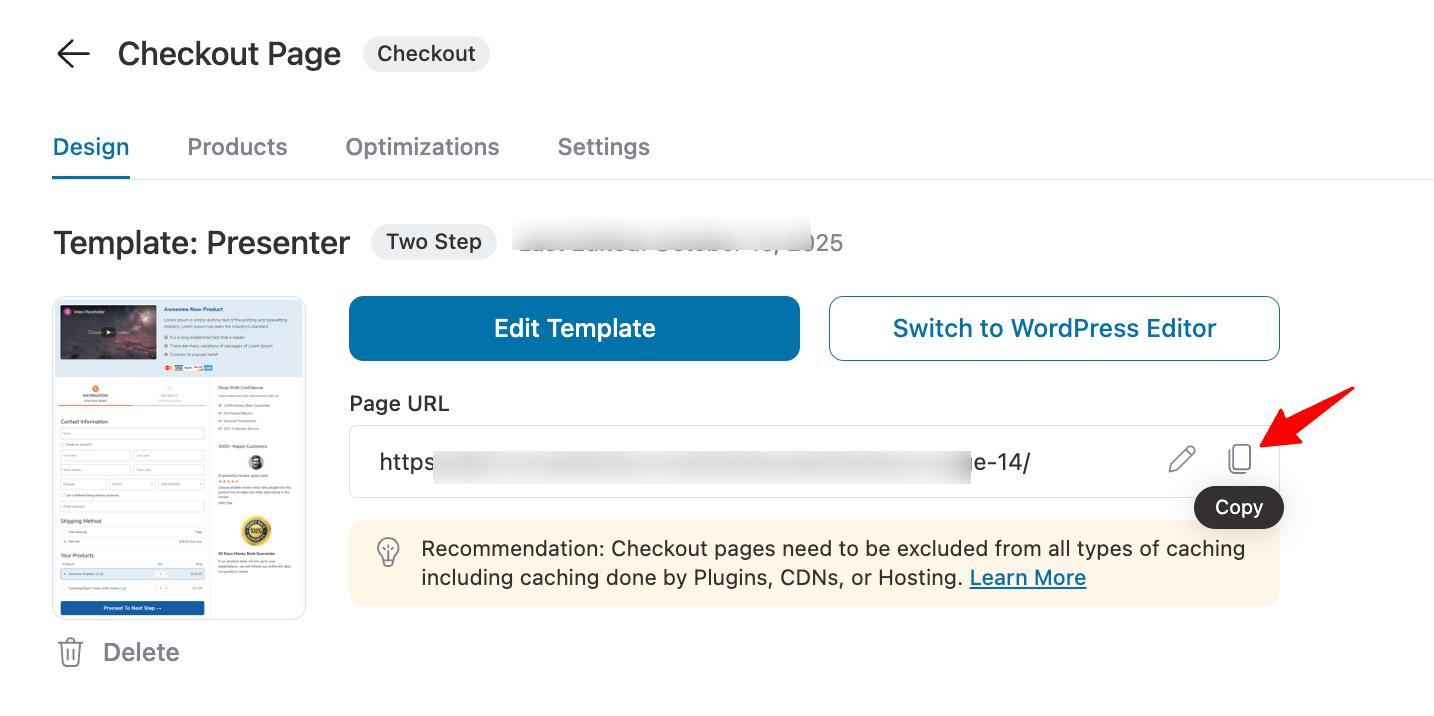
You can find the checkout URL on the checkout step design tab.
You can find the product sequence in the "Products" section of the checkout page. From the top, the sequence begins.
Therefore, the topmost product is 1, and the rest follow in sequential numerical order, like 2, 3, 4, etc.
So, to connect to the first product with quantity 1 discount 5%, the custom URL will be👇
https://yourdomain.com/checkouts/checkout-84?aero-default=1The second one with quantity 3 (discount 33%)👇
https://yourdomain.com/checkouts/checkout-84?aero-default=2And the URL for the last or third one with quantity 6 (discount 40%) will be 👇
https://yourdomain.com/checkouts/checkout-84?aero-default=3Now, all you have to do is edit the CTA of the pricing section we just added and add the URL in the Link option.
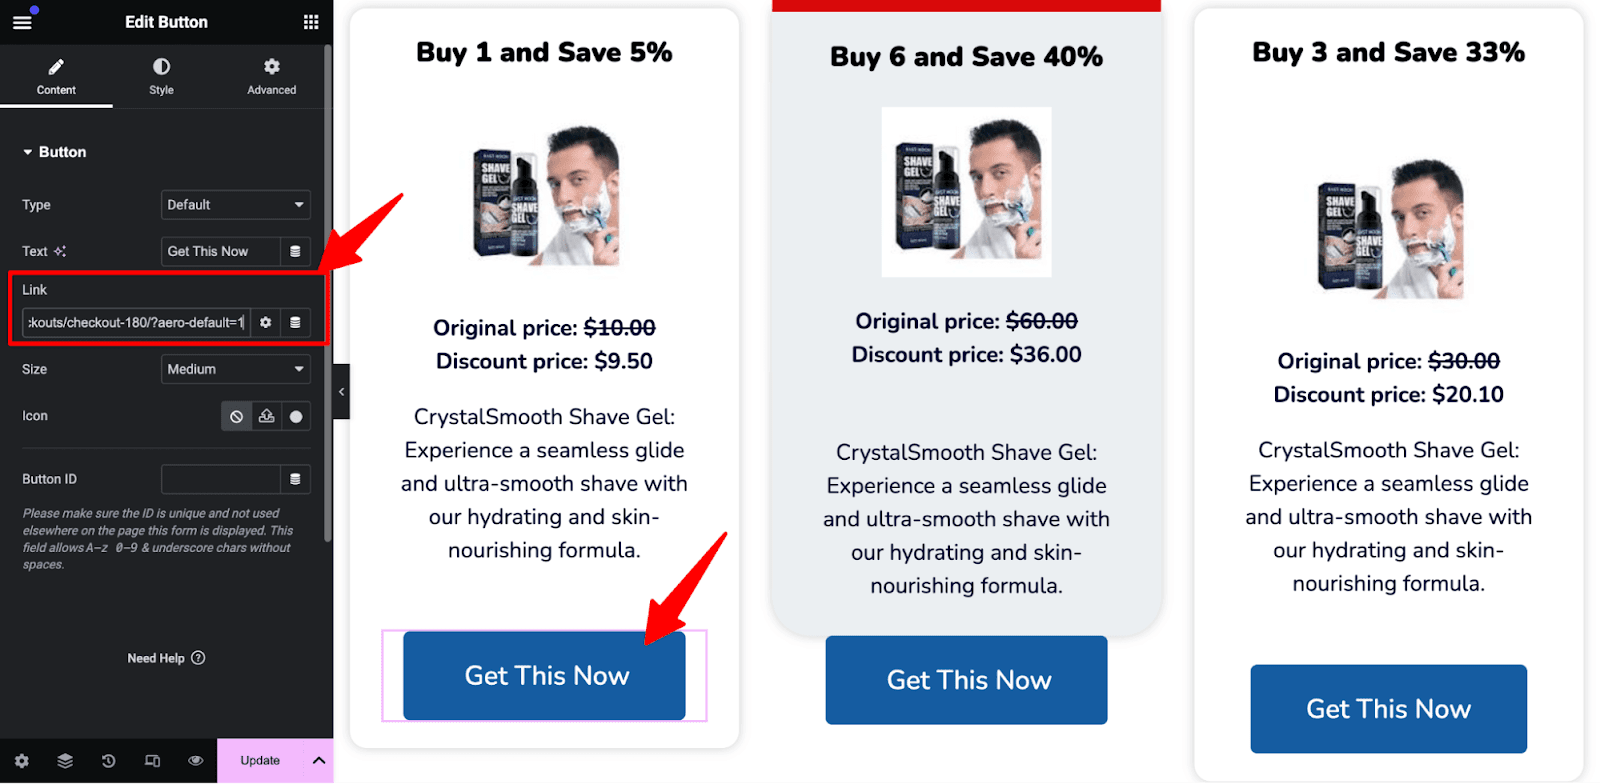
Repeat this process for all three CTAs.
That’s it!
Your sales page is now linked to the checkout page, allowing users to select their preferred quantity discount and complete checkout smoothly.
Step 5: Add an order bump offer to the checkout page
Now, you can add order bumps and one-click upsells to your sales funnel to increase average order value.
An order bump is a low-cost offer on the checkout page that users can add to their cart with a single click.
Here, we’re offering disposable razors as an order bump alongside our bundle of shaving creams.
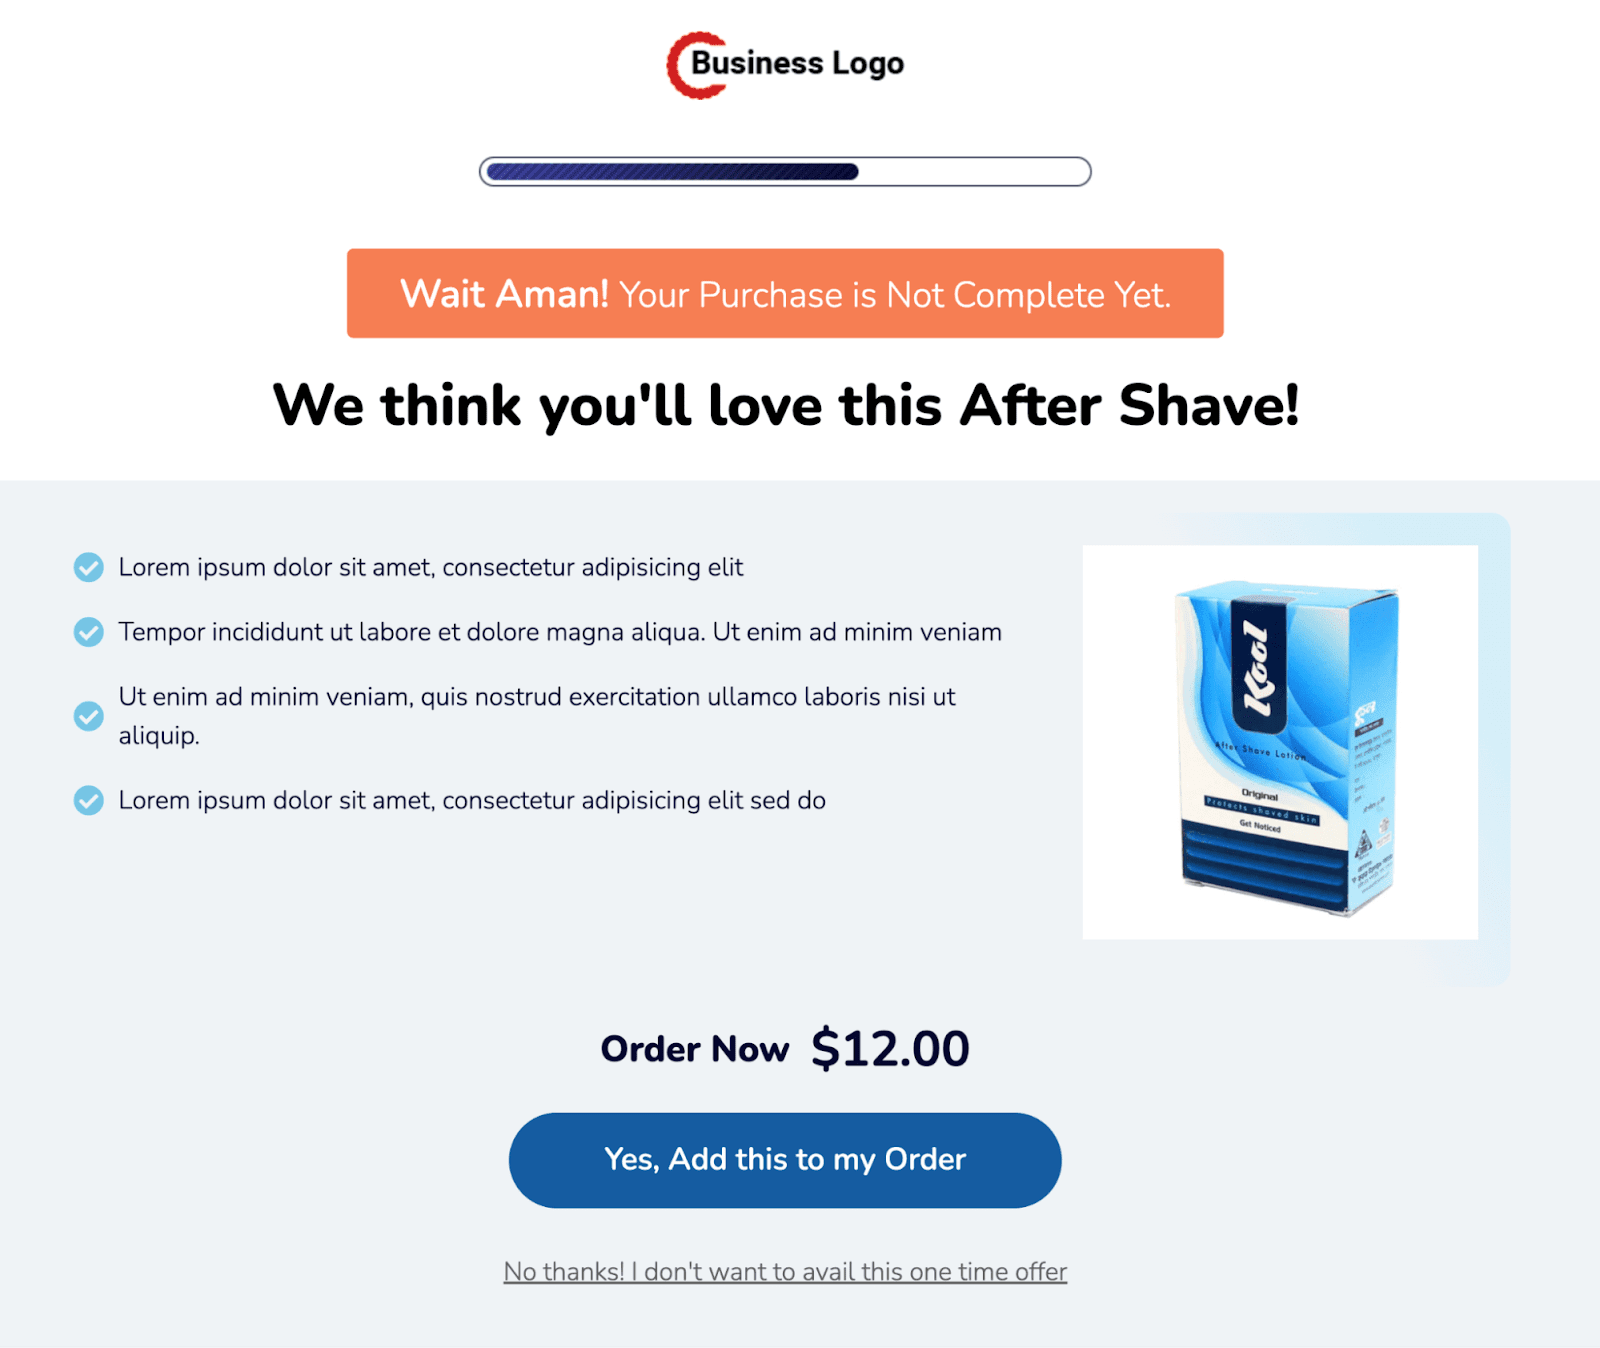
Step 6: Add a one-click upsell to boost AOV
Similar to order bumps, you can offer one-click upsells to increase average order value.
One-click upsells are high-value offers presented immediately after checkout, allowing customers to purchase with a single click without re-entering their payment details.
Here, we’re offering aftershave lotion as a one-click upsell.
You can customize the thank you page, as you did with checkout and upsell templates above.
And that’s it! Your sales funnel with WooCommerce quantity discounts is ready.


