The page-specific global settings are applicable to all the funnels you've created in your WooCommerce store.
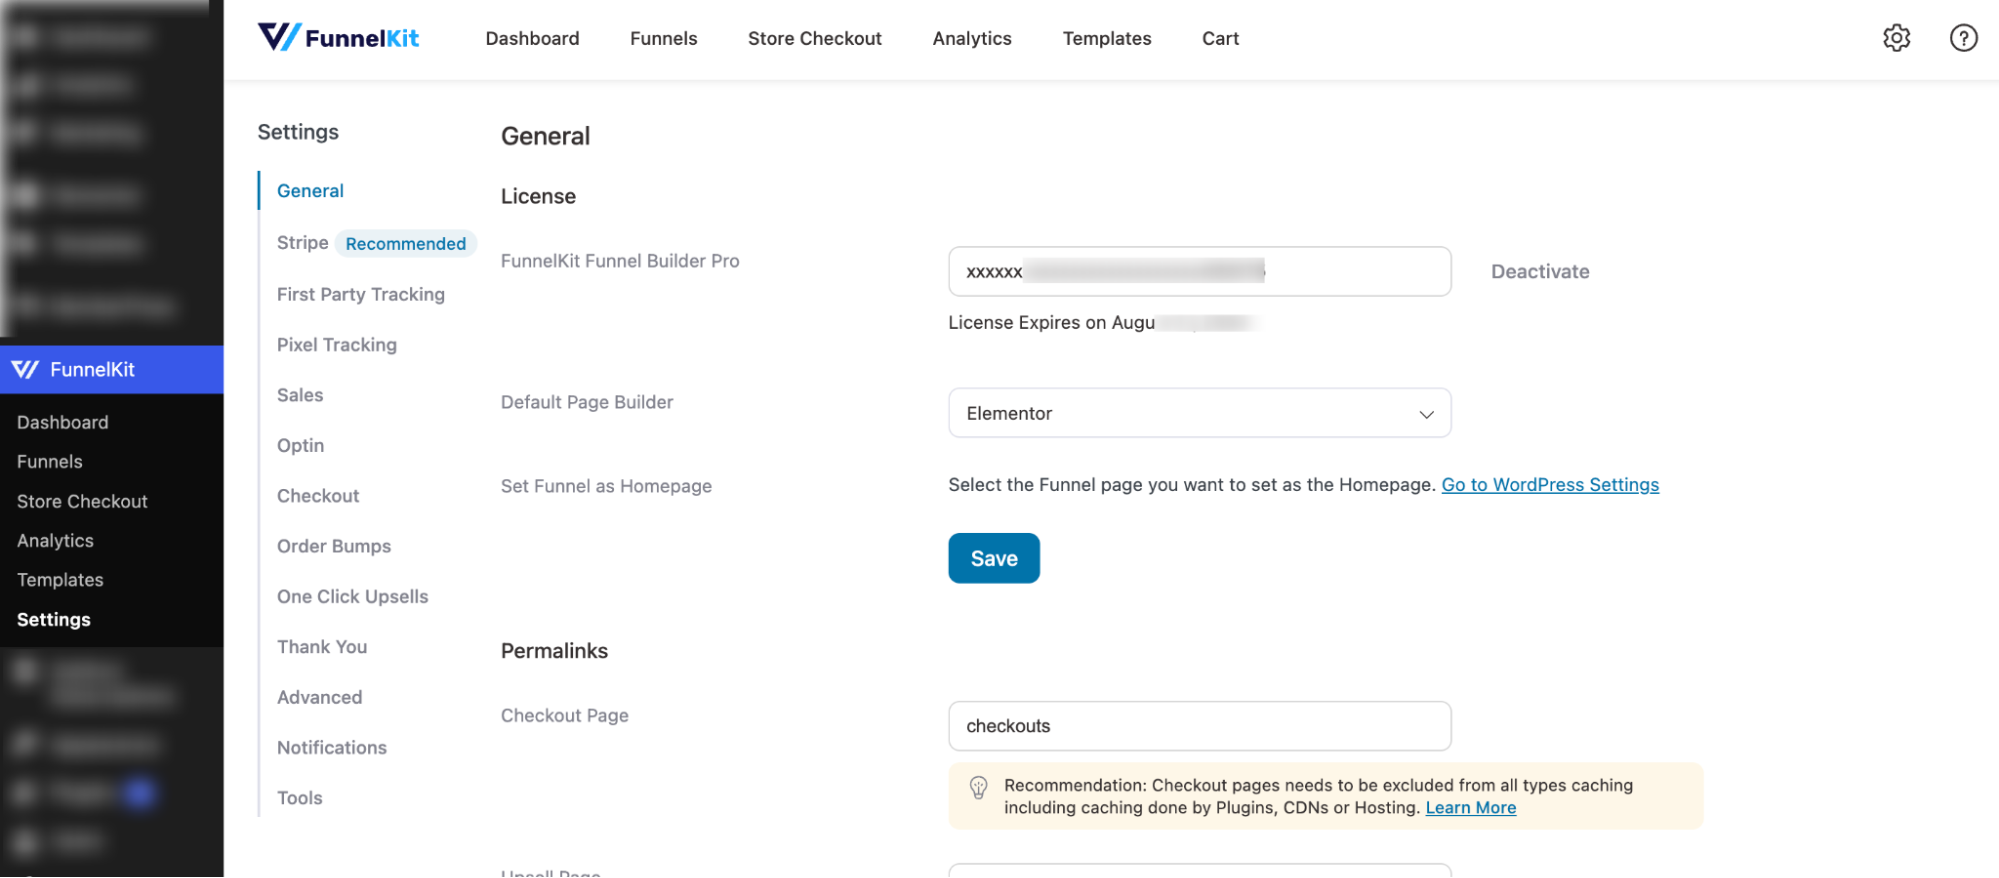
Go to FunnelKit > Settings to access the global settings of the Funnel Builder.
Here you can configure the general settings:
- License
- Permalinks
- First Party Conversion Tracking
- Facebook Pixel - Conversion API
- Google Analytics
- Google Ads
- TikTok
- Snapchat
In this document, we will explain how to configure these settings across all pages in every funnel. It can include sales pages, opt-in pages, checkouts, order bumps, one-click upsells, and thank-you pages.
Sales Pages
FunnelKit lets you write your custom CSS codes and external JavaScripts to modify your sales pages as per your brand.
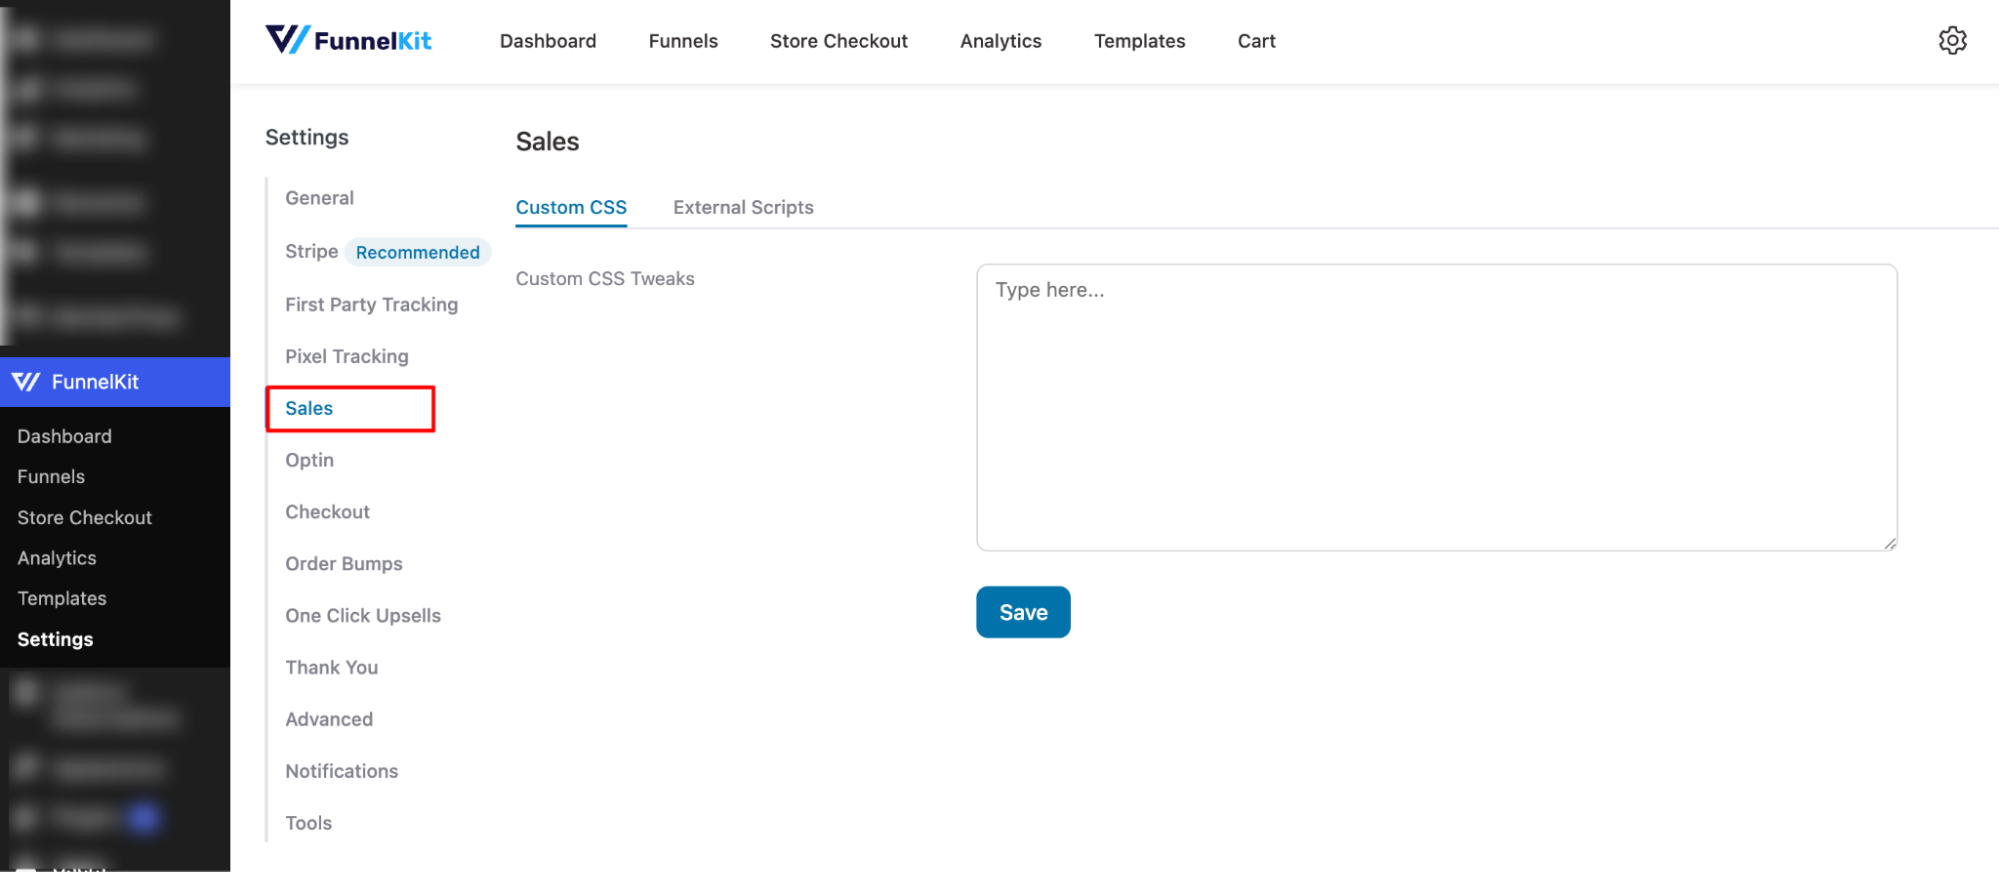
Start exploring the global Sales Page settings.
Optin Pages
With these settings, you can edit your sender's email information and spam protect your opt-in page using the Google v2 Invisible reCAPTCHA key.
Furthermore, FunnelKit lets you write your own CSS code and external scripts to make these pages more appealing.
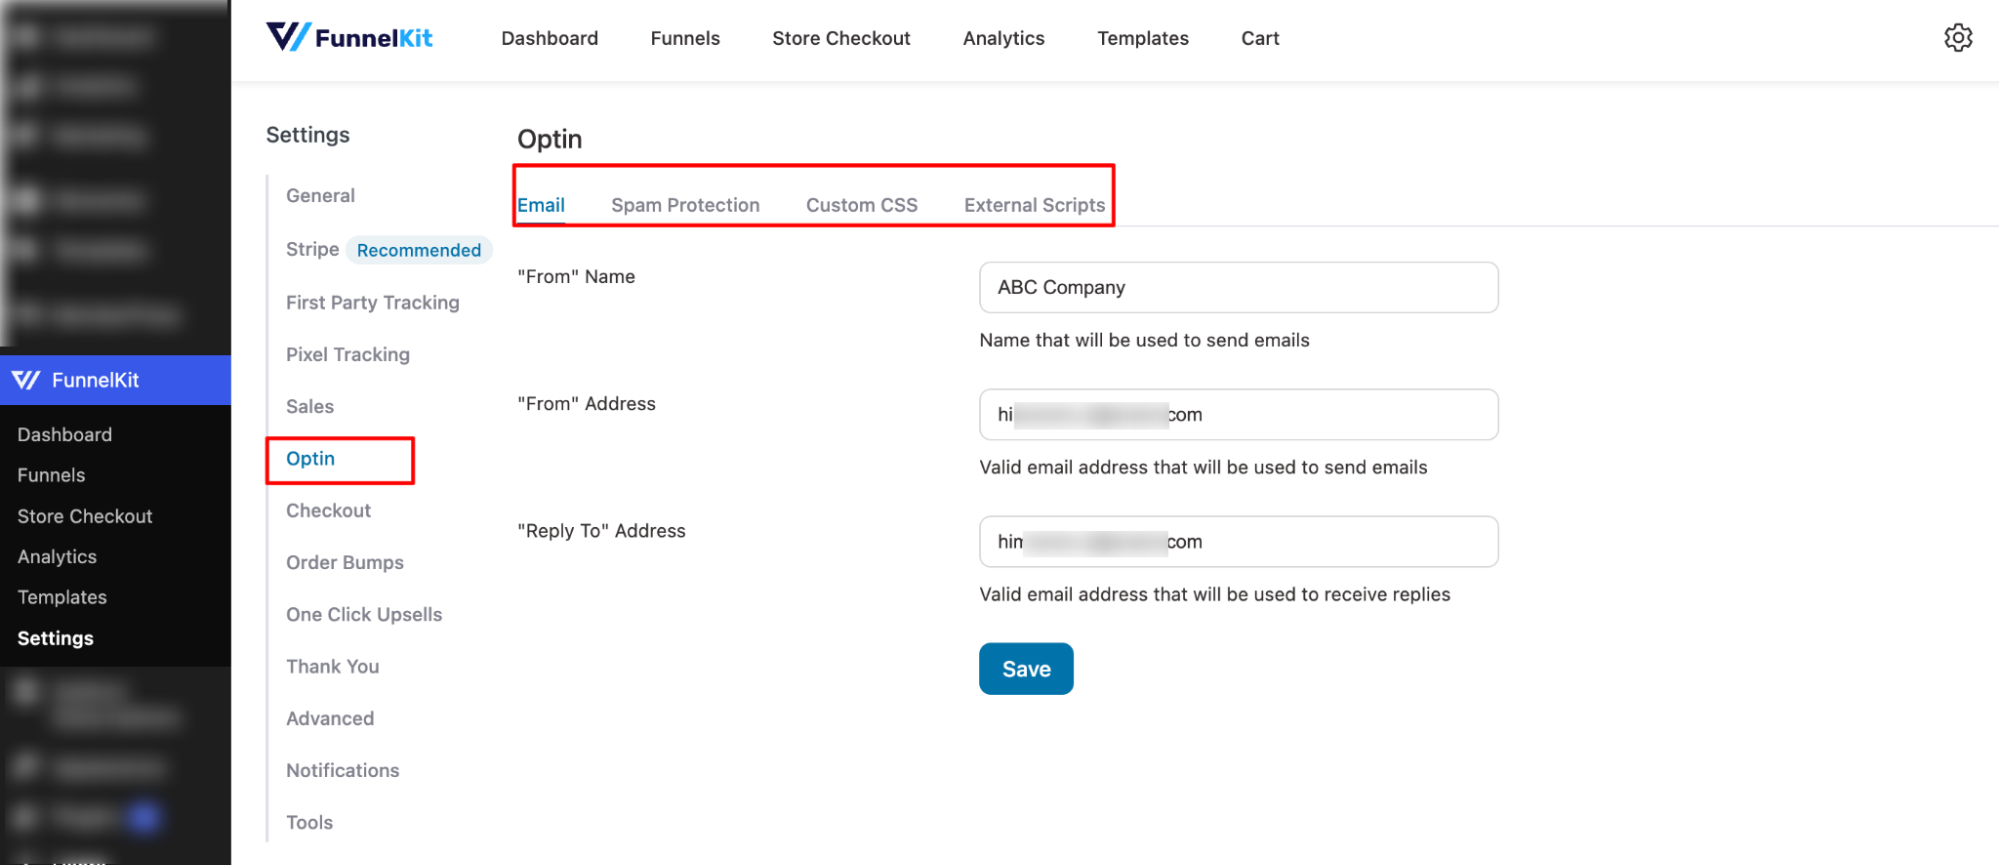
Learn how to configure global Optin page settings.
Checkouts
The global settings of Checkouts will show up here. You can choose to create custom CSS tweaks and external scripts for your checkout pages here.
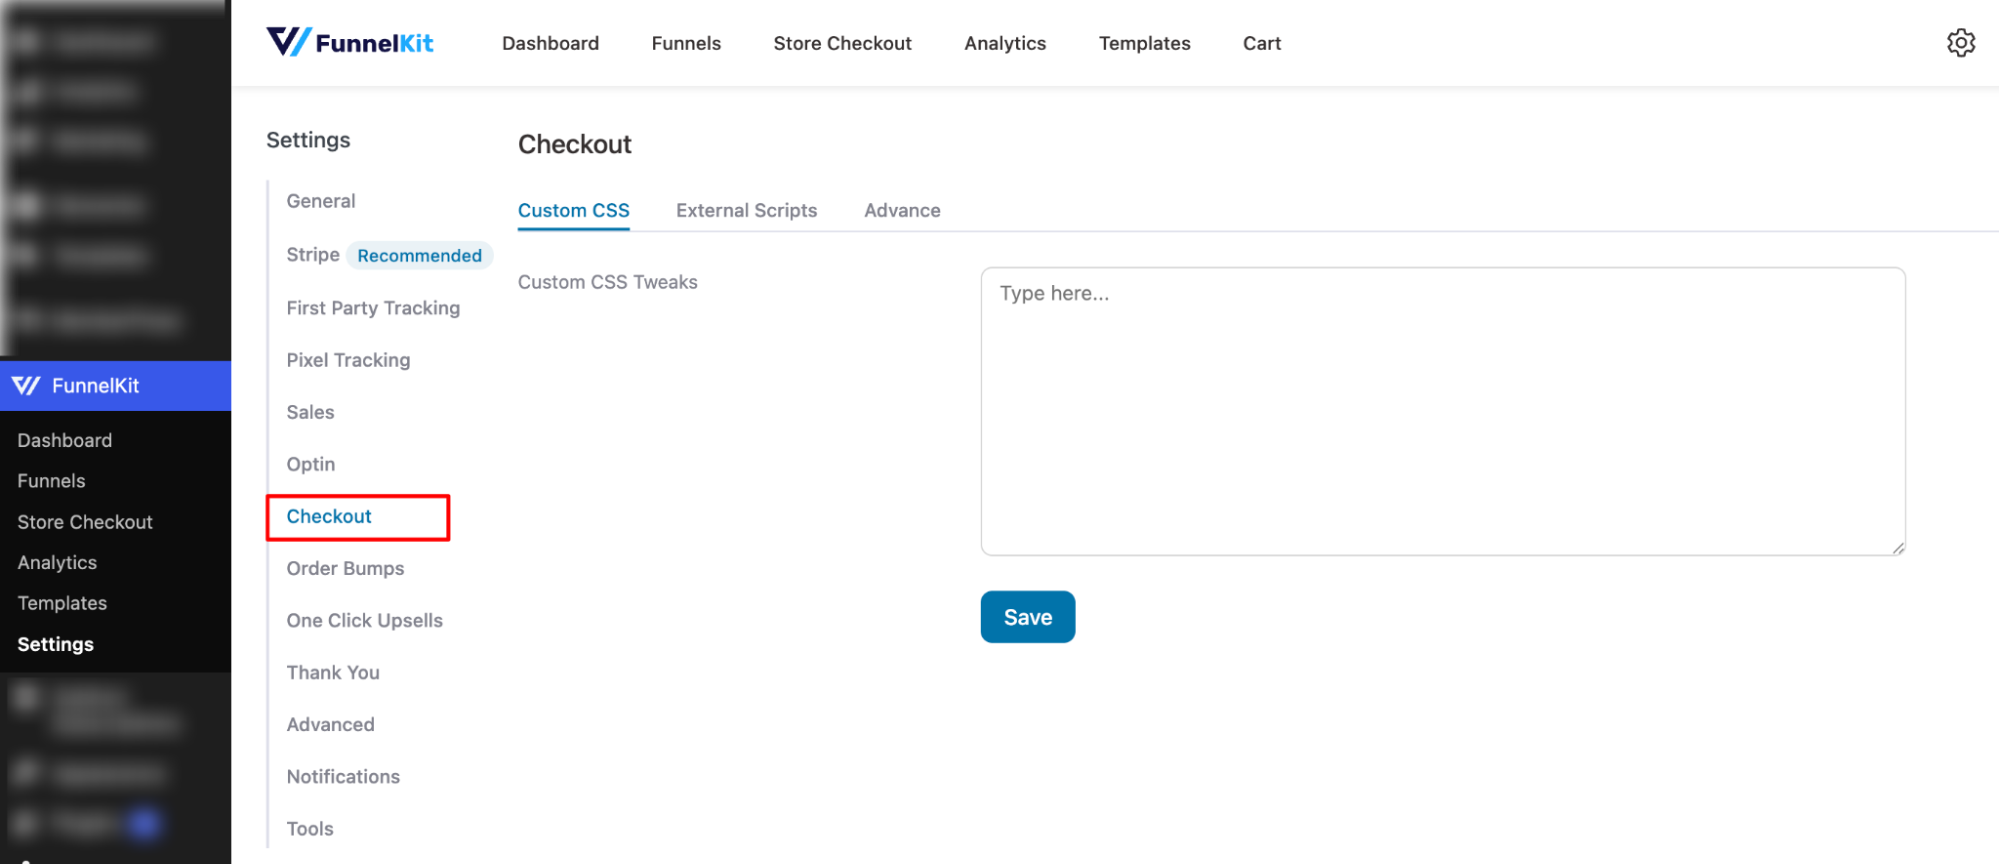
Learn more about these global Checkout page settings.
Order Bumps
If you want to configure settings for a specific order bump you're creating, then you must go to the Settings page here.
The settings here globally apply to system-level Order Bump preferences.
You can add a custom CSS code as well as set the limit on order bumps to be shown on the checkout page.

Read our documentation on global Order Bump settings.
One-Click Upsells
The global settings for one-click upsell have some great options to facilitate your sales conversion. Therefore, we recommend you go through these settings before making your one-click upsell sales funnel live.
Here are some important settings to check:
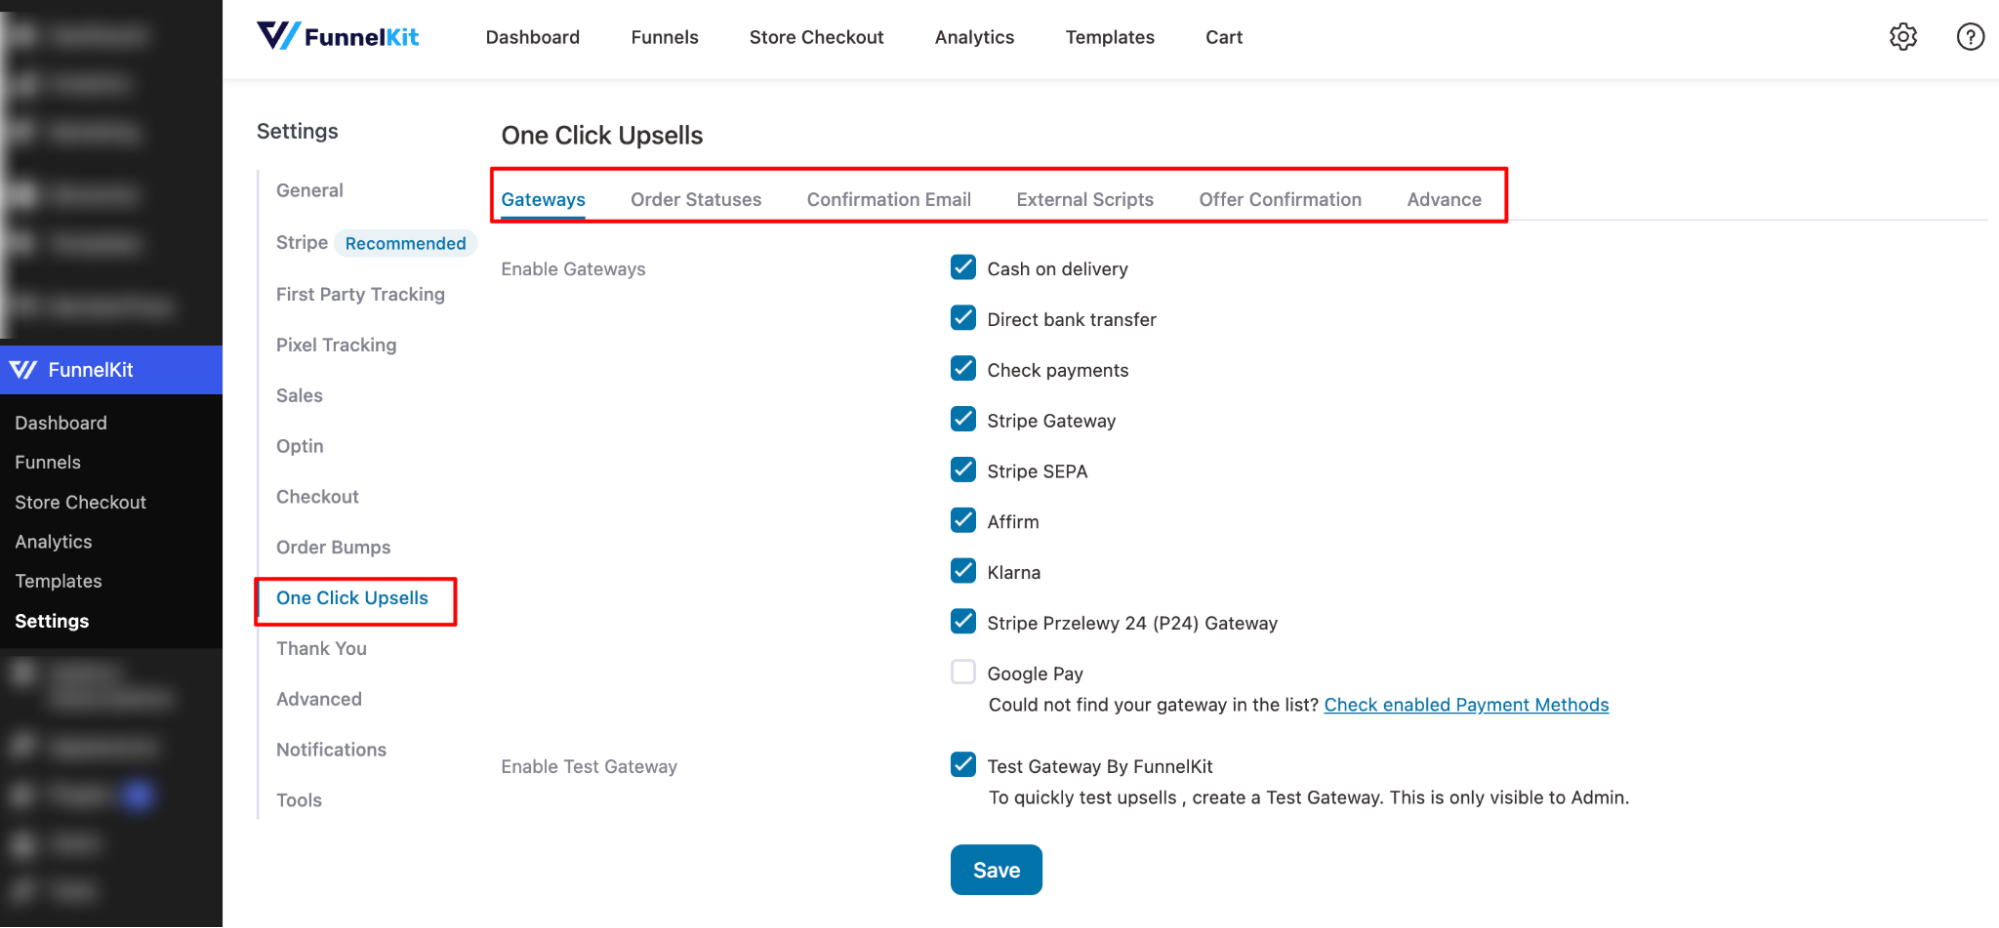
Gateways for One-Click Upsells - FunnelKit allows you to select the payment gateways for which you want to run post-purchase one-click offers.
Custom order statuses - You can add an intermediary state to point out when a one-click upsell offer gets triggered. This setting helps you process the correct order data.
Confirmation Email - You can either custom-design your upsell pages using shortcodes or use page builder tools. You can manage the style of custom one-click upsell pages here.
External Scripts: Add custom codes.
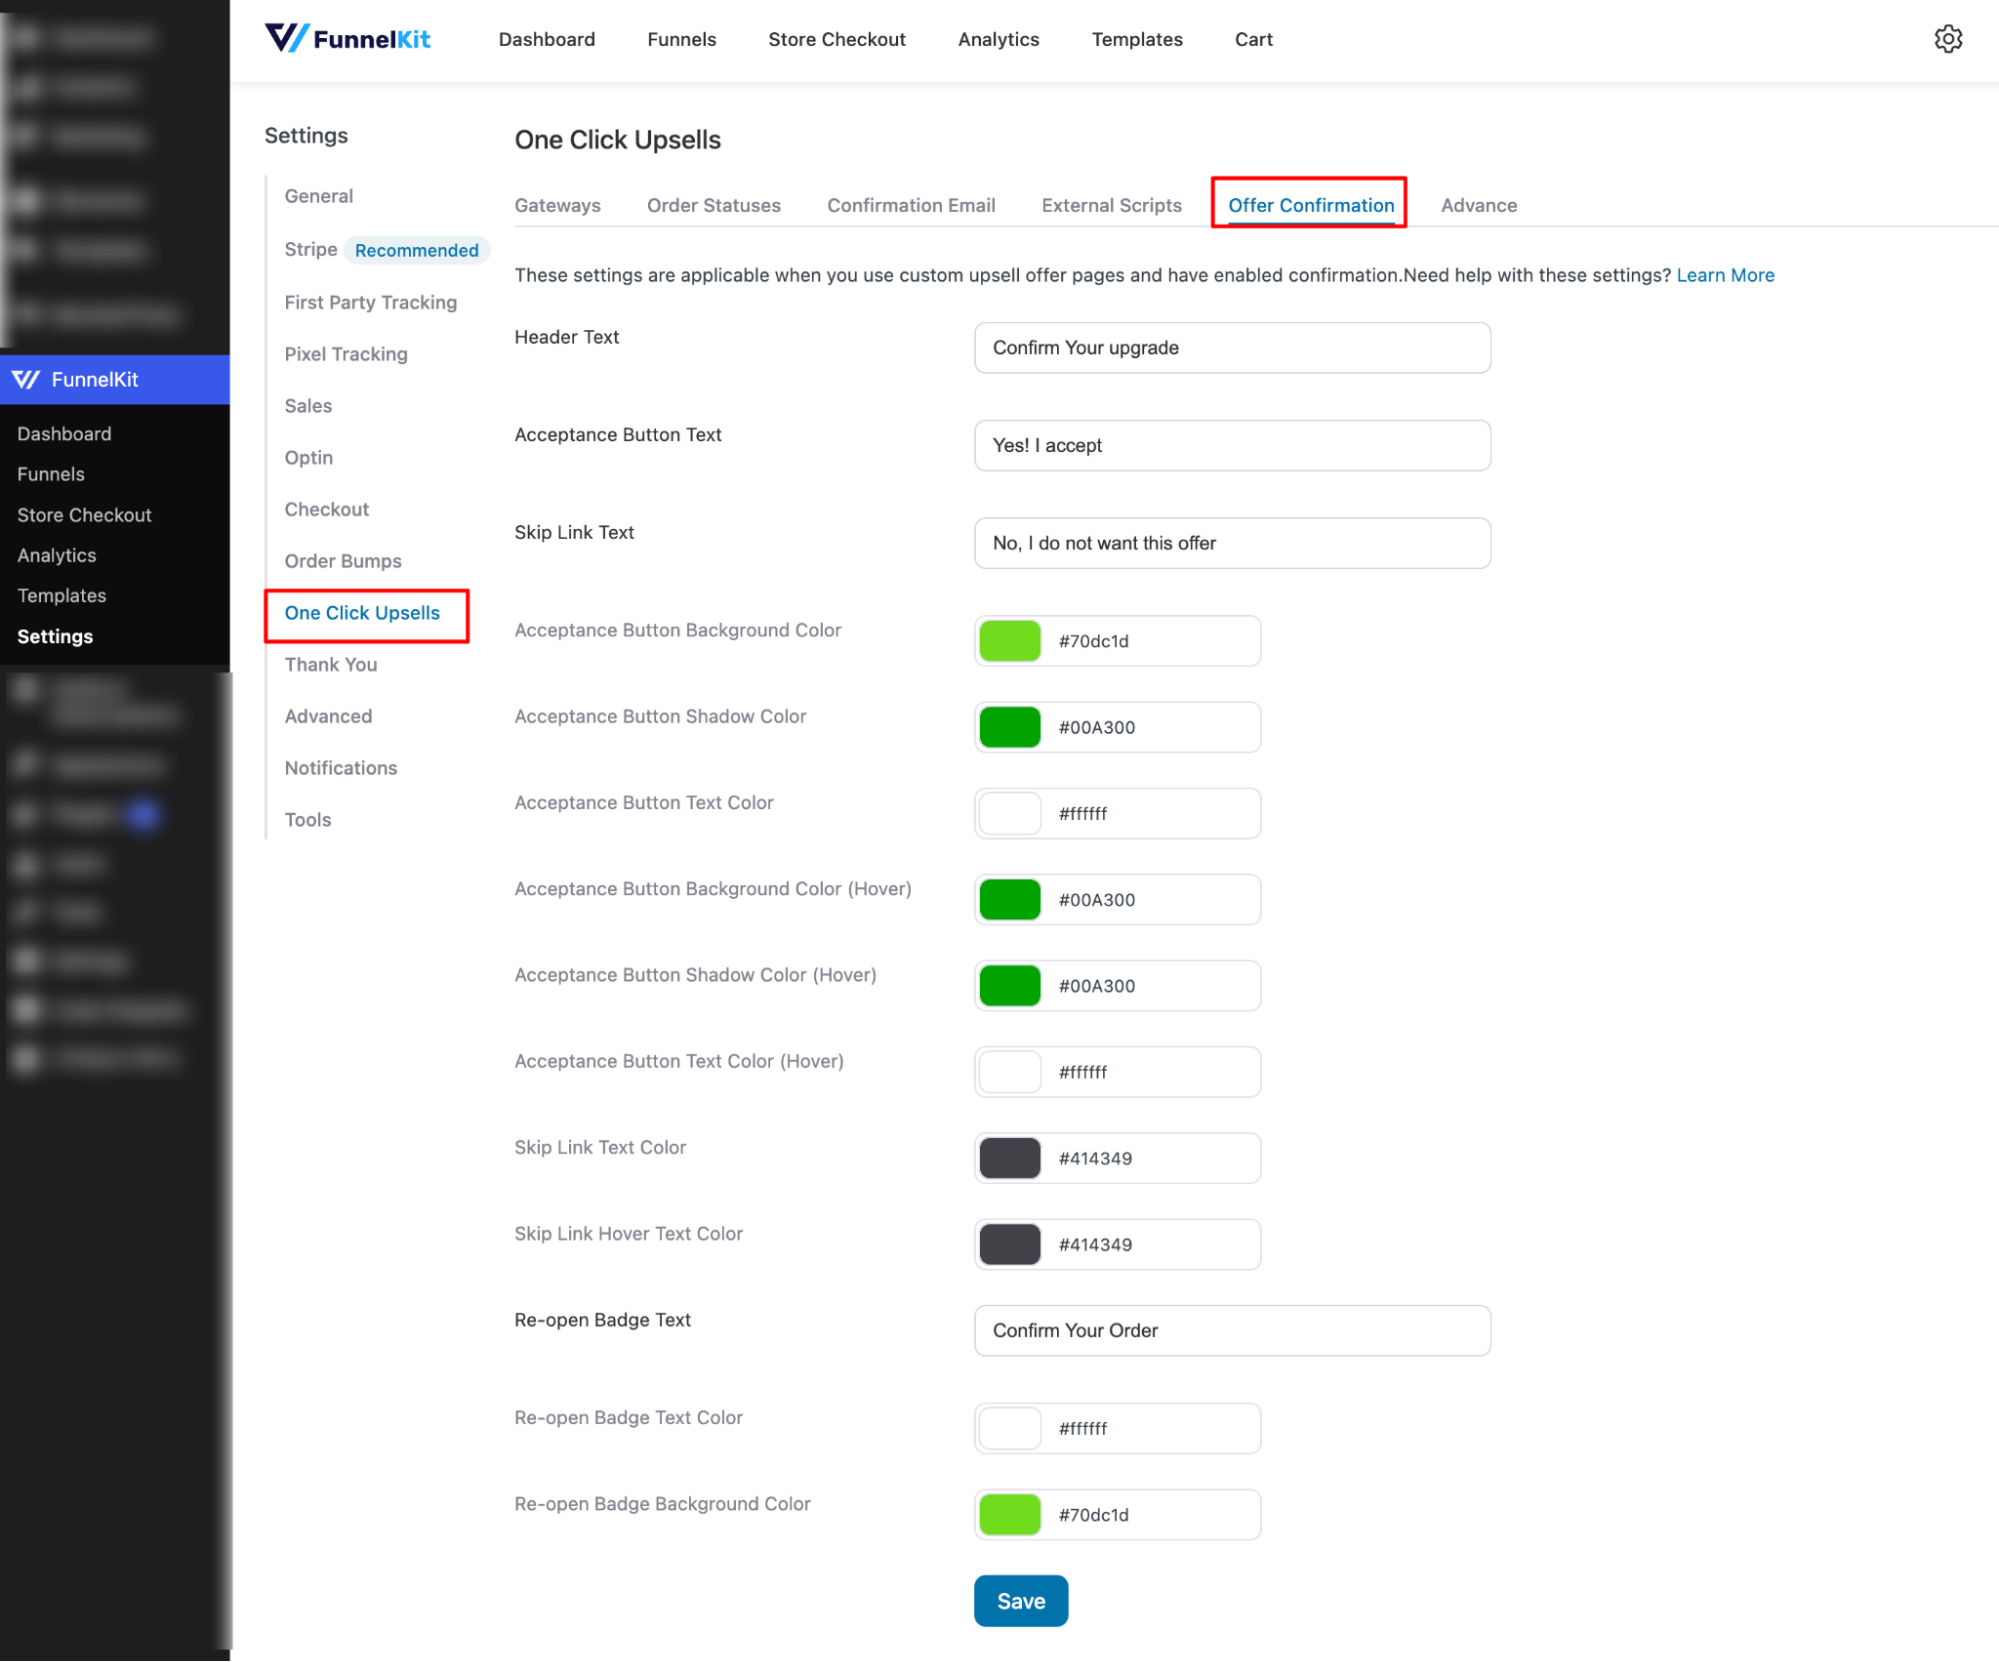
On the Offer Confirmation tab, you can customize the header, acceptance button, skip link, and re-open badge, including their text and colors (normal and hover).
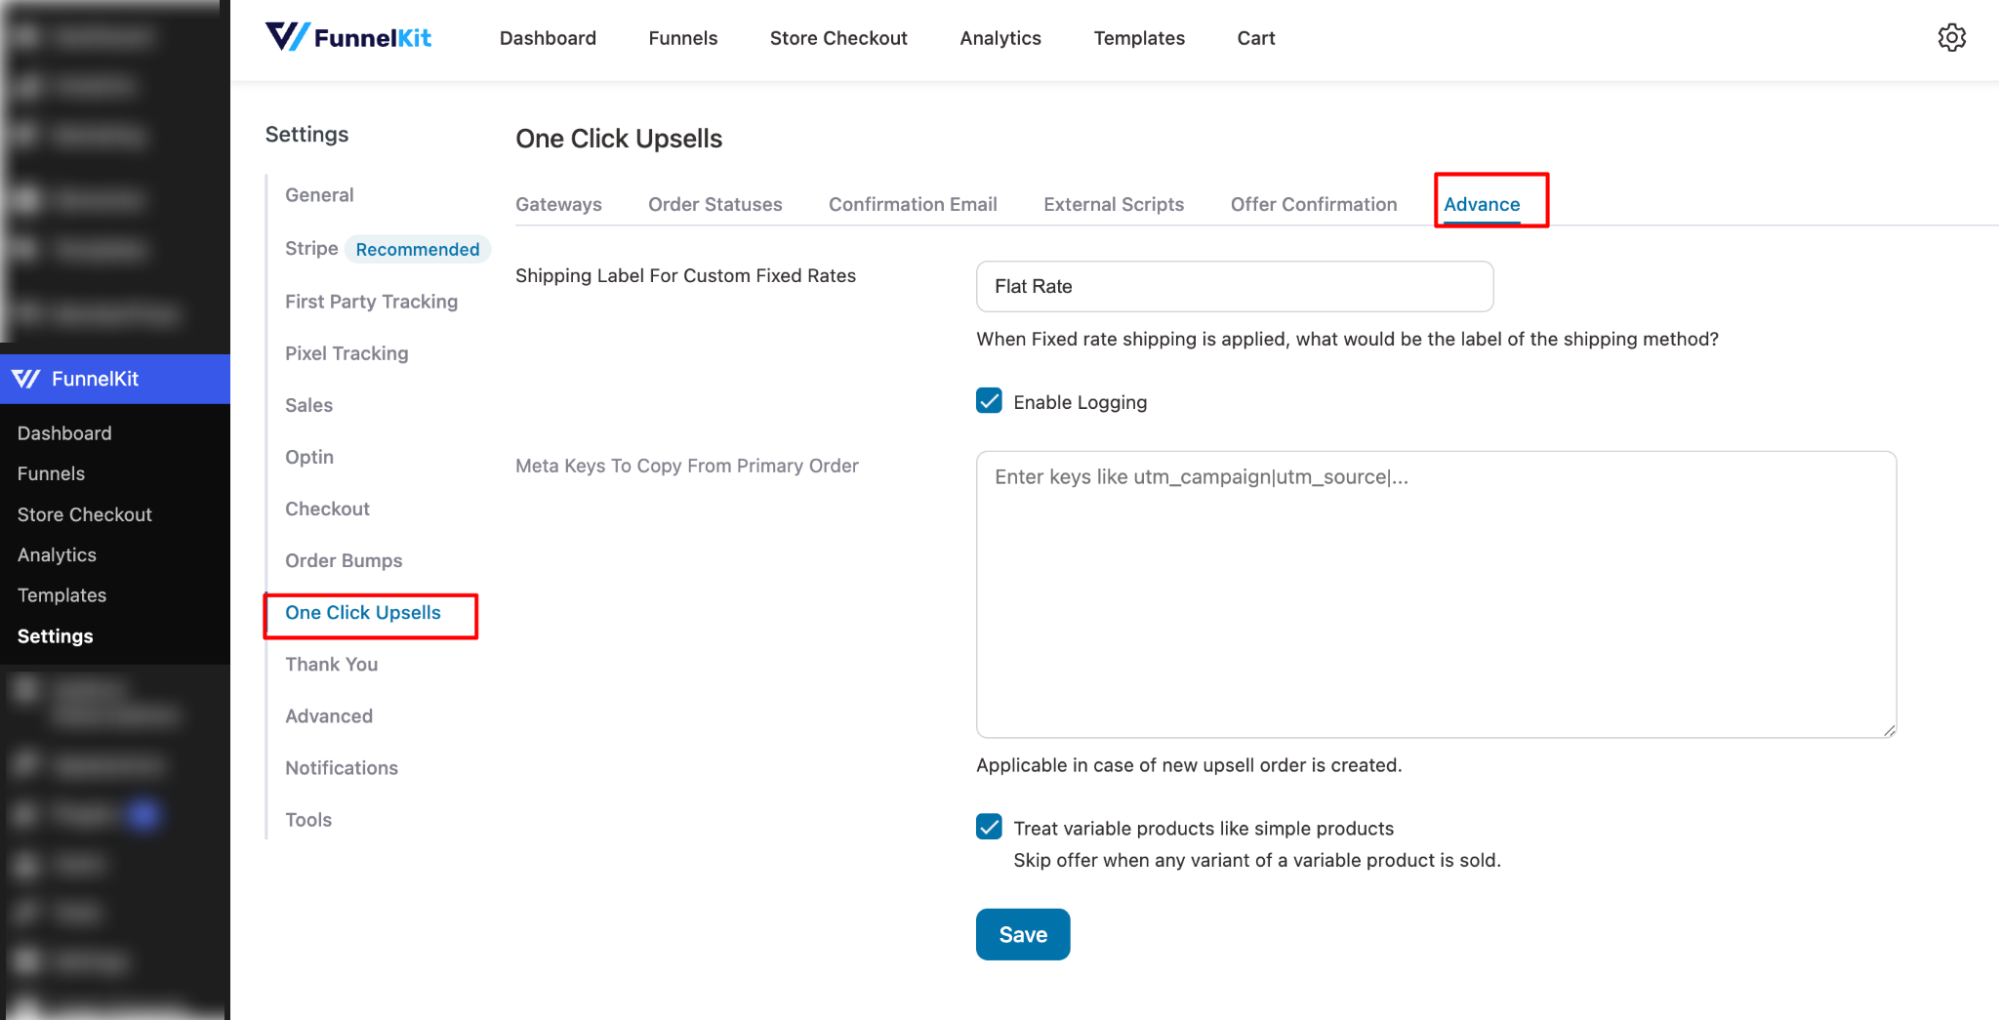
On the Advanced level, you can set the shipping label for fixed rates, enable logging, and specify meta keys to copy from the primary order.
Learn how to configure global settings for One Click Upsell pages.
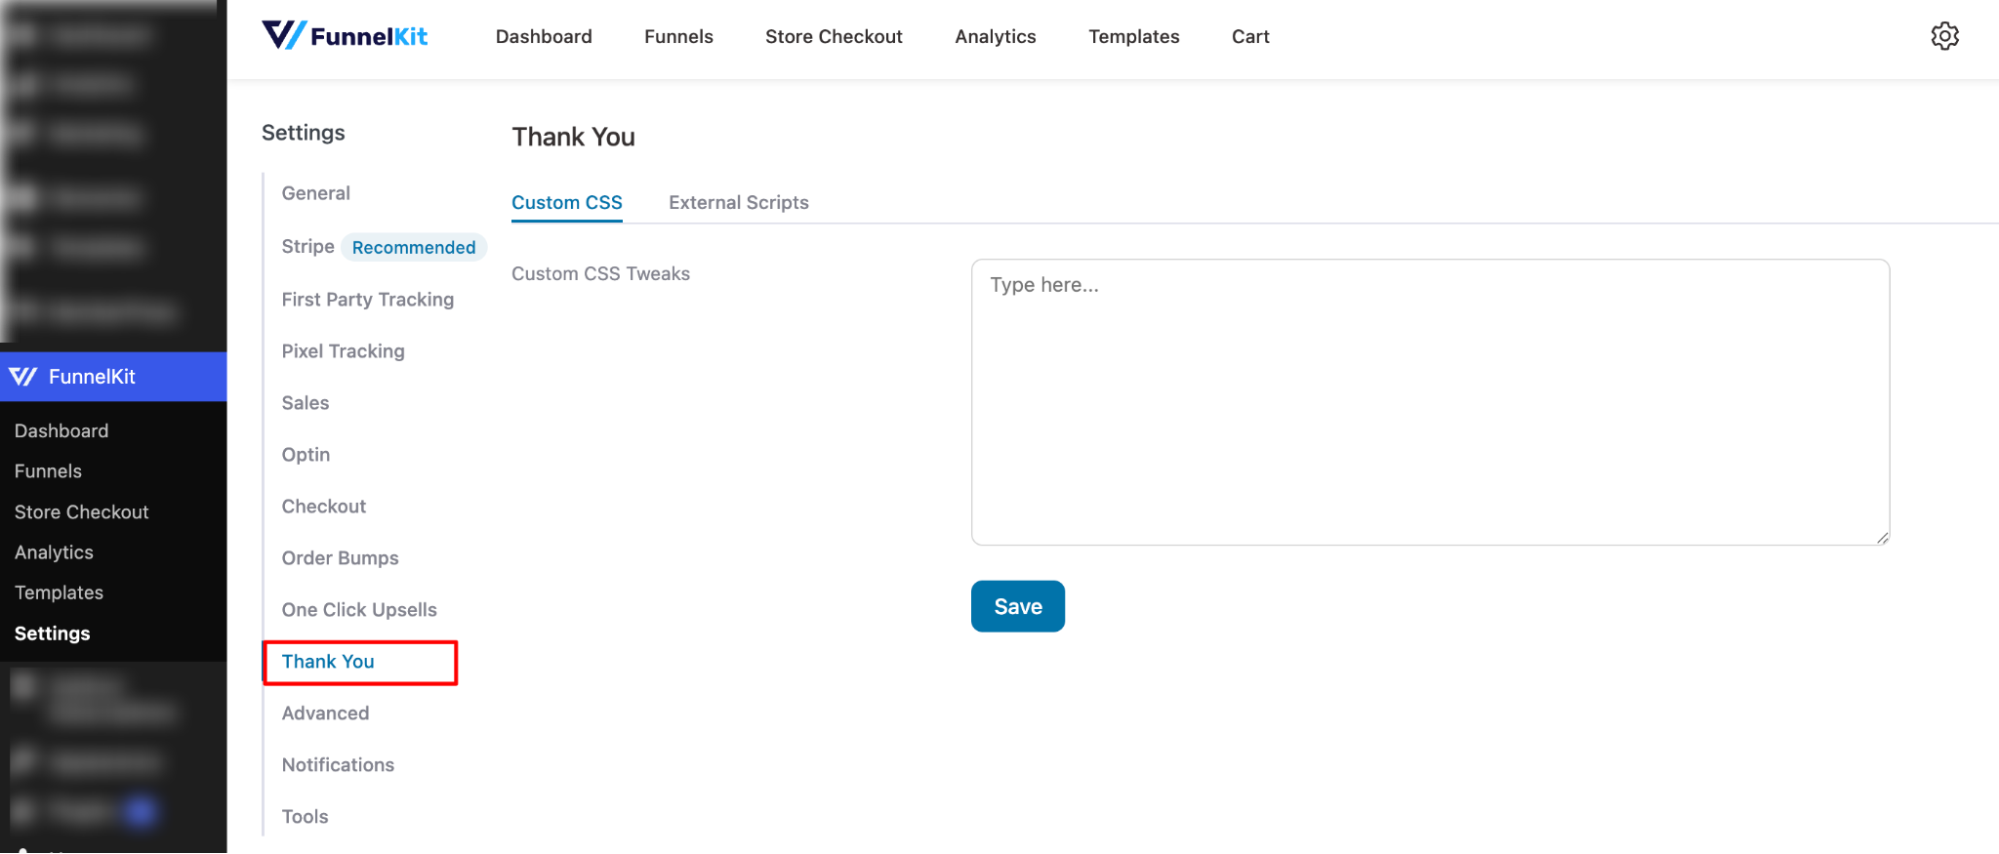
Thank You Pages
Creating brand-friendly thank you pages is easy in FunnelKit. All you have to do is trust your ability and follow the settings on the thank-you page here.
You can add custom CSS codes and external scripts here to make a lasting impact on your users.
Learn more about these global Thank you page settings.
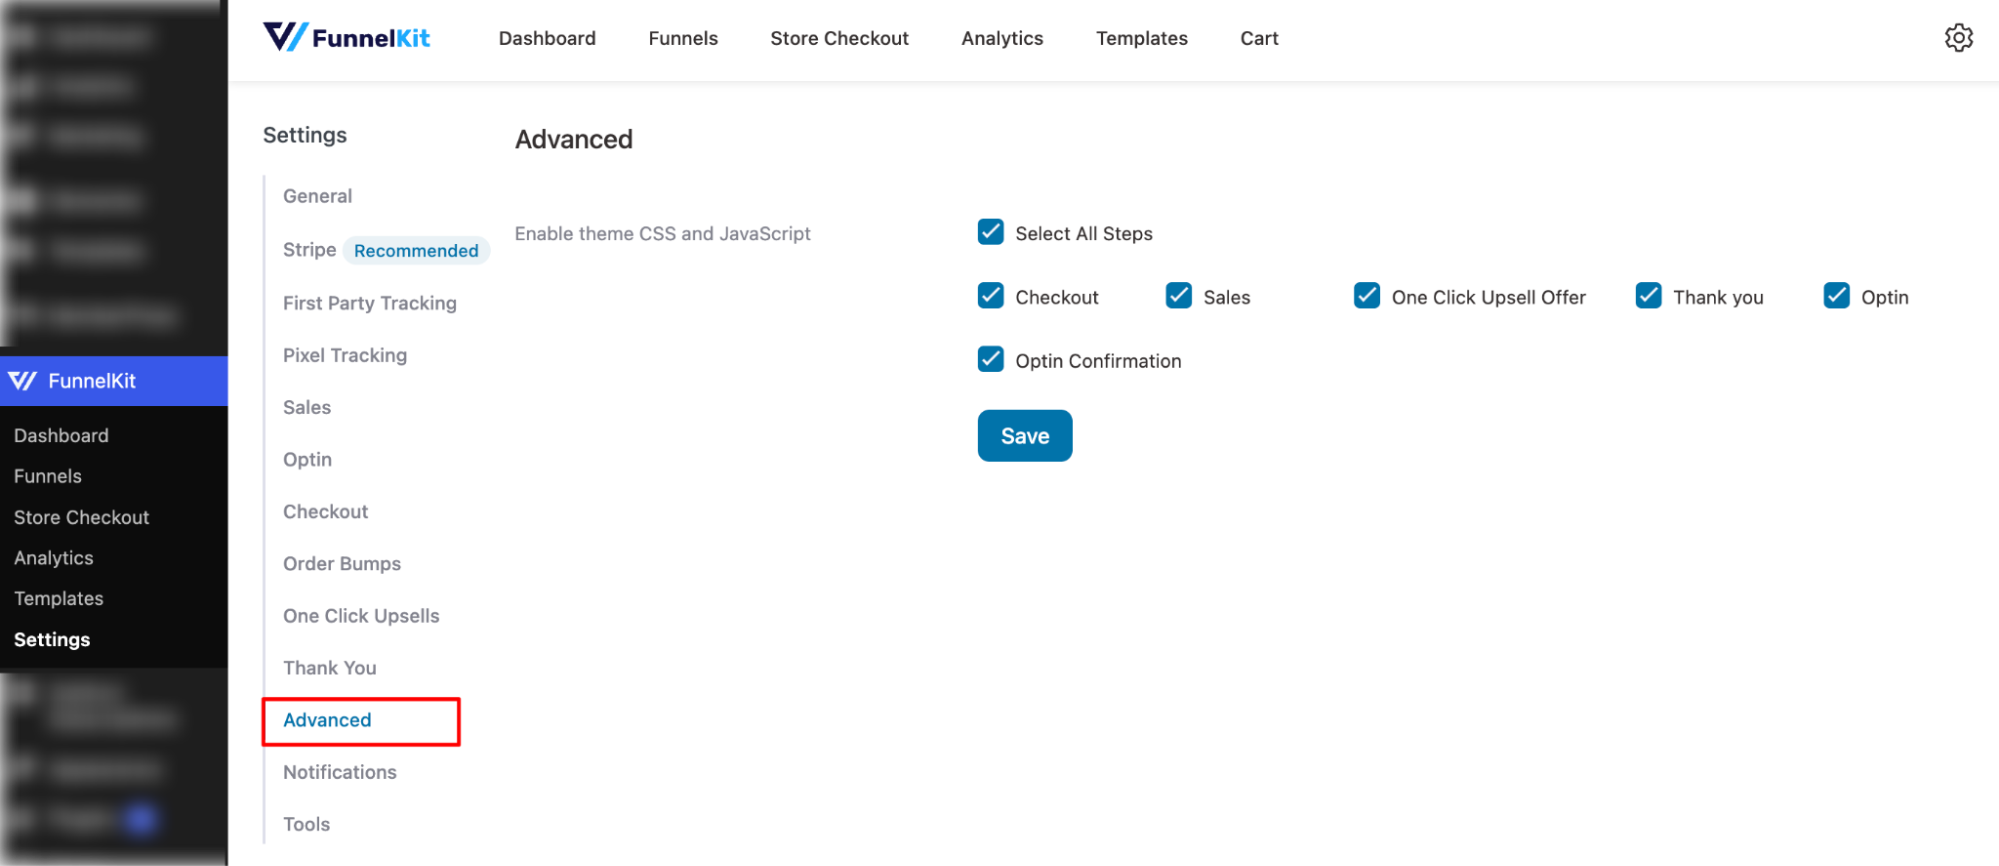
Advanced
On the Advanced tab, you can enable theme CSS and JavaScript for all steps: Checkout, Sales, One-Click Upsell Offer, Thank You, Optin, and Optin Confirmation.
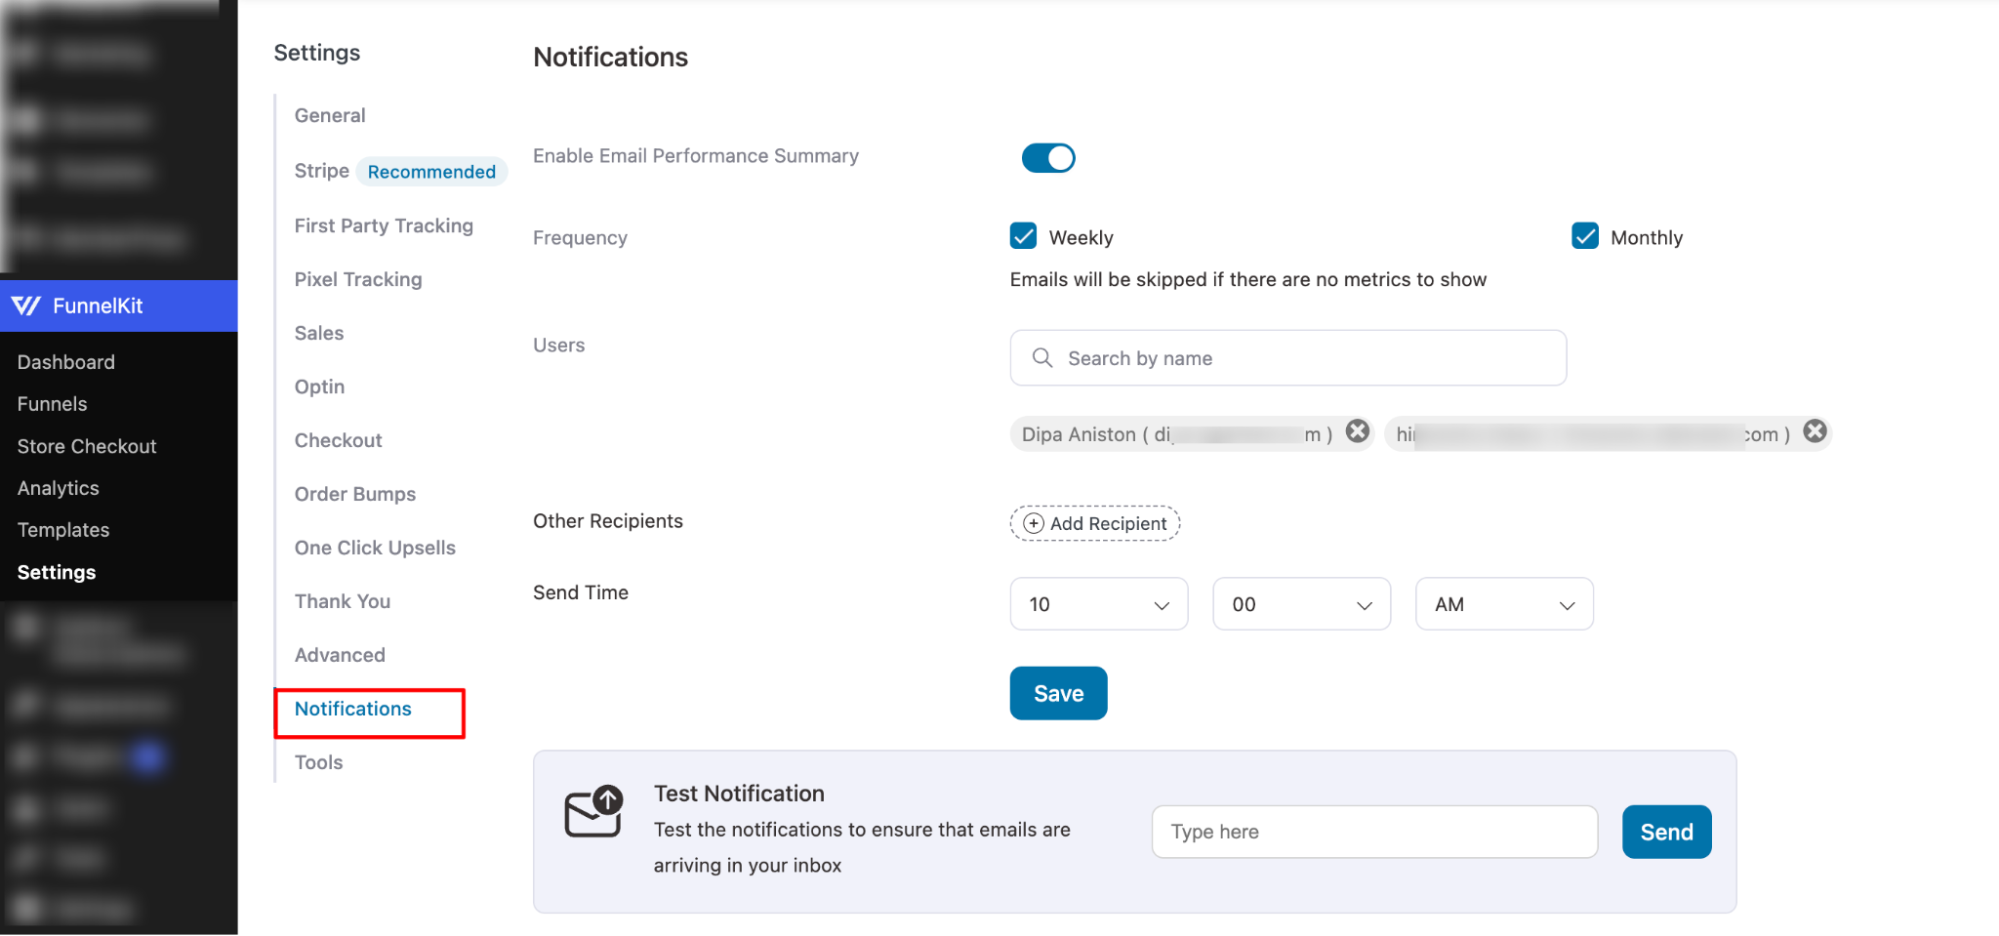
Notifications
On the Notifications tab, you can configure the following options:
- Enable Email Performance Summary: Turn on email updates to track key metrics.
- Frequency: Choose how often you want to receive the summary: Weekly or Monthly. Emails will be skipped if there are no metrics to show.
- Users: Select specific users to receive the summary. You can search by name.
- Other Recipients: Add additional email addresses to receive the summary.
- Send Time: Set the preferred time for the summary emails to be sent.
- Test Notification: Send a test email to ensure notifications are arriving correctly in your inbox.
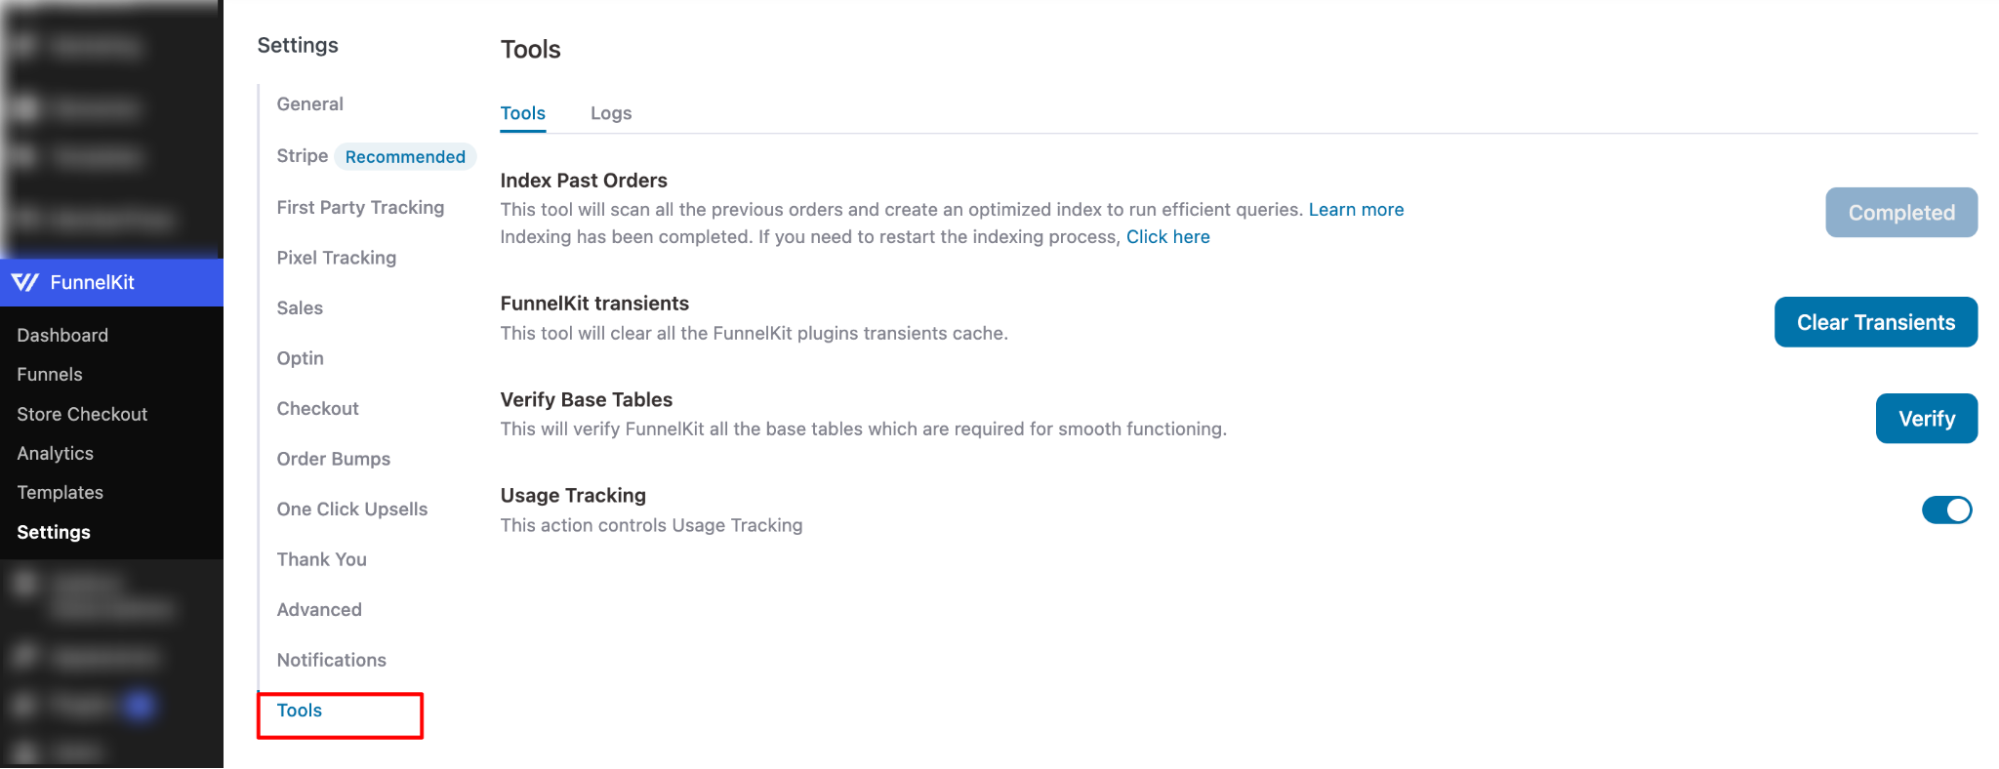
Tools
On the Tools tab, you can access the following options:
- Index Past Orders: Scan all previous orders and create an optimized index for efficient queries. You can restart the indexing process if needed.
- FunnelKit Transients: Clear all transients cache used by FunnelKit plugins.
- Verify Base Tables: Check all FunnelKit base tables required for smooth functioning.
- Usage Tracking: Enable or disable usage tracking to control data collection.
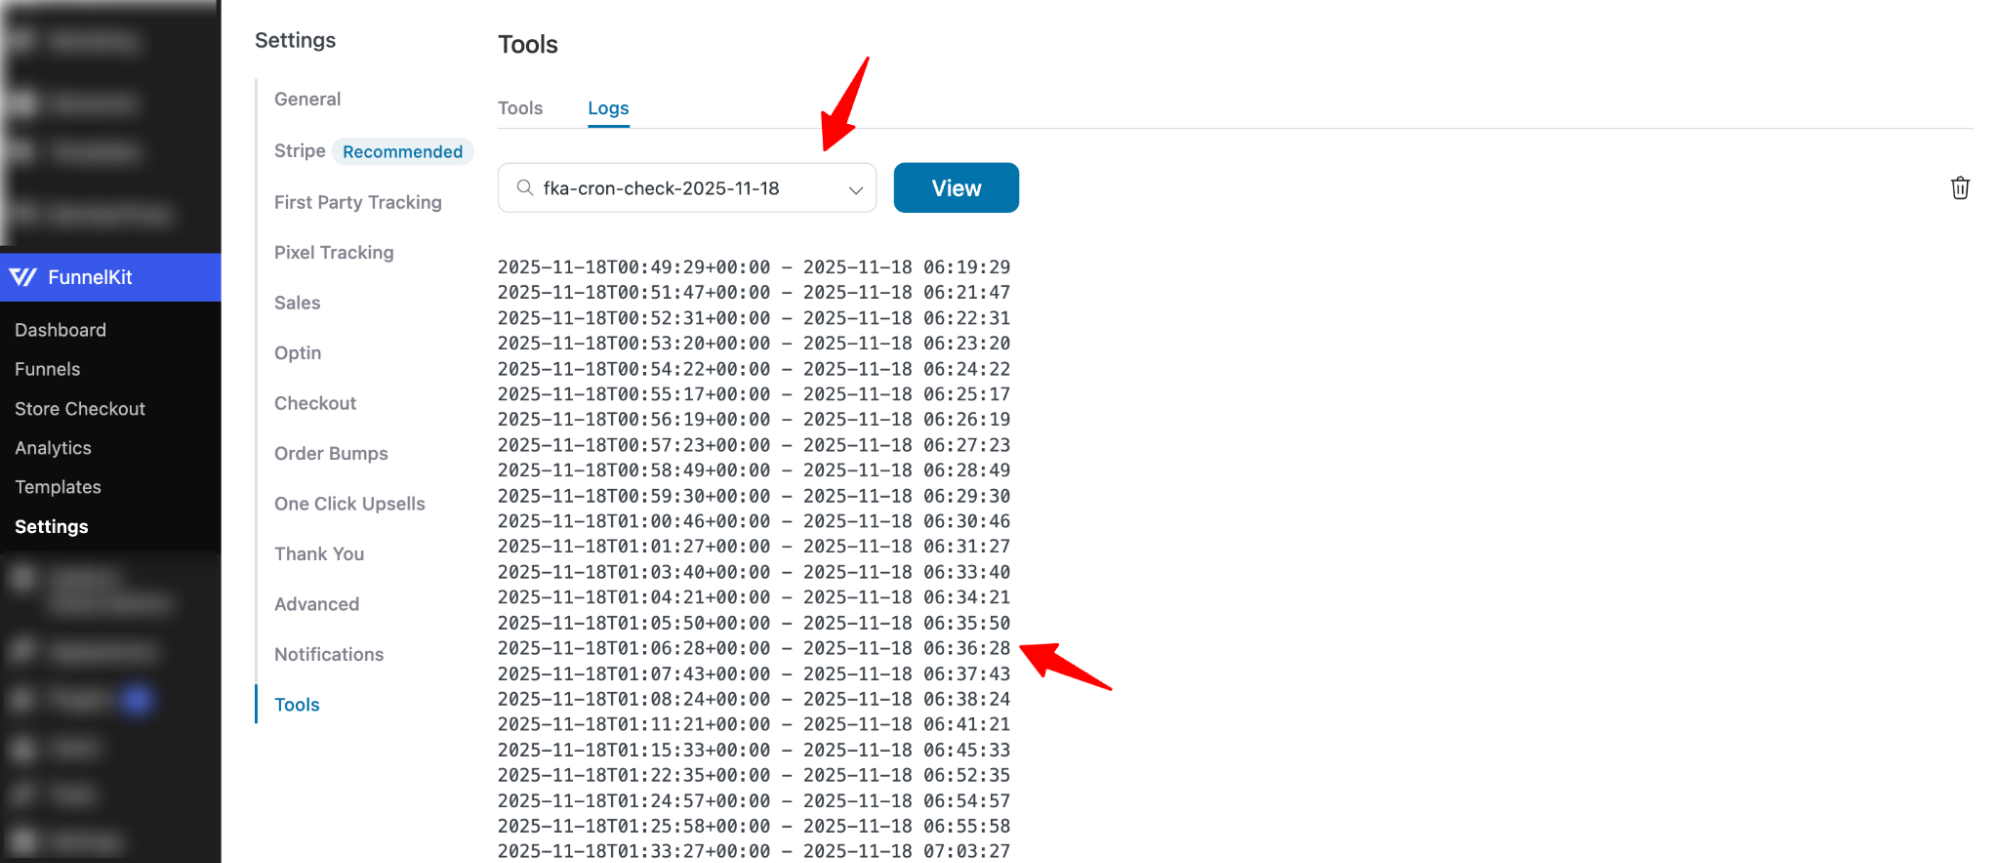
On the Logs tab, you can search, view, and delete log files.
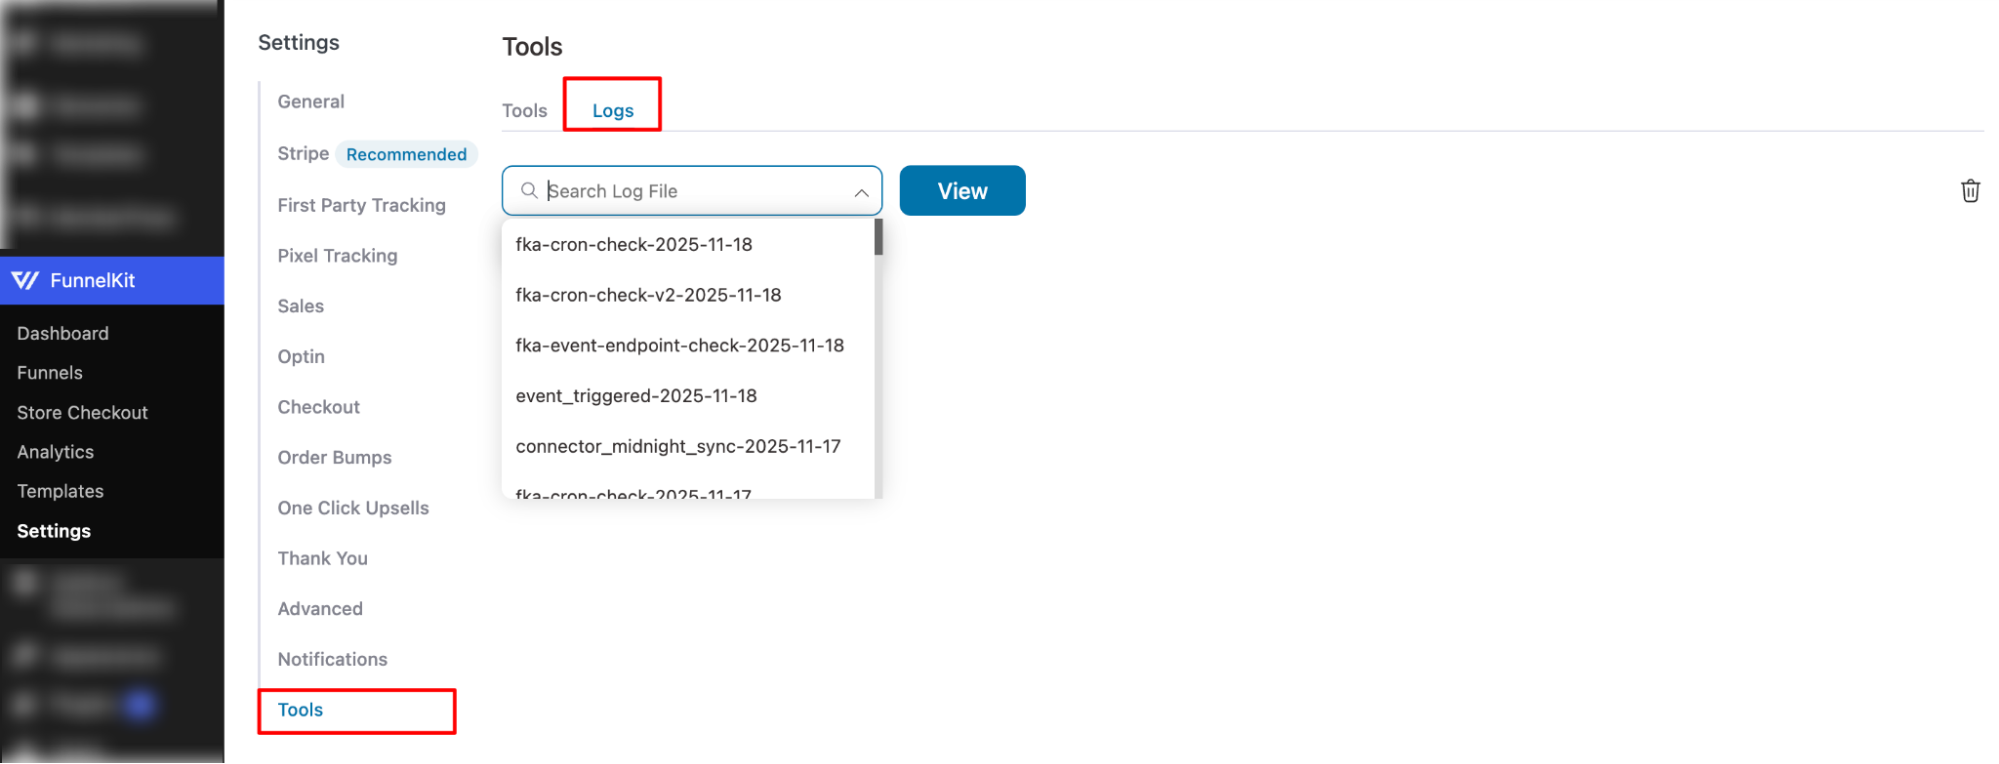
You can search and hit View to see the log details.
That's it. These were all about page-specific global settings in FunnelKit Funnel Builder.


