If you are creating a funnel for your storefront, you need a store checkout or a global checkout funnel.
A Global Checkout is the standard checkout that users see after they add items to the cart and proceed to the checkout.
You can maximize your average order value by adding order bumps and one-click upsells to this funnel.
To create a global checkout funnel, you can directly create a custom store checkout funnel for your WooCommerce store.
How to Create a Store Checkout (Global Checkout Funnel)
Next, follow these steps:
Step 1: Create a store checkout
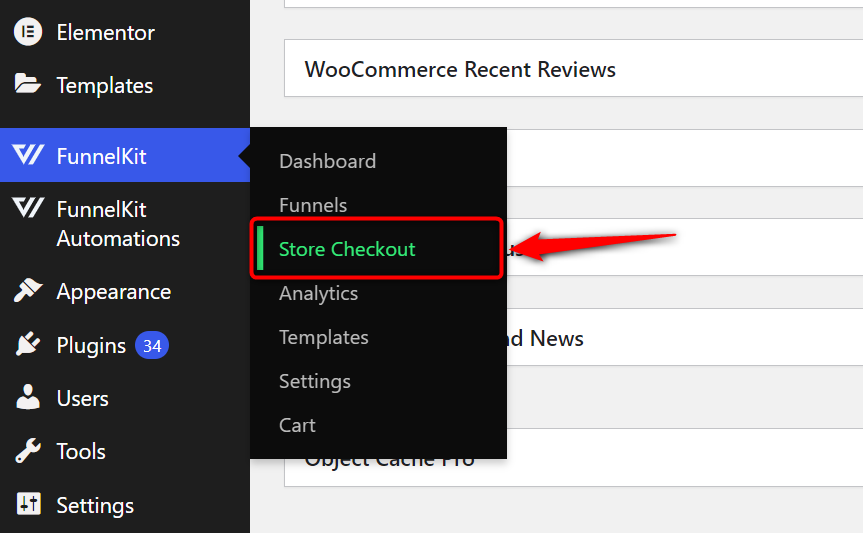
First, navigate to FunnelKit ⇒ Store Checkout.
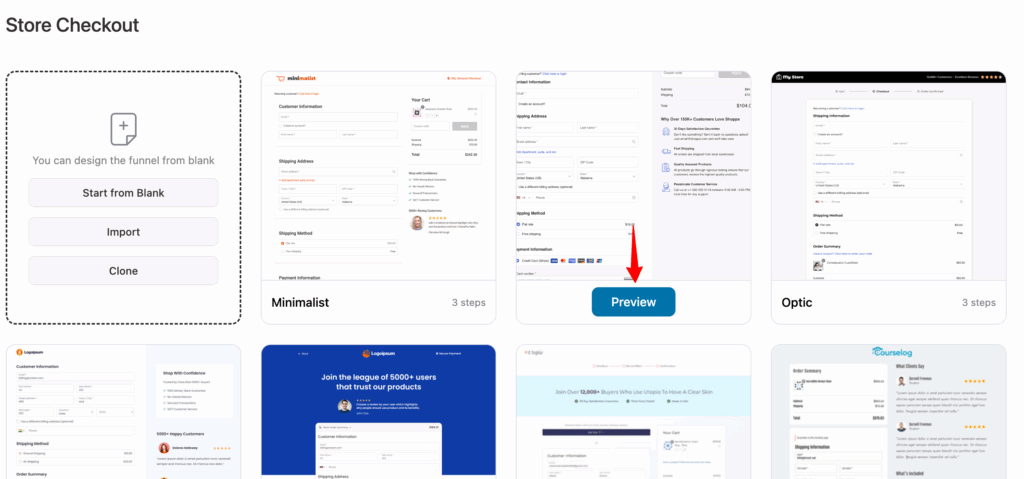
Next, click on the Create Store Checkout button to start the process.

You'll see the templates screen next.
Hover on the template you want to import and hit preview.
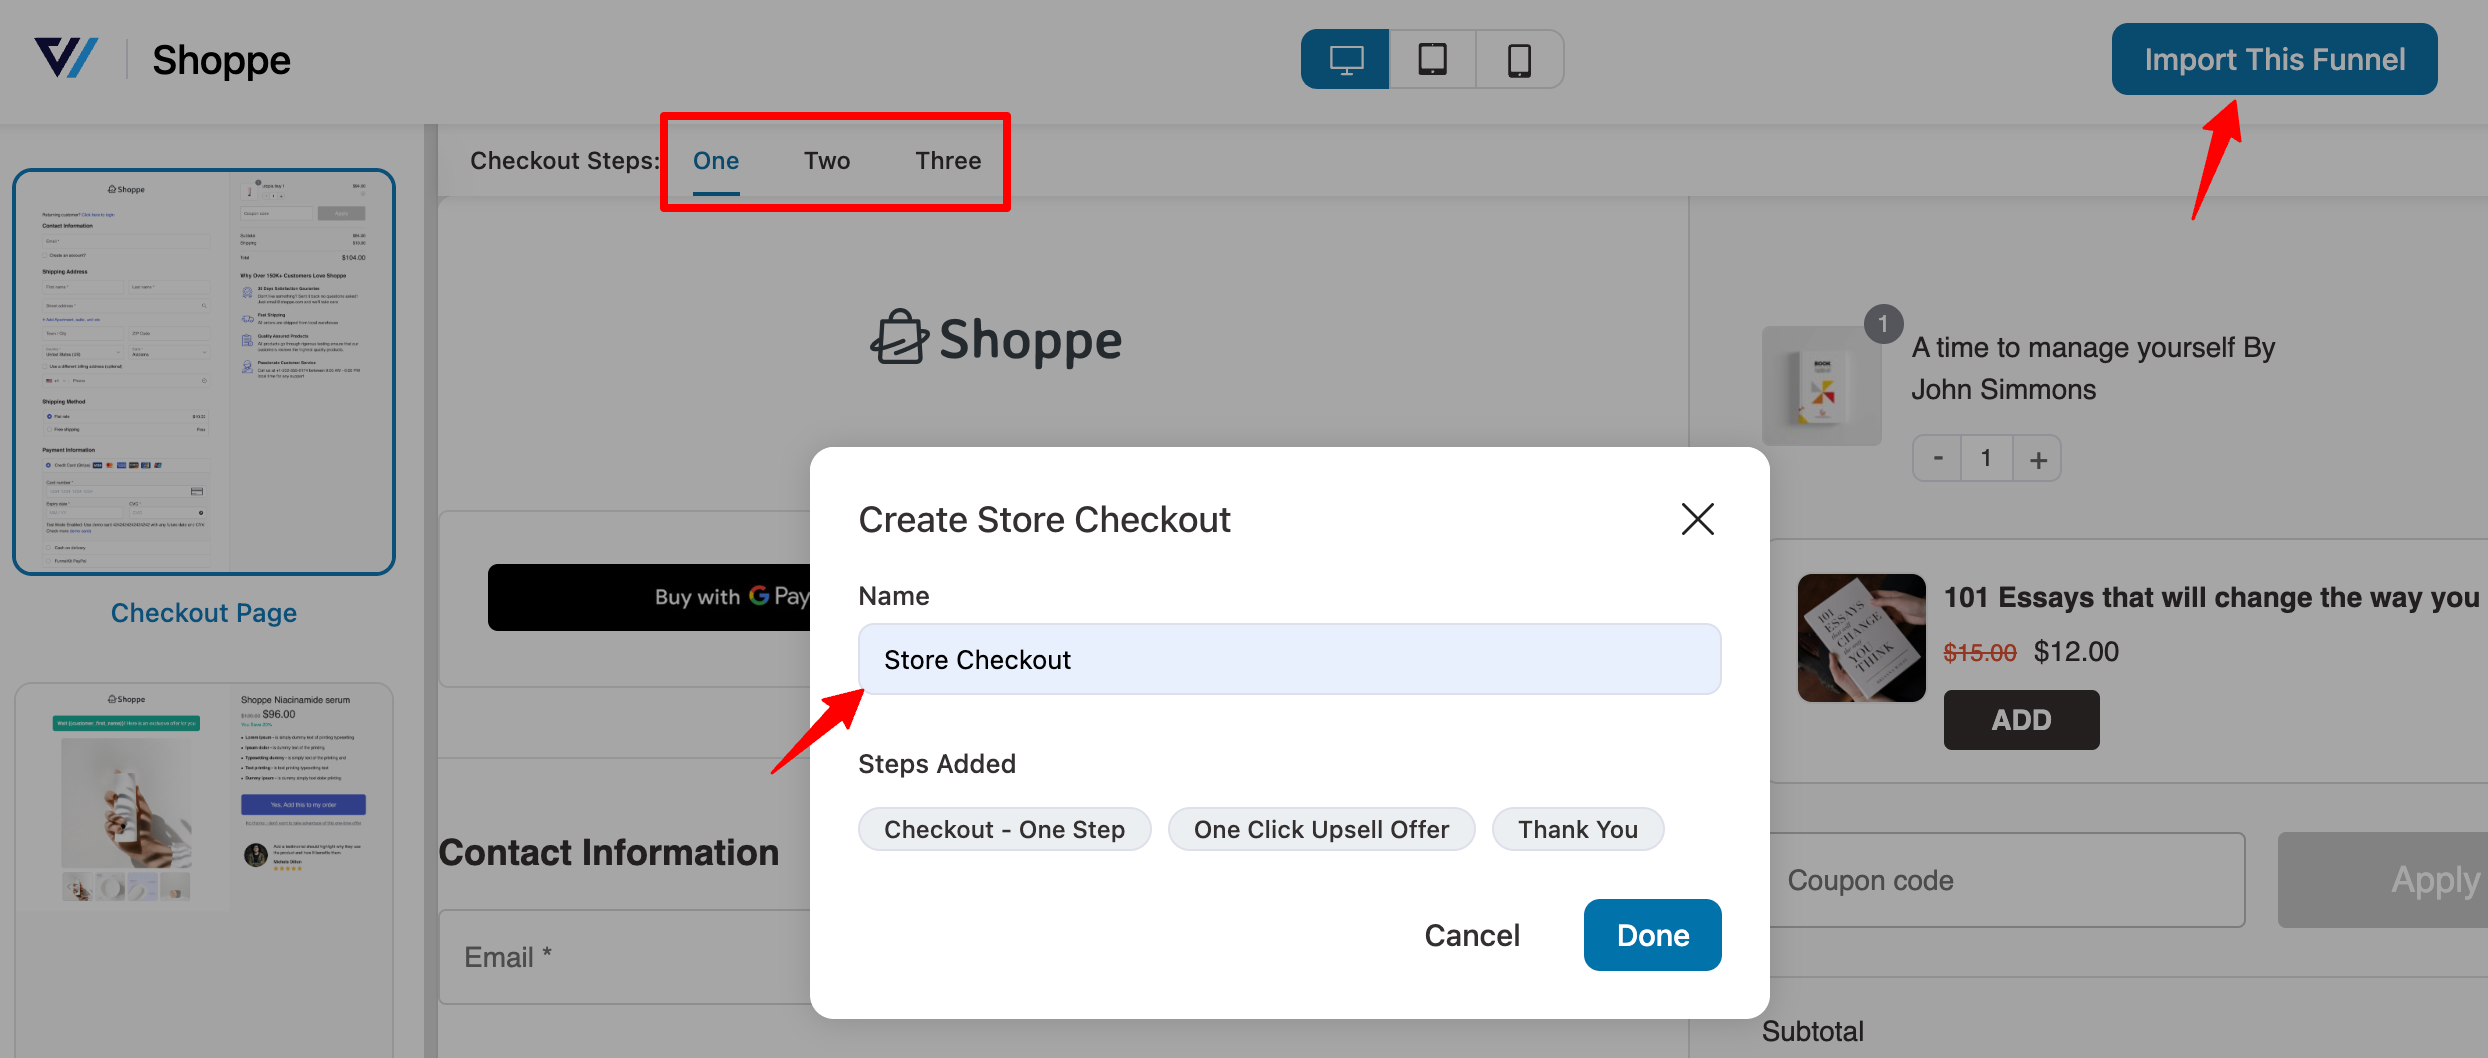
Next, select the number of steps you want on your WooCommerce checkout page, then hit Import the Funnel. Enter the name of your store's checkout and hit Done.
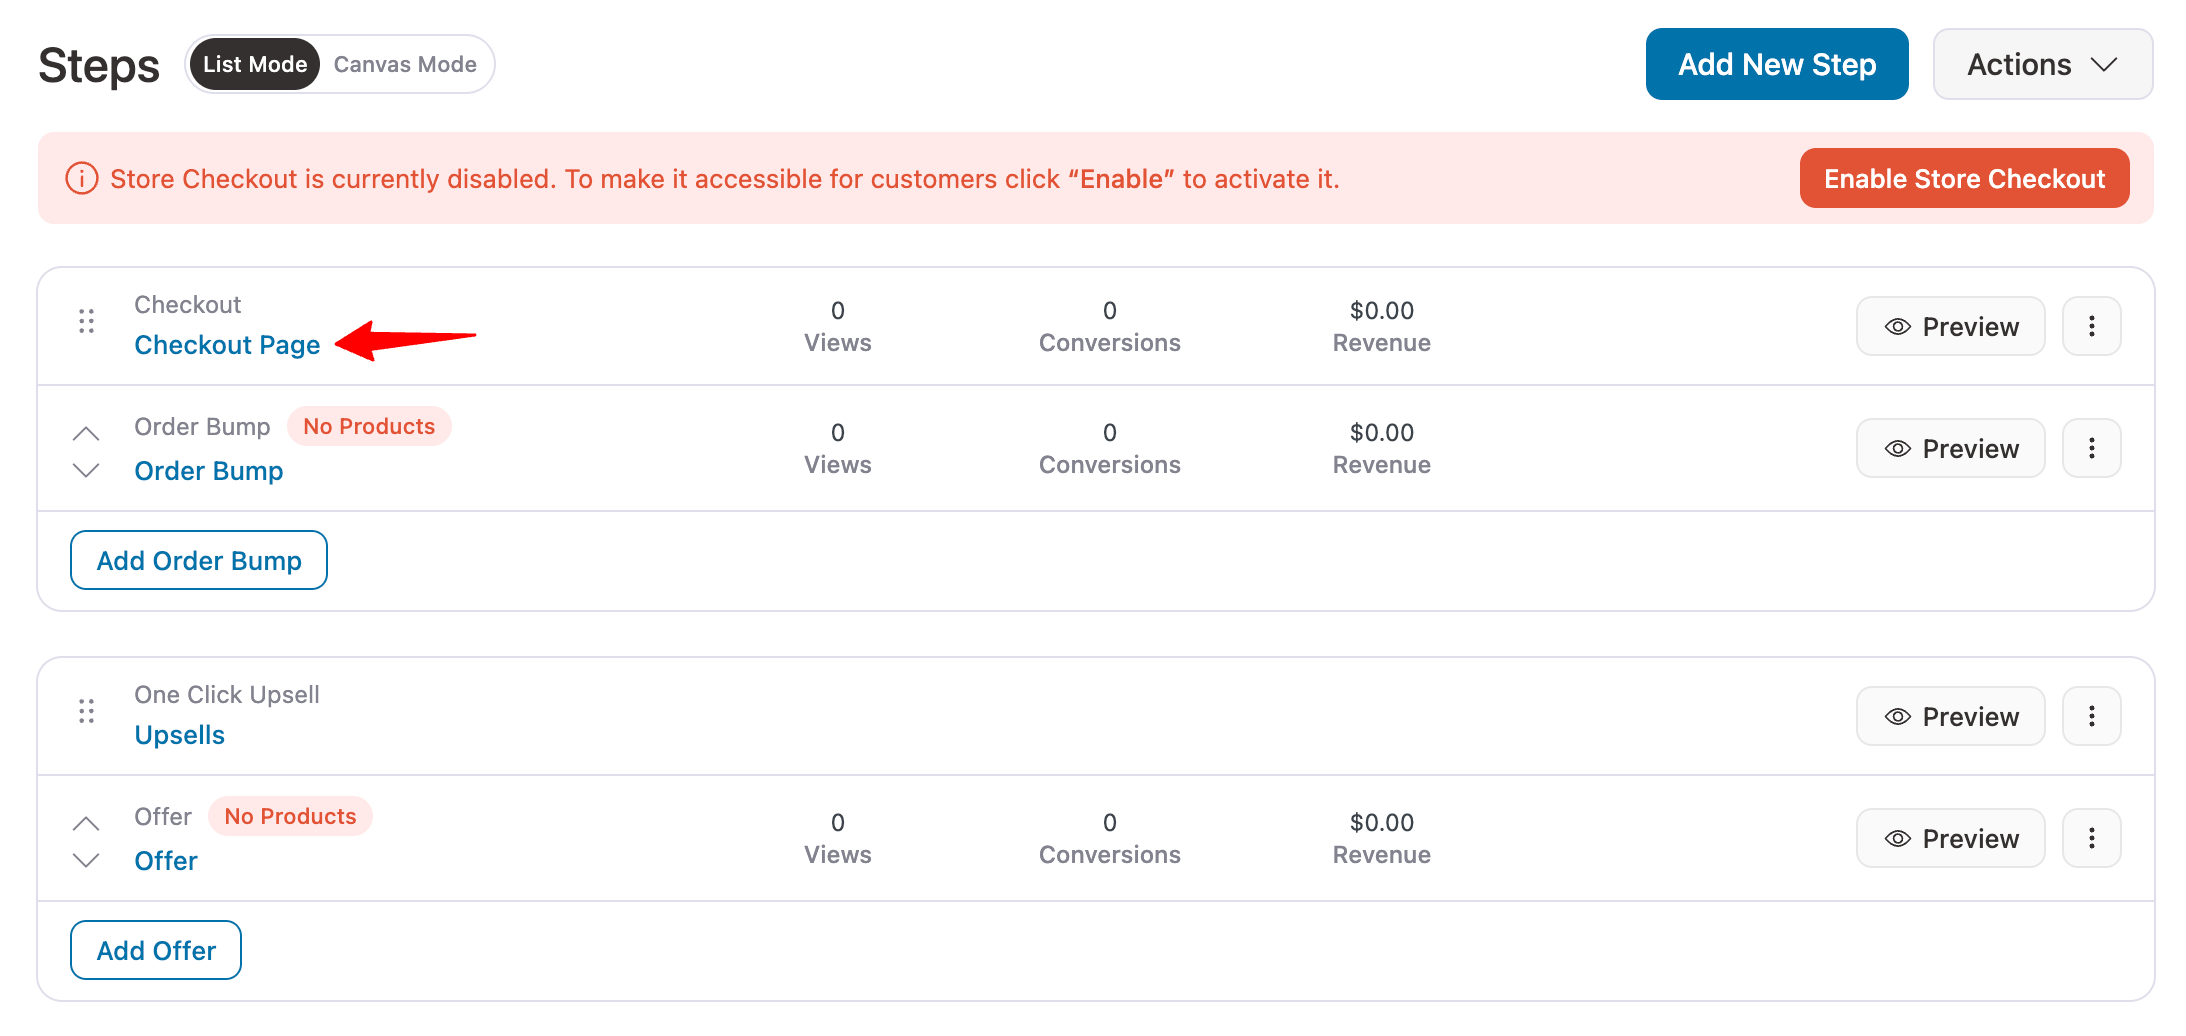
This will import your global checkout funnel.
Step 2: Customize the checkout page template
Click on the checkout page name to start customizing it.
You'll be directed to the Design tab of your Store Checkout Page.
Click on Edit Template to customize your Checkout page with the page builder you selected before.
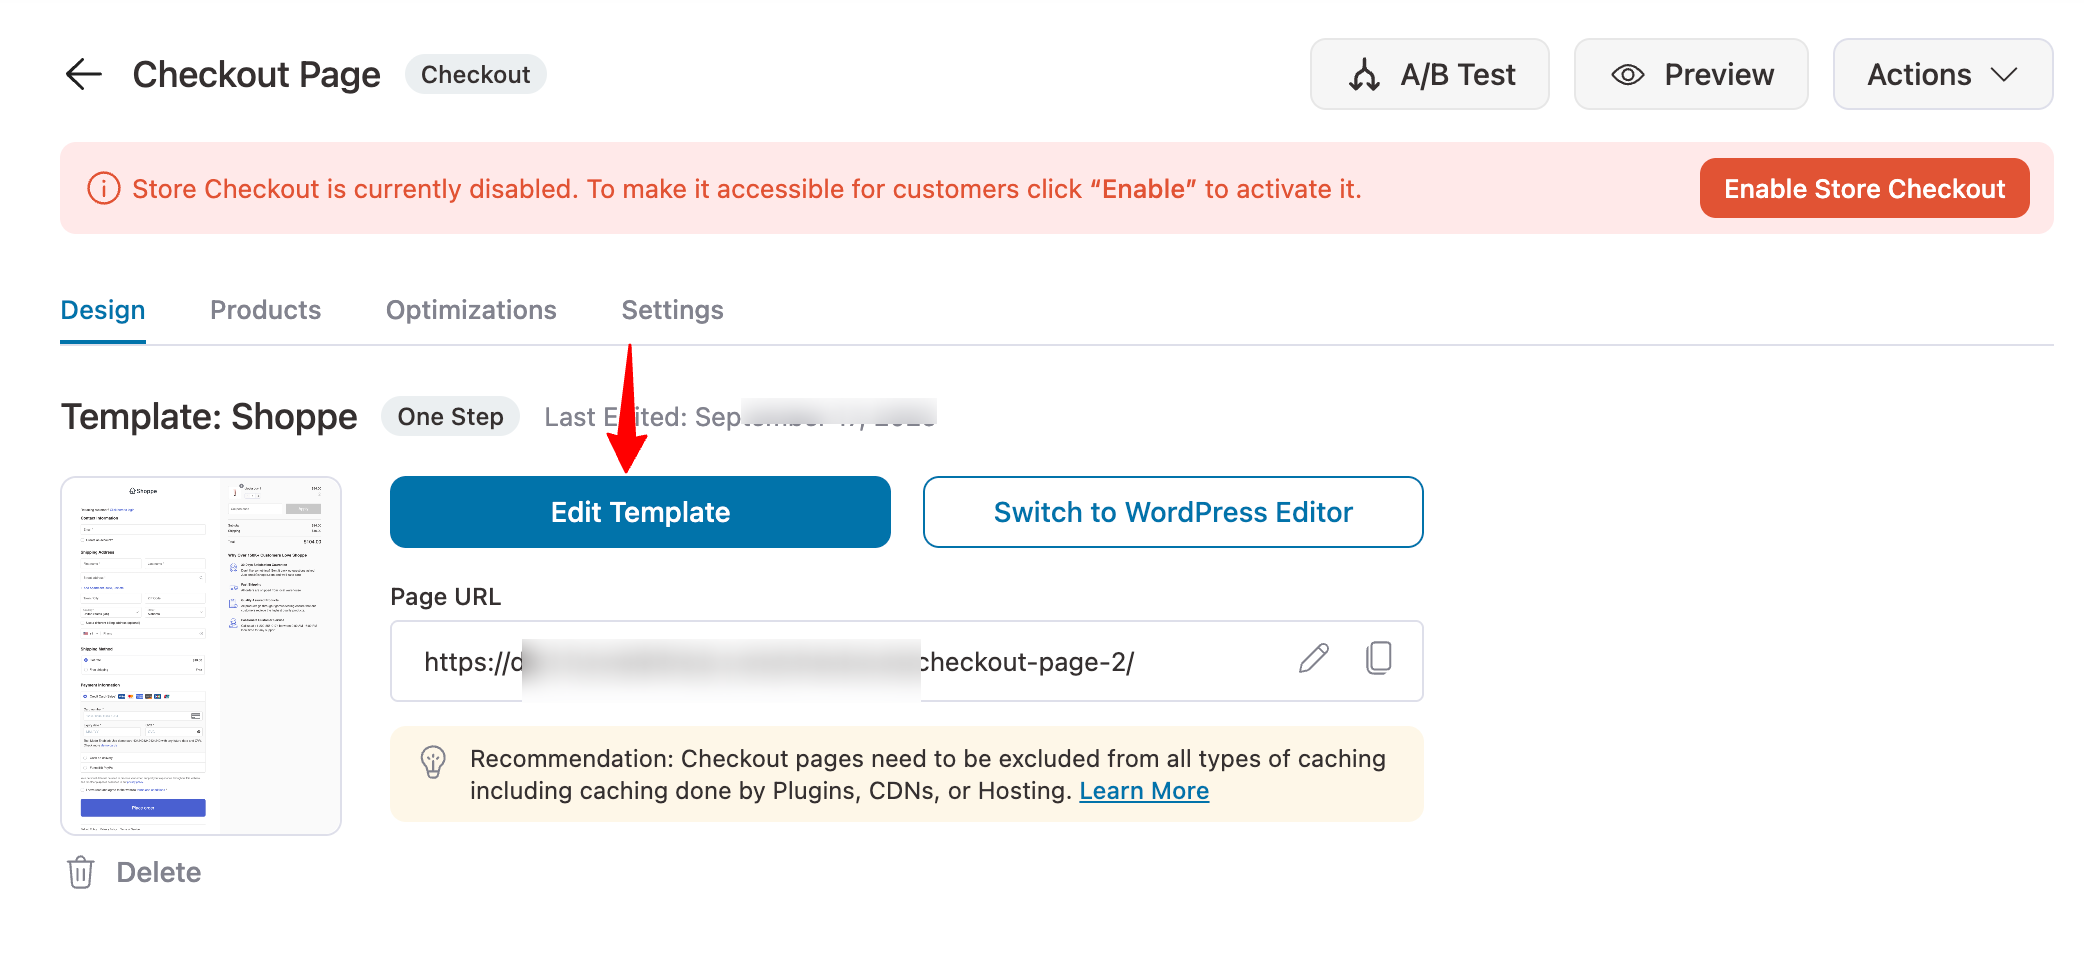
You can customize all the elements of your checkout page, including logos, checkout form, mini cart, background, typography, colors, checkout buttons, and more.
You can also visit the Design section to learn how to customize your checkout page in FunnelKit.

Step 3: Modify the fields on the checkout form
Go back to the Design tab, and you'll see the built-in checkout field editor.
You can modify the form fields of your checkout form - add, rearrange, edit, or delete the checkout fields as per your requirement.
Click here to learn more about modifying the checkout form fields.
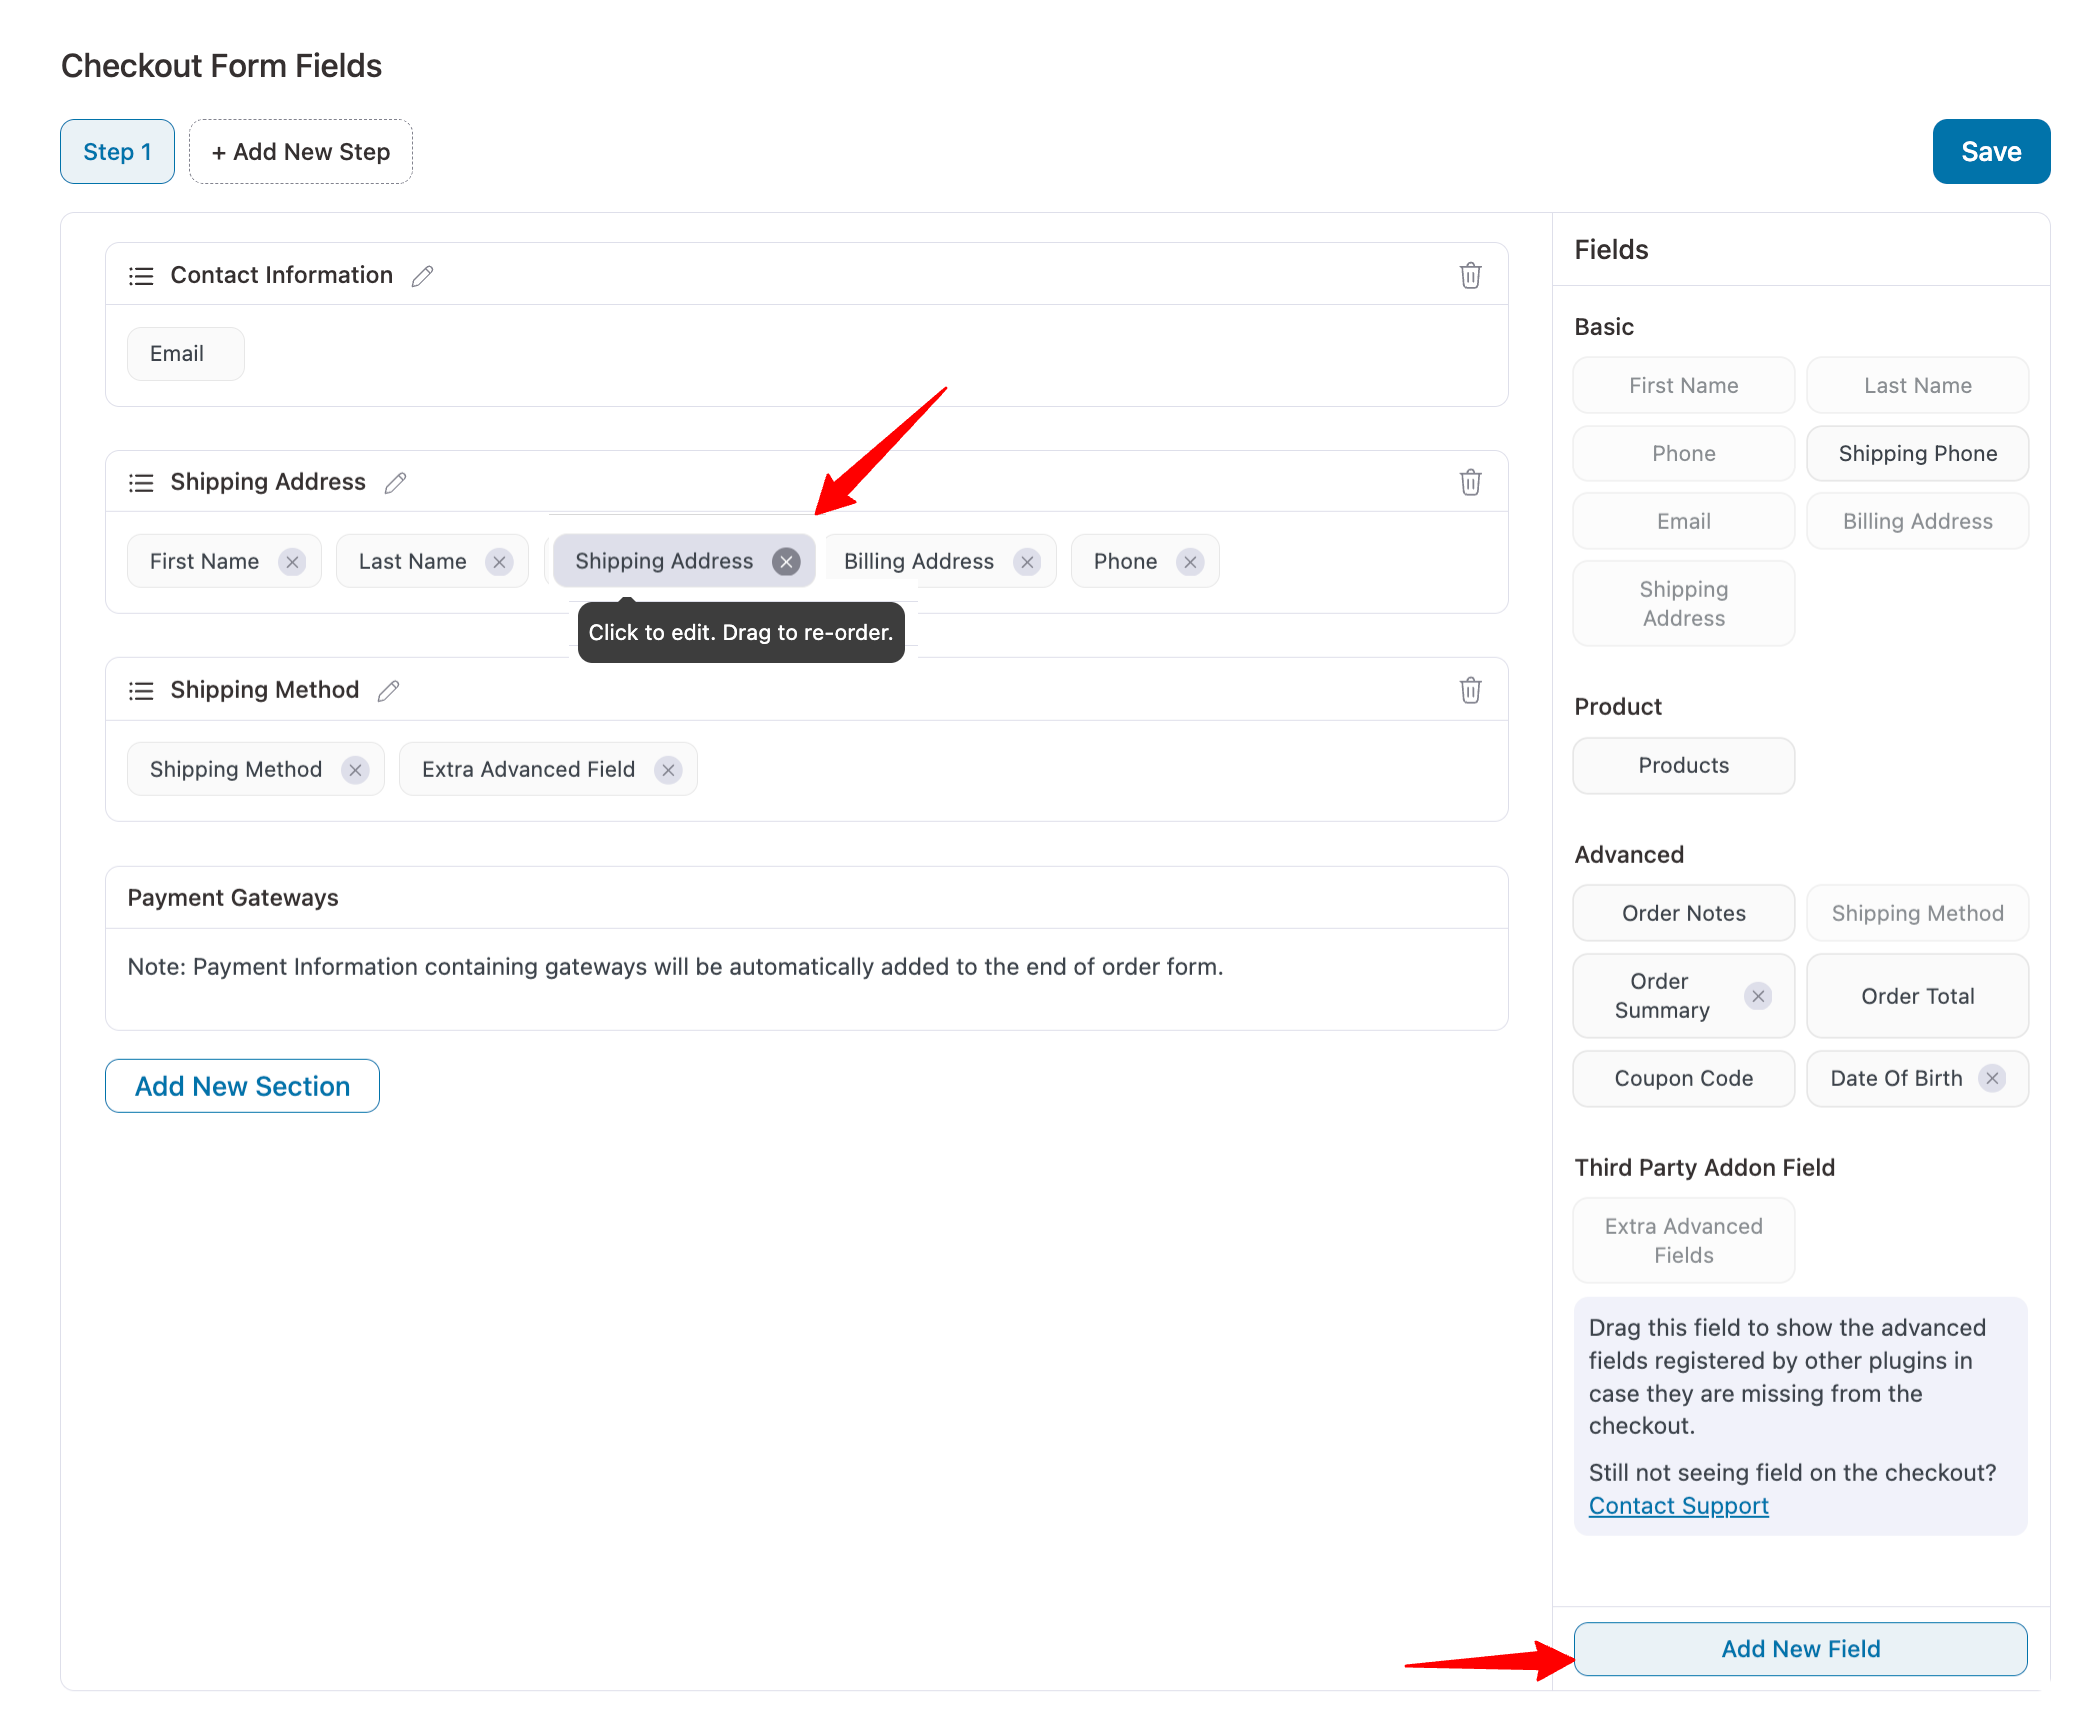
Click on 'Save' when done.
Step 4: Optimize the store checkout page
You can optimize your store checkout page, such as enabling
- Expressmart express checkout buttons such as Google Pay and Apple Pay,
- Google Address Autocomplete
- An enhanced phone field,
- Auto-apply coupons, and more.
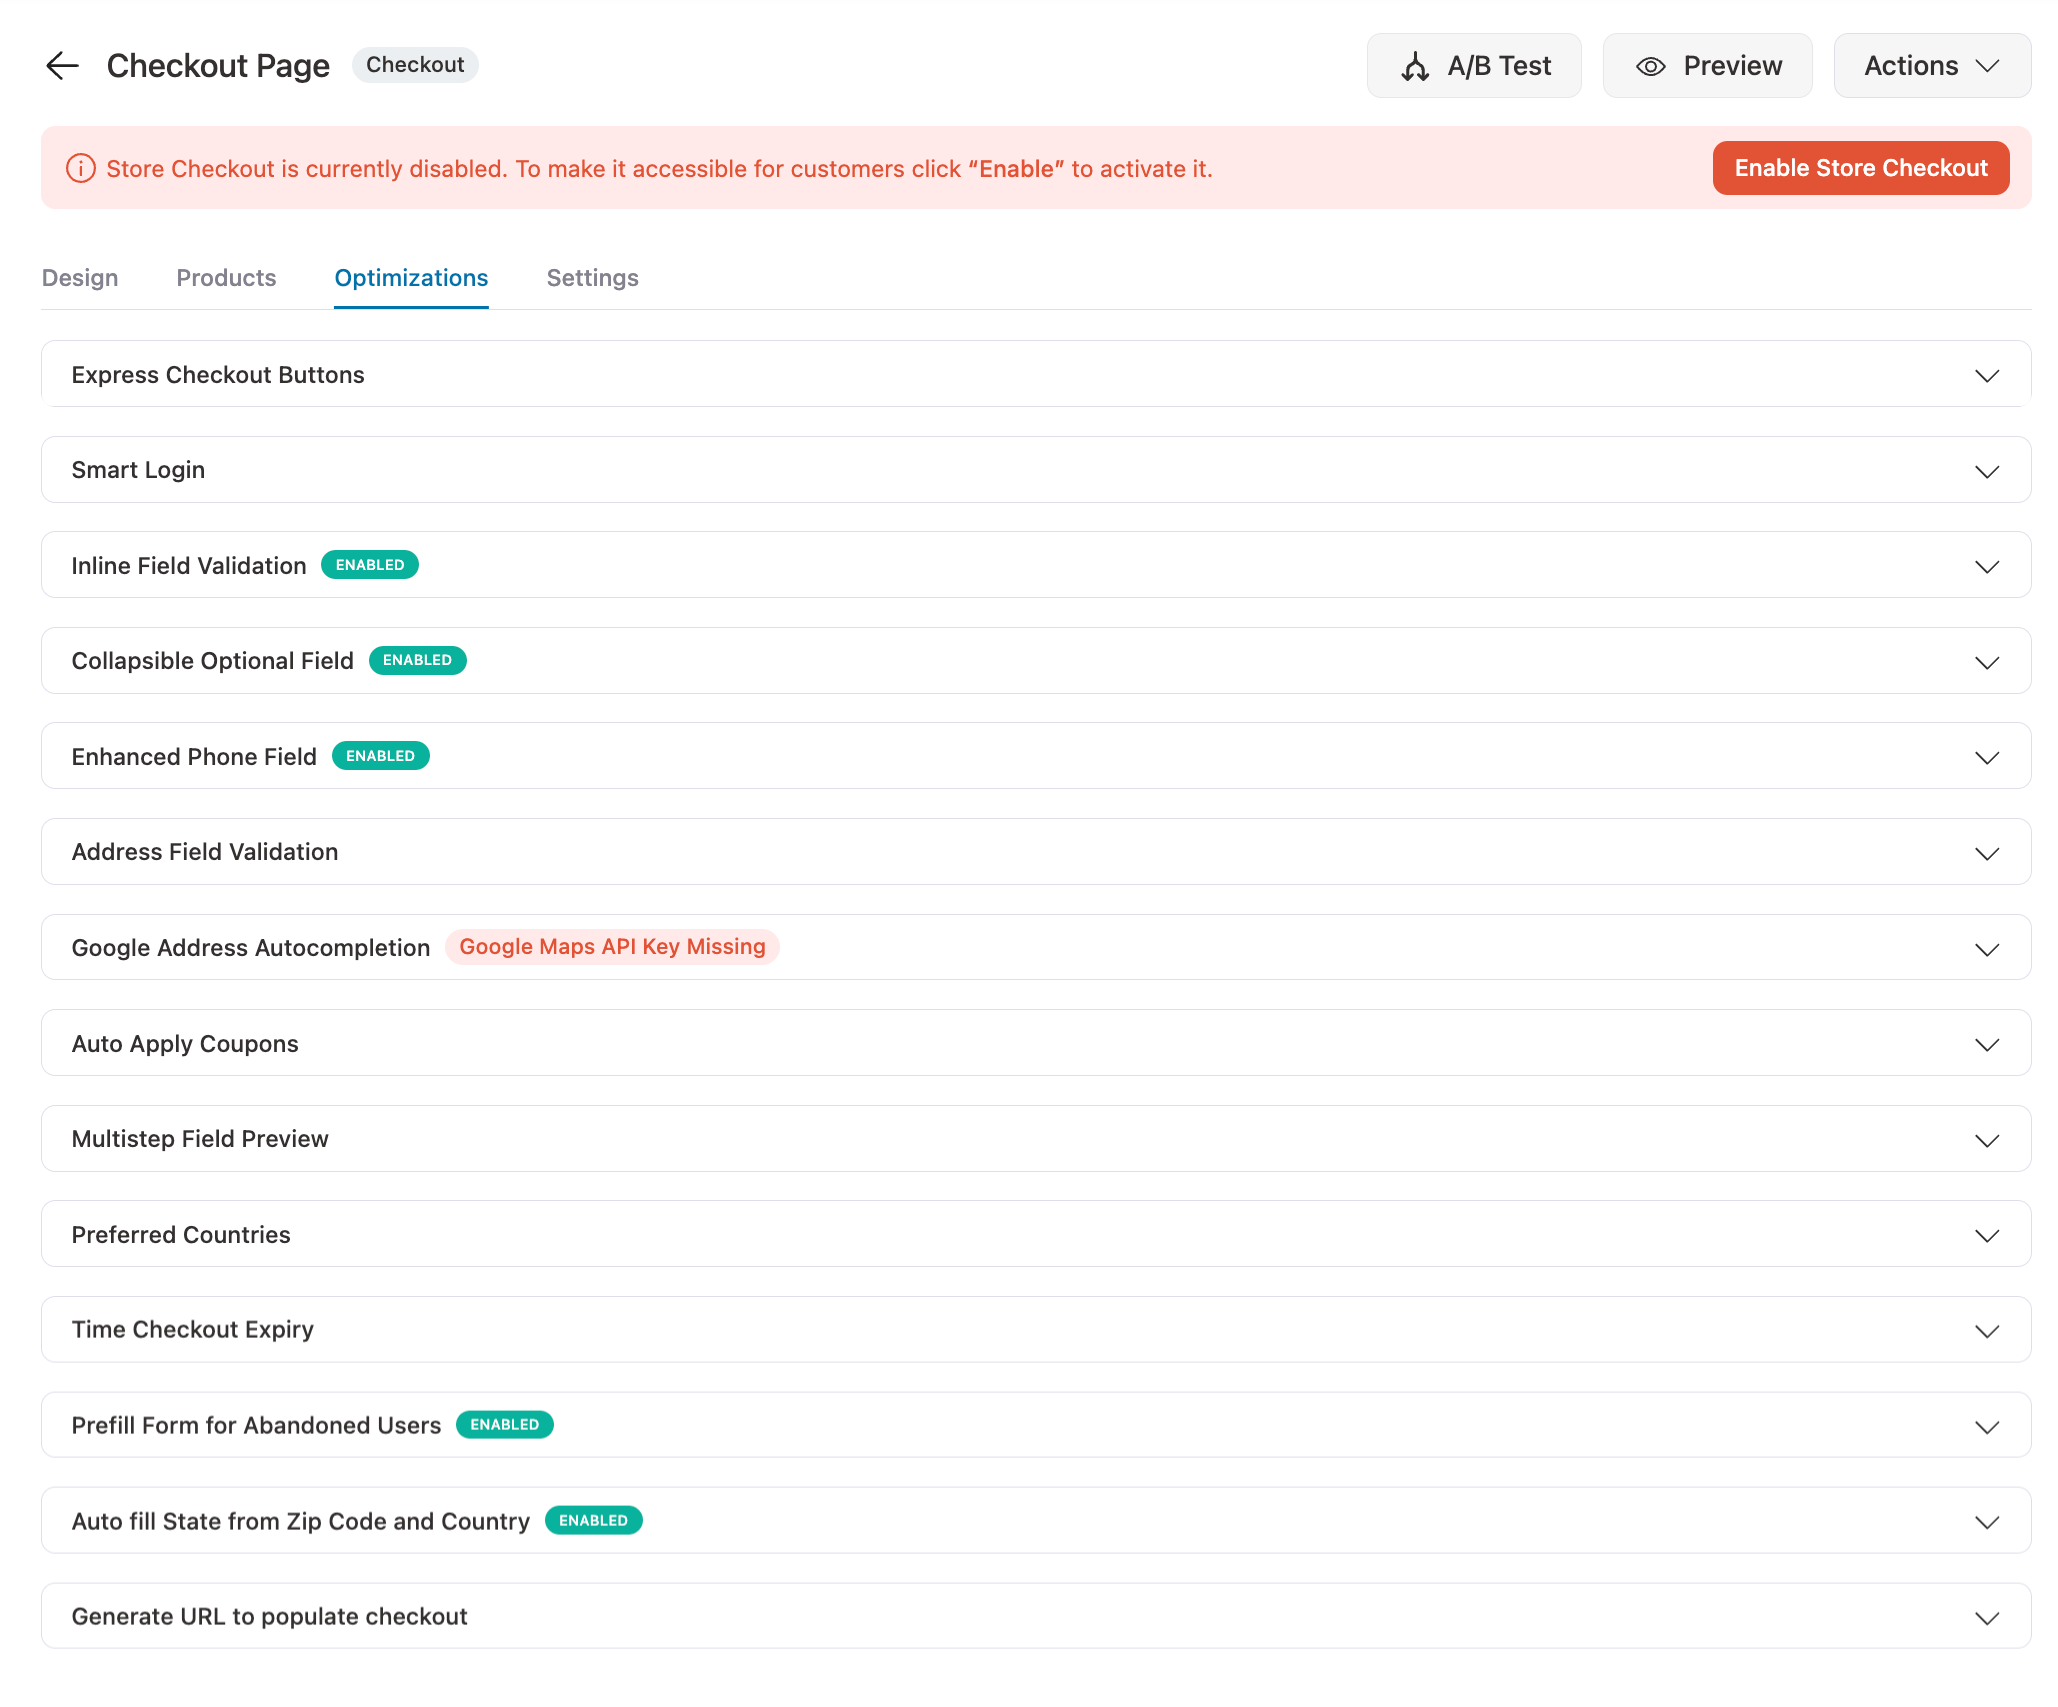
Click on Save when done.
You can also customize the thank you page using the same process followed in Step 2. Plus, check the documentation on order bump and one-click upsells to learn how to set it up.
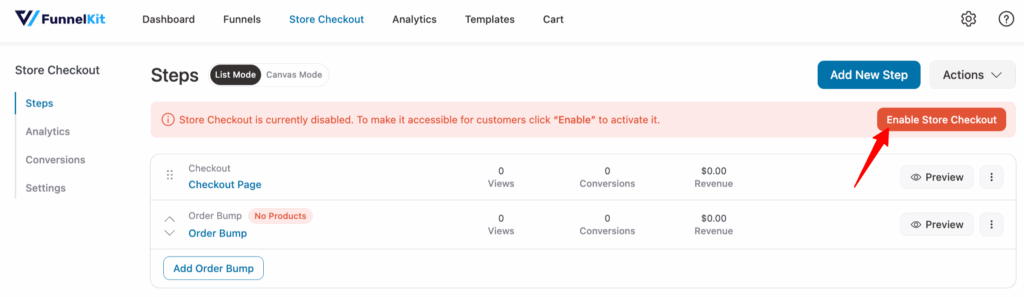
Step 5: Activate the store checkout
When you're satisfied with everything, go back and turn the toggle to activate your Store Checkout.
That's it! This is how you can set up Store Checkout (Global checkout page) in your WooCommerce store.
You can test your store checkout by adding any product to the cart and proceeding to the checkout.


