You can use WPML to create different pages of your sales funnel in different languages for your users.
This way, user from different countries will only see their regional-translated pages.
In this document, you will learn how to create different language-translated pages with WPML using FunnelKit Funnel Builder.
Make sure the WPML plugin is installed and activated, and you have set all the languages for your site.
Now follow these steps:
How to Set Up a Multilingual Store Checkout with WPML and FunnelKit Funnel Builder
When WPML is installed and activated in your store, a new 'Language' tab will be available in your store's checkout settings.
This allows you to create and manage different checkout pages for each language in your store.
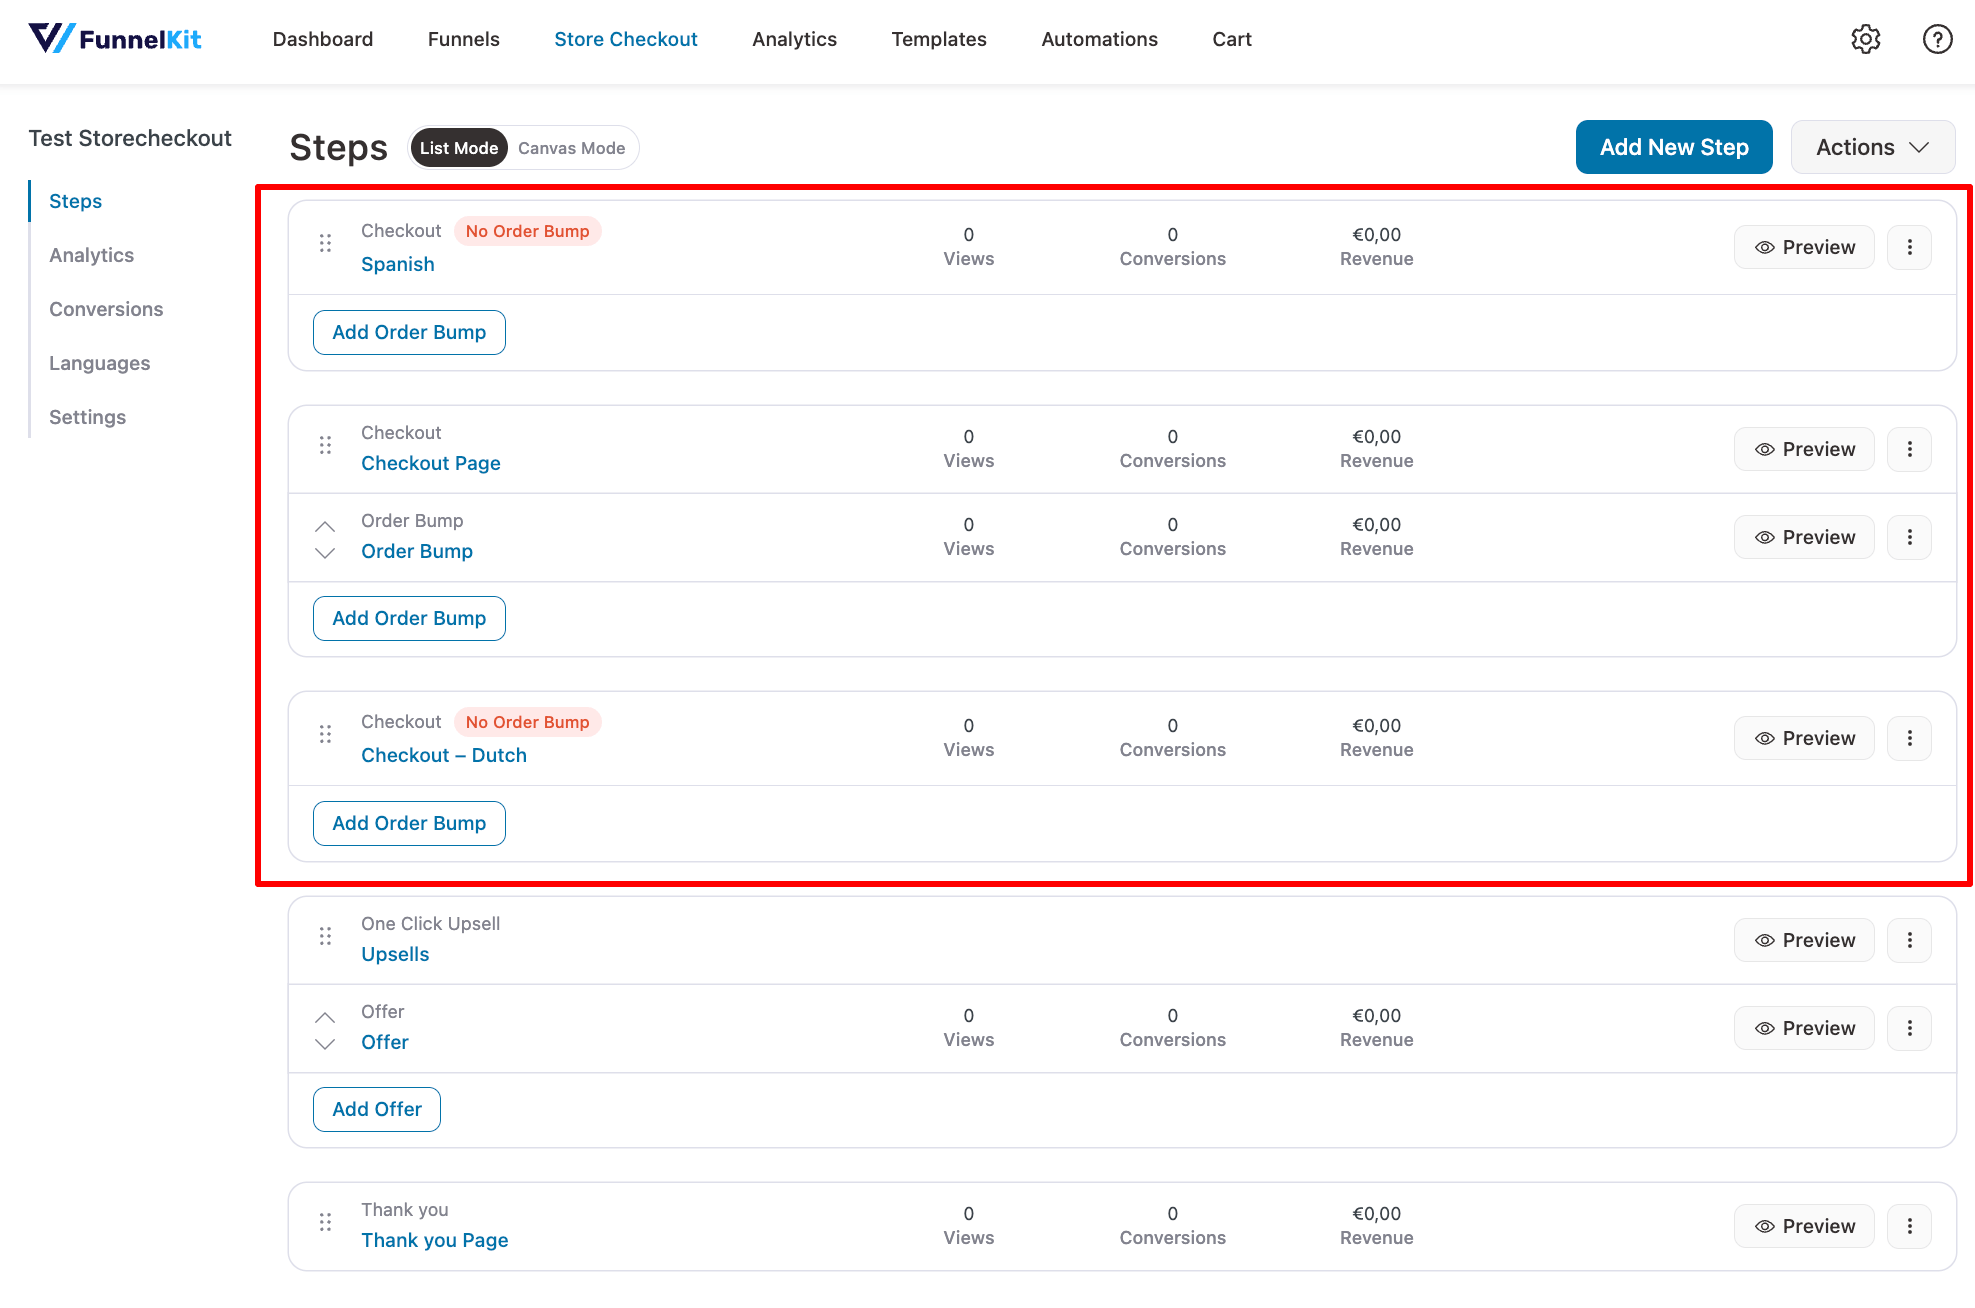
Step 1: Create multiple pages for different languages
Start by creating a separate checkout page for each language. You can either create a new step from scratch or duplicate an existing one and edit it.
For example, if you already have an English checkout, you might create Dutch and Spanish versions next. Note that you can follow the same process for upsell and thank-you pages as well.
Step 2: Enable WPML Language
Go to the Language tab in your checkout settings and check the box labeled "Enable WPML Language" to activate multilingual mapping.
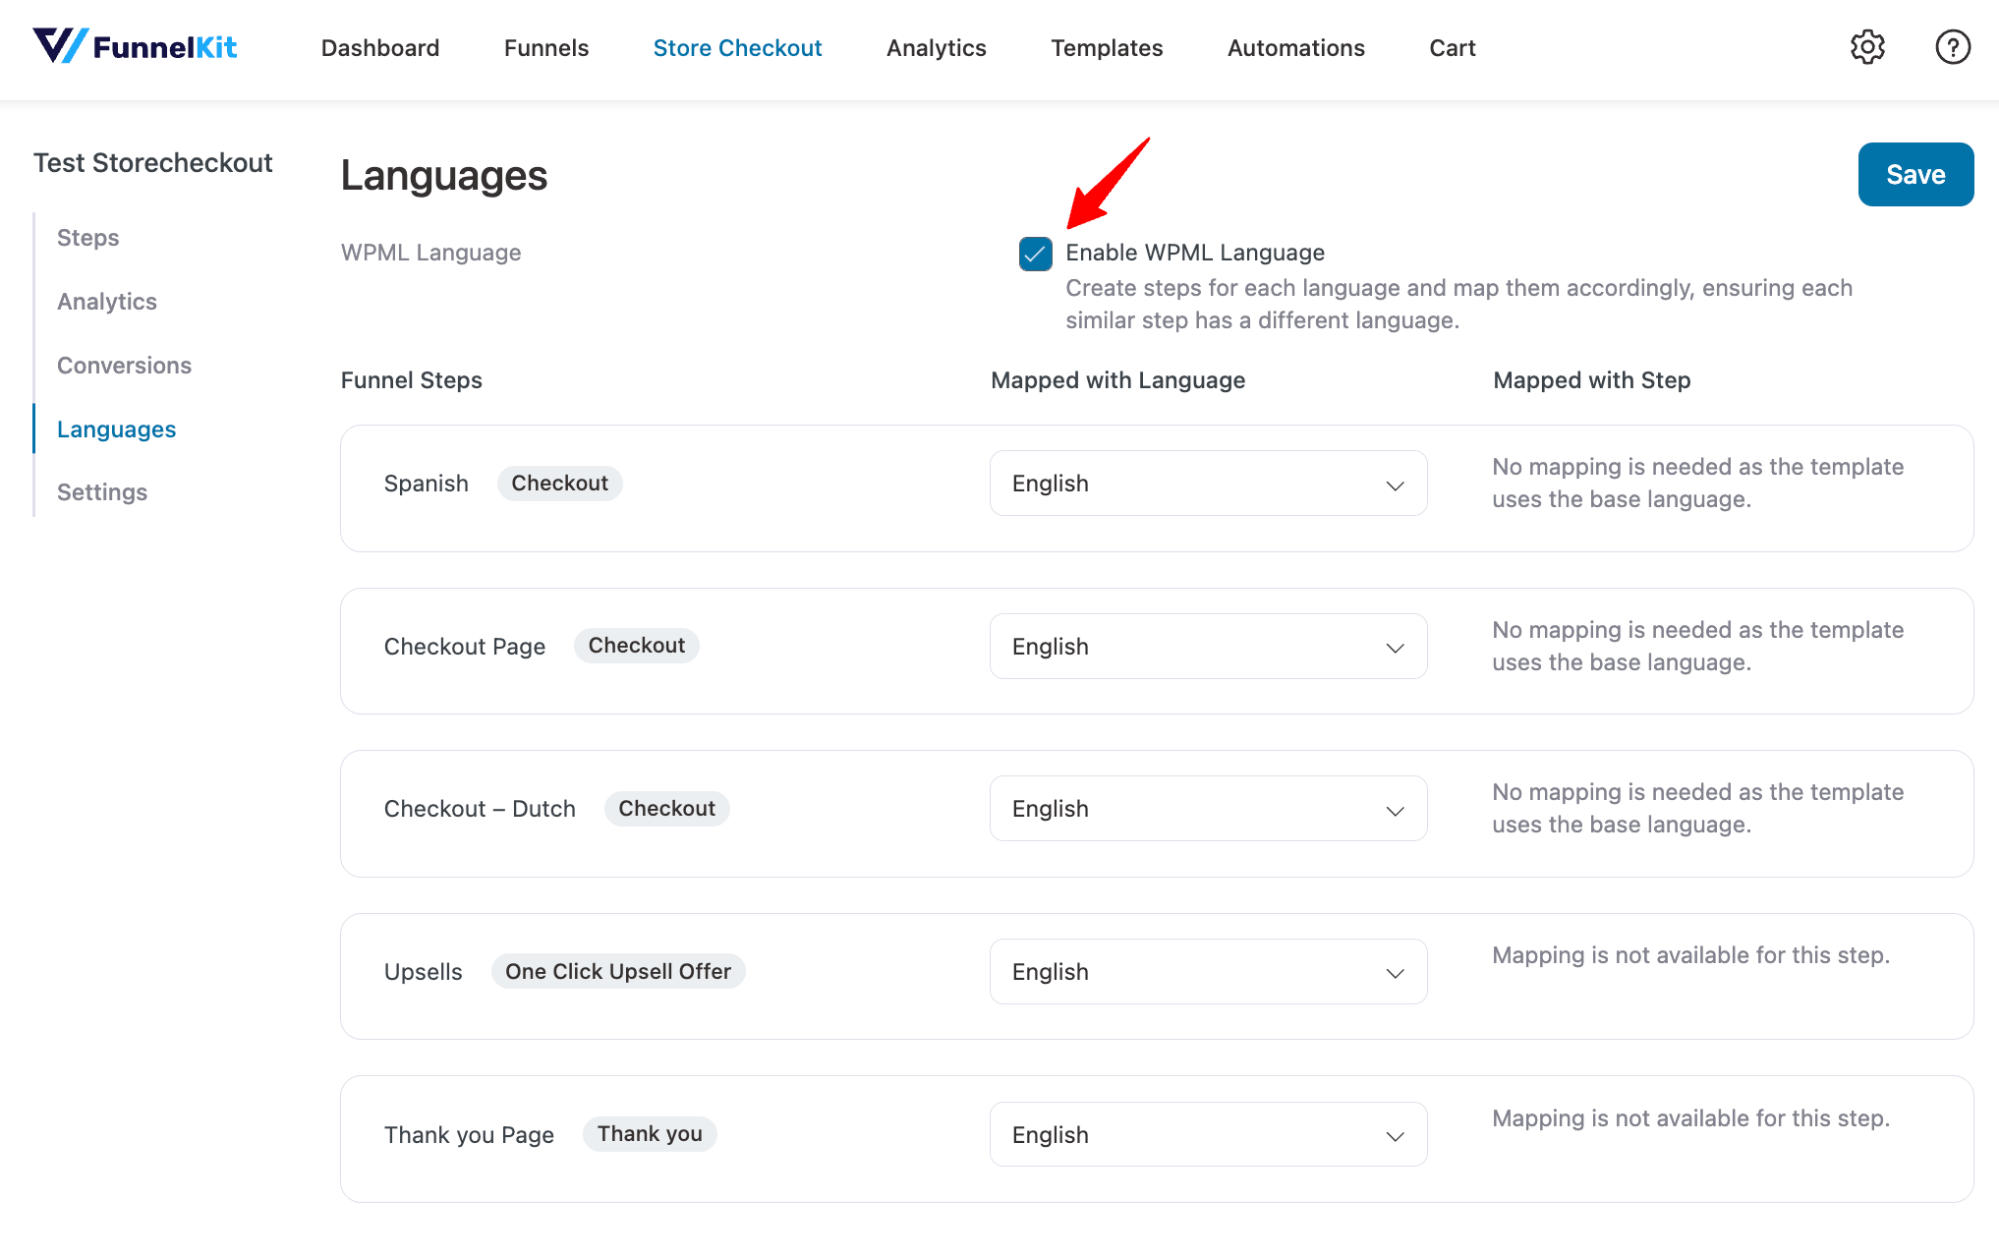
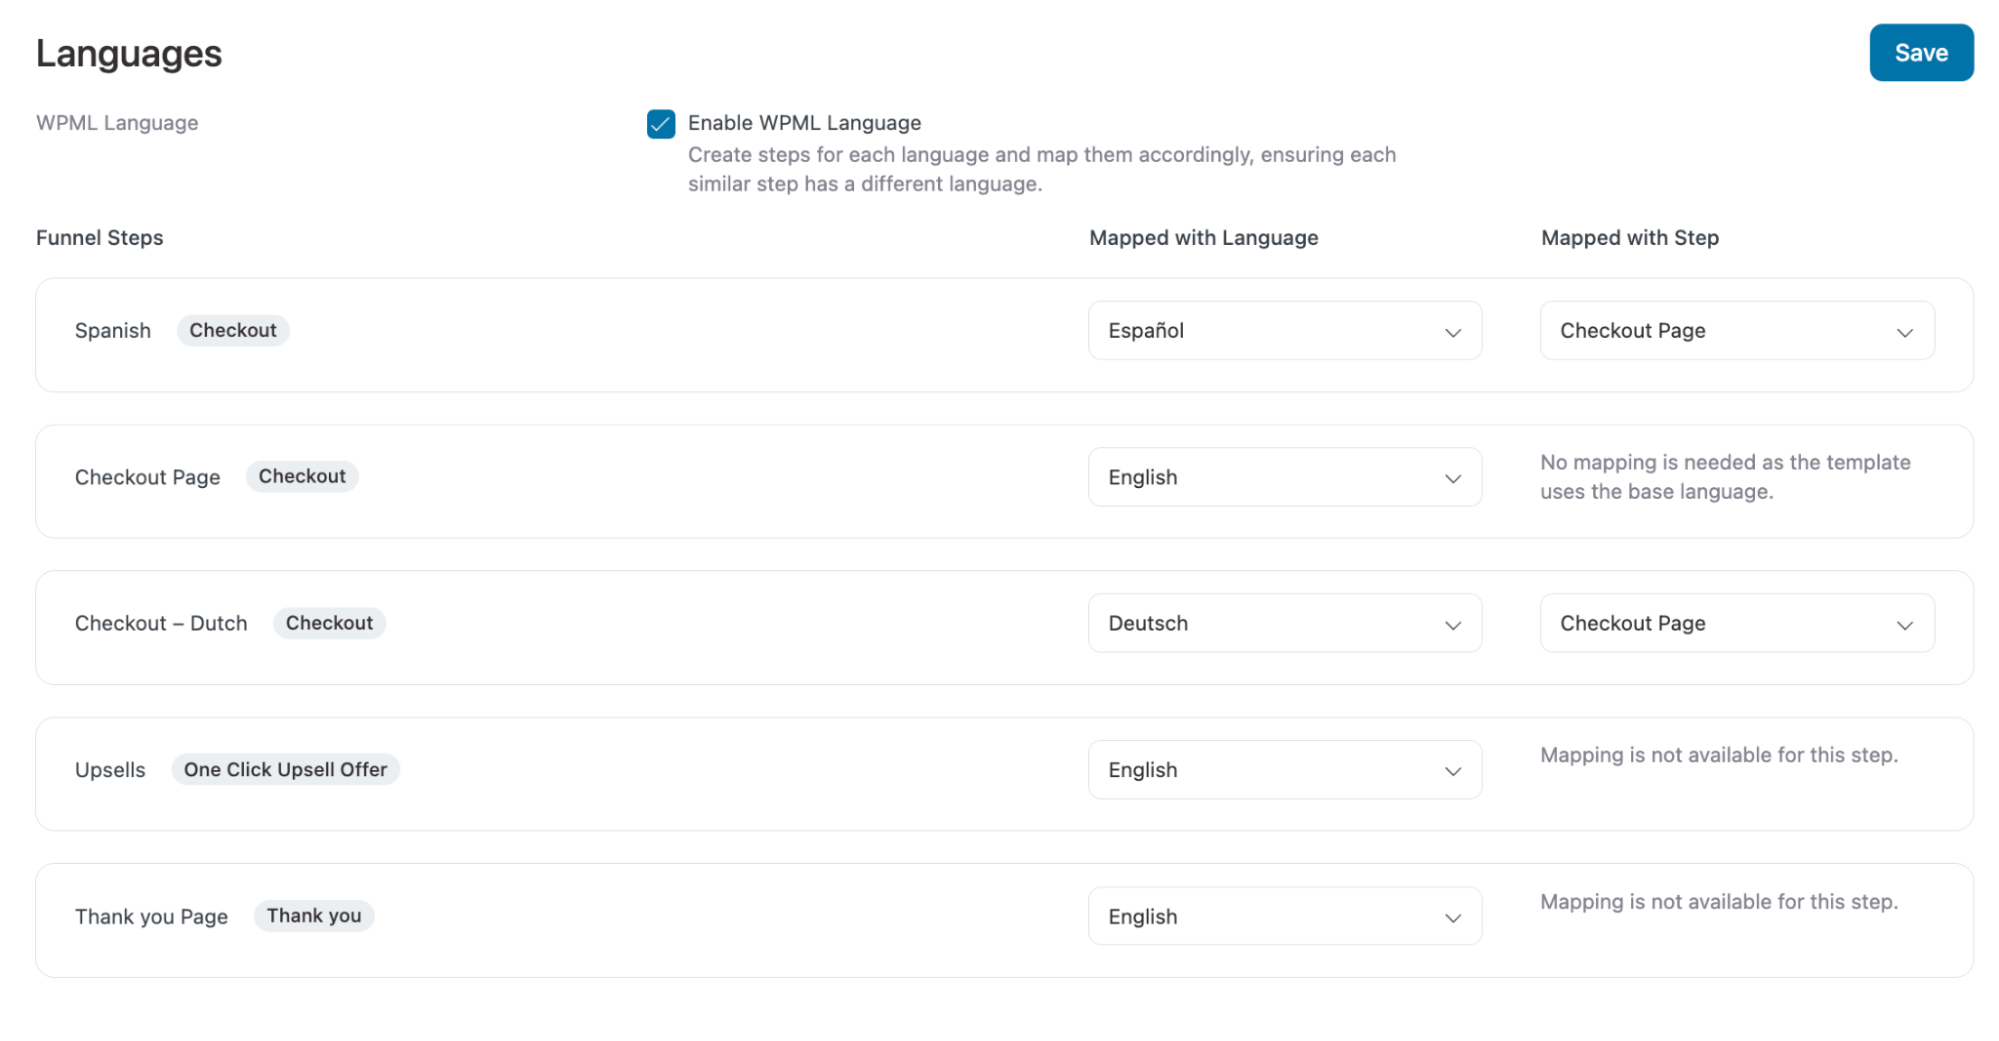
Step 3: Map the languages for different pages
By default, all checkout steps are assigned to your store’s default language (e.g., English). The default step acts as the base language and does not require mapping.
To set up checkout pages in other languages, first assign the desired language. Then, under “Mapped With Step,” choose the corresponding base language step to complete the mapping.
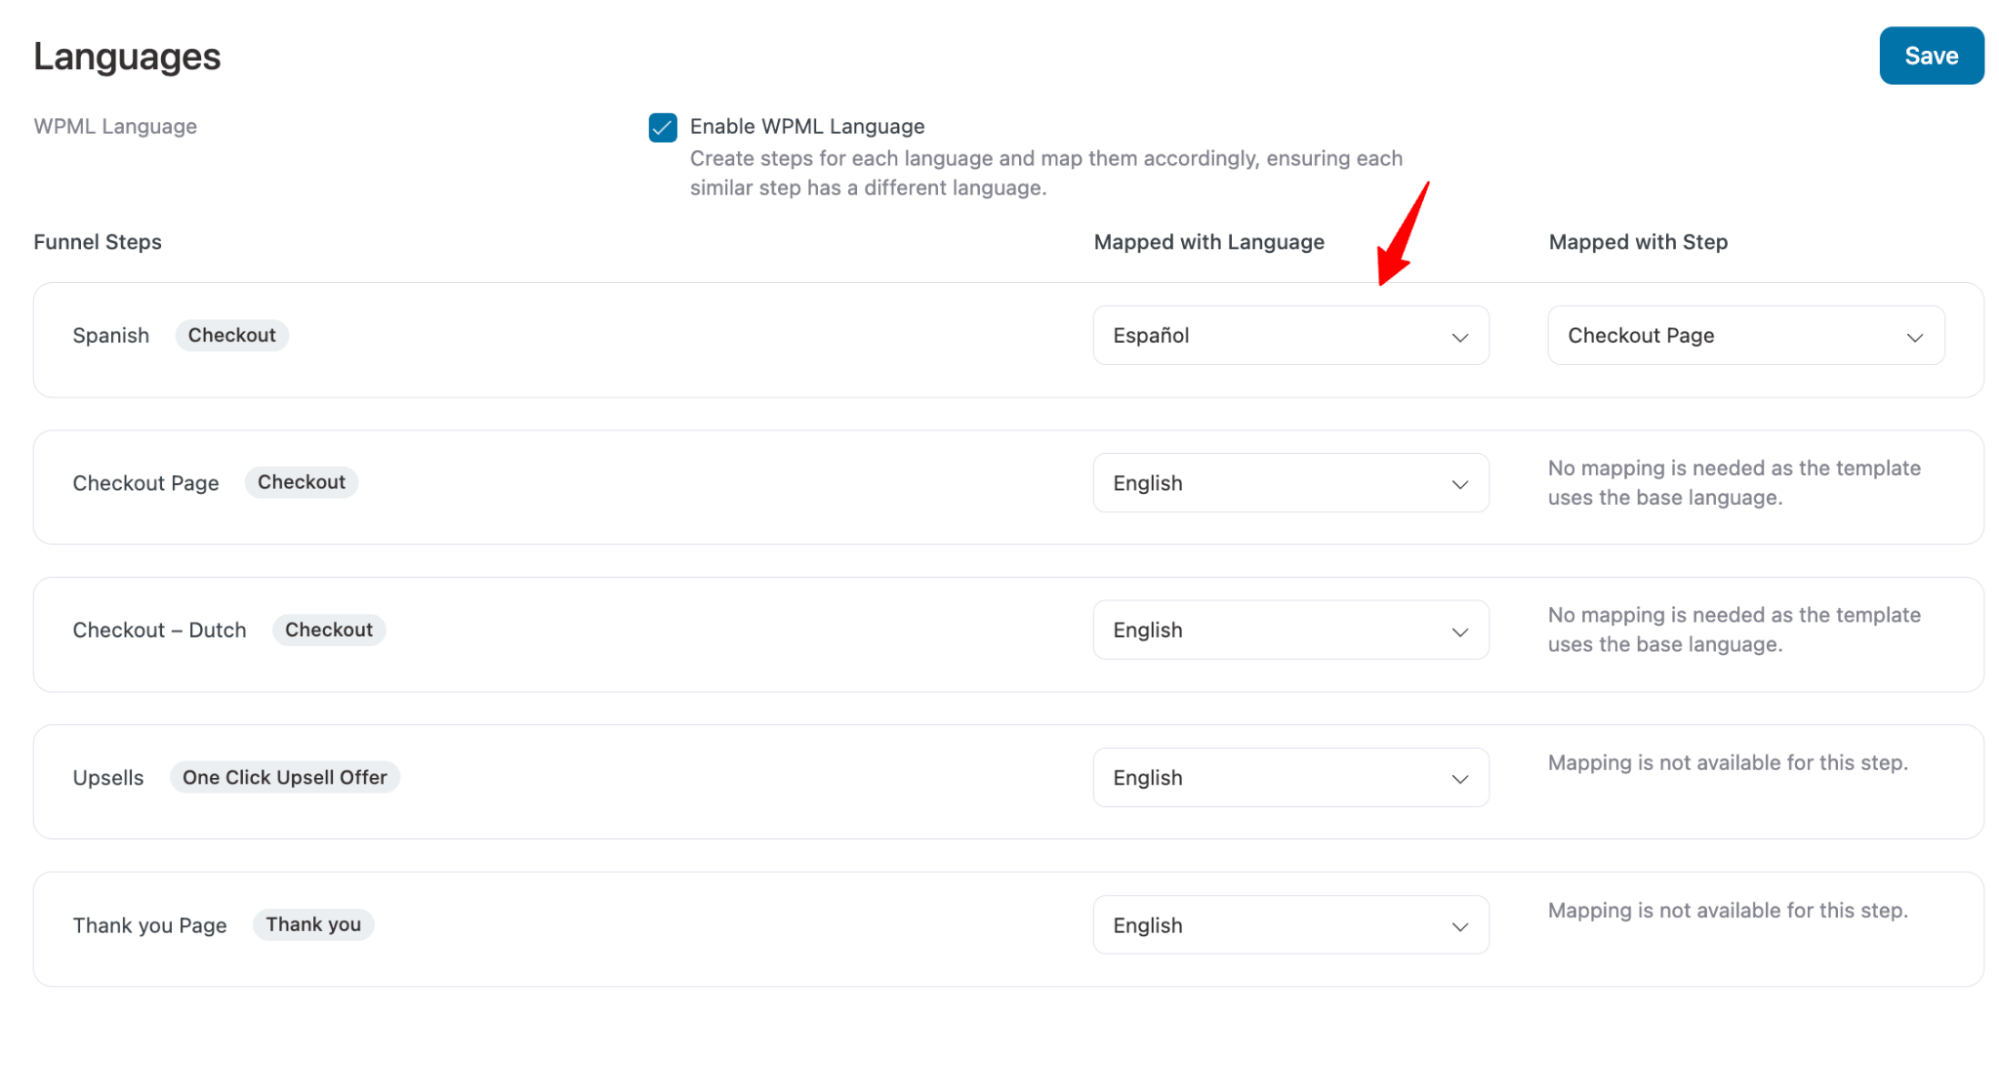
Repeat this process for each step of your store checkout, then click 'Save Changes.
Now, your store will automatically display the correct checkout page based on the visitor’s chosen language or site version.


