Install this official Stripe Payment method on your setup
Visit the official Express Checkout document here.
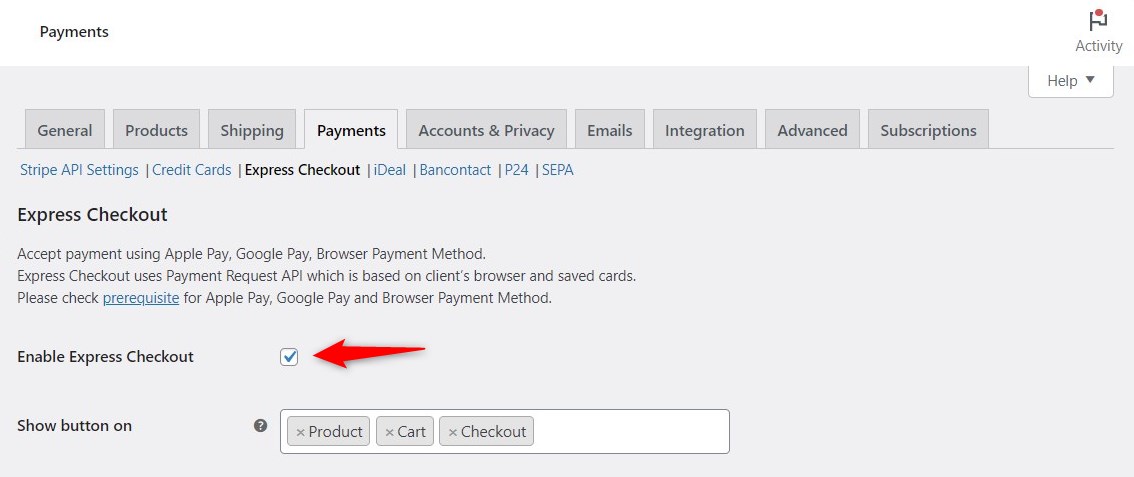
Go to WooCommerce > Settings > Payment tab > Stripe.
When the Payment Request Buttons option is selected, all types of Payment Request buttons are activated (on your site) at once.

It means that you’re now ready to accept payments via a variety of methods with the WooCommerce Stripe payment gateway.
The available payment options are:
- Apple Pay
- Google Pay
Apple Pay
Customers need to have a payment method from a supported bank or payment card provider.
Find the list of supported ones here.
Find the list of compatible Apple devices here.
Here's how you can offer Apple pay on your site via the WooCommerce Stripe payment gateway:
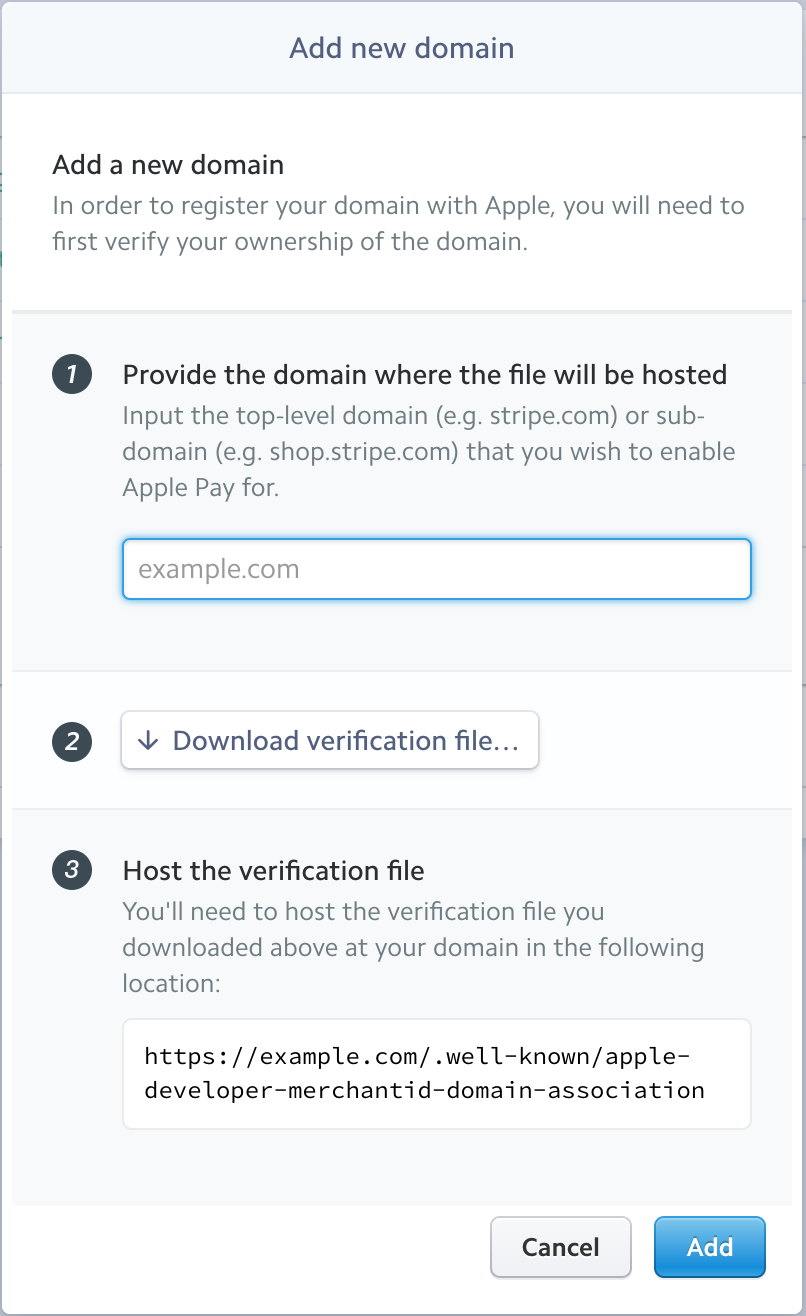
Go to the Stripe.com Dashboard > Settings > Apple Pay
Next, add your site URL there.
Add the domain of your site exactly as it loads, include the www, or leave it out, but remove https://.
You do not need to upload the verification file to your site – the extension does this for you in the background.

The domain will then show on your Apple Pay Stripe page under 'On the Web domains'.
There you go! You've now configured Stripe Apple Pay for your WooCommerce store.
Now let's move on to Google Pay.
Google Pay
Enable the Payment Request Buttons option.
There is no other setup to accept payments via these methods.
Note: These Payment Request buttons usually only show when there is a saved payment method in the browser or device being used.
Customers need to have a payment method from a supported bank or payment card provider.
That's it! You've now set up Stripe Apple Pay and Google Pay for WooCommerce.


