In this documentation, we will demonstrate how to utilize a Select2 field to add a conditional field in checkout using FunnelKit.
Depending on the option users select in the Select2 field, another field will be displayed.
Example: We will use a conditional field called Gift Option using the Select2 type. If users select “Yes” for gift wrapping, a Gift Message field will appear, allowing them to enter a custom message.
Step 1: Create the Select2 field
The first step is to create the Select2 field. The value selected in this field will determine when the conditional field is shown to the users.
To do so, click the Add New Field button and set up the following fields:
- Field Type: Choose Field Type as “Select2”.
- Label: Enter the Field Label. For example: “Gift Option”.
- Set the Field ID (Order Meta Key): This key determines where the value of this field is stored. Use underscores _ if the ID has multiple words (e.g., gift_option).
- Options (|) separated: Add Options, separated by a pipe |. Example: Yes|No.
- Default : Add a default Value, Example: No.
- Show on Thank You Page: Enable to display of the field value on the order confirmation page.
- Show in Order Email: to include the field value in the customer’s order email.
- Required: Must make it required to collect the conditional data.
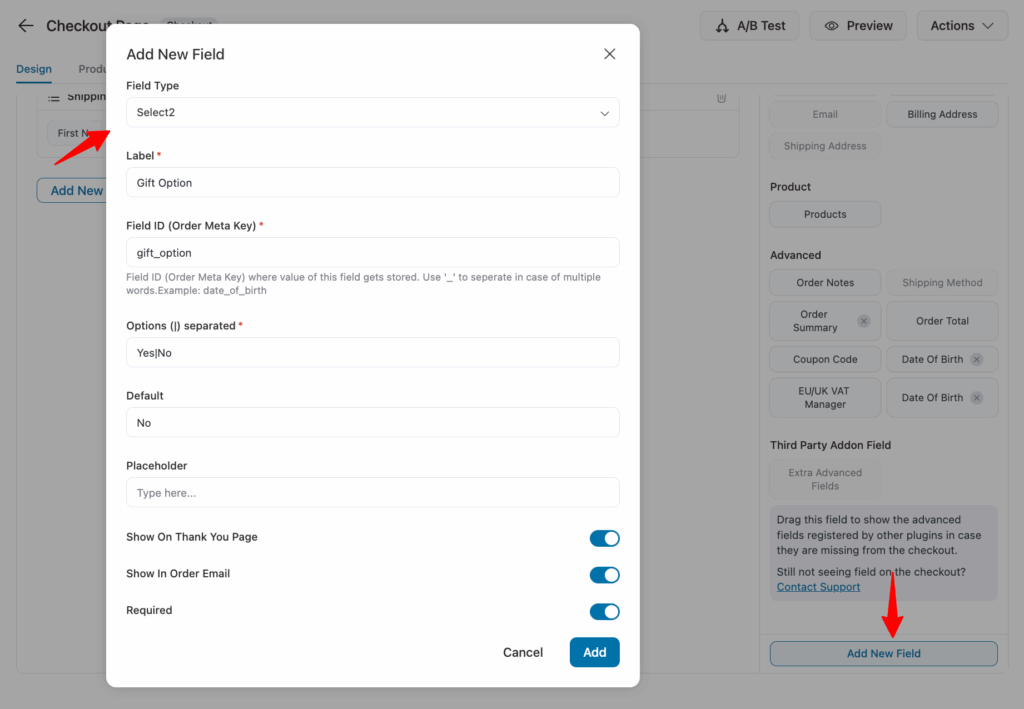
Then hit Add to add the Select2 field.
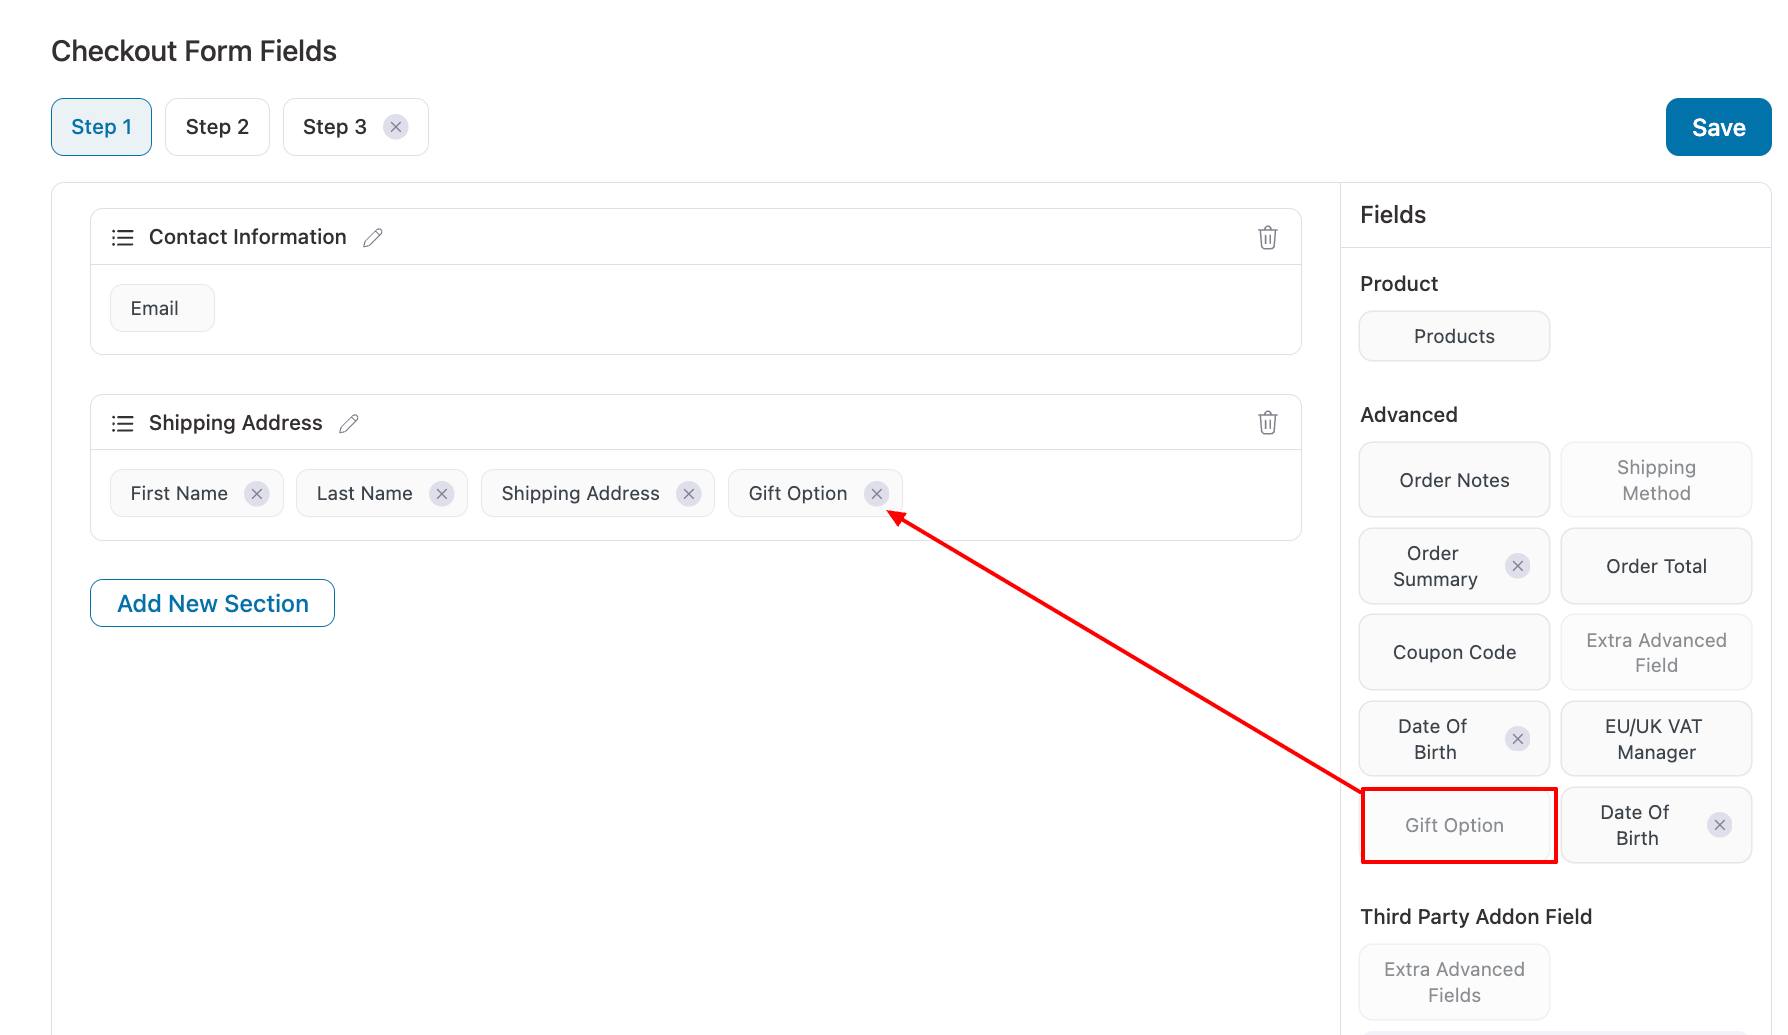
Next, drag and drop the field to your desired section on the checkout page.
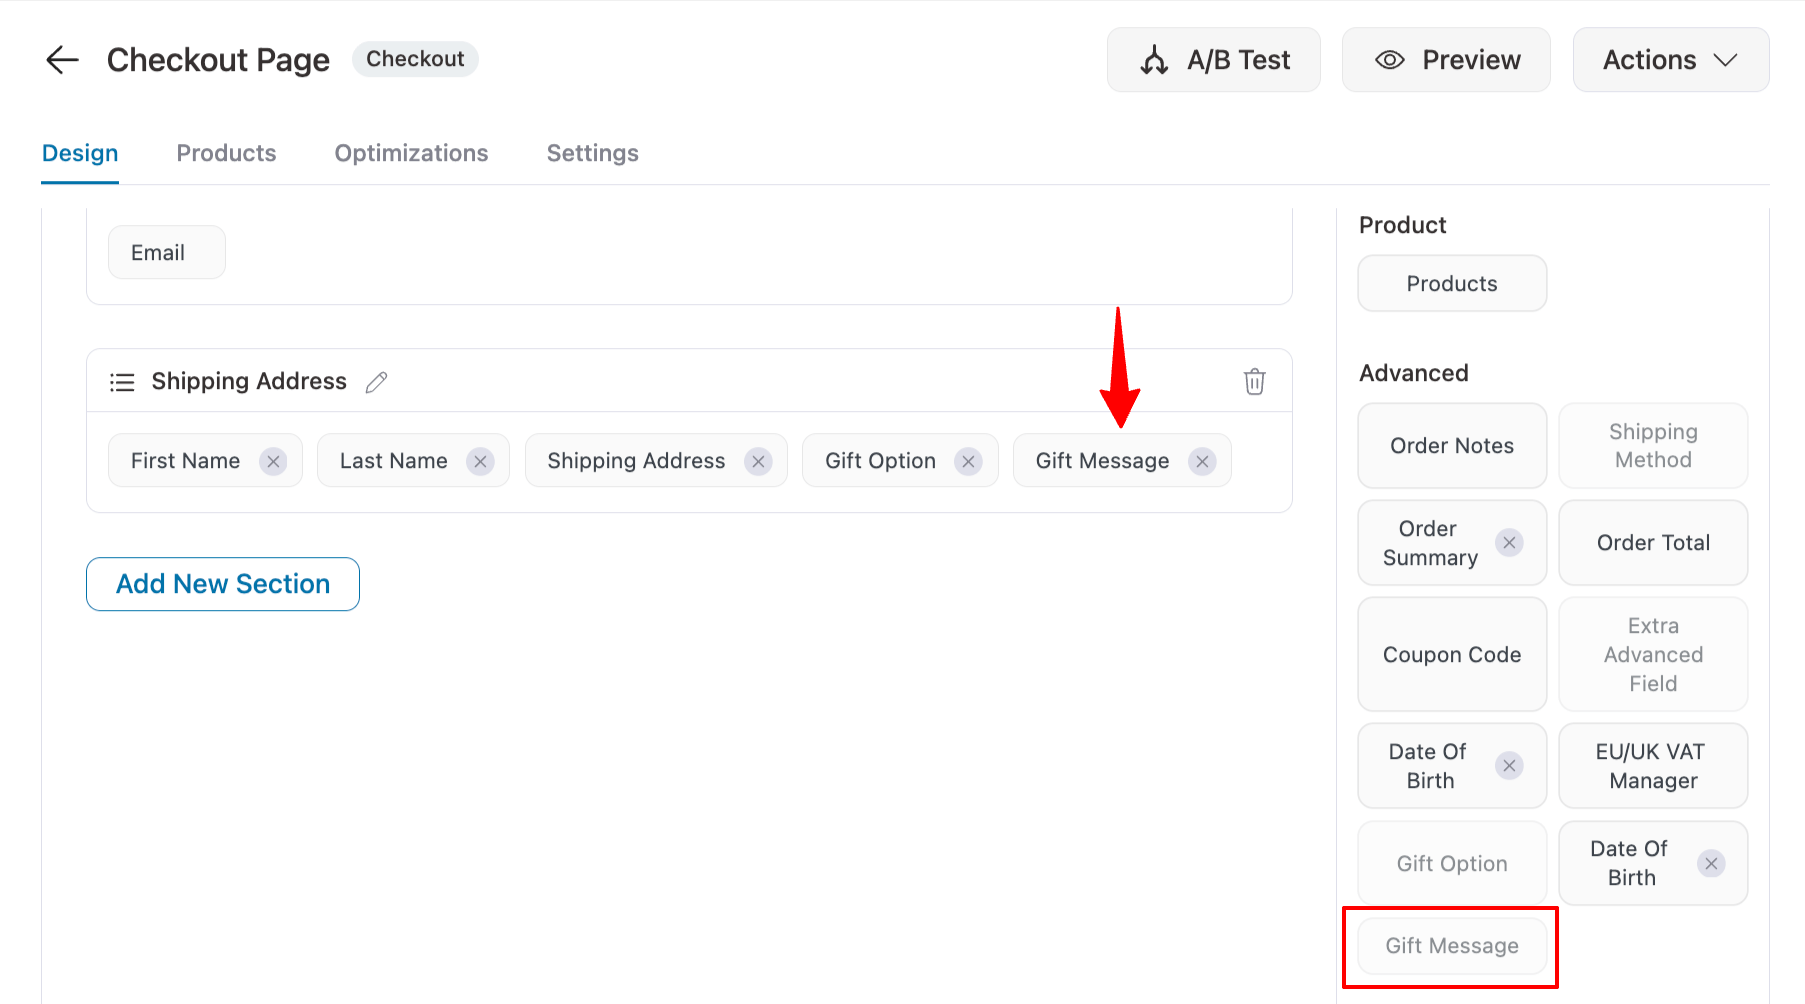
Step 2: Add the conditional field
Next, create the conditional field. In our example, this is a Gift Message. Place it right after the Gift Option field on the checkout form.
Step 3: Copy Field IDs for Select2 and Conditional Fields
We will use the Field IDs of both fields in a custom code snippet to make one field conditional based on the other.
To do this, open each field and copy its Field ID value. You’ll need these IDs in the next step when adding the custom code.
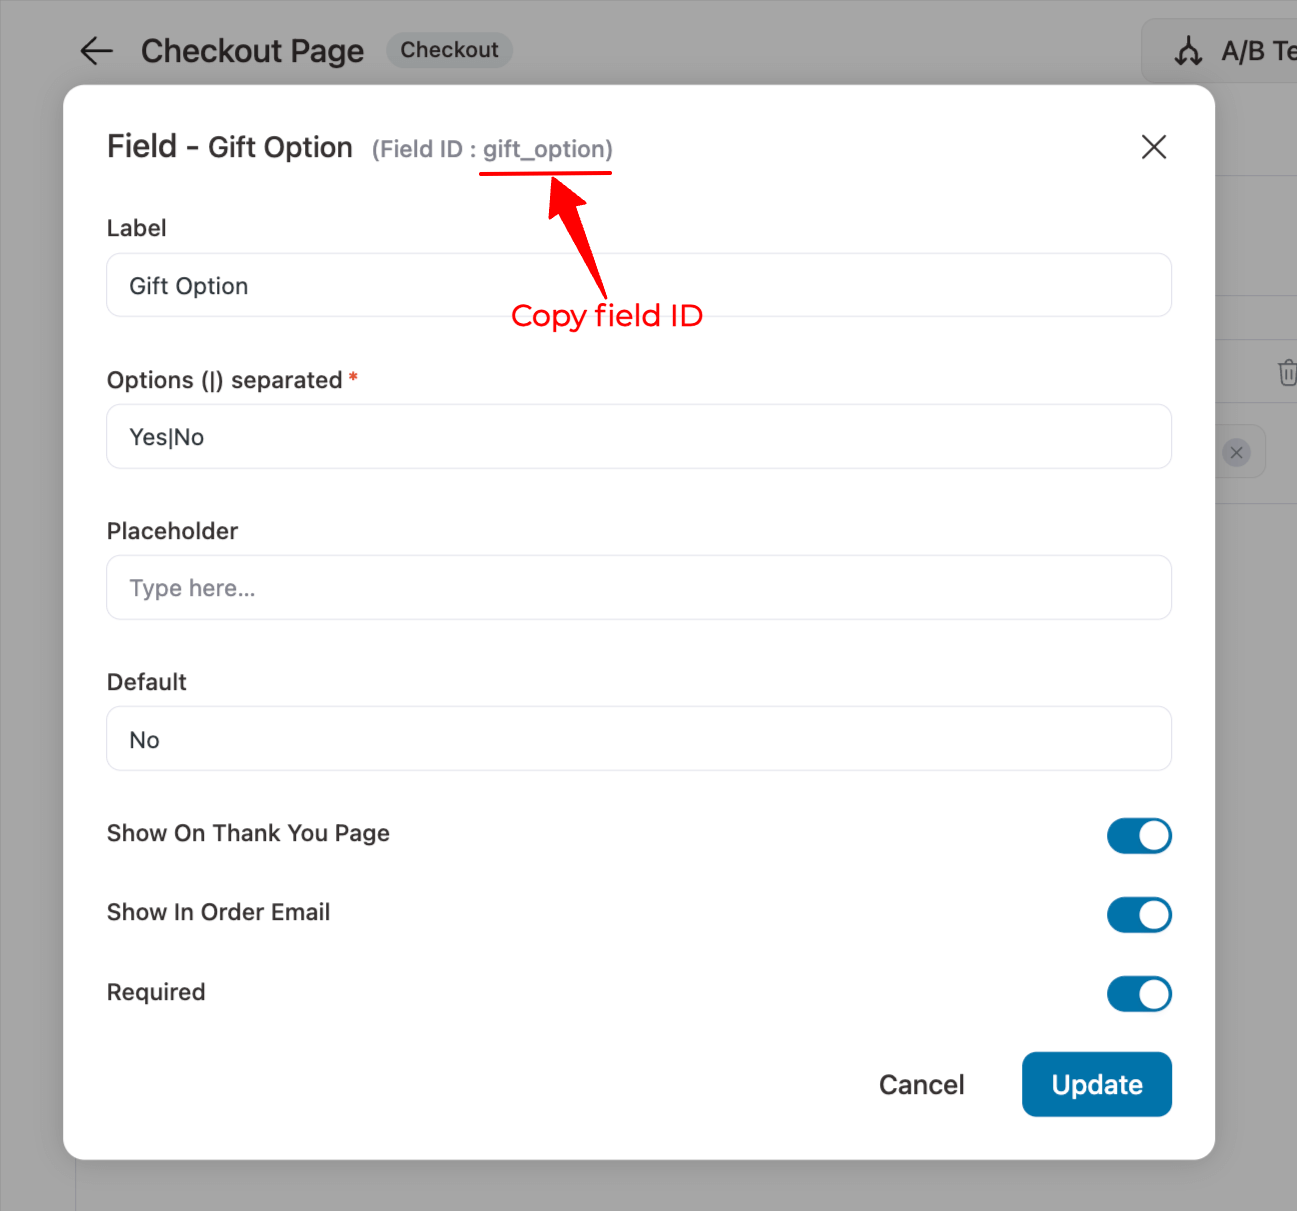
Do the same for both fields to copy the field IDs.
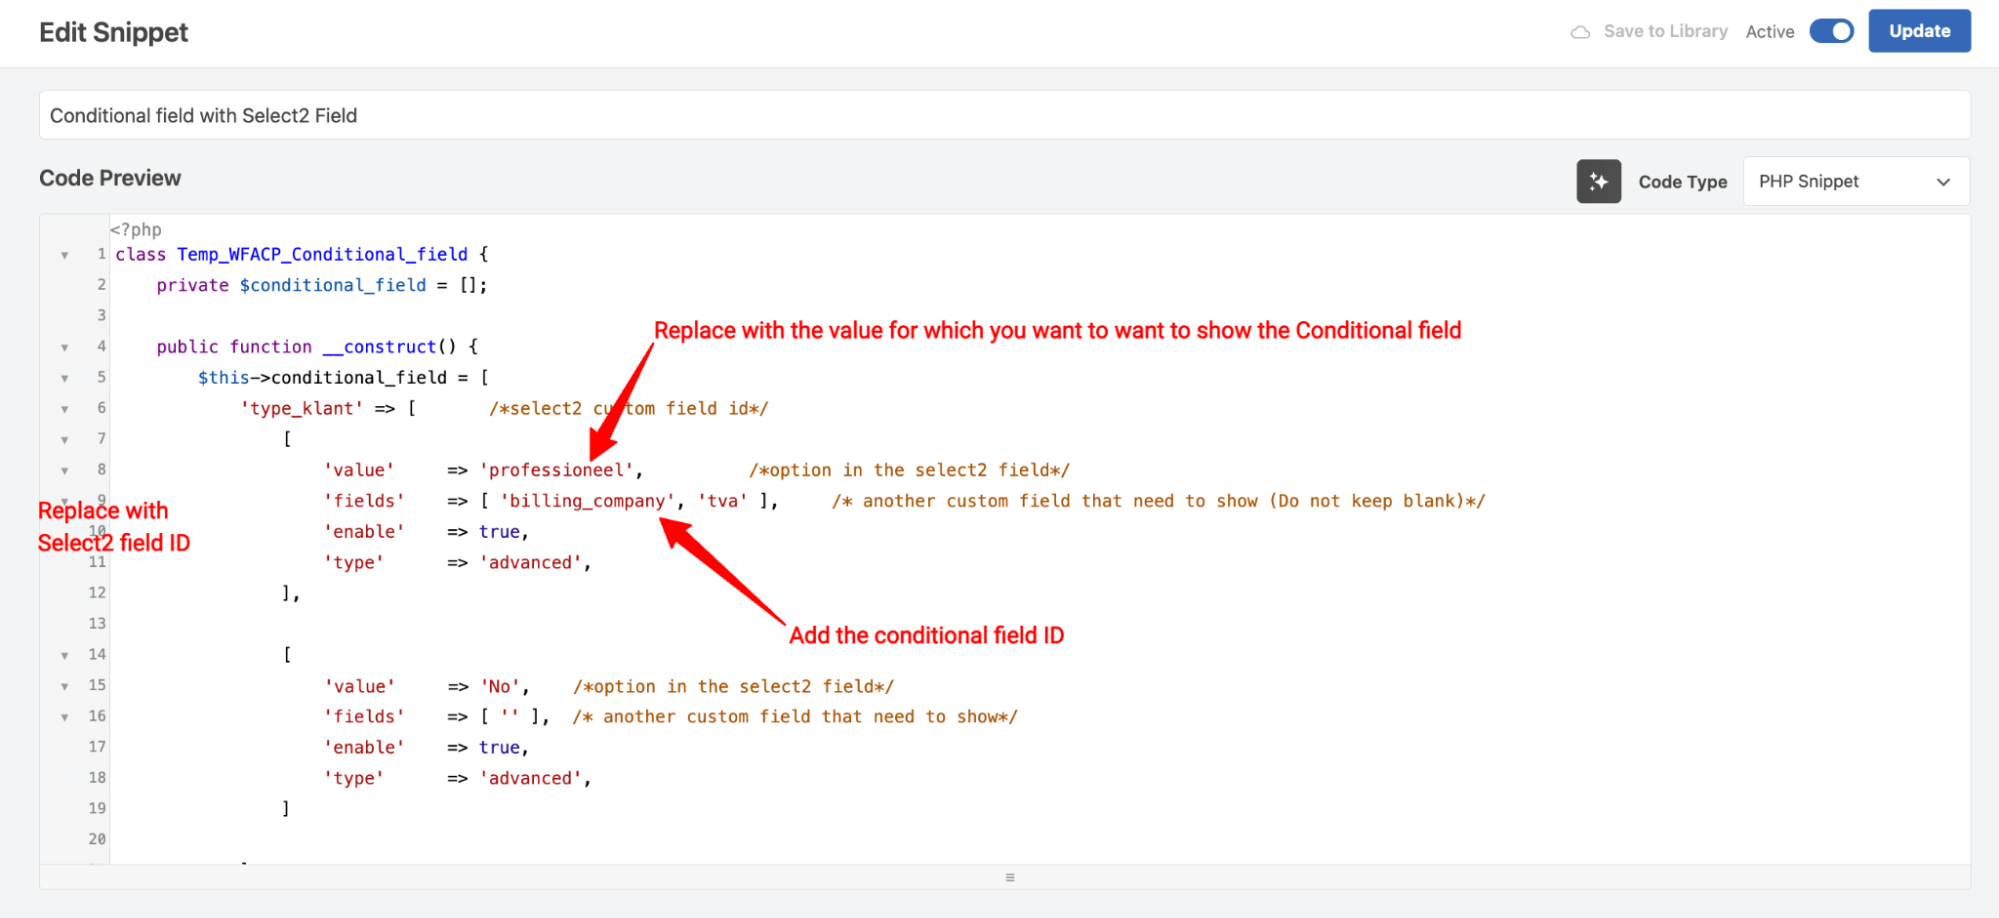
Step 4: Create custom code to make the field conditional
Now add the following custom code to your store using a code snippet plugin.
Guide: For the full process of adding a custom code, check our documentation.
Here is the code link:
class Temp_WFACP_Conditional_field {
	private $conditional_field = [];

	public function __construct() {
		$this->conditional_field = [
			'type_klant' => [       /*select2 custom field id*/
				[
					'value'     => 'professioneel',          /*option in the select2 field*/
					'fields'    => [ 'billing_company', 'tva' ],     /* another custom field that need to show (Do not keep blank)*/
					'enable'    => true,
					'type'      => 'advanced',
				],

				[
					'value'     => 'particulier',	/*option in the select2 field*/
					'fields'    => [ '' ],	/* another custom field that need to show*/
					'enable'    => true,
					'type'      => 'advanced',
				]

			]
		];
		add_action( 'wfacp_internal_css', [ $this, 'scripts' ] );
		add_filter( 'woocommerce_checkout_fields', [ $this, 'wfacp_remove_required' ], 10, 1 );

	}


	public function scripts() {
		$fields = json_encode( $this->conditional_field );
		?>
        <style>
            div.conditional_field,
            p.conditional_field {
                display: none !important;
            }

            .wfacp_dropdown option,
            .wfacp_dropdown select {
                text-transform: none;
            }
        </style>

        <script>
            jQuery(document).ready(function ($) {
                var conditional_fields =<?php echo $fields;?>;


                $.each(conditional_fields, function (field, values) {

                    $.each(values, function (key, value) {

                        displayConditionalField(field, value, 'null');
                        $(document.body).on('change', '#' + field, function () {

                            var id = $(this).attr('id');
                            var val = $(this).val();
                            if ($(this).parent('checkbox')) {
                                if ($(this).prop("checked")) {
                                    val = 'checked';
                                }
                            }
                            displayConditionalField(id, value, val);
                        });
                    });
                });

                function check_value_in_array(arr, obj) {
                    for (var i = 0; i < arr.length; i++) {
                        if (arr[i] == obj) {
                            return true;
                        }
                    }
                    return false;
                }

                function displayConditionalField(id, values, val) {

                    $.each(values.fields, function (index, field) {
                        var show = false;

                        if (val == 'null') {
                            val = $('#' + id).val();
                        }


                        var condition_to_display = values.condition;

                        if (typeof condition_to_display === 'object' && Object.keys(condition_to_display).length > 0 && check_value_in_array(condition_to_display, val) === true) {
                            show = true;
                        } else if (val == values.value) {
                            show = true;
                        }


                        if (show && values.enable) {
                            $('.' + field).removeClass('conditional_field');
                            $('#' + field + '_field').removeClass('conditional_field');
                        } else {
                            $('#' + field).val('');
                            $('.' + field).addClass('conditional_field');
                            $('#' + field + '_field').addClass('conditional_field');
                        }
                    });
                }
            });
        </script>


		<?php
	}

	function wfacp_remove_required( $fields ) {
    foreach ( $this->conditional_field as $field => $conditional_fields ) {
        foreach ( $conditional_fields as $conditional_field ) {
            if ( isset($_REQUEST[ $field ] ) ) {
                $selected_value = $_REQUEST[ $field ];
            } else {
                $selected_value = null;
            }

            foreach ( $conditional_field['fields'] as $field_id ) {
                $section = '';

                if ( isset( $fields['billing'][ $field_id ] ) ) {
                    $section = 'billing';
                } elseif ( isset( $fields['shipping'][ $field_id ] ) ) {
                    $section = 'shipping';
                } elseif ( isset( $fields['advanced'][ $field_id ] ) ) {
                    $section = 'advanced';
                }

                if ( ! empty( $section ) ) {
                    if (
                        $selected_value === null ||
                        ( isset($conditional_field['condition']) && is_array($conditional_field['condition']) && !in_array($selected_value, $conditional_field['condition']) ) ||
                        ( $selected_value !== $conditional_field['value'] )
                    ) {
                        // **Unsetting required field properly**
                        if ( isset( $fields[ $section ][ $field_id ] ) ) {
                            unset( $fields[ $section ][ $field_id ]['required'] );
                        }
                    }
                }
            }
        }
    }

    return $fields;
}


}

new Temp_WFACP_Conditional_field();
In this code snippet, you’ll need to make two changes:
- Replace "type_klant" with your Select2 field ID. In our case: "gift_option"
- Replace "professioneel" with the value for which you want to show the conditional field. In our case: "Yes"
- Replace "'billing_company', 'tva'" with your conditional field ID. In our case: "gift_message"
- Replace "particulier" with the other value. In our case: "No"
- If you want to show another field for the second value, replace "" with that field’s ID; in our case, we don’t want to, so leave it blank
After making the changes, save the code.
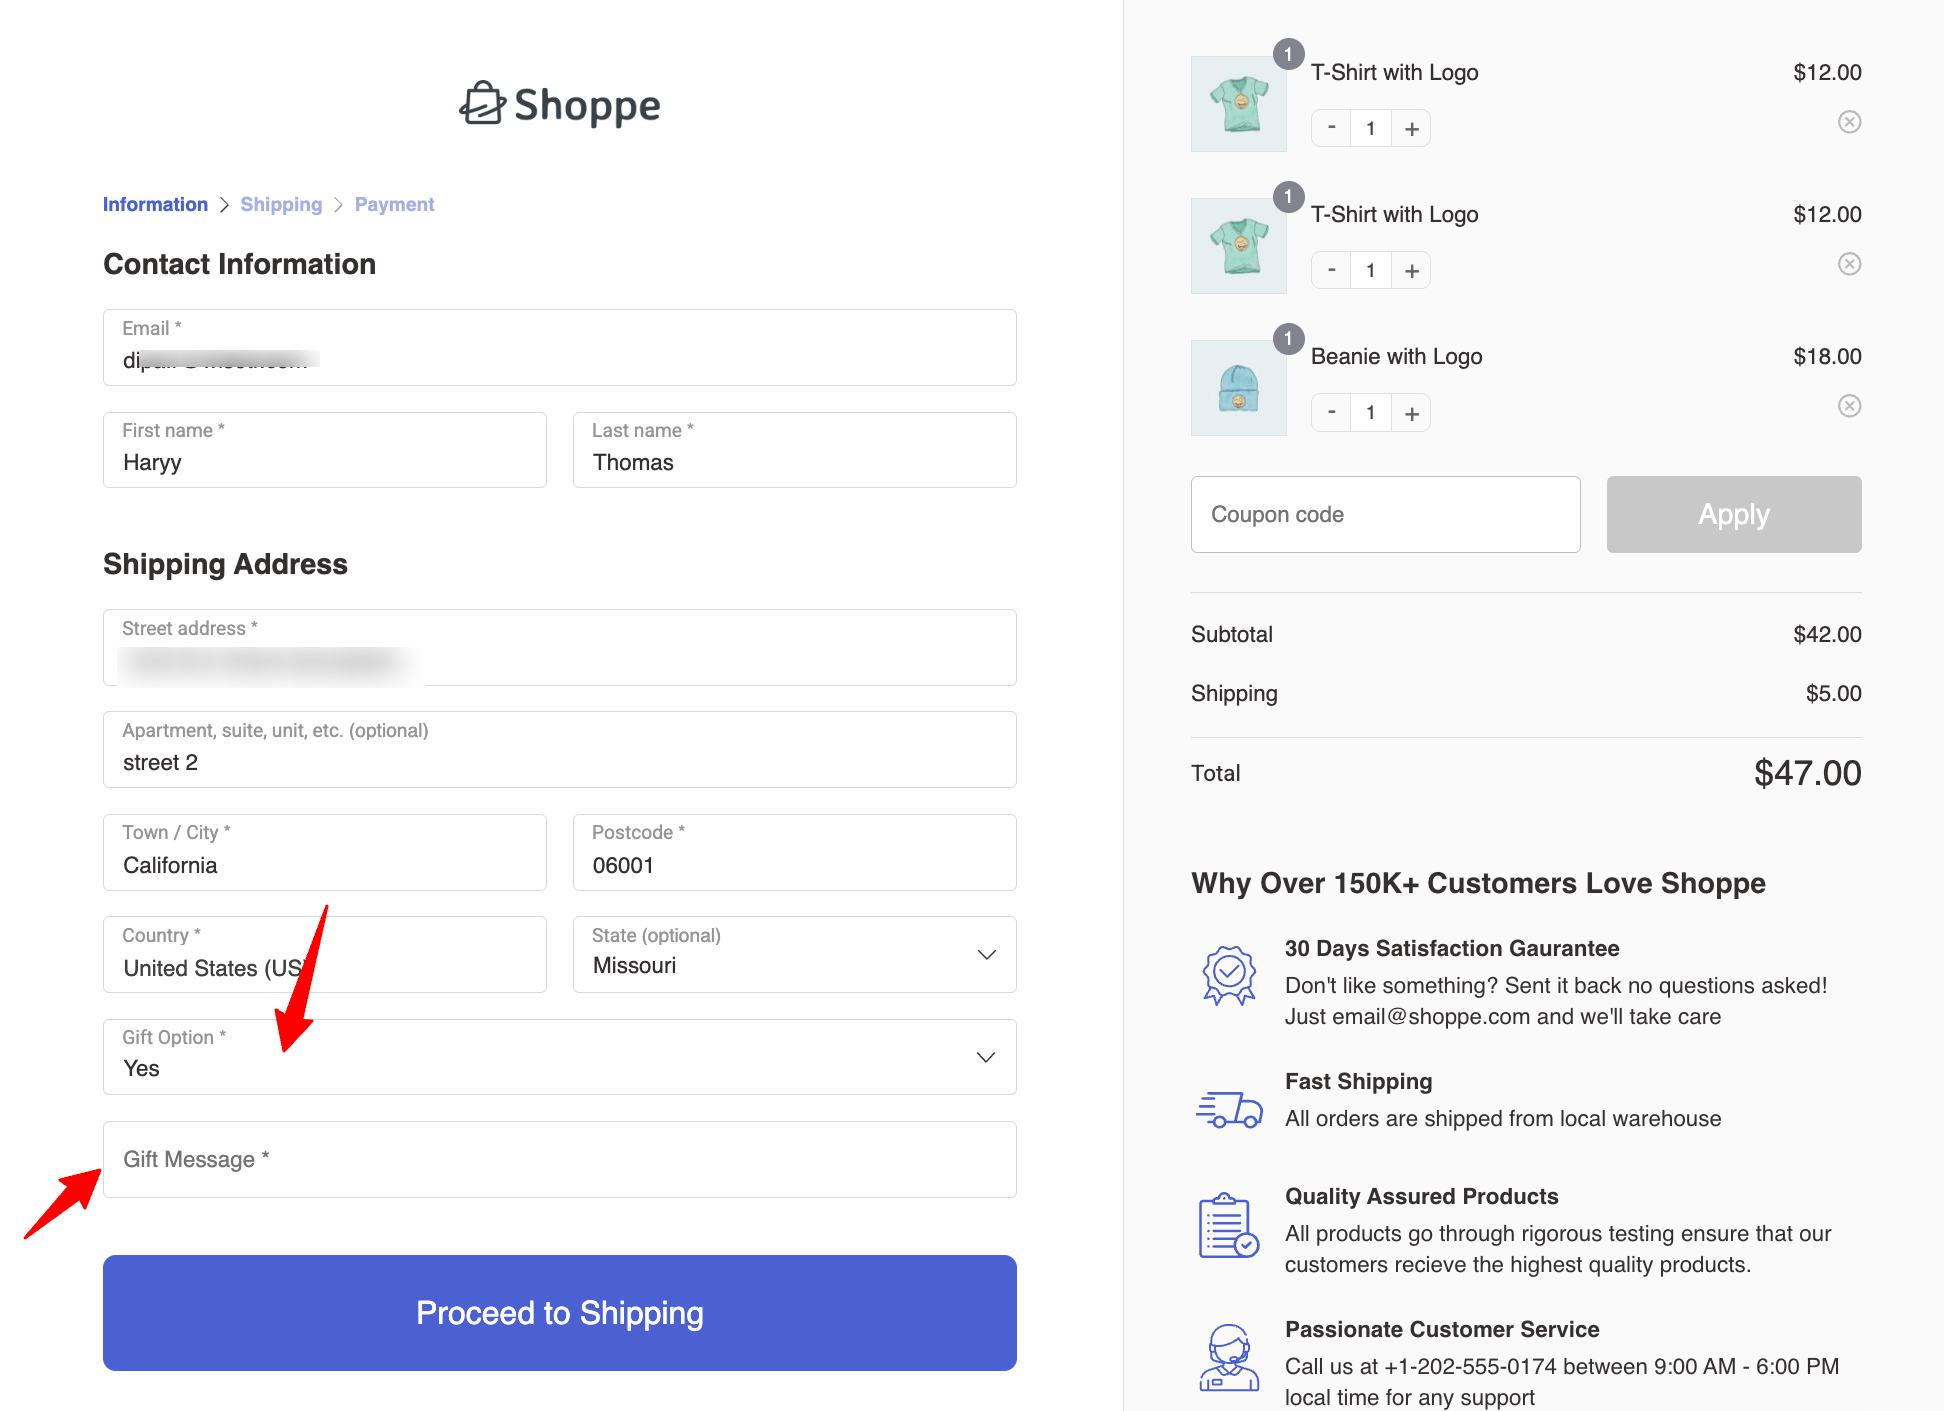
Step 5: Test the conditional checkout field using a Select2 field
Try placing a test order, and on the checkout for, you will only see the Select2 field and no conditional field since the default value is No.

If you choose “Yes”, you will see the conditional field.
You can follow this process to create any conditional field using a Select2 field and add it to your checkout form.


